
:max_bytes(150000):strip_icc()/blackiphonescreen-565bb1bcd29b4b2dba8e452a50ee1213.jpg)
"YT Thumbnail Mastery Guide to Your Video's Best Images"
YT Thumbnail Mastery: Guide to Your Video’s Best Images
Best 8 YouTube Thumbnail Grabbers You Should Know

Richard Bennett
Oct 26, 2023• Proven solutions
A YouTube thumbnail must be made very engaging and attractive to tell the potential viewers what the video is about and make them watch it. Since YouTube is a visual media platform, viewers set their eyes on the thumbnails first before they read the title of the video. If you’ve made a collage of YouTube thumbnails or designed YouTube channel art containing various freeze-frame images from different YouTube videos, you are no stranger to needing a fast way to collect YouTube thumbnail images. Online, there are several tools dedicated to solving this exact problem. These are the top five YouTube Thumbnail grabbers:
These thumbnails can be then be used in videos, blogs, articles, web pages, etc. Let’s have a look at 8 best thumbnail grabbers in the market:
- YouTube Thumbnail Grabber
- BoingBoing
- Thumbnailsave.com
- Get YouTube Thumbnail
- Fbutube.com
- YT Thumbnail Downloader
- Youtubethumbnailimage.com
- Youthumbnail.com
#1: YouTube Thumbnail Grabber
https://youtube-thumbnail-grabber.com
YouTube Thumbnail Grabber is at the top of our list. The website is very simple and clean with no ads. All you need to do is enter the YouTube video URL and click on the “Download Images” button. The site will then present you with your downloadable images in different sizes. It’s free and fast!
#2: BoingBoing

https://boingboing.net/features/getthumbs.html
BoingBoing is faster than YouTube Thumbnail grabber because it skips the “Download Images” step. As soon as you enter in your YouTube video URL, BoingBoing will automatically present you with your downloadable images. Although it is one step faster than YouTube Thumbnail Grabber, you will have to deal with having to view one small ad at the bottom of the page. In case you also want to download freeze frames that occur midway through the video, BoingBoing also gives you the option to download those images as well.
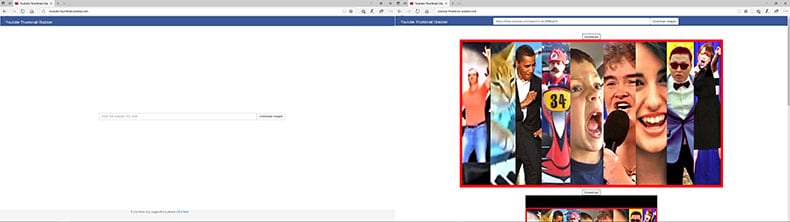
#3: Thumbnailsave.com
Another free, straightforward website for grabbing your YouTube thumbnails is Thumbnailsave.com. Again, all you need to do is enter the YouTube video URL and click the “Submit” button. Unlike our first two options, this site has a lot more ads. You’ll see a banner ad at the top as well as an ad to the side of the page. One interesting thing about this website is that it displays a column of thumbnails recently grabbed by users all over the world (displayed on the right side of the page). You might find this entertaining. If you are captivated by one of the thumbnail images, you can download it onto your computer and then do a reverse image search on Google to find the video.
#4: Get YouTube Thumbnail
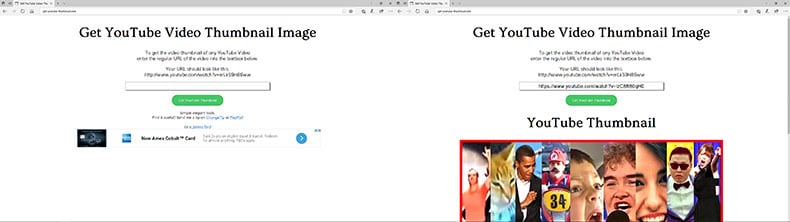
http://www.get-youtube-thumbnail.com
Get YouTube Thumbnail is another free, straightforward tool for grabbing YouTube thumbnail images. All you need to do is paste the URL of the YouTube video and click on the “Get YouTube Thumbnail” button to retrieve your thumbnail. Yes, that’s right. One thumbnail image. What’s different about this website is that it provides you with a unique image URL. This might be useful for anyone not wanting to deal with files. While this website is free to use, it does have ads.
#5: Fbutube.com
Fbtube.com is a tool that is used to download YouTube thumbnails by bloggers, YouTubers, graphic designers, etc. This tool helps to grab all the thumbnails available for a YouTube video. All you need to do is copy and paste the link of the YouTube video you like in the search bar and tap on the Generate tab.
A number of thumbnail images will be displayed of different sizes and resolutions (720p, 360p, 180p, and 90p) will be displayed for you to choose from. You can download the thumbnail you like by hitting the Download tab. This tool also offers an option to create a custom YouTube thumbnail for sharing on Facebook.
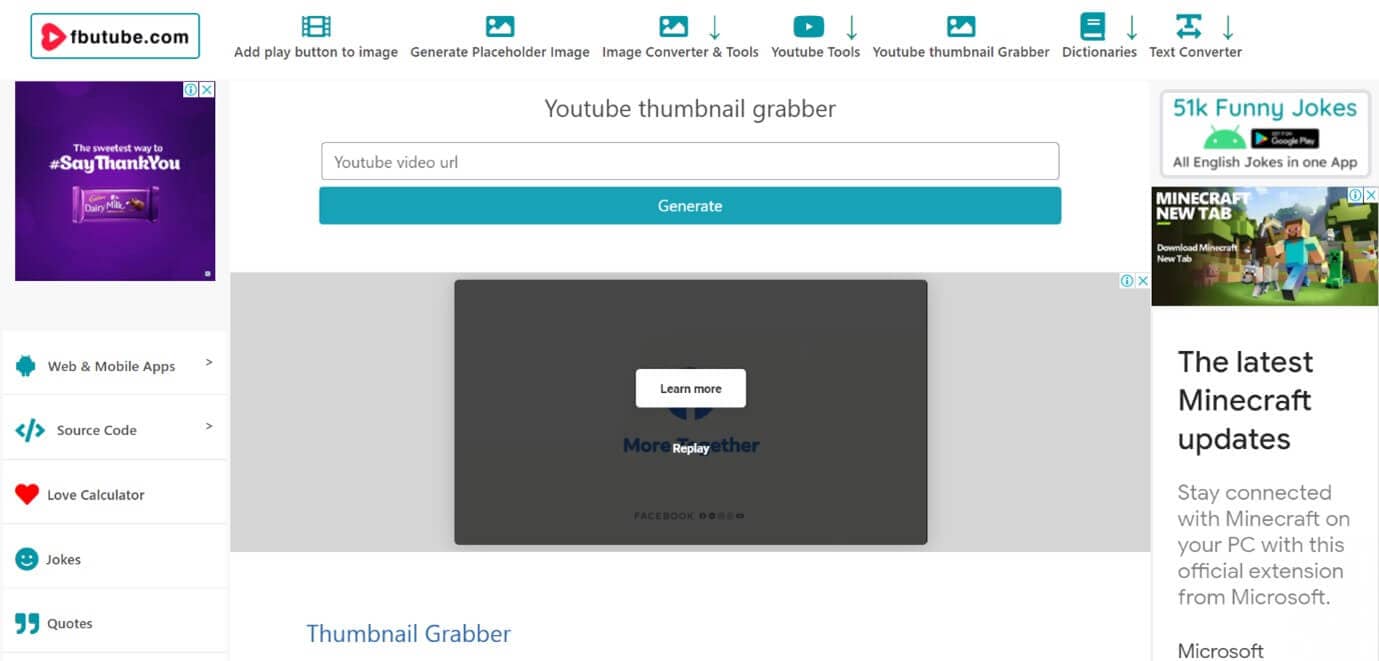
https://fbutube.com/youtube-thumbnail-grabber
#6: YT Thumbnail Downloader
YT Thumbnail Downloader is a free online tool that you can use to download the thumbnail of any YouTube video you wish. This tool is very easy to use, contains no ads, and offers thumbnails in 1080p, 720p, 480p, and 360p format.
To download the thumbnail simply paste the link of the YouTube video you like and hit the Download button. A list of thumbnails of different qualities will be displayed. Choose your desired quality and hit Download again. Another plus point of YTThumbnail Downloader is that it allows extracting thumbnails of live streaming videos.
https://yt-thumbnail-downloader.com/
#7: Youtubethumbnailimage.com
Youtubethumbnailimage.com is another free site that allows you to download YouTube thumbnails. This site allows to download thumbnails in 4 different dimensions, HD 1920x1080, SD 640x480, HQ 480x360, and MQ 320x180.
To download the thumbnail you just have to copy and paste the URL of your desired YouTube video in the search bar and hit Search. Once the results are displayed, choose a dimension and hit Download.
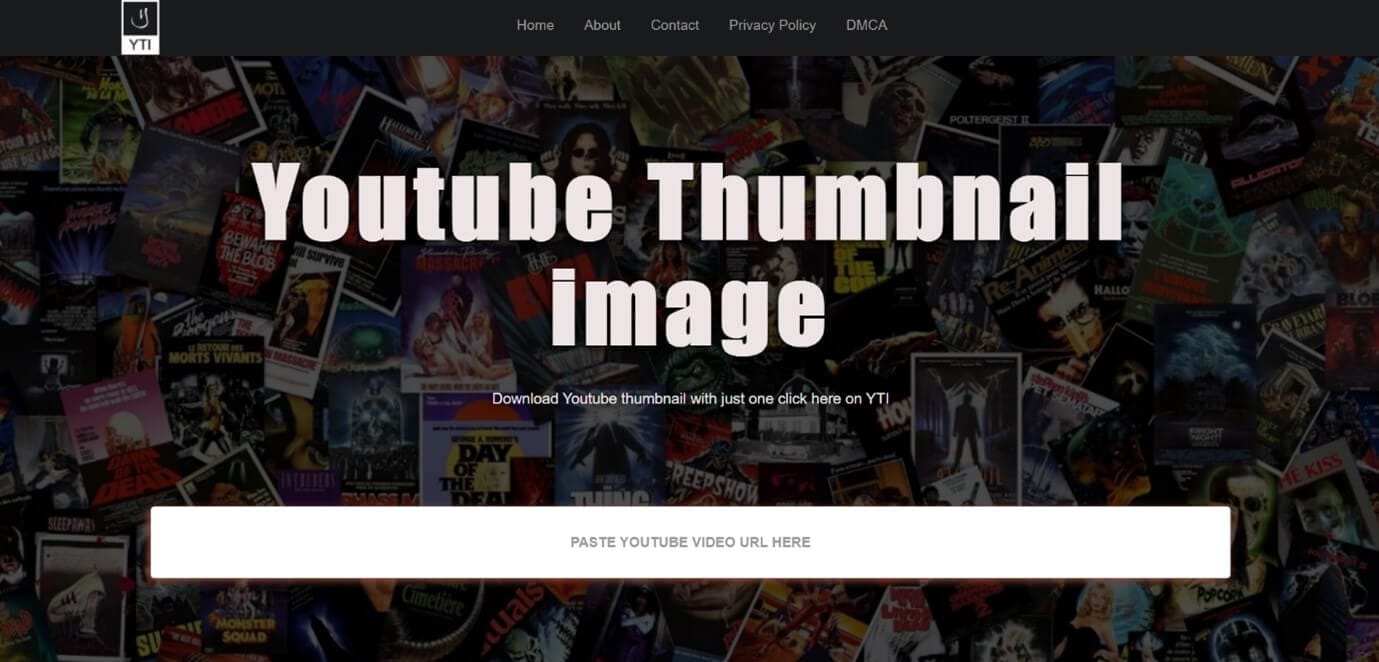
https://youtubethumbnailimage.com/
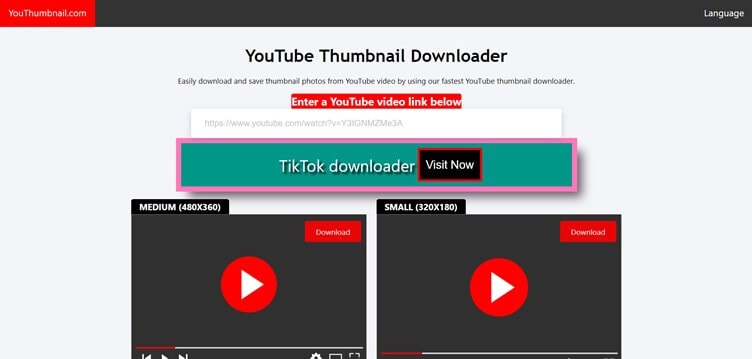
#8: Youthumbnail.com
Youthumbnail.com is the final tool we will be talking about that can help you save the YouTube thumbnail of a YouTube video. This free tool contains some annoying ads but can download YouTube thumbnail fast and easily in 3 different qualities.
To download the YouTube thumbnail, paste the link of the YouTube video you like in the search box and press Enter. Select the image of your choice from the three images displayed and the thumbnail will be downloaded for your later use.
So that’s our list of top online tools to grab your YouTube thumbnails with our favorite one being YouTube Thumbnail Grabber.
Want to know more about what makes a great YouTube thumbnail? Read all about it in our Ultimate Guide to YouTube Thumbnails.
Custom Videos with Versatile Video Editor
Filmora is a stunning video editing software that is suggested both by beginners and professionals alike for creating and editing all sorts of videos, from Gifs and one-minute videos to high-quality movies and YouTube videos. It packs in a wide variety of features like 4K editing, noise removal, color tuning, audio mixer, scene detection, video stabilization, advanced text editor, GIF support, audio equalizer, etc. that can be used to create an outstanding YouTube video of your own.
Some other features offered by Filmora that can be used to make your YouTube video more attractive are 800+ video effects, motion tracking, green screen editing, screen recording, 3D Lut, and the option to export videos to YouTube directly


Conclusion
The thumbnail is one of the most important metadata of a YouTube video and hence all the YouTubers try to design it in the best way possible. As a result, most of the thumbnails are very attractive, creative and speak a lot about the content. Hence many people including bloggers, YouTubers, content creators, etc. want to download and save these thumbnails for their videos, blogs, articles wallpapers, and much more.
The YouTube thumbnail grabbers we have listed above are free and can be used by anyone to download their desired YouTube video thumbnail in good quality. Along with that anyone who wishes to create an attractive YouTube video that stands out can use Wondershare Filmora and its extensive video editing features. Hope our suggestions help you in the future. Thank you.
Richard Bennett
Richard Bennett is a writer and a lover of all things video.
Follow @Richard Bennett
Richard Bennett
Oct 26, 2023• Proven solutions
A YouTube thumbnail must be made very engaging and attractive to tell the potential viewers what the video is about and make them watch it. Since YouTube is a visual media platform, viewers set their eyes on the thumbnails first before they read the title of the video. If you’ve made a collage of YouTube thumbnails or designed YouTube channel art containing various freeze-frame images from different YouTube videos, you are no stranger to needing a fast way to collect YouTube thumbnail images. Online, there are several tools dedicated to solving this exact problem. These are the top five YouTube Thumbnail grabbers:
These thumbnails can be then be used in videos, blogs, articles, web pages, etc. Let’s have a look at 8 best thumbnail grabbers in the market:
- YouTube Thumbnail Grabber
- BoingBoing
- Thumbnailsave.com
- Get YouTube Thumbnail
- Fbutube.com
- YT Thumbnail Downloader
- Youtubethumbnailimage.com
- Youthumbnail.com
#1: YouTube Thumbnail Grabber
https://youtube-thumbnail-grabber.com
YouTube Thumbnail Grabber is at the top of our list. The website is very simple and clean with no ads. All you need to do is enter the YouTube video URL and click on the “Download Images” button. The site will then present you with your downloadable images in different sizes. It’s free and fast!
#2: BoingBoing
https://boingboing.net/features/getthumbs.html
BoingBoing is faster than YouTube Thumbnail grabber because it skips the “Download Images” step. As soon as you enter in your YouTube video URL, BoingBoing will automatically present you with your downloadable images. Although it is one step faster than YouTube Thumbnail Grabber, you will have to deal with having to view one small ad at the bottom of the page. In case you also want to download freeze frames that occur midway through the video, BoingBoing also gives you the option to download those images as well.
#3: Thumbnailsave.com
Another free, straightforward website for grabbing your YouTube thumbnails is Thumbnailsave.com. Again, all you need to do is enter the YouTube video URL and click the “Submit” button. Unlike our first two options, this site has a lot more ads. You’ll see a banner ad at the top as well as an ad to the side of the page. One interesting thing about this website is that it displays a column of thumbnails recently grabbed by users all over the world (displayed on the right side of the page). You might find this entertaining. If you are captivated by one of the thumbnail images, you can download it onto your computer and then do a reverse image search on Google to find the video.
#4: Get YouTube Thumbnail
http://www.get-youtube-thumbnail.com
Get YouTube Thumbnail is another free, straightforward tool for grabbing YouTube thumbnail images. All you need to do is paste the URL of the YouTube video and click on the “Get YouTube Thumbnail” button to retrieve your thumbnail. Yes, that’s right. One thumbnail image. What’s different about this website is that it provides you with a unique image URL. This might be useful for anyone not wanting to deal with files. While this website is free to use, it does have ads.
#5: Fbutube.com
Fbtube.com is a tool that is used to download YouTube thumbnails by bloggers, YouTubers, graphic designers, etc. This tool helps to grab all the thumbnails available for a YouTube video. All you need to do is copy and paste the link of the YouTube video you like in the search bar and tap on the Generate tab.
A number of thumbnail images will be displayed of different sizes and resolutions (720p, 360p, 180p, and 90p) will be displayed for you to choose from. You can download the thumbnail you like by hitting the Download tab. This tool also offers an option to create a custom YouTube thumbnail for sharing on Facebook.
https://fbutube.com/youtube-thumbnail-grabber
#6: YT Thumbnail Downloader
YT Thumbnail Downloader is a free online tool that you can use to download the thumbnail of any YouTube video you wish. This tool is very easy to use, contains no ads, and offers thumbnails in 1080p, 720p, 480p, and 360p format.
To download the thumbnail simply paste the link of the YouTube video you like and hit the Download button. A list of thumbnails of different qualities will be displayed. Choose your desired quality and hit Download again. Another plus point of YTThumbnail Downloader is that it allows extracting thumbnails of live streaming videos.
https://yt-thumbnail-downloader.com/
#7: Youtubethumbnailimage.com
Youtubethumbnailimage.com is another free site that allows you to download YouTube thumbnails. This site allows to download thumbnails in 4 different dimensions, HD 1920x1080, SD 640x480, HQ 480x360, and MQ 320x180.
To download the thumbnail you just have to copy and paste the URL of your desired YouTube video in the search bar and hit Search. Once the results are displayed, choose a dimension and hit Download.
https://youtubethumbnailimage.com/
#8: Youthumbnail.com
Youthumbnail.com is the final tool we will be talking about that can help you save the YouTube thumbnail of a YouTube video. This free tool contains some annoying ads but can download YouTube thumbnail fast and easily in 3 different qualities.
To download the YouTube thumbnail, paste the link of the YouTube video you like in the search box and press Enter. Select the image of your choice from the three images displayed and the thumbnail will be downloaded for your later use.
So that’s our list of top online tools to grab your YouTube thumbnails with our favorite one being YouTube Thumbnail Grabber.
Want to know more about what makes a great YouTube thumbnail? Read all about it in our Ultimate Guide to YouTube Thumbnails.
Custom Videos with Versatile Video Editor
Filmora is a stunning video editing software that is suggested both by beginners and professionals alike for creating and editing all sorts of videos, from Gifs and one-minute videos to high-quality movies and YouTube videos. It packs in a wide variety of features like 4K editing, noise removal, color tuning, audio mixer, scene detection, video stabilization, advanced text editor, GIF support, audio equalizer, etc. that can be used to create an outstanding YouTube video of your own.
Some other features offered by Filmora that can be used to make your YouTube video more attractive are 800+ video effects, motion tracking, green screen editing, screen recording, 3D Lut, and the option to export videos to YouTube directly
Conclusion
The thumbnail is one of the most important metadata of a YouTube video and hence all the YouTubers try to design it in the best way possible. As a result, most of the thumbnails are very attractive, creative and speak a lot about the content. Hence many people including bloggers, YouTubers, content creators, etc. want to download and save these thumbnails for their videos, blogs, articles wallpapers, and much more.
The YouTube thumbnail grabbers we have listed above are free and can be used by anyone to download their desired YouTube video thumbnail in good quality. Along with that anyone who wishes to create an attractive YouTube video that stands out can use Wondershare Filmora and its extensive video editing features. Hope our suggestions help you in the future. Thank you.
Richard Bennett
Richard Bennett is a writer and a lover of all things video.
Follow @Richard Bennett
Professionalizing Slides with YouTube Videos
Create High-Quality Video - Wondershare Filmora
An easy and powerful YouTube video editor
Numerous video and audio effects to choose from
Detailed tutorials provided by the official channel
Google Slide presentation is a powerful tool for creators to keep their audience engaged. This online platform lets you create and demonstrate your ideas. It will capture your viewers’ attention from the very beginning. It also doesn’t matter whatever learning style you engage. Adding YouTube videos to Google Slide will appeal to all levels of individuals.
More so, it is the best way to provide a break for both the audience and the creator. You can break Google Slide presentations with videos to offer some break. Viewers and the presenter get a breather in the process. The presenter can take a short break from speaking while the video plays. Let’s now dive into how to embed a YouTube video in Google Slides.

In this article
01 Why should we add a video to Google Slides?
02 How to add a YouTube video to Google Slide
03 How to choose the right video for your Slides?
Why should we add a video to Google Slides?
There is a great impact of adding video to Google Slides.
For attention
Videos will automatically awaken you, especially if your thoughts have started to sway during a presentation. A video has a direct way of showing creativity. The audience automatically connects the dots between the video and the presentation lines alike.
To stimulate discussion
A picture is worth a thousand words. There is a way that an added video will help the audience connect to the day’s topic. It will bring up several ideas and stir up discussion with the presenter.
Easy following
With videos embedded in Google Slide, viewers will find it easy to understand and digest. Videos automatically eliminate boredom and make any topic interesting.
How to add a YouTube video to Google Slide
Use these two methods to add a YouTube video to Google Slides. Via the Search and Direct link.
Method 1. Embed YouTube video to Google Slide by search and selection
Google has owned YouTube since the year 2006. You can, therefore, integrate Google’s products with YouTube easily.
Step 1. First, go to the slide where you want to embed your video.
Step 2. Then choose the “Insert” option from the menu bar and hit the “Video” option.

Step 3. It would be best if you now viewed the “YouTube” search bar to type in the video you want to embed. You can use keywords to search for the video in question and view instant search results.
Step 4. Then select the video you want to embed, and you’ll see it appear on the “Slide.”

Step 5. Format your video. Remember that the entire video will be embedded. You don’t necessarily need the whole video. It is time to select just a brief but relevant clip from the video to use. Then position your video to the right point using the axes from the exact starting point to the finished part you want the video to appear in.
Method 2. Embed YouTube video to Google Slide by direct link
You can engage this method if you want to include the entire video.
Step 1. Get the URL of the specific YouTube video that you want to use.

Step 2. Then go to your browser’s “Address bar” to copy the YouTube link.
Step 3. Next, open the “Presentation” slide to put your video to.
Step 4. Choose the “Insert” tab from the menu bar.
Step 5. Then hit on the “Video” option from the drop-down menu that appears.
Step 6. A new window will open automatically. Choose the “By URL” tab.
Step 7. Then paste the YouTube video URL in the “Paste YouTube URL Here” bar section.

Step 8. Wait for the video file to load and press the “Select” option. The video will immediately appear in the presentation slide. Just drag and drop the video in your preferred position.
Note: You can do a few edits inside the application. Set the timer when your video should start and when to stop. You can also adjust the video player size.
How to choose the right video for your Slides?
Not all videos will make an impact on your Google Slide. You need to use the best shot that adds value to your presentation. These guidelines will help you to settle on the best video.
Be Professional – choose the best video for your presentation. Remember that the video is part of the presentation and carries more weight. Settling for quality video will bring out the professionalism in you.
Relevant – how do you know that what you are showing your audience corresponds to the presentation piece? Ensure that the video you add has something to do with the Google Slide presentation topic. The two should naturally flow to make it easy to understand the whole concept.
Precise – your presentation is not about the video. The ideal length should not exceed 60 seconds. The longer the video, the greater the chance for your audience to lose track along the way.
Know every footage you are working with – this will help you pick the best shots for your presentation. So, learn every aspect of the video before settling down to use it.
Add new content – even though one content may suit several presentations, don’t rely on the same piece each time. Your audience will want to feel something fresh each time you are presenting. So, compose different videos for different scenarios to make that big impact.
Create an eye-catching video for your Slides with Filmora
The video quality matters when it comes to creating your Slides. The best video creator – Filmora – works in simple steps to give you an eye-catching video. It will create videos for all scenarios like marketing, tutorial, gaming, etc.
Key features of Filmora
- It offers you advanced video effects like filters, motion elements, etc
- You can multiply your fun with multiple screens with the Split Screen feature
- Easily change backgrounds using the Green Screen feature
- The speed control lets you fast forward or slow down a special moment
- Import your video clips to social media platforms
- You can also adjust the audio of your tracks using the Audio Mixer feature
Follow this guide to create a video for your slide with Filmora
Step 1. Launch Filmora
First, begin by downloading and installing Filmora on your computer device. Once installed, launch it and allow it to run. You can either create a new project or open an existing project to work on.
Step 2. Create a new project
Here, click on the “New Project” tab on the app’s welcome screen. The editor should load immediately. Then proceed to register the product. Just hit on the “Register” tab.
Step 3. Import video
Check the upper left corner of your screen to see the “Import” tab. Click on it and choose the “Import Media Files” option. Next, navigate to the location of your computer’s local list to select the clip or video you want to edit. Then, hit the “Import” button to add the video to the timeline for editing.
Step 4. Edit video
Drag and drop the raw footage to Filmora’s timeline to begin editing. Here, you can trim, add other video clips, merge, and add effects as you wish. Likewise, you can add opening titles, subtitles, and end credits to your video. More so, this tool offers different templates to use. Just drag and drop the templates you wish to use to a specific location on the timeline.
Step 5. Preview your file
Last but not least, you can preview your files. Click on the “Play” tab to start previewing your video clips. The main essence of this part is to allow you to make the necessary changes to your clips if there is a need.
Step 6. Export and Share
With Filmora, you can export your file to various social media platforms. But first, go to the “Output window” and select the video file format to use. This software supports several output formats to apply to any platform and device. Just click on the “Format” tab and choose the file format to use. Then also change the resolution and other parameters like frame rate and channel of your video in the “Settings” section. Finally, share your video to your YouTube channel and get ready to add the video to the Google Slide presentation.
For Win 7 or later (64-bit)
For macOS 10.12 or later
Conclusion
● You now know how to put a YouTube video in Google Slides the simple way. You can search for your YouTube videos or directly use the URL link. Whatever the case, remember that it’s the quality of your video that carries more weight. Thanks to the availability of third-party apps that you can use to create and improve the quality of your videos.
● Filmora is at your service to create high-resolution videos that you can export in any format to your YouTube channel. The tool is intuitive, and it won’t matter whether you haven’t tried it before. It is a perfect choice for both professionals and first-time users.
Google Slide presentation is a powerful tool for creators to keep their audience engaged. This online platform lets you create and demonstrate your ideas. It will capture your viewers’ attention from the very beginning. It also doesn’t matter whatever learning style you engage. Adding YouTube videos to Google Slide will appeal to all levels of individuals.
More so, it is the best way to provide a break for both the audience and the creator. You can break Google Slide presentations with videos to offer some break. Viewers and the presenter get a breather in the process. The presenter can take a short break from speaking while the video plays. Let’s now dive into how to embed a YouTube video in Google Slides.
In this article
01 Why should we add a video to Google Slides?
02 How to add a YouTube video to Google Slide
03 How to choose the right video for your Slides?
Why should we add a video to Google Slides?
There is a great impact of adding video to Google Slides.
For attention
Videos will automatically awaken you, especially if your thoughts have started to sway during a presentation. A video has a direct way of showing creativity. The audience automatically connects the dots between the video and the presentation lines alike.
To stimulate discussion
A picture is worth a thousand words. There is a way that an added video will help the audience connect to the day’s topic. It will bring up several ideas and stir up discussion with the presenter.
Easy following
With videos embedded in Google Slide, viewers will find it easy to understand and digest. Videos automatically eliminate boredom and make any topic interesting.
How to add a YouTube video to Google Slide
Use these two methods to add a YouTube video to Google Slides. Via the Search and Direct link.
Method 1. Embed YouTube video to Google Slide by search and selection
Google has owned YouTube since the year 2006. You can, therefore, integrate Google’s products with YouTube easily.
Step 1. First, go to the slide where you want to embed your video.
Step 2. Then choose the “Insert” option from the menu bar and hit the “Video” option.
Step 3. It would be best if you now viewed the “YouTube” search bar to type in the video you want to embed. You can use keywords to search for the video in question and view instant search results.
Step 4. Then select the video you want to embed, and you’ll see it appear on the “Slide.”
Step 5. Format your video. Remember that the entire video will be embedded. You don’t necessarily need the whole video. It is time to select just a brief but relevant clip from the video to use. Then position your video to the right point using the axes from the exact starting point to the finished part you want the video to appear in.
Method 2. Embed YouTube video to Google Slide by direct link
You can engage this method if you want to include the entire video.
Step 1. Get the URL of the specific YouTube video that you want to use.
Step 2. Then go to your browser’s “Address bar” to copy the YouTube link.
Step 3. Next, open the “Presentation” slide to put your video to.
Step 4. Choose the “Insert” tab from the menu bar.
Step 5. Then hit on the “Video” option from the drop-down menu that appears.
Step 6. A new window will open automatically. Choose the “By URL” tab.
Step 7. Then paste the YouTube video URL in the “Paste YouTube URL Here” bar section.
Step 8. Wait for the video file to load and press the “Select” option. The video will immediately appear in the presentation slide. Just drag and drop the video in your preferred position.
Note: You can do a few edits inside the application. Set the timer when your video should start and when to stop. You can also adjust the video player size.
How to choose the right video for your Slides?
Not all videos will make an impact on your Google Slide. You need to use the best shot that adds value to your presentation. These guidelines will help you to settle on the best video.
Be Professional – choose the best video for your presentation. Remember that the video is part of the presentation and carries more weight. Settling for quality video will bring out the professionalism in you.
Relevant – how do you know that what you are showing your audience corresponds to the presentation piece? Ensure that the video you add has something to do with the Google Slide presentation topic. The two should naturally flow to make it easy to understand the whole concept.
Precise – your presentation is not about the video. The ideal length should not exceed 60 seconds. The longer the video, the greater the chance for your audience to lose track along the way.
Know every footage you are working with – this will help you pick the best shots for your presentation. So, learn every aspect of the video before settling down to use it.
Add new content – even though one content may suit several presentations, don’t rely on the same piece each time. Your audience will want to feel something fresh each time you are presenting. So, compose different videos for different scenarios to make that big impact.
Create an eye-catching video for your Slides with Filmora
The video quality matters when it comes to creating your Slides. The best video creator – Filmora – works in simple steps to give you an eye-catching video. It will create videos for all scenarios like marketing, tutorial, gaming, etc.
Key features of Filmora
- It offers you advanced video effects like filters, motion elements, etc
- You can multiply your fun with multiple screens with the Split Screen feature
- Easily change backgrounds using the Green Screen feature
- The speed control lets you fast forward or slow down a special moment
- Import your video clips to social media platforms
- You can also adjust the audio of your tracks using the Audio Mixer feature
Follow this guide to create a video for your slide with Filmora
Step 1. Launch Filmora
First, begin by downloading and installing Filmora on your computer device. Once installed, launch it and allow it to run. You can either create a new project or open an existing project to work on.
Step 2. Create a new project
Here, click on the “New Project” tab on the app’s welcome screen. The editor should load immediately. Then proceed to register the product. Just hit on the “Register” tab.
Step 3. Import video
Check the upper left corner of your screen to see the “Import” tab. Click on it and choose the “Import Media Files” option. Next, navigate to the location of your computer’s local list to select the clip or video you want to edit. Then, hit the “Import” button to add the video to the timeline for editing.
Step 4. Edit video
Drag and drop the raw footage to Filmora’s timeline to begin editing. Here, you can trim, add other video clips, merge, and add effects as you wish. Likewise, you can add opening titles, subtitles, and end credits to your video. More so, this tool offers different templates to use. Just drag and drop the templates you wish to use to a specific location on the timeline.
Step 5. Preview your file
Last but not least, you can preview your files. Click on the “Play” tab to start previewing your video clips. The main essence of this part is to allow you to make the necessary changes to your clips if there is a need.
Step 6. Export and Share
With Filmora, you can export your file to various social media platforms. But first, go to the “Output window” and select the video file format to use. This software supports several output formats to apply to any platform and device. Just click on the “Format” tab and choose the file format to use. Then also change the resolution and other parameters like frame rate and channel of your video in the “Settings” section. Finally, share your video to your YouTube channel and get ready to add the video to the Google Slide presentation.
For Win 7 or later (64-bit)
For macOS 10.12 or later
Conclusion
● You now know how to put a YouTube video in Google Slides the simple way. You can search for your YouTube videos or directly use the URL link. Whatever the case, remember that it’s the quality of your video that carries more weight. Thanks to the availability of third-party apps that you can use to create and improve the quality of your videos.
● Filmora is at your service to create high-resolution videos that you can export in any format to your YouTube channel. The tool is intuitive, and it won’t matter whether you haven’t tried it before. It is a perfect choice for both professionals and first-time users.
Also read:
- [Updated] Efficiently Add YouTube Playlists to Your Website Interface
- Audiovisual Perfection Leading Audio Enhancement Apps for 2024
- Demystifying the Process of Submitting Videos on YouTube
- [Updated] Audio Perfection Achieved Expert Tips Without a Microphone
- In 2024, Are Influencer Marketing Tactics on YouTube Effective for Long-Term Success?
- The Financial Race Between DailyMovement and YouTube Channels
- In 2024, Boosting Viewership with Animated Subscribe Buttons in Filmora (Easy Guide)
- 2024 Approved Channel Gain Traction Comprehensive Guide to YouTube's Featured Placement
- 2024 Approved Authenticating Your YouTube Username & Email
- 7 Easy Steps for a Subscriber Surge on YouTube
- Giggles Galore 7 Entertaining Video Sets for Chuckleheads
- [New] Everything You Need to Know About YouTube Shorts
- [New] Boost Your Channels A Guide to Best YouTube SEO Resources
- Behind-the-Camera Glory Spotlight on Top 10 Female YouTubers for 2024
- [Updated] Enhance Movie Length on YouTube Platform
- Achieving Financial Independence Through YouTube and AdSense
- In 2024, Cut the Cost on Downloads Exclusive Access to This List of 23 Affordable Extractors
- [Updated] Decoding the Earnings Algorithm of TSeries Online Channel
- Decoding YouTube’s Economic Strategy The Rise of Short Videos
- Seamless Video Integration on YouTube Platform
- [New] Cutting-Edge Studio Lights for Online Filmmakers
- [New] Easy Access to No-Cost Music for Video Makers
- In 2024, Avoid Mainstream Underrated Movies of the Year
- Personalized Music Collection Enhancement From Spotify to YouTube Music
- 2024 Approved Breakdown of Earnings How Much Does a Clicky Make?
- Pushing Boundaries Upward An Incisive Mavic Pro Review
- In 2024, Top 12 Prominent Vivo Y28 5G Fingerprint Not Working Solutions
- Expertly Curated List of Top 9 Virtual Mic Recorder Systems ('23)
- In 2024, Is pgsharp legal when you are playing pokemon On Apple iPhone 6s Plus? | Dr.fone
- Maximize Your Video Impact with FREE Vimeo Editing for 2024
- 10 Best Fake GPS Location Spoofers for Samsung Galaxy S24 Ultra | Dr.fone
- Updated In 2024, Transforming Text Into Audio Proven MP3 Conversion Strategies
- In 2024, 10 Free Online Subtitle Converters for Video Accessibility
- [Updated] How to Record Teams Video Meeting?
- Play Store Not Working On Realme GT 3? 8 Solutions Inside | Dr.fone
- [New] 2024 Approved Top 5 Apps for Capturing Precise Android Displays
- Best GIF to AVI Converters (Online + Software Solutions) for 2024
- [Updated] Escaping TikTok's Invisible Barriers for 2024
- 9 Mind-Blowing Tricks to Hatch Eggs in Pokemon Go Without Walking On Lava Blaze Curve 5G | Dr.fone
- In 2024, Here Are Some Reliable Ways to Get Pokemon Go Friend Codes For Asus ROG Phone 7 Ultimate | Dr.fone
- How To Use Allshare Cast To Turn On Screen Mirroring On Vivo V30 | Dr.fone
- Updated In 2024, Slow and Steady Wins Free Slow Motion Video Editing with Filmora
- In 2024, A Step-by-Step Tutorial to Monitor Popular Interactions on YouTube
- New Frontiers in Mobile Videography - Alternatives to Periscope
- [New] In 2024, Effortless Steps for Switching User Statuses on Discord
- [New] 2024 Approved The Road to Profitable Facebook Marketing Through Engaging Ads
- Title: "YT Thumbnail Mastery Guide to Your Video's Best Images"
- Author: Steven
- Created at : 2024-05-25 21:05:34
- Updated at : 2024-05-26 21:05:34
- Link: https://youtube-clips.techidaily.com/yt-thumbnail-mastery-guide-to-your-videos-best-images/
- License: This work is licensed under CC BY-NC-SA 4.0.
