
:max_bytes(150000):strip_icc()/copilotword01-6325e891b0804326a8b01ed1a9e02693.jpg)
"Youtuber Essentials Must-Have Hardware & Software for Successful Streams"
Youtuber Essentials: Must-Have Hardware & Software for Successful Streams
Best YouTube Live Streaming Software and Hardware You Should Know

Richard Bennett
Mar 27, 2024• Proven solutions
- Part1.Best Software for Live Streaming Video to YouTube
- Part2.Best Software for Live Streaming Game to YouTube
- Part3.Best Software for Live Streaming Mobile to YouTube
- Part4.Hardware for Live Streaming to YouTube
Best Video Editor for You


Best Software for Live Streaming Video to YouTube
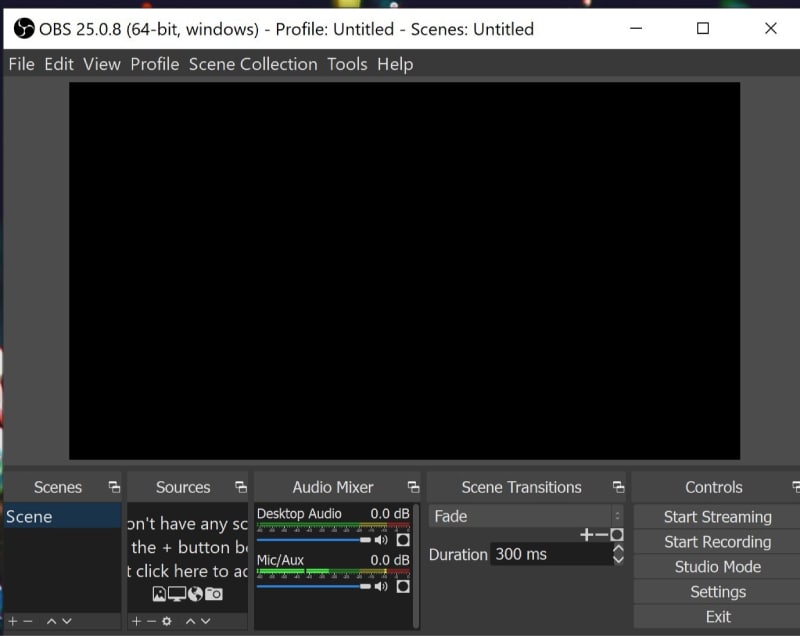
1.OBS:
Price: It is available for free.
OBS or Open Source Broadcaster is a popular recording and live streaming software tool that can be easily operated by all beginners. The best is that you can avail this software tool as an open source so it is possible to customize things as per need.
Key Features:
- It works perfectly on Linux, Mac and Windows.
- Advanced video editing tool with customized transitions.
- Filters, audio mixers, noise suppressor and automatic gain booster added for development of classic videos.
- Users can easily access light and dark themes as per their need.
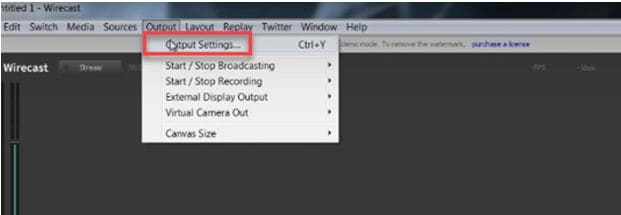
2. Wirecast Play:
Price:
- Wirecast Play 6: Free/ $9.99
- Wirecast Play Studio 6: $279
- Wirecast Play Pro 6: $549.
Wirecast play allows users to enjoy professional kind of stuff with impressive live recording facilities. Users can easily encode all live streams over multiple platforms or servers.
- The professional version of this software tool allows users to add web stream, Ip cameras and input sources.
- It possesses so many professional level editing features such as advanced audio controls, virtual sets, reply and live scoreboards.
- With its interactive user interface, Wirecast is rated as one of the most useful multicamera type live streaming package.
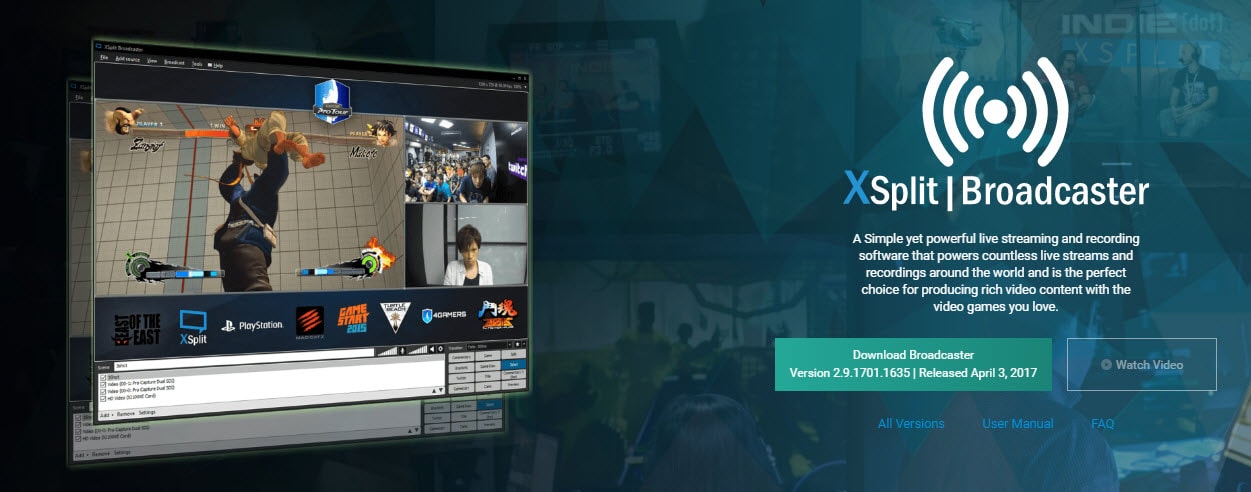
3. XSplit Broadcaster:
Price: Free and Paid
Here is a simple yet highly powerful live streaming software tool that can produce rich video content with its impressive user interface. It possesses all basic video development tools along with audio support feature. You will be glad to know that Xsplit offers Full HD recording ability; other then this you can access social features, in game annotations, in game production control as well as unique live production features.
Key Features:
- XSplit supports almost all capture cards.
- It possesses so many custom integrations and plugins.
- Easy video editing supported with professional production tools.
- You will be able to access notifications and chat option for organizing uploads in interactive manner.
Best Software for Live Streaming Game to YouTube
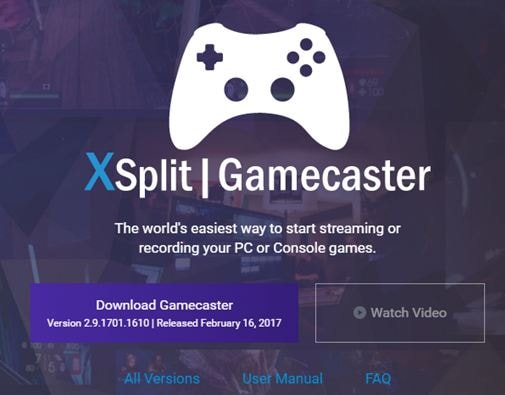
1. XSplit Gamecaster:
Price: Free and Paid
If you love gaming then Xsplit can assist you to share your memorable gaming moments on social media sites so that viewers can come to know about your creativity. Xsplit Gamecaster works perfectly with console games as well as on personal computers.
Key Features:
- It extends its support to all latest capture card designs.
- Users can easily switch to webcam mode and background can be easily removed.
- It offers loads of professional quality editing features.
- There are so many customizable integrations and plugins.
- Chat and notification feature supported.
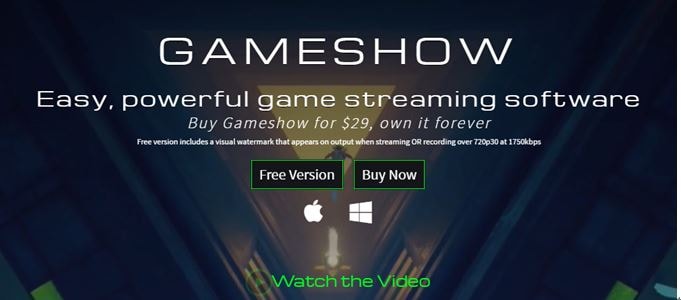
2. Gameshow (Mac/Win):
Price: $29
It is possible to start live streaming within few seconds using your gameshow oftware tool. Gameshow will help you to pick right template, adjust widgets and start streaming content within few seconds. It is possible to stream content directly to all popular social media platforms like Hitbox, YouTube and Twitch.
Key Features:
- It offers multiple layer combinations for development of interactive videos.
- Users will have complete control over scene development.
- It is possible to create playlists using transitions and customized timing effects.
- It works with low CPU usage hence will not affect your device performance.
Best Software for Live Streaming Mobile to YouTube
1. Airserver:
Price: $7.99 to $11.99 only for educational needs, $14.99- Consumer License and $19.99 for Business License.
AirServer is one of the most advanced and interactive screen mirroring type software receiver tools for Xbox, PC and Mac etc. Using this tool, users can easily receive content from chromcast device, Apple TV, Miracast Streams, Google Cast and AirPlay etc.
Key Features:
- It is designed with zero client footprint feature that means everything is just ready for your needs and you will not even need any third party support.
- This software tool enables collaboration between various applications that are working on different platforms.
- It is compatible with Windows, Chrombook and Android platform.
- Comes with retina quality mirroring that can effectively improve picture quality.
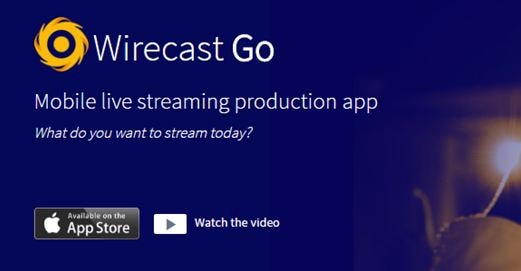
2. Wirecast Go (iOS device only):
Price: Free and upgrades demand payment of $5.99 only.
It is possible to stream rich video content from iPhone directly to Youtube using Wirecast platform. Users will be able to stream their interactive videos with effective editing and customization tools like text, replays and graphics etc. This software tool is compatible with iPod Touch, iPad and iPhone.
Key Features:
- One click type YouTube streaming option.
- Unlimited streaming available even for free version users.
- One can easily add graphics, logos and images for stream content.
- It replays all highlights for live broadcasts.
Hardware for Live Streaming to YouTube
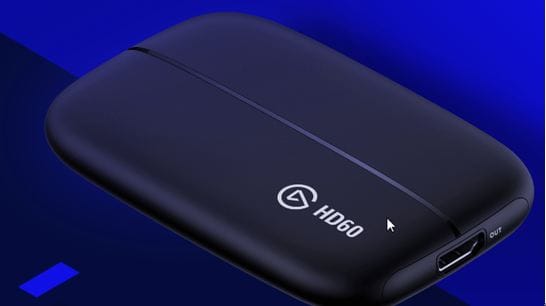
1. Elgato Game Capture HD 60:
Price: $179.95 only
Elgato Game Capture HD 60 is well known for its wide range of compatibility, efficiency and set of powerful features that assists in top quality content development. You can develop videos with 1080p resolution at 60fps frame rate using Elgato tool.
Key Features:
- Rich content quality with Full HD video support.
- It can easily record your overlays, webcam, audio and gameplay with additional facility to separate them as per need so that users can access anything upon selection.
- Easy editing functions that assist in direct upload.
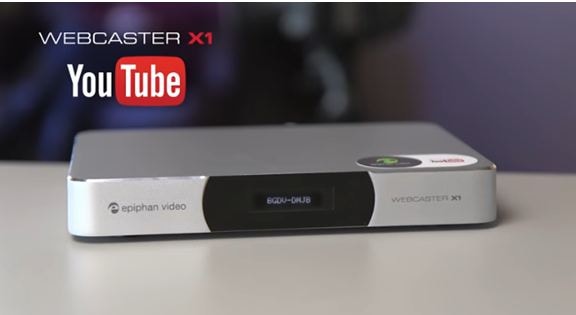
2. Webcaster X1 for YouTube:
Price: $329.95 only.
Webcaster allows users to enjoy interactive video uploading experience while offering easy connectivity to DSLR and dedicated Video camera units so that videos can be directly sent to YouTube.
Key Features:
- It offers easy setup options and starts automatically when you pair it up with a device using pairing code.
- This software tool can accept high quality audio content via HDMI inputs.
- It is possible to use advanced configuration options like keyboard, mouse and monitor connectivity for precise live streaming.
- One can easily make selections between Wi-Fi and Ethernet connections for content uploading.
Richard Bennett
Richard Bennett is a writer and a lover of all things video.
Follow @Richard Bennett
Richard Bennett
Mar 27, 2024• Proven solutions
- Part1.Best Software for Live Streaming Video to YouTube
- Part2.Best Software for Live Streaming Game to YouTube
- Part3.Best Software for Live Streaming Mobile to YouTube
- Part4.Hardware for Live Streaming to YouTube
Best Video Editor for You
Best Software for Live Streaming Video to YouTube
1.OBS:
Price: It is available for free.
OBS or Open Source Broadcaster is a popular recording and live streaming software tool that can be easily operated by all beginners. The best is that you can avail this software tool as an open source so it is possible to customize things as per need.
Key Features:
- It works perfectly on Linux, Mac and Windows.
- Advanced video editing tool with customized transitions.
- Filters, audio mixers, noise suppressor and automatic gain booster added for development of classic videos.
- Users can easily access light and dark themes as per their need.
2. Wirecast Play:
Price:
- Wirecast Play 6: Free/ $9.99
- Wirecast Play Studio 6: $279
- Wirecast Play Pro 6: $549.
Wirecast play allows users to enjoy professional kind of stuff with impressive live recording facilities. Users can easily encode all live streams over multiple platforms or servers.
- The professional version of this software tool allows users to add web stream, Ip cameras and input sources.
- It possesses so many professional level editing features such as advanced audio controls, virtual sets, reply and live scoreboards.
- With its interactive user interface, Wirecast is rated as one of the most useful multicamera type live streaming package.
3. XSplit Broadcaster:
Price: Free and Paid
Here is a simple yet highly powerful live streaming software tool that can produce rich video content with its impressive user interface. It possesses all basic video development tools along with audio support feature. You will be glad to know that Xsplit offers Full HD recording ability; other then this you can access social features, in game annotations, in game production control as well as unique live production features.
Key Features:
- XSplit supports almost all capture cards.
- It possesses so many custom integrations and plugins.
- Easy video editing supported with professional production tools.
- You will be able to access notifications and chat option for organizing uploads in interactive manner.
Best Software for Live Streaming Game to YouTube
1. XSplit Gamecaster:
Price: Free and Paid
If you love gaming then Xsplit can assist you to share your memorable gaming moments on social media sites so that viewers can come to know about your creativity. Xsplit Gamecaster works perfectly with console games as well as on personal computers.
Key Features:
- It extends its support to all latest capture card designs.
- Users can easily switch to webcam mode and background can be easily removed.
- It offers loads of professional quality editing features.
- There are so many customizable integrations and plugins.
- Chat and notification feature supported.
2. Gameshow (Mac/Win):
Price: $29
It is possible to start live streaming within few seconds using your gameshow oftware tool. Gameshow will help you to pick right template, adjust widgets and start streaming content within few seconds. It is possible to stream content directly to all popular social media platforms like Hitbox, YouTube and Twitch.
Key Features:
- It offers multiple layer combinations for development of interactive videos.
- Users will have complete control over scene development.
- It is possible to create playlists using transitions and customized timing effects.
- It works with low CPU usage hence will not affect your device performance.
Best Software for Live Streaming Mobile to YouTube
1. Airserver:
Price: $7.99 to $11.99 only for educational needs, $14.99- Consumer License and $19.99 for Business License.
AirServer is one of the most advanced and interactive screen mirroring type software receiver tools for Xbox, PC and Mac etc. Using this tool, users can easily receive content from chromcast device, Apple TV, Miracast Streams, Google Cast and AirPlay etc.
Key Features:
- It is designed with zero client footprint feature that means everything is just ready for your needs and you will not even need any third party support.
- This software tool enables collaboration between various applications that are working on different platforms.
- It is compatible with Windows, Chrombook and Android platform.
- Comes with retina quality mirroring that can effectively improve picture quality.
2. Wirecast Go (iOS device only):
Price: Free and upgrades demand payment of $5.99 only.
It is possible to stream rich video content from iPhone directly to Youtube using Wirecast platform. Users will be able to stream their interactive videos with effective editing and customization tools like text, replays and graphics etc. This software tool is compatible with iPod Touch, iPad and iPhone.
Key Features:
- One click type YouTube streaming option.
- Unlimited streaming available even for free version users.
- One can easily add graphics, logos and images for stream content.
- It replays all highlights for live broadcasts.
Hardware for Live Streaming to YouTube
1. Elgato Game Capture HD 60:
Price: $179.95 only
Elgato Game Capture HD 60 is well known for its wide range of compatibility, efficiency and set of powerful features that assists in top quality content development. You can develop videos with 1080p resolution at 60fps frame rate using Elgato tool.
Key Features:
- Rich content quality with Full HD video support.
- It can easily record your overlays, webcam, audio and gameplay with additional facility to separate them as per need so that users can access anything upon selection.
- Easy editing functions that assist in direct upload.
2. Webcaster X1 for YouTube:
Price: $329.95 only.
Webcaster allows users to enjoy interactive video uploading experience while offering easy connectivity to DSLR and dedicated Video camera units so that videos can be directly sent to YouTube.
Key Features:
- It offers easy setup options and starts automatically when you pair it up with a device using pairing code.
- This software tool can accept high quality audio content via HDMI inputs.
- It is possible to use advanced configuration options like keyboard, mouse and monitor connectivity for precise live streaming.
- One can easily make selections between Wi-Fi and Ethernet connections for content uploading.
Richard Bennett
Richard Bennett is a writer and a lover of all things video.
Follow @Richard Bennett
Boosting Video Appeal: Implementing Neon Borders in Thumbnails
Your YouTube video, or any other clip published on any forum, gets a larger number of hits if it has an attractive thumbnail. And, the fact is, a thumbnail becomes 10x more attractive when the main character that the image has have a neon border around it.
With that said, in the following sections, you will learn a couple of methods on how to add a YouTube thumbnail border around the main characters and/or objects that are significant to the clip.
In this article
01 Add Glowing Neon Border to YouTube Thumbnail with Filmora
02 Add a Glowing Neon Border in YouTube Thumbnail with Canva
03 Outline a Person in a YouTube Thumbnail with Photoshop
Part 1: How to Add Neon Border to YouTube Thumbnail for Free with Filmora
Being one of the most versatile and intuitive post-production tools available in the market today, Wondershare Filmora X allows you to add a neon border to a YouTube thumbnail quite conveniently. You can learn how to get this done on Windows or Mac by following the steps given below.
For Win 7 or later (64-bit)
For macOS 10.12 or later
Step 1: Define Project Settings and Add Image to the Timeline
Launch Wondershare Filmora X on your PC (a MacBook Pro M1 is used here), ensure that the project aspect ratio is set to 16:9 (Widescreen) on the splash screen, and click New Project. On the main interface, click the Preview quality and display settings icon from the upper-right area of the Timeline, click Change Project Aspect Ratio, click to select 1280 x 720 (HD) from the Resolution menu of the Project Settings box, and click OK to save the custom project settings.

Then select My Media from the menu bar if not already selected, click Project Media from the navigation pane, and click Import from the Media box to select and import the image of the main character or object that you want to use in the thumbnail.

Now, drag the image from the Media box to the Timeline at the bottom.

Step 2: Clear Image Background, Add Border, and Add Custom Background
Go to Effects from the menu bar, click to select the Default tab and then AI Portrait from the navigation pane, and click and drag the Human Segmentation preset from the right box, and place it over the image track in the Timeline.

Double-click the image layer, scroll down the upper-left box to the Video Effects section, and use the Edge Thickness and Edge Feather sliders to adjust the character’s edges to make them as realistic as possible. Click OK when done.

Next, click and drag the Human Border preset over the image track in the Timeline, and follow the same procedure to customize the border. This will give the character a neon border effect.

Now, use the method explained earlier to import a custom image for the background, and drag and place it under the previous track in the Timeline.

If you are running the latest version of Filmora, you will find there are some neon light effects available under AI Portrait as well.

Step 3: Add Titles to Thumbnail
Go to Titles from the menu bar, click to select the Default tab and then Lower 3rds from the navigation pane, and click and drag your preferred lower-third preset from the right window to a separate layer in the Timeline. Double-click the lower-third layer, and use the available options in the upper-left window to change the text, its color, etc., and drag the textbox to place it to your preferred position on the image as well. Click OK to save the changes.
Next, click to select Titles from the navigation pane, and drag your preferred title from the right window to the upper-most track in the Timeline. Now use the method explained earlier to edit the text, its color, position, etc. to make it look professional.

For more tips and tricks for creating YouTube thumbnail, you can check this You Tube thumbnail creating guide.
Step 4: Get the Neon Border Thumbnail
Click the Snapshot (Camera) icon from the upper-right area of the Timeline, go to My Media from the menu bar, right-click the thumbnail of the screenshot you captured, and click Reveal in Finder (on Mac) or Reveal in Explorer (on Windows) to get to the folder the YouTube thumbnail border is saved in.

Part 2: How to Add a Glowing Neon Border in Your YouTube Thumbnail with Canva
Canva is another intuitive editing program that works on the web interface rather than having you download and install an app on your PC. You can add a neon border for YouTube thumbnails using Canva by following the instructions given below:
Step 1: Define Project Settings and Add a Background
After signing in to your Canva account, click Create a design from the top-right corner of the page, click Custom size from the bottom, define 1280 and 720 in the Width and Height fields on the box that appears respectively, and click Create new design.

Now, click to select Background from the navigation bar on the left (if the Background tool is not visible, click More and then choose Background from the expanded list), and click to select a background from the images available in the center pane.

Step 2: Upload an Image and Add Effects
Click Uploads from the navigation bar, click the More icon from the right of the Upload media button present at the top of the center pane, choose your preferred method to upload the image (with the transparent background) that you want to use, upload the image, and drag it from the center pane to the Canvas.
Note: You can use any of the tools available online to remove the background from your image for free.

To add a YouTube thumbnail border, make sure that the image that you added to the Canvas is selected, click the Duplicate icon from the upper-right area, and use the scaling handles of the copy of the image to increase its size a bit. Reposition the image back to its original location as well.
Then, click Edit image from the upper-left corner of the Canvas, click Duotone from the Edit image pane at the center, if need be, click See all, choose your preferred duotone effect to apply on the image, choose your preferred highlight and shadow colors from the box that appears next, and click Back from the top of the pane.

Next, click See all next to the Adjust section from the center pane, and drag the Blur slider to the right to increase the blur effect on the image.

Step 3: Position the Layers
While keeping the duplicate image selected, click the Position button from the upper-right area of the Canvas, and click Background to send the second image behind the first one to get the neon border effect for the photo.

Part 3: How to Outline a Person in a YouTube Thumbnail with Photoshop
Because YouTube thumbnails are nothing but static images, creating YouTube thumbnail border with Adobe Photoshop is comparatively easier. The process of doing this is given below:
Step 1: Define Document Preferences and Import an Image
Launch Adobe Photoshop on your PC, click Create new, and on the New Document customization box, define the width and height values to 1280 and 720 pixels respectively. Select Transparent from the Background Contents menu as well if not already selected. Click Create from the bottom to create a new Photoshop document with the specified document settings. Next, open the folder that contains the source image, drag the photo to Photoshop, and press Enter to place the photo.

Step 2: Remove Background from the Image
Make sure that the image layer is selected in the Layers panel on the right, go to Select from the menu bar at the top, and click Subject. From the bottom of the Layers panel, click the Add a mask icon to get rid of the background, leaving only the human on the Canvas.

Step 3: Add a Custom Background and an Outline Around the Subject
Use the method explained earlier to import a background image of your choice to Photoshop. Drag the background image layer to the bottom in the Layers panel. Double-click the masked layer, click to select Stroke from the left pane of the Layer Style box, and use the options available on the right to manage the size, color, position, etc. of the stroke that has been added around the human subject. Click OK when done, and then export the image normally to use it as a YouTube thumbnail border.

Summary
It is important to know that the default resolution of a YouTube thumbnail is 1280 x 720 pixels that is usually written and referred to as 720p. While adding a YouTube thumbnail border, it is also imperative to have a good sense of color combination and fonts. Furthermore, a decent tool like Wondershare Filmora X must be used to add an appealing neon border around the main subject in the thumbnail image easily and quickly.
02 Add a Glowing Neon Border in YouTube Thumbnail with Canva
03 Outline a Person in a YouTube Thumbnail with Photoshop
Part 1: How to Add Neon Border to YouTube Thumbnail for Free with Filmora
Being one of the most versatile and intuitive post-production tools available in the market today, Wondershare Filmora X allows you to add a neon border to a YouTube thumbnail quite conveniently. You can learn how to get this done on Windows or Mac by following the steps given below.
For Win 7 or later (64-bit)
For macOS 10.12 or later
Step 1: Define Project Settings and Add Image to the Timeline
Launch Wondershare Filmora X on your PC (a MacBook Pro M1 is used here), ensure that the project aspect ratio is set to 16:9 (Widescreen) on the splash screen, and click New Project. On the main interface, click the Preview quality and display settings icon from the upper-right area of the Timeline, click Change Project Aspect Ratio, click to select 1280 x 720 (HD) from the Resolution menu of the Project Settings box, and click OK to save the custom project settings.
Then select My Media from the menu bar if not already selected, click Project Media from the navigation pane, and click Import from the Media box to select and import the image of the main character or object that you want to use in the thumbnail.
Now, drag the image from the Media box to the Timeline at the bottom.
Step 2: Clear Image Background, Add Border, and Add Custom Background
Go to Effects from the menu bar, click to select the Default tab and then AI Portrait from the navigation pane, and click and drag the Human Segmentation preset from the right box, and place it over the image track in the Timeline.
Double-click the image layer, scroll down the upper-left box to the Video Effects section, and use the Edge Thickness and Edge Feather sliders to adjust the character’s edges to make them as realistic as possible. Click OK when done.
Next, click and drag the Human Border preset over the image track in the Timeline, and follow the same procedure to customize the border. This will give the character a neon border effect.
Now, use the method explained earlier to import a custom image for the background, and drag and place it under the previous track in the Timeline.
If you are running the latest version of Filmora, you will find there are some neon light effects available under AI Portrait as well.
Step 3: Add Titles to Thumbnail
Go to Titles from the menu bar, click to select the Default tab and then Lower 3rds from the navigation pane, and click and drag your preferred lower-third preset from the right window to a separate layer in the Timeline. Double-click the lower-third layer, and use the available options in the upper-left window to change the text, its color, etc., and drag the textbox to place it to your preferred position on the image as well. Click OK to save the changes.
Next, click to select Titles from the navigation pane, and drag your preferred title from the right window to the upper-most track in the Timeline. Now use the method explained earlier to edit the text, its color, position, etc. to make it look professional.
For more tips and tricks for creating YouTube thumbnail, you can check this You Tube thumbnail creating guide.
Step 4: Get the Neon Border Thumbnail
Click the Snapshot (Camera) icon from the upper-right area of the Timeline, go to My Media from the menu bar, right-click the thumbnail of the screenshot you captured, and click Reveal in Finder (on Mac) or Reveal in Explorer (on Windows) to get to the folder the YouTube thumbnail border is saved in.
Part 2: How to Add a Glowing Neon Border in Your YouTube Thumbnail with Canva
Canva is another intuitive editing program that works on the web interface rather than having you download and install an app on your PC. You can add a neon border for YouTube thumbnails using Canva by following the instructions given below:
Step 1: Define Project Settings and Add a Background
After signing in to your Canva account, click Create a design from the top-right corner of the page, click Custom size from the bottom, define 1280 and 720 in the Width and Height fields on the box that appears respectively, and click Create new design.
Now, click to select Background from the navigation bar on the left (if the Background tool is not visible, click More and then choose Background from the expanded list), and click to select a background from the images available in the center pane.
Step 2: Upload an Image and Add Effects
Click Uploads from the navigation bar, click the More icon from the right of the Upload media button present at the top of the center pane, choose your preferred method to upload the image (with the transparent background) that you want to use, upload the image, and drag it from the center pane to the Canvas.
Note: You can use any of the tools available online to remove the background from your image for free.
To add a YouTube thumbnail border, make sure that the image that you added to the Canvas is selected, click the Duplicate icon from the upper-right area, and use the scaling handles of the copy of the image to increase its size a bit. Reposition the image back to its original location as well.
Then, click Edit image from the upper-left corner of the Canvas, click Duotone from the Edit image pane at the center, if need be, click See all, choose your preferred duotone effect to apply on the image, choose your preferred highlight and shadow colors from the box that appears next, and click Back from the top of the pane.
Next, click See all next to the Adjust section from the center pane, and drag the Blur slider to the right to increase the blur effect on the image.
Step 3: Position the Layers
While keeping the duplicate image selected, click the Position button from the upper-right area of the Canvas, and click Background to send the second image behind the first one to get the neon border effect for the photo.
Part 3: How to Outline a Person in a YouTube Thumbnail with Photoshop
Because YouTube thumbnails are nothing but static images, creating YouTube thumbnail border with Adobe Photoshop is comparatively easier. The process of doing this is given below:
Step 1: Define Document Preferences and Import an Image
Launch Adobe Photoshop on your PC, click Create new, and on the New Document customization box, define the width and height values to 1280 and 720 pixels respectively. Select Transparent from the Background Contents menu as well if not already selected. Click Create from the bottom to create a new Photoshop document with the specified document settings. Next, open the folder that contains the source image, drag the photo to Photoshop, and press Enter to place the photo.
Step 2: Remove Background from the Image
Make sure that the image layer is selected in the Layers panel on the right, go to Select from the menu bar at the top, and click Subject. From the bottom of the Layers panel, click the Add a mask icon to get rid of the background, leaving only the human on the Canvas.
Step 3: Add a Custom Background and an Outline Around the Subject
Use the method explained earlier to import a background image of your choice to Photoshop. Drag the background image layer to the bottom in the Layers panel. Double-click the masked layer, click to select Stroke from the left pane of the Layer Style box, and use the options available on the right to manage the size, color, position, etc. of the stroke that has been added around the human subject. Click OK when done, and then export the image normally to use it as a YouTube thumbnail border.
Summary
It is important to know that the default resolution of a YouTube thumbnail is 1280 x 720 pixels that is usually written and referred to as 720p. While adding a YouTube thumbnail border, it is also imperative to have a good sense of color combination and fonts. Furthermore, a decent tool like Wondershare Filmora X must be used to add an appealing neon border around the main subject in the thumbnail image easily and quickly.
Also read:
- Swiftly Upgrade Your Videos with Top Tips for Adding YouTube Closed Captions
- [New] Breaking Even on YouTube Key View Figures Explored
- Capture YouTube's Iconic Icons Online Tools, Desktop Software & Commands
- [Updated] 11 FREE YouTube Video Rippers to Download YouTube Videos
- Monthly Income on YouTube's Revenue Model?
- Chuckling Challenge Brainstroming 7 Humorous YouTube Videos for 2024
- [New] Boost Views via Strategic Tagging Tactics
- Delving Into Trending Video Exchange
- 2024 Approved A Filmmaker's Companion The Journey From Capturing to Post-Production of 360 Videos
- In 2024, Captivating Startups Discovering the Best 15 Video Intros
- In 2024, Charting a Course for Cash Flows The 3-Step Methodology for Measuring YouTube Earnings
- In 2024, Craft the Ultimate Outro with Pro Maker Advice
- Artisans Shaping Virtual Marvel Universes for 2024
- Dominating Viewers' Spaces Channel Empire Rules
- The Evolution of Streaming YouTube TV In Focus
- No Entry Fee Movies YouTube’s Ultimate Screen-Killing Selection
- [New] 7 Free Video Editing Programs That Work Flawlessly
- In 2024, Best Livestream Capturing Solutions for Content Makers
- How to Shave Seconds Off Your YouTube Video Submission
- Becoming a Video Virtuoso Essential Tips for Upside-Down Youtube Livestreams
- [New] Cultivate 1,000 Fanbase Followers Quickly
- Streaming Tunes Quick Methods for Youtube Videos in iMovie
- In 2024, A Practical Approach to Incorporate YouTube Playlists Online
- Above the Mainstage Significant YouTube Meetings for 2024
- Beware The Risk in Fake Followers on YouTube
- In 2024, Analyzing YouTube's Process for Selective Comment Showcasing
- Echo Video Storyteller for 2024
- Is Screening YouTube Footage Illegal?
- Enhancing Viewer Experience with Immersive 360 Video Content for YouTube for 2024
- [New] Bringing Dialogue to Life Writing for YouTube Videos
- [New] Blogging Basics for Business Beginnings
- Unplug and Laugh Select the Best 15 Funny YouTube Sources
- 2024 Approved [Filmora] Best Magic Tricks of YouTube Video Editors EVER
- Personalized Music Collection Enhancement From Spotify to YouTube Music
- Efficient Techniques Sharing Video Content From YouTube FB
- Elevate Views Prime SEO Equipment for Videos for 2024
- Cutting-Edge Techniques in YouTube Ad Design for 2024
- Cutting Clout, Not Content Efficient Video Length Reduction
- How to Add Text to YouTube Video for 2024
- How to Increase YouTube Traffic by a Million Safely Done
- [New] Adding Tag to YouTube Video? Better Read This First
- [Updated] Essential Media Makers' Software Linux Edition
- Personalize Your YouTube Experience with Altered Rhythms
- In 2024, Elevating Your Video's Reach - Top 8 YouTube Ranks Unveiled
- [New] Avoiding Common Pitfalls in PC-Based YouTube Video Editing
- [Updated] Comedic Craftsmanship The Best Short Video Ideas to Entertain Viewers
- [Updated] In 2024, Unseen Chronicles 5 Expertly Crafted Viewer Tools
- [Updated] Gaming Filmmaking Techniques to Record Games Flawlessly
- Pokemon Go Error 12 Failed to Detect Location On Samsung Galaxy Z Flip 5? | Dr.fone
- Audio Conversion Made Simple Our Top 12 Picks for 2024
- 3uTools Virtual Location Not Working On Xiaomi Redmi Note 12 Pro 4G? Fix Now | Dr.fone
- In 2024, How Can I See All My Connected Peers' Shared Vids and Pics?
- Preparation to Beat Giovani in Pokemon Go For OnePlus 11R | Dr.fone
- [Updated] 2024 Approved Capturing PC Gaming Moments 6 Innovative Techniques
- Updated 2024 Approved Discover the Top Time-Lapse Video Editing Software From Free to Pro
- [New] 2024 Approved Download TikTok Content Freely, Watermarks Included
- [Updated] 2024 Approved Driving Engagement and Visibility Effective Strategies for FB Video Marketing
- Authentication Error Occurred on Oppo Find N3 Flip? Here Are 10 Proven Fixes | Dr.fone
- In 2024, The Best Android Unlock Software For Lava Device Top 5 Picks to Remove Android Locks
- How to Stop Google Chrome from Tracking Your Location On Xiaomi Redmi Note 12 5G? | Dr.fone
- Laptop Unlock Free Movie Magic with These Tools
- 2024 Approved The Smart Choice Instagram Video Dimensions and Formats
- New In 2024, Free WMV Video Stitching Tools Expert Recommendations
- In 2024, Critical Selection of Terraria Upgrades
- How to Fix iPhone 12 Storage Not Loading/Showing | Stellar
- In 2024, How Can We Unlock Our Motorola Moto G04 Phone Screen?
- Inside Apeaksoft's 2023 Recording Technology Breakthroughs for 2024
- [Updated] Best Windows Video Editors Top Picks for Professional Creatives
- New 2024 Approved Ultimate Audio Enhancer Eliminate Unwanted Soundtracks
- New In 2024, Unbranded Video Editing 7 Free Trimmers to Get the Job Done
- Ranked High 8 Web-Based Image Fusion Service
- [New] Premium Screen Recorders Roundup
- In 2024, Clandestine FB Live Observer
- Top Picks Excellent 4K Displays for Playing Games
- In 2024, 5 Ways To Teach You To Transfer Files from Honor Magic 6 Lite to Other Android Devices Easily | Dr.fone
- How To Remove the Two Factor Authentication On Apple iPhone 15 Plus
- Updated In 2024, 6 Tips for Your First Facebook Ads
- New 2024 Approved Windows Movie Editing Made Easy Top 6 Software
- 2024 Approved Efficient Video Upload Techniques for TikTok Users (PC/MAC)
- [Updated] 2024 Approved The Ultimate Guide Elevating Your FB Video Content Game
- In 2024, All You Need To Know About Mega Greninja For Huawei P60 | Dr.fone
- Downloading SamFw FRP Tool 3.0 for Poco C50
- In 2024, Top-Notch Solutions for Disabled Apple ID From Apple iPhone 13 Pro Making It Possible
- 2024 Approved Mirror of Society Top 100 Inspiring #InstagramCaptions
- Top Picks Elite 4K Displays for Cutting-Edge Editing
- In 2024, Preparation to Beat Giovani in Pokemon Go For Apple iPhone 11 Pro Max | Dr.fone
- [New] In 2024, From Playback to Printout Top Five Methods of Documenting Minecraft on a Mac
- How To Change Your SIM PIN Code on Your Tecno Phone
- Updated Expert Picks Top OGG Converters and Why They Shine for 2024
- Title: "Youtuber Essentials Must-Have Hardware & Software for Successful Streams"
- Author: Steven
- Created at : 2024-05-25 21:05:10
- Updated at : 2024-05-26 21:05:10
- Link: https://youtube-clips.techidaily.com/youtuber-essentials-must-have-hardware-and-software-for-successful-streams/
- License: This work is licensed under CC BY-NC-SA 4.0.
