
!["[Updated] Enhancing Visual Impact of YouTube Thumbnails - Neon Edition"](https://www.lifewire.com/thmb/sPQbXlbZDpnoRk6plGrXde1S2II=/400x300/filters:no_upscale():max_bytes(150000):strip_icc()/womanwavingtolaptopwebcam-5b5b9b9bc9e77c004fc62a04.jpg)
"[Updated] Enhancing Visual Impact of YouTube Thumbnails - Neon Edition"
Enhancing Visual Impact of YouTube Thumbnails - Neon Edition
Your YouTube video, or any other clip published on any forum, gets a larger number of hits if it has an attractive thumbnail. And, the fact is, a thumbnail becomes 10x more attractive when the main character that the image has have a neon border around it.
With that said, in the following sections, you will learn a couple of methods on how to add a YouTube thumbnail border around the main characters and/or objects that are significant to the clip.
In this article
01 Add Glowing Neon Border to YouTube Thumbnail with Filmora
02 Add a Glowing Neon Border in YouTube Thumbnail with Canva
03 Outline a Person in a YouTube Thumbnail with Photoshop
Part 1: How to Add Neon Border to YouTube Thumbnail for Free with Filmora
Being one of the most versatile and intuitive post-production tools available in the market today, Wondershare Filmora X allows you to add a neon border to a YouTube thumbnail quite conveniently. You can learn how to get this done on Windows or Mac by following the steps given below.
For Win 7 or later (64-bit)
For macOS 10.12 or later
Step 1: Define Project Settings and Add Image to the Timeline
Launch Wondershare Filmora X on your PC (a MacBook Pro M1 is used here), ensure that the project aspect ratio is set to 16:9 (Widescreen) on the splash screen, and click New Project. On the main interface, click the Preview quality and display settings icon from the upper-right area of the Timeline, click Change Project Aspect Ratio, click to select 1280 x 720 (HD) from the Resolution menu of the Project Settings box, and click OK to save the custom project settings.

Then select My Media from the menu bar if not already selected, click Project Media from the navigation pane, and click Import from the Media box to select and import the image of the main character or object that you want to use in the thumbnail.

Now, drag the image from the Media box to the Timeline at the bottom.

Step 2: Clear Image Background, Add Border, and Add Custom Background
Go to Effects from the menu bar, click to select the Default tab and then AI Portrait from the navigation pane, and click and drag the Human Segmentation preset from the right box, and place it over the image track in the Timeline.

Double-click the image layer, scroll down the upper-left box to the Video Effects section, and use the Edge Thickness and Edge Feather sliders to adjust the character’s edges to make them as realistic as possible. Click OK when done.

Next, click and drag the Human Border preset over the image track in the Timeline, and follow the same procedure to customize the border. This will give the character a neon border effect.

Now, use the method explained earlier to import a custom image for the background, and drag and place it under the previous track in the Timeline.

If you are running the latest version of Filmora, you will find there are some neon light effects available under AI Portrait as well.

Step 3: Add Titles to Thumbnail
Go to Titles from the menu bar, click to select the Default tab and then Lower 3rds from the navigation pane, and click and drag your preferred lower-third preset from the right window to a separate layer in the Timeline. Double-click the lower-third layer, and use the available options in the upper-left window to change the text, its color, etc., and drag the textbox to place it to your preferred position on the image as well. Click OK to save the changes.
Next, click to select Titles from the navigation pane, and drag your preferred title from the right window to the upper-most track in the Timeline. Now use the method explained earlier to edit the text, its color, position, etc. to make it look professional.

For more tips and tricks for creating YouTube thumbnail, you can check this You Tube thumbnail creating guide.
Step 4: Get the Neon Border Thumbnail
Click the Snapshot (Camera) icon from the upper-right area of the Timeline, go to My Media from the menu bar, right-click the thumbnail of the screenshot you captured, and click Reveal in Finder (on Mac) or Reveal in Explorer (on Windows) to get to the folder the YouTube thumbnail border is saved in.

Part 2: How to Add a Glowing Neon Border in Your YouTube Thumbnail with Canva
Canva is another intuitive editing program that works on the web interface rather than having you download and install an app on your PC. You can add a neon border for YouTube thumbnails using Canva by following the instructions given below:
Step 1: Define Project Settings and Add a Background
After signing in to your Canva account, click Create a design from the top-right corner of the page, click Custom size from the bottom, define 1280 and 720 in the Width and Height fields on the box that appears respectively, and click Create new design.

Now, click to select Background from the navigation bar on the left (if the Background tool is not visible, click More and then choose Background from the expanded list), and click to select a background from the images available in the center pane.

Step 2: Upload an Image and Add Effects
Click Uploads from the navigation bar, click the More icon from the right of the Upload media button present at the top of the center pane, choose your preferred method to upload the image (with the transparent background) that you want to use, upload the image, and drag it from the center pane to the Canvas.
Note: You can use any of the tools available online to remove the background from your image for free.

To add a YouTube thumbnail border, make sure that the image that you added to the Canvas is selected, click the Duplicate icon from the upper-right area, and use the scaling handles of the copy of the image to increase its size a bit. Reposition the image back to its original location as well.
Then, click Edit image from the upper-left corner of the Canvas, click Duotone from the Edit image pane at the center, if need be, click See all, choose your preferred duotone effect to apply on the image, choose your preferred highlight and shadow colors from the box that appears next, and click Back from the top of the pane.

Next, click See all next to the Adjust section from the center pane, and drag the Blur slider to the right to increase the blur effect on the image.

Step 3: Position the Layers
While keeping the duplicate image selected, click the Position button from the upper-right area of the Canvas, and click Background to send the second image behind the first one to get the neon border effect for the photo.

Part 3: How to Outline a Person in a YouTube Thumbnail with Photoshop
Because YouTube thumbnails are nothing but static images, creating YouTube thumbnail border with Adobe Photoshop is comparatively easier. The process of doing this is given below:
Step 1: Define Document Preferences and Import an Image
Launch Adobe Photoshop on your PC, click Create new, and on the New Document customization box, define the width and height values to 1280 and 720 pixels respectively. Select Transparent from the Background Contents menu as well if not already selected. Click Create from the bottom to create a new Photoshop document with the specified document settings. Next, open the folder that contains the source image, drag the photo to Photoshop, and press Enter to place the photo.

Step 2: Remove Background from the Image
Make sure that the image layer is selected in the Layers panel on the right, go to Select from the menu bar at the top, and click Subject. From the bottom of the Layers panel, click the Add a mask icon to get rid of the background, leaving only the human on the Canvas.

Step 3: Add a Custom Background and an Outline Around the Subject
Use the method explained earlier to import a background image of your choice to Photoshop. Drag the background image layer to the bottom in the Layers panel. Double-click the masked layer, click to select Stroke from the left pane of the Layer Style box, and use the options available on the right to manage the size, color, position, etc. of the stroke that has been added around the human subject. Click OK when done, and then export the image normally to use it as a YouTube thumbnail border.

Summary
It is important to know that the default resolution of a YouTube thumbnail is 1280 x 720 pixels that is usually written and referred to as 720p. While adding a YouTube thumbnail border, it is also imperative to have a good sense of color combination and fonts. Furthermore, a decent tool like Wondershare Filmora X must be used to add an appealing neon border around the main subject in the thumbnail image easily and quickly.
02 Add a Glowing Neon Border in YouTube Thumbnail with Canva
03 Outline a Person in a YouTube Thumbnail with Photoshop
Part 1: How to Add Neon Border to YouTube Thumbnail for Free with Filmora
Being one of the most versatile and intuitive post-production tools available in the market today, Wondershare Filmora X allows you to add a neon border to a YouTube thumbnail quite conveniently. You can learn how to get this done on Windows or Mac by following the steps given below.
For Win 7 or later (64-bit)
For macOS 10.12 or later
Step 1: Define Project Settings and Add Image to the Timeline
Launch Wondershare Filmora X on your PC (a MacBook Pro M1 is used here), ensure that the project aspect ratio is set to 16:9 (Widescreen) on the splash screen, and click New Project. On the main interface, click the Preview quality and display settings icon from the upper-right area of the Timeline, click Change Project Aspect Ratio, click to select 1280 x 720 (HD) from the Resolution menu of the Project Settings box, and click OK to save the custom project settings.
Then select My Media from the menu bar if not already selected, click Project Media from the navigation pane, and click Import from the Media box to select and import the image of the main character or object that you want to use in the thumbnail.
Now, drag the image from the Media box to the Timeline at the bottom.
Step 2: Clear Image Background, Add Border, and Add Custom Background
Go to Effects from the menu bar, click to select the Default tab and then AI Portrait from the navigation pane, and click and drag the Human Segmentation preset from the right box, and place it over the image track in the Timeline.
Double-click the image layer, scroll down the upper-left box to the Video Effects section, and use the Edge Thickness and Edge Feather sliders to adjust the character’s edges to make them as realistic as possible. Click OK when done.
Next, click and drag the Human Border preset over the image track in the Timeline, and follow the same procedure to customize the border. This will give the character a neon border effect.
Now, use the method explained earlier to import a custom image for the background, and drag and place it under the previous track in the Timeline.
If you are running the latest version of Filmora, you will find there are some neon light effects available under AI Portrait as well.
Step 3: Add Titles to Thumbnail
Go to Titles from the menu bar, click to select the Default tab and then Lower 3rds from the navigation pane, and click and drag your preferred lower-third preset from the right window to a separate layer in the Timeline. Double-click the lower-third layer, and use the available options in the upper-left window to change the text, its color, etc., and drag the textbox to place it to your preferred position on the image as well. Click OK to save the changes.
Next, click to select Titles from the navigation pane, and drag your preferred title from the right window to the upper-most track in the Timeline. Now use the method explained earlier to edit the text, its color, position, etc. to make it look professional.
For more tips and tricks for creating YouTube thumbnail, you can check this You Tube thumbnail creating guide.
Step 4: Get the Neon Border Thumbnail
Click the Snapshot (Camera) icon from the upper-right area of the Timeline, go to My Media from the menu bar, right-click the thumbnail of the screenshot you captured, and click Reveal in Finder (on Mac) or Reveal in Explorer (on Windows) to get to the folder the YouTube thumbnail border is saved in.
Part 2: How to Add a Glowing Neon Border in Your YouTube Thumbnail with Canva
Canva is another intuitive editing program that works on the web interface rather than having you download and install an app on your PC. You can add a neon border for YouTube thumbnails using Canva by following the instructions given below:
Step 1: Define Project Settings and Add a Background
After signing in to your Canva account, click Create a design from the top-right corner of the page, click Custom size from the bottom, define 1280 and 720 in the Width and Height fields on the box that appears respectively, and click Create new design.
Now, click to select Background from the navigation bar on the left (if the Background tool is not visible, click More and then choose Background from the expanded list), and click to select a background from the images available in the center pane.
Step 2: Upload an Image and Add Effects
Click Uploads from the navigation bar, click the More icon from the right of the Upload media button present at the top of the center pane, choose your preferred method to upload the image (with the transparent background) that you want to use, upload the image, and drag it from the center pane to the Canvas.
Note: You can use any of the tools available online to remove the background from your image for free.
To add a YouTube thumbnail border, make sure that the image that you added to the Canvas is selected, click the Duplicate icon from the upper-right area, and use the scaling handles of the copy of the image to increase its size a bit. Reposition the image back to its original location as well.
Then, click Edit image from the upper-left corner of the Canvas, click Duotone from the Edit image pane at the center, if need be, click See all, choose your preferred duotone effect to apply on the image, choose your preferred highlight and shadow colors from the box that appears next, and click Back from the top of the pane.
Next, click See all next to the Adjust section from the center pane, and drag the Blur slider to the right to increase the blur effect on the image.
Step 3: Position the Layers
While keeping the duplicate image selected, click the Position button from the upper-right area of the Canvas, and click Background to send the second image behind the first one to get the neon border effect for the photo.
Part 3: How to Outline a Person in a YouTube Thumbnail with Photoshop
Because YouTube thumbnails are nothing but static images, creating YouTube thumbnail border with Adobe Photoshop is comparatively easier. The process of doing this is given below:
Step 1: Define Document Preferences and Import an Image
Launch Adobe Photoshop on your PC, click Create new, and on the New Document customization box, define the width and height values to 1280 and 720 pixels respectively. Select Transparent from the Background Contents menu as well if not already selected. Click Create from the bottom to create a new Photoshop document with the specified document settings. Next, open the folder that contains the source image, drag the photo to Photoshop, and press Enter to place the photo.
Step 2: Remove Background from the Image
Make sure that the image layer is selected in the Layers panel on the right, go to Select from the menu bar at the top, and click Subject. From the bottom of the Layers panel, click the Add a mask icon to get rid of the background, leaving only the human on the Canvas.
Step 3: Add a Custom Background and an Outline Around the Subject
Use the method explained earlier to import a background image of your choice to Photoshop. Drag the background image layer to the bottom in the Layers panel. Double-click the masked layer, click to select Stroke from the left pane of the Layer Style box, and use the options available on the right to manage the size, color, position, etc. of the stroke that has been added around the human subject. Click OK when done, and then export the image normally to use it as a YouTube thumbnail border.
Summary
It is important to know that the default resolution of a YouTube thumbnail is 1280 x 720 pixels that is usually written and referred to as 720p. While adding a YouTube thumbnail border, it is also imperative to have a good sense of color combination and fonts. Furthermore, a decent tool like Wondershare Filmora X must be used to add an appealing neon border around the main subject in the thumbnail image easily and quickly.
Earn Online via YouTube: How Reaching 500 Subscribers Pays Off
For small creators on YouTube, getting monetized seemed like an uphill task. You had to accumulate over 1,000 subscribers and over 4,000 public watch hours. This can be difficult to attain, especially on a platform where creators are publishing new content every day. However, the 2023 update on the YouTube Partner Program (YPP) provided an easier way to start making money on YouTube. In this article, we look at how the YPP is changing and the beauty of the YouTube monetization 500 subscribers’ policy update.
YouTube Shorts Monetization A cross-platform for helping you present your content in the best way possible!
Free Download Free Download Learn More

Part 1. YouTube Monetization Revamp: 500 Subscribers Minimum Threshold Unveiled
The recent update in YouTube monetization requirements has made it easier than ever for small creators to make money on the platform. The YPP program changed and reduced the number of subscribers needed to be eligible. It has also reduced the amount of watch time needed. Let’s have a look at what the new eligibility criteria look like:

The eligibility criteria for the YPP program are now easier and more achievable than before. To apply, you now need:
- At least 500 subscribers
- Three Shorts or Video uploads in the last 90 days
- At least 3,000 public watch hours in the last 12 months or
- At least 3 million public Short videos in the last 90 days
The new requirements are lower than the old ones. Previously, you were required to have at least 1,000 subscribers with over 4,000 public watch hours. By lowering the threshold, YouTube makes it easier for all creators to monetize their content.
Part 2. YouTube Monetization with 500 Subscribers: A Brief Guide
YouTube announced in 2022 that they were evolving the YPP to continue rewarding more creators. Starting mid-June 2023, the program was expanded to allow more creators to access monetization benefits.
Know If You are Eligible
As a creator, you will want to know if you are eligible for the YouTube monetization 500 subscribers’ plan. Make sure that the notify feature on your channel is active to receive a notification. Go to the Earn area of the YouTube channel, and select Get Notified. Once selected, YouTube will send you an email when reach above the eligibility threshold.

What You Need to Join Expanded YPP
Joining the expanded YouTube Partner Program has the same requirements as the earlier version. These include:
- Being compliant with the YouTube channel monetization policies
- Active 2-Step verification on the Google Account
- Channel is based in any of the available regions or countries
- An active AdSense account linked to the channel
- No Community Guidelines strikes on your Channel
- Have advanced features access on YouTube
Where to Apply for Monetization
After meeting the eligibility criteria, you will need to apply to be enrolled in the YPP. Remember that being eligible does not automatically translate to instant income. You need to apply for the program and wait for the approval. Here are the steps to follow:
On Computer/Desktop
Step 1Sign in to YouTube Studio on your computer or desktop

Step 2Click Earn in the left menu

Step 3Click Apply Now to review and Accept the base terms

Step 4Click Start to set up an AdSense account

On Android, iPhone and iPad
Applying for YouTube monetization on your mobile devices follows the same process as the computer. Only in this case you will using the YouTube Studio app instead of the website. Follow these steps as outlined.
- Open the YouTube Studio mobile app on your Android device.
- Tap Earn from the bottom men
- Tap Apply now to review and accept the base terms.
- Set up an AdSense account as requested, or link an existing active one.
Once you complete these steps on your computer or mobile, In Progress status will surface in the Get Reviewed step. This means that YouTube will review your channel and provide feedback within a month.
What Monetization Review Entails
Once you submit your application, YouTube’s automated systems and human reviewers will look at your channel for a while. They will review it to make sure it follows all the platform’s policies and guidelines. As the reviews are in progress, creators are encouraged to back to the Earn section of YouTube Studio regularly. Typically, you will get the results within a month, but this may be affected by several factors:
- Application Volumes
- Resource Limitations
- System Issues
- Channel requiring several reviewers to determine suitability for YPP
Sometimes the first application may not be successful for some reason. In this case, creators are encouraged to continue uploading original content and try again after 30 days. For second or other rejections, you are allowed to try again after 90 days. During this period, make sure that your channel follows YouTube policies and guidelines to increase your chances of being accepted.
Choose How to Earn
The major way of earning money on YouTube is through ads that show in your videos. In the case of Shorts, the ad-sharing revenue involves YouTube sharing the revenue generated from the ads with creators. However, getting accepted to YPP also allows you to start earning with fan funding and Shopping features. This means that creators can earn money directly from their views using these unique features
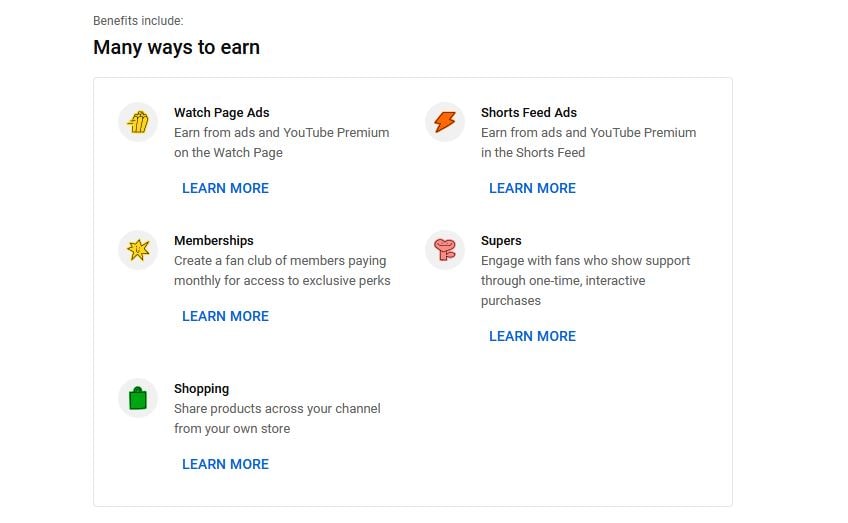
YouTube monetization 500 subscribers update allows you to earn money through monetization features that were not there before. This allows creators to interact more with their viewer while generating income. The main fan funding features include:
- Channel Membership: Offer a membership plan to your viewer through monthly payments in exchange for perks like emojis and badges.
- Super Thanks: Earn revenue from viewers who show extra gratitude for your videos.
- Super Stickers and Super Chat: Allows your fans to buy Super Chats that highlight their messages or add fun animated images in the live chat.
- Shopping: Allows you to connect your official merchandise story to YouTube to showcase your products.
Part 3. Edit Your Shorts for Monetization with WonderShare Filmora
The quality of your Shorts plays an essential role in determining whether your channel will be monetized. This is why you need good video editing software to help you present your content in the best way possible. Wondershare Filmora is a great choice when you want your YouTube Shorts to stand out. From cool green screen tricks to auto-reframing your videos for Shorts, Filmora gives you the whole editing package.
Free Download For Win 7 or later(64-bit)
Free Download For macOS 10.14 or later
Filmora offers creators fantastic editing features to create better Shorts. Let’s have a look at some of the features you may find helpful:
1. AI Copywriting
YouTube Shorts require quick content that covers everything within 60 seconds. With the Filmora AI Copywriting feature, you can get inspiration and add text to your videos. Express your thoughts more clearly and generate text that makes the video more engaging.
2. Split Screen Video Editor
YouTube Shorts are limited to a length of 1 minute only. Since 60 seconds is quite a short time, you may want to showcase your content on multiple screens. The Split Screen Video Editor on Filmora allows you to make a split screen instantly. Choose from the readily available templates and show your audience what you want from multiple perspectives in the same video.
3. Motion Tracking
With YouTube Shorts, you need to be more creative. Adding objects to your videos makes them fun and engaging. The motion tracking feature on Filmora allows you to track the movement of an object in the video. You can then pin graphics on the object, making the video more exciting. You can also add specific text and align it to an object, allowing your audience to follow through the story.
4. Speed Ramping
The way you present your video means a lot to the audience. No one wants a boring or a really slow-moving video. With the Speed Ramping feature on Filmora, you can adjust the speed of your Shorts with better control of your keyframes. This allows you to create unique cinematic effects that keep the audience wanting more of the content.
Conclusion
The introduction of the YouTube monetization 500 subscribers’ policy update was a special moment for small YouTubers. It meant that the platform was extending its YPP program to more creators, allowing them to earn money from their content. Lowering the monetization requirement gives more people a chance to make money faster. However, it is important to make sure that your videos are offering value to your audience. We recommend using Wondershare Filmora to edit your videos and make sure they stand out from the competition. The better your videos will be, the more views you will get, and the more money you will make.
Free Download Free Download Learn More
Part 1. YouTube Monetization Revamp: 500 Subscribers Minimum Threshold Unveiled
The recent update in YouTube monetization requirements has made it easier than ever for small creators to make money on the platform. The YPP program changed and reduced the number of subscribers needed to be eligible. It has also reduced the amount of watch time needed. Let’s have a look at what the new eligibility criteria look like:
The eligibility criteria for the YPP program are now easier and more achievable than before. To apply, you now need:
- At least 500 subscribers
- Three Shorts or Video uploads in the last 90 days
- At least 3,000 public watch hours in the last 12 months or
- At least 3 million public Short videos in the last 90 days
The new requirements are lower than the old ones. Previously, you were required to have at least 1,000 subscribers with over 4,000 public watch hours. By lowering the threshold, YouTube makes it easier for all creators to monetize their content.
Part 2. YouTube Monetization with 500 Subscribers: A Brief Guide
YouTube announced in 2022 that they were evolving the YPP to continue rewarding more creators. Starting mid-June 2023, the program was expanded to allow more creators to access monetization benefits.
Know If You are Eligible
As a creator, you will want to know if you are eligible for the YouTube monetization 500 subscribers’ plan. Make sure that the notify feature on your channel is active to receive a notification. Go to the Earn area of the YouTube channel, and select Get Notified. Once selected, YouTube will send you an email when reach above the eligibility threshold.
What You Need to Join Expanded YPP
Joining the expanded YouTube Partner Program has the same requirements as the earlier version. These include:
- Being compliant with the YouTube channel monetization policies
- Active 2-Step verification on the Google Account
- Channel is based in any of the available regions or countries
- An active AdSense account linked to the channel
- No Community Guidelines strikes on your Channel
- Have advanced features access on YouTube
Where to Apply for Monetization
After meeting the eligibility criteria, you will need to apply to be enrolled in the YPP. Remember that being eligible does not automatically translate to instant income. You need to apply for the program and wait for the approval. Here are the steps to follow:
On Computer/Desktop
Step 1Sign in to YouTube Studio on your computer or desktop
Step 2Click Earn in the left menu
Step 3Click Apply Now to review and Accept the base terms
Step 4Click Start to set up an AdSense account
On Android, iPhone and iPad
Applying for YouTube monetization on your mobile devices follows the same process as the computer. Only in this case you will using the YouTube Studio app instead of the website. Follow these steps as outlined.
- Open the YouTube Studio mobile app on your Android device.
- Tap Earn from the bottom men
- Tap Apply now to review and accept the base terms.
- Set up an AdSense account as requested, or link an existing active one.
Once you complete these steps on your computer or mobile, In Progress status will surface in the Get Reviewed step. This means that YouTube will review your channel and provide feedback within a month.
What Monetization Review Entails
Once you submit your application, YouTube’s automated systems and human reviewers will look at your channel for a while. They will review it to make sure it follows all the platform’s policies and guidelines. As the reviews are in progress, creators are encouraged to back to the Earn section of YouTube Studio regularly. Typically, you will get the results within a month, but this may be affected by several factors:
- Application Volumes
- Resource Limitations
- System Issues
- Channel requiring several reviewers to determine suitability for YPP
Sometimes the first application may not be successful for some reason. In this case, creators are encouraged to continue uploading original content and try again after 30 days. For second or other rejections, you are allowed to try again after 90 days. During this period, make sure that your channel follows YouTube policies and guidelines to increase your chances of being accepted.
Choose How to Earn
The major way of earning money on YouTube is through ads that show in your videos. In the case of Shorts, the ad-sharing revenue involves YouTube sharing the revenue generated from the ads with creators. However, getting accepted to YPP also allows you to start earning with fan funding and Shopping features. This means that creators can earn money directly from their views using these unique features
YouTube monetization 500 subscribers update allows you to earn money through monetization features that were not there before. This allows creators to interact more with their viewer while generating income. The main fan funding features include:
- Channel Membership: Offer a membership plan to your viewer through monthly payments in exchange for perks like emojis and badges.
- Super Thanks: Earn revenue from viewers who show extra gratitude for your videos.
- Super Stickers and Super Chat: Allows your fans to buy Super Chats that highlight their messages or add fun animated images in the live chat.
- Shopping: Allows you to connect your official merchandise story to YouTube to showcase your products.
Part 3. Edit Your Shorts for Monetization with WonderShare Filmora
The quality of your Shorts plays an essential role in determining whether your channel will be monetized. This is why you need good video editing software to help you present your content in the best way possible. Wondershare Filmora is a great choice when you want your YouTube Shorts to stand out. From cool green screen tricks to auto-reframing your videos for Shorts, Filmora gives you the whole editing package.
Free Download For Win 7 or later(64-bit)
Free Download For macOS 10.14 or later
Filmora offers creators fantastic editing features to create better Shorts. Let’s have a look at some of the features you may find helpful:
1. AI Copywriting
YouTube Shorts require quick content that covers everything within 60 seconds. With the Filmora AI Copywriting feature, you can get inspiration and add text to your videos. Express your thoughts more clearly and generate text that makes the video more engaging.
2. Split Screen Video Editor
YouTube Shorts are limited to a length of 1 minute only. Since 60 seconds is quite a short time, you may want to showcase your content on multiple screens. The Split Screen Video Editor on Filmora allows you to make a split screen instantly. Choose from the readily available templates and show your audience what you want from multiple perspectives in the same video.
3. Motion Tracking
With YouTube Shorts, you need to be more creative. Adding objects to your videos makes them fun and engaging. The motion tracking feature on Filmora allows you to track the movement of an object in the video. You can then pin graphics on the object, making the video more exciting. You can also add specific text and align it to an object, allowing your audience to follow through the story.
4. Speed Ramping
The way you present your video means a lot to the audience. No one wants a boring or a really slow-moving video. With the Speed Ramping feature on Filmora, you can adjust the speed of your Shorts with better control of your keyframes. This allows you to create unique cinematic effects that keep the audience wanting more of the content.
Conclusion
The introduction of the YouTube monetization 500 subscribers’ policy update was a special moment for small YouTubers. It meant that the platform was extending its YPP program to more creators, allowing them to earn money from their content. Lowering the monetization requirement gives more people a chance to make money faster. However, it is important to make sure that your videos are offering value to your audience. We recommend using Wondershare Filmora to edit your videos and make sure they stand out from the competition. The better your videos will be, the more views you will get, and the more money you will make.
Also read:
- [Updated] Charting Your Path to Success in YouTube's Earnings System
- The Art of YouTube Video Trailers with Filmora Software
- Exploring YouTube's Operations After Video Upload
- Improving Accessibility with On-Screen Text Elements on YouTube Videos
- [Updated] Cutting-Edge Techniques for Incorporating Soundtracks in YouTube Creations
- In 2024, A Quick Guide to Moving Videos From YouTube to Dailymotion
- Marvelous Magicians Top YouTube Editor Magic Moments!
- How to Create Impactful Video Elements Cards/Annotations
- Skyrocketing Up the Rankings - Hit 10K Views to Unlock Partnership
- Unlock Free YouTube Gallery Downloads Now
- Crafting Charm in the Click A Thumbnail Hack for YouTube Shorts
- [New] Comparative Assessment YouTube Vs. DailyMention
- Profit Power-Up Innovative Ways to Earning with YouTube Mobile Views
- Zero-Price Path to Enhanced YouTube Video Analysis
- [New] Dialing in the Perfect Aspect Ratio for YouTube Images
- In 2024, Choose From the Finest 7 Android Browsers Without Ads
- [New] Corrected Clandestine Miniature Video Absence
- Per-View Value to YouTube Star Economy
- [New] In 2024, How to Enhance Team Engagement Through Zoom Recording
- In 2024, FB Media Migration Tools for Windows/macOS Users
- [Updated] 2024 Approved Crack the Code of Imagery's Roots with Our Reverse Analysis Tools for Instagram
- Your Complete TikTok Camera Operation Manual
- [New] 2024 Approved Godslayer Chronicles Ragnarok Dawn
- 3 Facts You Need to Know about Screen Mirroring OnePlus Nord CE 3 5G | Dr.fone
- How to Update Apple iPhone 7 Plus to the Latest iOS Version? | Dr.fone
- A Complete Guide To OEM Unlocking on ZTE Blade A73 5G
- [Updated] How to Trim and Cut Vimeo Videos Online [5 Ways]
- Read This Guide to Find a Reliable Alternative to Fake GPS On Nubia Red Magic 9 Pro+ | Dr.fone
- 2 Ways to Fade in Text in Premiere Pro
- Unova Stone Pokémon Go Evolution List and How Catch Them For Motorola Moto G84 5G | Dr.fone
- In 2024, How to Transfer Data from Honor 90 Lite to BlackBerry | Dr.fone
- Title: "[Updated] Enhancing Visual Impact of YouTube Thumbnails - Neon Edition"
- Author: Steven
- Created at : 2024-05-25 20:59:55
- Updated at : 2024-05-26 20:59:55
- Link: https://youtube-clips.techidaily.com/updated-enhancing-visual-impact-of-youtube-thumbnails-neon-edition/
- License: This work is licensed under CC BY-NC-SA 4.0.
