
!["[Updated] Elevate Your YouTube Thumbnails - Triple Neon Border Techniques"](https://www.lifewire.com/thmb/gkHTDPF5tRElmHvxvKCu-VDPyhI=/400x300/filters:no_upscale():max_bytes(150000):strip_icc():format(webp)/should-you-buy-an-apple-tv-5248431-f35331ef36b749b9895a2c1e3705cf22.jpg)
"[Updated] Elevate Your YouTube Thumbnails - Triple Neon Border Techniques"
Elevate Your YouTube Thumbnails - Triple Neon Border Techniques
Your YouTube video, or any other clip published on any forum, gets a larger number of hits if it has an attractive thumbnail. And, the fact is, a thumbnail becomes 10x more attractive when the main character that the image has have a neon border around it.
With that said, in the following sections, you will learn a couple of methods on how to add a YouTube thumbnail border around the main characters and/or objects that are significant to the clip.
In this article
01 Add Glowing Neon Border to YouTube Thumbnail with Filmora
02 Add a Glowing Neon Border in YouTube Thumbnail with Canva
03 Outline a Person in a YouTube Thumbnail with Photoshop
Part 1: How to Add Neon Border to YouTube Thumbnail for Free with Filmora
Being one of the most versatile and intuitive post-production tools available in the market today, Wondershare Filmora X allows you to add a neon border to a YouTube thumbnail quite conveniently. You can learn how to get this done on Windows or Mac by following the steps given below.
For Win 7 or later (64-bit)
For macOS 10.12 or later
Step 1: Define Project Settings and Add Image to the Timeline
Launch Wondershare Filmora X on your PC (a MacBook Pro M1 is used here), ensure that the project aspect ratio is set to 16:9 (Widescreen) on the splash screen, and click New Project. On the main interface, click the Preview quality and display settings icon from the upper-right area of the Timeline, click Change Project Aspect Ratio, click to select 1280 x 720 (HD) from the Resolution menu of the Project Settings box, and click OK to save the custom project settings.

Then select My Media from the menu bar if not already selected, click Project Media from the navigation pane, and click Import from the Media box to select and import the image of the main character or object that you want to use in the thumbnail.

Now, drag the image from the Media box to the Timeline at the bottom.

Step 2: Clear Image Background, Add Border, and Add Custom Background
Go to Effects from the menu bar, click to select the Default tab and then AI Portrait from the navigation pane, and click and drag the Human Segmentation preset from the right box, and place it over the image track in the Timeline.

Double-click the image layer, scroll down the upper-left box to the Video Effects section, and use the Edge Thickness and Edge Feather sliders to adjust the character’s edges to make them as realistic as possible. Click OK when done.

Next, click and drag the Human Border preset over the image track in the Timeline, and follow the same procedure to customize the border. This will give the character a neon border effect.

Now, use the method explained earlier to import a custom image for the background, and drag and place it under the previous track in the Timeline.

If you are running the latest version of Filmora, you will find there are some neon light effects available under AI Portrait as well.

Step 3: Add Titles to Thumbnail
Go to Titles from the menu bar, click to select the Default tab and then Lower 3rds from the navigation pane, and click and drag your preferred lower-third preset from the right window to a separate layer in the Timeline. Double-click the lower-third layer, and use the available options in the upper-left window to change the text, its color, etc., and drag the textbox to place it to your preferred position on the image as well. Click OK to save the changes.
Next, click to select Titles from the navigation pane, and drag your preferred title from the right window to the upper-most track in the Timeline. Now use the method explained earlier to edit the text, its color, position, etc. to make it look professional.

For more tips and tricks for creating YouTube thumbnail, you can check this You Tube thumbnail creating guide.
Step 4: Get the Neon Border Thumbnail
Click the Snapshot (Camera) icon from the upper-right area of the Timeline, go to My Media from the menu bar, right-click the thumbnail of the screenshot you captured, and click Reveal in Finder (on Mac) or Reveal in Explorer (on Windows) to get to the folder the YouTube thumbnail border is saved in.

Part 2: How to Add a Glowing Neon Border in Your YouTube Thumbnail with Canva
Canva is another intuitive editing program that works on the web interface rather than having you download and install an app on your PC. You can add a neon border for YouTube thumbnails using Canva by following the instructions given below:
Step 1: Define Project Settings and Add a Background
After signing in to your Canva account, click Create a design from the top-right corner of the page, click Custom size from the bottom, define 1280 and 720 in the Width and Height fields on the box that appears respectively, and click Create new design.

Now, click to select Background from the navigation bar on the left (if the Background tool is not visible, click More and then choose Background from the expanded list), and click to select a background from the images available in the center pane.

Step 2: Upload an Image and Add Effects
Click Uploads from the navigation bar, click the More icon from the right of the Upload media button present at the top of the center pane, choose your preferred method to upload the image (with the transparent background) that you want to use, upload the image, and drag it from the center pane to the Canvas.
Note: You can use any of the tools available online to remove the background from your image for free.

To add a YouTube thumbnail border, make sure that the image that you added to the Canvas is selected, click the Duplicate icon from the upper-right area, and use the scaling handles of the copy of the image to increase its size a bit. Reposition the image back to its original location as well.
Then, click Edit image from the upper-left corner of the Canvas, click Duotone from the Edit image pane at the center, if need be, click See all, choose your preferred duotone effect to apply on the image, choose your preferred highlight and shadow colors from the box that appears next, and click Back from the top of the pane.

Next, click See all next to the Adjust section from the center pane, and drag the Blur slider to the right to increase the blur effect on the image.

Step 3: Position the Layers
While keeping the duplicate image selected, click the Position button from the upper-right area of the Canvas, and click Background to send the second image behind the first one to get the neon border effect for the photo.

Part 3: How to Outline a Person in a YouTube Thumbnail with Photoshop
Because YouTube thumbnails are nothing but static images, creating YouTube thumbnail border with Adobe Photoshop is comparatively easier. The process of doing this is given below:
Step 1: Define Document Preferences and Import an Image
Launch Adobe Photoshop on your PC, click Create new, and on the New Document customization box, define the width and height values to 1280 and 720 pixels respectively. Select Transparent from the Background Contents menu as well if not already selected. Click Create from the bottom to create a new Photoshop document with the specified document settings. Next, open the folder that contains the source image, drag the photo to Photoshop, and press Enter to place the photo.

Step 2: Remove Background from the Image
Make sure that the image layer is selected in the Layers panel on the right, go to Select from the menu bar at the top, and click Subject. From the bottom of the Layers panel, click the Add a mask icon to get rid of the background, leaving only the human on the Canvas.

Step 3: Add a Custom Background and an Outline Around the Subject
Use the method explained earlier to import a background image of your choice to Photoshop. Drag the background image layer to the bottom in the Layers panel. Double-click the masked layer, click to select Stroke from the left pane of the Layer Style box, and use the options available on the right to manage the size, color, position, etc. of the stroke that has been added around the human subject. Click OK when done, and then export the image normally to use it as a YouTube thumbnail border.

Summary
It is important to know that the default resolution of a YouTube thumbnail is 1280 x 720 pixels that is usually written and referred to as 720p. While adding a YouTube thumbnail border, it is also imperative to have a good sense of color combination and fonts. Furthermore, a decent tool like Wondershare Filmora X must be used to add an appealing neon border around the main subject in the thumbnail image easily and quickly.
02 Add a Glowing Neon Border in YouTube Thumbnail with Canva
03 Outline a Person in a YouTube Thumbnail with Photoshop
Part 1: How to Add Neon Border to YouTube Thumbnail for Free with Filmora
Being one of the most versatile and intuitive post-production tools available in the market today, Wondershare Filmora X allows you to add a neon border to a YouTube thumbnail quite conveniently. You can learn how to get this done on Windows or Mac by following the steps given below.
For Win 7 or later (64-bit)
For macOS 10.12 or later
Step 1: Define Project Settings and Add Image to the Timeline
Launch Wondershare Filmora X on your PC (a MacBook Pro M1 is used here), ensure that the project aspect ratio is set to 16:9 (Widescreen) on the splash screen, and click New Project. On the main interface, click the Preview quality and display settings icon from the upper-right area of the Timeline, click Change Project Aspect Ratio, click to select 1280 x 720 (HD) from the Resolution menu of the Project Settings box, and click OK to save the custom project settings.
Then select My Media from the menu bar if not already selected, click Project Media from the navigation pane, and click Import from the Media box to select and import the image of the main character or object that you want to use in the thumbnail.
Now, drag the image from the Media box to the Timeline at the bottom.
Step 2: Clear Image Background, Add Border, and Add Custom Background
Go to Effects from the menu bar, click to select the Default tab and then AI Portrait from the navigation pane, and click and drag the Human Segmentation preset from the right box, and place it over the image track in the Timeline.
Double-click the image layer, scroll down the upper-left box to the Video Effects section, and use the Edge Thickness and Edge Feather sliders to adjust the character’s edges to make them as realistic as possible. Click OK when done.
Next, click and drag the Human Border preset over the image track in the Timeline, and follow the same procedure to customize the border. This will give the character a neon border effect.
Now, use the method explained earlier to import a custom image for the background, and drag and place it under the previous track in the Timeline.
If you are running the latest version of Filmora, you will find there are some neon light effects available under AI Portrait as well.
Step 3: Add Titles to Thumbnail
Go to Titles from the menu bar, click to select the Default tab and then Lower 3rds from the navigation pane, and click and drag your preferred lower-third preset from the right window to a separate layer in the Timeline. Double-click the lower-third layer, and use the available options in the upper-left window to change the text, its color, etc., and drag the textbox to place it to your preferred position on the image as well. Click OK to save the changes.
Next, click to select Titles from the navigation pane, and drag your preferred title from the right window to the upper-most track in the Timeline. Now use the method explained earlier to edit the text, its color, position, etc. to make it look professional.
For more tips and tricks for creating YouTube thumbnail, you can check this You Tube thumbnail creating guide.
Step 4: Get the Neon Border Thumbnail
Click the Snapshot (Camera) icon from the upper-right area of the Timeline, go to My Media from the menu bar, right-click the thumbnail of the screenshot you captured, and click Reveal in Finder (on Mac) or Reveal in Explorer (on Windows) to get to the folder the YouTube thumbnail border is saved in.
Part 2: How to Add a Glowing Neon Border in Your YouTube Thumbnail with Canva
Canva is another intuitive editing program that works on the web interface rather than having you download and install an app on your PC. You can add a neon border for YouTube thumbnails using Canva by following the instructions given below:
Step 1: Define Project Settings and Add a Background
After signing in to your Canva account, click Create a design from the top-right corner of the page, click Custom size from the bottom, define 1280 and 720 in the Width and Height fields on the box that appears respectively, and click Create new design.
Now, click to select Background from the navigation bar on the left (if the Background tool is not visible, click More and then choose Background from the expanded list), and click to select a background from the images available in the center pane.
Step 2: Upload an Image and Add Effects
Click Uploads from the navigation bar, click the More icon from the right of the Upload media button present at the top of the center pane, choose your preferred method to upload the image (with the transparent background) that you want to use, upload the image, and drag it from the center pane to the Canvas.
Note: You can use any of the tools available online to remove the background from your image for free.
To add a YouTube thumbnail border, make sure that the image that you added to the Canvas is selected, click the Duplicate icon from the upper-right area, and use the scaling handles of the copy of the image to increase its size a bit. Reposition the image back to its original location as well.
Then, click Edit image from the upper-left corner of the Canvas, click Duotone from the Edit image pane at the center, if need be, click See all, choose your preferred duotone effect to apply on the image, choose your preferred highlight and shadow colors from the box that appears next, and click Back from the top of the pane.
Next, click See all next to the Adjust section from the center pane, and drag the Blur slider to the right to increase the blur effect on the image.
Step 3: Position the Layers
While keeping the duplicate image selected, click the Position button from the upper-right area of the Canvas, and click Background to send the second image behind the first one to get the neon border effect for the photo.
Part 3: How to Outline a Person in a YouTube Thumbnail with Photoshop
Because YouTube thumbnails are nothing but static images, creating YouTube thumbnail border with Adobe Photoshop is comparatively easier. The process of doing this is given below:
Step 1: Define Document Preferences and Import an Image
Launch Adobe Photoshop on your PC, click Create new, and on the New Document customization box, define the width and height values to 1280 and 720 pixels respectively. Select Transparent from the Background Contents menu as well if not already selected. Click Create from the bottom to create a new Photoshop document with the specified document settings. Next, open the folder that contains the source image, drag the photo to Photoshop, and press Enter to place the photo.
Step 2: Remove Background from the Image
Make sure that the image layer is selected in the Layers panel on the right, go to Select from the menu bar at the top, and click Subject. From the bottom of the Layers panel, click the Add a mask icon to get rid of the background, leaving only the human on the Canvas.
Step 3: Add a Custom Background and an Outline Around the Subject
Use the method explained earlier to import a background image of your choice to Photoshop. Drag the background image layer to the bottom in the Layers panel. Double-click the masked layer, click to select Stroke from the left pane of the Layer Style box, and use the options available on the right to manage the size, color, position, etc. of the stroke that has been added around the human subject. Click OK when done, and then export the image normally to use it as a YouTube thumbnail border.
Summary
It is important to know that the default resolution of a YouTube thumbnail is 1280 x 720 pixels that is usually written and referred to as 720p. While adding a YouTube thumbnail border, it is also imperative to have a good sense of color combination and fonts. Furthermore, a decent tool like Wondershare Filmora X must be used to add an appealing neon border around the main subject in the thumbnail image easily and quickly.
Scaling Success: The Tactics for Increasing YouTube Audiences
How to Get More Subscribers on YouTube

Richard Bennett
Mar 27, 2024• Proven solutions
Working hard to produce exciting, informative and beautiful YouTube videos only to miss out on the exposure you’re hoping for can be very demoralizing, and many people give up the practice of video production after failing to generate interest in their work.
However, don’t accept defeat just yet if you’re not quite getting the numbers you’ve been aiming for. Take these steps to if you need to get subscribers for YouTube videos. Read on to find out more about the best ways to attract new YouTube subscribers for your online video channel.
- Part 1: How to Get More Subscribers on YouTube for Beginners
- Part 2: How to Get More Subscribers on YouTube for Pros
- Part 3: How to Get Free YouTube Subscribers [With Proven Methods]
Part 1: How to Get More Subscribers on YouTube for Beginners
1. Be Real and Approachable
You should always be yourself when you vlog. People will subscribe when they feel invested in you as a person, and that happens when they feel like you are being sincere. You do not need to share all of your innermost secrets on your vlog, but you should let your viewers feel like they know you.
2. Don’t forget to add a call to action
Some people need to be prompted to subscribe to your channel, no matter how much they enjoy your content. At the end of all your videos, ask your viewers to subscribe to your channel and like your social media page.
Don’t forget to explain the benefits of subscribing to them, such as to benefit from your informative tips and gain a deeper insight into your projects. If you have any interesting videos in the pipeline, let them know about them.
3. Listen To Your Subscribers
It feels nice to get positive comments on your videos. If people feel comfortable enough to leave you suggestions and requests then that is even better. It means that you have succeeded in making them feel like they are part of your community.
If you get a video request, try to do it. People like to feel that you are open to trying the things they want to see. However, there are also times when you should just ignore requests and suggestions. If the majority of your subscribers enjoy your jokes and you get one comment telling you to stop trying to be funny then it is fairly obvious that that ‘suggestion’ does not really reflect the wishes of your community.
4. Optimize your title
Try not to underestimate the importance of a great eye-catching title. Include relevant words and phrases that you think people will search for and don’t just hastily add the first title that comes into your head. The better your title is, the more viewers and subscribers you are likely to amass.
5. Be Patient
Almost all vlogs grow slowly at first; the first 1000 subscribers take the longest to get. It takes a lot of patience to keep producing content on a regular schedule when it seems like not many people are watching, but you need to stick with it in order to grow.
Part 2: How to Get more Subscribers on YouTube for Pros
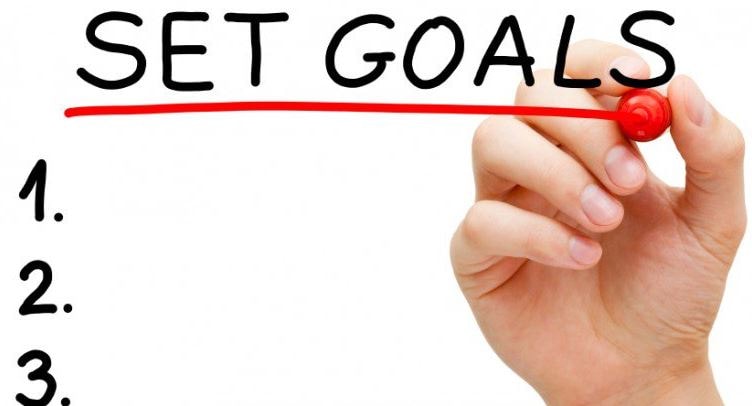
1. Set goals
You can gain extra drive and momentum by setting yourself attainable goals and encouraging your followers to help you achieve them. These goals can include milestones such as reaching 500 followers, 1,000 followers and so on. Don’t hesitate to tell your viewers about these goals – if they think your content is of real value, chances are they will be only too happy to assist you.
2. Contests can be funny – why not enter one?
One way to increase subscribers is to take part in a contest. A site called Gleam can oversee a contest for you. It’s up to you to choose how you want the contest to work, and you can gain an edge over your competitors by getting people to leave comments, follow you on Instagram, subscribe to your channel and more.
You will be provided with a landing page for promoting your channel, and you can share this in a variety of places, including on your Facebook, Twitter and blog. The best way to heighten your chances of success is to have a clear goal in mind.

3. Make a trailer
YouTube’s channel interface allows you to add a trailer to entice viewers into watching your videos and following you on the platform. Your trailer gives you a valuable opportunity to quickly explain what your channel is all about and what the benefits of following you are.
Don’t waffle on – try to get your clip down to 90 seconds maximum. Include clips from your videos and don’t forget to add a strong call to action at the end. The more effort you put into your videos, the bigger the rewards are likely to become. And here are some of the best trailer makers that you can use on both Windows and Mac .

4. Make a Schedule and Stick To It
You want to vlog at least once a week, and making a schedule will help you keep on top of that. It will also give your subscribers a chance to anticipate your videos and get excited. They are more likely to watch an update they have been expecting than one that was not already on their minds.
Sticking to your schedule is a good wait to build up credibility with your audience, but late or skipped updates will cause you to lose that credibility. If you do not post for a month then people who already subscribed to you might still ignore your update because it has been too long and they forgot about you.
5. Collaborate With Other Vloggers
Collaboration videos are always big hits. When you collaborate with another vlogger you are essentially introducing each other to your subscribers. This is a great way to grow your community quickly: by connecting it to another community.
Collaborations work best when the other vlogger is located close enough to you that you can actually meet up, but you can do distance collaborations too. When you collaborate you and the other vlogger should have close to the same number of subscribers, so the video will benefit you both equally.

Bonus: How to Get Free YouTube Subscribers [6 Proven Methods]
There are lots of ways to get free YouTube subscribers. This proven method involves networking with other creators! Making your presence felt on YouTube is an important part of creating your network of subscribers that watch, share and talk about your videos. Interaction with your subscribers, reaching new audiences every day, and a plethora of other factors influence how well your YouTube channel is doing.
In this part, we will show you how you can build your own network of loyal YouTube supporters and prove that you don’t need the services of paid providers who promise better reach for your channel.
1. Find YouTubers in your niche
The first step to building an enviable army of YouTube subscribers starts with the realization that you are not alone. Regardless of the niche, your videos are covering, there are probably thousands of people who are just starting out or that have as many subscribers as your YouTube channel. Focus on finding them. You may even want to make a list.
2. Subscribe to YouTube channels you really like
Of the channels you found in Step 1, choose the ones you genuinely like and subscribe to them.
It goes without saying that everyone enjoys support, especially if you are not asking for anything in return. By subscribing to YouTube channels in your genre you appreciate, you will make yourself known to the channel’s owner, and there is a chance they will check out and subscribe to your channel.
3. Spend time watching videos each day
Knowledge is power and, if you want to attract real people to your channel, you should learn how to use your knowledge to your advantage. By paying attention to other new videos in your genre you’ll gain insight into what is going over well with audiences like yours, and what isn’t.
Also, be especially sure to watch videos from those channels you found in Step 1 and subscribed to in Step 2. Try to watch at least two minutes of content from those channels whenever they upload.
4. Comment thoughtfully. Don’t ask for anything in return
Most YouTubers are delighted to hear someone else’s positive opinion or constructive criticism regarding their work. The reason you are watching 2 minutes of content per video in Step 3 is so that you will really have something to say in this step.
If you do make a thoughtful comment, and especially if you use the time stamp of the part of the video you’re referring to, the video creator will know you have watched the video and that you are not just another spammer. Avoid the sub-4-sub strategy, and don’t be the person who’s always saying ‘Subscribe to my channel’. You will be ignored by both the creator and other viewers, and the creator will find you annoying. However, if you comment regularly without asking for anything, the creator and some of their viewers will naturally decide to check out your channel.
5. Reach out on social media
YouTube is just one out of many channels through which you can reach like-minded people. Facebook, Instagram, Pinterest or any other social network can help you network with other creators and potential subscribers. Create accounts on social networks you find the most suitable for your video category and share links to your videos on these accounts as often as you can. Furthermore, if you try to foster real discussions about topics that are relevant, people who get to know you through these other platforms will probably decide to check out your YouTube channel.
Social media is also a great place to reach out to other creators, whether it’s for collabs or just to chat about doing YouTube.
6. Do it all again. And again. And again
You aren’t going to see great results overnight. You have to spend time almost every day repeating the steps we just described. This might seem intimidating, but as time passes it will become routine.
When you build your presence on YouTube in this way, other creators and their subscribers will naturally start becoming your subscribers. What’s your best tip for free YouTube subscribers?
Conclusion
Some people might need to watch multiple videos by you before they decide they want to subscribe. If you stop making videos because you did not get any subscribers or comments on your first few then chances are there were people who were paying attention who may have subscribed if you had kept at it.


Richard Bennett
Richard Bennett is a writer and a lover of all things video.
Follow @Richard Bennett
Richard Bennett
Mar 27, 2024• Proven solutions
Working hard to produce exciting, informative and beautiful YouTube videos only to miss out on the exposure you’re hoping for can be very demoralizing, and many people give up the practice of video production after failing to generate interest in their work.
However, don’t accept defeat just yet if you’re not quite getting the numbers you’ve been aiming for. Take these steps to if you need to get subscribers for YouTube videos. Read on to find out more about the best ways to attract new YouTube subscribers for your online video channel.
- Part 1: How to Get More Subscribers on YouTube for Beginners
- Part 2: How to Get More Subscribers on YouTube for Pros
- Part 3: How to Get Free YouTube Subscribers [With Proven Methods]
Part 1: How to Get More Subscribers on YouTube for Beginners
1. Be Real and Approachable
You should always be yourself when you vlog. People will subscribe when they feel invested in you as a person, and that happens when they feel like you are being sincere. You do not need to share all of your innermost secrets on your vlog, but you should let your viewers feel like they know you.
2. Don’t forget to add a call to action
Some people need to be prompted to subscribe to your channel, no matter how much they enjoy your content. At the end of all your videos, ask your viewers to subscribe to your channel and like your social media page.
Don’t forget to explain the benefits of subscribing to them, such as to benefit from your informative tips and gain a deeper insight into your projects. If you have any interesting videos in the pipeline, let them know about them.
3. Listen To Your Subscribers
It feels nice to get positive comments on your videos. If people feel comfortable enough to leave you suggestions and requests then that is even better. It means that you have succeeded in making them feel like they are part of your community.
If you get a video request, try to do it. People like to feel that you are open to trying the things they want to see. However, there are also times when you should just ignore requests and suggestions. If the majority of your subscribers enjoy your jokes and you get one comment telling you to stop trying to be funny then it is fairly obvious that that ‘suggestion’ does not really reflect the wishes of your community.
4. Optimize your title
Try not to underestimate the importance of a great eye-catching title. Include relevant words and phrases that you think people will search for and don’t just hastily add the first title that comes into your head. The better your title is, the more viewers and subscribers you are likely to amass.
5. Be Patient
Almost all vlogs grow slowly at first; the first 1000 subscribers take the longest to get. It takes a lot of patience to keep producing content on a regular schedule when it seems like not many people are watching, but you need to stick with it in order to grow.
Part 2: How to Get more Subscribers on YouTube for Pros
1. Set goals
You can gain extra drive and momentum by setting yourself attainable goals and encouraging your followers to help you achieve them. These goals can include milestones such as reaching 500 followers, 1,000 followers and so on. Don’t hesitate to tell your viewers about these goals – if they think your content is of real value, chances are they will be only too happy to assist you.
2. Contests can be funny – why not enter one?
One way to increase subscribers is to take part in a contest. A site called Gleam can oversee a contest for you. It’s up to you to choose how you want the contest to work, and you can gain an edge over your competitors by getting people to leave comments, follow you on Instagram, subscribe to your channel and more.
You will be provided with a landing page for promoting your channel, and you can share this in a variety of places, including on your Facebook, Twitter and blog. The best way to heighten your chances of success is to have a clear goal in mind.
3. Make a trailer
YouTube’s channel interface allows you to add a trailer to entice viewers into watching your videos and following you on the platform. Your trailer gives you a valuable opportunity to quickly explain what your channel is all about and what the benefits of following you are.
Don’t waffle on – try to get your clip down to 90 seconds maximum. Include clips from your videos and don’t forget to add a strong call to action at the end. The more effort you put into your videos, the bigger the rewards are likely to become. And here are some of the best trailer makers that you can use on both Windows and Mac .
4. Make a Schedule and Stick To It
You want to vlog at least once a week, and making a schedule will help you keep on top of that. It will also give your subscribers a chance to anticipate your videos and get excited. They are more likely to watch an update they have been expecting than one that was not already on their minds.
Sticking to your schedule is a good wait to build up credibility with your audience, but late or skipped updates will cause you to lose that credibility. If you do not post for a month then people who already subscribed to you might still ignore your update because it has been too long and they forgot about you.
5. Collaborate With Other Vloggers
Collaboration videos are always big hits. When you collaborate with another vlogger you are essentially introducing each other to your subscribers. This is a great way to grow your community quickly: by connecting it to another community.
Collaborations work best when the other vlogger is located close enough to you that you can actually meet up, but you can do distance collaborations too. When you collaborate you and the other vlogger should have close to the same number of subscribers, so the video will benefit you both equally.
Bonus: How to Get Free YouTube Subscribers [6 Proven Methods]
There are lots of ways to get free YouTube subscribers. This proven method involves networking with other creators! Making your presence felt on YouTube is an important part of creating your network of subscribers that watch, share and talk about your videos. Interaction with your subscribers, reaching new audiences every day, and a plethora of other factors influence how well your YouTube channel is doing.
In this part, we will show you how you can build your own network of loyal YouTube supporters and prove that you don’t need the services of paid providers who promise better reach for your channel.
1. Find YouTubers in your niche
The first step to building an enviable army of YouTube subscribers starts with the realization that you are not alone. Regardless of the niche, your videos are covering, there are probably thousands of people who are just starting out or that have as many subscribers as your YouTube channel. Focus on finding them. You may even want to make a list.
2. Subscribe to YouTube channels you really like
Of the channels you found in Step 1, choose the ones you genuinely like and subscribe to them.
It goes without saying that everyone enjoys support, especially if you are not asking for anything in return. By subscribing to YouTube channels in your genre you appreciate, you will make yourself known to the channel’s owner, and there is a chance they will check out and subscribe to your channel.
3. Spend time watching videos each day
Knowledge is power and, if you want to attract real people to your channel, you should learn how to use your knowledge to your advantage. By paying attention to other new videos in your genre you’ll gain insight into what is going over well with audiences like yours, and what isn’t.
Also, be especially sure to watch videos from those channels you found in Step 1 and subscribed to in Step 2. Try to watch at least two minutes of content from those channels whenever they upload.
4. Comment thoughtfully. Don’t ask for anything in return
Most YouTubers are delighted to hear someone else’s positive opinion or constructive criticism regarding their work. The reason you are watching 2 minutes of content per video in Step 3 is so that you will really have something to say in this step.
If you do make a thoughtful comment, and especially if you use the time stamp of the part of the video you’re referring to, the video creator will know you have watched the video and that you are not just another spammer. Avoid the sub-4-sub strategy, and don’t be the person who’s always saying ‘Subscribe to my channel’. You will be ignored by both the creator and other viewers, and the creator will find you annoying. However, if you comment regularly without asking for anything, the creator and some of their viewers will naturally decide to check out your channel.
5. Reach out on social media
YouTube is just one out of many channels through which you can reach like-minded people. Facebook, Instagram, Pinterest or any other social network can help you network with other creators and potential subscribers. Create accounts on social networks you find the most suitable for your video category and share links to your videos on these accounts as often as you can. Furthermore, if you try to foster real discussions about topics that are relevant, people who get to know you through these other platforms will probably decide to check out your YouTube channel.
Social media is also a great place to reach out to other creators, whether it’s for collabs or just to chat about doing YouTube.
6. Do it all again. And again. And again
You aren’t going to see great results overnight. You have to spend time almost every day repeating the steps we just described. This might seem intimidating, but as time passes it will become routine.
When you build your presence on YouTube in this way, other creators and their subscribers will naturally start becoming your subscribers. What’s your best tip for free YouTube subscribers?
Conclusion
Some people might need to watch multiple videos by you before they decide they want to subscribe. If you stop making videos because you did not get any subscribers or comments on your first few then chances are there were people who were paying attention who may have subscribed if you had kept at it.
Richard Bennett
Richard Bennett is a writer and a lover of all things video.
Follow @Richard Bennett
Also read:
- In 2024, Chuckle Factory Designing 7 Video Ideas for Humorists
- [Updated] Download Mastery 11 Key YouTube Extractors
- 2024 Approved Establishing a Mac-Based Sports Media Outlet
- In 2024, Capture YouTube's Subtitles on No-Cost Platforms
- Dive Into YouTube TV Tips & Tricks for Optimal Viewing
- 3-Step Financial Forecasting Assessing Revenue From Google's Platform, YouTube for 2024
- Choose Your Perfect Wedding Tales - Youtube's Finest 8 for 2024
- Building Blocks for Successful Channel Branding and Growth for 2024
- 10 Parody Songs That Totally Crack You Up for 2024
- Building Engaging Learning Experiences YouTube as Your Classroom Screen
- Crafting the Perfect Close YouTube's Free End Screen Tools
- 2024 Approved Charting Out Your Audience YouTube's Blueprint
- Voice of Volume 6 Free Apps for Channeling YouTube Music Onto Android Devices
- Boosting Video Quality Utilizing YouTube Studio's Features
- [Updated] Channel Growth Strategy Going with Studio or Beta Progression
- Recover your pictures after Realme 11 Pro has been deleted.
- In 2024, How to Cast Realme Narzo N55 Screen to PC Using WiFi | Dr.fone
- [Updated] 2024 Approved Cutting Through Steps Posting TikTok Videos on Twitter
- In 2024, 2 Ways to Transfer Text Messages from Realme Narzo N55 to iPhone 15/14/13/12/11/X/8/ | Dr.fone
- 2024 Approved Add Song to iMovie
- Updated Cross-Platform Video Editing 35 Top-Rated Software Solutions for 2024
- Updated In 2024, Navigating Through the Premier Selection of FREE VST Tools Ready to Elevate Your Sound
- [Updated] Unveiling TikTok's Hidden Emoji Gems Top 7 List for 2024
- 4 Feasible Ways to Fake Location on Facebook For your OnePlus Nord 3 5G | Dr.fone
- Elite Collection The Best 11 Streamers for 2024
- [Updated] In 2024, Cutting-Edge Videography Bordering Techniques for IG
- Updated 2024 Approved Amplifying the Listener Experience Where to Obtain Professional Podcast Sound Effects
- How to Fake GPS on Android without Mock Location For your Itel S23 | Dr.fone
- Title: "[Updated] Elevate Your YouTube Thumbnails - Triple Neon Border Techniques"
- Author: Steven
- Created at : 2024-05-25 20:58:37
- Updated at : 2024-05-26 20:58:37
- Link: https://youtube-clips.techidaily.com/updated-elevate-your-youtube-thumbnails-triple-neon-border-techniques/
- License: This work is licensed under CC BY-NC-SA 4.0.
