![[Updated] Elevate Narrative Flow Expert Tips on Using Jump Cuts](https://www.lifewire.com/thmb/HjZqZIAdFDbePPWfCwBgS1rzDSM=/400x300/filters:no_upscale():max_bytes(150000):strip_icc()/how-to-play-subway-surfers-3583994550e74c3f81fc162b40548cc2.jpg)
"[Updated] Elevate Narrative Flow Expert Tips on Using Jump Cuts"
Elevate Narrative Flow: Expert Tips on Using Jump Cuts
How To Use Jump Cuts in Your Vlog

Richard Bennett
Mar 27, 2024• Proven solutions
A common problem for new YouTubers and Vlogers is that they cannot get through a recording without feeling like they have messed up and need to restart. It can be extremely discouraging at first. More experienced vloggers know that mistakes happen and they are no reason to stop recording. Instead of trying to record a perfect clip it is common for vloggers to remove errors from their videos in editing using jump cuts.
How To Use Jump Cuts in Your Vlog
1. What is a Jump Cut?
A jump cut is when you jump from one part of your clip to a later part of that same clip, cutting out the section in-between.
In movies or tv shows jump cuts can be distracting. In vlogs it is the exact opposite; jump cuts are used to remove distractions. It is not strange for a YouTube video to contain a lot of jump cuts. If you go and re-watch a video by your favorite vlogger you will probably notice that every once in a while the vlogger is suddenly sitting differently or that something else has suddenly changed. That is a jump cut, and chances are you did not even think twice about it when you first watched the video.
2. When to use Jump Cuts in your Youtube Video
There are a lot of things you might want to take out of your clips using jump cuts. Here are some examples:
Repetition: You may have had to repeat yourself because you misspoke. Or, you might watch your clip back and realize that two sections you intended – perhaps even scripted – are very similar and you only need one.
Off-Topic Tangents: Once you get comfortable talking to the camera it is easy to find yourself getting off-topic while recording. These tangents might be funny or feel important, but you should still cut them out of your final video. Rather than scrapping them completely, though, consider giving your tangent its very own video. Successful vloggers post new videos frequently, after all.
Silence: Use jump cuts to take out any pauses in your video. Every period of silence is an opportunity for viewers to get distracted and decide to click on something else. Adding music to the background of your video can help with shorter pauses, but cutting out any silence is still a good way to go.
In the video tutorial below, we will share with you some practical and creative jump cuts tips that you can try in video editing. And most of the jump cuts are done with the cutting features in Filmora . You can download the free trial version below by clicking the Free Download button based on your system.
 Download Mac Version ](https://tools.techidaily.com/wondershare/filmora/download/ )
3. How to Make Jump Cuts in Vlog & YouTube Videos
You can make jump cuts in almost every editing program, from free software like Windows Movie Maker to professional programs like Adobe Premiere. Remember no matter which video editing software you are using to edit your videos with jump cut, you need to ensure that the software can scroll through your video clips and audio files frame-by-frame. And some video editors may only allow you to scroll video footage frame by frame. This tutorial is for Filmora Video Editor (Now upgraded to Filmora), but many of the same steps will apply to other software.
Download Mac Version ](https://tools.techidaily.com/wondershare/filmora/download/ )
You may also like: How to trim and cut videos in Windows Movie Maker for Free
Open up Filmora Video Editor and add a clip into the timeline. Watch it through, and then revisit sections where you think you might want to make cuts.
Find a place in your clip that has silence and use the scissors icon to cut your clip into two. Then start playing your clip and pause as soon as you hear sound.
Make sure your clip is selected, and then go back frame by frame until you hear nothing.
Use the scissors icon to make another cut. You will now have three clips; one before the silence, the silent pause, and the section where sound starts again. Delete the quiet middle clip.
4. Keep video shorter for more views
The videos that get the most views on YouTube are an average of three minutes long. People will use the length of a video as a reason not to click on it. Viewers are also more likely to get distracted and stop watching longer videos before they are over. That does not mean you should not take as long as you need to properly explain your ideas, just that you should be careful your video is not longer than it needs to be. It is common for youtubers to use only about a third of the clip they record. The rest is removed using jump cuts.
Filmora video editor will help you to be more creative in video editing and saving your time at the same time. Download and leave a comment below about how do you like it.

Richard Bennett
Richard Bennett is a writer and a lover of all things video.
Follow @Richard Bennett
Richard Bennett
Mar 27, 2024• Proven solutions
A common problem for new YouTubers and Vlogers is that they cannot get through a recording without feeling like they have messed up and need to restart. It can be extremely discouraging at first. More experienced vloggers know that mistakes happen and they are no reason to stop recording. Instead of trying to record a perfect clip it is common for vloggers to remove errors from their videos in editing using jump cuts.
How To Use Jump Cuts in Your Vlog
1. What is a Jump Cut?
A jump cut is when you jump from one part of your clip to a later part of that same clip, cutting out the section in-between.
In movies or tv shows jump cuts can be distracting. In vlogs it is the exact opposite; jump cuts are used to remove distractions. It is not strange for a YouTube video to contain a lot of jump cuts. If you go and re-watch a video by your favorite vlogger you will probably notice that every once in a while the vlogger is suddenly sitting differently or that something else has suddenly changed. That is a jump cut, and chances are you did not even think twice about it when you first watched the video.
2. When to use Jump Cuts in your Youtube Video
There are a lot of things you might want to take out of your clips using jump cuts. Here are some examples:
Repetition: You may have had to repeat yourself because you misspoke. Or, you might watch your clip back and realize that two sections you intended – perhaps even scripted – are very similar and you only need one.
Off-Topic Tangents: Once you get comfortable talking to the camera it is easy to find yourself getting off-topic while recording. These tangents might be funny or feel important, but you should still cut them out of your final video. Rather than scrapping them completely, though, consider giving your tangent its very own video. Successful vloggers post new videos frequently, after all.
Silence: Use jump cuts to take out any pauses in your video. Every period of silence is an opportunity for viewers to get distracted and decide to click on something else. Adding music to the background of your video can help with shorter pauses, but cutting out any silence is still a good way to go.
In the video tutorial below, we will share with you some practical and creative jump cuts tips that you can try in video editing. And most of the jump cuts are done with the cutting features in Filmora . You can download the free trial version below by clicking the Free Download button based on your system.
Download Mac Version ](https://tools.techidaily.com/wondershare/filmora/download/ )
3. How to Make Jump Cuts in Vlog & YouTube Videos
You can make jump cuts in almost every editing program, from free software like Windows Movie Maker to professional programs like Adobe Premiere. Remember no matter which video editing software you are using to edit your videos with jump cut, you need to ensure that the software can scroll through your video clips and audio files frame-by-frame. And some video editors may only allow you to scroll video footage frame by frame. This tutorial is for Filmora Video Editor (Now upgraded to Filmora), but many of the same steps will apply to other software.
Download Mac Version ](https://tools.techidaily.com/wondershare/filmora/download/ )

You may also like: How to trim and cut videos in Windows Movie Maker for Free
Open up Filmora Video Editor and add a clip into the timeline. Watch it through, and then revisit sections where you think you might want to make cuts.
Find a place in your clip that has silence and use the scissors icon to cut your clip into two. Then start playing your clip and pause as soon as you hear sound.
Make sure your clip is selected, and then go back frame by frame until you hear nothing.
Use the scissors icon to make another cut. You will now have three clips; one before the silence, the silent pause, and the section where sound starts again. Delete the quiet middle clip.
4. Keep video shorter for more views
The videos that get the most views on YouTube are an average of three minutes long. People will use the length of a video as a reason not to click on it. Viewers are also more likely to get distracted and stop watching longer videos before they are over. That does not mean you should not take as long as you need to properly explain your ideas, just that you should be careful your video is not longer than it needs to be. It is common for youtubers to use only about a third of the clip they record. The rest is removed using jump cuts.
Filmora video editor will help you to be more creative in video editing and saving your time at the same time. Download and leave a comment below about how do you like it.
Richard Bennett
Richard Bennett is a writer and a lover of all things video.
Follow @Richard Bennett
Richard Bennett
Mar 27, 2024• Proven solutions
A common problem for new YouTubers and Vlogers is that they cannot get through a recording without feeling like they have messed up and need to restart. It can be extremely discouraging at first. More experienced vloggers know that mistakes happen and they are no reason to stop recording. Instead of trying to record a perfect clip it is common for vloggers to remove errors from their videos in editing using jump cuts.
How To Use Jump Cuts in Your Vlog
1. What is a Jump Cut?
A jump cut is when you jump from one part of your clip to a later part of that same clip, cutting out the section in-between.
In movies or tv shows jump cuts can be distracting. In vlogs it is the exact opposite; jump cuts are used to remove distractions. It is not strange for a YouTube video to contain a lot of jump cuts. If you go and re-watch a video by your favorite vlogger you will probably notice that every once in a while the vlogger is suddenly sitting differently or that something else has suddenly changed. That is a jump cut, and chances are you did not even think twice about it when you first watched the video.
2. When to use Jump Cuts in your Youtube Video
There are a lot of things you might want to take out of your clips using jump cuts. Here are some examples:
Repetition: You may have had to repeat yourself because you misspoke. Or, you might watch your clip back and realize that two sections you intended – perhaps even scripted – are very similar and you only need one.
Off-Topic Tangents: Once you get comfortable talking to the camera it is easy to find yourself getting off-topic while recording. These tangents might be funny or feel important, but you should still cut them out of your final video. Rather than scrapping them completely, though, consider giving your tangent its very own video. Successful vloggers post new videos frequently, after all.
Silence: Use jump cuts to take out any pauses in your video. Every period of silence is an opportunity for viewers to get distracted and decide to click on something else. Adding music to the background of your video can help with shorter pauses, but cutting out any silence is still a good way to go.
In the video tutorial below, we will share with you some practical and creative jump cuts tips that you can try in video editing. And most of the jump cuts are done with the cutting features in Filmora . You can download the free trial version below by clicking the Free Download button based on your system.
Download Mac Version ](https://tools.techidaily.com/wondershare/filmora/download/ )
3. How to Make Jump Cuts in Vlog & YouTube Videos
You can make jump cuts in almost every editing program, from free software like Windows Movie Maker to professional programs like Adobe Premiere. Remember no matter which video editing software you are using to edit your videos with jump cut, you need to ensure that the software can scroll through your video clips and audio files frame-by-frame. And some video editors may only allow you to scroll video footage frame by frame. This tutorial is for Filmora Video Editor (Now upgraded to Filmora), but many of the same steps will apply to other software.
Download Mac Version ](https://tools.techidaily.com/wondershare/filmora/download/ )
You may also like: How to trim and cut videos in Windows Movie Maker for Free
Open up Filmora Video Editor and add a clip into the timeline. Watch it through, and then revisit sections where you think you might want to make cuts.
Find a place in your clip that has silence and use the scissors icon to cut your clip into two. Then start playing your clip and pause as soon as you hear sound.
Make sure your clip is selected, and then go back frame by frame until you hear nothing.
Use the scissors icon to make another cut. You will now have three clips; one before the silence, the silent pause, and the section where sound starts again. Delete the quiet middle clip.
4. Keep video shorter for more views
The videos that get the most views on YouTube are an average of three minutes long. People will use the length of a video as a reason not to click on it. Viewers are also more likely to get distracted and stop watching longer videos before they are over. That does not mean you should not take as long as you need to properly explain your ideas, just that you should be careful your video is not longer than it needs to be. It is common for youtubers to use only about a third of the clip they record. The rest is removed using jump cuts.
Filmora video editor will help you to be more creative in video editing and saving your time at the same time. Download and leave a comment below about how do you like it.
Richard Bennett
Richard Bennett is a writer and a lover of all things video.
Follow @Richard Bennett
Transforming Channel Visibility Into Subscriber Stardom on YouTube
Case Study: How to Grow on YouTube to Have Millions of Subs

Shanoon Cox
Oct 26, 2023• Proven solutions
You’ve probably heard of stories about individuals who managed to find financial success on YouTube. If your dream is to make money on YouTube it’s important to remember that regular people are doing it.
Jesse Ridgway is the owner of the vlog McJuggerNuggets , which has grown to over 3.4 million subscribers. He makes enough money to live off of YouTube alone. Here is a case study of how he made his first $10,000 on YouTube:
Case Study of McJuggerNuggets
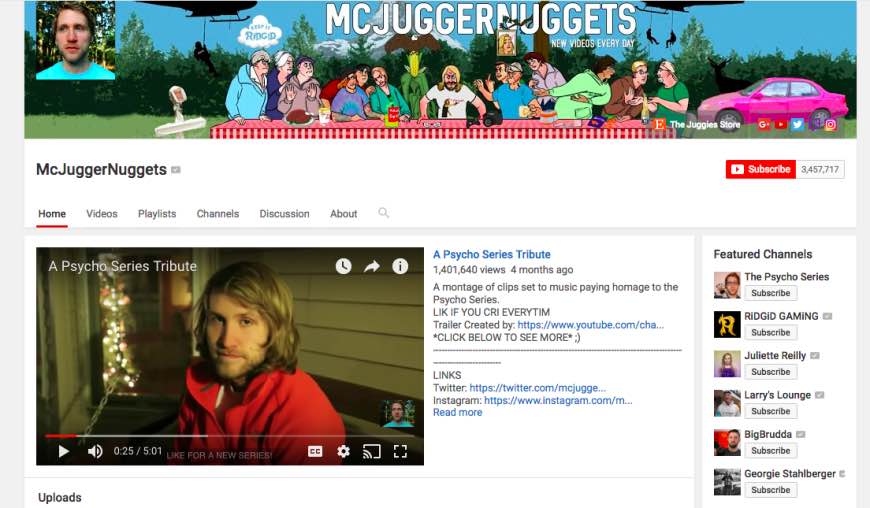
Jesse was one of the earliest YouTubers. He started his channel on December 9, 2006. Jesse never guessed that he would make enough money to live off of the videos he was creating. Here are some of the ways that he monetized his channel:
AdSense
Monetization of videos through AdSense is one of the easiest ways that you can start to profit off your videos. Registering for a Google AdSense can earn you between $0.30 and $2.00 per thousand ad impressions (an impression is a click, not a view). How much you make per ad impression depends on a lot of things, including the time of year. There are good months for advertising revenue and bad months. December is usually the hottest month for making money through AdSense because of the holiday shopping season. Some of the other months where you can see huge profits include September for back-to-school, June, and March.
More popular channels get higher paying ads, and it is harder to earn ad revenue in popular vlogging genres (i.e. gaming) than in more obscure niches.
Target the Right Demographic
Some of the largest YouTuber success stories are creators who primarily target younger audiences. Others target men or women specifically. Think about who you want your audience to be and make videos that will appeal to them.
Multichannel Networks
Once you hit a certain level of subscribership and views you will start getting invited to MCMs. In some cases, multichannel network promotions could entitle you to discounts on merchandise and products. Be careful: a multichannel network will always want you to sign a contract, and they will take over your AdSense account.
Social Blade
This site will provide details about your subscription count, which of your videos has the best watch time, and more. It will give you a good impression of what you should be including in your videos and how you can make more money from your channel.
Uploading Your Videos at the Right Time
Uploading videos at the right time will make sure that you are on the front page of recently uploaded videos when people are let out of school or taking a break from work. This will earn you lots of views. Set an upload time for all of your videos each day and stick to that schedule.
Check out Webinars
Looking into webinars and videos of what other popular YouTube experts have done will help you model their success.
Collaborate with Other YouTubers
When you create a collab video you and your partner are each introduced to each other’s subscribers.
Keep Quality Up
Putting time and effort into every upload will ensure that you won’t lose subscribers or viewers because you got a bit lazy.
Do Follow-Up Videos
If you have a particular video that has a lot of views, you may want to consider creating follow-up videos. This can be a great way to generate lots of views.
Complete Regular Research
Regular research into your target market will help you to create the trendiest new content.
Don’t Get Discouraged
Timing and luck are definitely two of the biggest factors in becoming a success on YouTube. If you are willing to keep working and don’t get discouraged you will eventually earn profits.
Edit Your Videos with High-Quality Video Editor
Shanoon Cox
Shanoon Cox is a writer and a lover of all things video.
Follow @Shanoon Cox
Shanoon Cox
Oct 26, 2023• Proven solutions
You’ve probably heard of stories about individuals who managed to find financial success on YouTube. If your dream is to make money on YouTube it’s important to remember that regular people are doing it.
Jesse Ridgway is the owner of the vlog McJuggerNuggets , which has grown to over 3.4 million subscribers. He makes enough money to live off of YouTube alone. Here is a case study of how he made his first $10,000 on YouTube:
Case Study of McJuggerNuggets
Jesse was one of the earliest YouTubers. He started his channel on December 9, 2006. Jesse never guessed that he would make enough money to live off of the videos he was creating. Here are some of the ways that he monetized his channel:
AdSense
Monetization of videos through AdSense is one of the easiest ways that you can start to profit off your videos. Registering for a Google AdSense can earn you between $0.30 and $2.00 per thousand ad impressions (an impression is a click, not a view). How much you make per ad impression depends on a lot of things, including the time of year. There are good months for advertising revenue and bad months. December is usually the hottest month for making money through AdSense because of the holiday shopping season. Some of the other months where you can see huge profits include September for back-to-school, June, and March.
More popular channels get higher paying ads, and it is harder to earn ad revenue in popular vlogging genres (i.e. gaming) than in more obscure niches.
Target the Right Demographic
Some of the largest YouTuber success stories are creators who primarily target younger audiences. Others target men or women specifically. Think about who you want your audience to be and make videos that will appeal to them.
Multichannel Networks
Once you hit a certain level of subscribership and views you will start getting invited to MCMs. In some cases, multichannel network promotions could entitle you to discounts on merchandise and products. Be careful: a multichannel network will always want you to sign a contract, and they will take over your AdSense account.
Social Blade
This site will provide details about your subscription count, which of your videos has the best watch time, and more. It will give you a good impression of what you should be including in your videos and how you can make more money from your channel.
Uploading Your Videos at the Right Time
Uploading videos at the right time will make sure that you are on the front page of recently uploaded videos when people are let out of school or taking a break from work. This will earn you lots of views. Set an upload time for all of your videos each day and stick to that schedule.
Check out Webinars
Looking into webinars and videos of what other popular YouTube experts have done will help you model their success.
Collaborate with Other YouTubers
When you create a collab video you and your partner are each introduced to each other’s subscribers.
Keep Quality Up
Putting time and effort into every upload will ensure that you won’t lose subscribers or viewers because you got a bit lazy.
Do Follow-Up Videos
If you have a particular video that has a lot of views, you may want to consider creating follow-up videos. This can be a great way to generate lots of views.
Complete Regular Research
Regular research into your target market will help you to create the trendiest new content.
Don’t Get Discouraged
Timing and luck are definitely two of the biggest factors in becoming a success on YouTube. If you are willing to keep working and don’t get discouraged you will eventually earn profits.
Edit Your Videos with High-Quality Video Editor
Shanoon Cox
Shanoon Cox is a writer and a lover of all things video.
Follow @Shanoon Cox
Also read:
- [Updated] Choose From the Finest 7 Android Browsers Without Ads
- [Updated] In 2024, Golden Text in 3D Selecting Quality Online Sites
- [Updated] Premium Film Experiences YT's Best Of Lists
- 11-Year-Old's Financial Rise via YouTube Stardom
- 2024 Approved Boosting Your Content Reach with Eye-Catching YouTube Video Thumbnails
- 2024 Approved Channel Acquisition 101 Maximizing Youtubers' Earnings
- 2024 Approved Maximizing Impact Adjusting Facebook Video Sizes Correctly
- Breaking Down Barriers to Making Calls on Your iPhone: A Guide with 10 Fixes
- Edu-Core Definitive Learning Channels Online
- Emerging Trends in Developer Careers & Popular Coding Languages - Exploring the Future of Tech with ZDNet
- In 2024, Enhancing Video Visibility with Strategic YouTube Links
- In 2024, Pinnacle of Video Quality 3 Key Transcoder Strategies
- Revolutionizing Browsing: AI in Microsoft's Bing
- Step-by-Step Guide to Correcting Ralink RT3290 Driver Issues for Multiple Windows Versions
- Tips for Quicker/Slower Video in Instagram Stories for 2024
- Unbeatable Video Popularity Tracker in YouTube Arena
- Unveiling the Secrets of Mobile Monetization on YouTube for Creators
- Title: [Updated] Elevate Narrative Flow Expert Tips on Using Jump Cuts
- Author: Steven
- Created at : 2024-11-10 20:38:14
- Updated at : 2024-11-14 18:46:40
- Link: https://youtube-clips.techidaily.com/updated-elevate-narrative-flow-expert-tips-on-using-jump-cuts/
- License: This work is licensed under CC BY-NC-SA 4.0.