![[Updated] Efficient Video Cutting Techniques to Boost Your Content](https://thmb.techidaily.com/4fe1c562a7e3ab45c8b1f68d5fb5d836545aa73283e591a5a7261febdc4cbc2c.jpg)
[Updated] Efficient Video Cutting Techniques to Boost Your Content
Efficient Video Cutting Techniques to Boost Your Content
How to Trim YouTube Videos?

Richard Bennett
Mar 27, 2024• Proven solutions
The world’s largest video sharing platform currently has nearly two billion active monthly users who upload over 400 hours of video content to their channels each minute. It is to see from these statistics why every video aspiring YouTubers post on their channels has to be perfect in every way in order to reach a wide audience. Fortunately, trimming a video even after you’ve uploaded it to YouTube is a quick and easy process, and in this article, we are going to show you a few different methods you can use to trim the videos you upload to YouTube. So, let’s get started.
In this article
- How to Trim a Video After You Upload it to Your YouTube Channel?
- Trimming a Video Before Posting On YouTube with Filmora Video Editor [4 Ways]
- Using Online Video Editing Platforms to Trim YouTube Videos
How to Trim a Video After You Upload it to Your YouTube Channel?
The YouTube Studio is no longer in beta phase, which means that the feature is here to stay. This is good news for all video creators who frequently update their YouTube videos after they upload them, as they no longer have to go through the endless uploads just because they wanted to trim a video.
Make sure that you’re signed into your YouTube channel, then click on your profile picture and select the YouTube Studio (Beta) option. On the left side of the screen, you’ll be able to see a menu that contains different subcategories like Analytics, Dashboard or Videos, so just click on the Videos option and proceed to select a video you’d like to trim. After the Videos submenu appears on the screen you should click on the Editor option and the video you selected will open in the YouTube’s video editor.

Click on the Trim button to start trimming the video and drag the blue bars located at the start and the end of the file to designate the portion of the video you’d like to remove. Preview the changes and confirm what you’ve made by clicking on the Save button located in the upper right corner of the screen and the new shortened version of the video will become available within a couple of hours.

In this way, you don’t need to take down the original video, edit it and re-upload. One of the benefits of trimming YouTube videos with the Trim feature in YouTube Editor is that this will keep your video URL and views and ranks etc.
Trimming a Video Before Posting On YouTube with Filmora Video Editor [4 Ways]


Method 1: Trim on Timeline
YouTubers who don’t want to rely on YouTube’s video editing capabilities can trim their footage with Filmora (to be honest, the Editor in YouTube platform has limited features). Filmora video editing software for PC and Mac computers offers a few different tools for trimming videos. After you’ve created a new project in Filmora, you should import a video clip into the editor by clicking on the Import drop-down menu and select the Import Media Files option. Each file you add to a project will be displayed in the Media tab, and you can just drag and drop it to a video track on the timeline.
All you have to do in order to trim a video after you’ve placed it on the timeline is drag one of its ends to the left or to the right. As you drag one of the clip’s edges the editor will only display the remaining footage while rendering the rest invisible. If at any point you want to access a portion of the video you’ve trimmed you just have to extend the file by dragging it until you’re able to see the segment you’re searching for.

Method 2: Using Filmora Split Tool
Filmora’s Split tool can help you separate the portion of the clip you want to remove from the segment you’d like to keep. Simply place the playhead at the exact location in the video clip where you want to make a cut, and click on the Split icon that looks like a pair of scissors. After the video is split, you should click on the clip you no longer need in order to select it and then hit the Delete button on your keyboard to remove it from the timeline.
Method 3: Using Scene Detection
Wondershare’s video editor also offers an automatic way to split a video clip into a number of separate scenes. Right-click on the video file located in the Filmora’s Media tab, and select the Scene Detection option from the menu and proceed to click on the Detect button, after the Scene Detection window pops up on the screen. The software will then automatically analyze the footage and divide it into separate scenes. Simply click on the Add to Timeline button once the process is completed to continue editing the video clip you’ve just split.

Method 4: Using Instant Cutter Tool
The Instant Cutter Tool enables you to quickly trim or merge high-resolution files recorded on action cameras as soon as you import them into a project in Filmora. Select the Import with Instant Cutter Tool option from the Import drop-down menu and wait for the Filmora Instant Cutter window to appear on the screen. In the upper left corner of this window, you will be able to see Trim and Merge tabs. Make sure that the Trim tab is selected and then click on the Open File button to import a video clip you’d like to trim. You can then use the trimming sliders to designate the parts of the video you’d like to remove or the set the In and Out points by clicking on the Set In Point or Set Out Point icons. Click on the Export button to save the new version of the video clip and click OK to complete the process.


Using Online Video Editing Platforms to Trim YouTube Videos
In case you’re looking for a tool that lets you save extracts of scenes from YouTube to your computer free of charge YT Cutter may be one of your best options.

This online video editing platform is remarkably easy to use since you just have to copy the link to the YouTube video you’d like to trim into YT Cutter’s URL box and then select how long the new video should be. Click on the Start and End buttons to set the duration of the video and click on the Download button to choose if you want to create a video, GIF or an audio file. The trimmed YouTube video will be available for download as soon as the platform processes it, and you just need to specify a folder on your hard drive before clicking on the Save button.
There’re many online video trimmers available on the market, some of them are totally free to use, check our guide about How to Trim Videos for Free Online .
Read More to Get : How to Download YouTube Videos without Any Software Easily >>
Conclusion
Trimming a video online or with a video editing software like Filmora is an effortless task that can be completed in just a couple of minutes. However, it is better to complete the entire video editing process before you upload a video to your YouTube channel because YouTube Studio and other online video editing platforms still offer only a limited amount of video editing tools. Which method of trimming YouTube videos do you like using the most? Leave a comment and share your opinions with us.
Richard Bennett
Richard Bennett is a writer and a lover of all things video.
Follow @Richard Bennett
Richard Bennett
Mar 27, 2024• Proven solutions
The world’s largest video sharing platform currently has nearly two billion active monthly users who upload over 400 hours of video content to their channels each minute. It is to see from these statistics why every video aspiring YouTubers post on their channels has to be perfect in every way in order to reach a wide audience. Fortunately, trimming a video even after you’ve uploaded it to YouTube is a quick and easy process, and in this article, we are going to show you a few different methods you can use to trim the videos you upload to YouTube. So, let’s get started.
In this article
- How to Trim a Video After You Upload it to Your YouTube Channel?
- Trimming a Video Before Posting On YouTube with Filmora Video Editor [4 Ways]
- Using Online Video Editing Platforms to Trim YouTube Videos
How to Trim a Video After You Upload it to Your YouTube Channel?
The YouTube Studio is no longer in beta phase, which means that the feature is here to stay. This is good news for all video creators who frequently update their YouTube videos after they upload them, as they no longer have to go through the endless uploads just because they wanted to trim a video.
Make sure that you’re signed into your YouTube channel, then click on your profile picture and select the YouTube Studio (Beta) option. On the left side of the screen, you’ll be able to see a menu that contains different subcategories like Analytics, Dashboard or Videos, so just click on the Videos option and proceed to select a video you’d like to trim. After the Videos submenu appears on the screen you should click on the Editor option and the video you selected will open in the YouTube’s video editor.
Click on the Trim button to start trimming the video and drag the blue bars located at the start and the end of the file to designate the portion of the video you’d like to remove. Preview the changes and confirm what you’ve made by clicking on the Save button located in the upper right corner of the screen and the new shortened version of the video will become available within a couple of hours.
In this way, you don’t need to take down the original video, edit it and re-upload. One of the benefits of trimming YouTube videos with the Trim feature in YouTube Editor is that this will keep your video URL and views and ranks etc.
Trimming a Video Before Posting On YouTube with Filmora Video Editor [4 Ways]
Method 1: Trim on Timeline
YouTubers who don’t want to rely on YouTube’s video editing capabilities can trim their footage with Filmora (to be honest, the Editor in YouTube platform has limited features). Filmora video editing software for PC and Mac computers offers a few different tools for trimming videos. After you’ve created a new project in Filmora, you should import a video clip into the editor by clicking on the Import drop-down menu and select the Import Media Files option. Each file you add to a project will be displayed in the Media tab, and you can just drag and drop it to a video track on the timeline.
All you have to do in order to trim a video after you’ve placed it on the timeline is drag one of its ends to the left or to the right. As you drag one of the clip’s edges the editor will only display the remaining footage while rendering the rest invisible. If at any point you want to access a portion of the video you’ve trimmed you just have to extend the file by dragging it until you’re able to see the segment you’re searching for.
Method 2: Using Filmora Split Tool
Filmora’s Split tool can help you separate the portion of the clip you want to remove from the segment you’d like to keep. Simply place the playhead at the exact location in the video clip where you want to make a cut, and click on the Split icon that looks like a pair of scissors. After the video is split, you should click on the clip you no longer need in order to select it and then hit the Delete button on your keyboard to remove it from the timeline.
Method 3: Using Scene Detection
Wondershare’s video editor also offers an automatic way to split a video clip into a number of separate scenes. Right-click on the video file located in the Filmora’s Media tab, and select the Scene Detection option from the menu and proceed to click on the Detect button, after the Scene Detection window pops up on the screen. The software will then automatically analyze the footage and divide it into separate scenes. Simply click on the Add to Timeline button once the process is completed to continue editing the video clip you’ve just split.
Method 4: Using Instant Cutter Tool
The Instant Cutter Tool enables you to quickly trim or merge high-resolution files recorded on action cameras as soon as you import them into a project in Filmora. Select the Import with Instant Cutter Tool option from the Import drop-down menu and wait for the Filmora Instant Cutter window to appear on the screen. In the upper left corner of this window, you will be able to see Trim and Merge tabs. Make sure that the Trim tab is selected and then click on the Open File button to import a video clip you’d like to trim. You can then use the trimming sliders to designate the parts of the video you’d like to remove or the set the In and Out points by clicking on the Set In Point or Set Out Point icons. Click on the Export button to save the new version of the video clip and click OK to complete the process.
Using Online Video Editing Platforms to Trim YouTube Videos
In case you’re looking for a tool that lets you save extracts of scenes from YouTube to your computer free of charge YT Cutter may be one of your best options.
This online video editing platform is remarkably easy to use since you just have to copy the link to the YouTube video you’d like to trim into YT Cutter’s URL box and then select how long the new video should be. Click on the Start and End buttons to set the duration of the video and click on the Download button to choose if you want to create a video, GIF or an audio file. The trimmed YouTube video will be available for download as soon as the platform processes it, and you just need to specify a folder on your hard drive before clicking on the Save button.
There’re many online video trimmers available on the market, some of them are totally free to use, check our guide about How to Trim Videos for Free Online .
Read More to Get : How to Download YouTube Videos without Any Software Easily >>
Conclusion
Trimming a video online or with a video editing software like Filmora is an effortless task that can be completed in just a couple of minutes. However, it is better to complete the entire video editing process before you upload a video to your YouTube channel because YouTube Studio and other online video editing platforms still offer only a limited amount of video editing tools. Which method of trimming YouTube videos do you like using the most? Leave a comment and share your opinions with us.
Richard Bennett
Richard Bennett is a writer and a lover of all things video.
Follow @Richard Bennett
Essential Hash Strategies for Optimizing YouTube Gameplay Videos
Hashtags are a great way to reach new viewers and subscribers interested in your content. But with so many hashtags out there, finding which ones are perfect for your YouTube gaming channel can be challenging.
That’s why we’ve extensively researched you and compiled a list of the 30 best tags/hashtags for YouTube gaming videos. We’ve also included tools to help you generate or plan your hashtags effectively to grow your channel and boost your subscription.
So, if you want to take your YouTube gaming channel to the next level, read on!
30 Best YouTube Gaming Hashtags
In recent years, YouTube has become the most popular platform for gamers worldwide. However, with millions of users uploading new videos daily, making your content stand out from the rest can take time and effort.
One way to alleviate the reach of your YouTube gaming videos is to use popular hashtags that can help you for many purposes like:
- Driving traffic toward your videos
- Increasing your brand awareness
- Expanding the search visibility of your content
You can also increase your video’s organic volume by using appropriate hashtags.
Here is the list of the 30 most popular hashtags with high search volume for YouTube gaming:
- #gamer
- #nintendo
- #games
- #livestream
- #videogames
- #gaming
- #youtubegamer
- #fortnite
- #PleaseForgiveMe
- #pcgaming
- #playfortnite
- #xbox
- #gamingcommunity
- #gamerguy
- #gamergirl
- #gamereview
- #livegaming
- #play
- #winning
- #videogameaddict
- #twitchstreamer
- #youtubegaming
- #reddead
- #playinggames
- #diablo
- #callofduty
- #xboxone
- #retrogaming
- #smallyoutuberarmy
- #nintendoswitch
Useful Tools For YouTube Gaming Hashtags
Well goes an old saying: “Better to teach someone to fish than to give him a fish.”
As a vlogger, you should use hashtags every time you upload a video to help your video spread and guide viewers to find more of your content. But it would help if you can ensure these hashtags are natural and relevant.
Hence, apart from providing the list of popular gaming hashtags, we have created this list of YouTube hashtag tools to help you generate such tags.
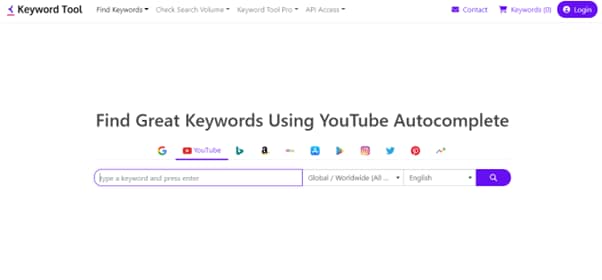
Keyword Tool
The Keyword Tool is a popular YouTube hashtags generator that can help you find popular gaming hashtags to use on YouTube. You can understand what keywords your audience is searching for with this tool.
New and popular YouTube gaming hashtags are just one click away with Keyword Tool. This tool makes developing variations, ideas, and other stuff relatively easy. It’s the best tool on the market now and gets updated regularly to provide the most relevant result each time.
The Keyword tool offers categories for each social platform and search engine where you can find the most popular tag for your videos. Hence, you can create more relevant content and reach more people on YouTube, Twitch streams, and Instagram posts. Moreover, it provides suggestions for combinations of titles. For example, it produces the fastest results and uses tolls to add the names of the games, providing you with more personalized results.
To use Keyword Tool, enter a topic into the search bar. You will then see a list of popular gaming hashtags related to your keyword. You can then use them to help promote your videos and get more views.
Tube Ranker
Tube Ranker is another excellent tool for ranking your videos on YouTube. This YouTube hashtag generator is fast, easy to use, and effective at getting your videos to the top of search results in no time.
Tube Ranker tool can work as a description generator, a channel auditor, a tags extractor, an SEO rank tracker, a keyword generator, and a title generator.
Therefore, if you want more views and engagement on your YouTube gaming videos, the Tube Ranker should be a must-have tool in your arsenal!
As to the price, TubeBuddy comes with a Pro version for $7.20/month, a Star version for $15.20/month, and a Legend version for $39.20/month in addition to the free version.

SEO Book
SEOBook is an excellent website for learning about search engine optimization (SEO). Aaron Wall, a leading expert on the topic, writes the book. This website covers everything from the basics of SEO to more advanced concepts.
The tool can help you generate relevant hashtags for your YouTube gaming videos and make your content more visible.

![]()
Note: If you want to optimize your YouTube gaming videos’ descriptions, tags and titles, click here to learn how!
Bonus: Using Filmora To Screen Record Or Edit The Gaming Video
Although we have talked about the most popular gaming hashtags and the useful tools for you videos, meanwhile, the quality and the content of the video are worth of high attention.
With the popularity of YouTube Gaming videos, how to record or edit content to make it more engaging and eye-capturing is important.
Therefore, we recommend using Filmora - a user-friendly video editing software for both Mac and Windows. It has all the features you need to edit, screen record, and export the edited videos to YouTube.
https://www.youtube.com/embed/
Free Download For Win 7 or later(64-bit)
Free Download For macOS 10.14 or later
There are many reasons to use Filmora, but here are the most important ones:
- Quick and easy to use, even for novice users
- It helps you screen record the footage of your game and webcam simultaneously while you are playing.
- Offers AI portrait, green screen, mask & blend, New BlueFX, and Boris FX effects
- Excellent and clear UI
- It lets you edit the video and add effects, transitions, and other elements to make it more engaging.
- It includes instant mode, PIP, preset templates for different occasions, WordArt, title editing, and motion tracking features.
- You can export the edited video to YouTube with just a few clicks.
Conclusion
This comprehensive article provides the 30 best tags/hashtags for YouTube gaming to help you improve your content visibility. We’ve also discussed the three most popular YouTube hashtags generator.
Moreover, we’ve recommended using Filmora to quickly screen record or edit your YouTube gaming videos before searching for popular hashtags.
We hope you’ve enjoyed reading this article and can now use the right hashtags for your YouTube gaming content.
Also read:
- [New] 2024 Approved Entering Income Territory with a Thousand Followers
- [New] 2024 Approved Solve Invisible Buffer Problems in Video Games
- [New] Dive Into the World of Expertise with YouTube's Top 10 Makeup Vloggers
- [New] Enhancing Content Discovery via Thumbnails
- 2024 Approved Eliminating Grey Edges on Video A YouTube Fix Guide
- 2024 Approved Tailoring Audio Rate on Mobile and Desktops for YouTube
- Addressing and Repairing Your Windows Headset's Microphone
- Audio Enthusiast Hub Capture and Audit MP3 Files
- In 2024, Channel Success Story Turning Budget Into Brands
- In 2024, Multiplatform IPTV Encoding
- Seamlessly Retrieve Tags List of 7 Premium Free YouTube Extractors
- YouTubeへのアップロード形式ガイド:動画変換手順
- Title: [Updated] Efficient Video Cutting Techniques to Boost Your Content
- Author: Steven
- Created at : 2024-11-09 09:01:19
- Updated at : 2024-11-15 08:03:06
- Link: https://youtube-clips.techidaily.com/updated-efficient-video-cutting-techniques-to-boost-your-content/
- License: This work is licensed under CC BY-NC-SA 4.0.