
!["[Updated] Edible Imagery Stepwise Food Film Making"](https://www.lifewire.com/thmb/zMpzmUsiz9u9cI7ifqEIl6_RowU=/300x200/filters:no_upscale():max_bytes(150000):strip_icc()/julio-lopez-jK_oDRU_Iv4-unsplash-349bc8590cba4b83a4ea4c683f3b9f55.jpg)
"[Updated] Edible Imagery Stepwise Food Film Making"
Edible Imagery: Stepwise Food Film Making
How to Make a Cooking Video in Steps - an Ultimate Guide

Richard Bennett
Mar 27, 2024• Proven solutions
Cooking and food-oriented videos are among the most outreaching and popular categories of content to publish online, notably, on YouTube, Facebook, or Instagram. So if you are a cooking aficionado, you have excellent potential to gain positive attention and a loyal audience. But to create engaging videos, you’d need a lot more than excellent culinary skills. This article aims to enlighten aspiring food and recipe vloggers about the essentials of video making straight out of the oven, to create enriched content that’s professional, neat, and viral-worthy.
- Part 1: What to Prepare Before Making a Recipe Video?
- Part 2: Make a Cooking Video with Filmora: a Step-by-Step Guide
- Part 3: Tips to Make Your Cooking Videos Stand Out
- Part 4: How to Promote Your Cooking Channel on YouTube?
What to Prepare Before Making a Recipe Video
While you would know best about the prep work needed for the recipes, the prep work for making a video starts with a plan. What goes into the plan?
Brainstorm this equation - Main Content + Duration + Light + Sound + Camera + Camera Angle, Shots & Transition.
The main content is how you picture the finished video. Ask yourself - Do you want an intro gig? Are you going to talk in the video or show only hands and the cooking with a piece of background music? How do you wish to present the ingredients? Would there be additional tips? At what platform are you going to publish your content? How long should be your clippings? Consider all these questions to chalk out a basic framework of your video
The camera is a pivotal element. Whether it is a smartphone or a hi-fidelity digital camera, it is worthwhile to familiarise the best positions and light orientations and the capacity of the device to produce the best quality picture.
How is your sound going to be like? If you are going to talk in the video, it is recommended that you use a microphone. Or else, you can also use background sound. But to mix sound with the video, you’d need an excellent sound editing tool.
Finally, comes the editing and finishing part. Eventually, you’ll need purposive video-editing software to help you work out the video transitions, sound, and visual effects.Choose a toolkit that is easy to learn and that you can get comfortable with so that the job of video editing doesn’t take the focus away from the main task of cooking.

Now, once you have all the essential ingredients to create your video, start practicing. Remember that it is the most natural thing for the first videos to appear amateurish or inept. And that is part of the plan. Don’t be disheartened and keep going.
Make a Cooking Video with Filmora: a Step-by-Step Guide
As one of the easiest-to-use video editing tools, the full-featured Filmora is the right choice considering it can fit most of your needs. Moreover, you’d be delighted to know that the software also has a series of features and functions and even tutorial videos dedicated to cooking videos.


Step 1: Filming the Video
Whether you are going to present a traditional cook-with-me style video or feature the contemporary “jump-cut” style focusing on speedy short videos, you need to prepare all the equipment and ingredients to suit the frame by frame shots. Consider spills, drops, overcooking, etc. as part of the process, so keep adequate substitutes to continue with your project unwaveringly. If you are using a phone, keep it fully charged up. And have a plan beforehand about what you should do when you get an urgent call while shooting. Also, consider doing a site investigation of the shooting spot for any fragile items, pointy corners, slippery areas, curious pets, etc. to avoid trips and falls in the middle of the filming, especially when working with a cameraman who’s following your movement. If you are using a tripod, and floor-standing lights, remember to secure the equipment with plenty of adhesive tapes, lest they bump into an expensive trip or fall.
Step 2: mport Your Video In Filmora
You need to sync the device that you used to film the video with the computer that has Filmora installed. It may be a phone or a camcorder. Once the devices are synced, you should launch the Filmora software and go the “Media” button at the top right toolbar. There you will find the “Import” button. You will get a pop-up message asking you to choose the type of device. Select the right one, and your video will be imported in the Filmora interface.
Step 3: Edit Video Pace: Time-Lapse, Jump Cut, Slow Motion
To create crisp, fast-paced videos, you don’t have to gobble up the content eyeing at the duration. Think smart when you have the resources of a tool like Filmora. Here are the three best features that help you create fast-paced yet well-defined recipes.
Time-Lapse: The time-lapse feature allows you to adjust the speed of the video from slow-motion to 10x faster. To use this, double click on a specific clip in your imported video and open the custom speed settings. Use the adjusting meter beside speed to make your clip as fast or slow as you want. You may use the same feature to introduce the slow-motion effects in certain areas of the video.
Now, when you are using either the fast-forward or slow-motion effects, it is best to have stable video footage with consistent lighting and a static background. There are also the options of Reverse Speed that can play the clip backward, as in flash-back. The Ripple edit feature allows you to cut short a long clip seamlessly.
Jump Cut: The Jump Cut is about snipping unwanted areas in the clip. It may sound like the Ripple edit mentioned above, but the ripple edit is more functional for cutting short a continuous video so that the viewer won’t realize the snip. For the Jump Cut, it doesn’t have to be a constant clip. You can get to the next frame or scene with an abracadabra move.
To use Jump Cut, place the cursor over the starting of the clip that you want to cut, and right-click on it and select “Split” (the “scissors” feature on the toolbar does the same thing). To make this look neat, preview the portion of the clip once again and delete the cuts between two clips with the same right-click.
Step 4: Understanding Transitions on Filmora
Transitions make your video more interactive and help you segregate the video from frame-to-frame with effects like dissolve, fade, flash, etc. there are numerous transition options available within the Filmora suit.
The best way to do this drag and drop the clips on the timeline is to trim parts of the clip to shorten it. Once you have all the clips in place, go to the “Transitions” options at the top toolbar to apply it on the end or start of each clip.
Step 5: Audio, Playback & Sound Edits
There are plenty of options that you can remove background noise, add voiceover, add music, and detach audio from video. Refer to the Audios section from your toolbar.
Step 6: Save to Drive/ Emport/ Publish
Once you are satisfied with your content, then go to Export. Choose the format of the video, MOV, MP4, MPG, etc. and whether you wish to publish directly or save to drive.
Tips to Make Your Cooking Videos Stand Out
- Lighting is your best friend. Invest in some quality spotlights or use the best of daylight.
- Mind your video duration. Short and Simple videos get the most views, but your content should not look incomplete. It is not a fact that long and elaborate videos do not get a place on the table; it is all about the relevance of your content. So don’t stop till you get enough.
- If you appear in the video, keep yourself always look good.
- Keep your video titles relevant and prominent, so that people looking for it can readily find it.
- Have a scrumptious custom thumbnail.
How to Promote Your Cooking Channel on YouTube
- Create an inventory before publishing videos. YouTube vlogging is valued for consistency. If you have a list of 10, 15, 20 videos, then you can have enough time in hand to film your next videos.
- Have a consistent style to create brand recognition. Do you think branding is not for Vlogs? Well, I suppose you might be wrong. Branding is for anyone who uses it.
- Share the link of your YouTube videos on other platforms like Twitter and Facebook.
- Encourage your viewers to comment on the video.
- Explore the different YouTube SEO strategies and use the accurate keywords in your video descriptions with hashtags.
With prior planning and practicing, you are bent on developing more confident moves and camera angles. Once you have that, follow this step by step guide to gain speed and prowess and also enjoy the whole adventure.
Richard Bennett
Richard Bennett is a writer and a lover of all things video.
Follow @Richard Bennett
Richard Bennett
Mar 27, 2024• Proven solutions
Cooking and food-oriented videos are among the most outreaching and popular categories of content to publish online, notably, on YouTube, Facebook, or Instagram. So if you are a cooking aficionado, you have excellent potential to gain positive attention and a loyal audience. But to create engaging videos, you’d need a lot more than excellent culinary skills. This article aims to enlighten aspiring food and recipe vloggers about the essentials of video making straight out of the oven, to create enriched content that’s professional, neat, and viral-worthy.
- Part 1: What to Prepare Before Making a Recipe Video?
- Part 2: Make a Cooking Video with Filmora: a Step-by-Step Guide
- Part 3: Tips to Make Your Cooking Videos Stand Out
- Part 4: How to Promote Your Cooking Channel on YouTube?
What to Prepare Before Making a Recipe Video
While you would know best about the prep work needed for the recipes, the prep work for making a video starts with a plan. What goes into the plan?
Brainstorm this equation - Main Content + Duration + Light + Sound + Camera + Camera Angle, Shots & Transition.
The main content is how you picture the finished video. Ask yourself - Do you want an intro gig? Are you going to talk in the video or show only hands and the cooking with a piece of background music? How do you wish to present the ingredients? Would there be additional tips? At what platform are you going to publish your content? How long should be your clippings? Consider all these questions to chalk out a basic framework of your video
The camera is a pivotal element. Whether it is a smartphone or a hi-fidelity digital camera, it is worthwhile to familiarise the best positions and light orientations and the capacity of the device to produce the best quality picture.
How is your sound going to be like? If you are going to talk in the video, it is recommended that you use a microphone. Or else, you can also use background sound. But to mix sound with the video, you’d need an excellent sound editing tool.
Finally, comes the editing and finishing part. Eventually, you’ll need purposive video-editing software to help you work out the video transitions, sound, and visual effects.Choose a toolkit that is easy to learn and that you can get comfortable with so that the job of video editing doesn’t take the focus away from the main task of cooking.
Now, once you have all the essential ingredients to create your video, start practicing. Remember that it is the most natural thing for the first videos to appear amateurish or inept. And that is part of the plan. Don’t be disheartened and keep going.
Make a Cooking Video with Filmora: a Step-by-Step Guide
As one of the easiest-to-use video editing tools, the full-featured Filmora is the right choice considering it can fit most of your needs. Moreover, you’d be delighted to know that the software also has a series of features and functions and even tutorial videos dedicated to cooking videos.
Step 1: Filming the Video
Whether you are going to present a traditional cook-with-me style video or feature the contemporary “jump-cut” style focusing on speedy short videos, you need to prepare all the equipment and ingredients to suit the frame by frame shots. Consider spills, drops, overcooking, etc. as part of the process, so keep adequate substitutes to continue with your project unwaveringly. If you are using a phone, keep it fully charged up. And have a plan beforehand about what you should do when you get an urgent call while shooting. Also, consider doing a site investigation of the shooting spot for any fragile items, pointy corners, slippery areas, curious pets, etc. to avoid trips and falls in the middle of the filming, especially when working with a cameraman who’s following your movement. If you are using a tripod, and floor-standing lights, remember to secure the equipment with plenty of adhesive tapes, lest they bump into an expensive trip or fall.
Step 2: mport Your Video In Filmora
You need to sync the device that you used to film the video with the computer that has Filmora installed. It may be a phone or a camcorder. Once the devices are synced, you should launch the Filmora software and go the “Media” button at the top right toolbar. There you will find the “Import” button. You will get a pop-up message asking you to choose the type of device. Select the right one, and your video will be imported in the Filmora interface.
Step 3: Edit Video Pace: Time-Lapse, Jump Cut, Slow Motion
To create crisp, fast-paced videos, you don’t have to gobble up the content eyeing at the duration. Think smart when you have the resources of a tool like Filmora. Here are the three best features that help you create fast-paced yet well-defined recipes.
Time-Lapse: The time-lapse feature allows you to adjust the speed of the video from slow-motion to 10x faster. To use this, double click on a specific clip in your imported video and open the custom speed settings. Use the adjusting meter beside speed to make your clip as fast or slow as you want. You may use the same feature to introduce the slow-motion effects in certain areas of the video.
Now, when you are using either the fast-forward or slow-motion effects, it is best to have stable video footage with consistent lighting and a static background. There are also the options of Reverse Speed that can play the clip backward, as in flash-back. The Ripple edit feature allows you to cut short a long clip seamlessly.
Jump Cut: The Jump Cut is about snipping unwanted areas in the clip. It may sound like the Ripple edit mentioned above, but the ripple edit is more functional for cutting short a continuous video so that the viewer won’t realize the snip. For the Jump Cut, it doesn’t have to be a constant clip. You can get to the next frame or scene with an abracadabra move.
To use Jump Cut, place the cursor over the starting of the clip that you want to cut, and right-click on it and select “Split” (the “scissors” feature on the toolbar does the same thing). To make this look neat, preview the portion of the clip once again and delete the cuts between two clips with the same right-click.
Step 4: Understanding Transitions on Filmora
Transitions make your video more interactive and help you segregate the video from frame-to-frame with effects like dissolve, fade, flash, etc. there are numerous transition options available within the Filmora suit.
The best way to do this drag and drop the clips on the timeline is to trim parts of the clip to shorten it. Once you have all the clips in place, go to the “Transitions” options at the top toolbar to apply it on the end or start of each clip.
Step 5: Audio, Playback & Sound Edits
There are plenty of options that you can remove background noise, add voiceover, add music, and detach audio from video. Refer to the Audios section from your toolbar.
Step 6: Save to Drive/ Emport/ Publish
Once you are satisfied with your content, then go to Export. Choose the format of the video, MOV, MP4, MPG, etc. and whether you wish to publish directly or save to drive.
Tips to Make Your Cooking Videos Stand Out
- Lighting is your best friend. Invest in some quality spotlights or use the best of daylight.
- Mind your video duration. Short and Simple videos get the most views, but your content should not look incomplete. It is not a fact that long and elaborate videos do not get a place on the table; it is all about the relevance of your content. So don’t stop till you get enough.
- If you appear in the video, keep yourself always look good.
- Keep your video titles relevant and prominent, so that people looking for it can readily find it.
- Have a scrumptious custom thumbnail.
How to Promote Your Cooking Channel on YouTube
- Create an inventory before publishing videos. YouTube vlogging is valued for consistency. If you have a list of 10, 15, 20 videos, then you can have enough time in hand to film your next videos.
- Have a consistent style to create brand recognition. Do you think branding is not for Vlogs? Well, I suppose you might be wrong. Branding is for anyone who uses it.
- Share the link of your YouTube videos on other platforms like Twitter and Facebook.
- Encourage your viewers to comment on the video.
- Explore the different YouTube SEO strategies and use the accurate keywords in your video descriptions with hashtags.
With prior planning and practicing, you are bent on developing more confident moves and camera angles. Once you have that, follow this step by step guide to gain speed and prowess and also enjoy the whole adventure.
Richard Bennett
Richard Bennett is a writer and a lover of all things video.
Follow @Richard Bennett
Secure & Simple: Grab Your Desired YouTube Cover at No Charge
Best Free Downloaders: Download YouTube Thumbnail for Free[Online/Win/Mac]
Richard Bennett
Mar 27, 2024• Proven solutions
What is a YouTube thumbnail?
A YouTube thumbnail is nothing but the cover image shown on a video file on YouTube. It shows what you are going to talk about in the youtube video. A cool thumbnail will make the viewers want to click your video which in turn will help you to improve the traffic and number of clicks per video. Sometimes you may want to download youtube thumbnail from others. But it is very difficult to download a thumbnail directly from YouTube and many of you might not know that a thumbnail can be downloaded from elsewhere and then added to your content.
Here in this article, we will introduce the best 6 online tools available in the market to download YouTube thumbnail.
- 6 Online Tools to Download YouTube Thumbnail for Free
- Bonus Tips to Create a Clickable YouTube Thumbnail
6 Online Tools to Download YouTube Thumbnail for Free
Knowing the importance of YouTube thumbnails, you might now be wondering where to download the thumbnails for free. Let us have a look at some of the tools that can help you download YouTube thumbnail for free.
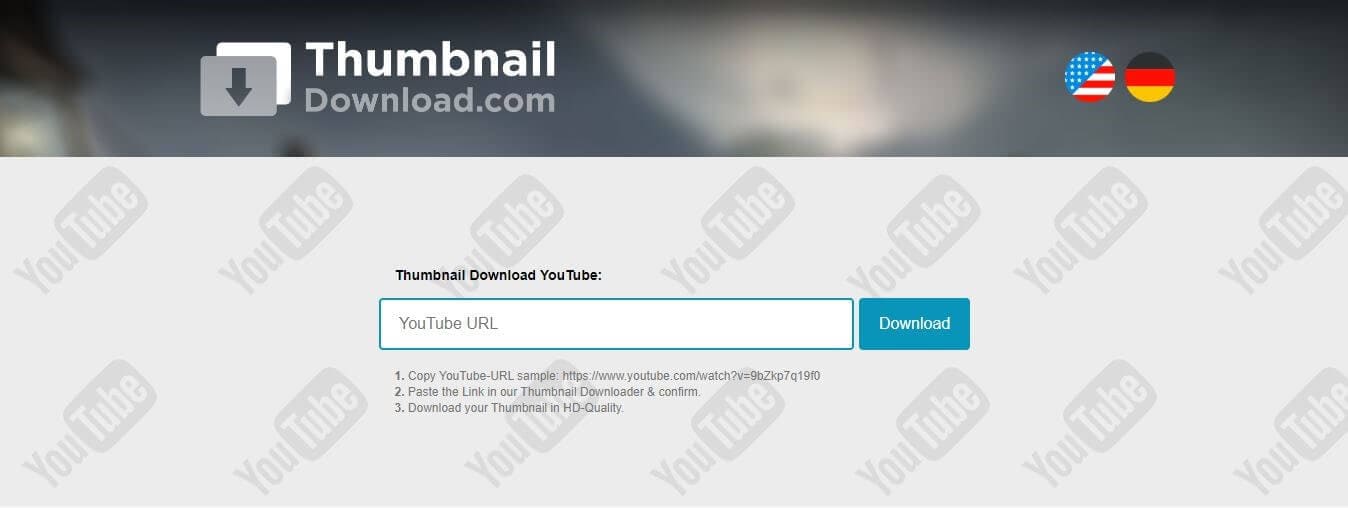
1. YouTube Thumbnail Image Tool
The YouTube Thumbnail Image Tool is a simple and free tool that helps you to download a thumbnail in four dimensions for your video, i.e. MQ 320*180, HQ 480*360, SD 640*480, and HD 1920*1080. Whether you are using a Windows or Mac OS, the thumbnail can be easily be downloaded via any browser.
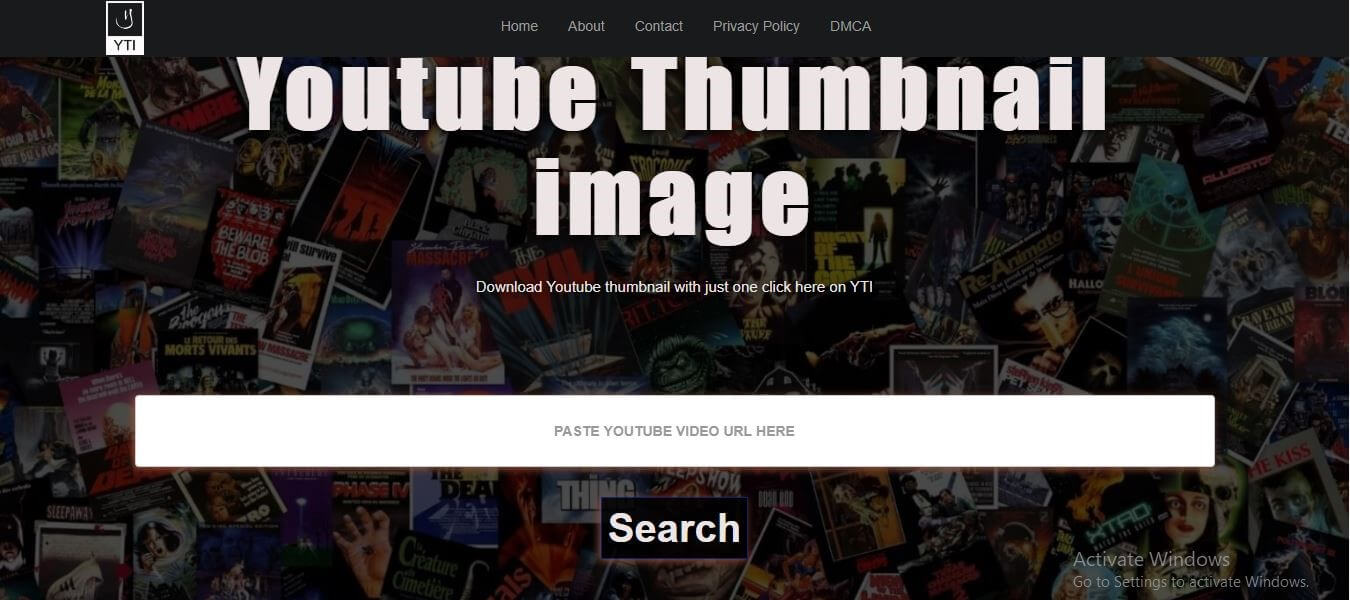
Steps to Download:
- Open any browser and open this youtube thumbnail image tool from Here
- Copy the link from your youtube video
- Paste the URL link of the video in the box and hit on Search
- You will be then displayed different qualities of the thumbnail. Choose one (HD is recommended) and hit the Download button
The selected quality of thumbnail will be downloaded to your storage which can later be used while uploading a video to YouTube.
2. Online YouTube Thumbnail Downloader
This online YouTube Thumbnail Downloader tool has a lot of features among which creating thumbnail for a YouTube video is one. This free online tool can easily be accessed both on Windows and Mac OS via any browser. This downloader can generate thumbnails for videos in HD, HQ 1080p, and 4K formats and the thumbnails will be available in SD, HD(720), and Full HD(1080).
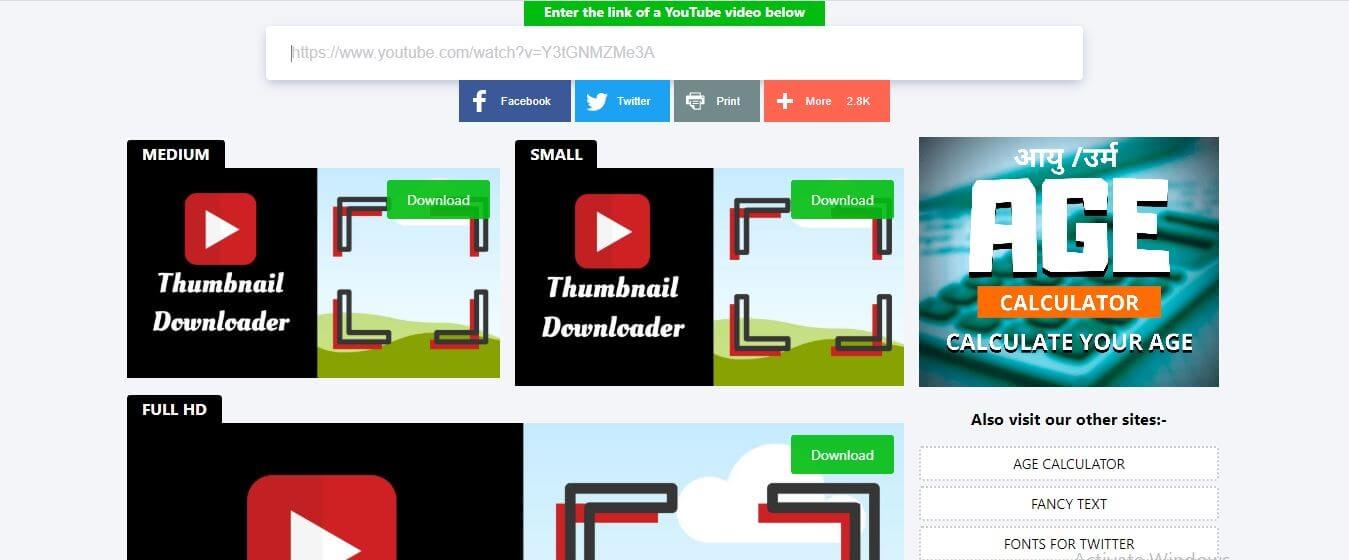
Steps to Download:
- Copy the link of the youtube video you wish to generate the thumbnail
- Click Here to open this free tool with your browser and paste the link in the box displayed at the top
- As soon as you paste the link, the available qualities of the thumbnail will be displayed just below the box
- Choose your desired quality of the image and hit on the Download button on the image you wish to download
The image will be downloaded and saved to your device instantly. You can now use it as a thumbnail for your YouTube video.
3. Thumbnail Save Tool
The Thumbnail Save Tool is also a free online tool which you can access from the browser of your Windows or Mac. It is a very simple tool that can generate thumbnails for HQ, HD, 1080P, and 4K videos instantly. Let us see how the thumbnail can be generated
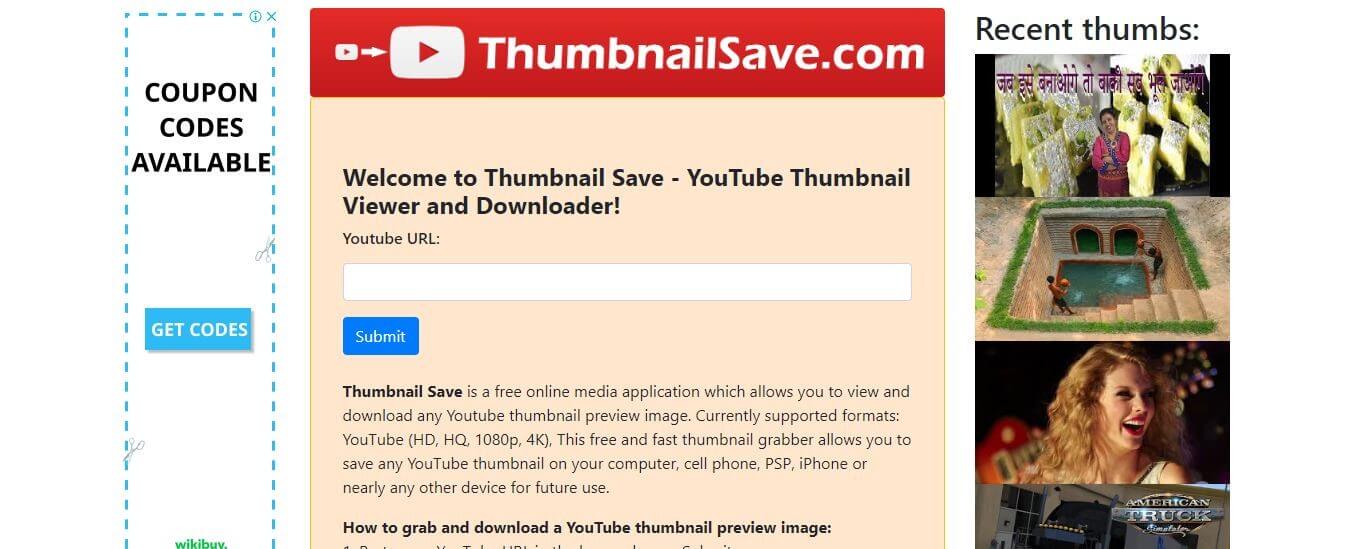
Steps to Download:
- Copy the URL of the video you want to create thumbnail
- Open this Thumbnail Save Tool from Here via your browser
- Paste the copied link in the box above Submit and hit Submit. Then the thumbnail will be generated instantly
- Now, to save the generated image to your device, right-click on the thumbnail and select the Save image as… option
The image will be saved to your device for later use as a thumbnail for your YouTube video.
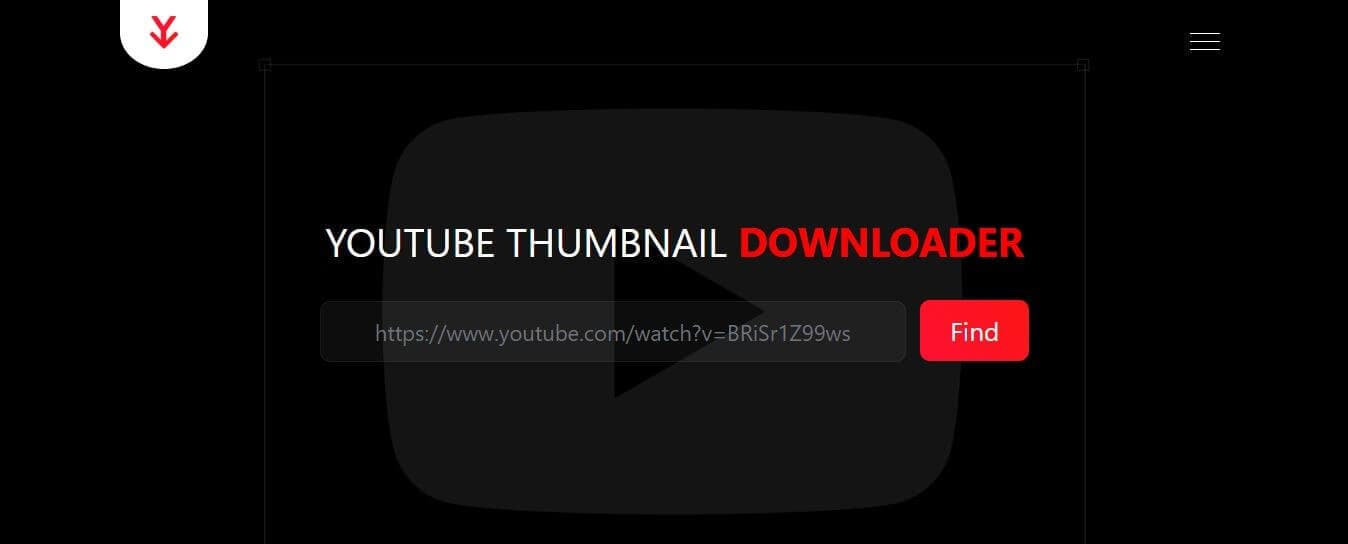
4. YouTube Thumbnail Grabber
The YouTube thumbnail grabber is an online tool that can help you to download a thumbnail from a YouTube video for free. This tool can simply be accessed both by windows and Mac users through any browser. This tool helps you to download a thumbnail in any quality in some simple steps. Let us see how.
Steps to Download:
- Open this youtube thumbnail grabber from Here with any browser. Then Copy the link of the youtube video.
- Paste the link in the box displayed on the page and hit the Get Thumbnails Image tab
- Five different qualities of thumbnails will be generated among which you can choose your desired quality
- Hit the Download button below the image you chose
The thumbnail will be downloaded to your device for later use.
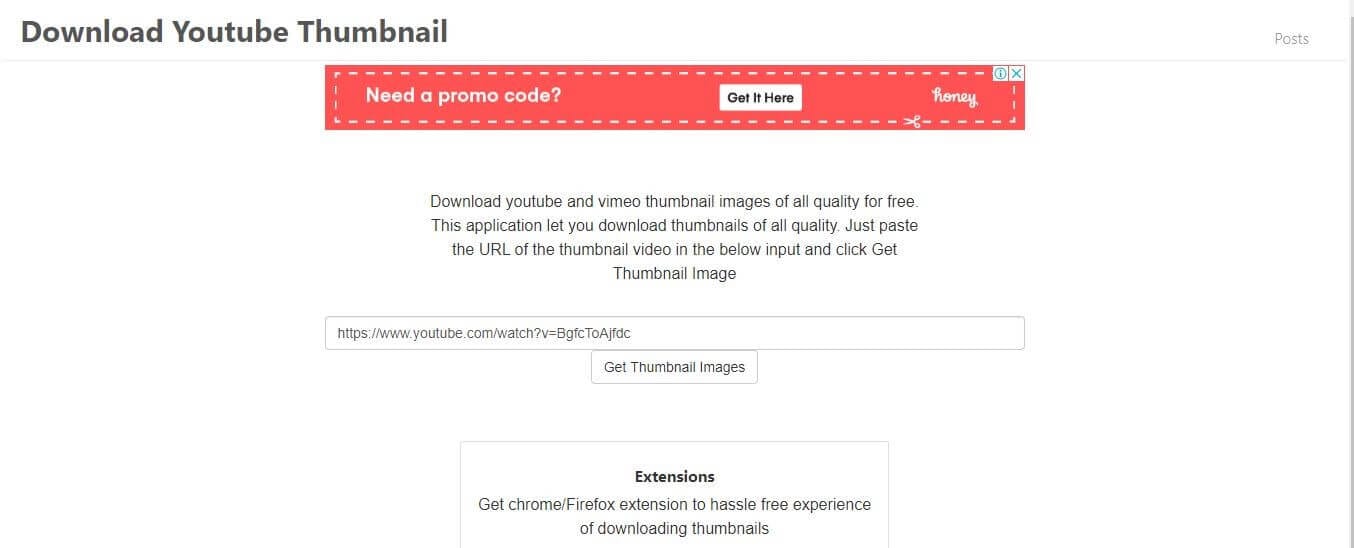
5. Thumbnail Download Tool
This thumbnail download tool allows generating thumbnails from video platforms like Dailymotion, Vimeo, Facebook, and YouTube. It is a free online tool that enables you to download the thumbnail of your video in the best quality. The tool can be accessed both on Windows and Mac OS without any issues. Let us see how the thumbnail can be downloaded for YouTube.
Steps to Download:
- Copy the URL link of the video you wish to generate a thumbnail
- Click Here to open this Thumbnail Download Tool with your browseron any browser of your Windows or iOS.
- Paste the copied link in the box and press the Download button
- Choose the picture size among the results displayed
- Save the picture to your PC
Your thumbnail image is now ready to be used.
6. YouTube Thumbnail Downloader
The YouTube Thumbnail Downloader is an online tool that can help you to create thumbnails for your YouTube videos and blogs. This tool will help you to download full HD 1080*720 images from YouTube for free, irrespective of the operative system you are using. Let us see how the thumbnail can be downloaded
Steps to Download:
- Copy the link of any YouTube video you wish to generate a thumbnail
- Click Here in your browser and Paste the link in the box
- Hit the Find button. Then different qualities of the image will be displayed
- Select your desired quality and tap on the download icon on the respective image
The image will now be saved to your device
Bonus Tips to Create a Clickable YouTube Thumbnail
Don’t know how to create a clickable youtube thumbnail? Here we will recommend 5 tips for you!
1. Great thumbnail image quality and size
The thumbnail image quality should be good (HD/UHD). It should be bright. No matter what the device (a large TV) the viewers are using, care must be taken to avoid getting blurry thumbnails. The quality and the correct size of the thumbnail will create a positive image of the video in the user’s mind even before viewing the video. The video must be viewed from a variety of devices to test if the quality differs in different devices. Here are some specs for a perfect thumbnail
- The image formats should be in GIF, JPG PNG OR BMP
- The maximum size of the image must be 1280*720 px
- The minimum size 640*360 px
- The aspect ratio 16:9
- The maximum file size 2MB
2. Show a person in the Thumbnail image
A human face will get you closer to your audience. Our brain is wired in a way that a human face will draw its attention more than anything. So the users will naturally would an image with a human delivering the content rather than a robot or just a video of nonliving things. People tend to find a connection with the characters displayed on the thumbnail and hence prompting them to click on the video.
3. Use descriptive text in your thumbnail with branding elements
It is not completely possible to deliver a message through a picture and hence try to use descriptive texts. The texts should be clear enough and must be phrased in a manner that increases the curiosity or appeals to the emotions of the viewers. People tend to click a video just because of curiosity, wanting to know what the content is about. The type of font, color, and size also plays an important role in catching the attention of the audience.
4. Make Color Contrast between the text and background
Complementary colors will make your thumbnail stand out to some extent. Combining a yellow background with a purple foreground or green with red will make it easier to draw the attention of the browsers. Also, the use of analogous colors in the thumbnail makes it more attractive and pleasing to the eye.
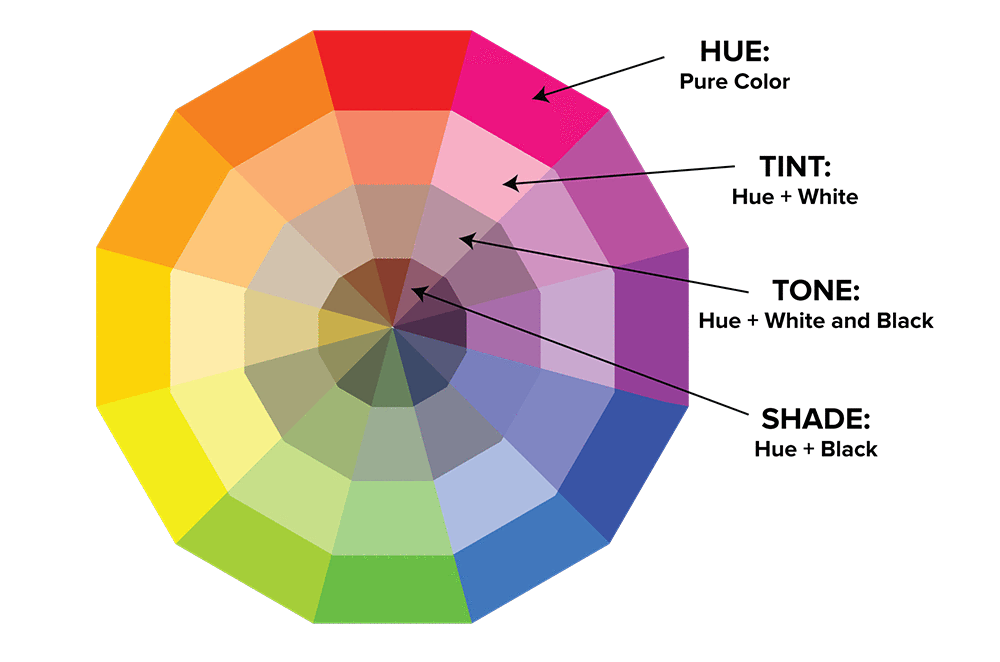
Image resource: Pinterest
Analogous colors are the colors that appear next to each other on a color wheel
5. Consistency
Consistency is something most of the people prefer and makes a thing more attractive. A thumbnail video with consistent text font, color tuning, visual effect, etc. will catch the eye of the users as it will stand apart in the whole webpage. Consistency adds to the standards of a video and will make people feel that this video is productive or from an authentic source
Create Your Own YouTube Thumbnail with Filmora for Free
Now that we have learned about how to download YouTube thumbnail for free and the rules you should follows, you may want to create a thumbnail. There are many Youtube thumbnail makers on the market that can help you create a YouTube thumbnail like Canva, PixStudio and more. However, we would like to be different today and recommend Filmora to you.
The benefits of using Filmora to create your YouTube thumbnail is that you don’t need to look for other softwares. You can make a thumbnail while you are editing your video with Filmora easily.
Wondering how can you do it? Here is a video guide for you.
Conclusion
Getting the proper size and quality of a YouTube thumbnail is very important for activities like blogging, designing, etc. Here in this article, we have described how to download YouTube thumbnail from the best free downloaders available online in simple steps. These Thumbnail downloading tools can be accessed from any device with an internet connection and will help you to download the perfect thumbnail image of your choice within minutes. Please leave your feedback about our suggestions in the comment box below.
Richard Bennett
Richard Bennett is a writer and a lover of all things video.
Follow @Richard Bennett
Richard Bennett
Mar 27, 2024• Proven solutions
What is a YouTube thumbnail?
A YouTube thumbnail is nothing but the cover image shown on a video file on YouTube. It shows what you are going to talk about in the youtube video. A cool thumbnail will make the viewers want to click your video which in turn will help you to improve the traffic and number of clicks per video. Sometimes you may want to download youtube thumbnail from others. But it is very difficult to download a thumbnail directly from YouTube and many of you might not know that a thumbnail can be downloaded from elsewhere and then added to your content.
Here in this article, we will introduce the best 6 online tools available in the market to download YouTube thumbnail.
- 6 Online Tools to Download YouTube Thumbnail for Free
- Bonus Tips to Create a Clickable YouTube Thumbnail
6 Online Tools to Download YouTube Thumbnail for Free
Knowing the importance of YouTube thumbnails, you might now be wondering where to download the thumbnails for free. Let us have a look at some of the tools that can help you download YouTube thumbnail for free.
1. YouTube Thumbnail Image Tool
The YouTube Thumbnail Image Tool is a simple and free tool that helps you to download a thumbnail in four dimensions for your video, i.e. MQ 320*180, HQ 480*360, SD 640*480, and HD 1920*1080. Whether you are using a Windows or Mac OS, the thumbnail can be easily be downloaded via any browser.
Steps to Download:
- Open any browser and open this youtube thumbnail image tool from Here
- Copy the link from your youtube video
- Paste the URL link of the video in the box and hit on Search
- You will be then displayed different qualities of the thumbnail. Choose one (HD is recommended) and hit the Download button
The selected quality of thumbnail will be downloaded to your storage which can later be used while uploading a video to YouTube.
2. Online YouTube Thumbnail Downloader
This online YouTube Thumbnail Downloader tool has a lot of features among which creating thumbnail for a YouTube video is one. This free online tool can easily be accessed both on Windows and Mac OS via any browser. This downloader can generate thumbnails for videos in HD, HQ 1080p, and 4K formats and the thumbnails will be available in SD, HD(720), and Full HD(1080).
Steps to Download:
- Copy the link of the youtube video you wish to generate the thumbnail
- Click Here to open this free tool with your browser and paste the link in the box displayed at the top
- As soon as you paste the link, the available qualities of the thumbnail will be displayed just below the box
- Choose your desired quality of the image and hit on the Download button on the image you wish to download
The image will be downloaded and saved to your device instantly. You can now use it as a thumbnail for your YouTube video.
3. Thumbnail Save Tool
The Thumbnail Save Tool is also a free online tool which you can access from the browser of your Windows or Mac. It is a very simple tool that can generate thumbnails for HQ, HD, 1080P, and 4K videos instantly. Let us see how the thumbnail can be generated
Steps to Download:
- Copy the URL of the video you want to create thumbnail
- Open this Thumbnail Save Tool from Here via your browser
- Paste the copied link in the box above Submit and hit Submit. Then the thumbnail will be generated instantly
- Now, to save the generated image to your device, right-click on the thumbnail and select the Save image as… option
The image will be saved to your device for later use as a thumbnail for your YouTube video.
4. YouTube Thumbnail Grabber
The YouTube thumbnail grabber is an online tool that can help you to download a thumbnail from a YouTube video for free. This tool can simply be accessed both by windows and Mac users through any browser. This tool helps you to download a thumbnail in any quality in some simple steps. Let us see how.
Steps to Download:
- Open this youtube thumbnail grabber from Here with any browser. Then Copy the link of the youtube video.
- Paste the link in the box displayed on the page and hit the Get Thumbnails Image tab
- Five different qualities of thumbnails will be generated among which you can choose your desired quality
- Hit the Download button below the image you chose
The thumbnail will be downloaded to your device for later use.
5. Thumbnail Download Tool
This thumbnail download tool allows generating thumbnails from video platforms like Dailymotion, Vimeo, Facebook, and YouTube. It is a free online tool that enables you to download the thumbnail of your video in the best quality. The tool can be accessed both on Windows and Mac OS without any issues. Let us see how the thumbnail can be downloaded for YouTube.
Steps to Download:
- Copy the URL link of the video you wish to generate a thumbnail
- Click Here to open this Thumbnail Download Tool with your browseron any browser of your Windows or iOS.
- Paste the copied link in the box and press the Download button
- Choose the picture size among the results displayed
- Save the picture to your PC
Your thumbnail image is now ready to be used.
6. YouTube Thumbnail Downloader
The YouTube Thumbnail Downloader is an online tool that can help you to create thumbnails for your YouTube videos and blogs. This tool will help you to download full HD 1080*720 images from YouTube for free, irrespective of the operative system you are using. Let us see how the thumbnail can be downloaded
Steps to Download:
- Copy the link of any YouTube video you wish to generate a thumbnail
- Click Here in your browser and Paste the link in the box
- Hit the Find button. Then different qualities of the image will be displayed
- Select your desired quality and tap on the download icon on the respective image
The image will now be saved to your device
Bonus Tips to Create a Clickable YouTube Thumbnail
Don’t know how to create a clickable youtube thumbnail? Here we will recommend 5 tips for you!
1. Great thumbnail image quality and size
The thumbnail image quality should be good (HD/UHD). It should be bright. No matter what the device (a large TV) the viewers are using, care must be taken to avoid getting blurry thumbnails. The quality and the correct size of the thumbnail will create a positive image of the video in the user’s mind even before viewing the video. The video must be viewed from a variety of devices to test if the quality differs in different devices. Here are some specs for a perfect thumbnail
- The image formats should be in GIF, JPG PNG OR BMP
- The maximum size of the image must be 1280*720 px
- The minimum size 640*360 px
- The aspect ratio 16:9
- The maximum file size 2MB
2. Show a person in the Thumbnail image
A human face will get you closer to your audience. Our brain is wired in a way that a human face will draw its attention more than anything. So the users will naturally would an image with a human delivering the content rather than a robot or just a video of nonliving things. People tend to find a connection with the characters displayed on the thumbnail and hence prompting them to click on the video.
3. Use descriptive text in your thumbnail with branding elements
It is not completely possible to deliver a message through a picture and hence try to use descriptive texts. The texts should be clear enough and must be phrased in a manner that increases the curiosity or appeals to the emotions of the viewers. People tend to click a video just because of curiosity, wanting to know what the content is about. The type of font, color, and size also plays an important role in catching the attention of the audience.
4. Make Color Contrast between the text and background
Complementary colors will make your thumbnail stand out to some extent. Combining a yellow background with a purple foreground or green with red will make it easier to draw the attention of the browsers. Also, the use of analogous colors in the thumbnail makes it more attractive and pleasing to the eye.
Image resource: Pinterest
Analogous colors are the colors that appear next to each other on a color wheel
5. Consistency
Consistency is something most of the people prefer and makes a thing more attractive. A thumbnail video with consistent text font, color tuning, visual effect, etc. will catch the eye of the users as it will stand apart in the whole webpage. Consistency adds to the standards of a video and will make people feel that this video is productive or from an authentic source
Create Your Own YouTube Thumbnail with Filmora for Free
Now that we have learned about how to download YouTube thumbnail for free and the rules you should follows, you may want to create a thumbnail. There are many Youtube thumbnail makers on the market that can help you create a YouTube thumbnail like Canva, PixStudio and more. However, we would like to be different today and recommend Filmora to you.
The benefits of using Filmora to create your YouTube thumbnail is that you don’t need to look for other softwares. You can make a thumbnail while you are editing your video with Filmora easily.
Wondering how can you do it? Here is a video guide for you.
Conclusion
Getting the proper size and quality of a YouTube thumbnail is very important for activities like blogging, designing, etc. Here in this article, we have described how to download YouTube thumbnail from the best free downloaders available online in simple steps. These Thumbnail downloading tools can be accessed from any device with an internet connection and will help you to download the perfect thumbnail image of your choice within minutes. Please leave your feedback about our suggestions in the comment box below.
Richard Bennett
Richard Bennett is a writer and a lover of all things video.
Follow @Richard Bennett
Also read:
- Essential Tips for Creating Compelling Free Ads on YouTube for 2024
- In 2024, Adjust Cutting Room Time for YouTube
- 2024 Approved Cut Beyond Youtube Unveiling the Top 5 Video Editor Options
- Unveiling the Secrets of Video Editing on YouTube
- 10 Best Video Streaming Alternatives to YouTube for Smartphone Users for 2024
- Cross-Application Title Strategy Consistent & Coherent for 2024
- 30 Powerful FreeGame Hashtags for Dominating YouTube for 2024
- Income Growth in Gaming Videos
- Elevating Your Channel YouTube Backlink Basics
- Quick Steps to Validate Your YouTube Login
- Binge-Watch With Ease Best Playlist Extractors Reviewed & Rated
- [New] Enhance TV Screens With Automatic Loops of YouTube
- 2024 Approved Achieving a Noiseless Presence on Social Video Platforms
- Secrets to Surpassing the Top in YouTube Fame
- Capitalizing on Hairstyle Demonstrations
- Is Paying Monthly Just For Ad-Free Streaming, Or Are There More Benefits?
- [Updated] Clear Shots for YouTube Filmmakers
- In 2024, A Step-by-Step Approach to Generating Income with Trailers
- Decoding the Core Contrasts Between YouTube and DailyMention
- Unlock 50 Exclusive YouTube Banner Free Gifts
- A Beginner's Blueprint Setting Up on YouTube
- [New] Craft Visionary Videos From Start to Finish Using YouTube Studio Editor
- A Step-by-Step Approach to Mastering Free YouTube Video Transcription for 2024
- Climbing the YouTube Search Rankings Key SEO Strategies Unveiled for 2024
- YouTube Creator Studio Unlocking the Power of Your Channel
- 2024 Approved Coordinating Multiple Channels on One Screen
- Striking a Balance in YouTube Thumbnail Sizing
- 2024 Approved 10 Premium Yoga Channels for Ultimate Fitness Journey
- 2024 Approved Easy Replay on iPhone Set Videos Cycling
- Escaping YouTube Ranked List of 27 Alternative Streaming Services
- In 2024, Essential Video Concepts Fueling Creativity in YouTube Channels
- [Updated] Cut the Clutter Advanced Techniques with YouTube Studio Editor
- Your Complete Breakdown of YouTube Short Content
- In 2024, Crafting Exceptional FreeFire Content on YouTube Platforms
- In 2024, Alternative Cinema Highlights Audiences
- Efficiency in Social Media Sharing Tweets with Snapchat
- How to Share Location in Messenger On Vivo X100? | Dr.fone
- 5 Solutions For Meizu 21 Unlock Without Password
- How do you play .mov files on Redmi A2 ?
- Calls on Oppo A1 5G Go Straight to Voicemail? 12 Fixes | Dr.fone
- All Things You Need to Know about Wipe Data/Factory Reset For Lava Yuva 2 Pro | Dr.fone
- In 2024, iPogo will be the new iSpoofer On OnePlus Nord N30 5G? | Dr.fone
- [Updated] Revolutionary Gameplay Preservation with Advanced FBX Recording for 2024
- Updated 2024 Approved Analyze and Adapt Image Size Ratio
- Updated Top 11 No-Cost Audio Transformation Apps for iOS Devices for 2024
- Acclaimed Cameras for Expert Automotive Tracking
- Advanced Windows 11 Video Recording Software Guide for 2024
- Updated 2024 Approved Mac Video Editing Essentials Best Software Options
- In 2024, Hot Pursuit of Snaps - Tactics for Uninterrupted Streaks
- Harmony and Code The Elite Circle S Digital Compositional Geniuses
- 2024 Approved How to Record Overwatch
- Replace VSDC with These Top-Notch Video Editors on Mac for 2024
- Title: "[Updated] Edible Imagery Stepwise Food Film Making"
- Author: Steven
- Created at : 2024-05-25 20:56:49
- Updated at : 2024-05-26 20:56:49
- Link: https://youtube-clips.techidaily.com/updated-edible-imagery-stepwise-food-film-making/
- License: This work is licensed under CC BY-NC-SA 4.0.
