
!["[Updated] Dive Into Old Content YouTube Video Recovery Guide"](https://www.lifewire.com/thmb/ZfXDt5cUhFXvIGt8owm9r2kbia4=/400x300/filters:no_upscale():max_bytes(150000):strip_icc()/set-top-dvr-1130767-f2aa7f11e3d2442b966d53b8aa2d25fd.png)
"[Updated] Dive Into Old Content YouTube Video Recovery Guide"
Dive Into Old Content: YouTube Video Recovery Guide
How to Watch Deleted YouTube Videos Online in 2 Ways | Ultimate Guide

Richard Bennett
Mar 27, 2024• Proven solutions


YouTube features a wide variety of corporate and user-generated content ranging from music to DIY videos. Along with all this massive inflow, there are scenarios where the video content that you like or wanted to watch gets deleted for any reason. Either the uploading channel deleted the video, or YouTube sometimes deletes videos for violating any of the platform’s rules – showing the dismal message “We’re sorry, this video is no longer available”. You’ll be thinking it is probably impossible to access deleted YouTube videos that you wanted to watch so badly. Though it may be true to some extent, in reality, nothing gets deleted from the internet. To help you watch deleted YouTube videos, we’ll dive into the two most handy methods down below. So, let get started.
You might be interested in How to Make a Playlist of Uploaded Videos and Others’ Video on YouTube>>>
- Part 1: Watch Deleted YouTube Videos with a URL
- Part 2: Watch Deleted YouTube Videos without a URL
- Part 3: Bonus Tip—Make Your Own YouTube Video with Wondershare FilmoraX
Part 1: Watch Deleted YouTube Videos with a URL
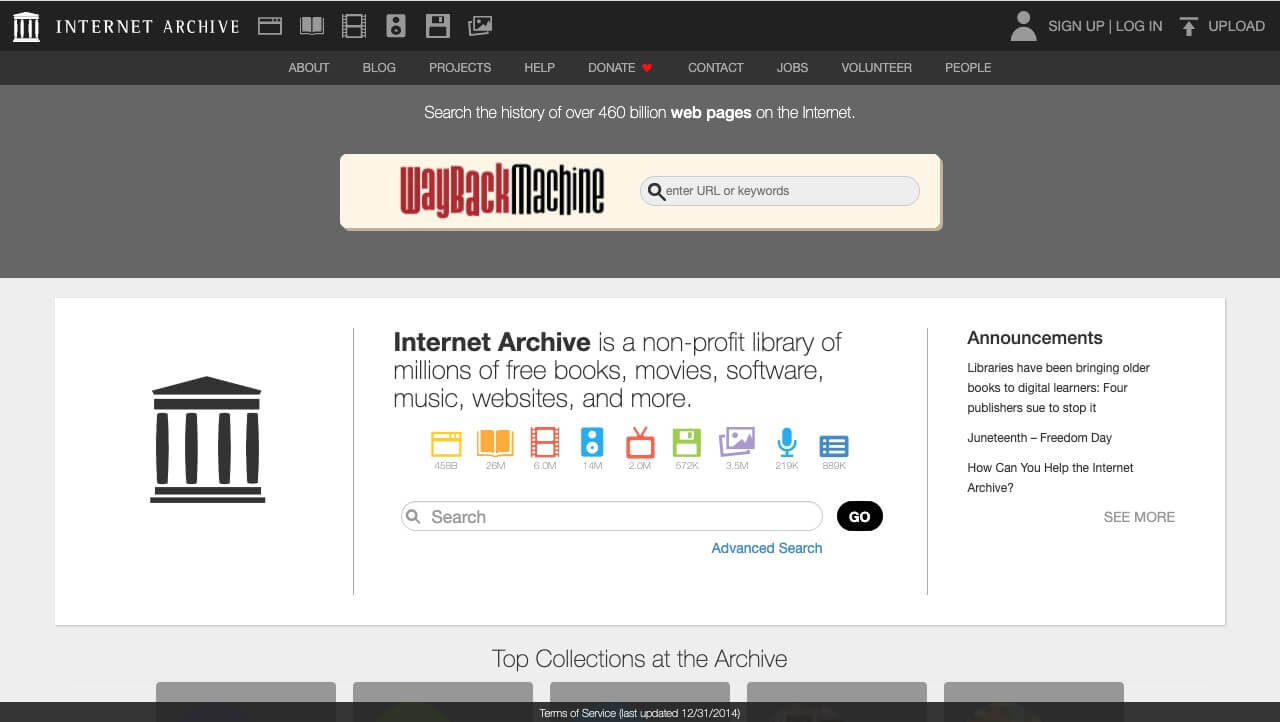
Internet Archive(known as the Wayback Machine) is a website archival system that has been collecting and cataloging websites since 1996. This means the system has effectively saved the site’s current layout and data. This enormous world archive of the Web’s past has amassed over 100 terabytes of storage with around 10 billion web pages.
On the archive.org website, you can find many of your favorite web site’s “snapshot” at a time in the past. For our case, we need to find and watch deleted YouTube videos, so for that, all we need is the link of the video, and we can most probably find it on archive.org. The steps for finding and restoring deleted YouTube videos are simple and as follows.
1. First of all, find the URL in your YouTube email, channel account if you’re searching for your uploaded video. You can find the link in browser history, in YouTube history, or you may have shared the link on social media.
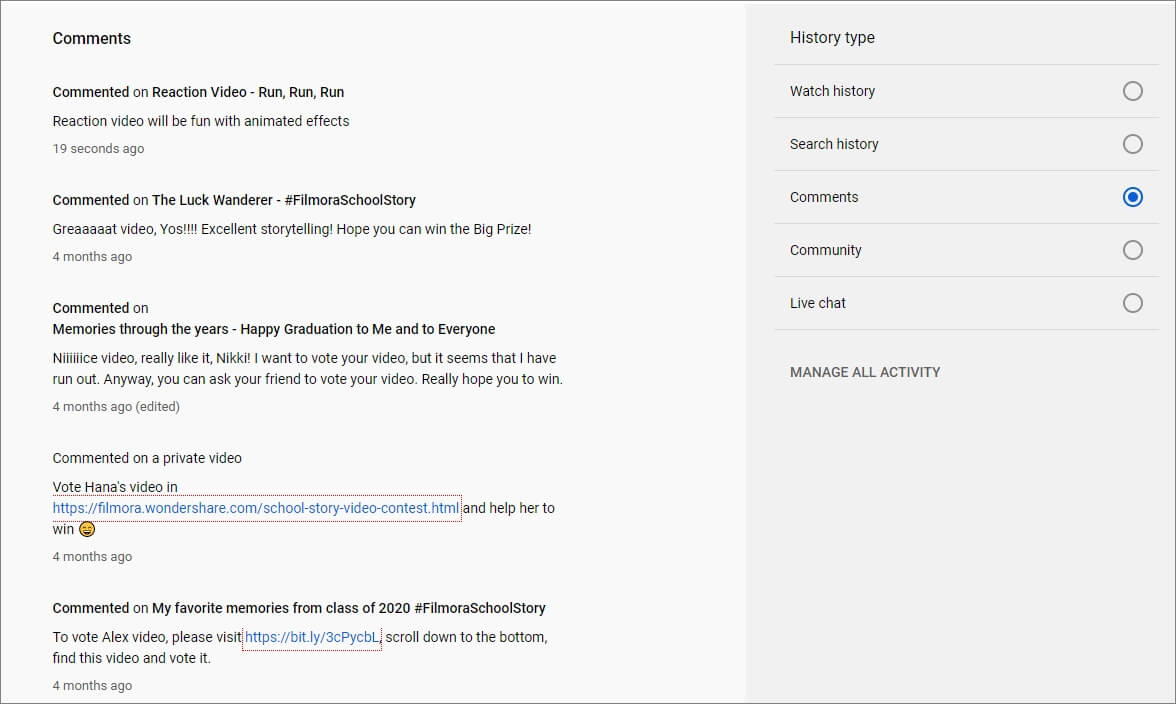
If you want to watch a deleted YouTube video using the Wayback Machine, you must find the link to the video you want to access; without the URL, you won’t be able to access the deleted YouTube video.
2. Head over to the archive.org website and paste the YouTube video URL in the search bar and press return.
3. Once you find your video on the internet archive, you can see the details of the video.
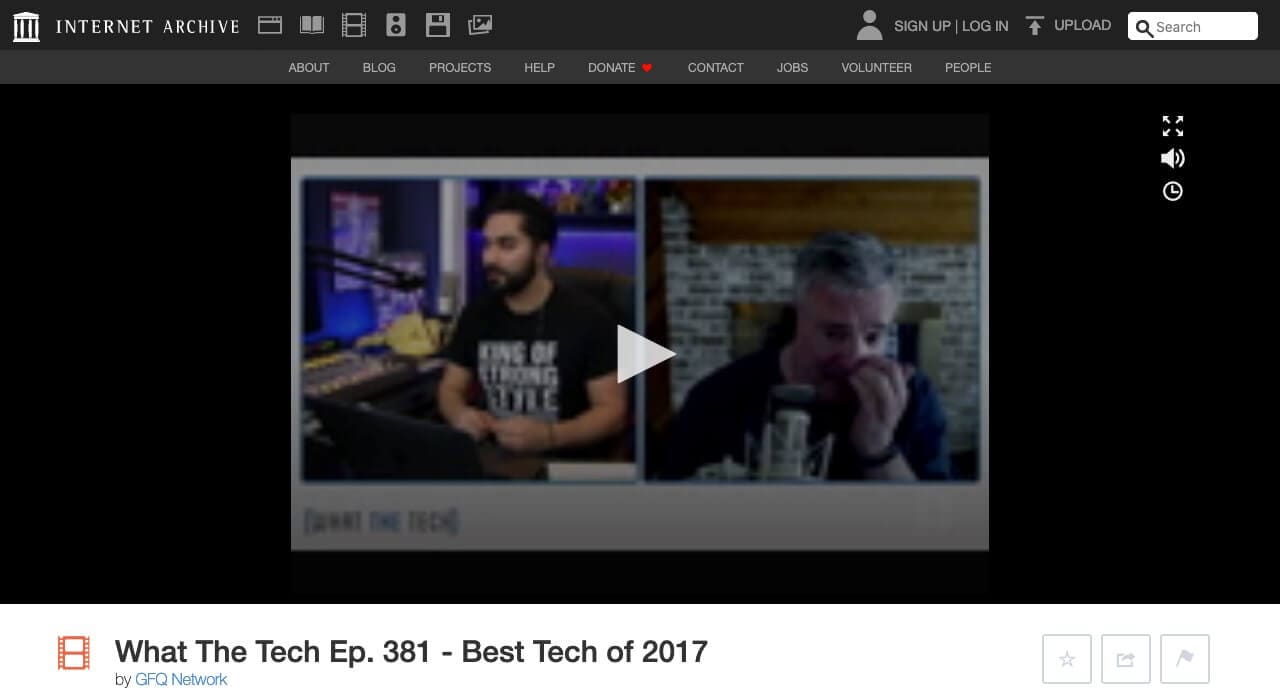
4. You won’t be able to play the video directly, but you should be able to download it. Right, click the video to find the option to download the video.

This method works mostly as the Wayback machine is pretty active and regularly crawls the web to archive the sites. But sometimes, this method may not work and would require a more sophisticated way to watch deleted YouTube videos.
Part 2: Watch Deleted YouTube Videos without a URL
But what if you don’t have a URL for the deleted YouTube video? The internet is a global village network. Everything on the internet is connected, and that connection makes it more useful for example, even though a YouTube video might be deleted, you can somehow access and watch the deleted YouTube videos without a URL because people always replicate videos and share them on other YouTube channels or social media platforms. To make sure you get to watch your favorite YouTube video again, we will dive into the vast internet and find the deleted YouTube videos.
This method can be a bit complicated and would require you to give full attention to find the video you want to watch that badly that you’ve landed on this article.
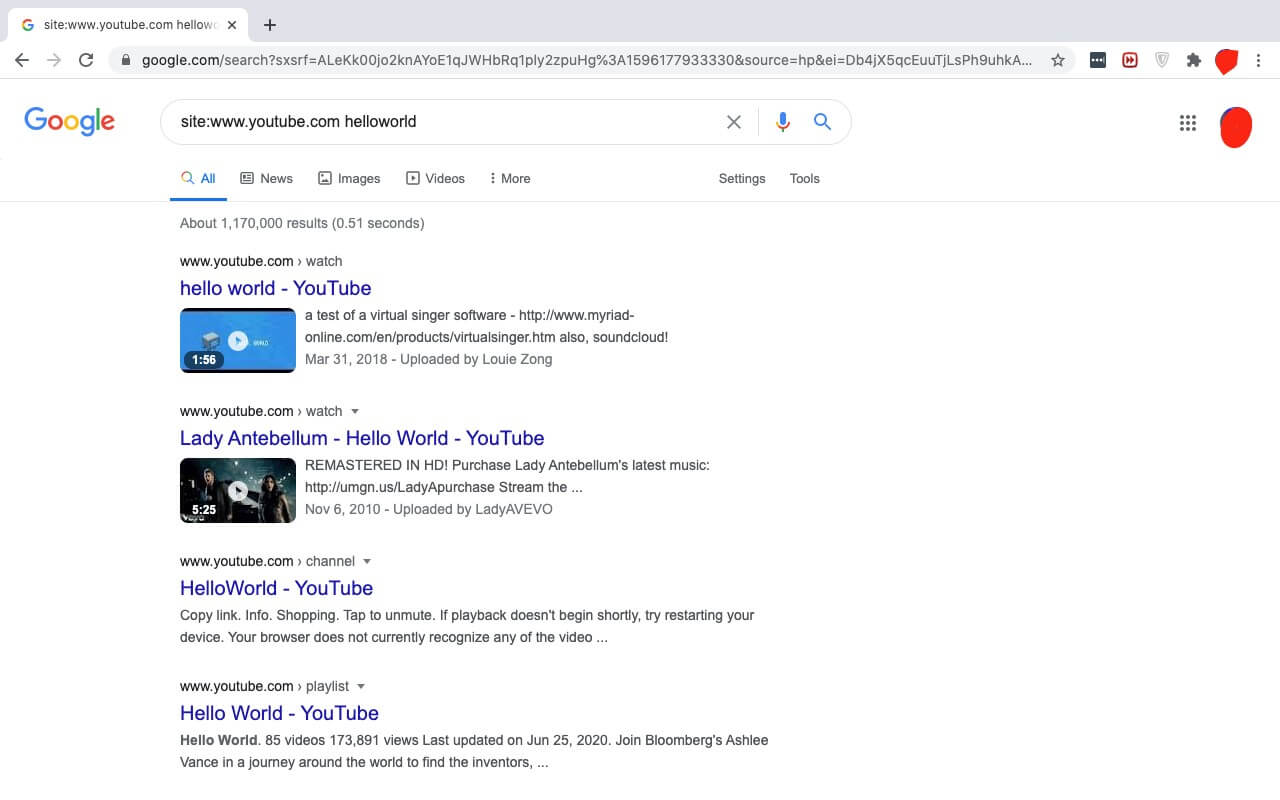
1. Open a new tab in your browser and go to the Google search bar. We’re going to employ a technique from the SEO expert’s toolbox – Google Search Operators.
2. In the search bar, type “site:www.youtube.com + name Of TheVideo”
3. This way Google will crawl all the name relevant videos only from the YouTube databases and move us closer to finding our deleted YouTube video.
4. If you know the video was shared by someone on Facebook or any other social media platform, you can change the site URL in the search bar, replacing YouTube with Facebook, for example.
5. Once you find the video URL, you can simply go back to the first method that we discussed and paste the URL into the internet archive. The archive will give you the video and you can enjoy watching a deleted YouTube video.
Note: If you still cannot find the video using this method, I’m sorry to tell you the video may be completely deleted from the server, and you cannot access it anymore.
Part 3: Bonus Tip—Make Your Own YouTube Video with Wondershare Filmora
Want to make a YouTube video again? Wondershare Filmora is a relatively lightweight and powerful platform you get an intuitive interface and the power to create wonderful, unique content. To help you make your own YouTube video with Filmora, we’ll go through a short introduction of the flow and features first:
- Organize media with folders and projects
- Cutting and trimming raw footage
- Unlimited Layering
- Visual effects and filters
- Attach/detach audio and music
- Add creative text and icons with a wide range of templates to choose from
- Advanced color correction tools
- Export videos to YouTube directly and support various output formats
Make a YouTube video with several clicks using Wondershare Filmora:
1. Download and install Wondershare Filmora on your computer by tapping the download wizard below. Remember to join the Wondershare Video Community to connect with other video creators.
2. Launch Wondershare Filmora, add your videos to the Media Library. And you’ll also be greeted with a sleek and simple interface with controls for everything such as transitions, titles, layering clips, soundtrack, and more.

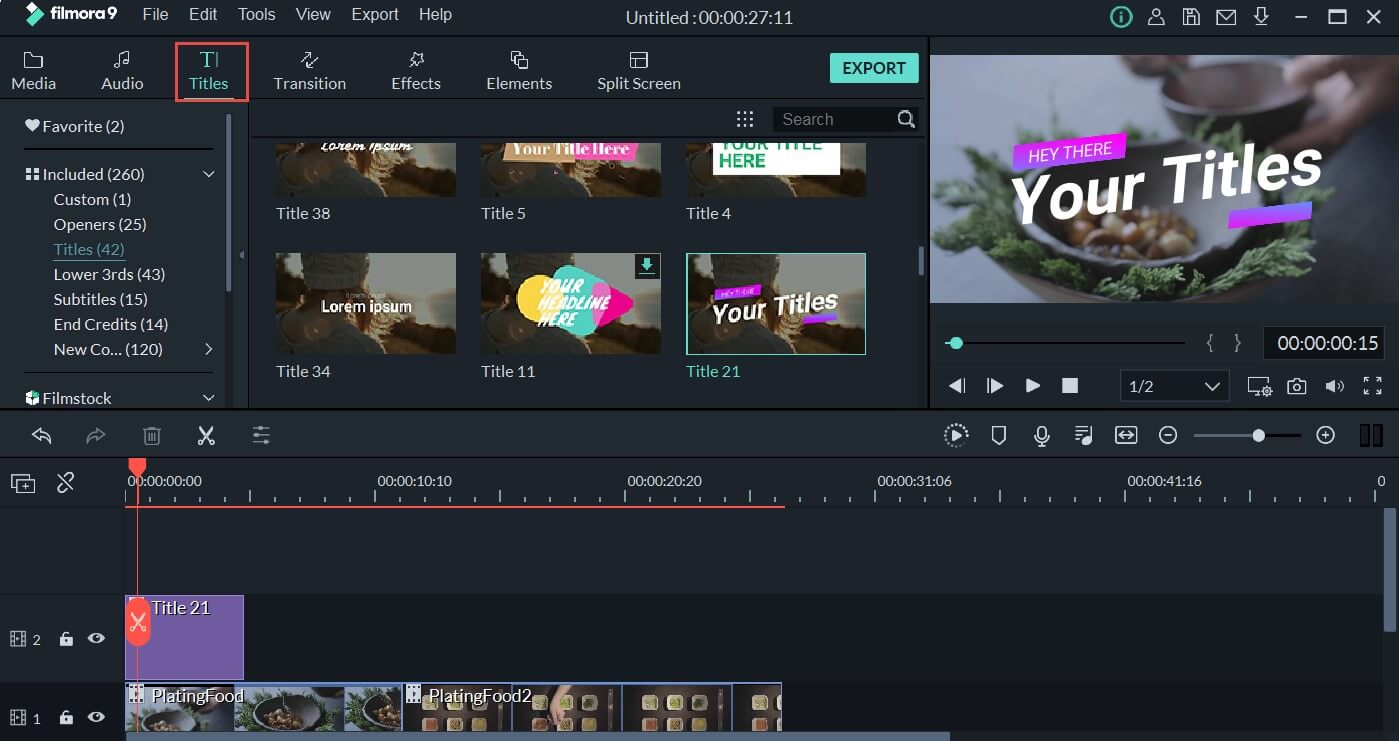
3. Add your video to the timeline, then go to the Titles tab, and you will see hundreds of titles and text templates. Select the template you love and add it to the video.
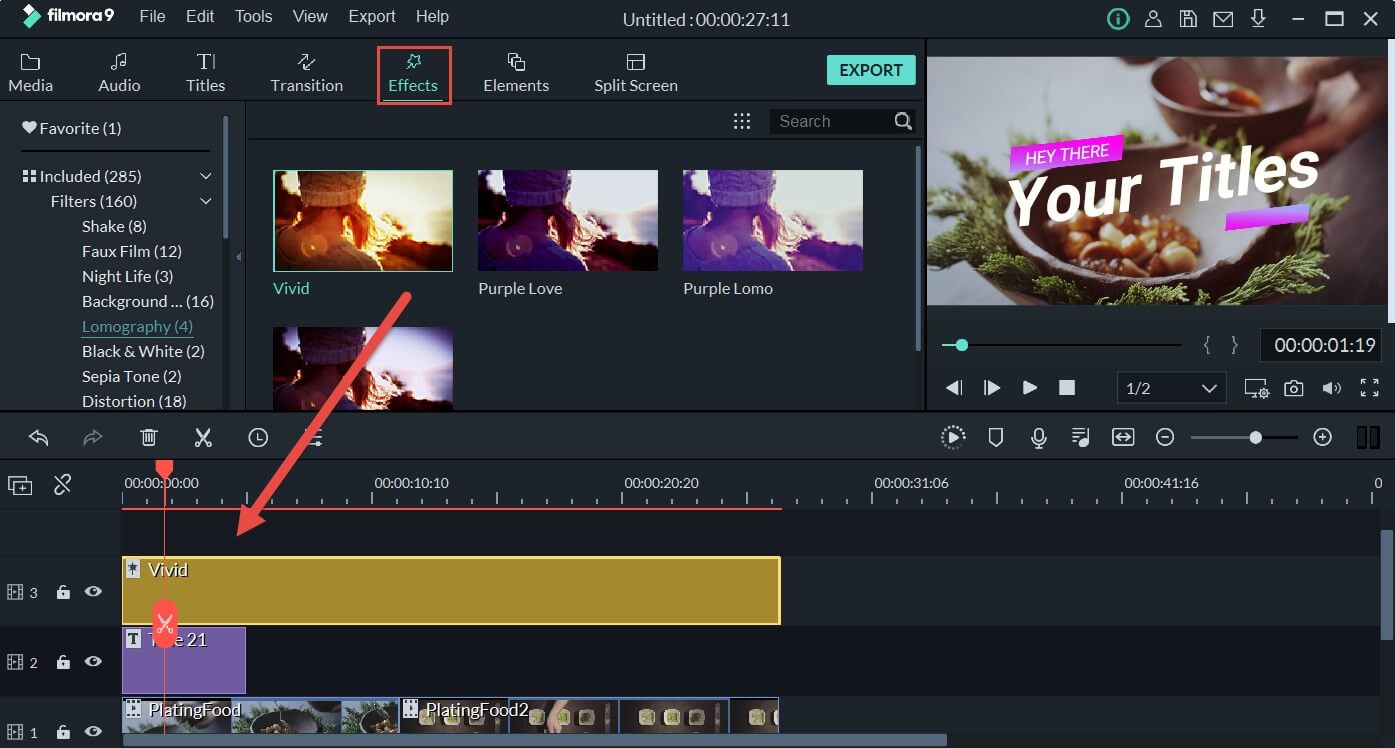
4. Then you can also go to the Effects tab and apply astonishing filters to the video
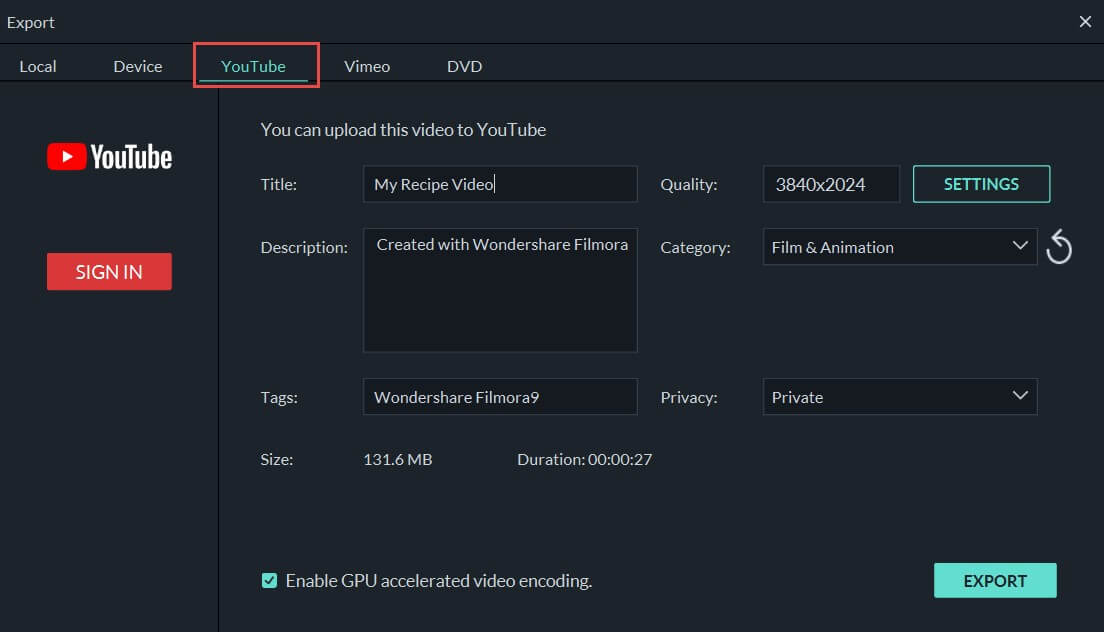
5. Once you’re done, you can click Export and upload your video to YouTube directly.
The free version will have a watermark on the exported video.
There’s nothing more delightful than to put your skills to work and save time by using Filmora. The time you save can be put into making more content and editing videos to boast of your creativity to friends.
Conclusion
YouTube has immersed so much in our day-to-day life that on average a mobile viewing session lasts more than 40 mins. To satiate our thirst for video content, YouTube has become the sole free platform. But even if your favorite song or movie gets deleted, you don’t have to worry as I’ve compiled the best solution to watch deleted YouTube videos and even be able to restore deleted YouTube videos to relish watching them with your friends and family. Leave your comments below if you love this article.
Richard Bennett
Richard Bennett is a writer and a lover of all things video.
Follow @Richard Bennett
Richard Bennett
Mar 27, 2024• Proven solutions
YouTube features a wide variety of corporate and user-generated content ranging from music to DIY videos. Along with all this massive inflow, there are scenarios where the video content that you like or wanted to watch gets deleted for any reason. Either the uploading channel deleted the video, or YouTube sometimes deletes videos for violating any of the platform’s rules – showing the dismal message “We’re sorry, this video is no longer available”. You’ll be thinking it is probably impossible to access deleted YouTube videos that you wanted to watch so badly. Though it may be true to some extent, in reality, nothing gets deleted from the internet. To help you watch deleted YouTube videos, we’ll dive into the two most handy methods down below. So, let get started.
You might be interested in How to Make a Playlist of Uploaded Videos and Others’ Video on YouTube>>>
- Part 1: Watch Deleted YouTube Videos with a URL
- Part 2: Watch Deleted YouTube Videos without a URL
- Part 3: Bonus Tip—Make Your Own YouTube Video with Wondershare FilmoraX
Part 1: Watch Deleted YouTube Videos with a URL
Internet Archive(known as the Wayback Machine) is a website archival system that has been collecting and cataloging websites since 1996. This means the system has effectively saved the site’s current layout and data. This enormous world archive of the Web’s past has amassed over 100 terabytes of storage with around 10 billion web pages.
On the archive.org website, you can find many of your favorite web site’s “snapshot” at a time in the past. For our case, we need to find and watch deleted YouTube videos, so for that, all we need is the link of the video, and we can most probably find it on archive.org. The steps for finding and restoring deleted YouTube videos are simple and as follows.
1. First of all, find the URL in your YouTube email, channel account if you’re searching for your uploaded video. You can find the link in browser history, in YouTube history, or you may have shared the link on social media.
If you want to watch a deleted YouTube video using the Wayback Machine, you must find the link to the video you want to access; without the URL, you won’t be able to access the deleted YouTube video.
2. Head over to the archive.org website and paste the YouTube video URL in the search bar and press return.
3. Once you find your video on the internet archive, you can see the details of the video.
4. You won’t be able to play the video directly, but you should be able to download it. Right, click the video to find the option to download the video.
This method works mostly as the Wayback machine is pretty active and regularly crawls the web to archive the sites. But sometimes, this method may not work and would require a more sophisticated way to watch deleted YouTube videos.
Part 2: Watch Deleted YouTube Videos without a URL
But what if you don’t have a URL for the deleted YouTube video? The internet is a global village network. Everything on the internet is connected, and that connection makes it more useful for example, even though a YouTube video might be deleted, you can somehow access and watch the deleted YouTube videos without a URL because people always replicate videos and share them on other YouTube channels or social media platforms. To make sure you get to watch your favorite YouTube video again, we will dive into the vast internet and find the deleted YouTube videos.
This method can be a bit complicated and would require you to give full attention to find the video you want to watch that badly that you’ve landed on this article.
1. Open a new tab in your browser and go to the Google search bar. We’re going to employ a technique from the SEO expert’s toolbox – Google Search Operators.
2. In the search bar, type “site:www.youtube.com + name Of TheVideo”
3. This way Google will crawl all the name relevant videos only from the YouTube databases and move us closer to finding our deleted YouTube video.
4. If you know the video was shared by someone on Facebook or any other social media platform, you can change the site URL in the search bar, replacing YouTube with Facebook, for example.
5. Once you find the video URL, you can simply go back to the first method that we discussed and paste the URL into the internet archive. The archive will give you the video and you can enjoy watching a deleted YouTube video.
Note: If you still cannot find the video using this method, I’m sorry to tell you the video may be completely deleted from the server, and you cannot access it anymore.
Part 3: Bonus Tip—Make Your Own YouTube Video with Wondershare Filmora
Want to make a YouTube video again? Wondershare Filmora is a relatively lightweight and powerful platform you get an intuitive interface and the power to create wonderful, unique content. To help you make your own YouTube video with Filmora, we’ll go through a short introduction of the flow and features first:
- Organize media with folders and projects
- Cutting and trimming raw footage
- Unlimited Layering
- Visual effects and filters
- Attach/detach audio and music
- Add creative text and icons with a wide range of templates to choose from
- Advanced color correction tools
- Export videos to YouTube directly and support various output formats
Make a YouTube video with several clicks using Wondershare Filmora:
1. Download and install Wondershare Filmora on your computer by tapping the download wizard below. Remember to join the Wondershare Video Community to connect with other video creators.
2. Launch Wondershare Filmora, add your videos to the Media Library. And you’ll also be greeted with a sleek and simple interface with controls for everything such as transitions, titles, layering clips, soundtrack, and more.
3. Add your video to the timeline, then go to the Titles tab, and you will see hundreds of titles and text templates. Select the template you love and add it to the video.
4. Then you can also go to the Effects tab and apply astonishing filters to the video
5. Once you’re done, you can click Export and upload your video to YouTube directly.
The free version will have a watermark on the exported video.
There’s nothing more delightful than to put your skills to work and save time by using Filmora. The time you save can be put into making more content and editing videos to boast of your creativity to friends.
Conclusion
YouTube has immersed so much in our day-to-day life that on average a mobile viewing session lasts more than 40 mins. To satiate our thirst for video content, YouTube has become the sole free platform. But even if your favorite song or movie gets deleted, you don’t have to worry as I’ve compiled the best solution to watch deleted YouTube videos and even be able to restore deleted YouTube videos to relish watching them with your friends and family. Leave your comments below if you love this article.
Richard Bennett
Richard Bennett is a writer and a lover of all things video.
Follow @Richard Bennett
Essential MP4 Software: Elevate Your Mac Productions
What is the Best MP4 Cutter for YouTubers On Mac?

Liza Brown
Oct 26, 2023• Proven solutions
Editing videos is a big part of YouTubers’ job including cutting MP4, customizing intros and outros, grading video colors, adding a multitude of effects, and many more. All YouTube celebrities use a diverse set of video editing features such as filters, transitions, custom titles and captions, and overlays.
These post-processing effects ensure that their videos don’t only look aesthetically pleasing but are more engaging and interactive to keep their viewers hooked from the beginning right till the end. This is exactly why cutting MP4 videos and editing have become monumentally significant for newcomers.
Having said that, most of the beginners and hobbyists either can’t afford or want to pay for professional video editing software for cutting MP4 such as Adobe Premiere or Final Cut Pro. In this time, FilmoraX will be a better choice to cut MP4 for Youtube
Before we further delve into the details of advanced video cutter functions, let’s first develop an understanding of the basics.
Section1. Basic Video Cutter Functions
Section2. Advanced Video Cutter Functions
Section 1. Basic Video Cutter Functions
These are the features of cutting MP4 videos that are used by almost all of the YouTuber to give their videos a more engaging look and contextualize them based on the content. For instance, almost all of the YouTubers use customized captions and titles to share information that is highly valuable for the viewers and enables them to develop a connection with the YouTuber.
Almost all of the YouTubers have customized intros and outros in their videos but some of the notable names include MKBHD, PewDiePie, and Smosh. In the process of cutting MP4 videos, they add these effects to create a brand for themselves.
One of the most basic functions of cutting MP4 or other videos intended for YouTube audiences is to add your intro and outro.
- Intro - It is a customized beginning where YouTubers usually add their channel name or its logo along with the title of the video. This helps them to develop a personal brand and add context to what their audience is about to see.
- Outro - It is the customized ending of the video where most content creators choose to add a call to action (CTA) encouraging them to engage with the channel or the video in some manner. For example, they may add an outro that asks the users to subscribe to the YouTube channel.

These are customized stickers, captions, and titles that enable YouTubers to add contextual information at any point in the video to add more value to their content during the process of cutting MP4 videos. For example, if a YouTuber is running a smartphone review channel, they can add rich stickers that contain specifications of the smartphone for those who are interested in particulars.
Including such information, while cutting MP4 also adds to the credibility of the content creator as they are perceived as more professional and dedicated to their job.

Steps to Perform Basic Video Cutter Effects on Filmora X
Here’s how you can add intros and outros to your YouTube videos using Wondershare Filmora X for cutting MP4 videos.
- Add intro background and select your favorite audio or sound effect
- Add your logo and/or text to the intro video
- Now add cool effects to improve the appearance of your intro
- Export your intro video and add it to shared media
You can also use Filmora templates for cutting MP4 videos to create your intro video for your YouTube content.
In Filmora, you will find a wide variety of templates for titles, openers, end credits, plain texts, callouts, and more for cutting MP4 and other video formats. You can use the premade template to add the desired text effect and then edit them according to your preferences. If you want to use these settings again, save the customized text effects as presets. It will save you a lot of time.
Section 2. Advanced Video Cutter Functions

These are the cutting MP4 effects that aren’t used by beginners but hobbyists and professional video content creators may use them to add production value and interactive dimension to their content.
- Green Screen - This effect allows YouTubers to add any type of live or static background while cutting MP4 videos adding production value to their video.
- Motion Tracking - This is a cinematic method that enables YouTubers to include digital visuals in live-action video. It ensures that everything including scale, position, relative motion, and orientation is accurate.
- Color Matching - If you are shooting your video with different cameras, every camera records the footage in its own color profile. Color matching is used to introduce color consistency throughout the video. Filmora X is perfectly capable of handling color matching while you are cutting MP4 and other videos.
Some of the channels and YouTubers that rely on advanced video cutting MP4 effects include Vlad and Niki, MKBHD, Dude Perfect, Canal KondZilla, Like Nastya Vlog, and Kids Diana Show.
Performing Advanced Cutting MP4 Video Effects on Filmora X
Step 1 - Set up and position the green screen and add adequate lighting.
Step 2 - Make sure that you don’t wear anything that’s green and start shooting.
Step 3 - Download green screen backgrounds from the website of your choice.
Step 4 - Import your green screen footage into Filmora X and adjust the settings according to your preferences.
Step 5 - Position the background-clip so it looks natural and then export the video in your required format (MP4).
Step 1 - Go to Behaviors in Control Panel and select the top clip. Then click on the “plus” button right next to Behaviors.
Step 2 - Here, select the motion track from the list and open the folder to select the footage you want to track.
Step 3 - This will automatically start motion analysis of the video clip and you’ll be notified with grey tracker points once the analysis is complete.
Step 4 - You can draw around the region that you want to follow the motion and it will be automatically applied to the object.
Step 5 - Preview the clip and adjust any settings if the result isn’t according to your liking.
Step 1 - Drag the video clip to your timeline and move the play head to the frame you want to color match.
Step 2 - Select the remaining video clips and apply color matching through the right-click or the toolbar. Select the frame as a reference and click on ‘Match’.
Step 3 - Now, using the slider, adjust the extent to which you want the color setting of other clips that need to be matched. See the result in the ‘comparison view’.
Final Word
Cutting MP4 or other videos for YouTube content creation is a major part of the process. You need to have reliable and versatile video editing software that can get the job done without any hassle. And while there are professional packages available, they cost way too much for the YouTubers who are just starting out or are just hobbyists. That’s where Filmora X can be an exceptional alternative offering a wide variety of features at a fraction of the cost.
You can tryFilmora X for free for cutting MP4 videos before you pay for the fully-featured software.
You May Also Like:How do Beginners Make a Cool Video for YouTube on Mac>>>
Liza Brown
Liza Brown is a writer and a lover of all things video.
Follow @Liza Brown
Liza Brown
Oct 26, 2023• Proven solutions
Editing videos is a big part of YouTubers’ job including cutting MP4, customizing intros and outros, grading video colors, adding a multitude of effects, and many more. All YouTube celebrities use a diverse set of video editing features such as filters, transitions, custom titles and captions, and overlays.
These post-processing effects ensure that their videos don’t only look aesthetically pleasing but are more engaging and interactive to keep their viewers hooked from the beginning right till the end. This is exactly why cutting MP4 videos and editing have become monumentally significant for newcomers.
Having said that, most of the beginners and hobbyists either can’t afford or want to pay for professional video editing software for cutting MP4 such as Adobe Premiere or Final Cut Pro. In this time, FilmoraX will be a better choice to cut MP4 for Youtube
Before we further delve into the details of advanced video cutter functions, let’s first develop an understanding of the basics.
Section1. Basic Video Cutter Functions
Section2. Advanced Video Cutter Functions
Section 1. Basic Video Cutter Functions
These are the features of cutting MP4 videos that are used by almost all of the YouTuber to give their videos a more engaging look and contextualize them based on the content. For instance, almost all of the YouTubers use customized captions and titles to share information that is highly valuable for the viewers and enables them to develop a connection with the YouTuber.
Almost all of the YouTubers have customized intros and outros in their videos but some of the notable names include MKBHD, PewDiePie, and Smosh. In the process of cutting MP4 videos, they add these effects to create a brand for themselves.
One of the most basic functions of cutting MP4 or other videos intended for YouTube audiences is to add your intro and outro.
- Intro - It is a customized beginning where YouTubers usually add their channel name or its logo along with the title of the video. This helps them to develop a personal brand and add context to what their audience is about to see.
- Outro - It is the customized ending of the video where most content creators choose to add a call to action (CTA) encouraging them to engage with the channel or the video in some manner. For example, they may add an outro that asks the users to subscribe to the YouTube channel.
These are customized stickers, captions, and titles that enable YouTubers to add contextual information at any point in the video to add more value to their content during the process of cutting MP4 videos. For example, if a YouTuber is running a smartphone review channel, they can add rich stickers that contain specifications of the smartphone for those who are interested in particulars.
Including such information, while cutting MP4 also adds to the credibility of the content creator as they are perceived as more professional and dedicated to their job.
Steps to Perform Basic Video Cutter Effects on Filmora X
Here’s how you can add intros and outros to your YouTube videos using Wondershare Filmora X for cutting MP4 videos.
- Add intro background and select your favorite audio or sound effect
- Add your logo and/or text to the intro video
- Now add cool effects to improve the appearance of your intro
- Export your intro video and add it to shared media
You can also use Filmora templates for cutting MP4 videos to create your intro video for your YouTube content.
In Filmora, you will find a wide variety of templates for titles, openers, end credits, plain texts, callouts, and more for cutting MP4 and other video formats. You can use the premade template to add the desired text effect and then edit them according to your preferences. If you want to use these settings again, save the customized text effects as presets. It will save you a lot of time.
Section 2. Advanced Video Cutter Functions
These are the cutting MP4 effects that aren’t used by beginners but hobbyists and professional video content creators may use them to add production value and interactive dimension to their content.
- Green Screen - This effect allows YouTubers to add any type of live or static background while cutting MP4 videos adding production value to their video.
- Motion Tracking - This is a cinematic method that enables YouTubers to include digital visuals in live-action video. It ensures that everything including scale, position, relative motion, and orientation is accurate.
- Color Matching - If you are shooting your video with different cameras, every camera records the footage in its own color profile. Color matching is used to introduce color consistency throughout the video. Filmora X is perfectly capable of handling color matching while you are cutting MP4 and other videos.
Some of the channels and YouTubers that rely on advanced video cutting MP4 effects include Vlad and Niki, MKBHD, Dude Perfect, Canal KondZilla, Like Nastya Vlog, and Kids Diana Show.
Performing Advanced Cutting MP4 Video Effects on Filmora X
Step 1 - Set up and position the green screen and add adequate lighting.
Step 2 - Make sure that you don’t wear anything that’s green and start shooting.
Step 3 - Download green screen backgrounds from the website of your choice.
Step 4 - Import your green screen footage into Filmora X and adjust the settings according to your preferences.
Step 5 - Position the background-clip so it looks natural and then export the video in your required format (MP4).
Step 1 - Go to Behaviors in Control Panel and select the top clip. Then click on the “plus” button right next to Behaviors.
Step 2 - Here, select the motion track from the list and open the folder to select the footage you want to track.
Step 3 - This will automatically start motion analysis of the video clip and you’ll be notified with grey tracker points once the analysis is complete.
Step 4 - You can draw around the region that you want to follow the motion and it will be automatically applied to the object.
Step 5 - Preview the clip and adjust any settings if the result isn’t according to your liking.
Step 1 - Drag the video clip to your timeline and move the play head to the frame you want to color match.
Step 2 - Select the remaining video clips and apply color matching through the right-click or the toolbar. Select the frame as a reference and click on ‘Match’.
Step 3 - Now, using the slider, adjust the extent to which you want the color setting of other clips that need to be matched. See the result in the ‘comparison view’.
Final Word
Cutting MP4 or other videos for YouTube content creation is a major part of the process. You need to have reliable and versatile video editing software that can get the job done without any hassle. And while there are professional packages available, they cost way too much for the YouTubers who are just starting out or are just hobbyists. That’s where Filmora X can be an exceptional alternative offering a wide variety of features at a fraction of the cost.
You can tryFilmora X for free for cutting MP4 videos before you pay for the fully-featured software.
You May Also Like:How do Beginners Make a Cool Video for YouTube on Mac>>>
Liza Brown
Liza Brown is a writer and a lover of all things video.
Follow @Liza Brown
Also read:
- Step-by-Step for Compelling Haul Video Crafting
- Leveraging SEO in Youtube A Title & Tags Guidebook
- 2024 Approved How to Edit YouTube Videos in Finalcut Pro
- [New] Battlefront Bastion 100+ Epic Game Battles
- [Updated] Demystifying YouTube Analytics Views, Subscriptions & Profits
- In 2024, Adjust Cutting Room Time for YouTube
- 2024 Approved Essential Banner Design Rules for Top YouTube Channels
- Is YouTube's 4-Second Trick Effective?
- 2024 Approved Crafting Powerful Video Titles & Sizes
- Elevate Your Brand Discovering the Essential 5 YouTube Strategies
- In 2024, Boost Engagement on YouTube by Adding Emojis
- Comparative Content Crusade Analyzing Your Videos Against Others' For 2024
- [Updated] A Compreayer's Guide to Monetizing Videos Critical View Figures
- Beyond The Algorithm A Look at 27 Non-YouTube Platforms for 2024
- The Audio Advantage Elevating Sound Quality in YouTube Productions
- [Updated] Beyond the Basics Advanced Techniques for Improved Recordings
- 2024 Approved Deciding on a Personal Social Media Platform TikTok or YouTubes' Shorts?
- The Ultimate Guide to Closing Videos Effectively
- Enhance Your Channel's Image Adding Watermarks & Logos to Video Posts for 2024
- [Updated] Anime YouTube Essentials The Best 20 Channels
- [Updated] Delightful Digests A List of Top Food Channels
- Winning at FreeFire Top Strategies and Hashtags Shared
- 2024 Approved Comparing TikTok & YouTube Shorts for Personal Content Creation
- Enthralling Epics Essential Channel-Building Tactics for 2024
- 2024 Approved Enhancing Engagement How to Utilize YouTube's Prominent Channels
- 2024 Approved Double Down on Viewership YouTube + Twitch Strategy
- YouTube Studio's Pathway to High-Quality Videography
- Channel Marketing Making a Trailer that Sells More for 2024
- Strategies to Design Lively and Uplifting Content Shows
- [New] Top 20 TikTok Anthems Discovering Today’s Hip-Hop Stars for 2024
- [New] Enhancing Meet Visuals Applying Filters, Effects & Masks
- Remove FRP Lock on Sony Xperia 10 V
- [Updated] Mouthwatering Moments The Hottest TikTok Food Videos for the Modern Kitchen Aficionado for 2024
- [New] 2024 Approved Navigating Zoom Technology for Professional Use
- In 2024, How to Change Lock Screen Wallpaper on Oppo Reno 11F 5G
- How to Reset a Locked Poco X6 Phone
- Unlock Your Disabled Apple iPhone 12 Pro Max Without iTunes in 5 Ways
- The Ultimate Guide to Clearing Vids of Stickers
- Comprehensive Guide to Capturing LOL Showdowns
- Xiaomi Redmi 13C 5G Bootloop Problem, How to Fix it Without Data Loss | Dr.fone
- [Updated] Best Video Gear of 2024 – Our Curated List Unleashed
- [Updated] 2024 Approved The Ultimate Guide to Shooting Phenomenal IGTV with DSLR/Smartphone
- In 2024, Pokemon Go Error 12 Failed to Detect Location On Nokia XR21? | Dr.fone
- [Updated] Mastering Your FB Profile Picture Update for 2024
- [New] 2024 Approved Bypassing Instagram's Video Roadblocks Effortlessly
- How To Transfer WhatsApp From iPhone 14 to other iPhone 11 Pro Max devices? | Dr.fone
- [Updated] 2024 Approved The Path to Autoplay Configuring Youtube Content for Uninterrupted Streaming
- In 2024, Pro-Level Jump Cuts Made Easy A Final Cut Pro X Tutorial
- [Updated] From Social TV Viewing to Funny, Interactive Gifs A Twitter Video Journey
- How To Transfer WhatsApp From Apple iPhone 6s to other iPhone 15 devices? | Dr.fone
- Google Data Retrieval tool – restore lost data from Google Pixel 7a
- How to Spy on Text Messages from Computer & Poco X6 Pro | Dr.fone
- Updated The Essentials of Navigating Googles Podcast Experience for 2024
- [New] Mastering Instagram’s Latest Features Reels & Stories
- 2024 Approved A Guide to Copyright-Free Tracks Perfect for Videographic Artistry
- Title: "[Updated] Dive Into Old Content YouTube Video Recovery Guide"
- Author: Steven
- Created at : 2024-05-25 20:55:40
- Updated at : 2024-05-26 20:55:40
- Link: https://youtube-clips.techidaily.com/updated-dive-into-old-content-youtube-video-recovery-guide/
- License: This work is licensed under CC BY-NC-SA 4.0.
