
![[Updated] Dissecting YouTube's Criteria for Featured Community Inputs](https://www.lifewire.com/thmb/M8nTiwLLAFZesyB_EbKXIxGR1nU=/400x300/filters:no_upscale():max_bytes(150000):strip_icc()/GettyImages-1148422594-c785d515e0a34d2dba107f88fb475071.jpg)
[Updated] Dissecting YouTube's Criteria for Featured Community Inputs
Dissecting YouTube’s Criteria for Featured Community Inputs
What Is the YouTube Highlighted Comment?

Liza Brown
Mar 27, 2024• Proven solutions
Did you just come across a comment tagged with Highlight on YouTube and wondering what it means? In our guide, you will find an answer to this, along with related queries like how YouTube highlighted comment works, the removal process, its benefits, and more.
If you own a YouTube channel or are starting one, even you can do this. Without further ado, let’s jump straight into the core of YouTube’s highlighted comments. We’ve categorized this article into a total of 8 parts for simple and better understanding.
- Part 1: What Does Highlighted Comment Mean On YouTube?
- Part 2: What Does Highlighted Comments Look Like on YouTube?
- Part 3: How to Make Comment Highlighted?
- Part 4: How to Highlighted Comments URL?
- Part 5: How to Reply to Highlighted Comments?
- Part 6: How to Remove Highlighted Comments?
- Part 7: Tips for Writing a Comment
- Part 8: Benefits of Highlighted Comments
Part 1: What Does The Highlighted Comment Mean On YouTube?
Before you get on with highlighting your comments, you must understand what it means exactly. You may follow comments on the videos posted by several YouTubers, but the highlighted ones are always making it to the top of the list.
Having said that, neither the content creator nor users or moderators choose to highlight YouTube comments to begin with. They are no rocket science, but only a tad bit more than what you know as a bookmarking feature.
Think of highlighted comments as a “tag”. You might notice this in the form of a ‘new activity YouTube notification’ link you receive on your registered email. Only you can see this tag when you click the notification and arrive at Youtube.com to either view or reply to a comment.
Highlighting comments (HC’s) are an automatic feature generated by YouTube. It draws the YouTuber’s & viewer’s attention to relevant activities. Don’t fail to notice that the highlight disappears once you are done interacting in the tagged comment thread. However, they are reloadable by tapping the comment timestamp.
For instance, you may want to check the following links. The 2 URLs lead you to the same video, but only one of them shows a highlighted comment.
- https://www.youtube.com/watch?v=XWhjJjhpmQA&lc=Ugya-89WYAlutJurKGh4AaABAg
- https://www.youtube.com/watch?v=XWhjJjhpmQA
Notice the name “lc” in the first URL- that stands for linked comment. YouTube might include this additional parameter. If a reply comment (HR) gets highlighted, the parent comment gets raised to the top.
Part 2: What Does The Highlighted Comment Look Like?
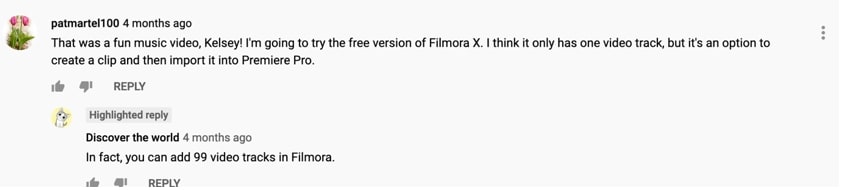
YouTube has been working on improving the navigation of the comment section for videos, and highlighted comments are one of them. These comments appear even above the pinned comments on a video. The label of a highlighted comment is displayed above the commentator’s name in a light grey shade.

YouTube labels comment replies as well and call it “Highlighted Reply.” You can see this tag above the replier’s name in the same color tone.
Part 3: How to Make My Comment Highlighted?
Now, making YouTube highlight your comment on a popular video is nothing less than an art. YouTube doesn’t make it easy for you. The advantage of getting your comment highlighted on YouTube is limitless.
Thus, anybody who wants to get their YouTube comment an HC tag has to follow a few simple steps, which we will discuss below in another section. Finding the correct or relevant video content that can benefit your channel from such a comment is an excellent place to start.
For example, if you are a YouTuber who deals in tech information, you need to look for a popular video or channel with a similar genre, in this case, technical knowledge. The more popular the channel is, the more is the chance of a viewer checking the comments on its videos. You will only benefit if you’re comment is highlighted on pages of Youtuber’s who are huge.
Part 4: How to Get the URL of Highlighted Comments?
The ways to acquire the URL or link for a highlighted comment are different for both parties- viewer and host.
Suppose you are a viewer who is going through the comments section of a video. If you want to get the highlighted URL for the comment, simply click on the timestamp (e.g., 2 weeks ago) beside the commentator’s username.
On the other hand, for a YouTuber, getting access to the comment URL is relatively straightforward. The host will get a notification on his or her registered email-id when a viewer publishes a comment on their posted video. You will find the link to the highlighted comment in the notification
Part 5: How to Reply to Highlighted Comments?
Replying to “highlighted comments” on your YouTube channel is pretty easy since this feature was developed, keeping the user’s convenience in mind. If you want to follow up or reply to such comments, you can do so from your email or YouTube Dashboard.
If you click the notification bell icon, whenever a viewer drops a new comment on one of your videos, YouTube will send you a notification via email. On opening the email, you will find a clickable “Reply” option. Or else, if you follow the comment section in the YouTube Dashboard, you can directly view or reply to highlighted comments from here as well.
Have you ever wondered why a highlighted comment always shows at the top of the comment list? Both the above options will lead you to the comment thread on YouTube. To help you find the new activity easily, it appears with the highlight tag on it. The purpose is to remind you that you are here for that specific comment.
Part 6: How to Remove Highlighted Comments?
Can you, as a video maker, remove highlighted comments on YouTube? The direct answer to this would be a ‘No.’ It is because based on how you have opened the specific video, YouTube does it automatically.
Alternatively, you can try out a few temporary solutions.
- You can edit the particular URL of the video where the highlighted tag is showing. Remove the red part of the URL (example given below) starting with “&”:
https://www.youtube.com/watch?v=XWhjJjhpmQA&lc=Ugya-89WYAlutJurKGh4AaABAg After removing the above parameter, reload the original video link (below):
https://www.youtube.com/watch?v=XWhjJjhpmQA
- Try logging out from your Google Account and browse YouTube (anonymously). Doing this will ensure that you no longer see any highlighted comments. However, at the same time, this will restrict you from interacting in any way with that video, let alone leaving a comment.
Part 7: Tips for Writing a Comment that will be Pinned as a Highlighted Comment?
Many frequently inquire on the internet about how they can improve the chances of getting their comment pinned, as highlighted on YouTube. The secret lies in how you write the statement. We’ve listed a few pro tips below that can help:
- First, go through all the posted comments under the video. It will help you identify what is missing. You can comment or write the missing point in comprehendible and straightforward words. Also, never forget to acknowledge the YouTuber’s talent.
- Remember, no one has the time to read long comments. So, when you know what you want to write, try to shorten your sentences. A short and crisp comment draws more attention.
- After you have framed your comment, make sure that it is grammatically correct. YouTube and Google hate grammatical errors.
- Do not hit the post option already. Before publishing it, you must cross-check that your comment has all the above points in place.
- Lastly, you have to wait after publishing on the video’s comment section. YouTube will highlight your comment if it passes according to the YouTube policy and if the search engine finds it unique.
Part 8: Are Highlighted Comments Beneficial?
Being a convenience feature, a highlighted comment on YouTube is 100% beneficial. That is especially true if you are looking for ways to optimize your channel.
YouTube is undeniably the second largest search engine on the web. Highlight comments can potentially increase the outreach of your content and, consequently, your brand presence.
As said earlier, these comments always show first on the comment section. Needless to say, many people who watch the videos also scroll down to the comments section to start a conversation or see what other viewers are saying about this video.
In the process, alongside the interaction, they also check out the channels or profiles of the commentators. Viewers often visit the pages of these channels, and if they happen to enjoy the video content, they will subscribe to the YouTuber’s channel. If your comment gets highlighted, your YouTube channel can be one of them.
Conclusion
YouTube can be an intimidating tool for marketing and more so for newcomers. Every YouTuber wishes that their channel performs better than the previous day. Even though the highlighted comment or highlighted reply feature doesn’t have any direct benefits, it can indeed help in optimizing your YouTube channel.
It can connect you with potential viewers and increase the number of people that visit your channel regularly. However, how many of them stay and hit the “Subscribe” button is a different story altogether and is wholly based on whether they like what you share through your videos.
In this article, we have shared facts on YouTube’s commonly seen highlighted comment feature. Yet, the term is a heavily misleading one, as far as viewers and Youtuber’s are concerned. We have also covered all other aspects and queries related to this term. Here’s hoping they clarify all your doubts.
Liza Brown
Liza Brown is a writer and a lover of all things video.
Follow @Liza Brown
Liza Brown
Mar 27, 2024• Proven solutions
Did you just come across a comment tagged with Highlight on YouTube and wondering what it means? In our guide, you will find an answer to this, along with related queries like how YouTube highlighted comment works, the removal process, its benefits, and more.
If you own a YouTube channel or are starting one, even you can do this. Without further ado, let’s jump straight into the core of YouTube’s highlighted comments. We’ve categorized this article into a total of 8 parts for simple and better understanding.
- Part 1: What Does Highlighted Comment Mean On YouTube?
- Part 2: What Does Highlighted Comments Look Like on YouTube?
- Part 3: How to Make Comment Highlighted?
- Part 4: How to Highlighted Comments URL?
- Part 5: How to Reply to Highlighted Comments?
- Part 6: How to Remove Highlighted Comments?
- Part 7: Tips for Writing a Comment
- Part 8: Benefits of Highlighted Comments
Part 1: What Does The Highlighted Comment Mean On YouTube?
Before you get on with highlighting your comments, you must understand what it means exactly. You may follow comments on the videos posted by several YouTubers, but the highlighted ones are always making it to the top of the list.
Having said that, neither the content creator nor users or moderators choose to highlight YouTube comments to begin with. They are no rocket science, but only a tad bit more than what you know as a bookmarking feature.
Think of highlighted comments as a “tag”. You might notice this in the form of a ‘new activity YouTube notification’ link you receive on your registered email. Only you can see this tag when you click the notification and arrive at Youtube.com to either view or reply to a comment.
Highlighting comments (HC’s) are an automatic feature generated by YouTube. It draws the YouTuber’s & viewer’s attention to relevant activities. Don’t fail to notice that the highlight disappears once you are done interacting in the tagged comment thread. However, they are reloadable by tapping the comment timestamp.
For instance, you may want to check the following links. The 2 URLs lead you to the same video, but only one of them shows a highlighted comment.
- https://www.youtube.com/watch?v=XWhjJjhpmQA&lc=Ugya-89WYAlutJurKGh4AaABAg
- https://www.youtube.com/watch?v=XWhjJjhpmQA
Notice the name “lc” in the first URL- that stands for linked comment. YouTube might include this additional parameter. If a reply comment (HR) gets highlighted, the parent comment gets raised to the top.
Part 2: What Does The Highlighted Comment Look Like?
YouTube has been working on improving the navigation of the comment section for videos, and highlighted comments are one of them. These comments appear even above the pinned comments on a video. The label of a highlighted comment is displayed above the commentator’s name in a light grey shade.
YouTube labels comment replies as well and call it “Highlighted Reply.” You can see this tag above the replier’s name in the same color tone.
Part 3: How to Make My Comment Highlighted?
Now, making YouTube highlight your comment on a popular video is nothing less than an art. YouTube doesn’t make it easy for you. The advantage of getting your comment highlighted on YouTube is limitless.
Thus, anybody who wants to get their YouTube comment an HC tag has to follow a few simple steps, which we will discuss below in another section. Finding the correct or relevant video content that can benefit your channel from such a comment is an excellent place to start.
For example, if you are a YouTuber who deals in tech information, you need to look for a popular video or channel with a similar genre, in this case, technical knowledge. The more popular the channel is, the more is the chance of a viewer checking the comments on its videos. You will only benefit if you’re comment is highlighted on pages of Youtuber’s who are huge.
Part 4: How to Get the URL of Highlighted Comments?
The ways to acquire the URL or link for a highlighted comment are different for both parties- viewer and host.
Suppose you are a viewer who is going through the comments section of a video. If you want to get the highlighted URL for the comment, simply click on the timestamp (e.g., 2 weeks ago) beside the commentator’s username.
On the other hand, for a YouTuber, getting access to the comment URL is relatively straightforward. The host will get a notification on his or her registered email-id when a viewer publishes a comment on their posted video. You will find the link to the highlighted comment in the notification
Part 5: How to Reply to Highlighted Comments?
Replying to “highlighted comments” on your YouTube channel is pretty easy since this feature was developed, keeping the user’s convenience in mind. If you want to follow up or reply to such comments, you can do so from your email or YouTube Dashboard.
If you click the notification bell icon, whenever a viewer drops a new comment on one of your videos, YouTube will send you a notification via email. On opening the email, you will find a clickable “Reply” option. Or else, if you follow the comment section in the YouTube Dashboard, you can directly view or reply to highlighted comments from here as well.
Have you ever wondered why a highlighted comment always shows at the top of the comment list? Both the above options will lead you to the comment thread on YouTube. To help you find the new activity easily, it appears with the highlight tag on it. The purpose is to remind you that you are here for that specific comment.
Part 6: How to Remove Highlighted Comments?
Can you, as a video maker, remove highlighted comments on YouTube? The direct answer to this would be a ‘No.’ It is because based on how you have opened the specific video, YouTube does it automatically.
Alternatively, you can try out a few temporary solutions.
- You can edit the particular URL of the video where the highlighted tag is showing. Remove the red part of the URL (example given below) starting with “&”:
https://www.youtube.com/watch?v=XWhjJjhpmQA&lc=Ugya-89WYAlutJurKGh4AaABAg After removing the above parameter, reload the original video link (below):
https://www.youtube.com/watch?v=XWhjJjhpmQA
- Try logging out from your Google Account and browse YouTube (anonymously). Doing this will ensure that you no longer see any highlighted comments. However, at the same time, this will restrict you from interacting in any way with that video, let alone leaving a comment.
Part 7: Tips for Writing a Comment that will be Pinned as a Highlighted Comment?
Many frequently inquire on the internet about how they can improve the chances of getting their comment pinned, as highlighted on YouTube. The secret lies in how you write the statement. We’ve listed a few pro tips below that can help:
- First, go through all the posted comments under the video. It will help you identify what is missing. You can comment or write the missing point in comprehendible and straightforward words. Also, never forget to acknowledge the YouTuber’s talent.
- Remember, no one has the time to read long comments. So, when you know what you want to write, try to shorten your sentences. A short and crisp comment draws more attention.
- After you have framed your comment, make sure that it is grammatically correct. YouTube and Google hate grammatical errors.
- Do not hit the post option already. Before publishing it, you must cross-check that your comment has all the above points in place.
- Lastly, you have to wait after publishing on the video’s comment section. YouTube will highlight your comment if it passes according to the YouTube policy and if the search engine finds it unique.
Part 8: Are Highlighted Comments Beneficial?
Being a convenience feature, a highlighted comment on YouTube is 100% beneficial. That is especially true if you are looking for ways to optimize your channel.
YouTube is undeniably the second largest search engine on the web. Highlight comments can potentially increase the outreach of your content and, consequently, your brand presence.
As said earlier, these comments always show first on the comment section. Needless to say, many people who watch the videos also scroll down to the comments section to start a conversation or see what other viewers are saying about this video.
In the process, alongside the interaction, they also check out the channels or profiles of the commentators. Viewers often visit the pages of these channels, and if they happen to enjoy the video content, they will subscribe to the YouTuber’s channel. If your comment gets highlighted, your YouTube channel can be one of them.
Conclusion
YouTube can be an intimidating tool for marketing and more so for newcomers. Every YouTuber wishes that their channel performs better than the previous day. Even though the highlighted comment or highlighted reply feature doesn’t have any direct benefits, it can indeed help in optimizing your YouTube channel.
It can connect you with potential viewers and increase the number of people that visit your channel regularly. However, how many of them stay and hit the “Subscribe” button is a different story altogether and is wholly based on whether they like what you share through your videos.
In this article, we have shared facts on YouTube’s commonly seen highlighted comment feature. Yet, the term is a heavily misleading one, as far as viewers and Youtuber’s are concerned. We have also covered all other aspects and queries related to this term. Here’s hoping they clarify all your doubts.
Liza Brown
Liza Brown is a writer and a lover of all things video.
Follow @Liza Brown
The Creator’s Guide: Turn Viewers Into Paychecks
How To Get Paid on YouTube - From AdSense to your Bank Account

Richard Bennett
Oct 26, 2023• Proven solutions
YouTube is more than a video sharing social network; here’s how to get paid on YouTube. Having an active YouTube channel with decent monthly views can earn you income through advertising. If your channel is set up properly, Google can place ads over your YouTube videos and you can earn money based on how many people see or click on (depends on the ad) those ads while watching your videos.
- The Requirements for YouTube Monetization
- How to Enable Monetization for Your YouTube Channel
- Linking Your Bank Account to Your AdSense Account
- Receiving Payments
Many vloggers receive direct bank deposits of their ad-based revenues every month. In this article, we’ll show you how to monetize your YouTube Channel and how to receive payments to your bank account.
Making Your YouTube Videos Better with Filmora
If you want to earn more money with YouTube videos, your video should be stand out. To achieve that, you should use a powerful video editing software as well. Here, I recommend Wondershare Filmora video editor . As one of the most widely used video editing software among YouTubers, Filmora provides lots of templates and effects which allows you to edit faster and better.


Part 1: The Requirements for YouTube Monetization
Meeting the minimum requirement for YouTube monetization is probably the hardest part of this whole process. About a month ago, you had to have 10,000 lifetime views on your YouTube channel to qualify for monetization. However, earlier this year, Google changed their eligibility requirements and made them even tougher.
As of February 20, 2018, YouTube channels need to have accumulated 4000 hours of ‘watch time’ over the past 12 months and no less than 1000 subscribers to qualify for monetization. If you do not meet these requirements you cannot join the YouTube Partner Program and monetize your YouTube channel.
So, the first step to successful monetization on YouTube is to actually grow your channel. You need to create videos that will attract viewers and engage your audience. You also need to get people to subscribe because this is really what will grow your YouTube channel over time.
Part 2: How To Enable Monetization for Your YouTube Channel
Here’s the step-by-step process for monetizing your YouTube Channel, for those who are qualified.
- Log in to your YouTube account.
- Find your account icon in the top right corner. Click it to find the ‘Creator Studio’ button.
- Click the ‘Creator Studio’ button.
- Click the ‘Channel’ option in the left side menu.
- You’ll see a drop-down menu under ‘Channel’. Click on ‘Status and Features’. This is actually the first option on the menu. It should open by default once you click the ‘Channel’ button.
- Look through the ‘Status and Features’ page and click the ‘Enable’ button beside monetization.

- Clicking the ‘Enable’ button should lead you to another page where the guidelines for monetization are explained. Take the time to read through the guidelines and understand the dos and don’ts of YouTube monetization.
- Once you’ve looked through the guidelines, click the ‘Enable my account’ button to proceed. This will lead you to a page where you’ll be prompted to join the YouTube Partner Program.
- Read through the YouTube Partner Program terms, check the appropriate boxes, and click the ‘accept’ button.
- You’ll be prompted to link an AdSense account.
- Connect an existing AdSense account if you have one or create a new one.
- Once you’re done linking an AdSense account, you’ll be redirected to YouTube. There, select the type of ads you want to run under ‘Monetization Preferences’.
- Click the submit button and wait to find out if your account is approved for monetization.
According to YouTube, it can take up to a week for a decision to be reached on your application.
YouTube will not review your monetization application until you’ve met their eligibility criteria. Even then, your application may be declined if your videos do not follow the community guidelines (i.e. channels which simply repost content from other channels will not be monetized).
Not all videos can be monetized. While there are legal ways to create videos consisting of imagery and footage belonging to others, be aware that such videos are not always eligible for monetization. YouTube will only monetize videos that you own. So, posting videos which do not belong to you or which include copyrighted content can cause your monetization application to be declined.
Part 3: Linking Your Bank Account To Your AdSense Account
AdSense offers a variety of payment options including mailed checks and Western Union transfers. However, these options may not be available to you depending on where you’re based. AdSense does make payments through electronic wire transfer (EFT – Electronic funds transfer) to virtually every country in the world, and this is the preferred payment option for most people.
To have your earnings deposited directly into your account through EFT, you’ll need to link your bank account to your AdSense account.
Here’s a step-by-step guide for linking your bank account to your AdSense account.
- Log in to AdSense via: www.google.com/adsense/start
- Click the ‘Settings’ button in the left panel menu
- Under ‘Settings’, click ‘Payments’.
- On the ‘Payments’ page, click ‘Manage payment options’.
- Click ‘Add payment method’.
- Next, you’ll be prompted to add your bank account details. In general, you will be asked to provide the following:
- Name on the account / account holder’s name
- Bank account number
- Bank name
- Bank SWIFT code
- Depending on where you are based, additional information may be required.
- Ensure that the name on your AdSense account matches the name on the bank account you provide. To edit your AdSense name, click the ‘Manage settings’ button also on the Payments page.
Part 4: Receiving Payments
To get paid by AdSense, you need to reach the $100 threshold. You may wish to set a higher threshold but as a rule, earnings below the $100 will not be processed for payment (you will still receive the money, it will just keep adding up until it gets to $100 and then you’ll be paid).
Also, bear in mind that AdSense follows a monthly payment cycle. This means that a month’s earnings (assuming they meet the threshold requirement) will be paid next month. Usually, direct deposit payments will be processed between the 21st and 26th of every month. That said, it can take up to 10 days for electronic wire payments to be received.
In addition to reaching the payment threshold, be sure that you have no payment hold on your AdSense account. A payment hold can cause your earnings to be withheld even if it has reached the payment threshold.
To avoid a payment hold, be sure to provide the necessary tax information, verify your identity and your address, make sure the bank account linked to your AdSense is verified, and make sure you have not violated any of YouTube’s guidelines and community rules.
Conclusion
Depending on your vlogging skills and the nature of your content (some types of videos get more attention than others), it can take a while for you to be eligible for monetization. And even when you’ve successfully monetized your channel, getting enough views to reach the payment threshold can be tough.
Don’t let this discourage you from working towards earning income from your YouTube channel. Just focus on creating a YouTube channel people will want to watch. That’s how to get paid on YouTube - be sticking with your channel long enough for it to grow.
Richard Bennett
Richard Bennett is a writer and a lover of all things video.
Follow @Richard Bennett
Richard Bennett
Oct 26, 2023• Proven solutions
YouTube is more than a video sharing social network; here’s how to get paid on YouTube. Having an active YouTube channel with decent monthly views can earn you income through advertising. If your channel is set up properly, Google can place ads over your YouTube videos and you can earn money based on how many people see or click on (depends on the ad) those ads while watching your videos.
- The Requirements for YouTube Monetization
- How to Enable Monetization for Your YouTube Channel
- Linking Your Bank Account to Your AdSense Account
- Receiving Payments
Many vloggers receive direct bank deposits of their ad-based revenues every month. In this article, we’ll show you how to monetize your YouTube Channel and how to receive payments to your bank account.
Making Your YouTube Videos Better with Filmora
If you want to earn more money with YouTube videos, your video should be stand out. To achieve that, you should use a powerful video editing software as well. Here, I recommend Wondershare Filmora video editor . As one of the most widely used video editing software among YouTubers, Filmora provides lots of templates and effects which allows you to edit faster and better.
Part 1: The Requirements for YouTube Monetization
Meeting the minimum requirement for YouTube monetization is probably the hardest part of this whole process. About a month ago, you had to have 10,000 lifetime views on your YouTube channel to qualify for monetization. However, earlier this year, Google changed their eligibility requirements and made them even tougher.
As of February 20, 2018, YouTube channels need to have accumulated 4000 hours of ‘watch time’ over the past 12 months and no less than 1000 subscribers to qualify for monetization. If you do not meet these requirements you cannot join the YouTube Partner Program and monetize your YouTube channel.
So, the first step to successful monetization on YouTube is to actually grow your channel. You need to create videos that will attract viewers and engage your audience. You also need to get people to subscribe because this is really what will grow your YouTube channel over time.
Part 2: How To Enable Monetization for Your YouTube Channel
Here’s the step-by-step process for monetizing your YouTube Channel, for those who are qualified.
- Log in to your YouTube account.
- Find your account icon in the top right corner. Click it to find the ‘Creator Studio’ button.
- Click the ‘Creator Studio’ button.
- Click the ‘Channel’ option in the left side menu.
- You’ll see a drop-down menu under ‘Channel’. Click on ‘Status and Features’. This is actually the first option on the menu. It should open by default once you click the ‘Channel’ button.
- Look through the ‘Status and Features’ page and click the ‘Enable’ button beside monetization.
- Clicking the ‘Enable’ button should lead you to another page where the guidelines for monetization are explained. Take the time to read through the guidelines and understand the dos and don’ts of YouTube monetization.
- Once you’ve looked through the guidelines, click the ‘Enable my account’ button to proceed. This will lead you to a page where you’ll be prompted to join the YouTube Partner Program.
- Read through the YouTube Partner Program terms, check the appropriate boxes, and click the ‘accept’ button.
- You’ll be prompted to link an AdSense account.
- Connect an existing AdSense account if you have one or create a new one.
- Once you’re done linking an AdSense account, you’ll be redirected to YouTube. There, select the type of ads you want to run under ‘Monetization Preferences’.
- Click the submit button and wait to find out if your account is approved for monetization.
According to YouTube, it can take up to a week for a decision to be reached on your application.
YouTube will not review your monetization application until you’ve met their eligibility criteria. Even then, your application may be declined if your videos do not follow the community guidelines (i.e. channels which simply repost content from other channels will not be monetized).
Not all videos can be monetized. While there are legal ways to create videos consisting of imagery and footage belonging to others, be aware that such videos are not always eligible for monetization. YouTube will only monetize videos that you own. So, posting videos which do not belong to you or which include copyrighted content can cause your monetization application to be declined.
Part 3: Linking Your Bank Account To Your AdSense Account
AdSense offers a variety of payment options including mailed checks and Western Union transfers. However, these options may not be available to you depending on where you’re based. AdSense does make payments through electronic wire transfer (EFT – Electronic funds transfer) to virtually every country in the world, and this is the preferred payment option for most people.
To have your earnings deposited directly into your account through EFT, you’ll need to link your bank account to your AdSense account.
Here’s a step-by-step guide for linking your bank account to your AdSense account.
- Log in to AdSense via: www.google.com/adsense/start
- Click the ‘Settings’ button in the left panel menu
- Under ‘Settings’, click ‘Payments’.
- On the ‘Payments’ page, click ‘Manage payment options’.
- Click ‘Add payment method’.
- Next, you’ll be prompted to add your bank account details. In general, you will be asked to provide the following:
- Name on the account / account holder’s name
- Bank account number
- Bank name
- Bank SWIFT code
- Depending on where you are based, additional information may be required.
- Ensure that the name on your AdSense account matches the name on the bank account you provide. To edit your AdSense name, click the ‘Manage settings’ button also on the Payments page.
Part 4: Receiving Payments
To get paid by AdSense, you need to reach the $100 threshold. You may wish to set a higher threshold but as a rule, earnings below the $100 will not be processed for payment (you will still receive the money, it will just keep adding up until it gets to $100 and then you’ll be paid).
Also, bear in mind that AdSense follows a monthly payment cycle. This means that a month’s earnings (assuming they meet the threshold requirement) will be paid next month. Usually, direct deposit payments will be processed between the 21st and 26th of every month. That said, it can take up to 10 days for electronic wire payments to be received.
In addition to reaching the payment threshold, be sure that you have no payment hold on your AdSense account. A payment hold can cause your earnings to be withheld even if it has reached the payment threshold.
To avoid a payment hold, be sure to provide the necessary tax information, verify your identity and your address, make sure the bank account linked to your AdSense is verified, and make sure you have not violated any of YouTube’s guidelines and community rules.
Conclusion
Depending on your vlogging skills and the nature of your content (some types of videos get more attention than others), it can take a while for you to be eligible for monetization. And even when you’ve successfully monetized your channel, getting enough views to reach the payment threshold can be tough.
Don’t let this discourage you from working towards earning income from your YouTube channel. Just focus on creating a YouTube channel people will want to watch. That’s how to get paid on YouTube - be sticking with your channel long enough for it to grow.
Richard Bennett
Richard Bennett is a writer and a lover of all things video.
Follow @Richard Bennett
Also read:
- Permanently Quit YouTube Shorts Now!
- [Updated] 10 Best Yoga YouTube Channels to Follow - Keep Fit
- Unveiling the Art of Personal Branding Mastery
- Above the Mainstage Significant YouTube Meetings for 2024
- Cross-Platform Titling Guidelines for Mobile & Social Apps
- [Updated] Earning Expertise Short Video Revenue Boosting
- [Updated] Avoiding Pitfalls Understanding YouTube Standards
- In 2024, Charting New Pathways in Art An Exclusive Look at the Top 10 Low-Cost Creator Platforms on YouTube
- [Updated] Dynamic Techniques for YouTube Promotional Videos
- In 2024, Brand Your Content Download Complimentary Templates for YouTube Makers
- Internet's Influencers Top 10 Global YouTube Sensations
- 10 Most Popular Beauty Gurus on YouTube
- Cross-Platform Strategies to Boost YouTube Presence for 2024
- Efficient Editing for Creators - Top 10 Online Trimmers for 2024
- 2024 Approved Conquer & Cease The Unremovable Guide to Youtube Shorts
- Extract YouTube Soundtracks for Free With This List of 25 Rippers
- [New] Balancing Creativity and Logic in Gaming Videos
- [New] Cutting-Edge Camera & Recording Apps for Smartphones' Most Reliable Sources
- 2024 Approved Bite-Sized Video Lessons, Clearly
- Charting Success Top 15 Investment Educational Videos for 2024
- In 2024, Boosting Revenue with YouTube Short Videos – A Complete Plan
- In 2024, Dynamic Duo Shots Perfecting YouTube Video Splitting
- [New] Earning Through YouTube Navigating Revenue Without Ads
- Leading 10 YouTube Creators in Views & Subs
- The Art of Color in Online Beauty Content
- Surpass Your Competition Effective YouTube SEO Tips
- The Ultimate Checklist of 8 Mirrorless Cameras for Vloggers
- Forget YouTube? Here Are the Best 10 Mobile Video Sites
- 2024 Approved A Novice's Navigational Guide on YouTube Channel Creation and Making Dough
- Audience Retention The Key to a Great YouTube Conclusion for 2024
- Mr. Beast’s Financial Portrait
- In 2024, ASMR Knowledge Beyond What You See
- In 2024, Dive Deep Into Designing Dynamic YouTube Live Thumbnails
- A Step-by-Step Guide to Elevate Your Stream on YouTube for 2024
- 5 Key Aspects to Consider When Sizing Your YouTube Thumbnail
- Perfect Your Video's First Impression 20 Best Fonts
- New Linux Listens Well The Best Free Software and Practices for Capturing Exceptional Soundtracks
- How Do I Stop Someone From Tracking My Google Pixel 7a? | Dr.fone
- [New] 2024 Approved Transforming TikTok Videos A Guide to Audio Amplification Techniques
- In 2024, How to Change Location On Facebook Dating for your Apple iPhone 12 Pro | Dr.fone
- In 2024, How To Use Allshare Cast To Turn On Screen Mirroring On Itel P55 5G | Dr.fone
- [New] In 2024, From Sideways to Symmetry A Guide to Flipping Images and Spreading Engagement
- [Updated] Efficient Downloads Transform Vimeo Videos Into MP4
- In 2024, Cost-Free Treasure Hunts Finding Gorgeous TikTok Backdrops
- [Updated] In 2024, Prime Video Picks Most Watched of All Time
- A Step-by-Step Guide to Video Aspect Ratio Selection
- Unleashing Video Power The Galaxy S8 in 4K
- Updated No Watermark, No Problem Top Video Merger Tools
- Unleash Vibrant Canvas Cropping, Adding, & Editing Sound Effectively
- Does Oppo A2 Have Find My Friends? | Dr.fone
- Title: [Updated] Dissecting YouTube's Criteria for Featured Community Inputs
- Author: Steven
- Created at : 2024-05-25 20:55:35
- Updated at : 2024-05-26 20:55:35
- Link: https://youtube-clips.techidaily.com/updated-dissecting-youtubes-criteria-for-featured-community-inputs/
- License: This work is licensed under CC BY-NC-SA 4.0.
