
!["[Updated] Discover The 7 Most Popular Video Apps for iPhones & Android Live Streaming"](https://www.lifewire.com/thmb/nbqgLnPpUPiuvThF3CkLGTo8XnU=/400x300/filters:no_upscale():max_bytes(150000):strip_icc()/GettyImages-174750928-58a48cc35f9b58819cc45552-5bd8c2274cedfd00264695bd.jpg)
"[Updated] Discover The 7 Most Popular Video Apps for iPhones & Android Live Streaming"
Discover: The 7 Most Popular Video Apps for iPhones & Android Live Streaming
FREE 7 Best Apps to Go Live on YouTube from iPhone or Android

Richard Bennett
Mar 27, 2024• Proven solutions


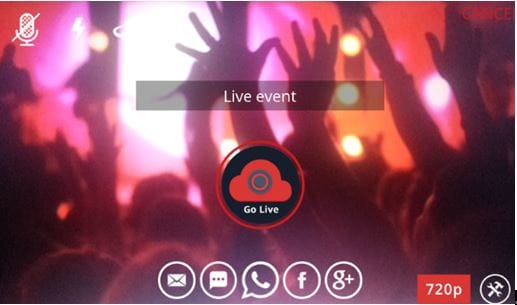
1. Emoze: (Android /iOS )
This most awaited Go Live application is now available for Android as well as iOS platform. It assists users in direct live streaming to YouTube channel via portable devices. The one click type installation facility allows users to get connected to heir channel, video, followers and viewers within seconds.
Key Features:
- Emoze offers unlimited broadcast time for live content.
- It supports HD live transmissions.
- Users can enjoy customized video effects.
- It is possible to switch between horizontal and vertical video mode during broadcast.
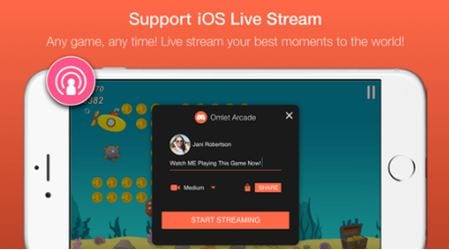
2. Omlet Arcade: (Android /iOS )
Omlet Arcade is well known for its most convenient collection of tools that can assist mobile gamers, the exclusive and highly interactive chat room and easy to share and upload facilities. Users love its intuitive functionality that makes content sharing on social media platforms like YouTube, Facebook and Twitch etc. much easier.
Key Features:
- It offers in game chat feature where users can spend unlimited time. You can prefer to connect via region chat, group chat and SMS options.
- Omlet Arcade hosts an active forum where gamers can easily explore information about all new stuff.
- One can enjoy easy recording, fast uploading of videos and it is also possible to develop personal community files for your favorite games.
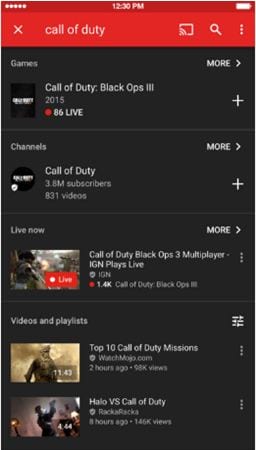
3. YouTube App: (Android /iOS )
It is time to enjoy lots of interesting things on single platform on the go; this YouTube application allow users to stay connected to most popular music videos, entertainment, game hot spots and news etc. It is possible to subscribe to different channels and share impressive content with friends via YouTube.
Key Features:
- Users will be able to browse their personalized recommendations on Home tab.
- The subscription tab assists users to get connected to their favorite channel with ease.
- One can express his thoughts via shares and comments.
- It is possible to develop customized videos using its top quality filters and music editing tools. Everything can be managed directly on YouTube platform.
4. YouTube Gaming: (Android /iOS )
YouTube Gamming application help users to stay connected with their favorite players, games and culture. It features live streams and videos with interactive chats, let’s play option, reviews, trailers and speed runs etc.
Key Features:
- With YouTube gaming application, you will be able to place live streams as well as videos at same place.
- You can enjoy chatting while live streaming your content.
- It is possible to browse specially designed pages for all games, channels as well as publishers.
- YouTube Gaming platform is currently serving the biggest community with more than 100 million active users.
5. Live Now: (iOS )
Live Now application is well recognized for its easy to use interface and simple sign up process. The basic widgets are designed pretty fine with collection of templates; beginners will find it much easier to explore all hot new features of Live Now.
Key Features:
- Users can easily define any number of phrases for quick access in form of tags.
- It offers numbers of integrations to end users along with SugarCRM, Salesforce and Highrise etc.
- You will find awesome mobile support from service professionals and your dream to work in team for development of interesting projects may end here with Live Now.

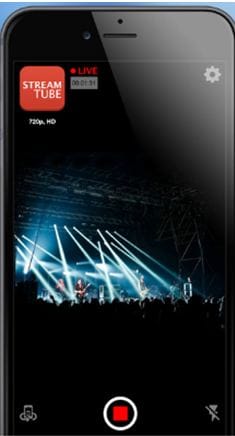
6. Stream Tube: (iOS )
Stream Tube application comes with so many advanced features that can assist users in easy live streaming. It can support HD as well as SD content whereas stream quality can be adjusted as per need. The donation system, ability to surf safari while live streaming and change YouTube server as per need, are some of its latest features.
Key Features:
- Users can enjoy editing with advanced filters, logos and manual as well as auto focus abilities.
- It offers landscape and portrait streaming abilities.
- Users can capture stills while live streaming their content.
- You will love to use its Zoomx15 feature.
- The one tap start type functionality is highly useful.
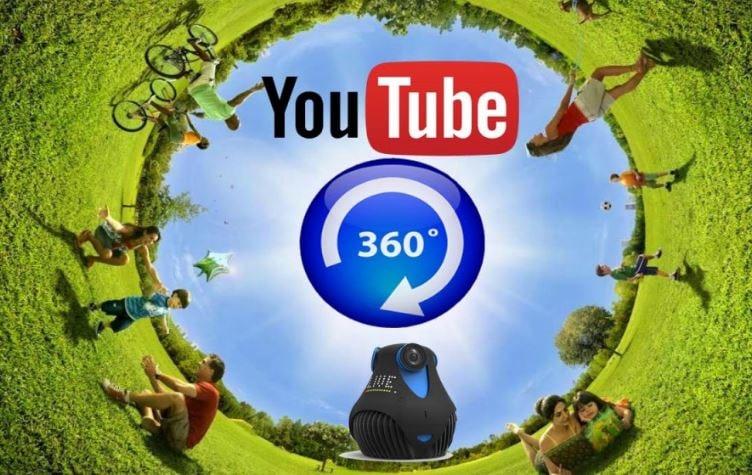
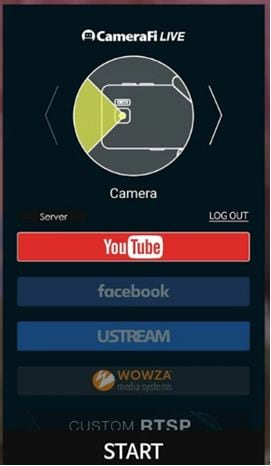
7. CameraFi Live: (Android )
CameraFi Live app is designed for Android devices only and it makes direct connection with Facebook and YouTube for fast sharing abilities. CameraFi Live can be used with smart phone camera as well as can be connected to a USB camera unit. The interactive user platform assists in fast responses.
Key Features:
- It is possible to broadcast amazing videos without any restriction over time using CameraFi Live.
- This application is well known for its professional video quality that leads to much higher performance when connected to DSLR and camcorders.
- Users will love to enjoy its ability to broadcast games with much impressive content quality
- Some of the best and most advanced features added to CameraFi Live are live poll voting, 360 degree live streaming with VR camera, picture in picture ability, advanced text and image overlays, video filters and many more.
![]()

Filmora - Best YouTube Video Recorder and Editor
- Record YouTube videos on your computer with audio and webcam.
- Edit videos quickly with a wide range of gaming effects.
- Rich video tempaltes and resources for videos.
- Export to MP4, MOV, MKV, GIF and multiple formats.
For Win 7 or later (64-bit)
For macOS 10.12 or later
 Secure Download
Richard Bennett
Richard Bennett is a writer and a lover of all things video.
Follow @Richard Bennett
Richard Bennett
Mar 27, 2024• Proven solutions
1. Emoze: (Android /iOS )
This most awaited Go Live application is now available for Android as well as iOS platform. It assists users in direct live streaming to YouTube channel via portable devices. The one click type installation facility allows users to get connected to heir channel, video, followers and viewers within seconds.
Key Features:
- Emoze offers unlimited broadcast time for live content.
- It supports HD live transmissions.
- Users can enjoy customized video effects.
- It is possible to switch between horizontal and vertical video mode during broadcast.
2. Omlet Arcade: (Android /iOS )
Omlet Arcade is well known for its most convenient collection of tools that can assist mobile gamers, the exclusive and highly interactive chat room and easy to share and upload facilities. Users love its intuitive functionality that makes content sharing on social media platforms like YouTube, Facebook and Twitch etc. much easier.
Key Features:
- It offers in game chat feature where users can spend unlimited time. You can prefer to connect via region chat, group chat and SMS options.
- Omlet Arcade hosts an active forum where gamers can easily explore information about all new stuff.
- One can enjoy easy recording, fast uploading of videos and it is also possible to develop personal community files for your favorite games.
3. YouTube App: (Android /iOS )
It is time to enjoy lots of interesting things on single platform on the go; this YouTube application allow users to stay connected to most popular music videos, entertainment, game hot spots and news etc. It is possible to subscribe to different channels and share impressive content with friends via YouTube.
Key Features:
- Users will be able to browse their personalized recommendations on Home tab.
- The subscription tab assists users to get connected to their favorite channel with ease.
- One can express his thoughts via shares and comments.
- It is possible to develop customized videos using its top quality filters and music editing tools. Everything can be managed directly on YouTube platform.
4. YouTube Gaming: (Android /iOS )
YouTube Gamming application help users to stay connected with their favorite players, games and culture. It features live streams and videos with interactive chats, let’s play option, reviews, trailers and speed runs etc.
Key Features:
- With YouTube gaming application, you will be able to place live streams as well as videos at same place.
- You can enjoy chatting while live streaming your content.
- It is possible to browse specially designed pages for all games, channels as well as publishers.
- YouTube Gaming platform is currently serving the biggest community with more than 100 million active users.
5. Live Now: (iOS )
Live Now application is well recognized for its easy to use interface and simple sign up process. The basic widgets are designed pretty fine with collection of templates; beginners will find it much easier to explore all hot new features of Live Now.
Key Features:
- Users can easily define any number of phrases for quick access in form of tags.
- It offers numbers of integrations to end users along with SugarCRM, Salesforce and Highrise etc.
- You will find awesome mobile support from service professionals and your dream to work in team for development of interesting projects may end here with Live Now.
6. Stream Tube: (iOS )
Stream Tube application comes with so many advanced features that can assist users in easy live streaming. It can support HD as well as SD content whereas stream quality can be adjusted as per need. The donation system, ability to surf safari while live streaming and change YouTube server as per need, are some of its latest features.
Key Features:
- Users can enjoy editing with advanced filters, logos and manual as well as auto focus abilities.
- It offers landscape and portrait streaming abilities.
- Users can capture stills while live streaming their content.
- You will love to use its Zoomx15 feature.
- The one tap start type functionality is highly useful.
7. CameraFi Live: (Android )
CameraFi Live app is designed for Android devices only and it makes direct connection with Facebook and YouTube for fast sharing abilities. CameraFi Live can be used with smart phone camera as well as can be connected to a USB camera unit. The interactive user platform assists in fast responses.
Key Features:
- It is possible to broadcast amazing videos without any restriction over time using CameraFi Live.
- This application is well known for its professional video quality that leads to much higher performance when connected to DSLR and camcorders.
- Users will love to enjoy its ability to broadcast games with much impressive content quality
- Some of the best and most advanced features added to CameraFi Live are live poll voting, 360 degree live streaming with VR camera, picture in picture ability, advanced text and image overlays, video filters and many more.
![]()
Filmora - Best YouTube Video Recorder and Editor
- Record YouTube videos on your computer with audio and webcam.
- Edit videos quickly with a wide range of gaming effects.
- Rich video tempaltes and resources for videos.
- Export to MP4, MOV, MKV, GIF and multiple formats.
For Win 7 or later (64-bit)
For macOS 10.12 or later
Secure Download
Richard Bennett
Richard Bennett is a writer and a lover of all things video.
Follow @Richard Bennett
Populate Play Button Visuals: Incorporating Electrodes
Your YouTube video, or any other clip published on any forum, gets a larger number of hits if it has an attractive thumbnail. And, the fact is, a thumbnail becomes 10x more attractive when the main character that the image has have a neon border around it.
With that said, in the following sections, you will learn a couple of methods on how to add a YouTube thumbnail border around the main characters and/or objects that are significant to the clip.
In this article
01 Add Glowing Neon Border to YouTube Thumbnail with Filmora
02 Add a Glowing Neon Border in YouTube Thumbnail with Canva
03 Outline a Person in a YouTube Thumbnail with Photoshop
Part 1: How to Add Neon Border to YouTube Thumbnail for Free with Filmora
Being one of the most versatile and intuitive post-production tools available in the market today, Wondershare Filmora X allows you to add a neon border to a YouTube thumbnail quite conveniently. You can learn how to get this done on Windows or Mac by following the steps given below.
For Win 7 or later (64-bit)
For macOS 10.12 or later
Step 1: Define Project Settings and Add Image to the Timeline
Launch Wondershare Filmora X on your PC (a MacBook Pro M1 is used here), ensure that the project aspect ratio is set to 16:9 (Widescreen) on the splash screen, and click New Project. On the main interface, click the Preview quality and display settings icon from the upper-right area of the Timeline, click Change Project Aspect Ratio, click to select 1280 x 720 (HD) from the Resolution menu of the Project Settings box, and click OK to save the custom project settings.

Then select My Media from the menu bar if not already selected, click Project Media from the navigation pane, and click Import from the Media box to select and import the image of the main character or object that you want to use in the thumbnail.

Now, drag the image from the Media box to the Timeline at the bottom.

Step 2: Clear Image Background, Add Border, and Add Custom Background
Go to Effects from the menu bar, click to select the Default tab and then AI Portrait from the navigation pane, and click and drag the Human Segmentation preset from the right box, and place it over the image track in the Timeline.

Double-click the image layer, scroll down the upper-left box to the Video Effects section, and use the Edge Thickness and Edge Feather sliders to adjust the character’s edges to make them as realistic as possible. Click OK when done.

Next, click and drag the Human Border preset over the image track in the Timeline, and follow the same procedure to customize the border. This will give the character a neon border effect.

Now, use the method explained earlier to import a custom image for the background, and drag and place it under the previous track in the Timeline.

If you are running the latest version of Filmora, you will find there are some neon light effects available under AI Portrait as well.

Step 3: Add Titles to Thumbnail
Go to Titles from the menu bar, click to select the Default tab and then Lower 3rds from the navigation pane, and click and drag your preferred lower-third preset from the right window to a separate layer in the Timeline. Double-click the lower-third layer, and use the available options in the upper-left window to change the text, its color, etc., and drag the textbox to place it to your preferred position on the image as well. Click OK to save the changes.
Next, click to select Titles from the navigation pane, and drag your preferred title from the right window to the upper-most track in the Timeline. Now use the method explained earlier to edit the text, its color, position, etc. to make it look professional.

For more tips and tricks for creating YouTube thumbnail, you can check this You Tube thumbnail creating guide.
Step 4: Get the Neon Border Thumbnail
Click the Snapshot (Camera) icon from the upper-right area of the Timeline, go to My Media from the menu bar, right-click the thumbnail of the screenshot you captured, and click Reveal in Finder (on Mac) or Reveal in Explorer (on Windows) to get to the folder the YouTube thumbnail border is saved in.

Part 2: How to Add a Glowing Neon Border in Your YouTube Thumbnail with Canva
Canva is another intuitive editing program that works on the web interface rather than having you download and install an app on your PC. You can add a neon border for YouTube thumbnails using Canva by following the instructions given below:
Step 1: Define Project Settings and Add a Background
After signing in to your Canva account, click Create a design from the top-right corner of the page, click Custom size from the bottom, define 1280 and 720 in the Width and Height fields on the box that appears respectively, and click Create new design.

Now, click to select Background from the navigation bar on the left (if the Background tool is not visible, click More and then choose Background from the expanded list), and click to select a background from the images available in the center pane.

Step 2: Upload an Image and Add Effects
Click Uploads from the navigation bar, click the More icon from the right of the Upload media button present at the top of the center pane, choose your preferred method to upload the image (with the transparent background) that you want to use, upload the image, and drag it from the center pane to the Canvas.
Note: You can use any of the tools available online to remove the background from your image for free.

To add a YouTube thumbnail border, make sure that the image that you added to the Canvas is selected, click the Duplicate icon from the upper-right area, and use the scaling handles of the copy of the image to increase its size a bit. Reposition the image back to its original location as well.
Then, click Edit image from the upper-left corner of the Canvas, click Duotone from the Edit image pane at the center, if need be, click See all, choose your preferred duotone effect to apply on the image, choose your preferred highlight and shadow colors from the box that appears next, and click Back from the top of the pane.

Next, click See all next to the Adjust section from the center pane, and drag the Blur slider to the right to increase the blur effect on the image.

Step 3: Position the Layers
While keeping the duplicate image selected, click the Position button from the upper-right area of the Canvas, and click Background to send the second image behind the first one to get the neon border effect for the photo.

Part 3: How to Outline a Person in a YouTube Thumbnail with Photoshop
Because YouTube thumbnails are nothing but static images, creating YouTube thumbnail border with Adobe Photoshop is comparatively easier. The process of doing this is given below:
Step 1: Define Document Preferences and Import an Image
Launch Adobe Photoshop on your PC, click Create new, and on the New Document customization box, define the width and height values to 1280 and 720 pixels respectively. Select Transparent from the Background Contents menu as well if not already selected. Click Create from the bottom to create a new Photoshop document with the specified document settings. Next, open the folder that contains the source image, drag the photo to Photoshop, and press Enter to place the photo.

Step 2: Remove Background from the Image
Make sure that the image layer is selected in the Layers panel on the right, go to Select from the menu bar at the top, and click Subject. From the bottom of the Layers panel, click the Add a mask icon to get rid of the background, leaving only the human on the Canvas.

Step 3: Add a Custom Background and an Outline Around the Subject
Use the method explained earlier to import a background image of your choice to Photoshop. Drag the background image layer to the bottom in the Layers panel. Double-click the masked layer, click to select Stroke from the left pane of the Layer Style box, and use the options available on the right to manage the size, color, position, etc. of the stroke that has been added around the human subject. Click OK when done, and then export the image normally to use it as a YouTube thumbnail border.

Summary
It is important to know that the default resolution of a YouTube thumbnail is 1280 x 720 pixels that is usually written and referred to as 720p. While adding a YouTube thumbnail border, it is also imperative to have a good sense of color combination and fonts. Furthermore, a decent tool like Wondershare Filmora X must be used to add an appealing neon border around the main subject in the thumbnail image easily and quickly.
02 Add a Glowing Neon Border in YouTube Thumbnail with Canva
03 Outline a Person in a YouTube Thumbnail with Photoshop
Part 1: How to Add Neon Border to YouTube Thumbnail for Free with Filmora
Being one of the most versatile and intuitive post-production tools available in the market today, Wondershare Filmora X allows you to add a neon border to a YouTube thumbnail quite conveniently. You can learn how to get this done on Windows or Mac by following the steps given below.
For Win 7 or later (64-bit)
For macOS 10.12 or later
Step 1: Define Project Settings and Add Image to the Timeline
Launch Wondershare Filmora X on your PC (a MacBook Pro M1 is used here), ensure that the project aspect ratio is set to 16:9 (Widescreen) on the splash screen, and click New Project. On the main interface, click the Preview quality and display settings icon from the upper-right area of the Timeline, click Change Project Aspect Ratio, click to select 1280 x 720 (HD) from the Resolution menu of the Project Settings box, and click OK to save the custom project settings.
Then select My Media from the menu bar if not already selected, click Project Media from the navigation pane, and click Import from the Media box to select and import the image of the main character or object that you want to use in the thumbnail.
Now, drag the image from the Media box to the Timeline at the bottom.
Step 2: Clear Image Background, Add Border, and Add Custom Background
Go to Effects from the menu bar, click to select the Default tab and then AI Portrait from the navigation pane, and click and drag the Human Segmentation preset from the right box, and place it over the image track in the Timeline.
Double-click the image layer, scroll down the upper-left box to the Video Effects section, and use the Edge Thickness and Edge Feather sliders to adjust the character’s edges to make them as realistic as possible. Click OK when done.
Next, click and drag the Human Border preset over the image track in the Timeline, and follow the same procedure to customize the border. This will give the character a neon border effect.
Now, use the method explained earlier to import a custom image for the background, and drag and place it under the previous track in the Timeline.
If you are running the latest version of Filmora, you will find there are some neon light effects available under AI Portrait as well.
Step 3: Add Titles to Thumbnail
Go to Titles from the menu bar, click to select the Default tab and then Lower 3rds from the navigation pane, and click and drag your preferred lower-third preset from the right window to a separate layer in the Timeline. Double-click the lower-third layer, and use the available options in the upper-left window to change the text, its color, etc., and drag the textbox to place it to your preferred position on the image as well. Click OK to save the changes.
Next, click to select Titles from the navigation pane, and drag your preferred title from the right window to the upper-most track in the Timeline. Now use the method explained earlier to edit the text, its color, position, etc. to make it look professional.
For more tips and tricks for creating YouTube thumbnail, you can check this You Tube thumbnail creating guide.
Step 4: Get the Neon Border Thumbnail
Click the Snapshot (Camera) icon from the upper-right area of the Timeline, go to My Media from the menu bar, right-click the thumbnail of the screenshot you captured, and click Reveal in Finder (on Mac) or Reveal in Explorer (on Windows) to get to the folder the YouTube thumbnail border is saved in.
Part 2: How to Add a Glowing Neon Border in Your YouTube Thumbnail with Canva
Canva is another intuitive editing program that works on the web interface rather than having you download and install an app on your PC. You can add a neon border for YouTube thumbnails using Canva by following the instructions given below:
Step 1: Define Project Settings and Add a Background
After signing in to your Canva account, click Create a design from the top-right corner of the page, click Custom size from the bottom, define 1280 and 720 in the Width and Height fields on the box that appears respectively, and click Create new design.
Now, click to select Background from the navigation bar on the left (if the Background tool is not visible, click More and then choose Background from the expanded list), and click to select a background from the images available in the center pane.
Step 2: Upload an Image and Add Effects
Click Uploads from the navigation bar, click the More icon from the right of the Upload media button present at the top of the center pane, choose your preferred method to upload the image (with the transparent background) that you want to use, upload the image, and drag it from the center pane to the Canvas.
Note: You can use any of the tools available online to remove the background from your image for free.
To add a YouTube thumbnail border, make sure that the image that you added to the Canvas is selected, click the Duplicate icon from the upper-right area, and use the scaling handles of the copy of the image to increase its size a bit. Reposition the image back to its original location as well.
Then, click Edit image from the upper-left corner of the Canvas, click Duotone from the Edit image pane at the center, if need be, click See all, choose your preferred duotone effect to apply on the image, choose your preferred highlight and shadow colors from the box that appears next, and click Back from the top of the pane.
Next, click See all next to the Adjust section from the center pane, and drag the Blur slider to the right to increase the blur effect on the image.
Step 3: Position the Layers
While keeping the duplicate image selected, click the Position button from the upper-right area of the Canvas, and click Background to send the second image behind the first one to get the neon border effect for the photo.
Part 3: How to Outline a Person in a YouTube Thumbnail with Photoshop
Because YouTube thumbnails are nothing but static images, creating YouTube thumbnail border with Adobe Photoshop is comparatively easier. The process of doing this is given below:
Step 1: Define Document Preferences and Import an Image
Launch Adobe Photoshop on your PC, click Create new, and on the New Document customization box, define the width and height values to 1280 and 720 pixels respectively. Select Transparent from the Background Contents menu as well if not already selected. Click Create from the bottom to create a new Photoshop document with the specified document settings. Next, open the folder that contains the source image, drag the photo to Photoshop, and press Enter to place the photo.
Step 2: Remove Background from the Image
Make sure that the image layer is selected in the Layers panel on the right, go to Select from the menu bar at the top, and click Subject. From the bottom of the Layers panel, click the Add a mask icon to get rid of the background, leaving only the human on the Canvas.
Step 3: Add a Custom Background and an Outline Around the Subject
Use the method explained earlier to import a background image of your choice to Photoshop. Drag the background image layer to the bottom in the Layers panel. Double-click the masked layer, click to select Stroke from the left pane of the Layer Style box, and use the options available on the right to manage the size, color, position, etc. of the stroke that has been added around the human subject. Click OK when done, and then export the image normally to use it as a YouTube thumbnail border.
Summary
It is important to know that the default resolution of a YouTube thumbnail is 1280 x 720 pixels that is usually written and referred to as 720p. While adding a YouTube thumbnail border, it is also imperative to have a good sense of color combination and fonts. Furthermore, a decent tool like Wondershare Filmora X must be used to add an appealing neon border around the main subject in the thumbnail image easily and quickly.
Also read:
- [New] Actor's Insight Crafting Engaging Online Reactions on YouTube (3 Pro Tips)
- In 2024, Creating Professional Edits Using YouTube Studio Editor
- [New] Download YouTube Gallery Files Instantly
- [New] Enrich Thumbnails Introducing Radiant Neon Elements
- [New] Discovering Your YouTube Unique Slot
- 2024 Approved Boosting Watch Time and Reducing Churn on YouTube The Ultimate List of Methods
- 2024 Approved Best Livestream Capturing Solutions for Content Makers
- Affordable Techniques to Enhance Written Content with Media
- [Updated] Captivating Channels Spotlight on the Most Popular Female Creators
- Unpacking Online Influence Your Channel Versus Competitors' Strategies
- [New] Essential YouTube Yoga Channels for Fitness Enthusiasts
- [Updated] Dismantle Bots, Elevate YouTube Watch Time
- Best Free Downloaders Download YouTube Thumbnail for Free for 2024
- Post Youtube Video on the Best Days to Get More View
- Capture YouTube Video in Screenshot Forms for Free
- Professional Insights Top 10 Capture Cards for YouTube Enthusiasts
- Excellence Cutter Suite Ultimate PC Editing with Beats
- Exploring YouTube's Operations After Video Upload
- In 2024, Day Jobs & Digital Passion Striking a Balance
- How to Capitalize on Youtube Shorts Must-Knows, Earning Prospects
- [Updated] Elevate Your YouTube Presence Filmmaking with Filmora
- [Updated] Choose Your Perfect Wedding Tales - Youtube's Finest 8
- [New] Bypass Software for YouTube Downloads
- Loop & Love Effortless YouTube Video Views on Your TV Screen
- Designing an Editorial Epilogue for 2024
- Video Editing Essentials Building YouTube Trailers in Filmora
- Child Prodigy Ryan Kaji Dominates YouTube Revenue Race
- [Updated] Enhance Movie Length on YouTube Platform
- In 2024, Efficient Guide Image Conversion to Professional YouTube Thumbnails
- Finance Frontiers The Finest YouTube Channels to Follow
- Boost Your Channels Top 5 YouTube Tricks for Increased Visibility for 2024
- In 2024, A Novice's Roadmap to YouTube Traffic Success
- 2024 Approved Audiovisual Improvement Voice Changing Apps Reviewed
- [Updated] Converting Spotify Playlist Content for YouTube Music Compatibility
- Webpage Wonders Enhancing with YouTube's Playlist Features
- 2024 Approved Digital Storyboard Studio
- In 2024, Discovering 10 Superior History Educational Videos
- The Ultimate Guide to Convert YouTube Shorts to Mp4
- 2024 Approved Ensuring Security in Converting YouTube Tracks to MP3 Format
- In 2024, Creating a Viral YouTube Sensation Simplified Action Plan
- Thwart Bots, Surge in Authentic YouTube Interest
- In 2024, Three Ways to Sim Unlock Samsung Galaxy A14 5G
- In 2024, Did Your iPhone XS Max Passcode Change Itself? Unlock It Now
- In 2024, Converting SRT Into SUB Quick, Effective Ways
- Sync Your Stories Essential Strategies for Incorporating Audio in Android Videography
- How to Bypass FRP from Vivo Y56 5G?
- 9 Solutions to Fix Motorola Razr 40 System Crash Issue | Dr.fone
- [Updated] A Beginner’s Path to Creating Engaging FB Covers for 2024
- New No Watermark, No Problem Top 10 Free Video Editors for Android
- [Updated] 2024 Approved Workplace Messaging Battle Is Slack Claiming Victory Over Discord?
- [Updated] Storing Session Videos in GH for 2024
- Spectacular Top Liquid Physics Gaming
- Android Safe Mode - How to Turn off Safe Mode on Infinix Note 30 Pro? | Dr.fone
- [New] In 2024, Country Soundscapes to Soothe Your Soul (TikTok Edition)
- In 2024, 7 Ways to Unlock a Locked Poco M6 5G Phone
- The Insider’s View Advanced Strategies for Successful Storytelling in Social Media
- In 2024, Clan Combat Chronicles Top 10 Games Inspired by Ghost of Tsushima
- Get the Perfect Fit Top 5 Aspect Ratio Calculators Online
- From Scenes to Screens Sims 4 Video Capturing for 2024
- Updated 2024 Approved Get VLLO on Mac + Top Alternative Options
- New 2024 Approved Cutting-Edge Videography The Most Favored Software for Detaching Sound From Moving Pictures
- [Updated] In 2024, Best Video Enhancement Apps for TikTok Mastery on W Indos/PC
- Cutting Edge Audio Solutions Top Online Sites for Professional-Grade MP3 Modification for 2024
- New In 2024, Macs Finest The Ultimate MP3 Conversion Software Roundup
- Title: "[Updated] Discover The 7 Most Popular Video Apps for iPhones & Android Live Streaming"
- Author: Steven
- Created at : 2024-05-25 20:54:59
- Updated at : 2024-05-26 20:54:59
- Link: https://youtube-clips.techidaily.com/updated-discover-the-7-most-popular-video-apps-for-iphones-and-android-live-streaming/
- License: This work is licensed under CC BY-NC-SA 4.0.
