
!["[Updated] Direct Capture Screen Record on PC/Mac + YouTube Upload"](https://www.lifewire.com/thmb/B19AEnNcJJVJJxRPUz9mmkezNmw=/400x300/filters:no_upscale():max_bytes(150000):strip_icc()/bestbuystudentdiscount-8bd31f2839d24d0f802c7f214e9f3254.jpg)
"[Updated] Direct Capture Screen Record on PC/Mac + YouTube Upload"
Direct Capture: Screen Record on PC/Mac + YouTube Upload
10 Record Screen and Upload to YouTube Tools [PC, Mac, Online]

Richard Bennett
Mar 27, 2024• Proven solutions
Recording the screen, including the audio, can help you introduce your gaming flow, show how to perform a task on the computer, or create a presentation. You can also upload the screen record to YouTube for free. There are several solutions if you want to record your screen and upload it to YouTube. You can record the screen with some screen recording software on your Mac or your Windows PC or with some online screen recording software or the screen recording feature built-in YouTube itself. In this article, we will show you how to to record screens and upload to YouTube on Windows and Mac with some screen recorders , some of which are free to use, or freemium, which are built in your computer. Check it out now.
- Part 1: Record Screen and Upload to YouTube Directly on PC
- Part 2: Record Screen and Upload to YouTube Online
- Part 3: Record Screen and Upload it to YouTube on Mac
Recommended YouTube Screen Recorders to Record Screen and Upload to YouTube Directly [Windows & Mac]
The following YouTube screen recording software can be used on both Windows and Mac computers. You can record the entire screen or a particular portion of the screen, record your own voiceover or add music to the recorded video and then upload it to YouTube directly.
Using Wondershare Filmora
Filmora is an easy-to-use yet powerful enough video editing software which features the Recording tools. Using Filmora, you can record the desktop screen , audio and webcam simultaneously. But compared with Filmora, the highest frame rates that Filmora can capture at 1 second is 60FPS.

Launch Wondershare Filmora and choose Full Feature mode to begin a project. Go to the Record tab and choose Record PC Screen. There are three types of screen recording to choose from – Target Window, Full Screen and Custom. You can also choose to record computer system audio or record from microphone. Click the icons to turn them off or on accordingly. Click Settings to see if there’s anything you need to adjust before recording.
 Download Mac Version ](https://tools.techidaily.com/wondershare/filmora/download/ )
The recorded footage will be loaded to the Media panel directly, you can then cut out imperfect frames, add some texts and titles, or apply transitions and filters to it. To upload the recorded screen video, click the Export in the main interface, and then switch to YouTube tab in the Export window.

Sign in your YouTube account and complete the video info accordingly and then click the Export button to upload the recorded video to YouTube directly.
If you are looking for more screen recorders which can run on Windows, Mac, Linux, Android, iOS or online for different purposes, you can check our picks of the best screen recorders for all platforms based on different purposes.
Part 1: How to Record Screen on Windows PC and Upload to YouTube Directly
1. Bandicam
To record screen using Bandicam, select “Screen Recording” and a green-edged rectangle window will appear. Adjust the rectangle window on the video then play the video.
Clicking the REC button will change the green-edged line of the rectangle window to red. Click the stop button to stop recording. To watch the recorded video, go to the “General” tab and click “Open.”
You can also upload your desired videos to YouTube from Bandicam by clicking the “Upload” button found under Bandicam’s “Output” tab.

2. Using Microsoft Expression Encoder 4
You can download Microsoft Expression Encoder 4 to record the screen of your device and upload it to YouTube. The software has a screen capture tool and encoder. Install the software as you would usually do. There’ll be 2 shortcuts in the start menu – Microsoft Expression Encoder 4 Screen Capture (used to capture the screen) and Microsoft Expression Encoder 4 (converts the screen into a video that can be uploaded to YouTube).
3. Using Ezvid
Ezvid can record screen and audio simultaneously. It can also capture the whole area of the screen, making it perfect for tutorial videos. Ezvid also has speech synthesis that translates text captions into artificial human language, so it can easily produce human sound with only a click of a button.
4. Using Smartpixel
Smartpixel is a screen recorder for Android and Windows. It has a user-friendly interface and different editing as well as recording functions. Smartpixel can export various video formats such as 3gp, MP4, wmv, avi and flv. It also allows you to upload videos to different online platforms like GoPlay and YouTube.
Part 2: How to Record Screen Online
1. Using YouTube
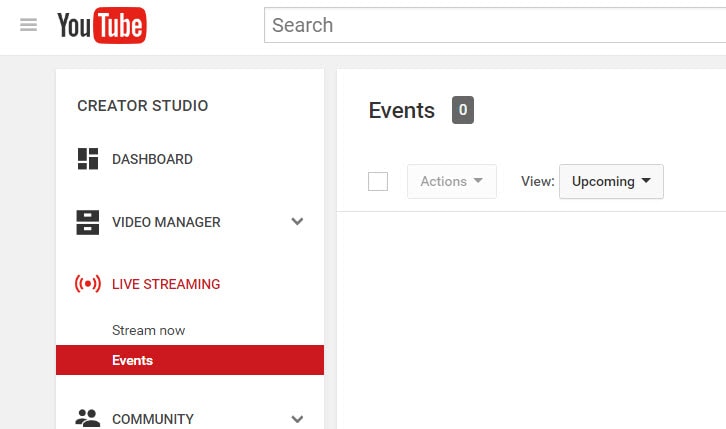
You can now also record desktop screen with the features in YouTube. To start recording the screen using YouTube, you just need to sign-in to the website using your Google Account. Click “Creator Studio”. Go to Live Streaming and choose “Events”. You’ll be directed to the “Create Event” page. Provide the title for your screencast video, set the video’s privacy to either Private or Unlisted.
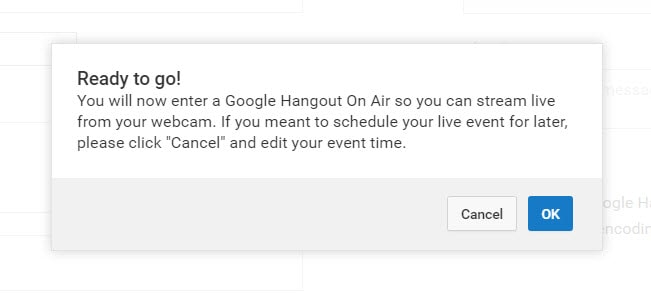
Click “Go Live Now” The Hangouts on Air page will open. Start the webcam from recording by clicking the camera icon. If you don’t want to record audio, you can just click the microphone icon.
Click “Screenshare” and choose a desktop window that you want to record for the screencast. Click “Start Screenshare” to share the screen then click the “Start Broadcast” button to begin recording the screen. When you’re done recording, just “Stop Broadcast” and go to the YouTube website. The new screencast video is stored in your YouTube video dashboard. You can share the video or download it to your Google Drive.
For more details, you can check How to record YouTube videos . If you’re looking for more online screen recorders for YouTube, you can check our picks of the 10 Best Free Online Screen Recorders .
2. Using FlexClip - Free Online Screen Recorder
FlexClip is a complete bundle of creativity. Why so? It is because it’s a web-based tool that helps you with image and video editing and post-production. It also offers a free online screen recording option.
FlexClip lets you record your webcam, screen, and audio with a simple click. Contrarily, you can also record simultaneous screens without a hitch! It can record almost anything that is being displayed on your computer screen. So be it gameplays, seminars, courses, presentations, or anything, you can always use this program to save your recording.
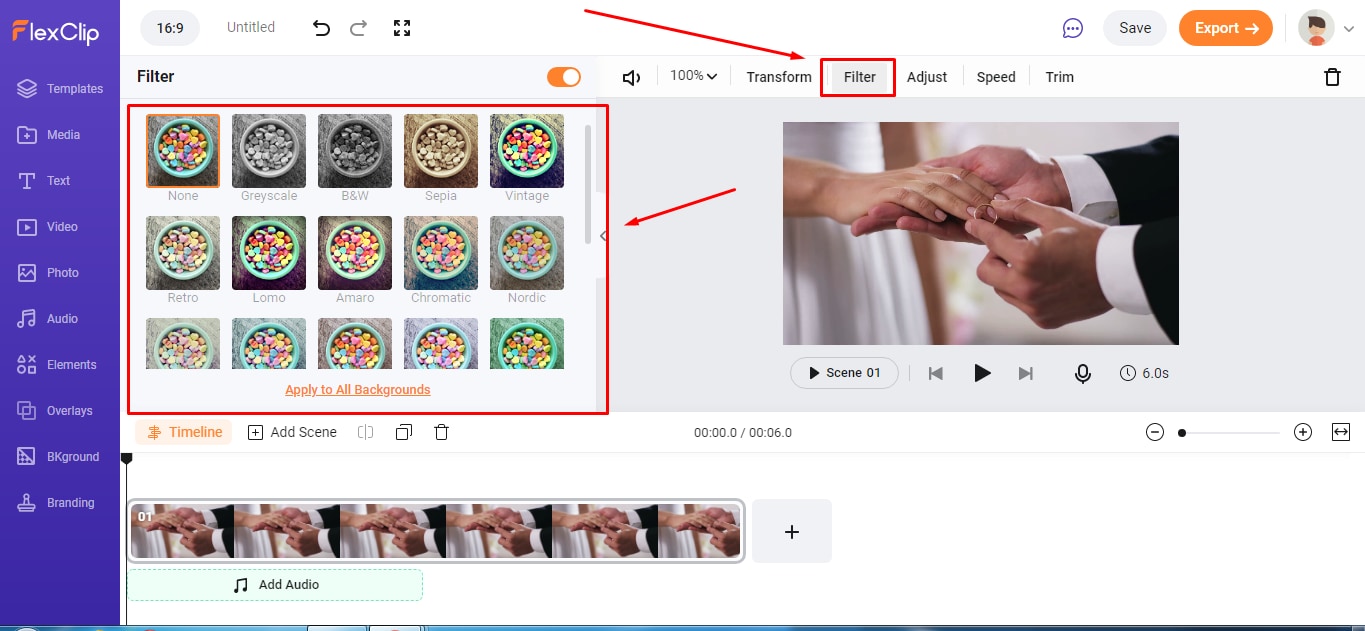
And once you’re done capturing the screen, FlexClip also allows you to edit your recording. You can add subtitles, highlights, overlays, and annotations to increase your video’s worth. So no wonder why FlexClip is one of the leading web-based software for free online screen capturing, especially if you want to make great YouTube videos.
The recording process is easy. All you need to do is visit the website and click the “Start Recording” button.
Then, choose your layout to start recording the screen and audio. When you’re finished, just hit the “Stop” button to end recording to edit the video in FlexClip’s built-in video editor. Lastly, download the screencast to upload it to your YouTube channel.
3. Using Apowersoft - Online Screen Recorder (Free)
Apowersoft is a renowned company that creates digital products, including file compressors, watermark removers, and more. Since there’s a growing demand for screen recorders for YouTube, the Apowersoft creators have also launched a “Free Online Screen Recorder.” Yup! You’re reading the right name.
Apowersoft – Free Online Screen Recorder eases the screen recording process. While it’s an online tool, you can also download the app on your Mac or Windows OS.
It’s a free program with simple features, such as a screen and webcam recording with audio. So if your YouTube content doesn’t require overlays, subtitles, or other editing stuff, this software is ideal due to its simplicity.
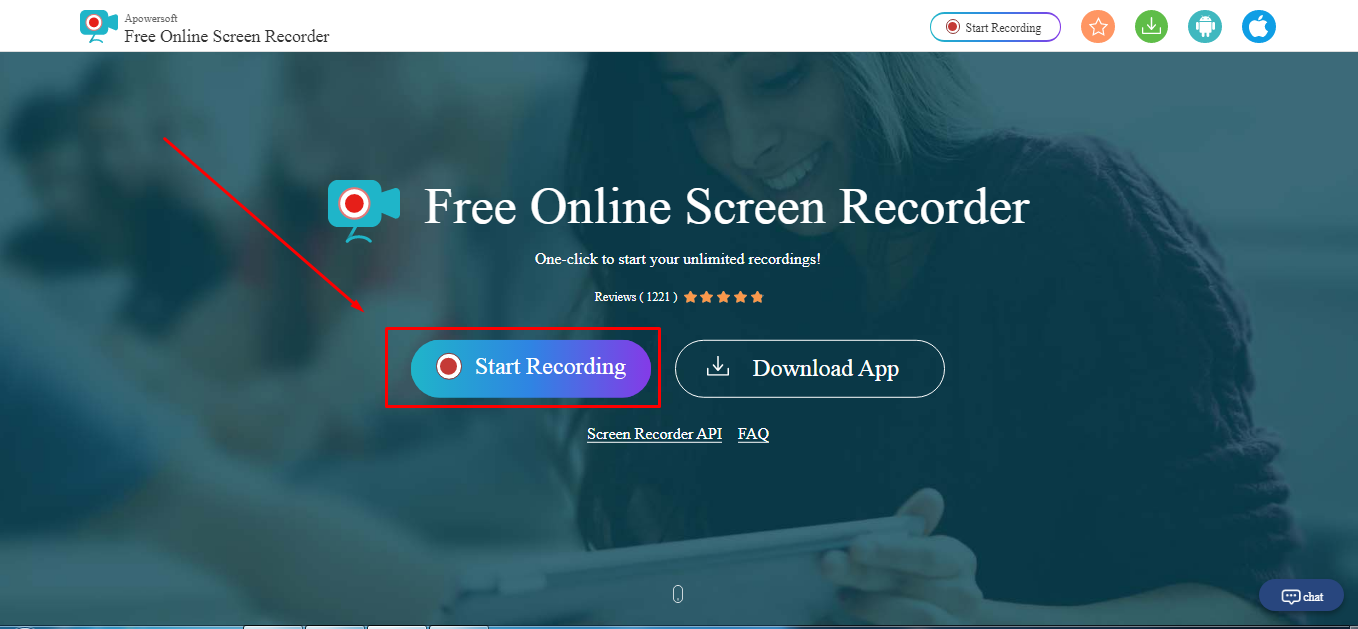
You can click the “Start Recording” button to get started.
.
Then, select the screen you wish to record, and save the captured screen to your local disk or cloud so you can upload the videos later to your YouTube channel.
Part 3: How to Record Screen for YouTube with Free Screen Recorder on Mac
1. Using QuickTime Player
QuickTime Player can be used to record movies from your camera or the screen of your iPad, iPod touch or iPhone. It can also record your Mac’s screen or record audio from your microphone. To record the screen of your Pad, iPod touch or iPhone, you should use the movie-recording function. You can use it to record the screen for YouTube video, or you can also record the YouTube video and empower it with your creativity.
For more details of using QuickTime Player to record YouTube videos, check our guide: How to record videos with Quicktime.
2. Using Screen Flow
Screen Flow is our second pick for Mac. Although it’s paid software, you can still enjoy the blessings of this screen recorder through the trial version. It’s a very handy tool that allows Mac screen recording and all iOS devices, such as iPhones and iPad.
Okay! So what’s good about screen flow? Let’s uncover. Firstly, it’s an editor + screen recorder specifically made for YouTube. You can capture the screen and edit the footage before uploading it to your channel.
Secondly, this software allows you to record simultaneous screens and your webcam. Plus, you can also record your voice through its mic recording option.
Another great thing about Screen Flow is that it has numerous video filters and a customizable title library. It also permits you to save screen recordings on your Mac or directly share them to your YouTube channel, other social media accounts, websites, or cloud storage in a few clicks.
Here’s a video to help you get started with screen recording on your Mac using Screen Flow:
3. Using Vmaker
Vmaker is another authentic software to record screens for your YouTube videos. It’s a free program, but you can buy premium versions to unlock more features.
The tool is trusted by many software review websites, such as “crozdesk.” It is available on both Mac and Windows OS. However, it seems like this software performs well on Mac operating systems.
Vmaker allows you to record your screen, your favorite YouTube videos, and the audio – all together! You can record the entire Mac screen or a specific portion in HD quality. Moreover, the software allows you to pick resolutions up to 4K to record the media.
This program also offers editing features like adding subtitles, music, flip, blur, trim, and more to create an awesome video. All videos are saved to your cloud workspace once you finish recording. Then, you can share the recorded video screens on your YouTube.
The tool is ideal for making tutorials, courses, demos, and product review videos. All you need to do is download Vmaker on your Mac. Choose a webcam, screen, or both with audio for recording. Start recording in the highest quality. Edit your video and share it on your YouTube channel.
Conclusion
Above are some screen recorders that you can use to record YouTube videos or record the screen and webcam simultaneously to make a video and upload it it to YouTube. If you want to record a screen video and edit it further, you should try Wondershare Filmora video editor.
Download Mac Version ](https://tools.techidaily.com/wondershare/filmora/download/ )
FAQs
Q1. How do you record your screen on a Mac for YouTube?
There are some great tools for screen recording on Mac for YouTube. The most loved and enjoyed program is Filmora by Wondershare. It’s a professional tool for screen recording and video editing. Most importantly, it has a user-friendly interface and records your screen in high quality.
Another option is the Quick Time Player. This program also allows screen recording. Likewise, Screen Flow is also a great program for screen capturing for YouTube on Mac.
Q2. Can I screen-record and upload it to YouTube?
There are two ways to do it. First, you can download the free or paid screen recording software on your Windows or macOS. Second, you can look for online screen recorders like FlexClip or the built-in YouTube recorder and directly share the recorded video to your channel.
Some tools, like Apowersoft and Vmaker, save screen recordings to the cloud or local disk. And there’s no direct sharing of the recorded screens to your YouTube channel. So if you’re using such programs, you will need to sign in to your YouTube channel and upload the file from your computer hard drive.
Q3. How do I record my computer screen for 2022?
Some of the greatest video editing and screen recording tools like Filmora, Bandicam, and FlexClip allow you to record your computer screen. Depending on the software, you can directly share the video to your YouTube channel. Or, save the video on your computer and then upload it on your channel.
Richard Bennett
Richard Bennett is a writer and a lover of all things video.
Follow @Richard Bennett
Richard Bennett
Mar 27, 2024• Proven solutions
Recording the screen, including the audio, can help you introduce your gaming flow, show how to perform a task on the computer, or create a presentation. You can also upload the screen record to YouTube for free. There are several solutions if you want to record your screen and upload it to YouTube. You can record the screen with some screen recording software on your Mac or your Windows PC or with some online screen recording software or the screen recording feature built-in YouTube itself. In this article, we will show you how to to record screens and upload to YouTube on Windows and Mac with some screen recorders , some of which are free to use, or freemium, which are built in your computer. Check it out now.
- Part 1: Record Screen and Upload to YouTube Directly on PC
- Part 2: Record Screen and Upload to YouTube Online
- Part 3: Record Screen and Upload it to YouTube on Mac
Recommended YouTube Screen Recorders to Record Screen and Upload to YouTube Directly [Windows & Mac]
The following YouTube screen recording software can be used on both Windows and Mac computers. You can record the entire screen or a particular portion of the screen, record your own voiceover or add music to the recorded video and then upload it to YouTube directly.
Using Wondershare Filmora
Filmora is an easy-to-use yet powerful enough video editing software which features the Recording tools. Using Filmora, you can record the desktop screen , audio and webcam simultaneously. But compared with Filmora, the highest frame rates that Filmora can capture at 1 second is 60FPS.
Launch Wondershare Filmora and choose Full Feature mode to begin a project. Go to the Record tab and choose Record PC Screen. There are three types of screen recording to choose from – Target Window, Full Screen and Custom. You can also choose to record computer system audio or record from microphone. Click the icons to turn them off or on accordingly. Click Settings to see if there’s anything you need to adjust before recording.
Download Mac Version ](https://tools.techidaily.com/wondershare/filmora/download/ )
The recorded footage will be loaded to the Media panel directly, you can then cut out imperfect frames, add some texts and titles, or apply transitions and filters to it. To upload the recorded screen video, click the Export in the main interface, and then switch to YouTube tab in the Export window.
Sign in your YouTube account and complete the video info accordingly and then click the Export button to upload the recorded video to YouTube directly.
If you are looking for more screen recorders which can run on Windows, Mac, Linux, Android, iOS or online for different purposes, you can check our picks of the best screen recorders for all platforms based on different purposes.
Part 1: How to Record Screen on Windows PC and Upload to YouTube Directly
1. Bandicam
To record screen using Bandicam, select “Screen Recording” and a green-edged rectangle window will appear. Adjust the rectangle window on the video then play the video.
Clicking the REC button will change the green-edged line of the rectangle window to red. Click the stop button to stop recording. To watch the recorded video, go to the “General” tab and click “Open.”
You can also upload your desired videos to YouTube from Bandicam by clicking the “Upload” button found under Bandicam’s “Output” tab.
2. Using Microsoft Expression Encoder 4
You can download Microsoft Expression Encoder 4 to record the screen of your device and upload it to YouTube. The software has a screen capture tool and encoder. Install the software as you would usually do. There’ll be 2 shortcuts in the start menu – Microsoft Expression Encoder 4 Screen Capture (used to capture the screen) and Microsoft Expression Encoder 4 (converts the screen into a video that can be uploaded to YouTube).
3. Using Ezvid
Ezvid can record screen and audio simultaneously. It can also capture the whole area of the screen, making it perfect for tutorial videos. Ezvid also has speech synthesis that translates text captions into artificial human language, so it can easily produce human sound with only a click of a button.
4. Using Smartpixel
Smartpixel is a screen recorder for Android and Windows. It has a user-friendly interface and different editing as well as recording functions. Smartpixel can export various video formats such as 3gp, MP4, wmv, avi and flv. It also allows you to upload videos to different online platforms like GoPlay and YouTube.
Part 2: How to Record Screen Online
1. Using YouTube
You can now also record desktop screen with the features in YouTube. To start recording the screen using YouTube, you just need to sign-in to the website using your Google Account. Click “Creator Studio”. Go to Live Streaming and choose “Events”. You’ll be directed to the “Create Event” page. Provide the title for your screencast video, set the video’s privacy to either Private or Unlisted.
Click “Go Live Now” The Hangouts on Air page will open. Start the webcam from recording by clicking the camera icon. If you don’t want to record audio, you can just click the microphone icon.
Click “Screenshare” and choose a desktop window that you want to record for the screencast. Click “Start Screenshare” to share the screen then click the “Start Broadcast” button to begin recording the screen. When you’re done recording, just “Stop Broadcast” and go to the YouTube website. The new screencast video is stored in your YouTube video dashboard. You can share the video or download it to your Google Drive.
For more details, you can check How to record YouTube videos . If you’re looking for more online screen recorders for YouTube, you can check our picks of the 10 Best Free Online Screen Recorders .
2. Using FlexClip - Free Online Screen Recorder
FlexClip is a complete bundle of creativity. Why so? It is because it’s a web-based tool that helps you with image and video editing and post-production. It also offers a free online screen recording option.
FlexClip lets you record your webcam, screen, and audio with a simple click. Contrarily, you can also record simultaneous screens without a hitch! It can record almost anything that is being displayed on your computer screen. So be it gameplays, seminars, courses, presentations, or anything, you can always use this program to save your recording.
And once you’re done capturing the screen, FlexClip also allows you to edit your recording. You can add subtitles, highlights, overlays, and annotations to increase your video’s worth. So no wonder why FlexClip is one of the leading web-based software for free online screen capturing, especially if you want to make great YouTube videos.
The recording process is easy. All you need to do is visit the website and click the “Start Recording” button.
Then, choose your layout to start recording the screen and audio. When you’re finished, just hit the “Stop” button to end recording to edit the video in FlexClip’s built-in video editor. Lastly, download the screencast to upload it to your YouTube channel.
3. Using Apowersoft - Online Screen Recorder (Free)
Apowersoft is a renowned company that creates digital products, including file compressors, watermark removers, and more. Since there’s a growing demand for screen recorders for YouTube, the Apowersoft creators have also launched a “Free Online Screen Recorder.” Yup! You’re reading the right name.
Apowersoft – Free Online Screen Recorder eases the screen recording process. While it’s an online tool, you can also download the app on your Mac or Windows OS.
It’s a free program with simple features, such as a screen and webcam recording with audio. So if your YouTube content doesn’t require overlays, subtitles, or other editing stuff, this software is ideal due to its simplicity.
You can click the “Start Recording” button to get started.
.
Then, select the screen you wish to record, and save the captured screen to your local disk or cloud so you can upload the videos later to your YouTube channel.
Part 3: How to Record Screen for YouTube with Free Screen Recorder on Mac
1. Using QuickTime Player
QuickTime Player can be used to record movies from your camera or the screen of your iPad, iPod touch or iPhone. It can also record your Mac’s screen or record audio from your microphone. To record the screen of your Pad, iPod touch or iPhone, you should use the movie-recording function. You can use it to record the screen for YouTube video, or you can also record the YouTube video and empower it with your creativity.
For more details of using QuickTime Player to record YouTube videos, check our guide: How to record videos with Quicktime.
2. Using Screen Flow
Screen Flow is our second pick for Mac. Although it’s paid software, you can still enjoy the blessings of this screen recorder through the trial version. It’s a very handy tool that allows Mac screen recording and all iOS devices, such as iPhones and iPad.
Okay! So what’s good about screen flow? Let’s uncover. Firstly, it’s an editor + screen recorder specifically made for YouTube. You can capture the screen and edit the footage before uploading it to your channel.
Secondly, this software allows you to record simultaneous screens and your webcam. Plus, you can also record your voice through its mic recording option.
Another great thing about Screen Flow is that it has numerous video filters and a customizable title library. It also permits you to save screen recordings on your Mac or directly share them to your YouTube channel, other social media accounts, websites, or cloud storage in a few clicks.
Here’s a video to help you get started with screen recording on your Mac using Screen Flow:
3. Using Vmaker
Vmaker is another authentic software to record screens for your YouTube videos. It’s a free program, but you can buy premium versions to unlock more features.
The tool is trusted by many software review websites, such as “crozdesk.” It is available on both Mac and Windows OS. However, it seems like this software performs well on Mac operating systems.
Vmaker allows you to record your screen, your favorite YouTube videos, and the audio – all together! You can record the entire Mac screen or a specific portion in HD quality. Moreover, the software allows you to pick resolutions up to 4K to record the media.
This program also offers editing features like adding subtitles, music, flip, blur, trim, and more to create an awesome video. All videos are saved to your cloud workspace once you finish recording. Then, you can share the recorded video screens on your YouTube.
The tool is ideal for making tutorials, courses, demos, and product review videos. All you need to do is download Vmaker on your Mac. Choose a webcam, screen, or both with audio for recording. Start recording in the highest quality. Edit your video and share it on your YouTube channel.
Conclusion
Above are some screen recorders that you can use to record YouTube videos or record the screen and webcam simultaneously to make a video and upload it it to YouTube. If you want to record a screen video and edit it further, you should try Wondershare Filmora video editor.
Download Mac Version ](https://tools.techidaily.com/wondershare/filmora/download/ )
FAQs
Q1. How do you record your screen on a Mac for YouTube?
There are some great tools for screen recording on Mac for YouTube. The most loved and enjoyed program is Filmora by Wondershare. It’s a professional tool for screen recording and video editing. Most importantly, it has a user-friendly interface and records your screen in high quality.
Another option is the Quick Time Player. This program also allows screen recording. Likewise, Screen Flow is also a great program for screen capturing for YouTube on Mac.
Q2. Can I screen-record and upload it to YouTube?
There are two ways to do it. First, you can download the free or paid screen recording software on your Windows or macOS. Second, you can look for online screen recorders like FlexClip or the built-in YouTube recorder and directly share the recorded video to your channel.
Some tools, like Apowersoft and Vmaker, save screen recordings to the cloud or local disk. And there’s no direct sharing of the recorded screens to your YouTube channel. So if you’re using such programs, you will need to sign in to your YouTube channel and upload the file from your computer hard drive.
Q3. How do I record my computer screen for 2022?
Some of the greatest video editing and screen recording tools like Filmora, Bandicam, and FlexClip allow you to record your computer screen. Depending on the software, you can directly share the video to your YouTube channel. Or, save the video on your computer and then upload it on your channel.
Richard Bennett
Richard Bennett is a writer and a lover of all things video.
Follow @Richard Bennett
Swift Technique: Coding Images for YouTube Channel Thumbnails
There is a saying that first impressions last, and this is proven true, especially when it comes to YouTube video viewership. For sure, you have experienced watching a video out of curiosity because of its thumbnail. That is why content creators take time to resize YouTube thumbnails or use a YouTube thumbnail size converter to customize the preview images that represent their videos.
This technique not only attract viewers to watch your video, but it also gives a glimpse of your content. In this article, we will provide you with a quick tutorial on how to resize a YouTube thumbnail and suggest handy tools you can use to create the perfect YouTube video thumbnail!

Best YouTube Thumbnail Size
According to YouTube’s help center, there are some things to remember when creating a thumbnail for your YouTube videos.
- First, make sure that the thumbnail size is 1280 pixels by 720 pixels and 640 pixels wide. It is the best YouTube thumbnail size.
- When it comes to the thumbnail dimension, make sure to use an aspect ratio of 16:9.
- Also, your YouTube thumbnail image should not exceed 2MB and is in either JPG, GIF or PNG format.
How To Resize Your YouTube Thumbnail
The primary reason for changing the YouTube thumbnail size is to gain more audience. If you are a content creator, your main goal is to introduce your content to a wider range of viewers, right? So you have to pay attention to even the smallest detail, such as YouTube thumbnails to increase viewership and top YouTube SEO.
In fact, YouTube recommends this technique to get more viewers. Also, resizing your YouTube thumbnail will prevent you from getting the “file larger than 2MB error” which can cause your thumbnail to be discarded.
So, how can you use this technique? Check our tutorial below as we walk you through various recommended methods for resizing a YouTube thumbnail:
Method 1: Resize YouTube Thumbnail With Windows Default App
The easiest way to resize YouTube thumbnails is through the Windows default app. Within just a few modifications, you can resize your thumbnail to fit as a preview image for your YouTube video.
Please take note that your image should be at least 2 megabytes or less to achieve the perfect YouTube thumbnail fit. If your image exceeds the limit, your thumbnail will either be rejected, or your image will have a black screen around it-which is not ideal at all.
Now, let us start the tutorial.
Step1 Open an image you want to set as a thumbnail. Then, Right-click> Resize.

Step2 Select “Define custom dimensions.”

Step3 Set the width to 1280 and the height to 720. Then tick the box for “Maintain Aspect Ratio “and click “Save Resized Copy.”

Step4 Click the upload thumbnail button on YouTube and import your resized image.

Method 2. Online YouTube Thumbnail Size Converter
The second method you can use is the online YouTube thumbnail size converter. As it completely works in browsers, you do not need to worry about any app installation to access the feature. Furthermore, using online YouTube thumbnail size converters ensures you maintain your image resolution and prevents it from getting blurry or pixelated.
There are various YouTube thumbnail resizers available online. Some of the most popular are Fotor, Super Image Converter, Pixelied, Super Image Converter , Adobe Express , Newisty, and Promo . Let us focus on the last online tool and the steps on how to use it.
Promo is a free online software you can use to convert an image to a YouTube thumbnail. It is one of the best YouTube Thumbnail tools as it uses simple operation steps and automatically resizes your image without losing its quality.

Here are the steps on how to use the Promo YouTube thumbnail size converter:
Step1 Go to Promo’s official website and import your image

Step2 Scroll down and find the YouTube thumbnail size where your resized image is displayed. Then, click “Download.”

Method 3: Convert the Image to YouTube Thumbnail Using Wondershare Filmora
It is without a doubt that online YouTube thumbnail resizers are great tools for converting your image to an ideal YouTube thumbnail. But it would be much better if you resize your video using the same app you use for editing. That way, you will save time using two separate apps, and your task will be much more efficient using an all-in-one video editing tool.
Wondershare Filmora , one of the most well-known software for creating high-quality and compelling videos, combines these functions in one app. Filmora is not just an excellent software for crafting YouTube videos but also a reliable tool you can use in creating and resizing YouTube thumbnails.
Free Download For Win 7 or later(64-bit)
Free Download For macOS 10.14 or later
Here is the step-by-step tutorial on how to use Filmora in resizing your YouTube thumbnail. It is divided into two parts:
1. Take a Snapshot as the Thumbnail with Filmora
Step1 Open the video in the timeline, click the play icon in the player window, and pause when you reach the desired frame for the YouTube thumbnail. Click the camera icon to take a snapshot.

Step2 In the snapshot window, choose to save the snapshot as a PNG or JPG file.
Step3 Select the output storage location and click OK.

2. Resize the YouTube Thumbnail
Step1 Import the image into the app timeline.

Step2 Drag and drop the image into the timeline and click the green “Export“ button. In the popup Export window, select GIF. Next, click “Settings“ to adjust the resolution.

Step3 As the recommended size of a YouTube Thumbnail is 1280 * 720 pixels, you can set the resolution to 1280 * 720. Then click Apply and Export the GIF. You can now upload the GIF thumbnail to your YouTube account.

Method 4. Convert Images to YouTube Thumbnail Using Third-Party Software
In addition to using dedicated video editing software, several third-party image editing programs can be used to resize images for use as YouTube thumbnails. Programs like GIMP are popular for this purpose, as it offers a wide range of tools and features for editing and resizing images.
This program allows you to import an image, resize it to the dimensions required for a YouTube thumbnail (typically 1280 x 720 pixels), and save the edited version to your desired location. Using an image editing program can be a good option if you need more control over the appearance of your thumbnail or if you want to make more extensive edits beyond simply resizing the image.
To resize an image using an image editing program like GIMP, follow these steps:
Step1 Install and launch GIMP on your computer.

Step2 Click on “File“ > “Open,” then search for the file you want to resize.

Step3 Click on “Image“ > “Scale Image“ and make sure that the resolution is 1920 by 1080.

Step4 Click on “File“ > “Export As“ and toggle the “Select File Type (By Extension)“ option. Choose JPG/JPEG format because it can compress the thumbnail enough to stay within the limit of 2 megabytes.

Step5 You can change the quality of the image and click the “Export“ button to save the thumbnail.

Comparison of These 4 YouTube Thumbnail Resizing Methods
Now that we’ve explored the four methods for resizing YouTube thumbnails, it’s time to compare the pros and cons of each method. In this section, we’ll consider factors such as ease of use, speed, quality, cost, and compatibility to help you determine the best option for your needs.
Take a look at the table below for a more detailed comparison.
| | Windows Default App | Online YouTube Thumbnail Size Converter | Wondershare Filmora | Third-Party Software | |
| ————————————————– | ——————————————- | ———————– | ———————— | ——– |
| Other Software Required or Not | No | Yes (Internet Browser) | Yes | Yes |
| Internet Connection Required | No | Yes | No | No |
| Complexity of Operations | Easy | Easy | Easy | Moderate |
| Support Other Editing of the YouTube Thumbnail | No | No | Yes | Yes |
| File Size Limit | None | 25MB | None | None |
Resizing YouTube thumbnails using the Windows default app is a quick and easy method that requires no additional software or tools. However, the quality of the resized thumbnail may improve if the original image is low resolution, and this method is only suitable for users on Windows operating systems.
Online YouTube thumbnail size converters are convenient and easy to use, and they can be accessed from any device with an internet connection. They also typically preserve the quality of the original image. However, some online converters may have size limits or require a subscription to unlock all features, and using an online converter can be slower than using a dedicated software tool.
Using Wondershare Filmora allows you to create and edit YouTube thumbnails within a single application, which can be a time-saving advantage if you’re already using Filmora for other video editing tasks. However, Filmora is a paid software, so there is a cost associated with using it, and it may have a steeper learning curve for users new to video editing.
Image editing programs like GIMP offer many features and tools for customizing your thumbnail, including adding text, applying filters, and making more extensive edits beyond simply resizing the image. They also typically offer more control over the quality and appearance of the resized thumbnail.
However, using a third-party image editing program may require a learning curve and maybe more time-consuming than other methods, and there may be a cost associated with purchasing the software.
Each of the four methods for resizing YouTube thumbnails has its pros and cons, and the best method will depend on the user’s specific needs and preferences.
Conclusion
This article explored four methods for resizing YouTube thumbnails: using the Windows default app, online converters, Wondershare Filmora, and image editing programs like GIMP. Each method has advantages and disadvantages; the best one depends on your specific needs and preferences. No matter your chosen method, you can resize YouTube thumbnails confidently with these tools and techniques.
Free Download For macOS 10.14 or later
Here is the step-by-step tutorial on how to use Filmora in resizing your YouTube thumbnail. It is divided into two parts:
1. Take a Snapshot as the Thumbnail with Filmora
Step1 Open the video in the timeline, click the play icon in the player window, and pause when you reach the desired frame for the YouTube thumbnail. Click the camera icon to take a snapshot.
Step2 In the snapshot window, choose to save the snapshot as a PNG or JPG file.
Step3 Select the output storage location and click OK.
2. Resize the YouTube Thumbnail
Step1 Import the image into the app timeline.
Step2 Drag and drop the image into the timeline and click the green “Export“ button. In the popup Export window, select GIF. Next, click “Settings“ to adjust the resolution.
Step3 As the recommended size of a YouTube Thumbnail is 1280 * 720 pixels, you can set the resolution to 1280 * 720. Then click Apply and Export the GIF. You can now upload the GIF thumbnail to your YouTube account.
Method 4. Convert Images to YouTube Thumbnail Using Third-Party Software
In addition to using dedicated video editing software, several third-party image editing programs can be used to resize images for use as YouTube thumbnails. Programs like GIMP are popular for this purpose, as it offers a wide range of tools and features for editing and resizing images.
This program allows you to import an image, resize it to the dimensions required for a YouTube thumbnail (typically 1280 x 720 pixels), and save the edited version to your desired location. Using an image editing program can be a good option if you need more control over the appearance of your thumbnail or if you want to make more extensive edits beyond simply resizing the image.
To resize an image using an image editing program like GIMP, follow these steps:
Step1 Install and launch GIMP on your computer.
Step2 Click on “File“ > “Open,” then search for the file you want to resize.
Step3 Click on “Image“ > “Scale Image“ and make sure that the resolution is 1920 by 1080.
Step4 Click on “File“ > “Export As“ and toggle the “Select File Type (By Extension)“ option. Choose JPG/JPEG format because it can compress the thumbnail enough to stay within the limit of 2 megabytes.
Step5 You can change the quality of the image and click the “Export“ button to save the thumbnail.
Comparison of These 4 YouTube Thumbnail Resizing Methods
Now that we’ve explored the four methods for resizing YouTube thumbnails, it’s time to compare the pros and cons of each method. In this section, we’ll consider factors such as ease of use, speed, quality, cost, and compatibility to help you determine the best option for your needs.
Take a look at the table below for a more detailed comparison.
| | Windows Default App | Online YouTube Thumbnail Size Converter | Wondershare Filmora | Third-Party Software | |
| ————————————————– | ——————————————- | ———————– | ———————— | ——– |
| Other Software Required or Not | No | Yes (Internet Browser) | Yes | Yes |
| Internet Connection Required | No | Yes | No | No |
| Complexity of Operations | Easy | Easy | Easy | Moderate |
| Support Other Editing of the YouTube Thumbnail | No | No | Yes | Yes |
| File Size Limit | None | 25MB | None | None |
Resizing YouTube thumbnails using the Windows default app is a quick and easy method that requires no additional software or tools. However, the quality of the resized thumbnail may improve if the original image is low resolution, and this method is only suitable for users on Windows operating systems.
Online YouTube thumbnail size converters are convenient and easy to use, and they can be accessed from any device with an internet connection. They also typically preserve the quality of the original image. However, some online converters may have size limits or require a subscription to unlock all features, and using an online converter can be slower than using a dedicated software tool.
Using Wondershare Filmora allows you to create and edit YouTube thumbnails within a single application, which can be a time-saving advantage if you’re already using Filmora for other video editing tasks. However, Filmora is a paid software, so there is a cost associated with using it, and it may have a steeper learning curve for users new to video editing.
Image editing programs like GIMP offer many features and tools for customizing your thumbnail, including adding text, applying filters, and making more extensive edits beyond simply resizing the image. They also typically offer more control over the quality and appearance of the resized thumbnail.
However, using a third-party image editing program may require a learning curve and maybe more time-consuming than other methods, and there may be a cost associated with purchasing the software.
Each of the four methods for resizing YouTube thumbnails has its pros and cons, and the best method will depend on the user’s specific needs and preferences.
Conclusion
This article explored four methods for resizing YouTube thumbnails: using the Windows default app, online converters, Wondershare Filmora, and image editing programs like GIMP. Each method has advantages and disadvantages; the best one depends on your specific needs and preferences. No matter your chosen method, you can resize YouTube thumbnails confidently with these tools and techniques.
Also read:
- Winter's Chill & Your Videos Selecting Heated Backdrops
- [Updated] Essential Illumination Strategies for Filming
- [Updated] Drafting Dynamic Denouements
- Gamer's Dream The Ultimate Compilation of Best YT Game Entrances
- Elevate Vlogging Quality - The Ultimate 12 Recommended Cam Picks
- The Gateway to YouTube Stardom via Studio Expertise
- Lawful Ways to Attain a Million Followers on YouTube
- Propel Your YouTube Presence with Google Analytics Skills
- Elevating Audience Excitement with Top Ideas
- Can Buying Likes Improve YouTube Rankings for 2024
- [Updated] Create Professional Minecraft Graphics
- Enhancing Clicks YouTube Thumbnail Sizes Explored
- The Art of Crafting and Sharing Detailed YouTube Videos
- 2024 Approved Best Sound Transforming Apps for YouTube Vloggers
- Sifting Through Mr. Beast's Bank Statements
- The Verdict on Your Next Step with YouTube MNCs
- [New] Effortless MP3 Conversion From YouTube for Mac Users
- [Updated] 10 Premier Yoga Educators on YouTube
- Elevate Viewing Experience Activating AV1 Codec on YouTube for 2024
- Breaking the Monotony Innovative YT Playlist Shuffling for 2024
- Elevate Your Channel's Popularity with 12 Key Growth Techniques
- In 2024, Achieve Stellar Clickthrough Rates via Thumbnail Enlargement on YouTube
- 2024 Approved Elevate Your Cinematography Skills Editing and Sharing 360° Videos on YouTube
- YouTube Monetization Does YouTube Pay Monthly?
- Cut The Cost, Not The Creativity Best Free Editing Tools (Top 9)
- [New] Enhancing Engagement How to Utilize YouTube's Prominent Channels
- The Art of Video Integration YouTube Meets Microsoft PowerPoint
- YouTube Movie Maker Tutorial and Alternatives
- In 2024, Beginner's Guide to Video Production Free Course Series
- Step-by-Step Guide to Scripting Engaging YouTube Videos
- Eyes on the Digital Winners Top Channels
- 9 Zero Price Programs to Take Your Videos From Average to Amazing for 2024
- [New] Charting Your Path to YouTube Affiliate Status with 10K Vistas Goal
- [New] Breathtaking Lyric Videos Made Easy by Lyric Video Maker
- 2024 Approved Access YouTube Tracks Without Spending a Dime 25+ No-Cost Audio Extractors
- Conquering Camera Fear Paving the Path to YouTube Success for 2024
- Turning Tides Creative Methods to Flip Your YouTube Video
- Fixing Problematic YouTube Shorts Thumbnails Display
- Innovating Sustainable Communities Within the Concrete Jungle
- Make Your Comments Pop with Emojis in YouTube
- Efficiently Achieving Color Background Separation
- The Vlogger's Selection Premium Camera Lenses Compared
- Navigating YouTube's Maker Central Interface
- From Footage to Fame Premiere Pro Edition Tricks for YouTube
- Unraveling Top 6 Your Guide to Free & Favored Shorts Downloaders
- Perfecting Stability A No-Tripod Guide
- Bypassing Barriers A Guide to Flawless YouTube Shorts for 2024
- 2024 Approved Awarded Top 12 Camcorders Including Satellite Position Tracking
- [New] Master the Art of Broadcasting Optimal Cameras For Your Twitch Channel
- In 2024, 3 Effective Methods to Fake GPS location on Android For your Samsung Galaxy XCover 7 | Dr.fone
- Google Play Services Wont Update? 12 Fixes are Here on Tecno Spark 20 | Dr.fone
- What should I do if I dont find the deleted iPhone 15 Pro Max files after scanning? | Stellar
- New 2024 Approved The Ultimate List 10 Best Intro Makers on the Web
- [New] 2024 Approved The Comprehensive Guide to High-Def Game Broadcasting
- Honor Magic 6 Stuck on Screen – Finding Solutions For Stuck on Boot | Dr.fone
- How To Restore Missing Contacts Files from Xiaomi Redmi Note 12T Pro.
- Bypassing Ban Secret Insights Into Avoiding FB Blacklist for 2024
- How to Unlock Your Apple iPhone 14 Pro Passcode 4 Easy Methods (With or Without iTunes)
- Honoring Creativity Ultimate OTU Collection
- Updated In 2024, How to Create Liquid Water Reveal Intro?
- How to use Pokemon Go Joystick on Vivo Y55s 5G (2023)? | Dr.fone
- Effortless Electronic Exchange 5 Secure Pathways to Your PC
- Crafting Colorful Snaps Embrace Snapchat's Anime Filters for 2024
- 2024 Approved Maximize Your Online Interactions with These 5 Devices
- Updated 2024 Approved Do You Want to Loop a Video but Arent Sure Where to Begin? This Is the Article for You. You May View Videos Endlessly without Having to Worry About the Loop Options if You Use a Third-Party Video Looper Program
- Updated 2024 Approved Transform Your Photos Into Stunning Videos with These Top Makers
- In 2024, IGTV's Top Picks for Next Week's Feed
- [Updated] 2024 Approved Expertise in Editing How to Add Descriptive Texts to Videos
- Updated Bringing Your Vision to Life Top 7 Animation Drawing Software Tools
- In 2024, A Guide Motorola Moto E13 Wireless and Wired Screen Mirroring | Dr.fone
- 2024 Approved Split, Cut, and Trim AVI Files Like a Pro The Ultimate Tutorial
- In 2024, What You Want To Know About Two-Factor Authentication for iCloud From your iPhone 15 Pro
- In 2024, 4 Methods to Turn off Life 360 On Vivo Y28 5G without Anyone Knowing | Dr.fone
- Discover the Best Free Online Video Editors for Your Needs
- In 2024, 5 Ways to Move Contacts From ZTE Nubia Z60 Ultra to iPhone (13/14/15) | Dr.fone
- [New] Identifying the Top 10 Hidden Story Admirers
- [New] Innovating Conference Calls with Google Meet Backdrop Shuffling
- In 2024, How to Bypass Apple iPhone 14 Passcode Easily Video Inside | Dr.fone
- New Finding Locations with the Hallmark of Enthusiastic Uproar
- Mastering Your FB Profile Picture Update for 2024
- How To Remove Phone Number From Your Apple ID on Your iPhone 15 Pro?
- Updated In 2024, Final Cut Pro Tutorial Adding Realistic Motion Blur
- New In 2024, Revolutionize Your Videos Best Free Special Effects Apps for Mobile
- Two Ways to Track My Boyfriends OnePlus Nord CE 3 5G without Him Knowing | Dr.fone
- 11 Proven Solutions to Fix Google Play Store Not Working Issue on Xiaomi Civi 3 Disney 100th Anniversary Edition | Dr.fone
- Streamlining Video Calls Leveraging Zoom on Windows 10 PCs
- Title: "[Updated] Direct Capture Screen Record on PC/Mac + YouTube Upload"
- Author: Steven
- Created at : 2024-05-25 20:54:44
- Updated at : 2024-05-26 20:54:44
- Link: https://youtube-clips.techidaily.com/updated-direct-capture-screen-record-on-pcmac-plus-youtube-upload/
- License: This work is licensed under CC BY-NC-SA 4.0.
