
!["[Updated] Cash Creation in Content A Deep Dive Into Vids and Videos"](https://www.lifewire.com/thmb/FSEnoGCMAP0T58dNwB2d4-upLhA=/400x300/filters:no_upscale():max_bytes(150000):strip_icc()/GettyImages-688982955-596fff12519de200112ef724.jpg)
"[Updated] Cash Creation in Content A Deep Dive Into Vids and Videos"
Cash Creation in Content: A Deep Dive Into Vids and Videos
Online video creators are always searching for ways to make their passion profitable. YouTube and Dailymotion are two of the largest video platforms. Millions of users use these platforms, and they have updated features. How do you choose the right video platform?
This article compares Dailymotion monetization to YouTube on privacy, audience, and analytics. To ease this exploration, Filmora is assisting us. This software edits videos to increase platforms’ income-generating potential. Read this article to monetize your videos in a better way, and join us on this journey.
Video Monetization Editor Create engaging and valuable videos with Wondershare Filmora for YouTube and Dailymotion Monetization!
Free Download Free Download Learn More

Part 1. Exploring YouTube and Dailymotion: Platforms for Creators

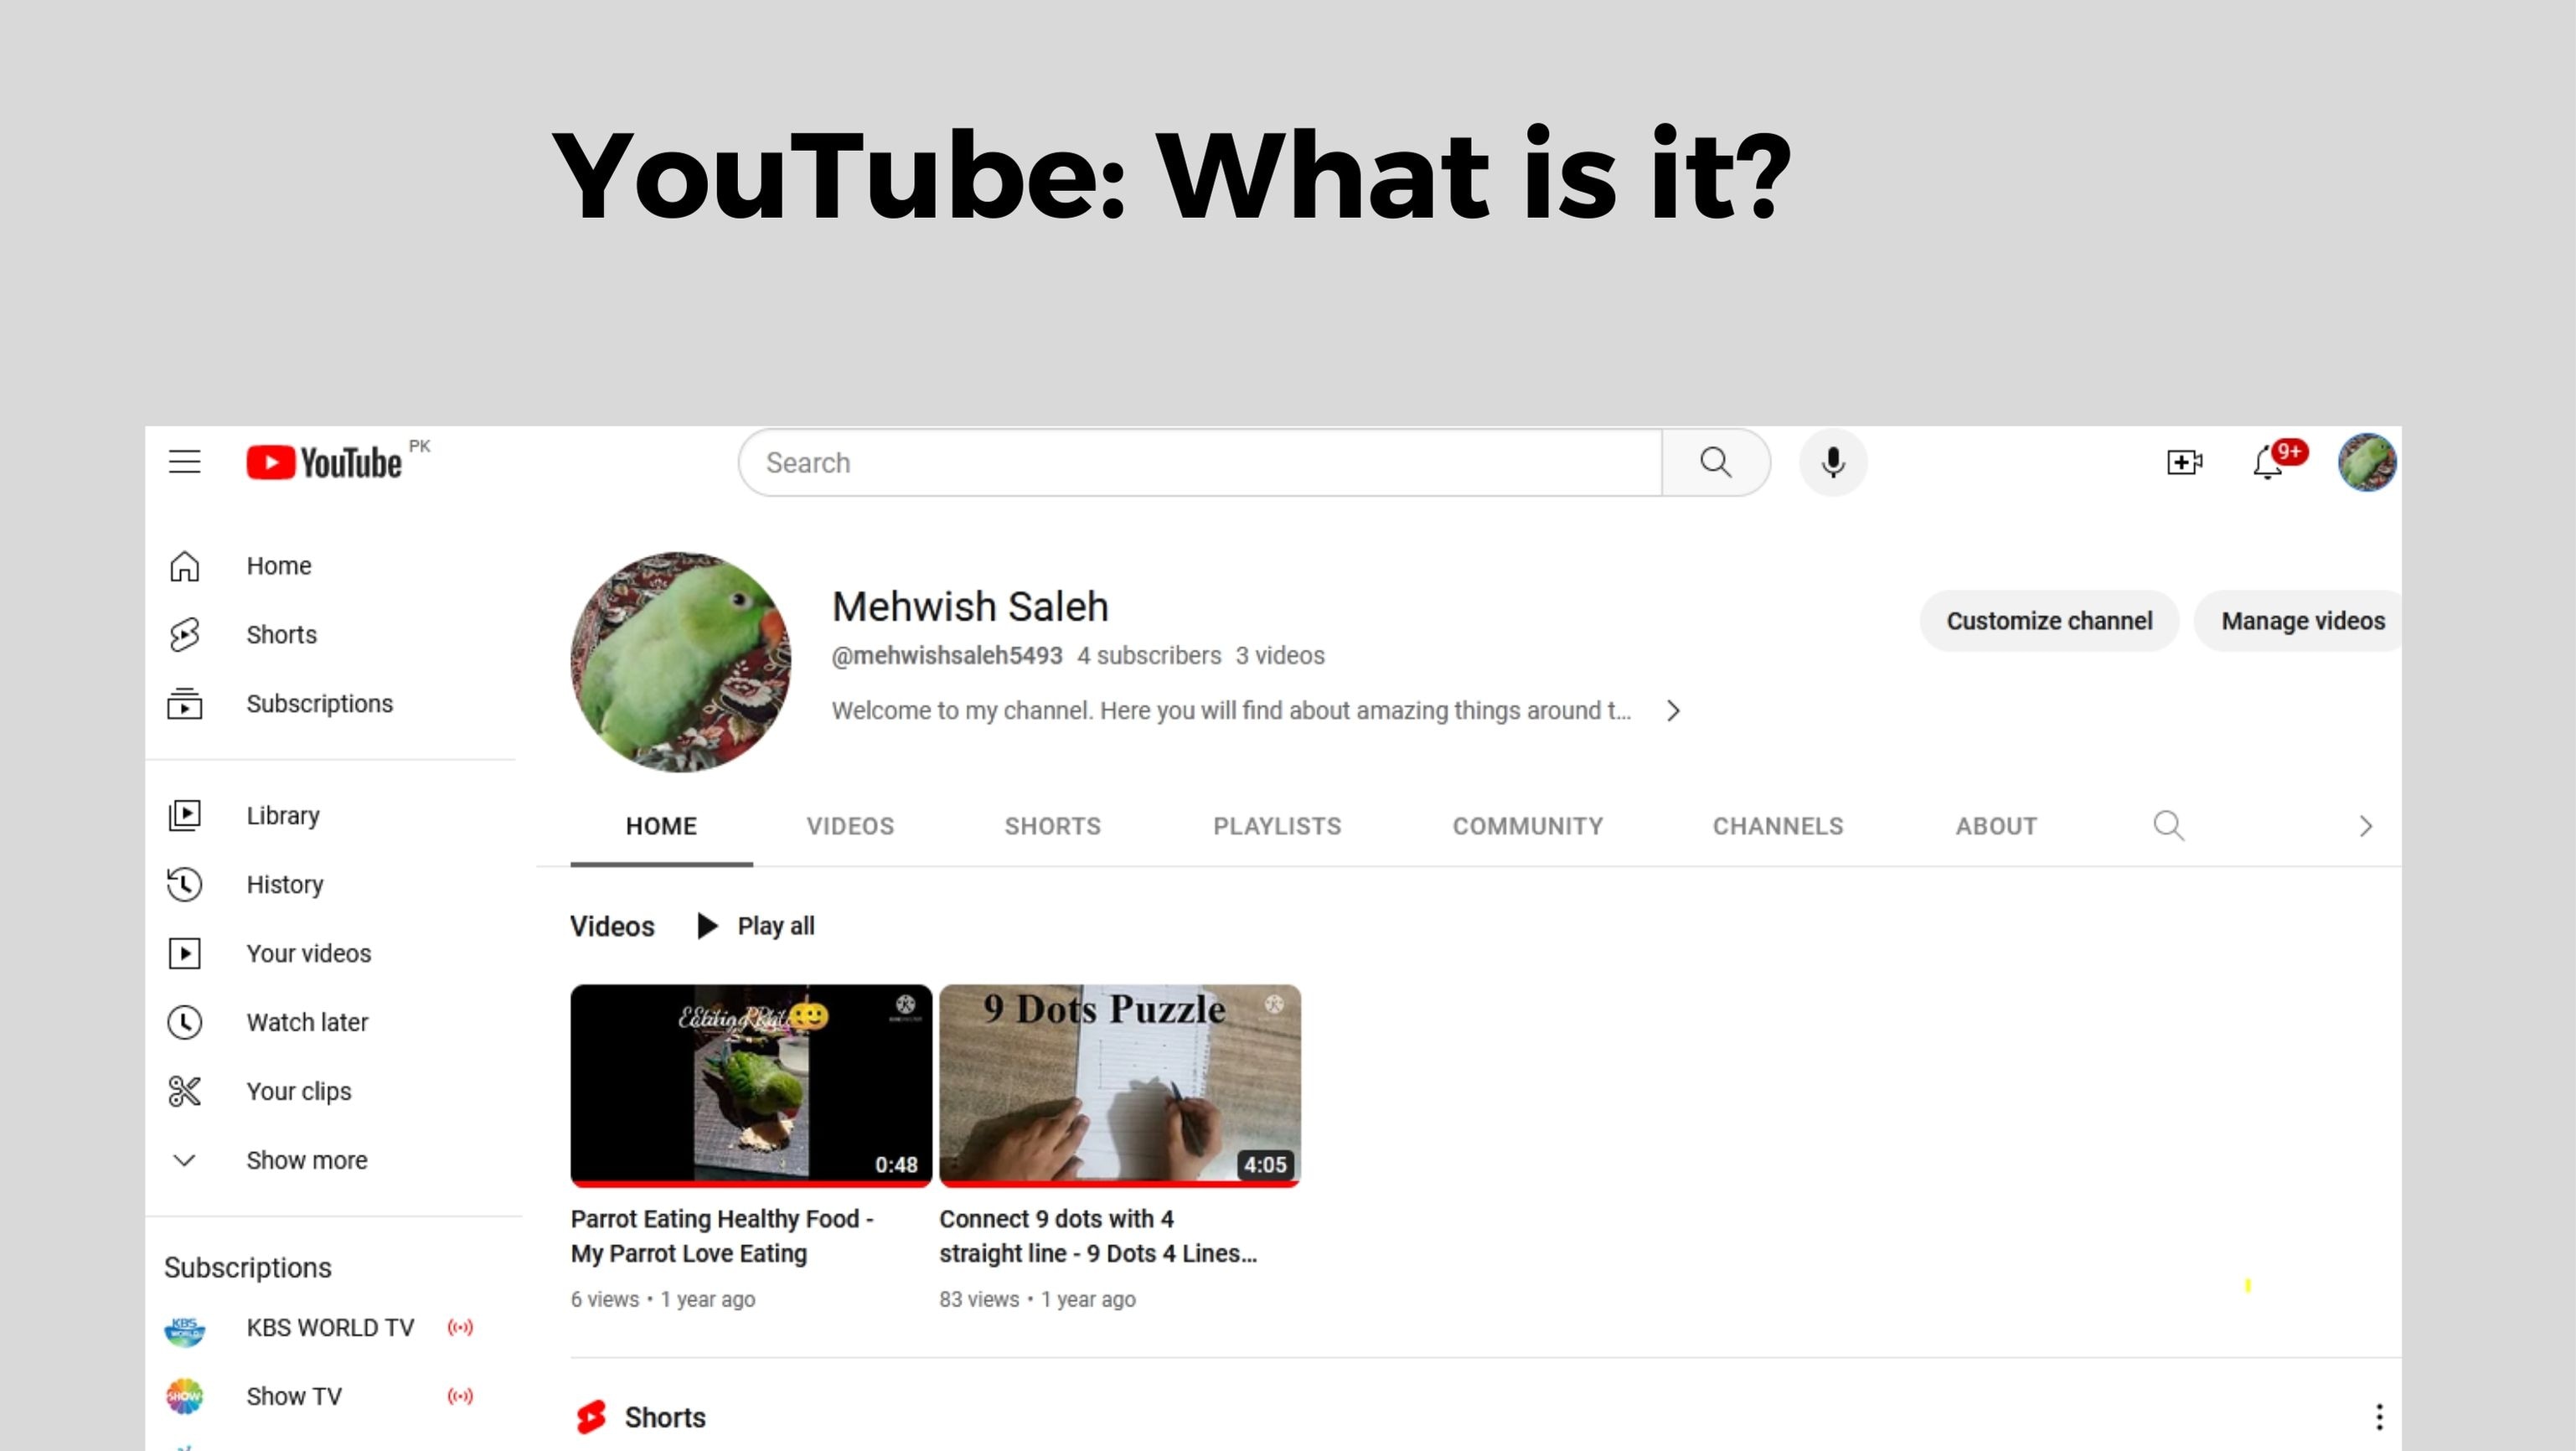
YouTube : What is it?
A three-person team, Chad Hurley, Steve Chen, and Jawed Karim, founded YouTube in 2005. Their goal is to create YouTube as a global platform for sharing videos. A huge $1.65 billion was paid by Google for buying YouTube. YouTube then became a more popular website with over two billion users every month.
Lots of creators, like makeup artists and gamers, make money on YouTube. With the platform, you can livestream, make money from your videos, and watch tons of user-made videos.
Dailymotion : What is it?
A French entrepreneur and an English entrepreneur founded Dailymotion in 2005. Dailymotion became one of the most popular video platforms in France and then Europe in just 1 year. You can upload and share videos on Dailymotion like on YouTube. There is a slight difference in their focus. Dailymotion’s content tends to be professional, while YouTube’s is user-made.
Dailymotion has over 300 million users every month. It’s accessible in 35 different languages. Also, for pro content, it offers features like “Motionmaker” to users and live streaming to creators.

The popularity and user base of YouTube and Dailymotion
YouTube’s user interface is very easy and simple to use. You can filter the results with date and popularity at the top bar of the website. You can watch YouTube without ads and gain access to YouTube analytics.
It’s cool to create your own channel on YouTube. It allows you to upload videos, customize your banner, and create a community.
It is easy to stream videos or share them with friends by creating playlists. YouTube and Dailymotion both have easy-to-use interfaces. You can customize your own channel, and it has categories and channels. YouTube has advanced playlist features, but Dailymotion does not.
It’s not all fun and games - YouTube has fewer ads than Dailymotion. A premium subscription to Dailymotion removes the ads and gives you access to other features.
Both Platforms have Different Content and Audiences
YouTube Content and Audience
Video content on YouTube ranges from cooking tips to music videos. It even offers live streaming concerts and mind-blowing documentaries. Gamer, beauty, sports, and learning enthusiasts will enjoy this channel.
YouTube allows you to upload 12-hour-long videos to increase your watch time. You can also share all types of experiences in the long video. Every day, 2.51 billion active users watch over one billion hours of content. Creators can showcase their work in high definition, up to 8K, on the platform, which is a major advantage. Mobile devices and smartphones also allow offline viewing of videos.
Dailymotion Content and Audience
There’s something special about Dailymotion. The site provides YouTube videos, animated shorts, music, documentaries, and TV shows. Although Dailymotion has upload limits, its videos are still of high quality, up to 1080p. There is a vibrant community of creators looking to connect with their audiences as well. There were 545.3 million visits to Dailymotion in April 2023, making it a strong competitor. Depending on your taste and the content you’re looking for, you can choose either.
Part 2. YouTube vs. Dailymotion Monetization: Unraveling the Key Differences
YouTube and Dailymotion monetization features and opportunities
It’s crucial for content creators to know which monetization options each platform offers. Let’s have a look at the monetization options available on YouTube and Dailymotion. It is possible to earn money from your content on both Dailymotion and YouTube. Dailymotion is easier to monetize, despite its broader and more sophisticated offering.
Programs and options for monetizing YouTube
There are many ways for YouTube creators to make money from their content. You can display video ads for sponsorships, AdSense payments, and merchandise sales. YouTube offers more monetization options and is more advanced than Dailymotion. The YouTube monetization rules can be tricky to meet for eligible accounts.
Programs and options for monetizaton Dailymotion
Creators can also monetize their content on Dailymotion. Dailymotion has fewer monetization options than YouTube. Unlike YouTube, Dailymotion allows creators to earn money through ads.
The Dailymotion Partner Program has made several French video creators extremely wealthy. The CPM is always low for video creators around the world, for whatever reason. Dailymotion Partners from France earn 3000 - 4000 euros per month. Global Partners withdraw the monthly least of $100.
Monetization Requirements and Earning Potential
YouTube’s YPP monetizes accounts with 1,000 subscribers and earns revenue through advertising. You’ll get 55% of the revenue generated by the ads shown during, before, and after your videos. It is also possible to charge channel memberships. For every 1,000 views, the average YouTuber makes about $18.
The Dailymotion Partner Program monetizes your videos. The least number of views you need to monetize your content is 1,000 (combined). One hour of watch time on the platform generates $57 in income, making it a great way to make money!
Choosing Between YouTube and Dailymotion Channel Monetization

Now that you’ve seen a YouTube vs. Dailymotion comparison, you are leaning toward one. Let’s dive into some key questions if you’re still not sure ( you can use both platforms ):
- Do you have a specific group in mind? It’s important to think about who your audience is.
- Are Your Videos Targeted? Do your videos match specific search queries?
- Video Length and Size: How long and big are your videos?
- Monetization: Want to make money? Consider your subscriber count.
- Privacy Control: How much control do you need over your content’s privacy?
- Analytics: Do you want detailed data on your video performance?
YouTube is your best bet if you want organic search traffic, a wide audience, and hefty videos. If you want privacy control, or if you want to monetize, Dailymotion shines.
Whatever you pick, remember to add captions to your videos. Transcription tools can help with that, making your content more accessible and engaging.
Part 3. Enhance Your Monetization Journey with Wondershare Filmora: A Video Editing Solution
Let’s take a look at a powerful tool to enhance your gaming experience. It’s Wondershare Filmora. Creating engaging and valuable videos is easy with Wondershare Filmora. An attractive user interface, a media library, and many useful features make it a great choice. A video tool that turns content creators’ vision into professional content. Filmora is perfect for YouTubers, filmmakers, and vloggers of all skill levels.
Free Download For Win 7 or later(64-bit)
Free Download For macOS 10.14 or later
Filmora Features for Monetization Magic
1.Creative Templates
Filmora’s video templates make it easy to create nice videos. With these templates, you can easily make a captivating intro or an engaging end screen. You make more money when you keep your audience interested.

2. Advanced Audio Editing
To create engaging content, you must have great audio. With Filmora’s audio tools, you can stretch, denoise, and duck audio to improve your videos. Having engaged viewers means you’re more likely to generate income from ads and sales.

3. Enhancing Your Videos with Video Effects
Using Wondershare Filmora, you can transform your ordinary videos into something extraordinary. There are a variety of effects available, such as overlays, filters, and transitions. Filters allow you to change your videos’ feel and appearance. With overlays, like glitch overlays, you can enhance your videos.

4. Color Correction
Wondershare Filmora’s color correction tool can make your videos much better. You can change the colors and mood of your videos with Filmora’s color options. To make your videos look more professional, you can adjust their brightness or darkness. Using vibrant colors can help you earn more and draw in more customers.
Conclusion
When it comes to making money from your passion, picking the right platform is crucial. This guide has shown the main differences between YouTube and Dailymotion monetization. With Wondershare Filmora, you can make the most money from both places.
YouTube is great for long videos, a big audience, and finding people naturally. Monetization Dailymotion is good for making money without needing as many subscribers.
If you put captions on your videos, more people will watch. Think of Filmora as a friend who helps you make money with fun, good videos. It’s like having a partner in making money from your videos.
Free Download Free Download Learn More
Part 1. Exploring YouTube and Dailymotion: Platforms for Creators
YouTube : What is it?
A three-person team, Chad Hurley, Steve Chen, and Jawed Karim, founded YouTube in 2005. Their goal is to create YouTube as a global platform for sharing videos. A huge $1.65 billion was paid by Google for buying YouTube. YouTube then became a more popular website with over two billion users every month.
Lots of creators, like makeup artists and gamers, make money on YouTube. With the platform, you can livestream, make money from your videos, and watch tons of user-made videos.
Dailymotion : What is it?
A French entrepreneur and an English entrepreneur founded Dailymotion in 2005. Dailymotion became one of the most popular video platforms in France and then Europe in just 1 year. You can upload and share videos on Dailymotion like on YouTube. There is a slight difference in their focus. Dailymotion’s content tends to be professional, while YouTube’s is user-made.
Dailymotion has over 300 million users every month. It’s accessible in 35 different languages. Also, for pro content, it offers features like “Motionmaker” to users and live streaming to creators.
The popularity and user base of YouTube and Dailymotion
YouTube’s user interface is very easy and simple to use. You can filter the results with date and popularity at the top bar of the website. You can watch YouTube without ads and gain access to YouTube analytics.
It’s cool to create your own channel on YouTube. It allows you to upload videos, customize your banner, and create a community.
It is easy to stream videos or share them with friends by creating playlists. YouTube and Dailymotion both have easy-to-use interfaces. You can customize your own channel, and it has categories and channels. YouTube has advanced playlist features, but Dailymotion does not.
It’s not all fun and games - YouTube has fewer ads than Dailymotion. A premium subscription to Dailymotion removes the ads and gives you access to other features.
Both Platforms have Different Content and Audiences
YouTube Content and Audience
Video content on YouTube ranges from cooking tips to music videos. It even offers live streaming concerts and mind-blowing documentaries. Gamer, beauty, sports, and learning enthusiasts will enjoy this channel.
YouTube allows you to upload 12-hour-long videos to increase your watch time. You can also share all types of experiences in the long video. Every day, 2.51 billion active users watch over one billion hours of content. Creators can showcase their work in high definition, up to 8K, on the platform, which is a major advantage. Mobile devices and smartphones also allow offline viewing of videos.
Dailymotion Content and Audience
There’s something special about Dailymotion. The site provides YouTube videos, animated shorts, music, documentaries, and TV shows. Although Dailymotion has upload limits, its videos are still of high quality, up to 1080p. There is a vibrant community of creators looking to connect with their audiences as well. There were 545.3 million visits to Dailymotion in April 2023, making it a strong competitor. Depending on your taste and the content you’re looking for, you can choose either.
Part 2. YouTube vs. Dailymotion Monetization: Unraveling the Key Differences
YouTube and Dailymotion monetization features and opportunities
It’s crucial for content creators to know which monetization options each platform offers. Let’s have a look at the monetization options available on YouTube and Dailymotion. It is possible to earn money from your content on both Dailymotion and YouTube. Dailymotion is easier to monetize, despite its broader and more sophisticated offering.
Programs and options for monetizing YouTube
There are many ways for YouTube creators to make money from their content. You can display video ads for sponsorships, AdSense payments, and merchandise sales. YouTube offers more monetization options and is more advanced than Dailymotion. The YouTube monetization rules can be tricky to meet for eligible accounts.
Programs and options for monetizaton Dailymotion
Creators can also monetize their content on Dailymotion. Dailymotion has fewer monetization options than YouTube. Unlike YouTube, Dailymotion allows creators to earn money through ads.
The Dailymotion Partner Program has made several French video creators extremely wealthy. The CPM is always low for video creators around the world, for whatever reason. Dailymotion Partners from France earn 3000 - 4000 euros per month. Global Partners withdraw the monthly least of $100.
Monetization Requirements and Earning Potential
YouTube’s YPP monetizes accounts with 1,000 subscribers and earns revenue through advertising. You’ll get 55% of the revenue generated by the ads shown during, before, and after your videos. It is also possible to charge channel memberships. For every 1,000 views, the average YouTuber makes about $18.
The Dailymotion Partner Program monetizes your videos. The least number of views you need to monetize your content is 1,000 (combined). One hour of watch time on the platform generates $57 in income, making it a great way to make money!
Choosing Between YouTube and Dailymotion Channel Monetization
Now that you’ve seen a YouTube vs. Dailymotion comparison, you are leaning toward one. Let’s dive into some key questions if you’re still not sure ( you can use both platforms ):
- Do you have a specific group in mind? It’s important to think about who your audience is.
- Are Your Videos Targeted? Do your videos match specific search queries?
- Video Length and Size: How long and big are your videos?
- Monetization: Want to make money? Consider your subscriber count.
- Privacy Control: How much control do you need over your content’s privacy?
- Analytics: Do you want detailed data on your video performance?
YouTube is your best bet if you want organic search traffic, a wide audience, and hefty videos. If you want privacy control, or if you want to monetize, Dailymotion shines.
Whatever you pick, remember to add captions to your videos. Transcription tools can help with that, making your content more accessible and engaging.
Part 3. Enhance Your Monetization Journey with Wondershare Filmora: A Video Editing Solution
Let’s take a look at a powerful tool to enhance your gaming experience. It’s Wondershare Filmora. Creating engaging and valuable videos is easy with Wondershare Filmora. An attractive user interface, a media library, and many useful features make it a great choice. A video tool that turns content creators’ vision into professional content. Filmora is perfect for YouTubers, filmmakers, and vloggers of all skill levels.
Free Download For Win 7 or later(64-bit)
Free Download For macOS 10.14 or later
Filmora Features for Monetization Magic
1.Creative Templates
Filmora’s video templates make it easy to create nice videos. With these templates, you can easily make a captivating intro or an engaging end screen. You make more money when you keep your audience interested.
2. Advanced Audio Editing
To create engaging content, you must have great audio. With Filmora’s audio tools, you can stretch, denoise, and duck audio to improve your videos. Having engaged viewers means you’re more likely to generate income from ads and sales.
3. Enhancing Your Videos with Video Effects
Using Wondershare Filmora, you can transform your ordinary videos into something extraordinary. There are a variety of effects available, such as overlays, filters, and transitions. Filters allow you to change your videos’ feel and appearance. With overlays, like glitch overlays, you can enhance your videos.
4. Color Correction
Wondershare Filmora’s color correction tool can make your videos much better. You can change the colors and mood of your videos with Filmora’s color options. To make your videos look more professional, you can adjust their brightness or darkness. Using vibrant colors can help you earn more and draw in more customers.
Conclusion
When it comes to making money from your passion, picking the right platform is crucial. This guide has shown the main differences between YouTube and Dailymotion monetization. With Wondershare Filmora, you can make the most money from both places.
YouTube is great for long videos, a big audience, and finding people naturally. Monetization Dailymotion is good for making money without needing as many subscribers.
If you put captions on your videos, more people will watch. Think of Filmora as a friend who helps you make money with fun, good videos. It’s like having a partner in making money from your videos.
Dynamic Slideshows: Embedding YouTube Content
Create High-Quality Video - Wondershare Filmora
An easy and powerful YouTube video editor
Numerous video and audio effects to choose from
Detailed tutorials provided by the official channel
Google Slide presentation is a powerful tool for creators to keep their audience engaged. This online platform lets you create and demonstrate your ideas. It will capture your viewers’ attention from the very beginning. It also doesn’t matter whatever learning style you engage. Adding YouTube videos to Google Slide will appeal to all levels of individuals.
More so, it is the best way to provide a break for both the audience and the creator. You can break Google Slide presentations with videos to offer some break. Viewers and the presenter get a breather in the process. The presenter can take a short break from speaking while the video plays. Let’s now dive into how to embed a YouTube video in Google Slides.

In this article
01 Why should we add a video to Google Slides?
02 How to add a YouTube video to Google Slide
03 How to choose the right video for your Slides?
Why should we add a video to Google Slides?
There is a great impact of adding video to Google Slides.
For attention
Videos will automatically awaken you, especially if your thoughts have started to sway during a presentation. A video has a direct way of showing creativity. The audience automatically connects the dots between the video and the presentation lines alike.
To stimulate discussion
A picture is worth a thousand words. There is a way that an added video will help the audience connect to the day’s topic. It will bring up several ideas and stir up discussion with the presenter.
Easy following
With videos embedded in Google Slide, viewers will find it easy to understand and digest. Videos automatically eliminate boredom and make any topic interesting.
How to add a YouTube video to Google Slide
Use these two methods to add a YouTube video to Google Slides. Via the Search and Direct link.
Method 1. Embed YouTube video to Google Slide by search and selection
Google has owned YouTube since the year 2006. You can, therefore, integrate Google’s products with YouTube easily.
Step 1. First, go to the slide where you want to embed your video.
Step 2. Then choose the “Insert” option from the menu bar and hit the “Video” option.

Step 3. It would be best if you now viewed the “YouTube” search bar to type in the video you want to embed. You can use keywords to search for the video in question and view instant search results.
Step 4. Then select the video you want to embed, and you’ll see it appear on the “Slide.”

Step 5. Format your video. Remember that the entire video will be embedded. You don’t necessarily need the whole video. It is time to select just a brief but relevant clip from the video to use. Then position your video to the right point using the axes from the exact starting point to the finished part you want the video to appear in.
Method 2. Embed YouTube video to Google Slide by direct link
You can engage this method if you want to include the entire video.
Step 1. Get the URL of the specific YouTube video that you want to use.

Step 2. Then go to your browser’s “Address bar” to copy the YouTube link.
Step 3. Next, open the “Presentation” slide to put your video to.
Step 4. Choose the “Insert” tab from the menu bar.
Step 5. Then hit on the “Video” option from the drop-down menu that appears.
Step 6. A new window will open automatically. Choose the “By URL” tab.
Step 7. Then paste the YouTube video URL in the “Paste YouTube URL Here” bar section.

Step 8. Wait for the video file to load and press the “Select” option. The video will immediately appear in the presentation slide. Just drag and drop the video in your preferred position.
Note: You can do a few edits inside the application. Set the timer when your video should start and when to stop. You can also adjust the video player size.
How to choose the right video for your Slides?
Not all videos will make an impact on your Google Slide. You need to use the best shot that adds value to your presentation. These guidelines will help you to settle on the best video.
Be Professional – choose the best video for your presentation. Remember that the video is part of the presentation and carries more weight. Settling for quality video will bring out the professionalism in you.
Relevant – how do you know that what you are showing your audience corresponds to the presentation piece? Ensure that the video you add has something to do with the Google Slide presentation topic. The two should naturally flow to make it easy to understand the whole concept.
Precise – your presentation is not about the video. The ideal length should not exceed 60 seconds. The longer the video, the greater the chance for your audience to lose track along the way.
Know every footage you are working with – this will help you pick the best shots for your presentation. So, learn every aspect of the video before settling down to use it.
Add new content – even though one content may suit several presentations, don’t rely on the same piece each time. Your audience will want to feel something fresh each time you are presenting. So, compose different videos for different scenarios to make that big impact.
Create an eye-catching video for your Slides with Filmora
The video quality matters when it comes to creating your Slides. The best video creator – Filmora – works in simple steps to give you an eye-catching video. It will create videos for all scenarios like marketing, tutorial, gaming, etc.
Key features of Filmora
- It offers you advanced video effects like filters, motion elements, etc
- You can multiply your fun with multiple screens with the Split Screen feature
- Easily change backgrounds using the Green Screen feature
- The speed control lets you fast forward or slow down a special moment
- Import your video clips to social media platforms
- You can also adjust the audio of your tracks using the Audio Mixer feature
Follow this guide to create a video for your slide with Filmora
Step 1. Launch Filmora
First, begin by downloading and installing Filmora on your computer device. Once installed, launch it and allow it to run. You can either create a new project or open an existing project to work on.
Step 2. Create a new project
Here, click on the “New Project” tab on the app’s welcome screen. The editor should load immediately. Then proceed to register the product. Just hit on the “Register” tab.
Step 3. Import video
Check the upper left corner of your screen to see the “Import” tab. Click on it and choose the “Import Media Files” option. Next, navigate to the location of your computer’s local list to select the clip or video you want to edit. Then, hit the “Import” button to add the video to the timeline for editing.
Step 4. Edit video
Drag and drop the raw footage to Filmora’s timeline to begin editing. Here, you can trim, add other video clips, merge, and add effects as you wish. Likewise, you can add opening titles, subtitles, and end credits to your video. More so, this tool offers different templates to use. Just drag and drop the templates you wish to use to a specific location on the timeline.
Step 5. Preview your file
Last but not least, you can preview your files. Click on the “Play” tab to start previewing your video clips. The main essence of this part is to allow you to make the necessary changes to your clips if there is a need.
Step 6. Export and Share
With Filmora, you can export your file to various social media platforms. But first, go to the “Output window” and select the video file format to use. This software supports several output formats to apply to any platform and device. Just click on the “Format” tab and choose the file format to use. Then also change the resolution and other parameters like frame rate and channel of your video in the “Settings” section. Finally, share your video to your YouTube channel and get ready to add the video to the Google Slide presentation.
For Win 7 or later (64-bit)
For macOS 10.12 or later
Conclusion
● You now know how to put a YouTube video in Google Slides the simple way. You can search for your YouTube videos or directly use the URL link. Whatever the case, remember that it’s the quality of your video that carries more weight. Thanks to the availability of third-party apps that you can use to create and improve the quality of your videos.
● Filmora is at your service to create high-resolution videos that you can export in any format to your YouTube channel. The tool is intuitive, and it won’t matter whether you haven’t tried it before. It is a perfect choice for both professionals and first-time users.
Google Slide presentation is a powerful tool for creators to keep their audience engaged. This online platform lets you create and demonstrate your ideas. It will capture your viewers’ attention from the very beginning. It also doesn’t matter whatever learning style you engage. Adding YouTube videos to Google Slide will appeal to all levels of individuals.
More so, it is the best way to provide a break for both the audience and the creator. You can break Google Slide presentations with videos to offer some break. Viewers and the presenter get a breather in the process. The presenter can take a short break from speaking while the video plays. Let’s now dive into how to embed a YouTube video in Google Slides.
In this article
01 Why should we add a video to Google Slides?
02 How to add a YouTube video to Google Slide
03 How to choose the right video for your Slides?
Why should we add a video to Google Slides?
There is a great impact of adding video to Google Slides.
For attention
Videos will automatically awaken you, especially if your thoughts have started to sway during a presentation. A video has a direct way of showing creativity. The audience automatically connects the dots between the video and the presentation lines alike.
To stimulate discussion
A picture is worth a thousand words. There is a way that an added video will help the audience connect to the day’s topic. It will bring up several ideas and stir up discussion with the presenter.
Easy following
With videos embedded in Google Slide, viewers will find it easy to understand and digest. Videos automatically eliminate boredom and make any topic interesting.
How to add a YouTube video to Google Slide
Use these two methods to add a YouTube video to Google Slides. Via the Search and Direct link.
Method 1. Embed YouTube video to Google Slide by search and selection
Google has owned YouTube since the year 2006. You can, therefore, integrate Google’s products with YouTube easily.
Step 1. First, go to the slide where you want to embed your video.
Step 2. Then choose the “Insert” option from the menu bar and hit the “Video” option.
Step 3. It would be best if you now viewed the “YouTube” search bar to type in the video you want to embed. You can use keywords to search for the video in question and view instant search results.
Step 4. Then select the video you want to embed, and you’ll see it appear on the “Slide.”
Step 5. Format your video. Remember that the entire video will be embedded. You don’t necessarily need the whole video. It is time to select just a brief but relevant clip from the video to use. Then position your video to the right point using the axes from the exact starting point to the finished part you want the video to appear in.
Method 2. Embed YouTube video to Google Slide by direct link
You can engage this method if you want to include the entire video.
Step 1. Get the URL of the specific YouTube video that you want to use.
Step 2. Then go to your browser’s “Address bar” to copy the YouTube link.
Step 3. Next, open the “Presentation” slide to put your video to.
Step 4. Choose the “Insert” tab from the menu bar.
Step 5. Then hit on the “Video” option from the drop-down menu that appears.
Step 6. A new window will open automatically. Choose the “By URL” tab.
Step 7. Then paste the YouTube video URL in the “Paste YouTube URL Here” bar section.
Step 8. Wait for the video file to load and press the “Select” option. The video will immediately appear in the presentation slide. Just drag and drop the video in your preferred position.
Note: You can do a few edits inside the application. Set the timer when your video should start and when to stop. You can also adjust the video player size.
How to choose the right video for your Slides?
Not all videos will make an impact on your Google Slide. You need to use the best shot that adds value to your presentation. These guidelines will help you to settle on the best video.
Be Professional – choose the best video for your presentation. Remember that the video is part of the presentation and carries more weight. Settling for quality video will bring out the professionalism in you.
Relevant – how do you know that what you are showing your audience corresponds to the presentation piece? Ensure that the video you add has something to do with the Google Slide presentation topic. The two should naturally flow to make it easy to understand the whole concept.
Precise – your presentation is not about the video. The ideal length should not exceed 60 seconds. The longer the video, the greater the chance for your audience to lose track along the way.
Know every footage you are working with – this will help you pick the best shots for your presentation. So, learn every aspect of the video before settling down to use it.
Add new content – even though one content may suit several presentations, don’t rely on the same piece each time. Your audience will want to feel something fresh each time you are presenting. So, compose different videos for different scenarios to make that big impact.
Create an eye-catching video for your Slides with Filmora
The video quality matters when it comes to creating your Slides. The best video creator – Filmora – works in simple steps to give you an eye-catching video. It will create videos for all scenarios like marketing, tutorial, gaming, etc.
Key features of Filmora
- It offers you advanced video effects like filters, motion elements, etc
- You can multiply your fun with multiple screens with the Split Screen feature
- Easily change backgrounds using the Green Screen feature
- The speed control lets you fast forward or slow down a special moment
- Import your video clips to social media platforms
- You can also adjust the audio of your tracks using the Audio Mixer feature
Follow this guide to create a video for your slide with Filmora
Step 1. Launch Filmora
First, begin by downloading and installing Filmora on your computer device. Once installed, launch it and allow it to run. You can either create a new project or open an existing project to work on.
Step 2. Create a new project
Here, click on the “New Project” tab on the app’s welcome screen. The editor should load immediately. Then proceed to register the product. Just hit on the “Register” tab.
Step 3. Import video
Check the upper left corner of your screen to see the “Import” tab. Click on it and choose the “Import Media Files” option. Next, navigate to the location of your computer’s local list to select the clip or video you want to edit. Then, hit the “Import” button to add the video to the timeline for editing.
Step 4. Edit video
Drag and drop the raw footage to Filmora’s timeline to begin editing. Here, you can trim, add other video clips, merge, and add effects as you wish. Likewise, you can add opening titles, subtitles, and end credits to your video. More so, this tool offers different templates to use. Just drag and drop the templates you wish to use to a specific location on the timeline.
Step 5. Preview your file
Last but not least, you can preview your files. Click on the “Play” tab to start previewing your video clips. The main essence of this part is to allow you to make the necessary changes to your clips if there is a need.
Step 6. Export and Share
With Filmora, you can export your file to various social media platforms. But first, go to the “Output window” and select the video file format to use. This software supports several output formats to apply to any platform and device. Just click on the “Format” tab and choose the file format to use. Then also change the resolution and other parameters like frame rate and channel of your video in the “Settings” section. Finally, share your video to your YouTube channel and get ready to add the video to the Google Slide presentation.
For Win 7 or later (64-bit)
For macOS 10.12 or later
Conclusion
● You now know how to put a YouTube video in Google Slides the simple way. You can search for your YouTube videos or directly use the URL link. Whatever the case, remember that it’s the quality of your video that carries more weight. Thanks to the availability of third-party apps that you can use to create and improve the quality of your videos.
● Filmora is at your service to create high-resolution videos that you can export in any format to your YouTube channel. The tool is intuitive, and it won’t matter whether you haven’t tried it before. It is a perfect choice for both professionals and first-time users.
Also read:
- [New] Detailed Guide to Dollar Counts A Stepwise Strategy to Track YouTube Earnings
- CarryMinati Financial Triumphs with Ajey Nagar for 2024
- From Vimeo Shorts to Professional MP4 A Comprehensive Tutorial
- 2024 Approved Danger Lurking Online Spotting the Falsehood of Fake Viewers on YouTube
- In 2024, Essential Techniques in YouTube Movie Production
- [Updated] Dive Into a Stream of 9 Full-Length Festive Flicks - No Charge
- In 2024, Cutting-Edge Techniques for Private YT Content Dissemination in Gmail
- Channel Name Wizardry Brainstorm & Create!
- 2024 Approved Direct Hit The Techno-Friendly Way to Upload Your Short Clips
- 2024 Approved Dissecting YouTube’s Strategy to Empower Short-Form Content Makers
- Creating Simple Videos Top 10 YouTube Projects Anyone Can Do
- YouTube SEO Masterclass The Ultimate Toolkit for Higher Traffic
- A Treasure Trove of Premium YouTube Images From 6 Websites
- Accelerated Sizing YouTube Content for MACs for 2024
- [Updated] Demystifying the Journey to Knowing Who Watches You
- From Playtime to Profits Ryan Kaji's YouTube Cash Crusade
- 2024 Approved Enriching YouTube Content with Improved Sound Quality
- Virality Vault Uncovering Keywords That Drive Video Shares
- In 2024, Budget-Friendly Vlogging Cameras Unveiled Our Picks
- [Updated] Beyond Mainstream A List of 6 Exclusive Icon & Logo Providers
- Bypassing YouTube's Copyright Strike Legal Strategies and Precautions
- 20 Essential YouTube Groups Navigating Stocks for 2024
- 2024 Approved A Trailblazer’s Guide YouTube Studio Location Unveiled
- [New] Developing a User-Friendly Direct URL for YT Subscription
- In 2024, A Symphony in Silence Mastering Audio with Precision
- Best YouTube Video Reverser Online [+Howtos]
- [Updated] Evaluating Dailymotion vs YouTube Profitability
- Prime 8 Chart Tracer Apex of YouTube Rankings
- 2024 Approved How to Change YouTube Video Playback Speed [Desktop/Mobile]
- Streamline Production Workflow Elevate Video Quality
- Captivate Audiences with Effective and Appealing Video Previews for 2024
- Quick Captioning Method for Enhanced YouTube Video Quality
- New In 2024, The Mechanics Behind Anime Translations Insights Into Adaptation and Localization
- [New] In 2024, Discord Flag Artists Masterpieces and Your Profile Coverage Ideas
- Cutting-Edge Simple Win 11 Recorders
- In 2024, How to Get and Use Pokemon Go Promo Codes On Vivo V27e | Dr.fone
- Updated In 2024, A Deep Dive Into Voice Recordings via Vocaroo Steps & Similar Solutions
- In 2024, How to Fix when Apple Account Locked From iPhone X?
- [Updated] Deciphering Derailed TikTok Videos' Functionality for 2024
- [New] 2024 Approved The Art of Perfecting Vocal Recordings for Video Projects
- In 2024, 3 Easy Methods to Unlock iCloud Locked iPhone 12/iPad/iPod
- In 2024, How PGSharp Save You from Ban While Spoofing Pokemon Go On Poco C65? | Dr.fone
- New 2024 Approved Mastering Video Playback Speed in QuickTime Tips and Tricks
- 2024 Approved Set Custom Save Path for Screen Captures (Mac)
- Will the iPogo Get You Banned and How to Solve It On Samsung Galaxy S24 Ultra | Dr.fone
- How To Change Tecno Spark 20 Lock Screen Clock in Seconds
- Updated In 2024, Free and Fabulous Top 10 Ubuntu Video Editing Software Options
- Hassle-Free Ways to Remove FRP Lock on Oppo Find N3with/without a PC
- All About Factory Reset, What Is It and What It Does to Your Realme GT Neo 5 SE? | Dr.fone
- Life360 Learn How Everything Works On Meizu 21 Pro | Dr.fone
- AddROM Bypass An Android Tool to Unlock FRP Lock Screen For your Asus ROG Phone 7 Ultimate
- In 2024, How to Change GPS Location on Vivo Y77t Easily & Safely | Dr.fone
- Keep Your Tweets Compliant with Aspect Ratio Requirements for 2024
- [New] 2024 Approved Smart Techniques to Capture GoToMeet Participants
- Title: "[Updated] Cash Creation in Content A Deep Dive Into Vids and Videos"
- Author: Steven
- Created at : 2024-05-25 20:49:01
- Updated at : 2024-05-26 20:49:01
- Link: https://youtube-clips.techidaily.com/updated-cash-creation-in-content-a-deep-dive-into-vids-and-videos/
- License: This work is licensed under CC BY-NC-SA 4.0.
