
![[Updated] Building Your Brand with a Sports YouTube Chain on macOS](https://www.lifewire.com/thmb/dKnfJfS-2dMUMRX_ekaA971sdhs=/400x300/filters:no_upscale():max_bytes(150000):strip_icc():format(webp)/GettyImages-664800650-4349941504c24712b81975694798236b.jpg)
[Updated] Building Your Brand with a Sports YouTube Chain on macOS
Building Your Brand with a Sports YouTube Chain on macOS
How to Create a Sports YouTube Channel on Mac?

Richard Bennett
Dec 14, 2023• Proven solutions
It is no secret that there is a huge audience of sports, including e-sports and gaming, on YouTube who appreciates high-quality content. These viewers are searching for sports YouTubers who create insightful and entertaining content that isn’t only rich in terms of content but production as well. It means that sports channels on YouTube have to rely on special video editing effects to ensure they are delivering what their viewers expect.
That being said, it is usually not easy for aspiring sports YouTubers to start since they have little to no experience when it comes to creating premium sports videos for YouTube. This article will help you out in terms of starting a new YouTube sports channel, especially if you are a mac user.
- Section1. Necessary Elements of a YouTube Sports Channel
- Section2. Must Use Feature for Making a Sports YouTube Channel
- Section3. Which Video Editing Software Has these Features?

Section 1. Necessary Elements of a YouTube Sports Channel
If you want to start a YouTube sports channel, you need to keep in mind that sports videos are fundamentally different from other types of videos. This requires you to have a strong grasp not only on content but video editing as well. Here are some of the top elements that every YouTube sports channel needs.
1.Insightful Producer Perspective
First of all, you should try to have a clear and comprehensive understanding of the sport you are going to talk about on your channel. If you are just an amateur or a casual fan, you will need to do more preparation as a sports YouTuber.
2.Brief and Clear Delivery
The second most important thing is to communicate your perspective in an entertaining, brief, and interactive manner so your viewers remain engaged and keep coming back to your channel. If you fail to communicate properly, your viewers will go somewhere else to watch what they are looking for.
3.Advanced Video Editing
Apart from the content, you need to make yourself familiar with using advanced video editing features such as picture-in-picture, screen recording, and audio recording. These allow you to provide a high-quality viewing experience to your YouTube channel audience.
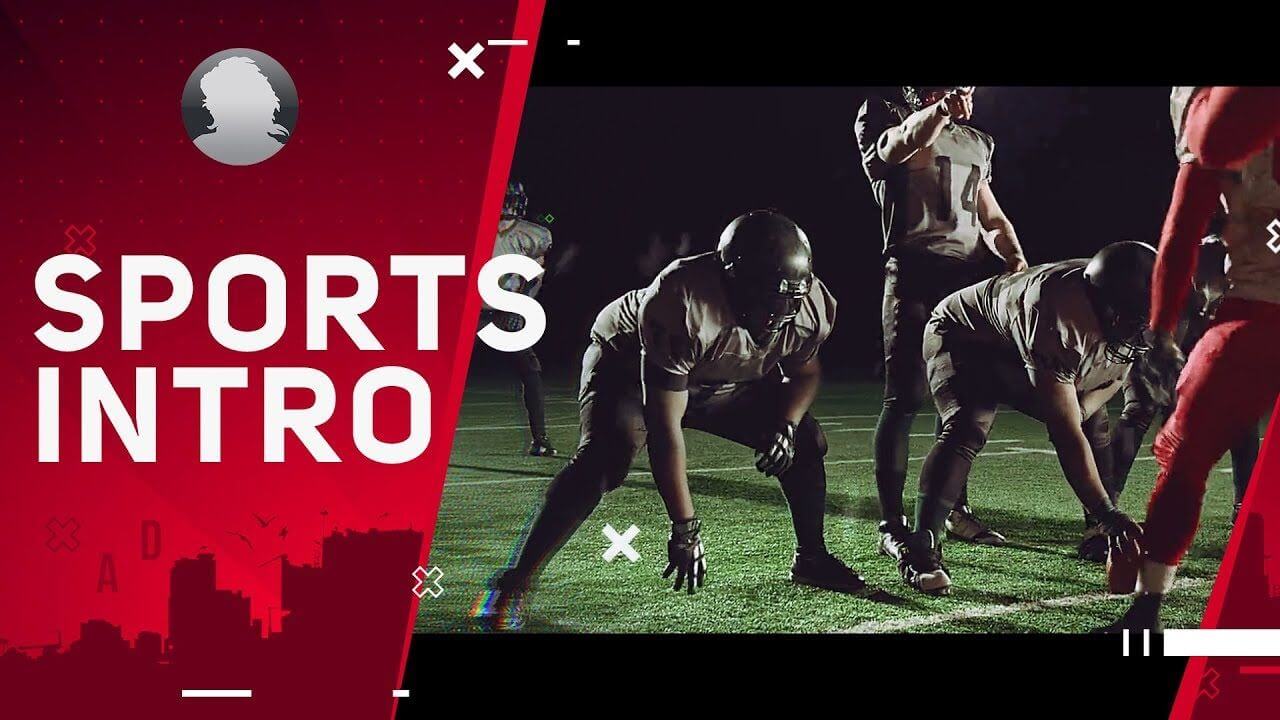
4.Branded Intro & Outro
You need to set yourself apart with the impactful branding of your sports YouTube channel. It means that the software you are using on your Mac needs to have smart editing features including the ability to add cool intros and outros that become the trademark of your sports channel.
You May Also Like:
- YouTuber Skillshare: Essential Video Cutting Skills For YouTubers>>>
- What is the Best MP4 Cutter for YouTubers On Mac?>>>
Section 2. Must Use Feature for Making a Sports YouTube Channel
There are many features that you may need in your sports content creation. High video quality will bring more views and attract more fans to your YouTube channel. Here are some features you may use in making sports videos.
1. Making a Sports YouTube Channel - Screen Recording
One of the top features that you must use in your sports content creation is screen recording. It is a vital feature for all sports YouTubers and it is used extensively for multiple reasons:
- It gives content creators the ability to give demonstrations in a clear and convenient manner that is easily understandable.
- Screen recording also allows them to create how-to and tutorial videos for games and other sports.
- They can also use this feature to record a video clip that may not be easy to include in the final video.
This feature will give your audience the opportunity to understand your point clearly without having to visualize everything in their heads. Everything you say would be right in front of them in the form of screen recording and they can easily get your perspective.
2. Making a Sports YouTube Channel- Picture in Picture
Another key feature that is widely used by YouTube sports channels is picture-in-picture, especially those who engage in live commentary while the game or match is still being played. As a Mac YouTube channel producer, you must use this feature to gain the following advantages:
- Picture in Picture allows you to stay visible to your audience while commentating or giving your opinion on a game.
- It also provides you with the ability to divert more focus on the game so the bigger part of the screen is dedicated to sports.
- You can also switch between the smaller and bigger video sections when necessary, for example during a break or interval.
- It gives you the opportunity to make your YouTube channel more personalized with your own take on picture-in-picture.
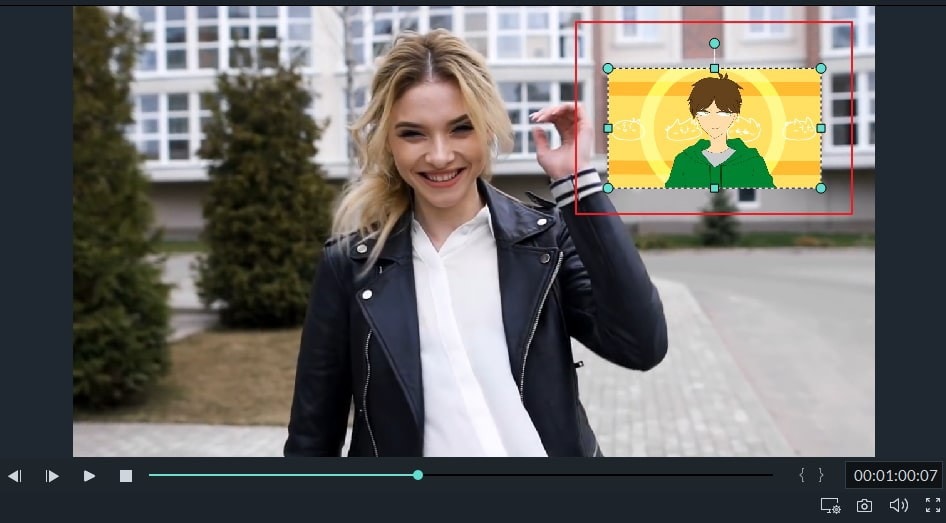
Picture in picture is a great feature for sports YouTubers on Mac as it keeps the video entertaining and personalized. Without using a picture-in-picture feature, you will find it difficult to compete with other sports YouTube channels.
3. Making a Sports YouTube Channel - Audio Recording
There are times when you cannot use the native audio of the sports video and need to add your own. It means that you need to record your own audio file and add it to the video before uploading it to your YouTube channel. This feature allows you to:
- Edit the audio of your sports video to make it more customizable according to your target audience.
- Remove the audio that might cause copyright issues and add your own to ensure your content remains original.
- Add your own remarks, commentary, and opinions in the video in full or in parts to make it more engaging and interactive.
- Make videos where you just need background music and don’t need the original audio such as montages, tributes, etc.


Clear and crisp audio recording is necessary to ensure that the video you upload on your sports YouTube channel is of high quality. Low-quality audio will damage the whole experience and leave a bad taste in the mouth of your viewers.
You May Also Like: Edit Audios in Wondershare Filmora For Mac
Filmstock Stock Media Library ](https://filmstock.wondershare.com/creative-theme-sports?spm=rs.filmora%5Fweb&source%5Fchannel=seo%5Farticle )
Section 3. What Video Editing Software Has these Features?
There are many video editing software applications that enable you to use the above-mentioned features. However, if you are just starting out and want to become a producer of your own YouTube sports channel using Mac, here are some of your options:
1. WonderShare Filmora X - Make sports channel editing easier
If you are just getting ready to do a YouTube sports channel and do not have any experience, Filmora is a good choice. There is no video editing software that provides better value.
This software contains most of the features and functions needed to create sports videos, such as audio and screen recording along with pip capability, and picture-in-picture. You can also use Filmora X to add cool branded intros and outros to customize your sports videos.
2.iMovie - Build-in software for Mac users
If you don’t want to rely on third-party software, the default built-in video editing software on Mac provides you with the basic editing features you may need.
3.Adobe Premiere Elements - Professional software to edit sport videos
If you want professional-grade software and don’t really care about the price, you can get Adobe Premiere Elements. Keep in mind that it is a highly advanced software for professionals and you may not need a wide variety of features offered here.
Richard Bennett
Richard Bennett is a writer and a lover of all things video.
Follow @Richard Bennett
Richard Bennett
Dec 14, 2023• Proven solutions
It is no secret that there is a huge audience of sports, including e-sports and gaming, on YouTube who appreciates high-quality content. These viewers are searching for sports YouTubers who create insightful and entertaining content that isn’t only rich in terms of content but production as well. It means that sports channels on YouTube have to rely on special video editing effects to ensure they are delivering what their viewers expect.
That being said, it is usually not easy for aspiring sports YouTubers to start since they have little to no experience when it comes to creating premium sports videos for YouTube. This article will help you out in terms of starting a new YouTube sports channel, especially if you are a mac user.
- Section1. Necessary Elements of a YouTube Sports Channel
- Section2. Must Use Feature for Making a Sports YouTube Channel
- Section3. Which Video Editing Software Has these Features?
Section 1. Necessary Elements of a YouTube Sports Channel
If you want to start a YouTube sports channel, you need to keep in mind that sports videos are fundamentally different from other types of videos. This requires you to have a strong grasp not only on content but video editing as well. Here are some of the top elements that every YouTube sports channel needs.
1.Insightful Producer Perspective
First of all, you should try to have a clear and comprehensive understanding of the sport you are going to talk about on your channel. If you are just an amateur or a casual fan, you will need to do more preparation as a sports YouTuber.
2.Brief and Clear Delivery
The second most important thing is to communicate your perspective in an entertaining, brief, and interactive manner so your viewers remain engaged and keep coming back to your channel. If you fail to communicate properly, your viewers will go somewhere else to watch what they are looking for.
3.Advanced Video Editing
Apart from the content, you need to make yourself familiar with using advanced video editing features such as picture-in-picture, screen recording, and audio recording. These allow you to provide a high-quality viewing experience to your YouTube channel audience.
4.Branded Intro & Outro
You need to set yourself apart with the impactful branding of your sports YouTube channel. It means that the software you are using on your Mac needs to have smart editing features including the ability to add cool intros and outros that become the trademark of your sports channel.
You May Also Like:
- YouTuber Skillshare: Essential Video Cutting Skills For YouTubers>>>
- What is the Best MP4 Cutter for YouTubers On Mac?>>>
Section 2. Must Use Feature for Making a Sports YouTube Channel
There are many features that you may need in your sports content creation. High video quality will bring more views and attract more fans to your YouTube channel. Here are some features you may use in making sports videos.
1. Making a Sports YouTube Channel - Screen Recording
One of the top features that you must use in your sports content creation is screen recording. It is a vital feature for all sports YouTubers and it is used extensively for multiple reasons:
- It gives content creators the ability to give demonstrations in a clear and convenient manner that is easily understandable.
- Screen recording also allows them to create how-to and tutorial videos for games and other sports.
- They can also use this feature to record a video clip that may not be easy to include in the final video.
This feature will give your audience the opportunity to understand your point clearly without having to visualize everything in their heads. Everything you say would be right in front of them in the form of screen recording and they can easily get your perspective.
2. Making a Sports YouTube Channel- Picture in Picture
Another key feature that is widely used by YouTube sports channels is picture-in-picture, especially those who engage in live commentary while the game or match is still being played. As a Mac YouTube channel producer, you must use this feature to gain the following advantages:
- Picture in Picture allows you to stay visible to your audience while commentating or giving your opinion on a game.
- It also provides you with the ability to divert more focus on the game so the bigger part of the screen is dedicated to sports.
- You can also switch between the smaller and bigger video sections when necessary, for example during a break or interval.
- It gives you the opportunity to make your YouTube channel more personalized with your own take on picture-in-picture.
Picture in picture is a great feature for sports YouTubers on Mac as it keeps the video entertaining and personalized. Without using a picture-in-picture feature, you will find it difficult to compete with other sports YouTube channels.
3. Making a Sports YouTube Channel - Audio Recording
There are times when you cannot use the native audio of the sports video and need to add your own. It means that you need to record your own audio file and add it to the video before uploading it to your YouTube channel. This feature allows you to:
- Edit the audio of your sports video to make it more customizable according to your target audience.
- Remove the audio that might cause copyright issues and add your own to ensure your content remains original.
- Add your own remarks, commentary, and opinions in the video in full or in parts to make it more engaging and interactive.
- Make videos where you just need background music and don’t need the original audio such as montages, tributes, etc.
Clear and crisp audio recording is necessary to ensure that the video you upload on your sports YouTube channel is of high quality. Low-quality audio will damage the whole experience and leave a bad taste in the mouth of your viewers.
You May Also Like: Edit Audios in Wondershare Filmora For Mac
Filmstock Stock Media Library ](https://filmstock.wondershare.com/creative-theme-sports?spm=rs.filmora%5Fweb&source%5Fchannel=seo%5Farticle )
Section 3. What Video Editing Software Has these Features?
There are many video editing software applications that enable you to use the above-mentioned features. However, if you are just starting out and want to become a producer of your own YouTube sports channel using Mac, here are some of your options:
1. WonderShare Filmora X - Make sports channel editing easier
If you are just getting ready to do a YouTube sports channel and do not have any experience, Filmora is a good choice. There is no video editing software that provides better value.
This software contains most of the features and functions needed to create sports videos, such as audio and screen recording along with pip capability, and picture-in-picture. You can also use Filmora X to add cool branded intros and outros to customize your sports videos.
2.iMovie - Build-in software for Mac users
If you don’t want to rely on third-party software, the default built-in video editing software on Mac provides you with the basic editing features you may need.
3.Adobe Premiere Elements - Professional software to edit sport videos
If you want professional-grade software and don’t really care about the price, you can get Adobe Premiere Elements. Keep in mind that it is a highly advanced software for professionals and you may not need a wide variety of features offered here.
Richard Bennett
Richard Bennett is a writer and a lover of all things video.
Follow @Richard Bennett
Achieving Depth in Indoor Vlogging Lighting
Lighting Tips for Vlogging: How to Light
Richard Bennett
Mar 27, 2024• Proven solutions
One of the best things you can do for your video quality is to ensure you have great lighting. Viewers find poor lighting distracting and it’s hard for them to see how great your content is if they are busy thinking about why your video is so dark. By creating a great lighting set up you can ensure that the people watching your videos are only thinking about how much they’re enjoying them.
Going outside and using natural light is the cheapest way to get a lot of light for your videos. If your vlog is not suited to the great outdoors then you need to get more strategic. You can turn on all the lights in your living room and still end up with a dark, grainy, video.
Video Lighting Basics: Three Point Lighting

The most common technique of lighting a scene is called three-point lighting. It involves three different sources of light in the shot and is used by portrait photographers, which is also a great method for lighting your vlog.
The brightest source of light is also known as the key light which need to be high quality. A window will work, but if you do not have access to one where you are filming then consider an LED panel light or a softbox light like the ones used in portrait photography.
This first light will create a dramatic shadow across half of your face. You want to reduce this shadow, but not get rid of it completely.
Rather than setting up another light source on the opposite side of the camera, put up a reflector to bounce some light back onto your face. This reflector is called your ‘Fill Light’.
The fill light is less bright than the primary source of light and it is placed on the side opposite to the key light. Its purpose is to reduce shadows produced by the key light and the reflector will need to be mounted on a stand.
The final step to creating three point lighting is to set up another light behind you. This is your ‘Backlight’, and it will help you stand out from your background. Backlight or Hair light is always placed behind and above the subject to create separation between the subject in the shot and the background. This basic lighting technique can be applied in almost every scene you shoot, which is why it is important to keep an open mind and to continue experimenting with possible light setups.
Watch Video! Top Lighting Tips for Vlogging
Lightning Tips for Aspiring YouTube Videographers
Becoming the master of light will take some time and practice, so it is crucial to remain curious and anxious to learn new tricks throughout that process if you want to continually become better. These tips will help you make the first steps on that journey.
1. Focus Your Key Light
Try to focus your Key Light so that it lights only you and not your background. Do this by mounting anything that can cast a shadow onto your Key Light to control the area where the light hits. If you are using a window for your Key Light then you can use a curtain. If you use a softbox light then your light will already be somewhat focused.
2. Use Natural Lighting
The light provided by the Sun is still the best light source, you can have in your video. The trouble is that natural light changes quickly, which makes it highly unpredictable. The best way to deal with this challenge is to come prepared to the set and to get the shot you want as quickly as you can.
3. Try DIY Lightning
Literally, anything from candles to LED light bulbs can serve as a source of light in a shot. You just need to pay attention to the light temperature, because warmer light sources may highlight reds and yellows that can make your footage look less realistic.
4. Use Lightning Kits
This is by far the best option if you want to be in complete control of the light on your set. You can adjust the intensity of the lights, use filters, diffusers and all sorts of other accessories to create the light that flatters the subjects of your videos. The only downside is that you’ll have to spend a considerable amount of money if you want to have a professional lighting kit.
5. Set up reflectors
Sets of reflectors are often under $50, so they are fairly affordable. However, some vloggers choose to forgo purchasing reflectors and make their own out of tinfoil.

If your strong main light is too hard on your eyes then you can use a translucent ‘reflector’ to soften it. Set your translucent reflector, or other screen, up in front of your main light to diffuse it.
If you are hosting a beauty vlog then you might consider a slightly different set up. Instead of having your main light off to one side set it up directly in front of you so your entire face is lit evenly. It is still a good idea to use fill lights in this set up to give you some dimension, and a backlight is even more essential for helping you stand out from the background. The even light hitting your face will also make you look flat if you do not use a backlight.

If you are using all of the lighting options available to you and your video still looks too dark then you can try brightening it by opening up the aperture of your camera lens/setting a lower f-stop. Letting more light into your camera can help your footage look brighter, although you also run the risk of making things look overexposed/ washed out if you are not careful.
If you are stuck shooting in low light conditions it is best to use a lens with a wider aperture/lower f-stop. This will make the best of the light you do have.
Richard Bennett
Richard Bennett is a writer and a lover of all things video.
Follow @Richard Bennett
Richard Bennett
Mar 27, 2024• Proven solutions
One of the best things you can do for your video quality is to ensure you have great lighting. Viewers find poor lighting distracting and it’s hard for them to see how great your content is if they are busy thinking about why your video is so dark. By creating a great lighting set up you can ensure that the people watching your videos are only thinking about how much they’re enjoying them.
Going outside and using natural light is the cheapest way to get a lot of light for your videos. If your vlog is not suited to the great outdoors then you need to get more strategic. You can turn on all the lights in your living room and still end up with a dark, grainy, video.
Video Lighting Basics: Three Point Lighting
The most common technique of lighting a scene is called three-point lighting. It involves three different sources of light in the shot and is used by portrait photographers, which is also a great method for lighting your vlog.
The brightest source of light is also known as the key light which need to be high quality. A window will work, but if you do not have access to one where you are filming then consider an LED panel light or a softbox light like the ones used in portrait photography.
This first light will create a dramatic shadow across half of your face. You want to reduce this shadow, but not get rid of it completely.
Rather than setting up another light source on the opposite side of the camera, put up a reflector to bounce some light back onto your face. This reflector is called your ‘Fill Light’.
The fill light is less bright than the primary source of light and it is placed on the side opposite to the key light. Its purpose is to reduce shadows produced by the key light and the reflector will need to be mounted on a stand.
The final step to creating three point lighting is to set up another light behind you. This is your ‘Backlight’, and it will help you stand out from your background. Backlight or Hair light is always placed behind and above the subject to create separation between the subject in the shot and the background. This basic lighting technique can be applied in almost every scene you shoot, which is why it is important to keep an open mind and to continue experimenting with possible light setups.
Watch Video! Top Lighting Tips for Vlogging
Lightning Tips for Aspiring YouTube Videographers
Becoming the master of light will take some time and practice, so it is crucial to remain curious and anxious to learn new tricks throughout that process if you want to continually become better. These tips will help you make the first steps on that journey.
1. Focus Your Key Light
Try to focus your Key Light so that it lights only you and not your background. Do this by mounting anything that can cast a shadow onto your Key Light to control the area where the light hits. If you are using a window for your Key Light then you can use a curtain. If you use a softbox light then your light will already be somewhat focused.
2. Use Natural Lighting
The light provided by the Sun is still the best light source, you can have in your video. The trouble is that natural light changes quickly, which makes it highly unpredictable. The best way to deal with this challenge is to come prepared to the set and to get the shot you want as quickly as you can.
3. Try DIY Lightning
Literally, anything from candles to LED light bulbs can serve as a source of light in a shot. You just need to pay attention to the light temperature, because warmer light sources may highlight reds and yellows that can make your footage look less realistic.
4. Use Lightning Kits
This is by far the best option if you want to be in complete control of the light on your set. You can adjust the intensity of the lights, use filters, diffusers and all sorts of other accessories to create the light that flatters the subjects of your videos. The only downside is that you’ll have to spend a considerable amount of money if you want to have a professional lighting kit.
5. Set up reflectors
Sets of reflectors are often under $50, so they are fairly affordable. However, some vloggers choose to forgo purchasing reflectors and make their own out of tinfoil.
If your strong main light is too hard on your eyes then you can use a translucent ‘reflector’ to soften it. Set your translucent reflector, or other screen, up in front of your main light to diffuse it.
If you are hosting a beauty vlog then you might consider a slightly different set up. Instead of having your main light off to one side set it up directly in front of you so your entire face is lit evenly. It is still a good idea to use fill lights in this set up to give you some dimension, and a backlight is even more essential for helping you stand out from the background. The even light hitting your face will also make you look flat if you do not use a backlight.
If you are using all of the lighting options available to you and your video still looks too dark then you can try brightening it by opening up the aperture of your camera lens/setting a lower f-stop. Letting more light into your camera can help your footage look brighter, although you also run the risk of making things look overexposed/ washed out if you are not careful.
If you are stuck shooting in low light conditions it is best to use a lens with a wider aperture/lower f-stop. This will make the best of the light you do have.
Richard Bennett
Richard Bennett is a writer and a lover of all things video.
Follow @Richard Bennett
Also read:
- Expert Guide to Creating Compact, Engaging YouTube Content
- 2024 Approved Elevate Your YouTube Thumbnails - Triple Neon Border Techniques
- 2024 Approved Comprehensible Guide to High-Quality Audios on YouTube
- In 2024, Download YouTube Videos Anywhere, Anytime Free Android Tips
- [New] Essentials to Skyrocketing Video Views on YouTube
- Mastering the Art of Divergence in Channels' Identities and Names
- In 2024, Building on Your Content A Guide to Stellar Videography Closures
- In 2024, Discover the Power of Proportions in YouTube Content Creation
- The Novice's Guide to Building a YouTube Studio Setup
- [Updated] An In-Depth Look at Video Apps for iPhone & Android Users
- In 2024, Cut Cost, Unlock Creativity Step-by-Step Guide to Professional Green Screen Effects From Top 4 Channels
- A Practical Approach to Incorporate YouTube Playlists Online for 2024
- Your Complete Manual on Live Streaming Platforms
- [New] Beam Your Content Upward Perfecting YouTube SEO Techniques
- Pinnacle of Presence A Strategic Approach for Live Video Graphics
- Top 10 YouTubers with the Most Subscribers
- Maximize Attention - Try These 7 Budget-Friendly Tools
- Create Professional Movies on YouTube Quickly
- [New] Best Audio Modification Methods for YouTube Stars
- Rapid Methods Unsettle and Rearrange Your Video List
- Bridging Giants A Comprehensive Guide to Linking YouTube and TikTok
- [Updated] Channel Wrap-Up Strategies - Free YouTube End Screens Tutorial
- Decoding the Visual Language of YouTube Thumbnails
- [New] Boost Your Channels A Guide to Best YouTube SEO Resources
- [New] Breaking Down the System Behind Highlighted Video Comments
- [Updated] Edit with Ease #10 Video-to-Mp3 Tools of the Trade
- [Updated] Boost Visibility Selecting the Right YouTube Thumbnail Dimensions
- 2024 Approved Audiovisual Powerhouses Select Best Laptops for Editing
- Innovative Approaches to Combine YT Videos with PPT Formats
- [Updated] Conquering Viewersphere Channels that Rule the Net
- In 2024, Achieving Excellence in Work and Online Content
- React and Relate - Harness the Power of Alternate Perspectives for Compelling YouTube Vids (2 POV Method)
- [New] The Essential Blueprint Setting Up Your First Xbox Recorder
- Updated In 2024, AVI Video Format How to Open, Play, Edit AVI File?
- Does Life360 Notify When You Log Out On Realme C51? | Dr.fone
- In 2024, iPhone 6s iCloud Activation Lock Bypass
- Restore Missing App Icon on Honor Magic 5 Step-by-Step Solutions | Dr.fone
- [New] In 2024, Home Visionary's Review Best Devices for Clips
- How to Honor X8b Get Deleted photos Back with Ease and Safety?
- New Compilation of the Best 8 Rain Styled Sounds for Digital Acquisition - Updated
- Updated Investigating the Pinnacle of Sound Design Software Assessing the Merits of MAGIX Samplitude
- [New] 30 Awesome TikTok-Inspired Finds on Amazon – Don’t Miss Them
- In 2024, Life360 Learn How Everything Works On Asus ROG Phone 8 Pro | Dr.fone
- In 2024, List of Pokémon Go Joysticks On OnePlus 12R | Dr.fone
- [New] 2024 Approved The Art of Zoom Etiquette Secrets to Polite and Productive Online Chats
- [New] 2024 Approved Inbuilt Screen Capture Huawei's Mate Series & P Lineup Phones.
- [New] Behind the Scenes Making Melodic TikToks for 2024
- Cutting-Edge Artisans Innovative Instagram HLV Designs
- Stop Motion in the Cloud Era Software, Strategies, and Success Stories for 2024
- How to Unlock Itel S23 Phone without PIN
- Forgot Pattern Lock? Heres How You Can Unlock Infinix Hot 40i Pattern Lock Screen
- New 2024 Approved How To Zoom In On TikTok Videos?
- In 2024, The Ultimate Experts Walkthrough Mastering Windows 10 Audio Recording
- In 2024, How to Reset your Xiaomi Redmi Note 12 Pro+ 5G Lock Screen Password
- How to Transfer Data from Realme C55 to Samsung Phone | Dr.fone
- [New] Tune & Trends A Guide to Sound in Social Media Snapshots
- New Mp3 Converter Mac; Choose One of the Best Converter Tools to Convert MP4 File Format to MP3 File Format for 2024
- Updated In 2024, Mastering Video Speed A Step-by-Step Camtasia Tutorial
- Discovering the Unseen Commentary on Online Videos
- [Updated] Best Free Virtual Meeting Software Options For Both Windows & Mac
- Title: [Updated] Building Your Brand with a Sports YouTube Chain on macOS
- Author: Steven
- Created at : 2024-05-25 20:48:37
- Updated at : 2024-05-26 20:48:37
- Link: https://youtube-clips.techidaily.com/updated-building-your-brand-with-a-sports-youtube-chain-on-macos/
- License: This work is licensed under CC BY-NC-SA 4.0.
