
![[Updated] Boost Channels to Partner Status in Under 90 Days, Start Now](https://www.lifewire.com/thmb/B0CAMp5n0odFeNrfTG4w7r2He08=/300x200/filters:no_upscale():max_bytes(150000):strip_icc()/Selfie-Stick-Tips-56a761cf5f9b58b7d0e9fa52.jpg)
[Updated] Boost Channels to Partner Status in Under 90 Days, Start Now
Boost Channels to Partner Status in Under 90 Days, Start Now
How to Become A YouTube Partner

Richard Bennett
Oct 26, 2023• Proven solutions
Navin explains this issue really clearly.
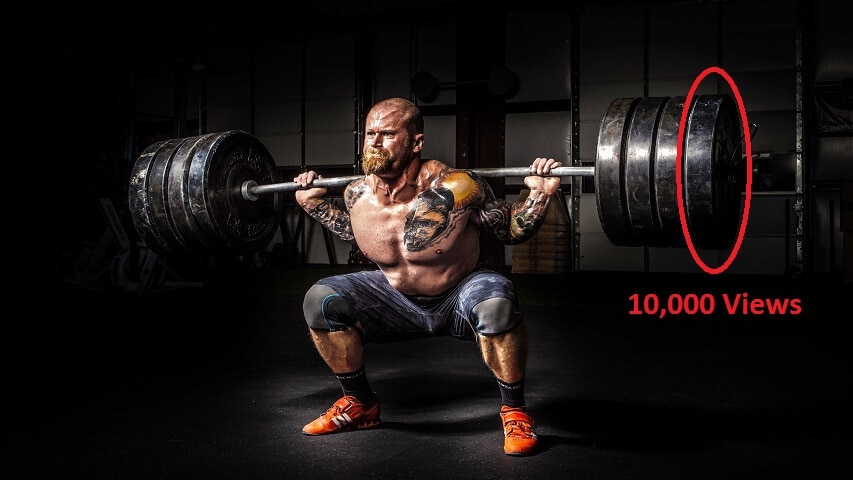
YouTube announced changes to its Partnership Program for some time. For a long time, anybody who had an account in good standing could monetize their videos and start earning ad revenue, but now you need to have 10,000 views to qualify.
My first thought was that this isn’t fair. Small channels shouldn’t be barred from trying to earn money.
I was prepared to go to war over this. Or do an angry blog post. One of those.
However, when you consider YouTube’s reasons for imposing this milestone, it actually starts to make a lot of sense. Here are 4 reasons why this will be a good thing for creators.
1. 10,000 isn’t a crazy number
This is actually a very do-able number for a smaller channel if the creator works hard at growing their audience. Remember that this is cumulative – you don’t need to get 10,000 views on a single video.
Say you receive about 100 views per video and post once a week. It would take you about 2 years to reach 10,000 at that rate, except that it wouldn’t because if you’re putting out good content on that reliable a schedule your channel will be growing (even if it’s slow).
If you get 500 views per video and post every week, you’ll reach 10,000 in about 5 months.
2. 10,000 views aren’t worth much money
Earning money from ad revenue has always been tough. This is just a little extra weight.
How much money could you earn off of 10,000 views, anyways? Not much.
You need to earn $50 in ad revenue to be paid out, and 10,000 views wouldn’t have gotten you there. You would have had to have passed this milestone anyways to actually see any money.
It’s too hard to put an exact number on the money you could have earned from your first 10,000 views – there are too many variables – but considering that smaller channels get lower-paying ads we’re probably talking about pocket change.
3. Inappropriate content won’t be monetized
YouTube has been having issues with advertisers lately. A lot of brands have been justifiably miffed that their products are appearing next to some violent, threatening, objectively offensive content. Anyone could monetize, and some pretty bad eggs took advantage of that.
Now that channels will be applying for YouTube’s Partnership Program instead of simply activating the feature, there can be a real screening process. Channels with content that violates YouTube’s Community Guidelines can be barred from monetization.
4. Thieves won’t profit
There are people out there who want views, subscribers, and nice comments but who do not want to put any real work into getting them. It isn’t uncommon for someone like this to download a video they like and post it to their own channel.
This reposted video will steal views and ad revenue away from the real post on the creator’s channel.
Having a review process for the Partnership Program will help ensure that these content thieves are caught before they can make any money.
YouTube also recently made it easier to report users for impersonation, regardless of how many views they have.
TheGamingGuy looked into people who had stolen his logo and found out they had also stolen whole videos from other YouTubers.
There are clear benefits to this new milestone, but there are also some questions remaining.
How does this change stop content thieves from taking views and ad revenue from creators?
It will help stop them from making money themselves, but not from siphoning away views from other channels. The impersonation rules only apply if somebody is pretending to be another creator. You can steal and repost someone’s content without pretending to be them.
This new rule does take away money as an incentive for stealing content, but a lot of people doing this probably aren’t in it for the money. They might just be misguided fans who want to repost videos they enjoy.
Could this affect your CPM?
Competition plays a huge role in how much YouTubers earn from ad revenue. Some genres are bigger on YouTube than others and, the more popular your genre is, the more options advertisers have. The more competition there is for higher-paying ads, the larger your channel has to be to get them.
Could this new milestone decrease competition in some genres?
Leave a comment to let me know what you think. Jayaprakash, one of our members here, also started an active forum thread on this issue so make sure to join that discussion too!
Touch Up YouTube Videos with Effects in Filmora
You can check our tips and tricks about how to get more views, and here is one thing that need to remember that content is the king. To polish your video content, you can use some YouTube video editing software to remove unwanted clips, add texts and titles, apply filters, create attractive channel arts such as banner and thumbnail. Here, I recommend Wondershare Filmora .


Richard Bennett
Richard Bennett is a writer and a lover of all things video.
Follow @Richard Bennett
Richard Bennett
Oct 26, 2023• Proven solutions
Navin explains this issue really clearly.
YouTube announced changes to its Partnership Program for some time. For a long time, anybody who had an account in good standing could monetize their videos and start earning ad revenue, but now you need to have 10,000 views to qualify.
My first thought was that this isn’t fair. Small channels shouldn’t be barred from trying to earn money.
I was prepared to go to war over this. Or do an angry blog post. One of those.
However, when you consider YouTube’s reasons for imposing this milestone, it actually starts to make a lot of sense. Here are 4 reasons why this will be a good thing for creators.
1. 10,000 isn’t a crazy number
This is actually a very do-able number for a smaller channel if the creator works hard at growing their audience. Remember that this is cumulative – you don’t need to get 10,000 views on a single video.
Say you receive about 100 views per video and post once a week. It would take you about 2 years to reach 10,000 at that rate, except that it wouldn’t because if you’re putting out good content on that reliable a schedule your channel will be growing (even if it’s slow).
If you get 500 views per video and post every week, you’ll reach 10,000 in about 5 months.
2. 10,000 views aren’t worth much money
Earning money from ad revenue has always been tough. This is just a little extra weight.
How much money could you earn off of 10,000 views, anyways? Not much.
You need to earn $50 in ad revenue to be paid out, and 10,000 views wouldn’t have gotten you there. You would have had to have passed this milestone anyways to actually see any money.
It’s too hard to put an exact number on the money you could have earned from your first 10,000 views – there are too many variables – but considering that smaller channels get lower-paying ads we’re probably talking about pocket change.
3. Inappropriate content won’t be monetized
YouTube has been having issues with advertisers lately. A lot of brands have been justifiably miffed that their products are appearing next to some violent, threatening, objectively offensive content. Anyone could monetize, and some pretty bad eggs took advantage of that.
Now that channels will be applying for YouTube’s Partnership Program instead of simply activating the feature, there can be a real screening process. Channels with content that violates YouTube’s Community Guidelines can be barred from monetization.
4. Thieves won’t profit
There are people out there who want views, subscribers, and nice comments but who do not want to put any real work into getting them. It isn’t uncommon for someone like this to download a video they like and post it to their own channel.
This reposted video will steal views and ad revenue away from the real post on the creator’s channel.
Having a review process for the Partnership Program will help ensure that these content thieves are caught before they can make any money.
YouTube also recently made it easier to report users for impersonation, regardless of how many views they have.
TheGamingGuy looked into people who had stolen his logo and found out they had also stolen whole videos from other YouTubers.
There are clear benefits to this new milestone, but there are also some questions remaining.
How does this change stop content thieves from taking views and ad revenue from creators?
It will help stop them from making money themselves, but not from siphoning away views from other channels. The impersonation rules only apply if somebody is pretending to be another creator. You can steal and repost someone’s content without pretending to be them.
This new rule does take away money as an incentive for stealing content, but a lot of people doing this probably aren’t in it for the money. They might just be misguided fans who want to repost videos they enjoy.
Could this affect your CPM?
Competition plays a huge role in how much YouTubers earn from ad revenue. Some genres are bigger on YouTube than others and, the more popular your genre is, the more options advertisers have. The more competition there is for higher-paying ads, the larger your channel has to be to get them.
Could this new milestone decrease competition in some genres?
Leave a comment to let me know what you think. Jayaprakash, one of our members here, also started an active forum thread on this issue so make sure to join that discussion too!
Touch Up YouTube Videos with Effects in Filmora
You can check our tips and tricks about how to get more views, and here is one thing that need to remember that content is the king. To polish your video content, you can use some YouTube video editing software to remove unwanted clips, add texts and titles, apply filters, create attractive channel arts such as banner and thumbnail. Here, I recommend Wondershare Filmora .
Richard Bennett
Richard Bennett is a writer and a lover of all things video.
Follow @Richard Bennett
Step Up to Spectacle: Adding Neon Borderlines to YouTubes
Your YouTube video, or any other clip published on any forum, gets a larger number of hits if it has an attractive thumbnail. And, the fact is, a thumbnail becomes 10x more attractive when the main character that the image has have a neon border around it.
With that said, in the following sections, you will learn a couple of methods on how to add a YouTube thumbnail border around the main characters and/or objects that are significant to the clip.
In this article
01 Add Glowing Neon Border to YouTube Thumbnail with Filmora
02 Add a Glowing Neon Border in YouTube Thumbnail with Canva
03 Outline a Person in a YouTube Thumbnail with Photoshop
Part 1: How to Add Neon Border to YouTube Thumbnail for Free with Filmora
Being one of the most versatile and intuitive post-production tools available in the market today, Wondershare Filmora X allows you to add a neon border to a YouTube thumbnail quite conveniently. You can learn how to get this done on Windows or Mac by following the steps given below.
For Win 7 or later (64-bit)
For macOS 10.12 or later
Step 1: Define Project Settings and Add Image to the Timeline
Launch Wondershare Filmora X on your PC (a MacBook Pro M1 is used here), ensure that the project aspect ratio is set to 16:9 (Widescreen) on the splash screen, and click New Project. On the main interface, click the Preview quality and display settings icon from the upper-right area of the Timeline, click Change Project Aspect Ratio, click to select 1280 x 720 (HD) from the Resolution menu of the Project Settings box, and click OK to save the custom project settings.

Then select My Media from the menu bar if not already selected, click Project Media from the navigation pane, and click Import from the Media box to select and import the image of the main character or object that you want to use in the thumbnail.

Now, drag the image from the Media box to the Timeline at the bottom.

Step 2: Clear Image Background, Add Border, and Add Custom Background
Go to Effects from the menu bar, click to select the Default tab and then AI Portrait from the navigation pane, and click and drag the Human Segmentation preset from the right box, and place it over the image track in the Timeline.

Double-click the image layer, scroll down the upper-left box to the Video Effects section, and use the Edge Thickness and Edge Feather sliders to adjust the character’s edges to make them as realistic as possible. Click OK when done.

Next, click and drag the Human Border preset over the image track in the Timeline, and follow the same procedure to customize the border. This will give the character a neon border effect.

Now, use the method explained earlier to import a custom image for the background, and drag and place it under the previous track in the Timeline.

If you are running the latest version of Filmora, you will find there are some neon light effects available under AI Portrait as well.

Step 3: Add Titles to Thumbnail
Go to Titles from the menu bar, click to select the Default tab and then Lower 3rds from the navigation pane, and click and drag your preferred lower-third preset from the right window to a separate layer in the Timeline. Double-click the lower-third layer, and use the available options in the upper-left window to change the text, its color, etc., and drag the textbox to place it to your preferred position on the image as well. Click OK to save the changes.
Next, click to select Titles from the navigation pane, and drag your preferred title from the right window to the upper-most track in the Timeline. Now use the method explained earlier to edit the text, its color, position, etc. to make it look professional.

For more tips and tricks for creating YouTube thumbnail, you can check this You Tube thumbnail creating guide.
Step 4: Get the Neon Border Thumbnail
Click the Snapshot (Camera) icon from the upper-right area of the Timeline, go to My Media from the menu bar, right-click the thumbnail of the screenshot you captured, and click Reveal in Finder (on Mac) or Reveal in Explorer (on Windows) to get to the folder the YouTube thumbnail border is saved in.

Part 2: How to Add a Glowing Neon Border in Your YouTube Thumbnail with Canva
Canva is another intuitive editing program that works on the web interface rather than having you download and install an app on your PC. You can add a neon border for YouTube thumbnails using Canva by following the instructions given below:
Step 1: Define Project Settings and Add a Background
After signing in to your Canva account, click Create a design from the top-right corner of the page, click Custom size from the bottom, define 1280 and 720 in the Width and Height fields on the box that appears respectively, and click Create new design.

Now, click to select Background from the navigation bar on the left (if the Background tool is not visible, click More and then choose Background from the expanded list), and click to select a background from the images available in the center pane.

Step 2: Upload an Image and Add Effects
Click Uploads from the navigation bar, click the More icon from the right of the Upload media button present at the top of the center pane, choose your preferred method to upload the image (with the transparent background) that you want to use, upload the image, and drag it from the center pane to the Canvas.
Note: You can use any of the tools available online to remove the background from your image for free.

To add a YouTube thumbnail border, make sure that the image that you added to the Canvas is selected, click the Duplicate icon from the upper-right area, and use the scaling handles of the copy of the image to increase its size a bit. Reposition the image back to its original location as well.
Then, click Edit image from the upper-left corner of the Canvas, click Duotone from the Edit image pane at the center, if need be, click See all, choose your preferred duotone effect to apply on the image, choose your preferred highlight and shadow colors from the box that appears next, and click Back from the top of the pane.

Next, click See all next to the Adjust section from the center pane, and drag the Blur slider to the right to increase the blur effect on the image.

Step 3: Position the Layers
While keeping the duplicate image selected, click the Position button from the upper-right area of the Canvas, and click Background to send the second image behind the first one to get the neon border effect for the photo.

Part 3: How to Outline a Person in a YouTube Thumbnail with Photoshop
Because YouTube thumbnails are nothing but static images, creating YouTube thumbnail border with Adobe Photoshop is comparatively easier. The process of doing this is given below:
Step 1: Define Document Preferences and Import an Image
Launch Adobe Photoshop on your PC, click Create new, and on the New Document customization box, define the width and height values to 1280 and 720 pixels respectively. Select Transparent from the Background Contents menu as well if not already selected. Click Create from the bottom to create a new Photoshop document with the specified document settings. Next, open the folder that contains the source image, drag the photo to Photoshop, and press Enter to place the photo.

Step 2: Remove Background from the Image
Make sure that the image layer is selected in the Layers panel on the right, go to Select from the menu bar at the top, and click Subject. From the bottom of the Layers panel, click the Add a mask icon to get rid of the background, leaving only the human on the Canvas.

Step 3: Add a Custom Background and an Outline Around the Subject
Use the method explained earlier to import a background image of your choice to Photoshop. Drag the background image layer to the bottom in the Layers panel. Double-click the masked layer, click to select Stroke from the left pane of the Layer Style box, and use the options available on the right to manage the size, color, position, etc. of the stroke that has been added around the human subject. Click OK when done, and then export the image normally to use it as a YouTube thumbnail border.

Summary
It is important to know that the default resolution of a YouTube thumbnail is 1280 x 720 pixels that is usually written and referred to as 720p. While adding a YouTube thumbnail border, it is also imperative to have a good sense of color combination and fonts. Furthermore, a decent tool like Wondershare Filmora X must be used to add an appealing neon border around the main subject in the thumbnail image easily and quickly.
02 Add a Glowing Neon Border in YouTube Thumbnail with Canva
03 Outline a Person in a YouTube Thumbnail with Photoshop
Part 1: How to Add Neon Border to YouTube Thumbnail for Free with Filmora
Being one of the most versatile and intuitive post-production tools available in the market today, Wondershare Filmora X allows you to add a neon border to a YouTube thumbnail quite conveniently. You can learn how to get this done on Windows or Mac by following the steps given below.
For Win 7 or later (64-bit)
For macOS 10.12 or later
Step 1: Define Project Settings and Add Image to the Timeline
Launch Wondershare Filmora X on your PC (a MacBook Pro M1 is used here), ensure that the project aspect ratio is set to 16:9 (Widescreen) on the splash screen, and click New Project. On the main interface, click the Preview quality and display settings icon from the upper-right area of the Timeline, click Change Project Aspect Ratio, click to select 1280 x 720 (HD) from the Resolution menu of the Project Settings box, and click OK to save the custom project settings.
Then select My Media from the menu bar if not already selected, click Project Media from the navigation pane, and click Import from the Media box to select and import the image of the main character or object that you want to use in the thumbnail.
Now, drag the image from the Media box to the Timeline at the bottom.
Step 2: Clear Image Background, Add Border, and Add Custom Background
Go to Effects from the menu bar, click to select the Default tab and then AI Portrait from the navigation pane, and click and drag the Human Segmentation preset from the right box, and place it over the image track in the Timeline.
Double-click the image layer, scroll down the upper-left box to the Video Effects section, and use the Edge Thickness and Edge Feather sliders to adjust the character’s edges to make them as realistic as possible. Click OK when done.
Next, click and drag the Human Border preset over the image track in the Timeline, and follow the same procedure to customize the border. This will give the character a neon border effect.
Now, use the method explained earlier to import a custom image for the background, and drag and place it under the previous track in the Timeline.
If you are running the latest version of Filmora, you will find there are some neon light effects available under AI Portrait as well.
Step 3: Add Titles to Thumbnail
Go to Titles from the menu bar, click to select the Default tab and then Lower 3rds from the navigation pane, and click and drag your preferred lower-third preset from the right window to a separate layer in the Timeline. Double-click the lower-third layer, and use the available options in the upper-left window to change the text, its color, etc., and drag the textbox to place it to your preferred position on the image as well. Click OK to save the changes.
Next, click to select Titles from the navigation pane, and drag your preferred title from the right window to the upper-most track in the Timeline. Now use the method explained earlier to edit the text, its color, position, etc. to make it look professional.
For more tips and tricks for creating YouTube thumbnail, you can check this You Tube thumbnail creating guide.
Step 4: Get the Neon Border Thumbnail
Click the Snapshot (Camera) icon from the upper-right area of the Timeline, go to My Media from the menu bar, right-click the thumbnail of the screenshot you captured, and click Reveal in Finder (on Mac) or Reveal in Explorer (on Windows) to get to the folder the YouTube thumbnail border is saved in.
Part 2: How to Add a Glowing Neon Border in Your YouTube Thumbnail with Canva
Canva is another intuitive editing program that works on the web interface rather than having you download and install an app on your PC. You can add a neon border for YouTube thumbnails using Canva by following the instructions given below:
Step 1: Define Project Settings and Add a Background
After signing in to your Canva account, click Create a design from the top-right corner of the page, click Custom size from the bottom, define 1280 and 720 in the Width and Height fields on the box that appears respectively, and click Create new design.
Now, click to select Background from the navigation bar on the left (if the Background tool is not visible, click More and then choose Background from the expanded list), and click to select a background from the images available in the center pane.
Step 2: Upload an Image and Add Effects
Click Uploads from the navigation bar, click the More icon from the right of the Upload media button present at the top of the center pane, choose your preferred method to upload the image (with the transparent background) that you want to use, upload the image, and drag it from the center pane to the Canvas.
Note: You can use any of the tools available online to remove the background from your image for free.
To add a YouTube thumbnail border, make sure that the image that you added to the Canvas is selected, click the Duplicate icon from the upper-right area, and use the scaling handles of the copy of the image to increase its size a bit. Reposition the image back to its original location as well.
Then, click Edit image from the upper-left corner of the Canvas, click Duotone from the Edit image pane at the center, if need be, click See all, choose your preferred duotone effect to apply on the image, choose your preferred highlight and shadow colors from the box that appears next, and click Back from the top of the pane.
Next, click See all next to the Adjust section from the center pane, and drag the Blur slider to the right to increase the blur effect on the image.
Step 3: Position the Layers
While keeping the duplicate image selected, click the Position button from the upper-right area of the Canvas, and click Background to send the second image behind the first one to get the neon border effect for the photo.
Part 3: How to Outline a Person in a YouTube Thumbnail with Photoshop
Because YouTube thumbnails are nothing but static images, creating YouTube thumbnail border with Adobe Photoshop is comparatively easier. The process of doing this is given below:
Step 1: Define Document Preferences and Import an Image
Launch Adobe Photoshop on your PC, click Create new, and on the New Document customization box, define the width and height values to 1280 and 720 pixels respectively. Select Transparent from the Background Contents menu as well if not already selected. Click Create from the bottom to create a new Photoshop document with the specified document settings. Next, open the folder that contains the source image, drag the photo to Photoshop, and press Enter to place the photo.
Step 2: Remove Background from the Image
Make sure that the image layer is selected in the Layers panel on the right, go to Select from the menu bar at the top, and click Subject. From the bottom of the Layers panel, click the Add a mask icon to get rid of the background, leaving only the human on the Canvas.
Step 3: Add a Custom Background and an Outline Around the Subject
Use the method explained earlier to import a background image of your choice to Photoshop. Drag the background image layer to the bottom in the Layers panel. Double-click the masked layer, click to select Stroke from the left pane of the Layer Style box, and use the options available on the right to manage the size, color, position, etc. of the stroke that has been added around the human subject. Click OK when done, and then export the image normally to use it as a YouTube thumbnail border.
Summary
It is important to know that the default resolution of a YouTube thumbnail is 1280 x 720 pixels that is usually written and referred to as 720p. While adding a YouTube thumbnail border, it is also imperative to have a good sense of color combination and fonts. Furthermore, a decent tool like Wondershare Filmora X must be used to add an appealing neon border around the main subject in the thumbnail image easily and quickly.
Also read:
- Ace Your Earnings Game in YouTube Shorts
- The Expert Guide to Earning with YouTube
- [New] Audience Attraction in a Minute Comparing YouTubes Shorts and TikToks
- In 2024, Assessing the Riches of Mr. Beast
- Perfecting Your Playlists Adapting Spotify to the YouTube Music Ecosystem
- Access Unlimited Free, High-Quality Green Screen Footage Online
- [Updated] DIY Tips to Cut Unwanted Sounds From Your Videos
- Launching Into Content Creation Account Setup on YouTube
- Joke Jamboree 7 Hilarious Plot Ideas for YouTube Stars
- [New] ASMR Gurus Recommend Best Microphones Reviewed
- In 2024, Behind the Scenes Unveiling the Best 9 Camera Additions for Mobile Films
- Crafting Perfect Youtube Channel Names A Comprehensive Guide for Video Content Creators (Maximum Length 156 Characters) for 2024
- 10 Viral Exercise Routines to Keep Your Channel Thriving for 2024
- [Updated] Curated List DJ Video Sources at Your Fingertips
- In 2024, Crafting a Stellar Visual Identity The Ultimate Guide to YT Design
- 2024 Approved Channel Command Center Mastering Your Digital Domain
- Your Step-by-Step Pathway to Efficient iDevice Video Uploads
- Crafting an Engaging Online Presence The Complete Guide to YouTube Submissions
- Deciphering the Differences Between YouTubes & DailyMentions
- [New] Disrupted Tunes The Best Audio Rippers
- 2024 Approved Discover Movie Substitutes, #7 Recommended
- The Angle Alchemist's Guide to Transforming Your Videos (YouTube Edition)
- Smartphone Intro Maker Tools Choosing the Right One
- [Updated] Effortless Guide to Share Your Videos as Shorts on Computers & Phones
- Amplify Engagement Key YouTube SEO Gadgets Revealed
- Unseen Magic of Online Video Alchemists
- [Updated] Bite-Sized Broadcasting Maintaining Quality in Quick Posts
- Designing a YouTube Subscription Shortcut URL for 2024
- [Updated] Crafting Timeless Videos with Historical Flair
- In 2024, A Complete Guide to Crafting Best-in-Class YT Thumbnails
- Efficient YouTube Ad Blocking on Chrome/Firefox/Android Devices
- [New] Constructing an Inviting Subscribe Link for YouTube Enthusiasts
- Designing an Editorial Epilogue for 2024
- In 2024, Crafting Your YouTube Content for Specific Crowds
- The Blueprint for YouTube Video Success
- Cementing Your Place in YouTube by Mastering Creative Studio Techniques
- Start Saving YouTube Videos as Screen Captures Today - Completely Free
- Complete Tutorial to Use VPNa to Fake GPS Location On Nokia C12 | Dr.fone
- TikTok Hits Twitter's Viral Top 10 List for 2024
- Unlocking the Power of Smart Lock A Beginners Guide for Vivo Y28 5G Users
- In 2024, Asus ROG Phone 8 ADB Format Tool for PC vs. Other Unlocking Tools Which One is the Best?
- [Updated] 2024 Approved Unlocking Creative Expression Tips for Sharing GIFs on Snapchat
- [Updated] Best Data Buffering Option for Sony A7C
- Updated 2024 Approved Movie Maker for Kids Teach Kids to Make a Movie
- How to Change/Add Location Filters on Snapchat For your Samsung Galaxy S24+ | Dr.fone
- [Updated] In 2024, Top Techniques to Keep Your .mov Files Organized on Windows
- In 2024, Top IMEI Unlokers for Your Samsung Galaxy A24 Phone
- Updated 2024 Approved Investigating Canine Emotional Responses Understanding the Roar of Discontent
- New In 2024, Battle of the Giants Adobe Premiere Pro vs After Effects for Visual Storytelling
- What to Do if Google Play Services Keeps Stopping on Infinix Smart 7 | Dr.fone
- New Unlock Canon Footage A Step-by-Step Video Editing Guide
- Step-by-Step Iphone Screen Recording
- 2024 Approved Complete DJI Inspire 1 Review Insights
- In 2024, How to Unlock Apple ID Activation Lock From Apple iPhone XS?
- In 2024, Virtual Journey's Ultimate Listing of 10 Free MMORPG Games
- Will iSpoofer update On Vivo S17 Pro | Dr.fone
- [Updated] A Novice's Guide to Making Unforgettable Snaps on Snapchat for 2024
- Does find my friends work on Infinix Smart 7 HD | Dr.fone
- [New] 2024 Approved Voice-Activated TikTok Mastering Siri on Your iPhone
- [Updated] Perfecting Gameplay with Steam Switch Pro Controller
- Title: [Updated] Boost Channels to Partner Status in Under 90 Days, Start Now
- Author: Steven
- Created at : 2024-05-25 20:47:15
- Updated at : 2024-05-26 20:47:15
- Link: https://youtube-clips.techidaily.com/updated-boost-channels-to-partner-status-in-under-90-days-start-now/
- License: This work is licensed under CC BY-NC-SA 4.0.
