
!["[Updated] ApexCutter Suite Sophisticated PC Editing with Music"](https://www.lifewire.com/thmb/YDOkX4KOrU-1Gfk6Kj7DPlg333E=/400x300/filters:no_upscale():max_bytes(150000):strip_icc():format(webp)/windows11contextmenu-f4d6ebb14db4444d851b4338aa553e21.png)
"[Updated] ApexCutter Suite Sophisticated PC Editing with Music"
ApexCutter Suite: Sophisticated PC Editing with Music
The online world is steadily shifting from static photos to videos and it is quite evident from the social media users. Everyone prefers uploading short videos with music to get more attention rather than uploading a collection of photos. You can join multiple video clips and add background music as well as make a slideshow video with audio. You will require a video editor with music to get the job done.
There are different types of video editors available where you can upload photos and video clips along with songs and music. You turn them into an eye-catching music video instantly with different video effects and animations. Starting from online video editors with music to standalone video editing software, here is the list of the top 10 best video editors for creating and editing videos with music like a professional.
Part 1. Best music video editors for PC
1. Filmora
System compatibility: Windows 11/10/8/7 and Mac
Rating: 4.7/5
Wondershare Filmora is the best video editor with music. It is a premium software where you get all the features and functionalities you need to make and edit music videos like a pro. The software lets you capture screen video, webcam video, external audio as well as voiceover. Therefore, you can use your own music or song in the background of your video.
When it comes to video editing, all the standard tools are available for music video creation. There are loads of transitions, effects, elements, audio and titles available. Besides, there is a dedicated stock media library available. You can import and export different file formats and publish 4K videos as well. Here are the top features of Wondershare Filmora.
For Win 7 or later (64-bit)
For macOS 10.12 or later
- Drag and drop all media files for video creation.
- Easy timeline for organizing media files and editing them quickly.
- Crop, trim, split, cut, and combine media files.
- Wide range of video transitions and audio effects.
- Different motion elements, titles, and stock media files.
- Keyframing, noise removal, video stabilization options.
- Super intuitive user interface for all users.

2. Windows Movie Maker
System compatibility: Windows 11, 10
Rating: 4.0/5
If you are Windows user and you are looking for a free video editor with song, Windows Movie Maker is the perfect app you can get from Microsoft Store. Even though it comes free, the video editor is quite powerful. You can crop, trim, join video clips and add text and music to your video. There are image filters available for photo enhancement as well as transitions to apply in the video.
There are in-built music tracks available and it supports importing a wide range of media files. You can avail animated pan and zoom feature for photos and adjust volume and speed. There is also a Pro version available that supports 4K video and better project management as well as advanced tools. Here are the top features of Windows Movie Maker.
- Rotate, trim, flip, and join video clips to make music video.
- Make video from photos and add in-built or external music files.
- Add titles, credits, texts, stickers, as well as pan-zoom animation.
- Wide range of transition effects and photo filters available.
- Supports importing and exporting different file formats.
- Pro version supports 4K resolution and offers exclusive quick tools.

3. Blender
System compatibility: Windows 11, 10, 8.1 macOS 10.13+, Linux.
Rating: 4.5/5
If you are looking for an open-source video editor, Blender is the best choice. It is completely free to use and it comes with all the standard features for creating and editing music videos. The software is particularly popular for modelling, sculpting, rendering and creating animation-based videos. The video editor contains 32 slots where you can add your media files to create the video.
Blender allows you to change video speed, adjust different layers in the videos and add preferred transitions. Moreover, there are masks and filters available to enhance video content. The advance options of audio mixing and keyframing will surely come handy for advanced users. Here are the top features of Blender video editor.
- Cut, split, trim, and join videos clips.
- Color grading, photo filters and custom text options.
- Add effects, transitions, and animations to your video.
- Live visualization options for advanced users.
- Motion tracking, scene stabilization and compositing options.

4. Adobe Premiere Pro
System compatibility: Windows 10 and 11.
Rating: 4.5/5
Adobe Premiere Pro is the best video editor for professionals. The software has a slightly steep learning curve and it requires a high-end computer. Therefore, it is useful for you when you are serious about making professional-quality music video. In fact, Adobe Premiere Pro is widely used in the music video and video creation industry.
Adobe Premiere Pro is the perfect combination of standard and advanced video editing options. You can edit various video files at the same time. In fact, it is perfect for a team to work on your music video files. You can edit VR videos, multi-cam videos as well 3D videos. You can edit your photos, video clips and audio files perfectly as per your requirements. Here are the top features of Adobe Premiere Pro.
- Trim, split, crop, merge, adjust speed, color correction options.
- Edit video clips and audio files minutely with comparison view.
- Auto color correction, auto reframe, and configurable user interface.
- Editing advanced videos like VR and 3D as well as advance audio editor.
- Supports importing and exporting different media file formats.

5. Final Cut Pro
System compatibility: macOS 10.14 or higher
Rating: 4.4/5
Final Cut Pro for Mac users is equivalent to Adobe Premium Pro for Windows users. It is widely used by video creators to edit your videos and add effects and audio to get the desired result. You get the standard as well as the advanced video editing options and features. You can publish your music video at high resolution, and the software takes minimum time for rendering.
Final Cut Pro allows editing 3D, VR, multi-cam, and 360-degree videos. There are loads of effects, filters, and presets available to apply to your video clips and photos to create a music video. The presence of cinematic mode and object tracker could be useful for creating out-of-the-box videos. Here are the top features of Final Cut Pro.
- Trim, split, crop, change speed, color correction, and multi-cam video editing.
- Amazing cinematic mode to enhance music video content and quality.
- Add external music file and edit the music file as required.
- Proper organization tool for team to work collaboratively.
- Background rendering feature saves a lot of time in video processing.
- Publish your music video in high resolution without long processing time.

7. Clido
System compatibility: Windows, Mac, Linux, Android and iOS.
Rating: 4.5/5
Clido is an online platform where you get different tools for video editing. It is a premium online video editor with music and hence, it is suitable for all those who want to edit video with music on the go. There is no need to download any software and you can merge, compress, resize, cut and crop video as per your requirements.
You can even rotate and adjust speed to create slow-motion videos. To create your music video, you have to opt for its video maker where you can use photos, video clips, GIFs, and music. You can edit the duration for photos and video clips as per your preference. There is also a slideshow maker available for instant video creation with your photos. Here are the top features of Clido that you should be aware of.
- Flip, loop, reverse, crop, resize, and merge video clips.
- Create slideshow videos and add music of your choice instantly.
- Wide range of presets and video filters.
- Change aspect ratios to make videos for different platforms.
- Super intuitive user interface and secure platform.
- Compatible with popular browsers and suitable for PC and phone users

8. Adobe Express
System compatibility: Windows, Mac, Linux, Android, and iOS.
Rating: 4.5/5
Adobe Express is an online video editor with song that is compatible with popular browsers and all devices. You can create stunning music videos in a few minutes. There are various templates available to get started and finish your stunning music video in a few steps. There is a wide range of stock images available from Adobe. You get access to effects, textures, overlays, and filters to enhance video quality.
You can also remove background from your photos to improve video content. There are various graphical elements available to add to your video. You can resize your video to be compatible with online platforms and different devices. The software allows you to play with texts and titles by offering various customization options. Here are the top features of Adobe Express.
- Loads of video templates for quick video creation.
- Resize photos, convert to different formats, and remove background.
- Trim and crop video clips, convert to GIFs, resize as required.
- Access to stock media library of Adobe and experiment with text.
- Make video for different online platforms and different devices.

9. VideoPad
System compatibility: Windows 11, 10, 8, 7, Vista and XP & Mac OS X 10.5 or above.
Rating: 4.1/5
VideoPad from NCH Software is a simple but powerful video editor. You can create stunning music videos and edit them as per your requirements. The user interface is suitable for beginners and you can avail different video effects and transitions to apply to your video. There are also dedicated audio tools available to edit audio and music files.
The software supports editing 360-degree and 3D videos. In fact, it supports over 60 video file formats for importing them. The software is equally useful in video optimization and you can share the edited video on different online platforms as per your preference. Here are the top features of VideoPad.
- Standard video and audio editing options available.
- Mix music track, add audio effects, and record your narration.
- Wide range of templates for intro, outro and others for branding.
- Supports up to 4K resolution and lossless export.
- Video optimization, stabilization, color correction, and change speed.
- Upload videos directly to YouTube, Vimeo, and Flickr and cloud platforms.

Part 2. How to make a music video on my own?
In order to make a music video file, you will need a video editor, video clips or photos, and background music. We recommend Wondershare Filmora as the best video editor for music videos. Transfer the video clips or photos with which you want to make the music video from your phone to your computer. Choose and download the music file that you would want to add to the background of your video. You can also record your own song or music and use the same for background music. Here are the steps to make a music video on your own.
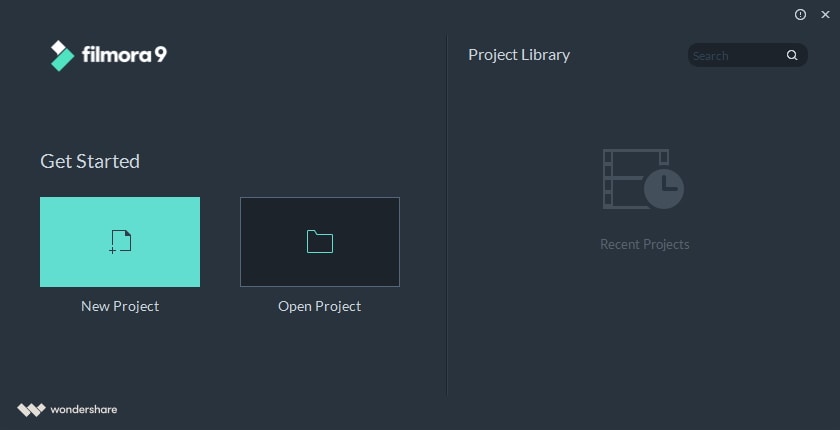
Step 1: Download and install Filmora as per your operating system. Launch the software and click on New Project.
Step 2: Drag and drop the video clips, photos, music and audio files on Project Media folder.
Step 3: Drag and drop the video clips or photos on Timeline and arrange them in order as you want in your video. You can stretch the duration of the photos and videos as per your requirements.

Step 4: Go to Transition option at the top bar and drag and drop the transition of your choice on the photos or video clips so that the transition is eye-catching and eye-soothing.

Step 5: Drag and drop the music file from Project Media folder on the Timeline below the photos or video clips. You can stretch or trim the music track to suit the video length. Check out Audio, Effects, Elements and Titles section at the top bar so that you can incorporate them in your music video to be more appealing and engaging.

Step 6: Preview the music video on Filmora and click on Export button to save it on your hard drive as per your selected file format.

Part 3. Related FAQs
1. How do I add music to video editor on PC?
Different video editor offers different options to add music. Some allow you to drag and drop music file from your hard drive to video editor directly. Otherwise, you have to browse and go to the location and select the music file. Online video editor also allows uploading music file from cloud storage.
2. What software is best for editing music videos?
Wondershare Filmora is the best video editor for editing music videos. This is because it is a premium software with all the features and functionalities that you need to edit your music video. The user interface is intuitive for everyone to enhance video content and quality.
3. What is the best app to put music to videos?
InShot is the best app to put music to videos for Android users. For iOS users, Video Maker with Music Editor is the best app to use where all the required features are readily available.
For macOS 10.12 or later
- Drag and drop all media files for video creation.
- Easy timeline for organizing media files and editing them quickly.
- Crop, trim, split, cut, and combine media files.
- Wide range of video transitions and audio effects.
- Different motion elements, titles, and stock media files.
- Keyframing, noise removal, video stabilization options.
- Super intuitive user interface for all users.
2. Windows Movie Maker
System compatibility: Windows 11, 10
Rating: 4.0/5
If you are Windows user and you are looking for a free video editor with song, Windows Movie Maker is the perfect app you can get from Microsoft Store. Even though it comes free, the video editor is quite powerful. You can crop, trim, join video clips and add text and music to your video. There are image filters available for photo enhancement as well as transitions to apply in the video.
There are in-built music tracks available and it supports importing a wide range of media files. You can avail animated pan and zoom feature for photos and adjust volume and speed. There is also a Pro version available that supports 4K video and better project management as well as advanced tools. Here are the top features of Windows Movie Maker.
- Rotate, trim, flip, and join video clips to make music video.
- Make video from photos and add in-built or external music files.
- Add titles, credits, texts, stickers, as well as pan-zoom animation.
- Wide range of transition effects and photo filters available.
- Supports importing and exporting different file formats.
- Pro version supports 4K resolution and offers exclusive quick tools.
3. Blender
System compatibility: Windows 11, 10, 8.1 macOS 10.13+, Linux.
Rating: 4.5/5
If you are looking for an open-source video editor, Blender is the best choice. It is completely free to use and it comes with all the standard features for creating and editing music videos. The software is particularly popular for modelling, sculpting, rendering and creating animation-based videos. The video editor contains 32 slots where you can add your media files to create the video.
Blender allows you to change video speed, adjust different layers in the videos and add preferred transitions. Moreover, there are masks and filters available to enhance video content. The advance options of audio mixing and keyframing will surely come handy for advanced users. Here are the top features of Blender video editor.
- Cut, split, trim, and join videos clips.
- Color grading, photo filters and custom text options.
- Add effects, transitions, and animations to your video.
- Live visualization options for advanced users.
- Motion tracking, scene stabilization and compositing options.
4. Adobe Premiere Pro
System compatibility: Windows 10 and 11.
Rating: 4.5/5
Adobe Premiere Pro is the best video editor for professionals. The software has a slightly steep learning curve and it requires a high-end computer. Therefore, it is useful for you when you are serious about making professional-quality music video. In fact, Adobe Premiere Pro is widely used in the music video and video creation industry.
Adobe Premiere Pro is the perfect combination of standard and advanced video editing options. You can edit various video files at the same time. In fact, it is perfect for a team to work on your music video files. You can edit VR videos, multi-cam videos as well 3D videos. You can edit your photos, video clips and audio files perfectly as per your requirements. Here are the top features of Adobe Premiere Pro.
- Trim, split, crop, merge, adjust speed, color correction options.
- Edit video clips and audio files minutely with comparison view.
- Auto color correction, auto reframe, and configurable user interface.
- Editing advanced videos like VR and 3D as well as advance audio editor.
- Supports importing and exporting different media file formats.
5. Final Cut Pro
System compatibility: macOS 10.14 or higher
Rating: 4.4/5
Final Cut Pro for Mac users is equivalent to Adobe Premium Pro for Windows users. It is widely used by video creators to edit your videos and add effects and audio to get the desired result. You get the standard as well as the advanced video editing options and features. You can publish your music video at high resolution, and the software takes minimum time for rendering.
Final Cut Pro allows editing 3D, VR, multi-cam, and 360-degree videos. There are loads of effects, filters, and presets available to apply to your video clips and photos to create a music video. The presence of cinematic mode and object tracker could be useful for creating out-of-the-box videos. Here are the top features of Final Cut Pro.
- Trim, split, crop, change speed, color correction, and multi-cam video editing.
- Amazing cinematic mode to enhance music video content and quality.
- Add external music file and edit the music file as required.
- Proper organization tool for team to work collaboratively.
- Background rendering feature saves a lot of time in video processing.
- Publish your music video in high resolution without long processing time.
7. Clido
System compatibility: Windows, Mac, Linux, Android and iOS.
Rating: 4.5/5
Clido is an online platform where you get different tools for video editing. It is a premium online video editor with music and hence, it is suitable for all those who want to edit video with music on the go. There is no need to download any software and you can merge, compress, resize, cut and crop video as per your requirements.
You can even rotate and adjust speed to create slow-motion videos. To create your music video, you have to opt for its video maker where you can use photos, video clips, GIFs, and music. You can edit the duration for photos and video clips as per your preference. There is also a slideshow maker available for instant video creation with your photos. Here are the top features of Clido that you should be aware of.
- Flip, loop, reverse, crop, resize, and merge video clips.
- Create slideshow videos and add music of your choice instantly.
- Wide range of presets and video filters.
- Change aspect ratios to make videos for different platforms.
- Super intuitive user interface and secure platform.
- Compatible with popular browsers and suitable for PC and phone users
8. Adobe Express
System compatibility: Windows, Mac, Linux, Android, and iOS.
Rating: 4.5/5
Adobe Express is an online video editor with song that is compatible with popular browsers and all devices. You can create stunning music videos in a few minutes. There are various templates available to get started and finish your stunning music video in a few steps. There is a wide range of stock images available from Adobe. You get access to effects, textures, overlays, and filters to enhance video quality.
You can also remove background from your photos to improve video content. There are various graphical elements available to add to your video. You can resize your video to be compatible with online platforms and different devices. The software allows you to play with texts and titles by offering various customization options. Here are the top features of Adobe Express.
- Loads of video templates for quick video creation.
- Resize photos, convert to different formats, and remove background.
- Trim and crop video clips, convert to GIFs, resize as required.
- Access to stock media library of Adobe and experiment with text.
- Make video for different online platforms and different devices.
9. VideoPad
System compatibility: Windows 11, 10, 8, 7, Vista and XP & Mac OS X 10.5 or above.
Rating: 4.1/5
VideoPad from NCH Software is a simple but powerful video editor. You can create stunning music videos and edit them as per your requirements. The user interface is suitable for beginners and you can avail different video effects and transitions to apply to your video. There are also dedicated audio tools available to edit audio and music files.
The software supports editing 360-degree and 3D videos. In fact, it supports over 60 video file formats for importing them. The software is equally useful in video optimization and you can share the edited video on different online platforms as per your preference. Here are the top features of VideoPad.
- Standard video and audio editing options available.
- Mix music track, add audio effects, and record your narration.
- Wide range of templates for intro, outro and others for branding.
- Supports up to 4K resolution and lossless export.
- Video optimization, stabilization, color correction, and change speed.
- Upload videos directly to YouTube, Vimeo, and Flickr and cloud platforms.
Part 2. How to make a music video on my own?
In order to make a music video file, you will need a video editor, video clips or photos, and background music. We recommend Wondershare Filmora as the best video editor for music videos. Transfer the video clips or photos with which you want to make the music video from your phone to your computer. Choose and download the music file that you would want to add to the background of your video. You can also record your own song or music and use the same for background music. Here are the steps to make a music video on your own.
Step 1: Download and install Filmora as per your operating system. Launch the software and click on New Project.
Step 2: Drag and drop the video clips, photos, music and audio files on Project Media folder.
Step 3: Drag and drop the video clips or photos on Timeline and arrange them in order as you want in your video. You can stretch the duration of the photos and videos as per your requirements.
Step 4: Go to Transition option at the top bar and drag and drop the transition of your choice on the photos or video clips so that the transition is eye-catching and eye-soothing.
Step 5: Drag and drop the music file from Project Media folder on the Timeline below the photos or video clips. You can stretch or trim the music track to suit the video length. Check out Audio, Effects, Elements and Titles section at the top bar so that you can incorporate them in your music video to be more appealing and engaging.
Step 6: Preview the music video on Filmora and click on Export button to save it on your hard drive as per your selected file format.
Part 3. Related FAQs
1. How do I add music to video editor on PC?
Different video editor offers different options to add music. Some allow you to drag and drop music file from your hard drive to video editor directly. Otherwise, you have to browse and go to the location and select the music file. Online video editor also allows uploading music file from cloud storage.
2. What software is best for editing music videos?
Wondershare Filmora is the best video editor for editing music videos. This is because it is a premium software with all the features and functionalities that you need to edit your music video. The user interface is intuitive for everyone to enhance video content and quality.
3. What is the best app to put music to videos?
InShot is the best app to put music to videos for Android users. For iOS users, Video Maker with Music Editor is the best app to use where all the required features are readily available.
Skyrocket Your YouTube Speed - Render and Upload Hacks
How to Render and Upload YouTube Videos Faster?

Richard Bennett
Oct 26, 2023• Proven solutions
You’ve shot a video you’re proud of and you can’t wait to post it! But, slow down, you have to edit all your clips together first. And then you have to export your video from the editing program, which can take a while. Then you have to wait for it to upload to YouTube, and once it’s up you have to write your description, add cards, and do a handful of other things.
The period between finishing a video and actually posting it for your subscribers to see can be long and tiresome. A lot of videos have probably died in these stages because their creators ran out of energy and patience.
Don’t let this happen to your videos! Here are 4 ways you can save time and avoid headaches during post-production:
3. Use default descriptions and tags
4. TubeBuddy’s bulk features and tagging tools
1. Create mini-projects
When you have alarge editing project with lots of different titles, animations, clip sequences, and PIP tracks it can get hard to keep track of everything. That’s especially true if you need to go back and make changes. A change to one part of your video could affect other parts of it.
Also, the more complex your video is the longer it will take to render/export.
There is a way you can keep your project more organized, save time making minor adjustments, and speed up rendering: create sub-projects of different segments of your video and import them into your main project as their own clips.
This helps you in 3 ways:
1. If there are a lot of effects it’ll be faster to render a shorter video.
2. If you import your sequence as its own clip you won’t have to worry about adjusting little parts of it whenever you change earlier sections of your video.
3. If you do want to make adjustments to your sequence you can open up your mini-project and change it without affecting anything in your main project.
2. Optimize your upload speed
At home, your videos will upload fastest if all of your internet resources are devoted to the upload. That means you should not have any other windows open on your computer while you are uploading. You should also make sure there aren’t other devices competing for wifi like smart tvs, cell phones, or really fancy coffee makers.
If you have neighbors on the same wifi signal as you and they are online at the same time, this will slow you down too.
Because there is so much that can interfere with wifi, you might want to consider a wired Ethernet cable. Ethernet connections are faster in general, and you won’t have any problems with other devices competing for resources like you get with wifi.
If you’re doing everything you can to optimize your upload speed at home and still find that it takes an unreasonable amount of time to upload videos to YouTube, go somewhere with a better connection. Save your video to a USB drive and take it to a library or college to upload. Connections in these kinds of places tend to be very strong.
3. Use default descriptions and tags
In your Creator Studio, go to Channel > Upload defaults. Here you can write in titles, descriptions, and tags which will automatically be applied to every video you upload.

Note: in the latest YouTube Studio, the upload interface is changed but the main process is similar.

You probably have tags you use for almost every video you post. For example, if your channel is about vegan cooking then every one of your videos is probably tagged ‘vegan’, ‘food’, and ‘cooking’. If you type those tags in here then you don’t have to keep adding them to every new video, and you can still add or remove tags from individual uploads so you aren’t stuck using the exact same set of tags every time.
Similarly, you probably have some default text that goes in the description of every one of your videos (i.e. a link to your personal website or a brief introduction of yourself). If you type in a default description then that text will appear automatically in every new video description and you can just add to it when you need to for individual videos.
Using defaults might only save you a couple of minutes per video, but those minutes add up.
4. TubeBuddy’s bulk features and tagging tools
TubeBuddy is a channel management tool for YouTube. Most of its features are more geared towards very large channels or companies with a YouTube presence, but there are also features that can help small or mid-sized YouTubers save time and stay organized.
Some of these tools include templates for things like cards and end screens and bulk processing tools for when you want to change a lot of things at once. For example, if you wanted to update the links in every card in every one of your videos at once then TubeBuddy could help with that.
Some of TubeBuddy’s best features for growing channels are the tagging features. TubeBuddy will help you discover tags, suggest new tags, and even copy whole lists of tags from rival videos.
There are different levels of pricing for TubeBuddy (including a free version, although it’s very limited) and you get a discount on the Pro version if you have less than 50,000 lifetime views on your channel. It ends up being $4.50USD a month (or $3.60 USD a month if you pay for a year in advance). It’s a good investment for someone who’s starting to see some growth on YouTube, but probably not if you’re still trying to reach milestones like 500 subs or 10,000 views.
You have to work hard to get anywhere on YouTube, but that doesn’t mean you should be toiling away at tedious stuff like typing in the same tags over and over. If you have any time-saving tips then make sure to share them with everyone in the comments!
Remember that your time is valuable =)

If you are using Filmora to edit YouTube videos, you can upload the video to YouTube directly from Filmora without download it again first, which can save you time. Besides, if you don’t want the video to be public, you can change Privacy to unlisted or private in Filmora.


Richard Bennett
Richard Bennett is a writer and a lover of all things video.
Follow @Richard Bennett
Richard Bennett
Oct 26, 2023• Proven solutions
You’ve shot a video you’re proud of and you can’t wait to post it! But, slow down, you have to edit all your clips together first. And then you have to export your video from the editing program, which can take a while. Then you have to wait for it to upload to YouTube, and once it’s up you have to write your description, add cards, and do a handful of other things.
The period between finishing a video and actually posting it for your subscribers to see can be long and tiresome. A lot of videos have probably died in these stages because their creators ran out of energy and patience.
Don’t let this happen to your videos! Here are 4 ways you can save time and avoid headaches during post-production:
3. Use default descriptions and tags
4. TubeBuddy’s bulk features and tagging tools
1. Create mini-projects
When you have alarge editing project with lots of different titles, animations, clip sequences, and PIP tracks it can get hard to keep track of everything. That’s especially true if you need to go back and make changes. A change to one part of your video could affect other parts of it.
Also, the more complex your video is the longer it will take to render/export.
There is a way you can keep your project more organized, save time making minor adjustments, and speed up rendering: create sub-projects of different segments of your video and import them into your main project as their own clips.
This helps you in 3 ways:
1. If there are a lot of effects it’ll be faster to render a shorter video.
2. If you import your sequence as its own clip you won’t have to worry about adjusting little parts of it whenever you change earlier sections of your video.
3. If you do want to make adjustments to your sequence you can open up your mini-project and change it without affecting anything in your main project.
2. Optimize your upload speed
At home, your videos will upload fastest if all of your internet resources are devoted to the upload. That means you should not have any other windows open on your computer while you are uploading. You should also make sure there aren’t other devices competing for wifi like smart tvs, cell phones, or really fancy coffee makers.
If you have neighbors on the same wifi signal as you and they are online at the same time, this will slow you down too.
Because there is so much that can interfere with wifi, you might want to consider a wired Ethernet cable. Ethernet connections are faster in general, and you won’t have any problems with other devices competing for resources like you get with wifi.
If you’re doing everything you can to optimize your upload speed at home and still find that it takes an unreasonable amount of time to upload videos to YouTube, go somewhere with a better connection. Save your video to a USB drive and take it to a library or college to upload. Connections in these kinds of places tend to be very strong.
3. Use default descriptions and tags
In your Creator Studio, go to Channel > Upload defaults. Here you can write in titles, descriptions, and tags which will automatically be applied to every video you upload.
Note: in the latest YouTube Studio, the upload interface is changed but the main process is similar.
You probably have tags you use for almost every video you post. For example, if your channel is about vegan cooking then every one of your videos is probably tagged ‘vegan’, ‘food’, and ‘cooking’. If you type those tags in here then you don’t have to keep adding them to every new video, and you can still add or remove tags from individual uploads so you aren’t stuck using the exact same set of tags every time.
Similarly, you probably have some default text that goes in the description of every one of your videos (i.e. a link to your personal website or a brief introduction of yourself). If you type in a default description then that text will appear automatically in every new video description and you can just add to it when you need to for individual videos.
Using defaults might only save you a couple of minutes per video, but those minutes add up.
4. TubeBuddy’s bulk features and tagging tools
TubeBuddy is a channel management tool for YouTube. Most of its features are more geared towards very large channels or companies with a YouTube presence, but there are also features that can help small or mid-sized YouTubers save time and stay organized.
Some of these tools include templates for things like cards and end screens and bulk processing tools for when you want to change a lot of things at once. For example, if you wanted to update the links in every card in every one of your videos at once then TubeBuddy could help with that.
Some of TubeBuddy’s best features for growing channels are the tagging features. TubeBuddy will help you discover tags, suggest new tags, and even copy whole lists of tags from rival videos.
There are different levels of pricing for TubeBuddy (including a free version, although it’s very limited) and you get a discount on the Pro version if you have less than 50,000 lifetime views on your channel. It ends up being $4.50USD a month (or $3.60 USD a month if you pay for a year in advance). It’s a good investment for someone who’s starting to see some growth on YouTube, but probably not if you’re still trying to reach milestones like 500 subs or 10,000 views.
You have to work hard to get anywhere on YouTube, but that doesn’t mean you should be toiling away at tedious stuff like typing in the same tags over and over. If you have any time-saving tips then make sure to share them with everyone in the comments!
Remember that your time is valuable =)
If you are using Filmora to edit YouTube videos, you can upload the video to YouTube directly from Filmora without download it again first, which can save you time. Besides, if you don’t want the video to be public, you can change Privacy to unlisted or private in Filmora.
Richard Bennett
Richard Bennett is a writer and a lover of all things video.
Follow @Richard Bennett
Also read:
- 10 Strategies for Boosting Your YouTube Visibility
- 2024 Approved Building a Strong Network How to Form Effective YouTube Partner Relationships
- Amass 1,000 Visionary Supporters Fast-Track Style
- Ideal Thumbnails for Maximum Clicks
- 2024 Approved Ahead of Tomorrow Key Youtube Gatherings (Post-VidCon)
- [New] Discovering the Past Best History YouTubers
- How to Make ASMR Videos All You Need to Know for 2024
- Video Venture Validation Benchmarking Against Business Rivals
- How to Captivate Audiences and Gain Traction with YouTube Shorts
- Elevating Your Content Choosing Right YouTube Duos/Groups
- Master YouTube Management A Detailed Plan for Watch Later and Playlists
- Crafting Compelling YouTube Profile Definitions for 2024
- Cut Down Clutter How to Efficiently Handle Unwanted YouTube Content (PC/Mobile) for 2024
- 2024 Approved Ensuring Legitimacy of Your YouTube Sign-In
- How to Make YouTube Animated Subscribe Button Easily in Filmora
- A Chill-Out Guide Selecting Inviting Winter Backgrounds for 2024
- Thriving on Short Video Profits YouTube's Money-Making Guide
- Digital Dome Streamlining Your Song Posts on YouTube for 2024
- [New] DIY Tripods| How to Stabilize Your Camera without Buying a Tripod
- 2024 Approved Avoiding the Bottom Ranks Understanding Impactful Factors
- [Updated] Boost YouTube Video Performance with Rapid Rendering Methods
- 2024 Approved Dive Into iOS Screenshots A Comprehensive YouTube Guide
- [New] Content Creation Conundrum Where to Go?
- Decoding the Essentials of Your YouTube TV Experience for 2024
- In 2024, Custom Soundtracks Simplified Converting From Spotify Playlists to YouTube Music
- [Updated] Unlocking Potential in Marketing with Strategic Use of Hash Tags on Facebook
- [Updated] Apex Online Video Streaming Applications
- In 2024, How to Unlock Poco F5 5G Pattern Lock if Forgotten? 6 Ways
- [Updated] Real-Time Broadcast Logging Made Simple for 2024
- Mastering Autofocus on iPhone Cameras Efficiently
- In 2024, Is GSM Flasher ADB Legit? Full Review To Bypass Your Samsung Galaxy A24FRP Lock
- 4 Ways to Transfer Music from Vivo T2x 5G to iPhone | Dr.fone
- The Insider’s Guide to Authentic Instagram Imagery
- Looking For A Location Changer On Vivo Y200e 5G? Look No Further | Dr.fone
- [New] 2024 Approved Stay Concentrated How to Tame the Chatter of Google Video Calls
- In 2024, Pattern Locks Are Unsafe Secure Your ZTE Nubia Flip 5G Phone Now with These Tips
- In 2024, Pokemon Go No GPS Signal? Heres Every Possible Solution On Vivo Y36i | Dr.fone
- 2024 Approved Which VoIP Service Is Right? Discord VS Skype Analyzed
- [Updated] In 2024, The Ultimate List of Mac's Best Screen Recorders Ranked
- In 2024, Windows Movie Maker for Mac Discover the Best Alternatives
- 2024 Approved Premiere Social Signatures Animation Highlights
- Updated 2024 Approved A Brief Review of CapCut Translate With Alternative
- [Updated] The Ultimate Guide for Converting Vimeo Videos (MP4) for 2024
- [New] Navigate the Art of Snapchat Filters for Beginners for 2024
- [New] In 2024, Discover These Eight Handy Apps to Upload Reels on Instagram
- Title: "[Updated] ApexCutter Suite Sophisticated PC Editing with Music"
- Author: Steven
- Created at : 2024-05-25 20:44:57
- Updated at : 2024-05-26 20:44:57
- Link: https://youtube-clips.techidaily.com/updated-apexcutter-suite-sophisticated-pc-editing-with-music/
- License: This work is licensed under CC BY-NC-SA 4.0.
