
![[Updated] 9 Powerful Applications for Saving YouTube Content on Android](https://www.lifewire.com/thmb/EXGWpSyhQVHE5qyXOS4fBPnp23o=/400x300/filters:no_upscale():max_bytes(150000):strip_icc()/5365WomanworkingonSpaceGrayMacBook-840cbcd31a35450fb53c51b287f6ea6d.jpg)
[Updated] 9 Powerful Applications for Saving YouTube Content on Android
9 Powerful Applications for Saving YouTube Content on Android
9 Powerful YouTube Video Downloader for Android

Ollie Mattison
Mar 27, 2024• Proven solutions
Streaming online videos on YouTube has become a lifestyle for almost all of us now. But time and data usage are huge constraints. Isn’t it annoying when you find free Wi-Fi but lack a suitable video downloader or you have a downloader but no Wi-Fi access at the moment to stream the videos. You may already know how to download mp3 on Android , to solve your dilemma and let you download YouTube videos on your Android phone, we have collected the most popular YouTube video downloader for Android in this article.
Note: We resolutely oppose all forms of copyright-infringing downloads. This tutorial is only for downloading YouTube videos/audio materials from your own channel.
Part 1: Online Video Downloader App Only Supporting YouTube video
1. TubeMate
Using TubeMate, you can now save your favorite YouTube videos directly on your phone and cherish them anywhere offline. You can choose the quality of the video as this tool supports different resolutions. If you are a novice user this App is simple as one two three, you need to search the video on YouTube and tap the green arrow at the bottom of the screen to download it.

Pros:
- Multiple download options are available, along with the background download option to carry on with other routine work on your phone.
- It can download the video as well as audio.
- Videos can be converted to MP3 format.
Cons:
- It cannot download in 4K format.
- TubeMate doesn’t download the original YouTube video, but rather a video encoded video by YouTube. Hence, the video sometimes fails to play, and downloading a low-resolution video to save YouTube videos on Android might help.
![]()
A cross-platform for making videos anywhere for all creators

Why your video editing isn’t good enough? How about some creative inspo?
- 100 Million+ Users
- 150+ Countries and Regions
- 4 Million+ Social Media Followers
- 5 Million+ Stock Media for Use
* Secure Download

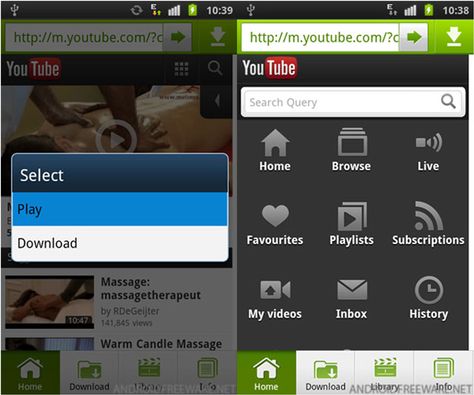
2. Dentex YouTube Downloader
Dentex is a YouTube video downloader for Android that allows you to download YouTube videos within seconds. The interface is divided into 3 parts. In the first part, you can search the YouTube video and see the results, the second part shows the quality and format options, whereas the third part lists the previously downloaded videos.

Pros:
- You can change the format of any video even after downloading.
- You can extract audio files from the videos and later convert them to MP3 format.
- You can remote download through SSH.
Cons:
- An additional plug-in is required to change the format of the video.
- The app is not compatible with lower Android versions such as Gingerbread, Froyo and Éclair.
- The downloading process might sometimes stop, requiring you to resume the process.
3. InsTube Free Video & Music Downloader
InsTube Free Video & Music Downloader allows you to download YouTube videos at high speed supporting MP3, MP4, 3GP, as well as M4A formats. With this tool, downloading YouTube videos in HD, Full HD, or 4K is at your fingertips. You can download videos from more than 40 websites apart from YouTube and enjoy them offline.
Pros:
- It has an inbuilt locker to protect videos and keep them private.
- The hassle-free and neat interface allows easy operation.
- Faster downloading options across 40 plus websites and free YouTube video download is also possible.
Cons:
- Unwanted Ads popup on the screen forcing you to install updates.
- You see the clipboard identifier icon only for few seconds on the screen.
4. WonTube
With WonTube, you can stock and save YouTube videos on Android. Its high conversion speed saves your time. The simple interface of the App makes it user friendly. The App can merge videos and convert the result to any format is a very unique feature.
Pros:
- It supports AVI, WMV, MP4, MKV, FLV, 3GP, and MPG.
- It works well with poor internet connectivity compared to other video downloaders.
- It can convert videos into 20+ formats.
Cons:
- Even though multiple videos can be downloaded simultaneously, the same batch of videos can be converted only to one output format.
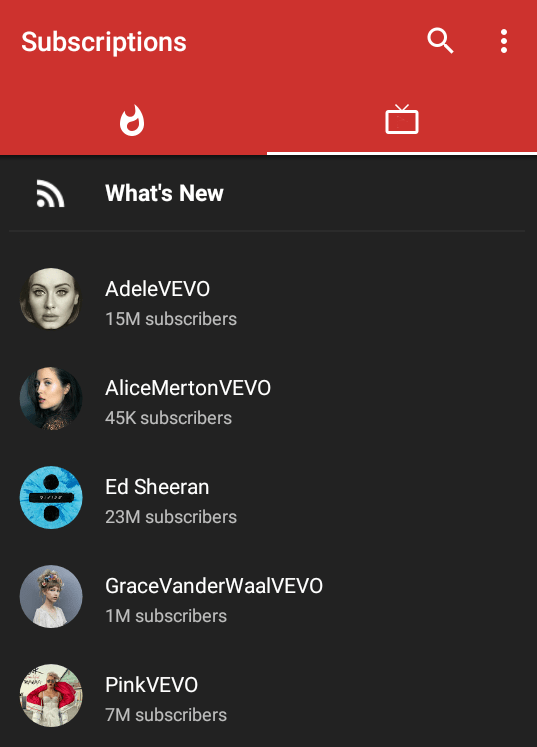
5. NewPipe
NewPipe analyses YouTube videos by itself to obtain the necessary information for downloading the videos. This downloader can thus work with phones that do not have Google Services installed in them. In addition, the app allows you to download audio and video with different formats and resolutions. NewPipe also keeps you updated about your favorite YouTube channels while you save YouTube videos on Android.
Pros:
- It is merely 2MB.
- It has a pop-up mode that is movable and resizable, using which you can watch the videos while carrying out other activities on your mobile.
- There are no Ads.
Cons:
- It doesn’t have a log in option, so you cannot view your history.
- It requires additional settings.
![]()

Best YouTube Video Editor for PC - Filmora
- Cut, Trim, Split and Deatch audio from YouTube videos
- Edit Videos with key frame, motion track, green screen ect.
- Built-in plentiful YouTube templates and effects
- Export to MP4, MOV, MKV, GIF and multiple formats
For Win 7 or later (64-bit)
For macOS 10.12 or later
 Secure Download


Part 2: YouTube Video Downloader App Supporting multiple video site
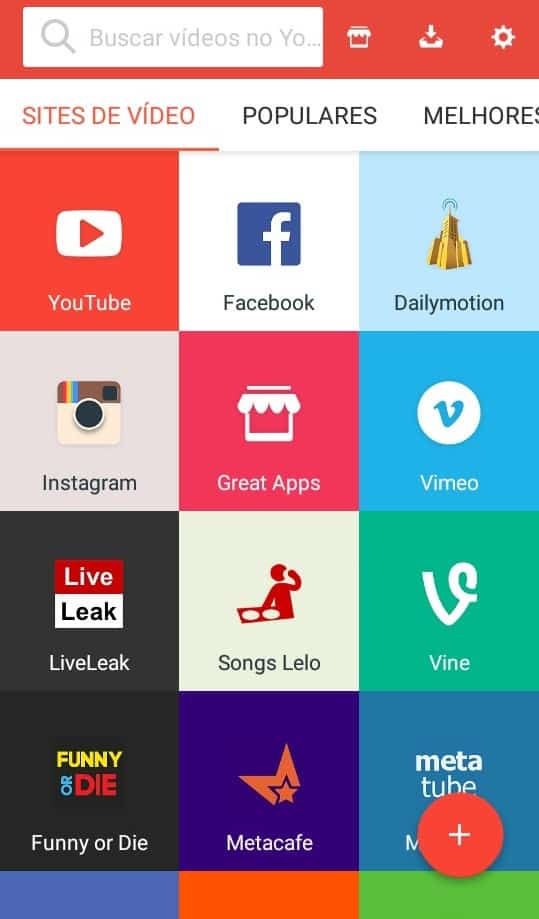
1. SnapTube
SnapTube is yet another amazing video and audio downloading app to download audio in MP3 format and video in MP4 format. The app is organized in itself, carrying a section of popular videos, most viewed videos and a daily recommendation section. The app also allows video downloading option from popular social media sites such as Instagram and Facebook.
Pros:
- It does not require an additional plug-in.
- It does not have malware and Ads.
Cons:
- YouTube multimedia download is restricted in India and China.
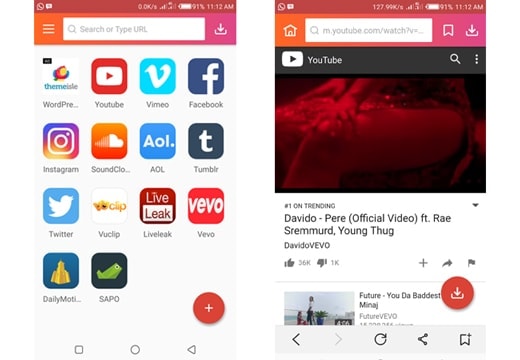
2. Videoder
Videoder is the app for you when you want to broaden your horizon and download videos from Facebook, Instagram, YouTube, Hotstar etc. in MP3 or MP4 format. It comes with an inbuilt feature to convert videos to MP3 format. You can personalize the app by using themes, setting cover art, and tag editor to organize your playlist in a visually attractive way.

Pros:
- Looking for HD quality viewing? You have 4K quality videos with Videoder.
- Multiple downloading is possible with a single tap.
- Downloading speed is accelerated by the number of network connections and utilizing it to the maximum.
Cons:
- Because of the numerous features, it may take time to learn all the functionalities.
- An audio encoding pop-up may sometimes appear asking to install a plug-in.
- It doesn’t support files other than MP3 and MP4 format.
3. KeepVid
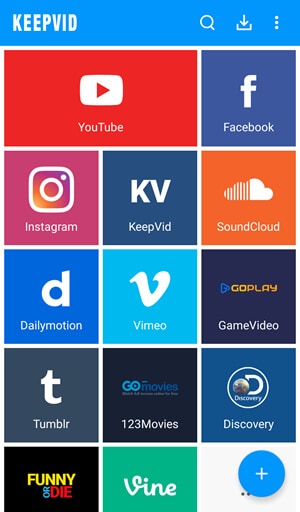
KeepVid is a handy YouTube downloader that can download videos from YouTube and 27 other sites. It is a fantastic downloading tool that comes with a user-friendly interface and allows you to download videos from many sites, including YouTube, Vimeo, and Dailymotion. KeepVid also allows you to download multiple videos simultaneously with the option of selecting the quality of the videos.
Pros:
- The app does not have any size limit to the video.
- It does not have any Ads.
- It can download videos as good as 4K.
Cons:
- The only disadvantage is that you must download the app from the official site KeepVid.com.
Conclusion
In the end, we would like to say that as time passes by and with the tight schedules a YouTube video downloader on your phone frees you from your computer. For all those offline viewing needs of yours, the above-mentioned downloaders are excellent alternatives and help you save YouTube videos on Android.
Ollie Mattison
Ollie Mattison is a writer and a lover of all things video.
Follow @Ollie Mattison
Ollie Mattison
Mar 27, 2024• Proven solutions
Streaming online videos on YouTube has become a lifestyle for almost all of us now. But time and data usage are huge constraints. Isn’t it annoying when you find free Wi-Fi but lack a suitable video downloader or you have a downloader but no Wi-Fi access at the moment to stream the videos. You may already know how to download mp3 on Android , to solve your dilemma and let you download YouTube videos on your Android phone, we have collected the most popular YouTube video downloader for Android in this article.
Note: We resolutely oppose all forms of copyright-infringing downloads. This tutorial is only for downloading YouTube videos/audio materials from your own channel.
Part 1: Online Video Downloader App Only Supporting YouTube video
1. TubeMate
Using TubeMate, you can now save your favorite YouTube videos directly on your phone and cherish them anywhere offline. You can choose the quality of the video as this tool supports different resolutions. If you are a novice user this App is simple as one two three, you need to search the video on YouTube and tap the green arrow at the bottom of the screen to download it.
Pros:
- Multiple download options are available, along with the background download option to carry on with other routine work on your phone.
- It can download the video as well as audio.
- Videos can be converted to MP3 format.
Cons:
- It cannot download in 4K format.
- TubeMate doesn’t download the original YouTube video, but rather a video encoded video by YouTube. Hence, the video sometimes fails to play, and downloading a low-resolution video to save YouTube videos on Android might help.
![]()
A cross-platform for making videos anywhere for all creators
Why your video editing isn’t good enough? How about some creative inspo?
- 100 Million+ Users
- 150+ Countries and Regions
- 4 Million+ Social Media Followers
- 5 Million+ Stock Media for Use
* Secure Download
2. Dentex YouTube Downloader
Dentex is a YouTube video downloader for Android that allows you to download YouTube videos within seconds. The interface is divided into 3 parts. In the first part, you can search the YouTube video and see the results, the second part shows the quality and format options, whereas the third part lists the previously downloaded videos.
Pros:
- You can change the format of any video even after downloading.
- You can extract audio files from the videos and later convert them to MP3 format.
- You can remote download through SSH.
Cons:
- An additional plug-in is required to change the format of the video.
- The app is not compatible with lower Android versions such as Gingerbread, Froyo and Éclair.
- The downloading process might sometimes stop, requiring you to resume the process.
3. InsTube Free Video & Music Downloader
InsTube Free Video & Music Downloader allows you to download YouTube videos at high speed supporting MP3, MP4, 3GP, as well as M4A formats. With this tool, downloading YouTube videos in HD, Full HD, or 4K is at your fingertips. You can download videos from more than 40 websites apart from YouTube and enjoy them offline.
Pros:
- It has an inbuilt locker to protect videos and keep them private.
- The hassle-free and neat interface allows easy operation.
- Faster downloading options across 40 plus websites and free YouTube video download is also possible.
Cons:
- Unwanted Ads popup on the screen forcing you to install updates.
- You see the clipboard identifier icon only for few seconds on the screen.
4. WonTube
With WonTube, you can stock and save YouTube videos on Android. Its high conversion speed saves your time. The simple interface of the App makes it user friendly. The App can merge videos and convert the result to any format is a very unique feature.
Pros:
- It supports AVI, WMV, MP4, MKV, FLV, 3GP, and MPG.
- It works well with poor internet connectivity compared to other video downloaders.
- It can convert videos into 20+ formats.
Cons:
- Even though multiple videos can be downloaded simultaneously, the same batch of videos can be converted only to one output format.
5. NewPipe
NewPipe analyses YouTube videos by itself to obtain the necessary information for downloading the videos. This downloader can thus work with phones that do not have Google Services installed in them. In addition, the app allows you to download audio and video with different formats and resolutions. NewPipe also keeps you updated about your favorite YouTube channels while you save YouTube videos on Android.
Pros:
- It is merely 2MB.
- It has a pop-up mode that is movable and resizable, using which you can watch the videos while carrying out other activities on your mobile.
- There are no Ads.
Cons:
- It doesn’t have a log in option, so you cannot view your history.
- It requires additional settings.
![]()
Best YouTube Video Editor for PC - Filmora
- Cut, Trim, Split and Deatch audio from YouTube videos
- Edit Videos with key frame, motion track, green screen ect.
- Built-in plentiful YouTube templates and effects
- Export to MP4, MOV, MKV, GIF and multiple formats
For Win 7 or later (64-bit)
For macOS 10.12 or later
Secure Download
Part 2: YouTube Video Downloader App Supporting multiple video site
1. SnapTube
SnapTube is yet another amazing video and audio downloading app to download audio in MP3 format and video in MP4 format. The app is organized in itself, carrying a section of popular videos, most viewed videos and a daily recommendation section. The app also allows video downloading option from popular social media sites such as Instagram and Facebook.
Pros:
- It does not require an additional plug-in.
- It does not have malware and Ads.
Cons:
- YouTube multimedia download is restricted in India and China.
2. Videoder
Videoder is the app for you when you want to broaden your horizon and download videos from Facebook, Instagram, YouTube, Hotstar etc. in MP3 or MP4 format. It comes with an inbuilt feature to convert videos to MP3 format. You can personalize the app by using themes, setting cover art, and tag editor to organize your playlist in a visually attractive way.
Pros:
- Looking for HD quality viewing? You have 4K quality videos with Videoder.
- Multiple downloading is possible with a single tap.
- Downloading speed is accelerated by the number of network connections and utilizing it to the maximum.
Cons:
- Because of the numerous features, it may take time to learn all the functionalities.
- An audio encoding pop-up may sometimes appear asking to install a plug-in.
- It doesn’t support files other than MP3 and MP4 format.
3. KeepVid
KeepVid is a handy YouTube downloader that can download videos from YouTube and 27 other sites. It is a fantastic downloading tool that comes with a user-friendly interface and allows you to download videos from many sites, including YouTube, Vimeo, and Dailymotion. KeepVid also allows you to download multiple videos simultaneously with the option of selecting the quality of the videos.
Pros:
- The app does not have any size limit to the video.
- It does not have any Ads.
- It can download videos as good as 4K.
Cons:
- The only disadvantage is that you must download the app from the official site KeepVid.com.
Conclusion
In the end, we would like to say that as time passes by and with the tight schedules a YouTube video downloader on your phone frees you from your computer. For all those offline viewing needs of yours, the above-mentioned downloaders are excellent alternatives and help you save YouTube videos on Android.
Ollie Mattison
Ollie Mattison is a writer and a lover of all things video.
Follow @Ollie Mattison
DIY Audio Excellence: No Mic Necessary
How to Record Good Audio Without a Microphone?

Richard Bennett
Oct 26, 2023• Proven solutions
Audio quality is more important than video quality on YouTube. You’ve probably heard that before – viewers might forgive sub-par video quality if they’re interested in what you’re saying, but if it’s hard to understand what you’re saying they’ll click away.
Getting an external mic (even a $10 one-off Amazon ) is one of the best ways to improve your videos. That said, maybe your budget is $0. Or, maybe you just don’t happen to have a mic now and don’t want to wait to make videos. It could even be that you just don’t want to bother with an external mic.
Luckily, there are a lot of easy, free, things you can do to protect the quality of your audio recording even if you’re not using an external mic. Here are a few tips:
- 1. Keep Your Camera Close
- 2. Shoot Somewhere Quiet
- 3. Pick a Good Room
- 4. Protect your Built-In Mic from Wind
- 5. Use a Free Audio App
- 6. Do a Sound Check
1. Keep Your Camera Close (like, really close)
The biggest problem with the mic built into any camera or phone is just that, since it’s with the camera, it’s usually too far away from you. Built-in mics can record decent audio up close, but usually, your camera will be set up farther away from you than an external mic would be.
For example, your camera’s mic might be just as good as a clip-on LAV, but that LAV is right by your mouth and the camera is a couple of big steps away.
Moving your camera/smartphone physically closer to you will make it hard to include anything besides your head and shoulders in your shot, but it will get you significantly better audio.
2.Shoot Somewhere Quiet
The best way to limit the amount of background noise you pick up in your sound recording is to shoot somewhere where there’s no background noise. That probably seems really basic, but it’s something a lot of people just don’t do. It’s easy to default to recording in your home office, even though it’s right next to the kitchen where your family is bustling around, or in your bedroom even though there’s a busy street right outside your window.
Sometimes the best thing you can do for your audio is simply to scout out a quiet room in your house where the sound recording conditions are better. Speaking of recording conditions…
3. Pick a Good Room
There’s more that goes into picking a good room than how quiet it is. If you try to record in a room that’s too big your voice might sound to distant, and if you try to record in a room that’s too small your audio will be too echo-y. You need a room that’s just right.
You should also pay attention to what’s in the room you’re recording in. Avoid hard, reflective, surfaces like appliances and mirrors which your voice will bounce off of. The same conditions that make you sound great when you sing in the shower will – like recording in a small space -make your voiceover unpleasantly echo-y.
Look for a room that has a lot of soft things in it, like beds and sofas.
4. Protect your Built-In Mic from Wind
If you shoot outside, then the wind passing over your built-in mic will do terrible things to your audio. You can do a lot to counter-act this problem by physically blocking the wind.
There are a few ways to do this. If you’re doing hand-held shots you can partially cover your camera or phone’s mic with your finger. You don’t want to completely cover it/press down or your audio will be muffled. What you’re trying to do is create a barrier blocking out the wind.
On movie sets, they block out wind by covering the microphones with big fuzzy things called ‘dead cats’. You can also block out wind noise by attaching something fuzzy to your microphone. If your camera’s built-in mic is on front of it then you just need something big and fluffy you can loop around the lens. You can use a piece of a boa, a fuzzy novelty scrunchie – you can even murder a fuzzy stuffed animal! Do you have an old coat with a fuzz around the hood? That fuzz would do nicely.
The pompom used in this video cost $2, but you might already have something that would work!
If your built-in mic is on top of your camera you can get something called a ‘micromuff’. A micromuff is essentially a circular or rectangular piece of velcro with long strands of fluff on top. It’s open in the middle so it doesn’t actually cover your mic, but the surrounding fuzz blocks out the wind.

You use the adhesive backing to attach the base velcro to your camera. The other side of the velcro has your fluff attached to the back.
The only thing about a micromuff is that it costs about $30, and if you’re going to spend $30 on audio equipment then you could just buy yourself an inexpensive LAV mic. I only bring up the micromuff because it’s a very simple design you can probably DIY – you just need velcro with adhesive backing and any of the fluff-sources we just discussed.
5. Use a Free Audio App
If you’re recording on a smartphone, you can download a free app that will let you make adjustments to your audio as you record it. With the right app, you can adjust your gain (volume is how you control ‘output’ audio, and gain is for ‘input’ audio. By turning up your gain, you can make your mic more sensitive), tempo, and more. A lot of the time, your audio recording app will also let you edit your audio afterward.
Even if you’re not recording video from your smartphone, it might be a good idea to use your phone as your mic and record a separate audio file. You’ll be able to use an app to fine-tune your recording, and you can set your phone up closer to you the way you would an external mic while keeping your camera back a bit farther.
Free audio apps: Hi-Q MP3 Voice Recorder (Android), RecForge II (Android), Smart Voice Recorder (Android), Audio Memos (iOS), and Recorder Plus (iOS).
6. Do a Sound Check
Once you think you’ve got good audio set up – test it! You don’t want to do a whole video and find out when you play it back that your audio doesn’t sound good.
Do you have any of your own audio tips to pass on? Leave them in the comments!
This topic was suggested by RS Beauty over in the forums. Thanks for the idea!
Polish Your YouTube Videos with Filmora
As one of the most widely used video editing software in YouTube video editing, Filmora allows you to record voiceover and edit the recorded audio with mixer, equalizer and provides lots of templates and effects with an intuitive interface, which saves much time. Download the free trial version and get started now.


Richard Bennett
Richard Bennett is a writer and a lover of all things video.
Follow @Richard Bennett
Richard Bennett
Oct 26, 2023• Proven solutions
Audio quality is more important than video quality on YouTube. You’ve probably heard that before – viewers might forgive sub-par video quality if they’re interested in what you’re saying, but if it’s hard to understand what you’re saying they’ll click away.
Getting an external mic (even a $10 one-off Amazon ) is one of the best ways to improve your videos. That said, maybe your budget is $0. Or, maybe you just don’t happen to have a mic now and don’t want to wait to make videos. It could even be that you just don’t want to bother with an external mic.
Luckily, there are a lot of easy, free, things you can do to protect the quality of your audio recording even if you’re not using an external mic. Here are a few tips:
- 1. Keep Your Camera Close
- 2. Shoot Somewhere Quiet
- 3. Pick a Good Room
- 4. Protect your Built-In Mic from Wind
- 5. Use a Free Audio App
- 6. Do a Sound Check
1. Keep Your Camera Close (like, really close)
The biggest problem with the mic built into any camera or phone is just that, since it’s with the camera, it’s usually too far away from you. Built-in mics can record decent audio up close, but usually, your camera will be set up farther away from you than an external mic would be.
For example, your camera’s mic might be just as good as a clip-on LAV, but that LAV is right by your mouth and the camera is a couple of big steps away.
Moving your camera/smartphone physically closer to you will make it hard to include anything besides your head and shoulders in your shot, but it will get you significantly better audio.
2.Shoot Somewhere Quiet
The best way to limit the amount of background noise you pick up in your sound recording is to shoot somewhere where there’s no background noise. That probably seems really basic, but it’s something a lot of people just don’t do. It’s easy to default to recording in your home office, even though it’s right next to the kitchen where your family is bustling around, or in your bedroom even though there’s a busy street right outside your window.
Sometimes the best thing you can do for your audio is simply to scout out a quiet room in your house where the sound recording conditions are better. Speaking of recording conditions…
3. Pick a Good Room
There’s more that goes into picking a good room than how quiet it is. If you try to record in a room that’s too big your voice might sound to distant, and if you try to record in a room that’s too small your audio will be too echo-y. You need a room that’s just right.
You should also pay attention to what’s in the room you’re recording in. Avoid hard, reflective, surfaces like appliances and mirrors which your voice will bounce off of. The same conditions that make you sound great when you sing in the shower will – like recording in a small space -make your voiceover unpleasantly echo-y.
Look for a room that has a lot of soft things in it, like beds and sofas.
4. Protect your Built-In Mic from Wind
If you shoot outside, then the wind passing over your built-in mic will do terrible things to your audio. You can do a lot to counter-act this problem by physically blocking the wind.
There are a few ways to do this. If you’re doing hand-held shots you can partially cover your camera or phone’s mic with your finger. You don’t want to completely cover it/press down or your audio will be muffled. What you’re trying to do is create a barrier blocking out the wind.
On movie sets, they block out wind by covering the microphones with big fuzzy things called ‘dead cats’. You can also block out wind noise by attaching something fuzzy to your microphone. If your camera’s built-in mic is on front of it then you just need something big and fluffy you can loop around the lens. You can use a piece of a boa, a fuzzy novelty scrunchie – you can even murder a fuzzy stuffed animal! Do you have an old coat with a fuzz around the hood? That fuzz would do nicely.
The pompom used in this video cost $2, but you might already have something that would work!
If your built-in mic is on top of your camera you can get something called a ‘micromuff’. A micromuff is essentially a circular or rectangular piece of velcro with long strands of fluff on top. It’s open in the middle so it doesn’t actually cover your mic, but the surrounding fuzz blocks out the wind.
You use the adhesive backing to attach the base velcro to your camera. The other side of the velcro has your fluff attached to the back.
The only thing about a micromuff is that it costs about $30, and if you’re going to spend $30 on audio equipment then you could just buy yourself an inexpensive LAV mic. I only bring up the micromuff because it’s a very simple design you can probably DIY – you just need velcro with adhesive backing and any of the fluff-sources we just discussed.
5. Use a Free Audio App
If you’re recording on a smartphone, you can download a free app that will let you make adjustments to your audio as you record it. With the right app, you can adjust your gain (volume is how you control ‘output’ audio, and gain is for ‘input’ audio. By turning up your gain, you can make your mic more sensitive), tempo, and more. A lot of the time, your audio recording app will also let you edit your audio afterward.
Even if you’re not recording video from your smartphone, it might be a good idea to use your phone as your mic and record a separate audio file. You’ll be able to use an app to fine-tune your recording, and you can set your phone up closer to you the way you would an external mic while keeping your camera back a bit farther.
Free audio apps: Hi-Q MP3 Voice Recorder (Android), RecForge II (Android), Smart Voice Recorder (Android), Audio Memos (iOS), and Recorder Plus (iOS).
6. Do a Sound Check
Once you think you’ve got good audio set up – test it! You don’t want to do a whole video and find out when you play it back that your audio doesn’t sound good.
Do you have any of your own audio tips to pass on? Leave them in the comments!
This topic was suggested by RS Beauty over in the forums. Thanks for the idea!
Polish Your YouTube Videos with Filmora
As one of the most widely used video editing software in YouTube video editing, Filmora allows you to record voiceover and edit the recorded audio with mixer, equalizer and provides lots of templates and effects with an intuitive interface, which saves much time. Download the free trial version and get started now.
Richard Bennett
Richard Bennett is a writer and a lover of all things video.
Follow @Richard Bennett
Also read:
- Streamline Your SEO Strategy with the Leading 7 Online Youtube Tags Tools
- Creative Camerawork Innovative Techniques for Video-Savvy YouTubers for 2024
- Master the Art of Editing on Zero Budget Discover These Apps
- This Year's Unexpected Cinematic Gems
- Unlocking Creativity in YouTube Video Splitting
- In 2024, 11-Year-Old Video Sensation Unprecedented Wealth Accumulation
- [Updated] Conquer YouTube's Copy-Paste Loop Mastery Essentials
- In 2024, Adjust Cutting Room Time for YouTube
- In 2024, Comedy Canvas Painting Laughter with Top 10 Video Concepts
- Unraveling the Secrets of Viral Content Creation
- Epicurean Elites Top Food Vloggers You Can't Miss
- 2024 Approved Dividing Opinions Is Mirrorless Better than DSLR for Vids?
- Plotline Path to YouTube Prosperity
- 2024 Approved Every Creator's Guide to YouTube Revenue
- 2024 Approved Closing with Panache Free YouTube's #1 Six
- [Updated] Compre Written Guide on Incorporating Markup Features in YouTube
- The Pathway to Recognition YouTubers' Guide to Personal Brands
- [Updated] Breaking Down the Most Influential YouTube Personalities
- [Updated] 17 Best Lights and Lighting Equipment for YouTube Videos
- Audio Integration Your YouTube Playlist for 2024
- New In 2024, Seamless Video Editing on Chromebook Top Android Apps
- 2024 Approved InSearchOfImprovedCameraTech Beyond MyCam
- In 2024, Life360 Circle Everything You Need to Know On Xiaomi Redmi 13C | Dr.fone
- [New] Digital Media Hacks Top 5 Online Techniques for Video Trimming on Vimeo
- 2024 Approved Sustainable Screen Tech Best Picks Reviewed
- Ultimate Guide to Catch the Regional-Located Pokemon For Honor Magic 5 Lite | Dr.fone
- 2024 Approved The Insider's Guide to Launching a Successful Device-Based TikTok
- [Updated] 2024 Approved Expert Edits at a Click – 2 Ways to Rule the World of TikTok Reactions with Filmora
- In 2024, Guide on How To Change Your Apple ID Email Address On iPhone 6s Plus
- [New] Unlock the Secrets Achieving Facebook's Prestige Marker
- Title: [Updated] 9 Powerful Applications for Saving YouTube Content on Android
- Author: Steven
- Created at : 2024-05-25 20:42:44
- Updated at : 2024-05-26 20:42:44
- Link: https://youtube-clips.techidaily.com/updated-9-powerful-applications-for-saving-youtube-content-on-android/
- License: This work is licensed under CC BY-NC-SA 4.0.
