
:max_bytes(150000):strip_icc()/dellstudentdiscount-e67f4f7e4b4b46cba7af6aa676fcf535.jpg)
Turn Your Twitch Sessions Into YouTube Stories
Turn Your Twitch Sessions Into YouTube Stories
Create High-Quality Video - Wondershare Filmora
An easy and powerful YouTube video editor
Numerous video and audio effects to choose from
Detailed tutorials provided by the official channel
Amidst many online applications is Twitch. This live streaming platform takes your experience to another level. You can use it to make crafts, play games, attract broadcasters, and many more. Twitch was launched in 2011, and since then, it has attracted millions of users, managing a database of about 4 million broadcasters by early 2020. With it, users can stream their activities as others watch in real-time. Just browse a category to find a stream.
You can also follow streamers that you like on the platform and get updates and notifications immediately after they are posted. But how do you start a career on a platform like Twitch? You need to broadcast and gather a large following. You can use built-in audiences from other platforms like Facebook. Let’s dive into the core of the matter and look at how to upload Twitch streams to YouTube and build your platform.

In this article
02 What is the benefit of uploading your Twitch Streams to YouTube
03 How to upload your Twitch Streams to YouTube
What is Twitch VOD?
Twitch Video on Demand (VOD) is a recording of previously streamed content. It provides briefings if you missed catching the Twitch live stream. Just watch the VOD from your favorite streamer and be engaged the best way possible. However, VODs don’t last forever. They are removed after two weeks of broadcast. But streamers with Partner Status can have their VODs last up to 60 days.
- How to enable Twitch VOD?
VODs are the best form to archive streams that your fans missed. Even though they are not enabled by default, you can manually enable them and not let your fans miss any important event from your channel. They’ll find it under the “Videos” tab on any Twitch channel. Follow these steps to enable VOD on your channel.
Step 1. Go to your profile icon in the top right corner of Twitch
Check in the “Channel & Video” section and locate the “Stream Key & Preferences” menu.

Step 2. Click on “Creator Dashboard”
Remember, you can enable VODs from your creator dashboard. Just go under the “Settings” tab and click on the “Stream section” of the creator dashboard. Check under the subtitle “VOD Settings” and get the option to store past broadcasts. You can also toggle the slider to store your past broadcasts.

Step 3 Click on the “Settings” tab on the left-hand side and go to Stream
You’ll get various drop-down menu options. Click on the “Settings” tab and choose the “Stream” option. The system will navigate to a new page, thus setting your preferences for VODs and clips.
Step 4. Go to “VOD Settings” and toggle on the “Store Past Broadcast.”
Ensure you have the toggle option turned ON under the “VOD Settings.” If it’s “ON,” you’ll realize the toggle will be purple, with a checkmark in it. Twitch will be confirmed to be enabled if it’s purple.

- Frequently Asked Question about Twitch VOD
These are some questions frequently asked by Twitch users.
1. How long will Twitch store my VOD
Your Twitch can either be stored for 14 or 60 days, depending on your level. For Twitch Prime, Twitch Partner or a Twitch Turbo user has their past broadcasts automatically saved for 60 days before deletion. But if you are not connected to these three options, your past broadcasts will be saved for only 14 days before deletion.
Since your past broadcasts cannot be live for more than 60 days, you have the option to download the video to your computer before the validity days expire and Twitch deletes it. You can use an External Hard drive to save the past broadcast content. Likewise, it is possible to turn your past broadcast content into Highlight and, in turn, permanently store them on Twitch.
2. What is the difference between Twitch VOD, Highlights, and Clips
Twitch VOD is a previously saved video of your live stream content. You choose to save either part or the entire content of your previously streamed content. More so, you don’t need any additional requirements to use VOD.
Highlights are short videos that have been edited from your past broadcast content. You can save them on Twitch permanently. Streamers majorly use highlights to save video game achievements. Unlike VOD Twitch that can be saved up to 60 days, Highlights usually lasts no more than 3 minutes.
- To make Highlights on Twitch, first, navigate to your Dashboard.
- Then scroll down and click on “Content” > “Video Producer.
- Next, press on “All Videos” to change them to “Past Broadcasts.”
- Now press the “Highlight” button, and Twitch will immediately open a new tab for “Twitch Highlighter Tool.”
- Then select the video part to include as “Highlight” and press the “Create Highlights” button.
- Wait a while for the process to be completed, and Voila! You have your Highlights created.
When it comes to Twitch Clip, you can capture special moments in a stream you are currently watching. On the same note, you can share clips with friends and other users on social media platforms. Such shared clips contain a link where others view the source or video from.
The clips you create will automatically be saved on the streamer’s channel on the “Clips” page, where other viewers can see them too. Nonetheless, you can download “clips” to your computer and, in turn, upload them whenever you want to. And note that you can help your stream grow via “Clips” by letting your viewers clip and share your stream moments.
- To create “Clips” on Twitch, identify which Streamers channel you wish to create a clip from.
- Then click on the “Clapper board” icon. Next, edit your clip between 5 and 60 seconds long.
- Finally, create a title and publish your Clip. You’ll also enjoy the privilege to share your clip’s link to other social media networks.
What is the benefit of uploading your Twitch Streams to YouTube
You stand to gain a lot when you upload your Twitch Streams to YouTube.
1) To enlighten your followers
Your followers will see your streams and make the best decisions. Viewers can check out your recordings and other highlights from past streams. It will help them decide whether they like what they see and probably join your live streams.
2) Twitch provides content for you to share and monetize on YouTube
Since Twitch streaming is more popular nowadays, many people throng it for content. It is not wise to rely entirely on Twitch to discover as a Twitch Streamer. Posting to YouTube will make it known within a short time. You would have announced your streams most nobly and kept your followers up to date, attracting new ones as well.
3) To keep your followers engaged even when you are offline
Even though live streaming is important, some viewers may not attend the live sessions due to different time zones or other commitments. In this regard, when uploaded to YouTube, Twitch will give them a chance to watch your content just whenever they log in. They, therefore, have the option to watch a Twitch VOD of the live stream they missed.
How to upload your Twitch Streams to YouTube
Check how to upload Twitch streams to YouTube from the Twitch website.
Step 1. Identify the little arrow next to your name on the Twitch website and click on it. Then click on the “Video Producer” to take you to a list of your Twitch videos.

Step 2. Check out and click on the “three-dots” on the video you wish to upload to YouTube. Click on the “Export” tab.
Step 3. A menu will then pop up. Here, you can fill in the description, title, and tags that you would like to appear on the YouTube video. There is an option for Twitch to split your video automatically. If you wish so, then tick the “Checkbox” to enable it. Then click on the “Start Export” option to export your Twitch streams to YouTube.

Bouns! Edit Your Twitch Video with Filmora
The quality of your video matters when it comes to uploading Twitch Streams to YouTube. Using a third-party tool to edit your video is the first step in ensuring your videos communicate meaningful content. Filmora comes in handy to bring your imaginations to life. Use it for simple creation without limits, even for beginners.
- Use it to track moving objects in video clips
- Easily match any image of the selected clip
- Its powerful tools let you edit your video by cropping, splitting, adjusting speed, etc
- The video keyframe easily indicates the beginning and end of the parameters
For Win 7 or later (64-bit)
For macOS 10.12 or later
Conclusion
● Don’t just focus on how to upload Twitch streams to YouTube but also consider the quality of video you are posting to YouTube. Remember, your video quality will speak much more of you than any other description. So, strive to produce quality videos using the best tool, Filmora. The app is easy to use and will elevate your views and imaginations through your video in the most impactful way.
Amidst many online applications is Twitch. This live streaming platform takes your experience to another level. You can use it to make crafts, play games, attract broadcasters, and many more. Twitch was launched in 2011, and since then, it has attracted millions of users, managing a database of about 4 million broadcasters by early 2020. With it, users can stream their activities as others watch in real-time. Just browse a category to find a stream.
You can also follow streamers that you like on the platform and get updates and notifications immediately after they are posted. But how do you start a career on a platform like Twitch? You need to broadcast and gather a large following. You can use built-in audiences from other platforms like Facebook. Let’s dive into the core of the matter and look at how to upload Twitch streams to YouTube and build your platform.
In this article
02 What is the benefit of uploading your Twitch Streams to YouTube
03 How to upload your Twitch Streams to YouTube
What is Twitch VOD?
Twitch Video on Demand (VOD) is a recording of previously streamed content. It provides briefings if you missed catching the Twitch live stream. Just watch the VOD from your favorite streamer and be engaged the best way possible. However, VODs don’t last forever. They are removed after two weeks of broadcast. But streamers with Partner Status can have their VODs last up to 60 days.
- How to enable Twitch VOD?
VODs are the best form to archive streams that your fans missed. Even though they are not enabled by default, you can manually enable them and not let your fans miss any important event from your channel. They’ll find it under the “Videos” tab on any Twitch channel. Follow these steps to enable VOD on your channel.
Step 1. Go to your profile icon in the top right corner of Twitch
Check in the “Channel & Video” section and locate the “Stream Key & Preferences” menu.
Step 2. Click on “Creator Dashboard”
Remember, you can enable VODs from your creator dashboard. Just go under the “Settings” tab and click on the “Stream section” of the creator dashboard. Check under the subtitle “VOD Settings” and get the option to store past broadcasts. You can also toggle the slider to store your past broadcasts.
Step 3 Click on the “Settings” tab on the left-hand side and go to Stream
You’ll get various drop-down menu options. Click on the “Settings” tab and choose the “Stream” option. The system will navigate to a new page, thus setting your preferences for VODs and clips.
Step 4. Go to “VOD Settings” and toggle on the “Store Past Broadcast.”
Ensure you have the toggle option turned ON under the “VOD Settings.” If it’s “ON,” you’ll realize the toggle will be purple, with a checkmark in it. Twitch will be confirmed to be enabled if it’s purple.
- Frequently Asked Question about Twitch VOD
These are some questions frequently asked by Twitch users.
1. How long will Twitch store my VOD
Your Twitch can either be stored for 14 or 60 days, depending on your level. For Twitch Prime, Twitch Partner or a Twitch Turbo user has their past broadcasts automatically saved for 60 days before deletion. But if you are not connected to these three options, your past broadcasts will be saved for only 14 days before deletion.
Since your past broadcasts cannot be live for more than 60 days, you have the option to download the video to your computer before the validity days expire and Twitch deletes it. You can use an External Hard drive to save the past broadcast content. Likewise, it is possible to turn your past broadcast content into Highlight and, in turn, permanently store them on Twitch.
2. What is the difference between Twitch VOD, Highlights, and Clips
Twitch VOD is a previously saved video of your live stream content. You choose to save either part or the entire content of your previously streamed content. More so, you don’t need any additional requirements to use VOD.
Highlights are short videos that have been edited from your past broadcast content. You can save them on Twitch permanently. Streamers majorly use highlights to save video game achievements. Unlike VOD Twitch that can be saved up to 60 days, Highlights usually lasts no more than 3 minutes.
- To make Highlights on Twitch, first, navigate to your Dashboard.
- Then scroll down and click on “Content” > “Video Producer.
- Next, press on “All Videos” to change them to “Past Broadcasts.”
- Now press the “Highlight” button, and Twitch will immediately open a new tab for “Twitch Highlighter Tool.”
- Then select the video part to include as “Highlight” and press the “Create Highlights” button.
- Wait a while for the process to be completed, and Voila! You have your Highlights created.
When it comes to Twitch Clip, you can capture special moments in a stream you are currently watching. On the same note, you can share clips with friends and other users on social media platforms. Such shared clips contain a link where others view the source or video from.
The clips you create will automatically be saved on the streamer’s channel on the “Clips” page, where other viewers can see them too. Nonetheless, you can download “clips” to your computer and, in turn, upload them whenever you want to. And note that you can help your stream grow via “Clips” by letting your viewers clip and share your stream moments.
- To create “Clips” on Twitch, identify which Streamers channel you wish to create a clip from.
- Then click on the “Clapper board” icon. Next, edit your clip between 5 and 60 seconds long.
- Finally, create a title and publish your Clip. You’ll also enjoy the privilege to share your clip’s link to other social media networks.
What is the benefit of uploading your Twitch Streams to YouTube
You stand to gain a lot when you upload your Twitch Streams to YouTube.
1) To enlighten your followers
Your followers will see your streams and make the best decisions. Viewers can check out your recordings and other highlights from past streams. It will help them decide whether they like what they see and probably join your live streams.
2) Twitch provides content for you to share and monetize on YouTube
Since Twitch streaming is more popular nowadays, many people throng it for content. It is not wise to rely entirely on Twitch to discover as a Twitch Streamer. Posting to YouTube will make it known within a short time. You would have announced your streams most nobly and kept your followers up to date, attracting new ones as well.
3) To keep your followers engaged even when you are offline
Even though live streaming is important, some viewers may not attend the live sessions due to different time zones or other commitments. In this regard, when uploaded to YouTube, Twitch will give them a chance to watch your content just whenever they log in. They, therefore, have the option to watch a Twitch VOD of the live stream they missed.
How to upload your Twitch Streams to YouTube
Check how to upload Twitch streams to YouTube from the Twitch website.
Step 1. Identify the little arrow next to your name on the Twitch website and click on it. Then click on the “Video Producer” to take you to a list of your Twitch videos.
Step 2. Check out and click on the “three-dots” on the video you wish to upload to YouTube. Click on the “Export” tab.
Step 3. A menu will then pop up. Here, you can fill in the description, title, and tags that you would like to appear on the YouTube video. There is an option for Twitch to split your video automatically. If you wish so, then tick the “Checkbox” to enable it. Then click on the “Start Export” option to export your Twitch streams to YouTube.
Bouns! Edit Your Twitch Video with Filmora
The quality of your video matters when it comes to uploading Twitch Streams to YouTube. Using a third-party tool to edit your video is the first step in ensuring your videos communicate meaningful content. Filmora comes in handy to bring your imaginations to life. Use it for simple creation without limits, even for beginners.
- Use it to track moving objects in video clips
- Easily match any image of the selected clip
- Its powerful tools let you edit your video by cropping, splitting, adjusting speed, etc
- The video keyframe easily indicates the beginning and end of the parameters
For Win 7 or later (64-bit)
For macOS 10.12 or later
Conclusion
● Don’t just focus on how to upload Twitch streams to YouTube but also consider the quality of video you are posting to YouTube. Remember, your video quality will speak much more of you than any other description. So, strive to produce quality videos using the best tool, Filmora. The app is easy to use and will elevate your views and imaginations through your video in the most impactful way.
Redefining Digital Space: Alternative Video Hosting Sites
YouTube Alternatives: 3 Best Video Sharing Sites

Richard Bennett
Mar 27, 2024• Proven solutions
YouTube is a great platform where almost everyone goes to watches videos. It is not the best platform for every video creator, though. This article will introduce you to some YouTube alternatives.
There are a lot of reasons you might want to learn about other websites like YouTube. You might want a site with less ads, or different ways of monetizing. YouTube can sometimes remove videos unfairly, so you may want a site where copyright claims are handled by people instead of robots. A lot of users simply want a site that is more like YouTube was when it was younger. There are features, like customizable channel pages, which have been discarded over the years.


YouTube Alternatives: 3 Best Video Sharing Sites
Here is a list of other places where you can upload videos:
1. Dailymotion
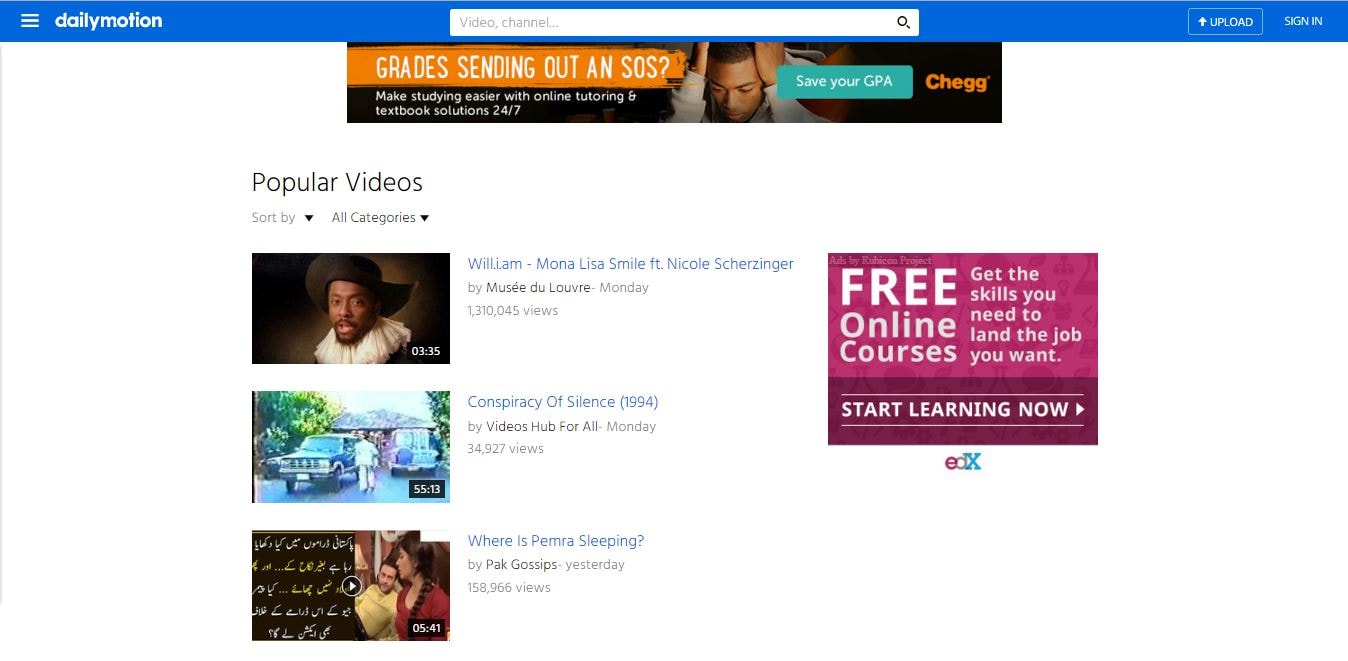
This may be the second most popular free video sharing website, and it is very similar to YouTube in appearance. Like YouTube, Dailymotion recommends videos to users based on what is trending as well as their personal viewing habits. Also like YouTube, there are ads in and around videos and you have the option of monetizing your content to earn ad revenue. There is more than one way to become a Dailymotion partner, though. You can sell a subscription for your channel instead of monetizing ads in your videos.
The main difference between Dailymotion and YouTube is that where YouTube has an abundance of both amateur and professional quality video, Dailymotion skews towards professional. There are personal vlogs and cat videos, but these are less the norm on Dailymotion than on YouTube. You may find less competition in your genre here. However, you should be aware that the expectations of viewers might be higher.
2. Vimeo
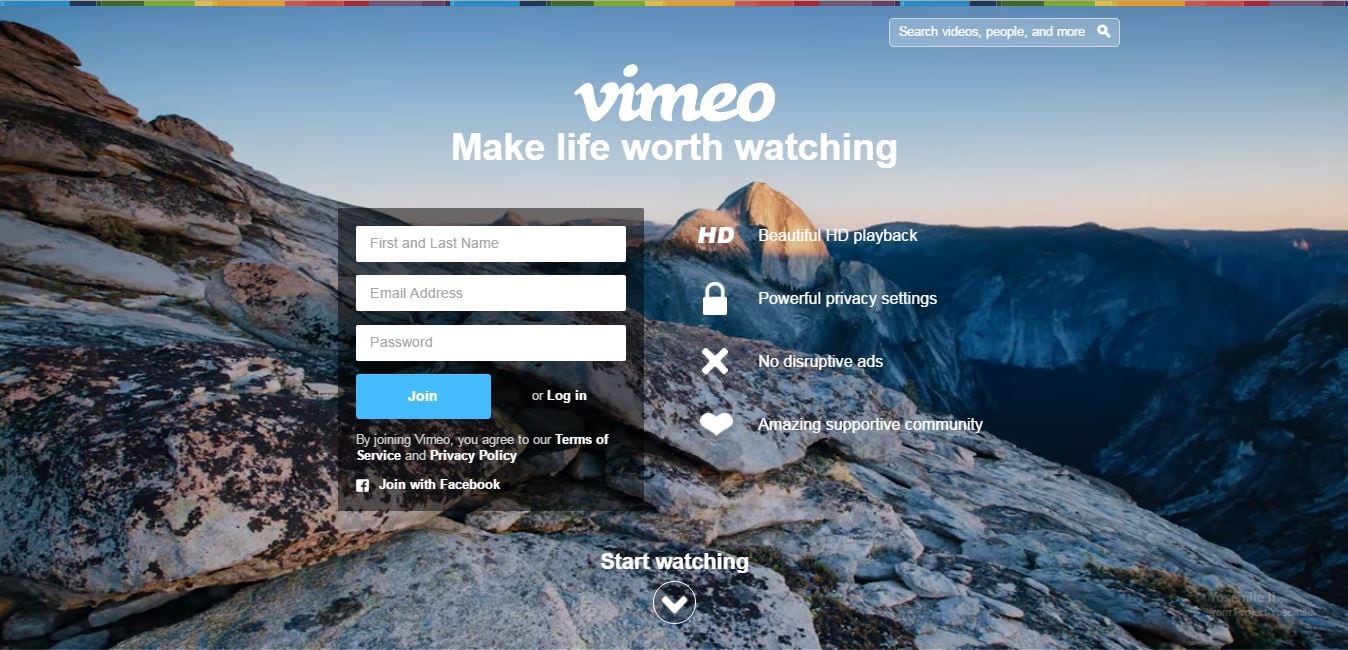
Although Vimeo is also a very popular video site, it is very different from YouTube. Everything from appearance to the types of comments left on videos is vastly different. The front page of this site does not display trending videos, for example. Instead it features high quality creative content that has been reviewed and singled out by Vimeo’s staff as some of the best the site has to offer.
There also are not any ads on Vimeo, whereas YouTube is full of them.
If you create, or are interested in creating, short films then this is where you should be posting. Many festival quality shorts are posted to Vimeo. There are vlogs there too, but they tend to be by serious video creators. The community on Vimeo tends to be a lot friendlier than YouTube so if you are still an amateur, but have dreams of being a pro, then this is probably still the site for you. You should be able to find real constructive criticism here rather than trolls.
Vimeo has a wider variety of privacy settings than YouTube. You can make videos watchable by everyone, just certain people, or require a password.
3. ZippCast
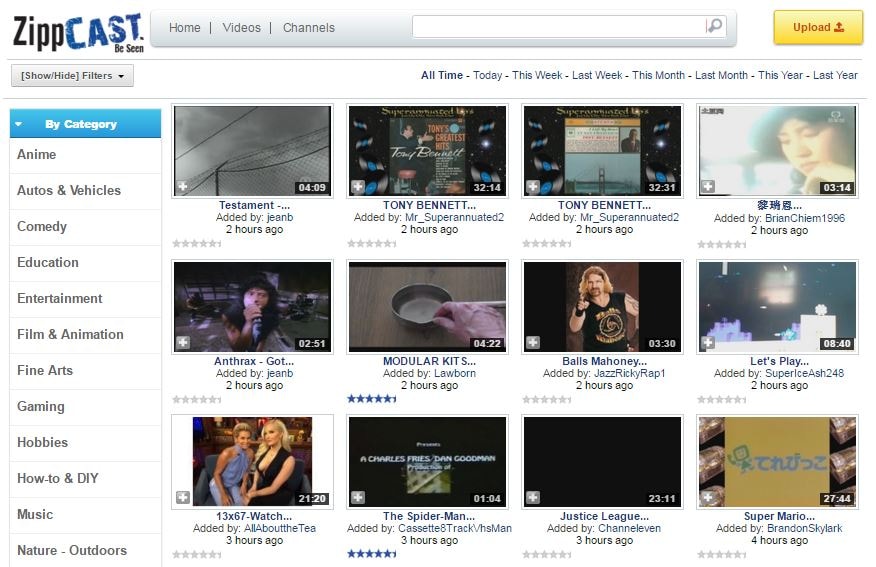
ZippCast is praised by some for being very similar to pre-Google YouTube. While the expectations for video quality may be slightly higher on DailyMotion than YouTube, and are much higher on Vimeo, they are basically the same on ZippCast. Comedy, gaming, music, animation, and vlogging are the most popular categories and almost all content is posted by average people with average skill levels. One of the ways in which ZippCast is like the ‘old’ YouTube is that you can customize the design of your channel.
One of the things users appreciate most about ZippCast is that identifying and removing copyrighted videos is done by humans rather than an automated system, like on YouTube. This means that if you use copyrighted content that is licensed to you or protected by fair use your video should not be taken down. It is common for YouTubers to have their videos unfairly removed, although disputing the copyright claim will usually result in getting the video restored.
Although it is definitely large enough to be considered an alternative to YouTube, ZippCast has been unreliable in the past (i.e shutting down randomly) and has lost the trust of many users.
Richard Bennett
Richard Bennett is a writer and a lover of all things video.
Follow @Richard Bennett
Richard Bennett
Mar 27, 2024• Proven solutions
YouTube is a great platform where almost everyone goes to watches videos. It is not the best platform for every video creator, though. This article will introduce you to some YouTube alternatives.
There are a lot of reasons you might want to learn about other websites like YouTube. You might want a site with less ads, or different ways of monetizing. YouTube can sometimes remove videos unfairly, so you may want a site where copyright claims are handled by people instead of robots. A lot of users simply want a site that is more like YouTube was when it was younger. There are features, like customizable channel pages, which have been discarded over the years.
YouTube Alternatives: 3 Best Video Sharing Sites
Here is a list of other places where you can upload videos:
1. Dailymotion
This may be the second most popular free video sharing website, and it is very similar to YouTube in appearance. Like YouTube, Dailymotion recommends videos to users based on what is trending as well as their personal viewing habits. Also like YouTube, there are ads in and around videos and you have the option of monetizing your content to earn ad revenue. There is more than one way to become a Dailymotion partner, though. You can sell a subscription for your channel instead of monetizing ads in your videos.
The main difference between Dailymotion and YouTube is that where YouTube has an abundance of both amateur and professional quality video, Dailymotion skews towards professional. There are personal vlogs and cat videos, but these are less the norm on Dailymotion than on YouTube. You may find less competition in your genre here. However, you should be aware that the expectations of viewers might be higher.
2. Vimeo
Although Vimeo is also a very popular video site, it is very different from YouTube. Everything from appearance to the types of comments left on videos is vastly different. The front page of this site does not display trending videos, for example. Instead it features high quality creative content that has been reviewed and singled out by Vimeo’s staff as some of the best the site has to offer.
There also are not any ads on Vimeo, whereas YouTube is full of them.
If you create, or are interested in creating, short films then this is where you should be posting. Many festival quality shorts are posted to Vimeo. There are vlogs there too, but they tend to be by serious video creators. The community on Vimeo tends to be a lot friendlier than YouTube so if you are still an amateur, but have dreams of being a pro, then this is probably still the site for you. You should be able to find real constructive criticism here rather than trolls.
Vimeo has a wider variety of privacy settings than YouTube. You can make videos watchable by everyone, just certain people, or require a password.
3. ZippCast
ZippCast is praised by some for being very similar to pre-Google YouTube. While the expectations for video quality may be slightly higher on DailyMotion than YouTube, and are much higher on Vimeo, they are basically the same on ZippCast. Comedy, gaming, music, animation, and vlogging are the most popular categories and almost all content is posted by average people with average skill levels. One of the ways in which ZippCast is like the ‘old’ YouTube is that you can customize the design of your channel.
One of the things users appreciate most about ZippCast is that identifying and removing copyrighted videos is done by humans rather than an automated system, like on YouTube. This means that if you use copyrighted content that is licensed to you or protected by fair use your video should not be taken down. It is common for YouTubers to have their videos unfairly removed, although disputing the copyright claim will usually result in getting the video restored.
Although it is definitely large enough to be considered an alternative to YouTube, ZippCast has been unreliable in the past (i.e shutting down randomly) and has lost the trust of many users.
Richard Bennett
Richard Bennett is a writer and a lover of all things video.
Follow @Richard Bennett
Also read:
- Direct the Degrees Cutting-Edge YouTube Video Manipulation
- Beautifying Videos for YouTube Viewers
- [New] Comprehensive Assessment of Digital Entertainers
- [New] Compre Written Guide on Incorporating Markup Features in YouTube
- [New] Controlling Who Can Leave a Comment on Your YouTube Videos
- Mastering YouTube Legalities A Comprehensive Overview
- [New] Capture Stillness on the Go without Tripods
- In 2024, Channeling Creativity Get Green Screen Tips From YouTube
- In 2024, Achieving Youtube Financial Goals via Viewer Statistics
- Creating Emotional Connections with Your Audience Through Hauls for 2024
- [New] Earn While You Entertain The Content Creator's Guide
- [Updated] Creating a Singular Stream From Diverse YouTube Videos
- Crafting Compelling Thumbnails to Captivate YouTube Viewers and Encourage Clicks for 2024
- Crafting a Winning Strategy YouTube Keyword Mastery Explained
- Navigate the Quickest-Growing YT Havens for Mental Brightness
- From Video to Visual Storytelling Crafting GIFs with YouTube Content
- [New] Building a Brand Through YouTube A Strategic Guide
- Top 10 Audio Amplifiers for Home-Office Setups
- In 2024, Android Advantage 5 Unique Playlist Downloaders Reviewed
- [New] Top 7 Grand Strategy Masterpieces for Epic Battles for 2024
- New Basic Video Editing Solutions for Everyone for 2024
- 2024 Approved Design Amazing WhatsApp Status Photos and Videos with Ease
- New In 2024, Ultimate Guide to Movie Trailer Makers for Mac and Windows Users
- The Art of Perusing Past Facebook Pages To Review or Not To?
- In 2024, Pull Off Professional Video Edits with Ken Burns Effect
- Updated 2024 Approved Download KineMaster Pro for Mac A Detailed Installation Process
- New In 2024, Ranking the Best iPad Video Editors for A Buyers Guide
- [Updated] 2024 Approved Captivate Your Market The Blueprint for Effective Instagram Video Plans
- 2024 Approved Best Deals on Superior ASMR Microphone Technology
- Title: Turn Your Twitch Sessions Into YouTube Stories
- Author: Steven
- Created at : 2024-05-25 20:37:27
- Updated at : 2024-05-26 20:37:27
- Link: https://youtube-clips.techidaily.com/turn-your-twitch-sessions-into-youtube-stories/
- License: This work is licensed under CC BY-NC-SA 4.0.
