
:max_bytes(150000):strip_icc()/GettyImages-527803604-ad6f389c89ff4be1b953a3c2cdc64c09.jpg)
Triple the Fun with YouTube + Twitch Live Sessions
Triple the Fun with YouTube + Twitch Live Sessions
Youtube Video Maker - Wondershare Filmora
Provide abundant video effects - A creative video editor
Powerful color correction and grading
Detailed tutorials provided by the official channel
As the world has progressed, a great deal has changed, and it has transformed into a digital hub. People have started to use different platforms to entertain themselves, watch their favorite content online, gaming, music, sports, or any other form of entertainment.
Cross-platform streaming is a concept people have started to follow especially when it comes to gaming. The audience has a wide variety of choices when it comes to viewing live content online.
YouTube and Twitch are two major platforms streamers use to publish their content online for their targeted audience. They need to stream their content on YouTube and Twitch simultaneously as it engages a wider range of audiences worldwide, and newer streamers can benefit from it.
In this article
Part 1: How Can You Stream on Twitch and YouTube at the Same Time?
Part 2: How to Multi-stream using Streamlabs Prime
Part 3: Bonus Tips | Enlarge your Live Stream Performance!
Part 1: How Can You Stream on Twitch and YouTube at the Same Time?
To stream simultaneously on multiple platforms, a certain program or application is required to provide you with the required tools to enable you to broadcast your content. Several programs provide the option to stream to multiple websites at the same time e.g., Restream, Streamlabs Prime, and MelonApp.
Restream
Restream.io is a service that provides you with the option to broadcast your content to more than 30 different platforms including Twitch and YouTube. When you log in, you can choose the channels you wish to broadcast on and restream will issue a unique key for you.

After you have selected your desired selection, go to your broadcasting software, and choose Restream.io as your preferred service and insert your unique key provided by Restream.
Restream will let you use their services for free provided you use it with their watermark. It is recommended for newer users but if you wish to remove the watermark and go ad-free you will have to upgrade your plan.
Below is a step-by-step guide to help you stream using Restream.io
Step 1: Sign up or log in
The first step is to sign up on Restream. It will require you to choose a unique username, password and enter a valid email address.
Step 2: Choose your desired Platforms
From the list of different platforms, choose the ones you wish to stream to and add your channels by authorizing with the required credentials. Restream has an option of more than 30 platforms including YouTube, Twitch, Facebook, Twitter, and LinkedIn.

Step 3: Choose your subscription plan
Choose your desired plan that caters to your needs. Keep in mind that Restream is 100% free but free accounts do not come with recording or storage and will show a Restream watermark.

You can remove this watermark by upgrading your subscription plan to a Professional one from the dashboard.
Step 4: Choose the final streaming platforms
Connect all your channels so you can stream from a single platform. Click the platform icon and connect your preferred accounts with Restream.
Step 5: Tweak the settings according to your preference
Set up for streaming preferences and settings along with your streaming software. You can broadcast directly from your browser, multiple members from different locations, from your mobile phone, or even your GoPro. More available streaming features can be found on the Restream Help Center.

Restream also offers a wide range of services including the option to stream pre-recorded videos on Twitch at a preselected time and date. However, there is a caveat that you will not be able to multi-stream after you get an affiliate status on your Twitch channel.
Part 2: How to Multi-stream using Streamlabs Prime
Streamlabs Prime is the premium version of Streamlabs. It provides you with a range of 40+ apps that can also improve the quality of your streams and allow you to multi-stream. It is one of the best streaming software in the game currently.
Many content creators use Streamlabs to simultaneously run their streams on YouTube along with Twitch to grasp a wider range of audiences and get more views. One of the best things about Streamlabs is that you can connect to the broadcast services directly from the program without entering any stream key.
Streamlabs has included the option to Multi Stream on different platforms within its OBS client. Below are the steps required to set you up for streaming on YouTube and Twitch at the same time.
Step 1: Open the settings of your desired client
Click on the gear icon to open the settings on the bottom left of the client, click on the Stream tab where you will see the three main platforms for streaming.
Step 2: Add your preferred platforms
Add YouTube and Twitch by pressing the connect button; you can also add other services as well with the Add Destination feature.

Your stream will automatically be broadcast to all selected platforms when you go live. Although, you will be required to use the premium service of Streamlabs to ensure you can Multistream to different platforms at the same time.

Melon is a web-based service that lets you live-stream onto different platforms at the same time such as YouTube, Twitch, Facebook, and LinkedIn in just a matter of a few clicks. No downloads are required and there are umpteen options of customizations to personalize your feed according to your preference.
You can earn through donations from your live stream and are provided with the best customer support 24/7. Everything is hosted on a cloud-based setup and you can stream and record in 1080p.
Below are the steps to guide you on how to stream using the MelonApp.
Step 1: Login or Sign up
Login or Signup with your credentials into Melon and allow the required permissions i.e., microphone and camera.

Step 2: Choose your subscription plan
Choose your premium plan to avail of multi-streaming along with high-quality broadcasting, unlimited streaming, and tons of customization.

Step 3: Choose your desired platforms
Choose and connect the platforms you want to stream to from the Settings in the top right corner. If you have to reselect, simply click x, and reconnect to a different service.
Step 4: Finalize your preferences
Click on ‘Go Live’ and select the platforms for the current stream you wish to broadcast. Selected platforms will be highlighted.

Step 5: Go live
In the end, click next, put in the title of your stream and its description and you are all set to broadcast your content.
Part 3: Bonus Tips | Enlarge your Live Stream Performance
Now that you know how to stream on Twitch and YouTube, here are some tips to improve your live streams!
Tip # 1: Enhance Your Content
You can enhance your content in multiple ways to grasp a wider audience and get your message all around the globe.
Tip # 2: Introduce Graphics and Transitions
You can use interesting gifs, screens, intros, and outros for your streams. Announcing your streams beforehand can also help build up hype and make people anticipate your feed.
Tip # 3: Work More on Post Production
People stream different content on these streaming platforms including gaming, podcasts, educational and entertainment videos. Editing your content to near perfection is one of the most major aspects of a successful broadcast.
Tip # 4: Use Editing Tools to Make Your Videos Interesting
You can use different editing tools such as Wondershare Filmora which is a great video editing software that allows you to edit, trim, cut, add sounds and apply tons of effects to your content no matter what type or genre it is.
Tip # 5: Add Certain Effects to Appear Professional
You can also introduce motion tracking, keyframing, and use other powerful features, and that too for free using Wondershare Filmora. However, if you wish to go a step further you can always opt for their premium version and transcend into a world of endless options and opportunities to edit and enhance your content.
Tip # 6: Promote Your Content Using Social Media
Multi-streaming helps build up a wider community of fans as it is targeting different sets of people and you can also earn from your streams using advertisements and introducing click-on banners for brand endorsements.
Some platforms also let you promote and manage your merchandise, so it is always a good opportunity for these streaming clients and platforms.
Conclusion
Now you can also monetize your streams and broadcast on different platforms such as YouTube and Twitch at the same time. This will boost your reach and views in a very positive way. You can also tweak your content by editing it and inserting sound effects, gifs, and much more to make it more interesting and catchier.
And by multi-streaming on YouTube and Twitch, you will have a greater chance of being found by gaming sponsors and your growth will not be tied just to a single platform. You can also promote your streams on other social media platforms and your handles as well.
Pre-recorded videos are also a great way to present your content with perfection without any chances of being prone to any potential online mishaps.
As the world has progressed, a great deal has changed, and it has transformed into a digital hub. People have started to use different platforms to entertain themselves, watch their favorite content online, gaming, music, sports, or any other form of entertainment.
Cross-platform streaming is a concept people have started to follow especially when it comes to gaming. The audience has a wide variety of choices when it comes to viewing live content online.
YouTube and Twitch are two major platforms streamers use to publish their content online for their targeted audience. They need to stream their content on YouTube and Twitch simultaneously as it engages a wider range of audiences worldwide, and newer streamers can benefit from it.
In this article
Part 1: How Can You Stream on Twitch and YouTube at the Same Time?
Part 2: How to Multi-stream using Streamlabs Prime
Part 3: Bonus Tips | Enlarge your Live Stream Performance!
Part 1: How Can You Stream on Twitch and YouTube at the Same Time?
To stream simultaneously on multiple platforms, a certain program or application is required to provide you with the required tools to enable you to broadcast your content. Several programs provide the option to stream to multiple websites at the same time e.g., Restream, Streamlabs Prime, and MelonApp.
Restream
Restream.io is a service that provides you with the option to broadcast your content to more than 30 different platforms including Twitch and YouTube. When you log in, you can choose the channels you wish to broadcast on and restream will issue a unique key for you.
After you have selected your desired selection, go to your broadcasting software, and choose Restream.io as your preferred service and insert your unique key provided by Restream.
Restream will let you use their services for free provided you use it with their watermark. It is recommended for newer users but if you wish to remove the watermark and go ad-free you will have to upgrade your plan.
Below is a step-by-step guide to help you stream using Restream.io
Step 1: Sign up or log in
The first step is to sign up on Restream. It will require you to choose a unique username, password and enter a valid email address.
Step 2: Choose your desired Platforms
From the list of different platforms, choose the ones you wish to stream to and add your channels by authorizing with the required credentials. Restream has an option of more than 30 platforms including YouTube, Twitch, Facebook, Twitter, and LinkedIn.
Step 3: Choose your subscription plan
Choose your desired plan that caters to your needs. Keep in mind that Restream is 100% free but free accounts do not come with recording or storage and will show a Restream watermark.
You can remove this watermark by upgrading your subscription plan to a Professional one from the dashboard.
Step 4: Choose the final streaming platforms
Connect all your channels so you can stream from a single platform. Click the platform icon and connect your preferred accounts with Restream.
Step 5: Tweak the settings according to your preference
Set up for streaming preferences and settings along with your streaming software. You can broadcast directly from your browser, multiple members from different locations, from your mobile phone, or even your GoPro. More available streaming features can be found on the Restream Help Center.
Restream also offers a wide range of services including the option to stream pre-recorded videos on Twitch at a preselected time and date. However, there is a caveat that you will not be able to multi-stream after you get an affiliate status on your Twitch channel.
Part 2: How to Multi-stream using Streamlabs Prime
Streamlabs Prime is the premium version of Streamlabs. It provides you with a range of 40+ apps that can also improve the quality of your streams and allow you to multi-stream. It is one of the best streaming software in the game currently.
Many content creators use Streamlabs to simultaneously run their streams on YouTube along with Twitch to grasp a wider range of audiences and get more views. One of the best things about Streamlabs is that you can connect to the broadcast services directly from the program without entering any stream key.
Streamlabs has included the option to Multi Stream on different platforms within its OBS client. Below are the steps required to set you up for streaming on YouTube and Twitch at the same time.
Step 1: Open the settings of your desired client
Click on the gear icon to open the settings on the bottom left of the client, click on the Stream tab where you will see the three main platforms for streaming.
Step 2: Add your preferred platforms
Add YouTube and Twitch by pressing the connect button; you can also add other services as well with the Add Destination feature.
Your stream will automatically be broadcast to all selected platforms when you go live. Although, you will be required to use the premium service of Streamlabs to ensure you can Multistream to different platforms at the same time.
Melon is a web-based service that lets you live-stream onto different platforms at the same time such as YouTube, Twitch, Facebook, and LinkedIn in just a matter of a few clicks. No downloads are required and there are umpteen options of customizations to personalize your feed according to your preference.
You can earn through donations from your live stream and are provided with the best customer support 24/7. Everything is hosted on a cloud-based setup and you can stream and record in 1080p.
Below are the steps to guide you on how to stream using the MelonApp.
Step 1: Login or Sign up
Login or Signup with your credentials into Melon and allow the required permissions i.e., microphone and camera.
Step 2: Choose your subscription plan
Choose your premium plan to avail of multi-streaming along with high-quality broadcasting, unlimited streaming, and tons of customization.
Step 3: Choose your desired platforms
Choose and connect the platforms you want to stream to from the Settings in the top right corner. If you have to reselect, simply click x, and reconnect to a different service.
Step 4: Finalize your preferences
Click on ‘Go Live’ and select the platforms for the current stream you wish to broadcast. Selected platforms will be highlighted.
Step 5: Go live
In the end, click next, put in the title of your stream and its description and you are all set to broadcast your content.
Part 3: Bonus Tips | Enlarge your Live Stream Performance
Now that you know how to stream on Twitch and YouTube, here are some tips to improve your live streams!
Tip # 1: Enhance Your Content
You can enhance your content in multiple ways to grasp a wider audience and get your message all around the globe.
Tip # 2: Introduce Graphics and Transitions
You can use interesting gifs, screens, intros, and outros for your streams. Announcing your streams beforehand can also help build up hype and make people anticipate your feed.
Tip # 3: Work More on Post Production
People stream different content on these streaming platforms including gaming, podcasts, educational and entertainment videos. Editing your content to near perfection is one of the most major aspects of a successful broadcast.
Tip # 4: Use Editing Tools to Make Your Videos Interesting
You can use different editing tools such as Wondershare Filmora which is a great video editing software that allows you to edit, trim, cut, add sounds and apply tons of effects to your content no matter what type or genre it is.
Tip # 5: Add Certain Effects to Appear Professional
You can also introduce motion tracking, keyframing, and use other powerful features, and that too for free using Wondershare Filmora. However, if you wish to go a step further you can always opt for their premium version and transcend into a world of endless options and opportunities to edit and enhance your content.
Tip # 6: Promote Your Content Using Social Media
Multi-streaming helps build up a wider community of fans as it is targeting different sets of people and you can also earn from your streams using advertisements and introducing click-on banners for brand endorsements.
Some platforms also let you promote and manage your merchandise, so it is always a good opportunity for these streaming clients and platforms.
Conclusion
Now you can also monetize your streams and broadcast on different platforms such as YouTube and Twitch at the same time. This will boost your reach and views in a very positive way. You can also tweak your content by editing it and inserting sound effects, gifs, and much more to make it more interesting and catchier.
And by multi-streaming on YouTube and Twitch, you will have a greater chance of being found by gaming sponsors and your growth will not be tied just to a single platform. You can also promote your streams on other social media platforms and your handles as well.
Pre-recorded videos are also a great way to present your content with perfection without any chances of being prone to any potential online mishaps.
Scoping Out the 12 Most Popular Flip-Screen Video Cameras
12 Best Vlogging Cameras with a Flip Screen

Richard Bennett
Nov 01, 2022• Proven solutions
A flip screen is a very important feature on a camera for vloggers. With a flip screen, you can preview whether or not your shot is composed the way you want it to be, all in real-time. Below is our top list and review of the twelve best vlogging cameras with a flip screen.
WHAT TO LOOK FOR IN A VLOGGING CAMERA
1. Fully articulated screen (flip screen)
2. Good continual autofocus while recording video
3. Good focus priority through face recognition
4. Touch to focus
5. Good low-light performance
6. external mic jack, hot/cold shoe bracket
7. optical image stabilization
8. good battery life
Check out my full list of 10 Things To Look For In A Vlogging Camera to understand the importance of these camera features.
THE 12 BEST VLOGGING CAMERAS WITH A FLIP SCREEN (2018)
| Camera | Release Date | Camera Type | Flip Screen Type | Mic Port | Price | |
|---|---|---|---|---|---|---|
| CanonEOSM50 | 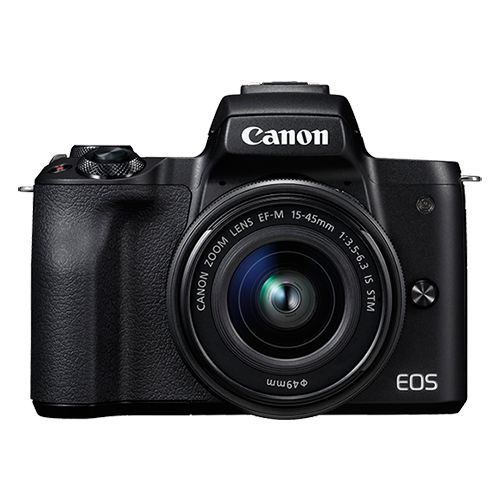 |
February2018 | Mirrorless | Fully Articulated | Yes | $- |
| PanasonicLumixDC-GH5S | 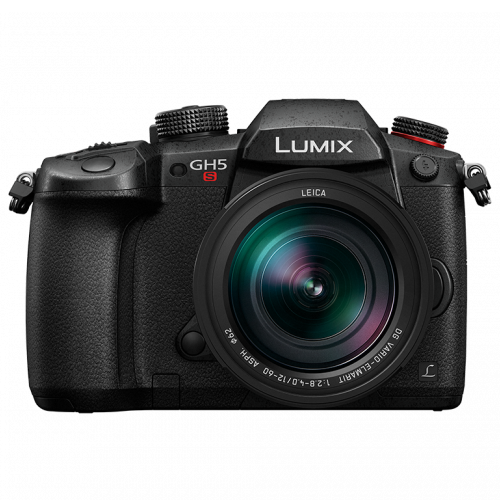 |
January2018 | Mirrorless | Fully Articulated | Yes | $$$ |
| CanonEOSM100 | 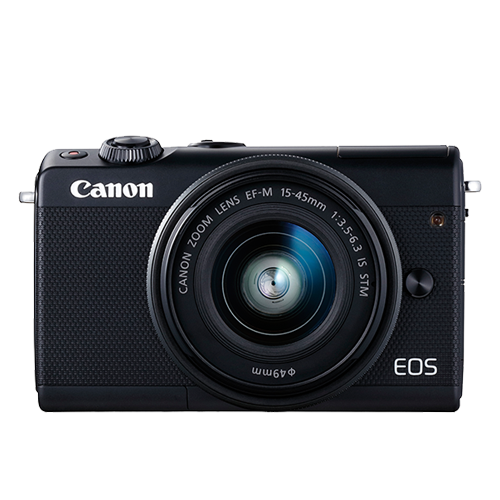 |
August2017 | Mirrorless | Flip Up | No | $ |
| CanonEOS6D Mark II | 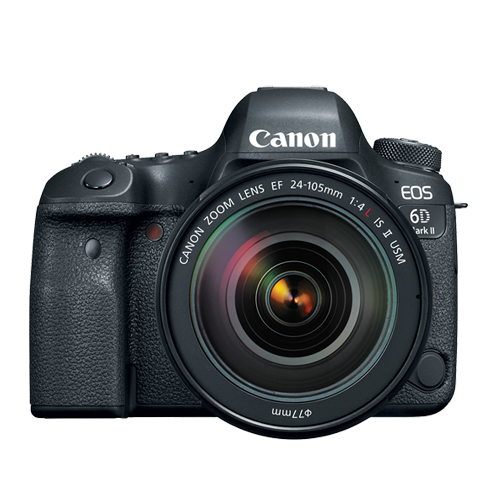 |
June2017 | Mid-size SLR | Fully Articulated | Yes | $$ |
| CanonEOS RebelSL2 |  |
June2017 | Compact SLR | Fully Articulated | Yes | $ |
| CanonEOS RebelT7i | 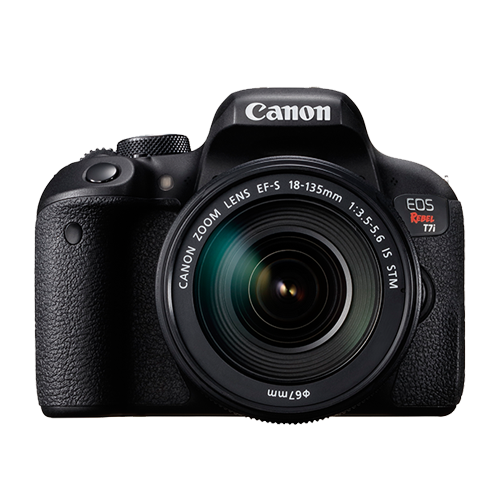 |
February2017 | Mid-size SLR | Fully Articulated | Yes | $- |
| CanonEOSM6 | 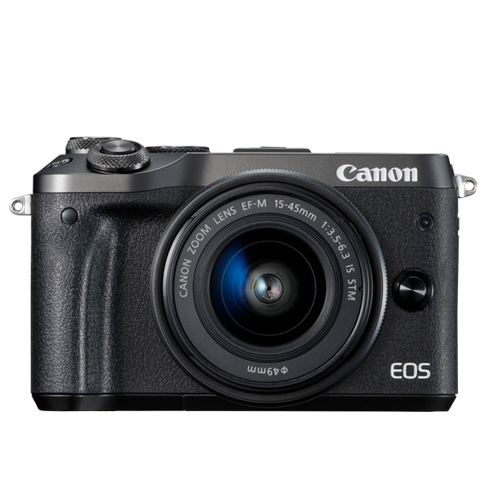 |
February2017 | Mirrorless | Flip Up | Yes | $ |
| NikonD5600 | 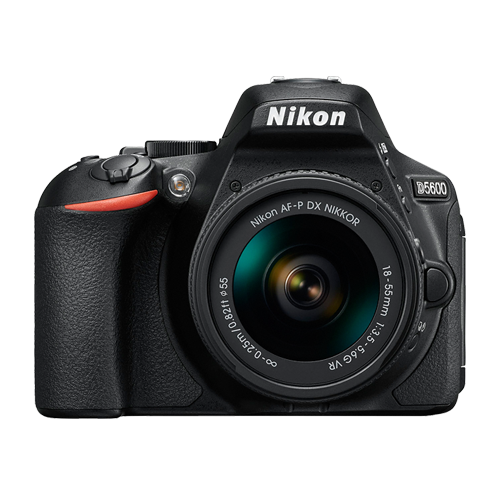 |
November2016 | Compact SLR | Fully Articulated | Yes | $- |
| SonyCyber-Shot DSCRX 100 V | 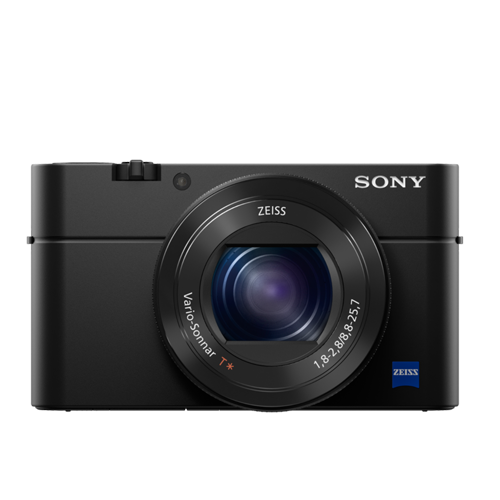 |
October2016 | Compact | Flip Up | No | $- |
| PanasonicLumixDMC-G85 | 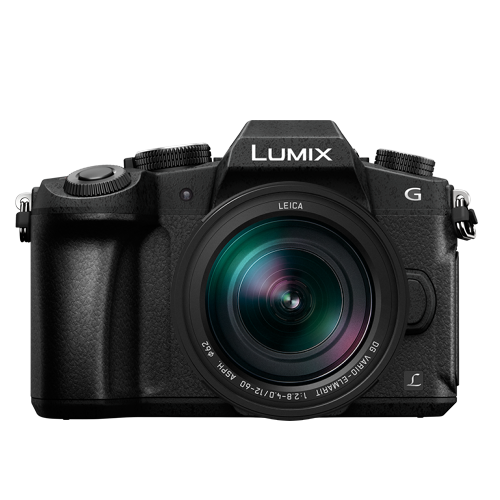 |
September2016 | Mirrorless | Flip Up | Yes | $- |
| CanonEOS80D | 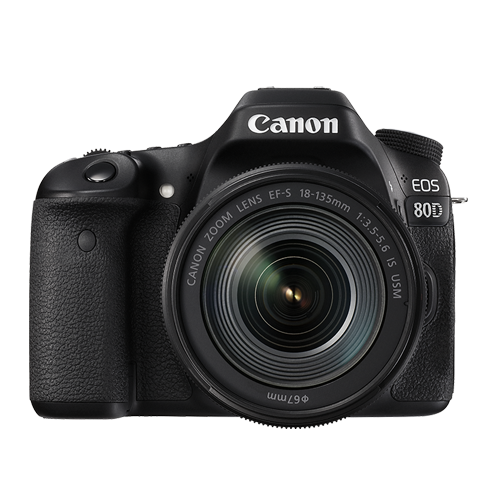 |
February2016 | Mid-size SLR | Fully Articulated | Yes | $$ |
| CanonPowerShotG7 X Mark II | 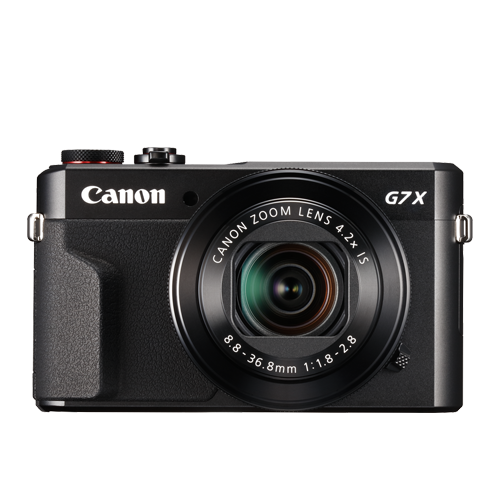 |
February2016 | Compact | Flip Up | No | $ |
|
Best daily vlogging camera with a flip screen: Sony Cyber-Shot DSC-RX 100 V If you want to use a compact camera with a flip screen, Sony’s Cyber-shot DSC-RX 100 V is an exceptional daily vlogging camera. This camera’s 20.1 MP Exmor RS BSI CMOS sensor with a maximum of 12800 in ISO sensitivity, can record footage in UHD 4K at 30 or 24 fps. The lens on this camera, a non-interchangeable Carl Zeiss Vario Sonnar T lens, performs well even under low-light conditions. With its fast hybrid AF system with 315 phase-detection points and an anti-motion blur mode, you can expect your shots to be accurately focused. The Sony RX 100 V packs so much power into such a small, portable camera, making it a great daily vlogging device. PROS - Light and easy to carry around - Produces high-res videos CONS - Short battery life - Lacking a touchscreen |
|---|---|
|
Best cheap vlogging camera with a flip screen: Canon EOS M100 The Canon EOS M100 is another great small vlogging camera with a flip screen. This mirrorless camera shoots up to full HD 1080p videos at 60 fps. Its 24.2 MP APS-C CMOS sensor and DIGIC 7 image processor will accurately lock the right focus and produce videos with rich detail. The camera’s ISO sensitivity goes as high as ISO 25600. Even in difficult light conditions, this camera will be able to capture a scene. You can control and navigate through the difficult functions of this camera using its 3-inch touchscreen LCD. This camera has a flip screen that flips upward so that you can see yourself while you vlog. With built-in Wi-Fi and NFC, you can also transfer your videos seamlessly to a computer without any cables. If you don’t want to spend a fortune but still want to produce videos with great picture quality, the Canon EOS M100 is the best entry-level camera for daily vlogging that’s currently on the market. PROS - Affordable - Great connectivity options CONS - Lacks advanced video recording features - No viewfinder |
|
Best entry-level mirrorless camera with a flip screen for vlogging: Canon EOS M100 The Canon EOS M100 is the best entry-level mirrorless camera with a flip screen for vlogging. In case you missed it, check out my review on the Canon EOS M100. |
|
Best mid-range mirrorless camera with a flip screen for vlogging: Canon EOS M50 The Canon EOS M50 is already regarded as one of the best mirrorless cameras for vlogging though it has only been on the market for just a few months. This mirrorless camera comes with the newer DIGIC 8 Image Processor that find a focus for your footage even better than the last generation’s image processor. You can crank up the ISO sensitivity to ISO 51200 with the Canon EOS M50. The Canon EOS M50 can shoot UHD 4K videos at 23.98 fps. You can also capture 720p slow-motion videos at 120 fps. PROS - Has an external microphone port - Has a 2.36m-dot OLED electronic viewfinder CONS - No image stabilization - Battery life could be longer |
|
Best professional mirrorless camera with a flip screen for vlogging: Panasonic Lumix DC-GH5S When Panasonic made its Lumix DC-GH5, it was a hybrid camera that performed equally well in both photo and video. In response to customers’ interest in a video-focused camera, Panasonic released the GH5S. This camera is equipped with a micro four-thirds sensor and can shoot UHD 4K and DCI videos at 60 fps, up to 150 Mbps. If you want to capture slow-motion footage, you can shoot full HD 1080p videos at 240 fps as well. With its 10.28MP multi-aspect ratio MOS sensor, you’ll be able to produce high-quality videos even under very challenging lighting conditions. In a fraction of a second, this camera can also automatically grab focus during your video with its advanced depth-from-focus technology. It is also equipped with a microphone jack so that you can record better audio while shooting with this camera. The GH5S has a fully articulated touchscreen so that you can compose your shot from any angle. PROS - ISO sensitivity goes up to 204800 - High video bit rates CONS - Expensive - The camera body weighs about 1.5 lbs |
|
Best entry-level DSLR camera with a flip screen for vlogging: Canon EOS SL2 If you’re looking for a low priced entry-level vlogging camera with a flip screen, the Canon EOS Rebel SL2 is the best option. You can precisely and quickly grab focus during video recording with its 9-point AF system and dual pixel CMOS AF technology. The camera powers these functions with its DIGIC 7 image processor. You can shoot up to full HD 1080p videos at 60 fps with its 24.2 MP APS-C CMOS sensor and crank the ISO up to ISO 51200 in case you need to shoot under low light conditions. If you want better audio for your vlogs, you can connect an external microphone to the SL2’s microphone jack. PROS - Microphone jack - Wi-Fi connectivity CONS - No 4K video support - Optical image stabilizer could be better |
|
Best mid-range DSLR camera with a flip screen for vlogging: Canon EOS 80D The 80D is the best camera to go with if you’re looking for a mid-range DLSR vlogging camera with a flip screen. It is equipped with a 24.2 MP APS-C CMOS sensor, comes with the DIGIC 6 image processor, and shoots up to full HD 1080p videos at 60 fps. For low lighting conditions, you can set the camera’s ISO to as high as ISO 25600. The 80D is great for autofocusing during video recording as it comes with a 45-point all cross phase detection autofocus system and a dual pixel CMOS AF system. PROS - Feature-rich - Continuous AF feature performs beautifully while recording high-res videos CONS - Just one SD card slot - PC sync connection features could be better |
|
Best professional DSLR camera with a flip screen for vlogging: Canon 6D Mark II The 6D Mark II is currently (at the time of writing this review) the only full-frame DSLR camera that comes with both a fully-articulated screen and a microphone jack. It is equipped with a 26.2 MP full-frame CMOS sensor, comes with the DIGIC 7 image processor, and shoots up to full HD 1080p videos at 60 fps. The 6D is also equipped with the same 45-point all cross-phase detection and dual pixel CMOS autofocusing system as the 80D. If you’re wanting to vlog with a full-frame camera, the 6D Mark II is the best option. PROS - ISO sensitivity goes up to 102400 - Amazing touchscreen controls CONS - No 4K video recording option - No USB 3.0 |
Want to compare even more cameras? Check out…
12 Best Vlogging Cameras (2018)
Top 11 Cheap Vlogging Cameras (2018)
7 Best DSLR Cameras For Vlogging (2018)
8 Best Mirrorless Cameras For Vlogging (2018)
Richard Bennett
Richard Bennett is a writer and a lover of all things video.
Follow @Richard Bennett
Richard Bennett
Nov 01, 2022• Proven solutions
A flip screen is a very important feature on a camera for vloggers. With a flip screen, you can preview whether or not your shot is composed the way you want it to be, all in real-time. Below is our top list and review of the twelve best vlogging cameras with a flip screen.
WHAT TO LOOK FOR IN A VLOGGING CAMERA
1. Fully articulated screen (flip screen)
2. Good continual autofocus while recording video
3. Good focus priority through face recognition
4. Touch to focus
5. Good low-light performance
6. external mic jack, hot/cold shoe bracket
7. optical image stabilization
8. good battery life
Check out my full list of 10 Things To Look For In A Vlogging Camera to understand the importance of these camera features.
THE 12 BEST VLOGGING CAMERAS WITH A FLIP SCREEN (2018)
| Camera | Release Date | Camera Type | Flip Screen Type | Mic Port | Price | |
|---|---|---|---|---|---|---|
| CanonEOSM50 | |
February2018 | Mirrorless | Fully Articulated | Yes | $- |
| PanasonicLumixDC-GH5S | |
January2018 | Mirrorless | Fully Articulated | Yes | $$$ |
| CanonEOSM100 | |
August2017 | Mirrorless | Flip Up | No | $ |
| CanonEOS6D Mark II | |
June2017 | Mid-size SLR | Fully Articulated | Yes | $$ |
| CanonEOS RebelSL2 | |
June2017 | Compact SLR | Fully Articulated | Yes | $ |
| CanonEOS RebelT7i | |
February2017 | Mid-size SLR | Fully Articulated | Yes | $- |
| CanonEOSM6 | |
February2017 | Mirrorless | Flip Up | Yes | $ |
| NikonD5600 | |
November2016 | Compact SLR | Fully Articulated | Yes | $- |
| SonyCyber-Shot DSCRX 100 V | |
October2016 | Compact | Flip Up | No | $- |
| PanasonicLumixDMC-G85 | |
September2016 | Mirrorless | Flip Up | Yes | $- |
| CanonEOS80D | |
February2016 | Mid-size SLR | Fully Articulated | Yes | $$ |
| CanonPowerShotG7 X Mark II | |
February2016 | Compact | Flip Up | No | $ |
|
Best daily vlogging camera with a flip screen: Sony Cyber-Shot DSC-RX 100 V If you want to use a compact camera with a flip screen, Sony’s Cyber-shot DSC-RX 100 V is an exceptional daily vlogging camera. This camera’s 20.1 MP Exmor RS BSI CMOS sensor with a maximum of 12800 in ISO sensitivity, can record footage in UHD 4K at 30 or 24 fps. The lens on this camera, a non-interchangeable Carl Zeiss Vario Sonnar T lens, performs well even under low-light conditions. With its fast hybrid AF system with 315 phase-detection points and an anti-motion blur mode, you can expect your shots to be accurately focused. The Sony RX 100 V packs so much power into such a small, portable camera, making it a great daily vlogging device. PROS - Light and easy to carry around - Produces high-res videos CONS - Short battery life - Lacking a touchscreen |
|---|---|
|
Best cheap vlogging camera with a flip screen: Canon EOS M100 The Canon EOS M100 is another great small vlogging camera with a flip screen. This mirrorless camera shoots up to full HD 1080p videos at 60 fps. Its 24.2 MP APS-C CMOS sensor and DIGIC 7 image processor will accurately lock the right focus and produce videos with rich detail. The camera’s ISO sensitivity goes as high as ISO 25600. Even in difficult light conditions, this camera will be able to capture a scene. You can control and navigate through the difficult functions of this camera using its 3-inch touchscreen LCD. This camera has a flip screen that flips upward so that you can see yourself while you vlog. With built-in Wi-Fi and NFC, you can also transfer your videos seamlessly to a computer without any cables. If you don’t want to spend a fortune but still want to produce videos with great picture quality, the Canon EOS M100 is the best entry-level camera for daily vlogging that’s currently on the market. PROS - Affordable - Great connectivity options CONS - Lacks advanced video recording features - No viewfinder |
|
Best entry-level mirrorless camera with a flip screen for vlogging: Canon EOS M100 The Canon EOS M100 is the best entry-level mirrorless camera with a flip screen for vlogging. In case you missed it, check out my review on the Canon EOS M100. |
|
Best mid-range mirrorless camera with a flip screen for vlogging: Canon EOS M50 The Canon EOS M50 is already regarded as one of the best mirrorless cameras for vlogging though it has only been on the market for just a few months. This mirrorless camera comes with the newer DIGIC 8 Image Processor that find a focus for your footage even better than the last generation’s image processor. You can crank up the ISO sensitivity to ISO 51200 with the Canon EOS M50. The Canon EOS M50 can shoot UHD 4K videos at 23.98 fps. You can also capture 720p slow-motion videos at 120 fps. PROS - Has an external microphone port - Has a 2.36m-dot OLED electronic viewfinder CONS - No image stabilization - Battery life could be longer |
|
Best professional mirrorless camera with a flip screen for vlogging: Panasonic Lumix DC-GH5S When Panasonic made its Lumix DC-GH5, it was a hybrid camera that performed equally well in both photo and video. In response to customers’ interest in a video-focused camera, Panasonic released the GH5S. This camera is equipped with a micro four-thirds sensor and can shoot UHD 4K and DCI videos at 60 fps, up to 150 Mbps. If you want to capture slow-motion footage, you can shoot full HD 1080p videos at 240 fps as well. With its 10.28MP multi-aspect ratio MOS sensor, you’ll be able to produce high-quality videos even under very challenging lighting conditions. In a fraction of a second, this camera can also automatically grab focus during your video with its advanced depth-from-focus technology. It is also equipped with a microphone jack so that you can record better audio while shooting with this camera. The GH5S has a fully articulated touchscreen so that you can compose your shot from any angle. PROS - ISO sensitivity goes up to 204800 - High video bit rates CONS - Expensive - The camera body weighs about 1.5 lbs |
|
Best entry-level DSLR camera with a flip screen for vlogging: Canon EOS SL2 If you’re looking for a low priced entry-level vlogging camera with a flip screen, the Canon EOS Rebel SL2 is the best option. You can precisely and quickly grab focus during video recording with its 9-point AF system and dual pixel CMOS AF technology. The camera powers these functions with its DIGIC 7 image processor. You can shoot up to full HD 1080p videos at 60 fps with its 24.2 MP APS-C CMOS sensor and crank the ISO up to ISO 51200 in case you need to shoot under low light conditions. If you want better audio for your vlogs, you can connect an external microphone to the SL2’s microphone jack. PROS - Microphone jack - Wi-Fi connectivity CONS - No 4K video support - Optical image stabilizer could be better |
|
Best mid-range DSLR camera with a flip screen for vlogging: Canon EOS 80D The 80D is the best camera to go with if you’re looking for a mid-range DLSR vlogging camera with a flip screen. It is equipped with a 24.2 MP APS-C CMOS sensor, comes with the DIGIC 6 image processor, and shoots up to full HD 1080p videos at 60 fps. For low lighting conditions, you can set the camera’s ISO to as high as ISO 25600. The 80D is great for autofocusing during video recording as it comes with a 45-point all cross phase detection autofocus system and a dual pixel CMOS AF system. PROS - Feature-rich - Continuous AF feature performs beautifully while recording high-res videos CONS - Just one SD card slot - PC sync connection features could be better |
|
Best professional DSLR camera with a flip screen for vlogging: Canon 6D Mark II The 6D Mark II is currently (at the time of writing this review) the only full-frame DSLR camera that comes with both a fully-articulated screen and a microphone jack. It is equipped with a 26.2 MP full-frame CMOS sensor, comes with the DIGIC 7 image processor, and shoots up to full HD 1080p videos at 60 fps. The 6D is also equipped with the same 45-point all cross-phase detection and dual pixel CMOS autofocusing system as the 80D. If you’re wanting to vlog with a full-frame camera, the 6D Mark II is the best option. PROS - ISO sensitivity goes up to 102400 - Amazing touchscreen controls CONS - No 4K video recording option - No USB 3.0 |
Want to compare even more cameras? Check out…
12 Best Vlogging Cameras (2018)
Top 11 Cheap Vlogging Cameras (2018)
7 Best DSLR Cameras For Vlogging (2018)
8 Best Mirrorless Cameras For Vlogging (2018)
Richard Bennett
Richard Bennett is a writer and a lover of all things video.
Follow @Richard Bennett
Also read:
- Top Viral Video Tags Tips for Popular YouTube Shorts
- In 2024, A Peek Into the Best Non-Youtube Sites for Videostreams
- Optimal YT Thumbnails Aspect Ratios Decoded
- [New] Achieve 10 Free Tools for Thumbnail Extraction
- [Updated] 7 Comedy YouTube Video Ideas That Only Funny People Are Allowed to Try
- Innovative Practices in Creating Powerful YouTube Summaries
- 2024 Approved Best Collection Sites for Quick Access to YouTube Vids
- Aspiring YouTubers' Guide to Affiliate Allies for 2024
- Your Guide to YouTube Stardom 6 Effortless Steps for Exposure
- [Updated] Avoid Oversaturated Greenscreen Effective Strategies for Mac Editors
- Ideal Thumbnails for Maximum Clicks
- 2024 Approved Channel Growth Essential Steps for YouTube Backlink Creation
- Top 10 YouTube App Alternatives for iPhone and Android
- [New] Elevate Your Mobile Shoot - Ranking the Best 9 CamGear Innovations
- 2024 Approved Alternatives That Shine Top 27 Non-YouTube Videostreaming Sites
- Efficiently Achieving Color Background Separation
- Create Standout Videos with These Top 7 Free Thumbnail Builders
- How to Merge/Combine/Join YouTube (FLV) Videos
- Download Subscribe Green Screen to Make Your CTA
- A Beginner's Blueprint Setting Up on YouTube
- 2024 Approved Building a Billion-View Empire Your Step-by-Step Youtube Strategy
- [Updated] Channel Upgrade How Reaching 500 Viewers Propelts Monetization
- [Updated] Elevate Video Consumption Constructing an Ideal 'Watch Later' List on YouTube
- Download Custom MCB Banner Packs
- Elevate Video Consumption Constructing an Ideal 'Watch Later' List on YouTube for 2024
- In 2024, Audiovisual Experts' Choices The Ultimate Video Editing Gear
- In 2024, Achieving Youtube Financial Goals via Viewer Statistics
- Channel Transformation via Musical Additions for 2024
- [Updated] Elevate Your Cinematography Skills Editing and Sharing 360° Videos on YouTube
- [Updated] 10 Visionary Beauticians Poised Success
- Raising Awareness with YouTube's CC Membership Tips for View Growth
- 10 Best YouTube Stations for Market Reports
- In 2024, Boost Your Discord Engagement with These Essential Plugins
- Updated Discovering Optimal Acoustic Ambiance Sets for Video Production
- In 2024, How to Unlock Infinix Zero 5G 2023 Turbo Phone Password Without Factory Reset?
- 2024 Approved Pro-Level MP3 Cutting Discover the Top 5 Online Platforms
- In 2024, Bringing Your Photos to Life A Final Cut Pro Slideshow Tutorial
- New In 2024, Best Audio Converter Applications that You Should Try Out Today Here Is the List of Multiple Audio Converter Applications, Which You Can Use Online or Download on Your Device
- Updated Top Chrome-Compatible Microphones Your Ultimate Selection Guide
- 2024 Approved Streamlining the Process of IPTV Video Recordings
- New In 2024, Best 6 Celebrity Text to Speech AI Voice Generators You May Like
- Play Store Stuck on Downloading Of Xiaomi 14 Pro? 7 Ways to Resolve | Dr.fone
- In 2024, How to Reset a Poco X6 Phone that is Locked?
- New Join MPEG Videos for Free Top 5 Solutions for 2024
- 2024 Approved ASUS MG28UQ Screen - A 4K Odyssey of Immersion and Fidelity
- Title: Triple the Fun with YouTube + Twitch Live Sessions
- Author: Steven
- Created at : 2024-05-25 20:37:14
- Updated at : 2024-05-26 20:37:14
- Link: https://youtube-clips.techidaily.com/triple-the-fun-with-youtube-plus-twitch-live-sessions/
- License: This work is licensed under CC BY-NC-SA 4.0.
