
Transforming Channel Visibility Into Subscriber Stardom on YouTube
Transforming Channel Visibility Into Subscriber Stardom on YouTube
Case Study: How to Grow on YouTube to Have Millions of Subs

Shanoon Cox
Oct 26, 2023• Proven solutions
You’ve probably heard of stories about individuals who managed to find financial success on YouTube. If your dream is to make money on YouTube it’s important to remember that regular people are doing it.
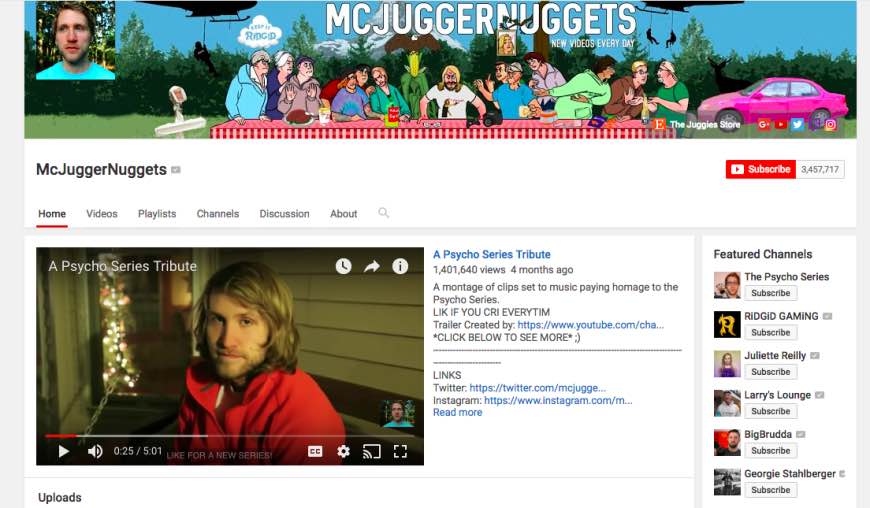
Jesse Ridgway is the owner of the vlog McJuggerNuggets , which has grown to over 3.4 million subscribers. He makes enough money to live off of YouTube alone. Here is a case study of how he made his first $10,000 on YouTube:
Case Study of McJuggerNuggets
Jesse was one of the earliest YouTubers. He started his channel on December 9, 2006. Jesse never guessed that he would make enough money to live off of the videos he was creating. Here are some of the ways that he monetized his channel:
AdSense
Monetization of videos through AdSense is one of the easiest ways that you can start to profit off your videos. Registering for a Google AdSense can earn you between $0.30 and $2.00 per thousand ad impressions (an impression is a click, not a view). How much you make per ad impression depends on a lot of things, including the time of year. There are good months for advertising revenue and bad months. December is usually the hottest month for making money through AdSense because of the holiday shopping season. Some of the other months where you can see huge profits include September for back-to-school, June, and March.
More popular channels get higher paying ads, and it is harder to earn ad revenue in popular vlogging genres (i.e. gaming) than in more obscure niches.
Target the Right Demographic
Some of the largest YouTuber success stories are creators who primarily target younger audiences. Others target men or women specifically. Think about who you want your audience to be and make videos that will appeal to them.
Multichannel Networks
Once you hit a certain level of subscribership and views you will start getting invited to MCMs. In some cases, multichannel network promotions could entitle you to discounts on merchandise and products. Be careful: a multichannel network will always want you to sign a contract, and they will take over your AdSense account.
Social Blade
This site will provide details about your subscription count, which of your videos has the best watch time, and more. It will give you a good impression of what you should be including in your videos and how you can make more money from your channel.
Uploading Your Videos at the Right Time
Uploading videos at the right time will make sure that you are on the front page of recently uploaded videos when people are let out of school or taking a break from work. This will earn you lots of views. Set an upload time for all of your videos each day and stick to that schedule.
Check out Webinars
Looking into webinars and videos of what other popular YouTube experts have done will help you model their success.
Collaborate with Other YouTubers
When you create a collab video you and your partner are each introduced to each other’s subscribers.
Keep Quality Up
Putting time and effort into every upload will ensure that you won’t lose subscribers or viewers because you got a bit lazy.
Do Follow-Up Videos
If you have a particular video that has a lot of views, you may want to consider creating follow-up videos. This can be a great way to generate lots of views.
Complete Regular Research
Regular research into your target market will help you to create the trendiest new content.
Don’t Get Discouraged
Timing and luck are definitely two of the biggest factors in becoming a success on YouTube. If you are willing to keep working and don’t get discouraged you will eventually earn profits.
Edit Your Videos with High-Quality Video Editor


Shanoon Cox
Shanoon Cox is a writer and a lover of all things video.
Follow @Shanoon Cox
Shanoon Cox
Oct 26, 2023• Proven solutions
You’ve probably heard of stories about individuals who managed to find financial success on YouTube. If your dream is to make money on YouTube it’s important to remember that regular people are doing it.
Jesse Ridgway is the owner of the vlog McJuggerNuggets , which has grown to over 3.4 million subscribers. He makes enough money to live off of YouTube alone. Here is a case study of how he made his first $10,000 on YouTube:
Case Study of McJuggerNuggets
Jesse was one of the earliest YouTubers. He started his channel on December 9, 2006. Jesse never guessed that he would make enough money to live off of the videos he was creating. Here are some of the ways that he monetized his channel:
AdSense
Monetization of videos through AdSense is one of the easiest ways that you can start to profit off your videos. Registering for a Google AdSense can earn you between $0.30 and $2.00 per thousand ad impressions (an impression is a click, not a view). How much you make per ad impression depends on a lot of things, including the time of year. There are good months for advertising revenue and bad months. December is usually the hottest month for making money through AdSense because of the holiday shopping season. Some of the other months where you can see huge profits include September for back-to-school, June, and March.
More popular channels get higher paying ads, and it is harder to earn ad revenue in popular vlogging genres (i.e. gaming) than in more obscure niches.
Target the Right Demographic
Some of the largest YouTuber success stories are creators who primarily target younger audiences. Others target men or women specifically. Think about who you want your audience to be and make videos that will appeal to them.
Multichannel Networks
Once you hit a certain level of subscribership and views you will start getting invited to MCMs. In some cases, multichannel network promotions could entitle you to discounts on merchandise and products. Be careful: a multichannel network will always want you to sign a contract, and they will take over your AdSense account.
Social Blade
This site will provide details about your subscription count, which of your videos has the best watch time, and more. It will give you a good impression of what you should be including in your videos and how you can make more money from your channel.
Uploading Your Videos at the Right Time
Uploading videos at the right time will make sure that you are on the front page of recently uploaded videos when people are let out of school or taking a break from work. This will earn you lots of views. Set an upload time for all of your videos each day and stick to that schedule.
Check out Webinars
Looking into webinars and videos of what other popular YouTube experts have done will help you model their success.
Collaborate with Other YouTubers
When you create a collab video you and your partner are each introduced to each other’s subscribers.
Keep Quality Up
Putting time and effort into every upload will ensure that you won’t lose subscribers or viewers because you got a bit lazy.
Do Follow-Up Videos
If you have a particular video that has a lot of views, you may want to consider creating follow-up videos. This can be a great way to generate lots of views.
Complete Regular Research
Regular research into your target market will help you to create the trendiest new content.
Don’t Get Discouraged
Timing and luck are definitely two of the biggest factors in becoming a success on YouTube. If you are willing to keep working and don’t get discouraged you will eventually earn profits.
Edit Your Videos with High-Quality Video Editor
Shanoon Cox
Shanoon Cox is a writer and a lover of all things video.
Follow @Shanoon Cox
Light It Right: Elevating Your YouTube Video Presence
How To Light Your YouTube Video

Richard Bennett
Oct 26, 2023• Proven solutions
When it comes to sensitivity to light, no consumer-level camera sensor comes close in performance to the human eye. Many newbies to videography, though, don’t think about this when they use their camera indoors and discover that their recorded footage appears too dark.
If you want to use your camera indoors as many YouTubers do, you’ll need to have extra light. But the solution is not as simple as surrounding yourself with lamps that are all randomly placed.
Below, I’ll go into detail on how you can set up your lighting equipment to make your YouTube videos look good.
| Table of Contents Using Light You Already Have Window LightingHome Lighting Home Studio Lighting Light Control3-Point Lighting4-Point Lighting |
|---|
Part 1: Using Light You Already Have
Most beginner YouTubers light their videos with what they already have. That’s what I did to start as well. In the past, my video recording space consisted of natural sunlight coming from my window and ceiling light for times when the sunlight wasn’t strong enough.
1. Window Lighting
The best thing about window lighting is that it’s free. The worst thing about it is that it’s uncontrollable. The amount of light you get in your video can vary with all the changes in the weather.
Window lighting for me was especially difficult to work with because I live in a very rainy and cloudy city, Vancouver, Canada, where we pretty much just get three months of good sun.

Above are two freeze frames from one of Daniel’s past window-lit vlogs. Although these two frames are both from the same vlog, you can see that the image on the right looks brighter due to clearer skies at that moment. These varying amounts of light is what you will have to deal with if you choose to light your YouTube video with window lighting.
2. Home Lighting
Home lighting is another source of light that many new YouTubers use. In the past, when my window light wasn’t strong enough to light my video recording space, I would turn on the ceiling light.

Notice how the color of Daniel’s skin looks much more orange here (above) than the color of the skin in the two side-by-side window lighting examples? The side of the face also appears to look bluer. This all happened because he mixed up different color temperatures shining out of the two lights (cooler window light and warmer ceiling light).
Most home lighting is warmer in its color temperature. If you want to use your home lights without everything being orange-tinted, you’ll need to switch out your light bulbs for daytime LED light bulbs.
Ceiling lights are also typically situated in the center of a room in order to light an entire room evenly. This is not likely to be the best location for your filming video. Since the ceiling light was directly above the face in the above example, you can see harder shadows beneath his cheeks.
Part 2: Home Studio Lighting
If you rather not deal with all the window and home lighting challenges, you can set up studio lighting in your home.
1. Light Control
The first thing you’ll want to do to set up studio lighting in your home is to pick a room to film in and eliminate as much external lighting as you can. Use blinds, curtains, towels, or any thick fabric to block sunlight from shining into your room.
2. 3-Point Lighting
The most common setup for studio lighting is 3-point lighting. For this kind of lighting you’ll need three lights: a key light, a fill light, and a back light (also called a hair light).

Out of the three lights, the key light should be the brightest. When it is positioned to the left of you (as shown in the diagram above) your right side will have shadows.
To minimize the shadows on your right side, use a weaker light as a fill light. You don’t want your fill light to completely eliminate all your shadows or else your shot will look flat.
Lastly, a backlight positioned behind you can give an appealing highlight to the ends of your head and even help to separate your hair from blending into your background if both happen to be dark.
3. 4-Point Lighting
As a YouTuber, you may not only want yourself to be seen optimally with proper lighting, but you may also want your background to be seen optimally, especially if you’ve taken the time to decorate it for your audience.
What you’ll need to ensure that your background is sufficiently lit is 4-point lighting setup. The 4-point lighting setup is the same as a 3-point lighting setup, but with an additional light shining at your background.
For more information on lighting equipment, check out my Top 17 Video Lighting Equipment For YouTubers .
Touch Up YouTube Videos with Filmora
Filmora is one of the best video editing software for YouTube beginners to start the YouTube channel. So, if you find the lighting isn’t perfect after recording, you can use the Auto Color Enhancement feature in Filmora to adjust the color with one-click. Or, you can change the white balance, Light, color, and HSL manually. Filmora also features some presets and LUTs templates , which allows you to apply pre-programmed effects to video for color correction faster.
Richard Bennett
Richard Bennett is a writer and a lover of all things video.
Follow @Richard Bennett
Richard Bennett
Oct 26, 2023• Proven solutions
When it comes to sensitivity to light, no consumer-level camera sensor comes close in performance to the human eye. Many newbies to videography, though, don’t think about this when they use their camera indoors and discover that their recorded footage appears too dark.
If you want to use your camera indoors as many YouTubers do, you’ll need to have extra light. But the solution is not as simple as surrounding yourself with lamps that are all randomly placed.
Below, I’ll go into detail on how you can set up your lighting equipment to make your YouTube videos look good.
| Table of Contents Using Light You Already Have Window LightingHome Lighting Home Studio Lighting Light Control3-Point Lighting4-Point Lighting |
|---|
Part 1: Using Light You Already Have
Most beginner YouTubers light their videos with what they already have. That’s what I did to start as well. In the past, my video recording space consisted of natural sunlight coming from my window and ceiling light for times when the sunlight wasn’t strong enough.
1. Window Lighting
The best thing about window lighting is that it’s free. The worst thing about it is that it’s uncontrollable. The amount of light you get in your video can vary with all the changes in the weather.
Window lighting for me was especially difficult to work with because I live in a very rainy and cloudy city, Vancouver, Canada, where we pretty much just get three months of good sun.
Above are two freeze frames from one of Daniel’s past window-lit vlogs. Although these two frames are both from the same vlog, you can see that the image on the right looks brighter due to clearer skies at that moment. These varying amounts of light is what you will have to deal with if you choose to light your YouTube video with window lighting.
2. Home Lighting
Home lighting is another source of light that many new YouTubers use. In the past, when my window light wasn’t strong enough to light my video recording space, I would turn on the ceiling light.
Notice how the color of Daniel’s skin looks much more orange here (above) than the color of the skin in the two side-by-side window lighting examples? The side of the face also appears to look bluer. This all happened because he mixed up different color temperatures shining out of the two lights (cooler window light and warmer ceiling light).
Most home lighting is warmer in its color temperature. If you want to use your home lights without everything being orange-tinted, you’ll need to switch out your light bulbs for daytime LED light bulbs.
Ceiling lights are also typically situated in the center of a room in order to light an entire room evenly. This is not likely to be the best location for your filming video. Since the ceiling light was directly above the face in the above example, you can see harder shadows beneath his cheeks.
Part 2: Home Studio Lighting
If you rather not deal with all the window and home lighting challenges, you can set up studio lighting in your home.
1. Light Control
The first thing you’ll want to do to set up studio lighting in your home is to pick a room to film in and eliminate as much external lighting as you can. Use blinds, curtains, towels, or any thick fabric to block sunlight from shining into your room.
2. 3-Point Lighting
The most common setup for studio lighting is 3-point lighting. For this kind of lighting you’ll need three lights: a key light, a fill light, and a back light (also called a hair light).
Out of the three lights, the key light should be the brightest. When it is positioned to the left of you (as shown in the diagram above) your right side will have shadows.
To minimize the shadows on your right side, use a weaker light as a fill light. You don’t want your fill light to completely eliminate all your shadows or else your shot will look flat.
Lastly, a backlight positioned behind you can give an appealing highlight to the ends of your head and even help to separate your hair from blending into your background if both happen to be dark.
3. 4-Point Lighting
As a YouTuber, you may not only want yourself to be seen optimally with proper lighting, but you may also want your background to be seen optimally, especially if you’ve taken the time to decorate it for your audience.
What you’ll need to ensure that your background is sufficiently lit is 4-point lighting setup. The 4-point lighting setup is the same as a 3-point lighting setup, but with an additional light shining at your background.
For more information on lighting equipment, check out my Top 17 Video Lighting Equipment For YouTubers .
Touch Up YouTube Videos with Filmora
Filmora is one of the best video editing software for YouTube beginners to start the YouTube channel. So, if you find the lighting isn’t perfect after recording, you can use the Auto Color Enhancement feature in Filmora to adjust the color with one-click. Or, you can change the white balance, Light, color, and HSL manually. Filmora also features some presets and LUTs templates , which allows you to apply pre-programmed effects to video for color correction faster.
Richard Bennett
Richard Bennett is a writer and a lover of all things video.
Follow @Richard Bennett
Also read:
- [Updated] In 2024, Tailoring Battery Choices for Exceptional Drone Performance
- [Updated] In 2024, Unveiling the Finest Free Online Recorders – Top Picks
- [Updated] Streamline Video Production with Free Music
- Decoding Unlisted Videos A Deep Dive Into YouTube Secrecy
- Dive Deep Into the World of Creator Studio for 2024
- Easy & Speed Share YouTube Playlists Now
- Elevating Audience Excitement with Top Ideas for 2024
- Engage Audiences on All Sides Live 360-Degree Video Broadcasting for YouTube
- Exploring the Intrigue of 'Watch Dogs: Legion': An Immersive Change in Venue
- From YouTube to IGTV Top Methods Unveiled
- Hasten Your Vimeo Watch Time for 2024
- How to Convert YouTube Videos Seamlessly Into AVI
- In 2024, Choosing Your Game Capture Tool OBS/ShadowPlay
- Uh-Oh! Convert2MP3's Out. Discover the Leading MP3 Conversion Alternatives Today!
- Understanding MetaAI: Beyond Basic Chatbot Capabilities
- Title: Transforming Channel Visibility Into Subscriber Stardom on YouTube
- Author: Steven
- Created at : 2024-11-28 16:15:51
- Updated at : 2024-12-03 18:23:36
- Link: https://youtube-clips.techidaily.com/transforming-channel-visibility-into-subscriber-stardom-on-youtube/
- License: This work is licensed under CC BY-NC-SA 4.0.