
:max_bytes(150000):strip_icc()/GettyImages-643997505-3dcb1b226e104d1da13825b0d9117173.jpg)
Transform Your YT Prompts with Green Savvy
Transform Your YT Prompts with Green Savvy
Create High-Quality Video - Wondershare Filmora
An easy and powerful YouTube video editor
Numerous video and audio effects to choose from
Detailed tutorials provided by the official channel
Advances in filmmaking have brought many concepts into reality. And the green screen is one common practice. Green screen technology is a technique where you use two images or video streams to composite them together. You can use any background images, either foreground or behind the actors. For YouTube, you can use green screen subscribe to facilitate video Call To Action. A green screen easily produces impossible scenes and expands filming ideas. Everything done at the Studio is also the best way to protect actors from hazardous environments.
More so, the best trick is to allow actors to appear together on the screen even when the scenes were captured separately. And did you know that subscribe green screen makes it easy to add YouTube Call To Action and direct viewers on what to do?

Methods to add a subscribe button to your video
Viewers are not likely to subscribe to any channel if they are not guided. One best method is to engage a subscribe button to your video and draw the attention of as many as possible.
1 Use Subscribe Green Screen
Put your green screen to work by subscribing to it. Follow these steps to produce eye-catching videos, with a call to action closing point.
Step 1. Set screen
You need to create a background at the Studio – and that’s the green screen. Keenly hand it on a frame before you start filming. Also, note that no wrinkles or fold-ups are visible.

Step 2. Adjust lighting
Lighting is important to facilitate high-resolution video output quality. Put appropriate lighting settings to avoid directional shadows and get the best results.
Step 3. Set up the subject
Give ample space between the subject and the green screen for an effective outcome. If they are too close, there will be a reflection of the green screen on the subject. It isn’t professional as it will be hard when it comes to matching to a different background.

Step 4. Start filming
Begin to film your video and ensure you take various shots for comparison. It is good to film at different angles to see what works best.
Step 5. Polish the rough cut
Tune all the footage to perfect video clips. It will save your efforts when keying out green screen footage. Remove the unwanted parts by trimming. You can also do other edits like merge and split where necessary.
Step 6. Key out the footage and edit the green screen
Your footage is now ready, and you are now free to edit the green screen. It is better to engage reliable editing software to remove the green traces in the shot.
Step 7. Paste the new background
Any background concept can now fit in. Add your desired background video or image in a new layer below the subject. You can continue to make other necessary adjustments like sharpness and hue for reality.
Step 8. Add Call To Action
Finally, tell your viewers to subscribe to your YouTube channel while watching the video. You can also introduce your other channels that aren’t yet known or those that have not reached 1,000 subscribers.
2 Using YouTube Studio
You can also enable the green screen to subscribe via the YouTube Studio. It is a YouTube application that provides you with the tools you need to create a successful YouTube channel. You can manage your videos, respond to comments and even add adverts to your content for pay. Here are the steps to add subscribe button.
Step 1. First, go directly to “studio.youtube.com” or click on your profile picture on the YouTube page to launch YT Studio.

Step 2. Click on the “Menu” option and choose the “Settings”> “Channel” option.

Step 3. Then select the “Choose” image and select which subscribe button image you wish to use as your branding watermark. You can easily get one on the Google images section.
Step 4. Next, choose the display time for the branding watermark. It could be a custom start time if you want the branding watermark to start showing at a specific time. You can also choose “End or video” for it to appear at the last 10 to 15 seconds of your video. Likewise, the branding watermark can show throughout the video if you choose the “Entire video” option.
Step 5. Finally, save the changes. Voila! Viewers can subscribe to your channel easily, with a single click of a button.
3 Using Subscribe Effects
You can also use the subscribers’ effects to add a Call To Action. Remember, your main aim is to increase the audience to your channel. And in most cases, viewers forget to subscribe even though they love your video. Perhaps they don’t understand the importance it holds to your channel. You can do this using a reliable video editor software – Filmora.
Filmora is a sophisticated tool that is easy to use and export your videos to your computer and upload them to YouTube. It has over 300 effects for YouTubers and comprises exclusive overlays for any scene. Follow these steps to add the subscribe button with subscribe effects.
Key Features of Filmora
- Edit and export your videos at up to 4K resolution
- Supports GIF animation, which you can use for CTA
- It has an advanced text editor
- Easily remove background noise for a polished video sound
- It has an audio equalizer functionality for audio uniformity
- It has the video stabilization functionality
For Win 7 or later (64-bit)
For macOS 10.12 or later
Step 1. Launch Filmora
Open Filmora on your computer, then navigate to the upper left corner of the screen. Click on the “Sample Colors” and select the “Green color.” Next, drag it to video track into the timeline. Then adjust the duration of your video track to your preference.

Step 2. Design the subscribe GIF animation
Use a different color shade to design the subscribe GIF animation. Take “Red” in this case as it smartly blends with the green color that we choose earlier. Drag the red color above the green background.

Step 3. Adjust the red box
Make the added color red button look like a subscribe button. Then place it at any point you want it to appear in front of the background.
Step 4. Add the subscribe text
Write a text into the button. Filmora offers you various styles of text to choose from. You can select the text style you want to use, then drag and drop it into the timeline.

Step 5. Edit title with “Subscribe”
Edit your text with the word “Subscribe,” then place it under the red rectangle and hit the “OK” button.
Step 6. Animate the “Subscribe” button
Double click on the “Red” button. Just go to the “Animate” tab and click on the “Customize” option. Next, click on the “Add” button.

Step 7. Animate text as well
Go to the “Text” option in the timeline and click on “Advanced” text editor. Then go to the “Animation” tab and select the animation you wish to use. Here, you can adjust your text’s start and ending time when you want it to start fading.
Step 8. Export GIF
Your Subscribe GIF is now ready to be exported to your video. Hit the “Export” button and select which format to export it in.

Extra Tip: Ways to Include Calls to Action on videos
Know how to include CTA in your video marketing strategy to boost your subscribers.
- Include Annotations
Annotations are eye-catching and a quick reminder for viewers. You have a variety to choose from, like bubbles, shoutouts, etc. They are used to remind you to subscribe to the channel, view another video, or comment after watching it. - Edit CTAs in your video
It lets the viewer know what to do next before the video ends. The likely reminder is to subscribe to the channel. They could also be reminded to watch the next video or leave a comment. - YouTube Ad Overlays also work
However, ad overlay is for content creators with Google AdWords enabled on their YT channel. Adding an Ad Overlay will link you to any part of the web. Do you want to know the best part? No cost at all! You only need to pay for the views you buy during your video promotion.
Conclusion
● The best strategy to get viewers to subscribe to your YouTube channel is to engage a Call To Action. A bigger number of subscribers guarantees more watch time and the possible growth of your channel. Subscribe green screen even makes it perfect as far as video creation is concerned. You can get different video background ideas and make every scene look authentic. You can engage a third-party tool like Filmora. It will effortlessly add a green screen subscribe in a few steps. Likewise, you can add annotations and other text styles to enhance your look.
Advances in filmmaking have brought many concepts into reality. And the green screen is one common practice. Green screen technology is a technique where you use two images or video streams to composite them together. You can use any background images, either foreground or behind the actors. For YouTube, you can use green screen subscribe to facilitate video Call To Action. A green screen easily produces impossible scenes and expands filming ideas. Everything done at the Studio is also the best way to protect actors from hazardous environments.
More so, the best trick is to allow actors to appear together on the screen even when the scenes were captured separately. And did you know that subscribe green screen makes it easy to add YouTube Call To Action and direct viewers on what to do?
Methods to add a subscribe button to your video
Viewers are not likely to subscribe to any channel if they are not guided. One best method is to engage a subscribe button to your video and draw the attention of as many as possible.
1 Use Subscribe Green Screen
Put your green screen to work by subscribing to it. Follow these steps to produce eye-catching videos, with a call to action closing point.
Step 1. Set screen
You need to create a background at the Studio – and that’s the green screen. Keenly hand it on a frame before you start filming. Also, note that no wrinkles or fold-ups are visible.
Step 2. Adjust lighting
Lighting is important to facilitate high-resolution video output quality. Put appropriate lighting settings to avoid directional shadows and get the best results.
Step 3. Set up the subject
Give ample space between the subject and the green screen for an effective outcome. If they are too close, there will be a reflection of the green screen on the subject. It isn’t professional as it will be hard when it comes to matching to a different background.
Step 4. Start filming
Begin to film your video and ensure you take various shots for comparison. It is good to film at different angles to see what works best.
Step 5. Polish the rough cut
Tune all the footage to perfect video clips. It will save your efforts when keying out green screen footage. Remove the unwanted parts by trimming. You can also do other edits like merge and split where necessary.
Step 6. Key out the footage and edit the green screen
Your footage is now ready, and you are now free to edit the green screen. It is better to engage reliable editing software to remove the green traces in the shot.
Step 7. Paste the new background
Any background concept can now fit in. Add your desired background video or image in a new layer below the subject. You can continue to make other necessary adjustments like sharpness and hue for reality.
Step 8. Add Call To Action
Finally, tell your viewers to subscribe to your YouTube channel while watching the video. You can also introduce your other channels that aren’t yet known or those that have not reached 1,000 subscribers.
2 Using YouTube Studio
You can also enable the green screen to subscribe via the YouTube Studio. It is a YouTube application that provides you with the tools you need to create a successful YouTube channel. You can manage your videos, respond to comments and even add adverts to your content for pay. Here are the steps to add subscribe button.
Step 1. First, go directly to “studio.youtube.com” or click on your profile picture on the YouTube page to launch YT Studio.
Step 2. Click on the “Menu” option and choose the “Settings”> “Channel” option.
Step 3. Then select the “Choose” image and select which subscribe button image you wish to use as your branding watermark. You can easily get one on the Google images section.
Step 4. Next, choose the display time for the branding watermark. It could be a custom start time if you want the branding watermark to start showing at a specific time. You can also choose “End or video” for it to appear at the last 10 to 15 seconds of your video. Likewise, the branding watermark can show throughout the video if you choose the “Entire video” option.
Step 5. Finally, save the changes. Voila! Viewers can subscribe to your channel easily, with a single click of a button.
3 Using Subscribe Effects
You can also use the subscribers’ effects to add a Call To Action. Remember, your main aim is to increase the audience to your channel. And in most cases, viewers forget to subscribe even though they love your video. Perhaps they don’t understand the importance it holds to your channel. You can do this using a reliable video editor software – Filmora.
Filmora is a sophisticated tool that is easy to use and export your videos to your computer and upload them to YouTube. It has over 300 effects for YouTubers and comprises exclusive overlays for any scene. Follow these steps to add the subscribe button with subscribe effects.
Key Features of Filmora
- Edit and export your videos at up to 4K resolution
- Supports GIF animation, which you can use for CTA
- It has an advanced text editor
- Easily remove background noise for a polished video sound
- It has an audio equalizer functionality for audio uniformity
- It has the video stabilization functionality
For Win 7 or later (64-bit)
For macOS 10.12 or later
Step 1. Launch Filmora
Open Filmora on your computer, then navigate to the upper left corner of the screen. Click on the “Sample Colors” and select the “Green color.” Next, drag it to video track into the timeline. Then adjust the duration of your video track to your preference.
Step 2. Design the subscribe GIF animation
Use a different color shade to design the subscribe GIF animation. Take “Red” in this case as it smartly blends with the green color that we choose earlier. Drag the red color above the green background.
Step 3. Adjust the red box
Make the added color red button look like a subscribe button. Then place it at any point you want it to appear in front of the background.
Step 4. Add the subscribe text
Write a text into the button. Filmora offers you various styles of text to choose from. You can select the text style you want to use, then drag and drop it into the timeline.
Step 5. Edit title with “Subscribe”
Edit your text with the word “Subscribe,” then place it under the red rectangle and hit the “OK” button.
Step 6. Animate the “Subscribe” button
Double click on the “Red” button. Just go to the “Animate” tab and click on the “Customize” option. Next, click on the “Add” button.
Step 7. Animate text as well
Go to the “Text” option in the timeline and click on “Advanced” text editor. Then go to the “Animation” tab and select the animation you wish to use. Here, you can adjust your text’s start and ending time when you want it to start fading.
Step 8. Export GIF
Your Subscribe GIF is now ready to be exported to your video. Hit the “Export” button and select which format to export it in.
Extra Tip: Ways to Include Calls to Action on videos
Know how to include CTA in your video marketing strategy to boost your subscribers.
- Include Annotations
Annotations are eye-catching and a quick reminder for viewers. You have a variety to choose from, like bubbles, shoutouts, etc. They are used to remind you to subscribe to the channel, view another video, or comment after watching it. - Edit CTAs in your video
It lets the viewer know what to do next before the video ends. The likely reminder is to subscribe to the channel. They could also be reminded to watch the next video or leave a comment. - YouTube Ad Overlays also work
However, ad overlay is for content creators with Google AdWords enabled on their YT channel. Adding an Ad Overlay will link you to any part of the web. Do you want to know the best part? No cost at all! You only need to pay for the views you buy during your video promotion.
Conclusion
● The best strategy to get viewers to subscribe to your YouTube channel is to engage a Call To Action. A bigger number of subscribers guarantees more watch time and the possible growth of your channel. Subscribe green screen even makes it perfect as far as video creation is concerned. You can get different video background ideas and make every scene look authentic. You can engage a third-party tool like Filmora. It will effortlessly add a green screen subscribe in a few steps. Likewise, you can add annotations and other text styles to enhance your look.
Elevate Your Video Presentation with These 7 Free Makers
Top 12 Free YouTube Thumbnail Makers - Filmora

Richard Bennett
Mar 27, 2024• Proven solutions
Video thumbnails are vital to get your videos more views. Many successful YouTubers make nice thumbnails which help them get lots of views and thus tons of subscribers.
If you are searching for software tools that can assist in the creation of YouTube video thumbnails, then you are on the right page because the details available below will provide you with complete information about the top 10+ highly rated YouTube Thumbnail Makers on both desktop and mobile devices. Some of them are free to create YouTube thumbnails; others may need to pay to get more advanced features. Besides, I’ll also show you how to create a thumbnail in the Filmora video editor in detail.
- Part 1: Best Free YouTube Thumbnail Makers for Online Users
- Part 2: How to Make Video Thumbnail with Wondershare Filmora [Creative Ways]
- Part 3: FAQs About YouTube Thumbnail
Before we get started, it is highly recommended to watch this video, teaching you how to make a YouTube Thumbnail in 30 seconds with Filmora.
You might be interested in
- How to Make Fortnite Thumbnail Super Easy and Free >>
- Best Size, Best Practices of Making YouTube Thumbnail >>


Part 1:10+ Free YouTube Thumbnail Makers for Windows/Mac/Online/Android/iPhone/iPad
In this part, we will share with you some Free YouTube Thumbnail Makers that you can use. Some of them are online solutions, so there is no need to download them, some of them can be downloaded on Windows or Mac computers.
If you prefer to edit videos on mobile devices, then it is good to have an app that allows you to create video thumbnails for YouTube videos. So in this part, we have included some video thumbnail maker apps that you can use on iPhone and Android phones.
1. Canva
It is a free thumbnail maker that can be accessed from its official website at Canva.com. This Video Thumbnail Maker is useful for graphic designers as it offers incredible features. The simple to use drag and drop type functions are wonderful, and the effects available for your Thumbnail Creation include free stock-type photos, Illustrations, Lines, Shapes, Frames, Grids, Backgrounds, Text, etc. The quick customer support facility is appreciable. Note: You need to sign up to use the thumbnail templates.
Main Features of this free YouTube Thumbnail Maker:
- It offers a customized YouTube thumbnail design
- You can change images, colors and fonts easily
- You can get more styles and templates if you pay
- Registration needed
2. Wondershare PixStudio
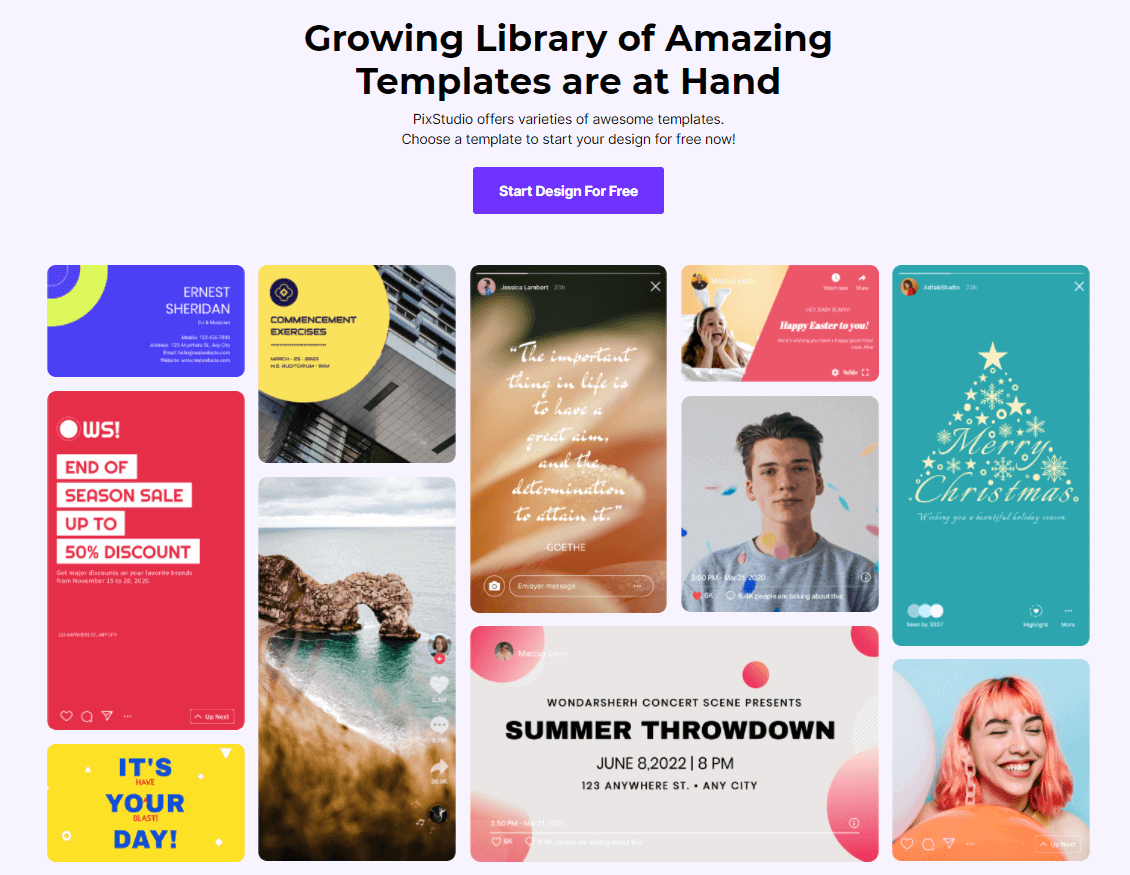
Wondershare PixStudio is an all-in-one and powerful online graphic design maker for everyone. It has various types of templates for YouTube Thumbnails, Logos, Posters, etc. You can create a beautiful design by simply dragging and dropping the elements and photos. The online platform is free to use all templates, just One-Click to download your creations and share to your Facebook, Instagram Story, YouTube Thumbnails, etc. immediately.
Features :
- Various types of templates
- Simple and Fast Design
- Background remover
Available:
Online
iPhone/iPad
Android
3. PicMonkey

This online thumbnail maker provides numerous filters, exclusive overlays, fonts, frames, and extra beautifying touch-up type tools to users with a single registration to Picmonkey’s premium membership. The exclusive effects like Ombre, zombify, premium fonts and Mirror are a really good collection of this tool. Now you can easily design beautiful collages, edit your memories, and create professional thumbnails with Picmonkey.com. Because of its wide range of options, it is probably the second most popular option for YouTubers who want to make professional thumbnails, right after Canva. One major difference between Picmonkey and Canva is that Picmonkey is no longer free. It costs $4 per month.
Features:
- As a youtube thumbnail maker, you also can touch up facial beautification
- Design tools make creative logos
- Provides 100+ designer-crafted thumbnail templates
Available :
Online
iPhone/iPad
Android
4. Fotor
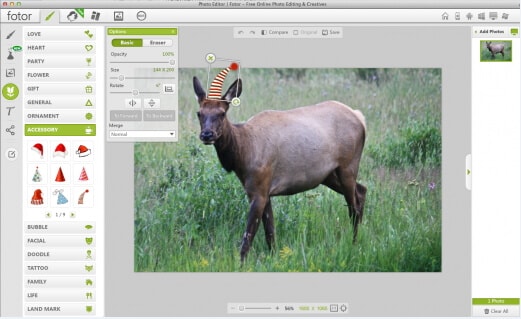
It is possible to get something outstanding even out of your simple content without making much effort because Fotor serves you with all advanced features, and it covers attractive themes from all over the world. Fotor allows you to re-discover your art and skills without any limitation as it offers all quick editing services online. It is very interactive and simple to use with all rich features, so even beginners who haven’t made any thumbnail before can make a video thumbnail with it easily.
Features:
- Your thumbnail will be saved on the cloud
- Fast processing speed while exporting your work
- Provides YouTube thumbnail templates for different scenarios
Available :
Online
iPhone/iPad
Android
5. Fotojet
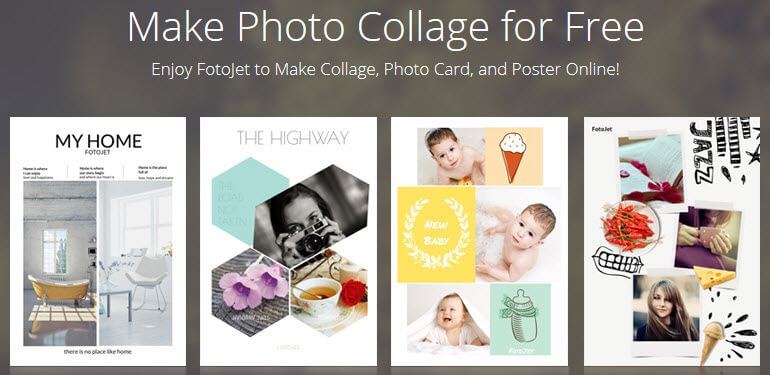
The fotojet.com online tool provides numerous facilities, whereas it is preferably used for collage making, graphic designing, and as a photo editor. With this advanced thumbnail creator tool, now you can easily rotate, crop, resize or filter your images while creating direct posts for social media pages such as Instagram, Facebook, etc. Fotojet.com possesses more than 600 stunning collage making templates that are suitable for your special events.
Features:
- It owns many templates for you to use
- Easy to have a high-quality thumbnail with only a few clicks
- 3 Steps to make a YouTube thumbnail
Available :
Online
Windows
Mac
6. Backgrounder
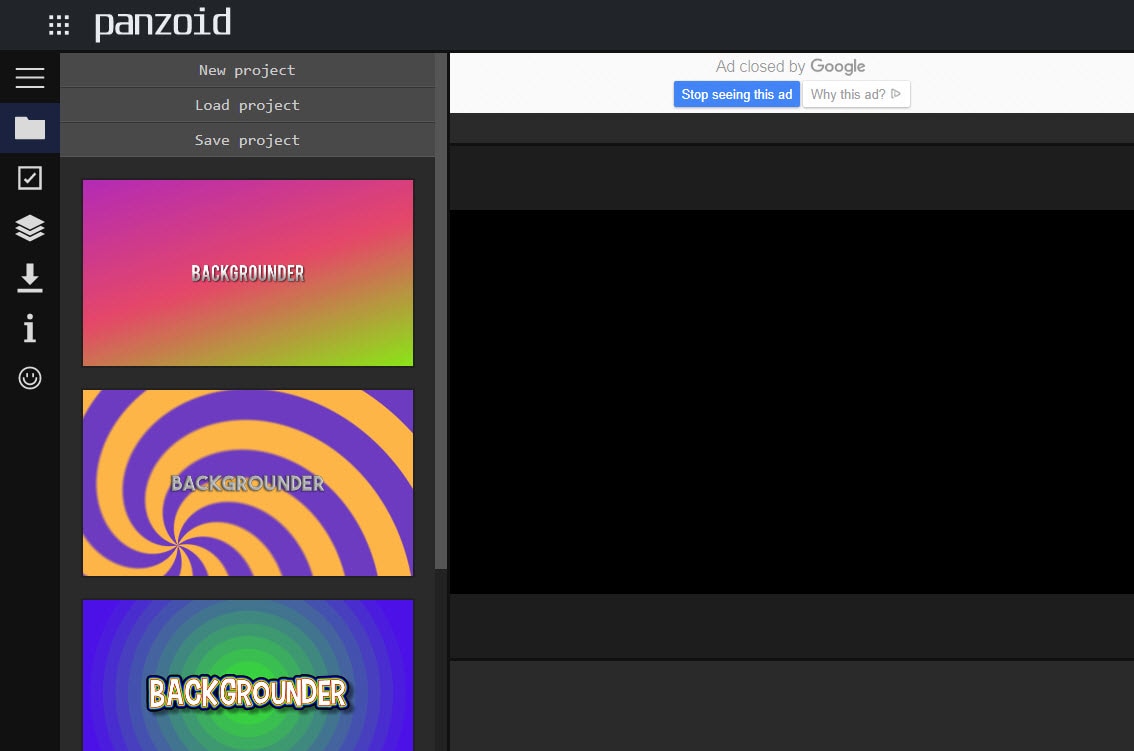
It allows you to design masterpieces of customized professional art, avatars, and thumbnails for videos on YouTube, Facebook, Twitter, etc. It is simple to use and contains an interactive user interface that is suitable for professionals as well as beginners.
Features:
- It owns a community that you can share works with other people
- The interface is extremely straightforward
Available :
Online
7. Pixlr:
It is a specially designs app version of well known Pixlr website where you can feel free to add overlays to your thumbnails. The choice of filters is also good for her with a high-end resolution as compared to available online solutions.
Features:
- Its free effects are a great source to come up with a new YouTube thumbnail
- Comprehensive editing tools are handy to use every day
Available :
Online
iPhone/iPad
Android
8. Photo Editor:
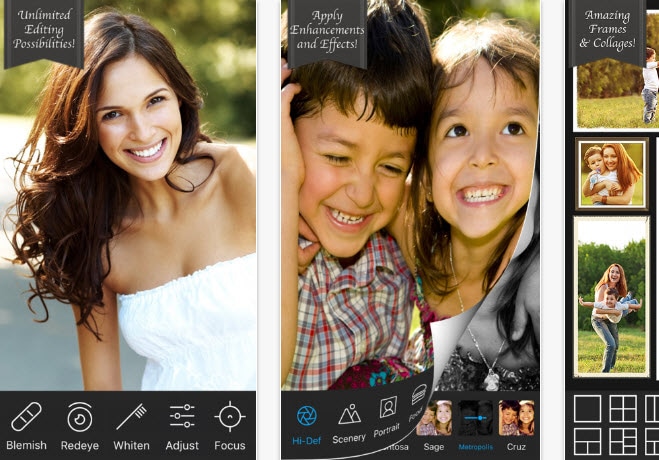
Photo Editor is one of the most popular applications that assist users in the easy addition of stickers, frames, etc while it makes adjustment of redeye, brightness, and sharpness much easier. Most people love this application more due to its ability to create memes with available images and text for those images can be adjusted easily. The photo editor also makes it much easier to share edited stuff on Instagram and the quality of edited images use to be very high in this case.
Features:
- Color splash is a great tool to brighten up your thumbnail
- You can easily crop, rotate and flip
Available :
iPhone/iPad
9. Insta Collage:
The name of this application describes its most special feature that is it allows users to create wonderful collages within very little time. This tool comes with easy editing and sharing features so that users can have an easy interface on other platforms too. There are lots of effects that can be added to images while designing thumbnails and it is rated to have an outstanding quality of results.
Features:
- The personalized layout will give you a catchy thumbnail
- It owns 30 patterns and 18 frames to select
Available :
Android
10. Cropic:
Here is one more application for you that you will need for easy customization as well as fast sharing to YouTube as well as Instagram. Users can bring all size types to this platform, and it is also possible to add text at the time of editing. This tool is suggested for beginners as well as professionals due to its great results.
Features:
- You can scale the image by hand and cut it
- Pro version is more powerful for supporting 1224x1224 pixels
Available :
iPhone/iPad
With all these available software tools, it becomes much easier to create video Thumbnails for YouTube. The easy-to-follow steps are well described in different articles on the internet, but first of all, you need to make a selection between whether you need to use the online tool or wish to download the app on your device.
For the second case, you need to spare some memory in your device, whereas for the first one it demands a fast internet connection for easy services. Besides those specially designed YouTube Thumbnail makers, you can also create a thumbnail in Filmora if you’ve already installed it.
11. Snappa:
If you’re looking for a tool that can be upgraded later, then Snappa could be for you. Offering users both free and paid functions, Snappa will allow users to generate some truly alluring thumbnails, while still being able to use the tools for work on other social media platforms.
Features:
- Pre-Made Templates Available
- Easily Customize Backgrounds
- Place Custom Text Anywhere You Want
- Create a Truly Bespoke YouTube Thumbnail
Available :
Online
iPhone/iPad
Android
12. Adobe Spark:
Not only is Adobe recognized for creating images in many different contexts, but it is also able to offer YouTubers a free tool to ensure that their video thumbnails are catching the eye of social network visitors.
Features:
- A Basic and Easy-To-Use Platform
- Ideal for Beginners
- Customize Colors, Backgrounds, and Text with Ease
- Add Additional Images if Needed
Available :
Windows 7 or newer
Mac OS X
Chromebook
Part 2: How to Make YouTube Thumbnails in Wondershare Filmora?
Filmora is easy to use and powerful video editing software for your YouTube videos, which allows you not only to cut, rotate, crop, reverse, or speed up your videos, but also to apply some advanced editing effects like green screen, PIP, audio editing, etc. within clicks.
Here are several creative ways of making thumbnails in Filmora. You can easily create a thumbnail in 30 seconds with Filmora’s new feature, AI portrait.
You can add your image or background image to Filmora and then add some filters, texts, overlay, or elements to the photo, and then take a snapshot, since Filmora features the snapshot tool which allows you to pick up the most attractive images from the video and use it as a video thumbnail.
Thumbnail created from a photo in Filmora
Or, you can extract frames from the video and use it as a thumbnail and upload it to YouTube later.
Thumbnail extracted from video footage in Filmora
One more creative way is to compositevideo footage with the green screen feature .
Use Green Screen to Create Video Thumbnail in Filmora
Where to find the thumbnail photo in Wondershare Filmora?
After clicking the Camera icon in Filmora to take a screenshot, you can find the photos by right-clicking the image in the Media library and then selecting Reveal in Explorer to check it.
Download Mac Version ](https://tools.techidaily.com/wondershare/filmora/download/ )
Part 3: FAQs About YouTube Thumbnail
1. What Does Thumbnail Mean on YouTube?
Thumbnails are reduced-size versions of images or videos. The name is an allusion to images being reduced to roughly the size of a human thumbnail. Thumbnails have special significance in YouTube SEO. They are used for drawing the viewers’ attention. A well-made thumbnail can bring millions of views for a YouTuber .
2. Which Is the Best Thumbnail Maker for YouTube?
Besides the thumbnail maker introduced above, the Filmora video editor and be used as an excellent thumbnail maker as well. Instead of going through the hassle of installing or subscribing to a separate program or website, it is better to use the extensive features of Filmora. It can take free snapshots for you, which you can modify within Filmora. There are stunning title templates, effects, overlays, transitions, and a large library of stock content at your service. From Part 2 in this article, you can see that making a YouTube thumbnail in Filmora is easy and efficient.
Richard Bennett
Richard Bennett is a writer and a lover of all things video.
Follow @Richard Bennett
Richard Bennett
Mar 27, 2024• Proven solutions
Video thumbnails are vital to get your videos more views. Many successful YouTubers make nice thumbnails which help them get lots of views and thus tons of subscribers.
If you are searching for software tools that can assist in the creation of YouTube video thumbnails, then you are on the right page because the details available below will provide you with complete information about the top 10+ highly rated YouTube Thumbnail Makers on both desktop and mobile devices. Some of them are free to create YouTube thumbnails; others may need to pay to get more advanced features. Besides, I’ll also show you how to create a thumbnail in the Filmora video editor in detail.
- Part 1: Best Free YouTube Thumbnail Makers for Online Users
- Part 2: How to Make Video Thumbnail with Wondershare Filmora [Creative Ways]
- Part 3: FAQs About YouTube Thumbnail
Before we get started, it is highly recommended to watch this video, teaching you how to make a YouTube Thumbnail in 30 seconds with Filmora.
You might be interested in
- How to Make Fortnite Thumbnail Super Easy and Free >>
- Best Size, Best Practices of Making YouTube Thumbnail >>
Part 1:10+ Free YouTube Thumbnail Makers for Windows/Mac/Online/Android/iPhone/iPad
In this part, we will share with you some Free YouTube Thumbnail Makers that you can use. Some of them are online solutions, so there is no need to download them, some of them can be downloaded on Windows or Mac computers.
If you prefer to edit videos on mobile devices, then it is good to have an app that allows you to create video thumbnails for YouTube videos. So in this part, we have included some video thumbnail maker apps that you can use on iPhone and Android phones.
1. Canva
It is a free thumbnail maker that can be accessed from its official website at Canva.com. This Video Thumbnail Maker is useful for graphic designers as it offers incredible features. The simple to use drag and drop type functions are wonderful, and the effects available for your Thumbnail Creation include free stock-type photos, Illustrations, Lines, Shapes, Frames, Grids, Backgrounds, Text, etc. The quick customer support facility is appreciable. Note: You need to sign up to use the thumbnail templates.
Main Features of this free YouTube Thumbnail Maker:
- It offers a customized YouTube thumbnail design
- You can change images, colors and fonts easily
- You can get more styles and templates if you pay
- Registration needed
2. Wondershare PixStudio
Wondershare PixStudio is an all-in-one and powerful online graphic design maker for everyone. It has various types of templates for YouTube Thumbnails, Logos, Posters, etc. You can create a beautiful design by simply dragging and dropping the elements and photos. The online platform is free to use all templates, just One-Click to download your creations and share to your Facebook, Instagram Story, YouTube Thumbnails, etc. immediately.
Features :
- Various types of templates
- Simple and Fast Design
- Background remover
Available:
Online
iPhone/iPad
Android
3. PicMonkey
This online thumbnail maker provides numerous filters, exclusive overlays, fonts, frames, and extra beautifying touch-up type tools to users with a single registration to Picmonkey’s premium membership. The exclusive effects like Ombre, zombify, premium fonts and Mirror are a really good collection of this tool. Now you can easily design beautiful collages, edit your memories, and create professional thumbnails with Picmonkey.com. Because of its wide range of options, it is probably the second most popular option for YouTubers who want to make professional thumbnails, right after Canva. One major difference between Picmonkey and Canva is that Picmonkey is no longer free. It costs $4 per month.
Features:
- As a youtube thumbnail maker, you also can touch up facial beautification
- Design tools make creative logos
- Provides 100+ designer-crafted thumbnail templates
Available :
Online
iPhone/iPad
Android
4. Fotor
It is possible to get something outstanding even out of your simple content without making much effort because Fotor serves you with all advanced features, and it covers attractive themes from all over the world. Fotor allows you to re-discover your art and skills without any limitation as it offers all quick editing services online. It is very interactive and simple to use with all rich features, so even beginners who haven’t made any thumbnail before can make a video thumbnail with it easily.
Features:
- Your thumbnail will be saved on the cloud
- Fast processing speed while exporting your work
- Provides YouTube thumbnail templates for different scenarios
Available :
Online
iPhone/iPad
Android
5. Fotojet
The fotojet.com online tool provides numerous facilities, whereas it is preferably used for collage making, graphic designing, and as a photo editor. With this advanced thumbnail creator tool, now you can easily rotate, crop, resize or filter your images while creating direct posts for social media pages such as Instagram, Facebook, etc. Fotojet.com possesses more than 600 stunning collage making templates that are suitable for your special events.
Features:
- It owns many templates for you to use
- Easy to have a high-quality thumbnail with only a few clicks
- 3 Steps to make a YouTube thumbnail
Available :
Online
Windows
Mac
6. Backgrounder
It allows you to design masterpieces of customized professional art, avatars, and thumbnails for videos on YouTube, Facebook, Twitter, etc. It is simple to use and contains an interactive user interface that is suitable for professionals as well as beginners.
Features:
- It owns a community that you can share works with other people
- The interface is extremely straightforward
Available :
Online
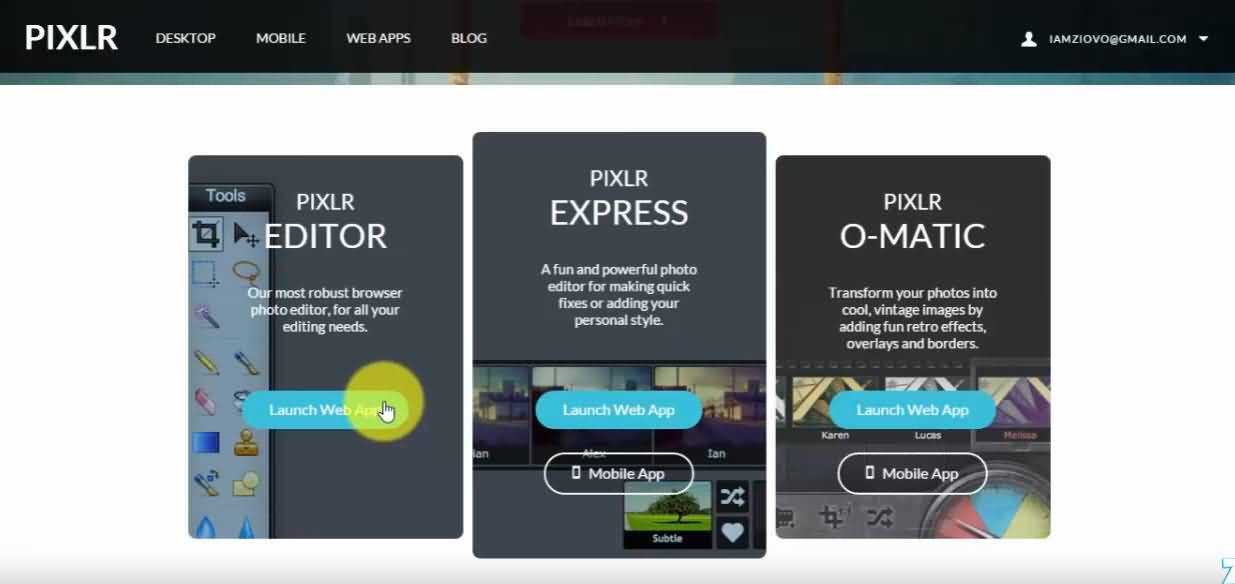
7. Pixlr:
It is a specially designs app version of well known Pixlr website where you can feel free to add overlays to your thumbnails. The choice of filters is also good for her with a high-end resolution as compared to available online solutions.
Features:
- Its free effects are a great source to come up with a new YouTube thumbnail
- Comprehensive editing tools are handy to use every day
Available :
Online
iPhone/iPad
Android
8. Photo Editor:
Photo Editor is one of the most popular applications that assist users in the easy addition of stickers, frames, etc while it makes adjustment of redeye, brightness, and sharpness much easier. Most people love this application more due to its ability to create memes with available images and text for those images can be adjusted easily. The photo editor also makes it much easier to share edited stuff on Instagram and the quality of edited images use to be very high in this case.
Features:
- Color splash is a great tool to brighten up your thumbnail
- You can easily crop, rotate and flip
Available :
iPhone/iPad
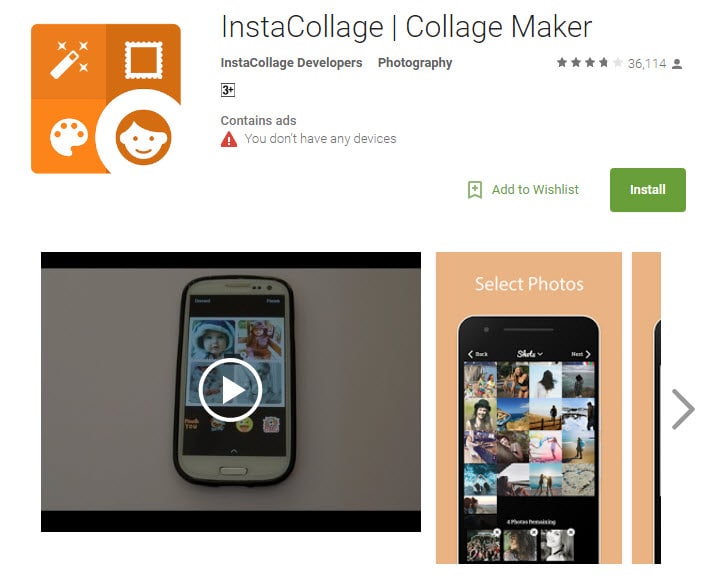
9. Insta Collage:
The name of this application describes its most special feature that is it allows users to create wonderful collages within very little time. This tool comes with easy editing and sharing features so that users can have an easy interface on other platforms too. There are lots of effects that can be added to images while designing thumbnails and it is rated to have an outstanding quality of results.
Features:
- The personalized layout will give you a catchy thumbnail
- It owns 30 patterns and 18 frames to select
Available :
Android
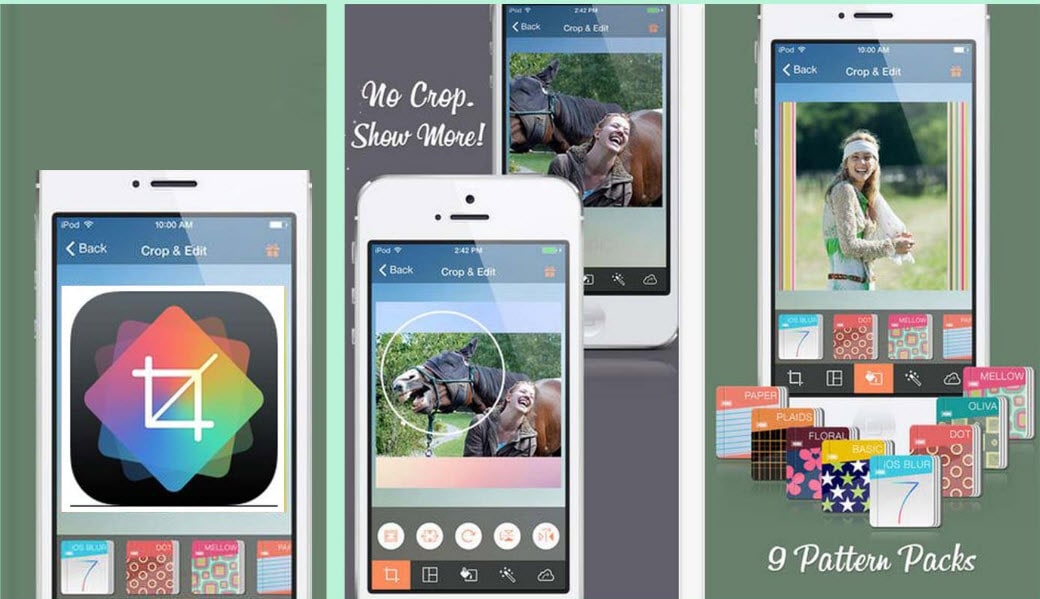
10. Cropic:
Here is one more application for you that you will need for easy customization as well as fast sharing to YouTube as well as Instagram. Users can bring all size types to this platform, and it is also possible to add text at the time of editing. This tool is suggested for beginners as well as professionals due to its great results.
Features:
- You can scale the image by hand and cut it
- Pro version is more powerful for supporting 1224x1224 pixels
Available :
iPhone/iPad
With all these available software tools, it becomes much easier to create video Thumbnails for YouTube. The easy-to-follow steps are well described in different articles on the internet, but first of all, you need to make a selection between whether you need to use the online tool or wish to download the app on your device.
For the second case, you need to spare some memory in your device, whereas for the first one it demands a fast internet connection for easy services. Besides those specially designed YouTube Thumbnail makers, you can also create a thumbnail in Filmora if you’ve already installed it.
11. Snappa:
If you’re looking for a tool that can be upgraded later, then Snappa could be for you. Offering users both free and paid functions, Snappa will allow users to generate some truly alluring thumbnails, while still being able to use the tools for work on other social media platforms.
Features:
- Pre-Made Templates Available
- Easily Customize Backgrounds
- Place Custom Text Anywhere You Want
- Create a Truly Bespoke YouTube Thumbnail
Available :
Online
iPhone/iPad
Android
12. Adobe Spark:
Not only is Adobe recognized for creating images in many different contexts, but it is also able to offer YouTubers a free tool to ensure that their video thumbnails are catching the eye of social network visitors.
Features:
- A Basic and Easy-To-Use Platform
- Ideal for Beginners
- Customize Colors, Backgrounds, and Text with Ease
- Add Additional Images if Needed
Available :
Windows 7 or newer
Mac OS X
Chromebook
Part 2: How to Make YouTube Thumbnails in Wondershare Filmora?
Filmora is easy to use and powerful video editing software for your YouTube videos, which allows you not only to cut, rotate, crop, reverse, or speed up your videos, but also to apply some advanced editing effects like green screen, PIP, audio editing, etc. within clicks.
Here are several creative ways of making thumbnails in Filmora. You can easily create a thumbnail in 30 seconds with Filmora’s new feature, AI portrait.
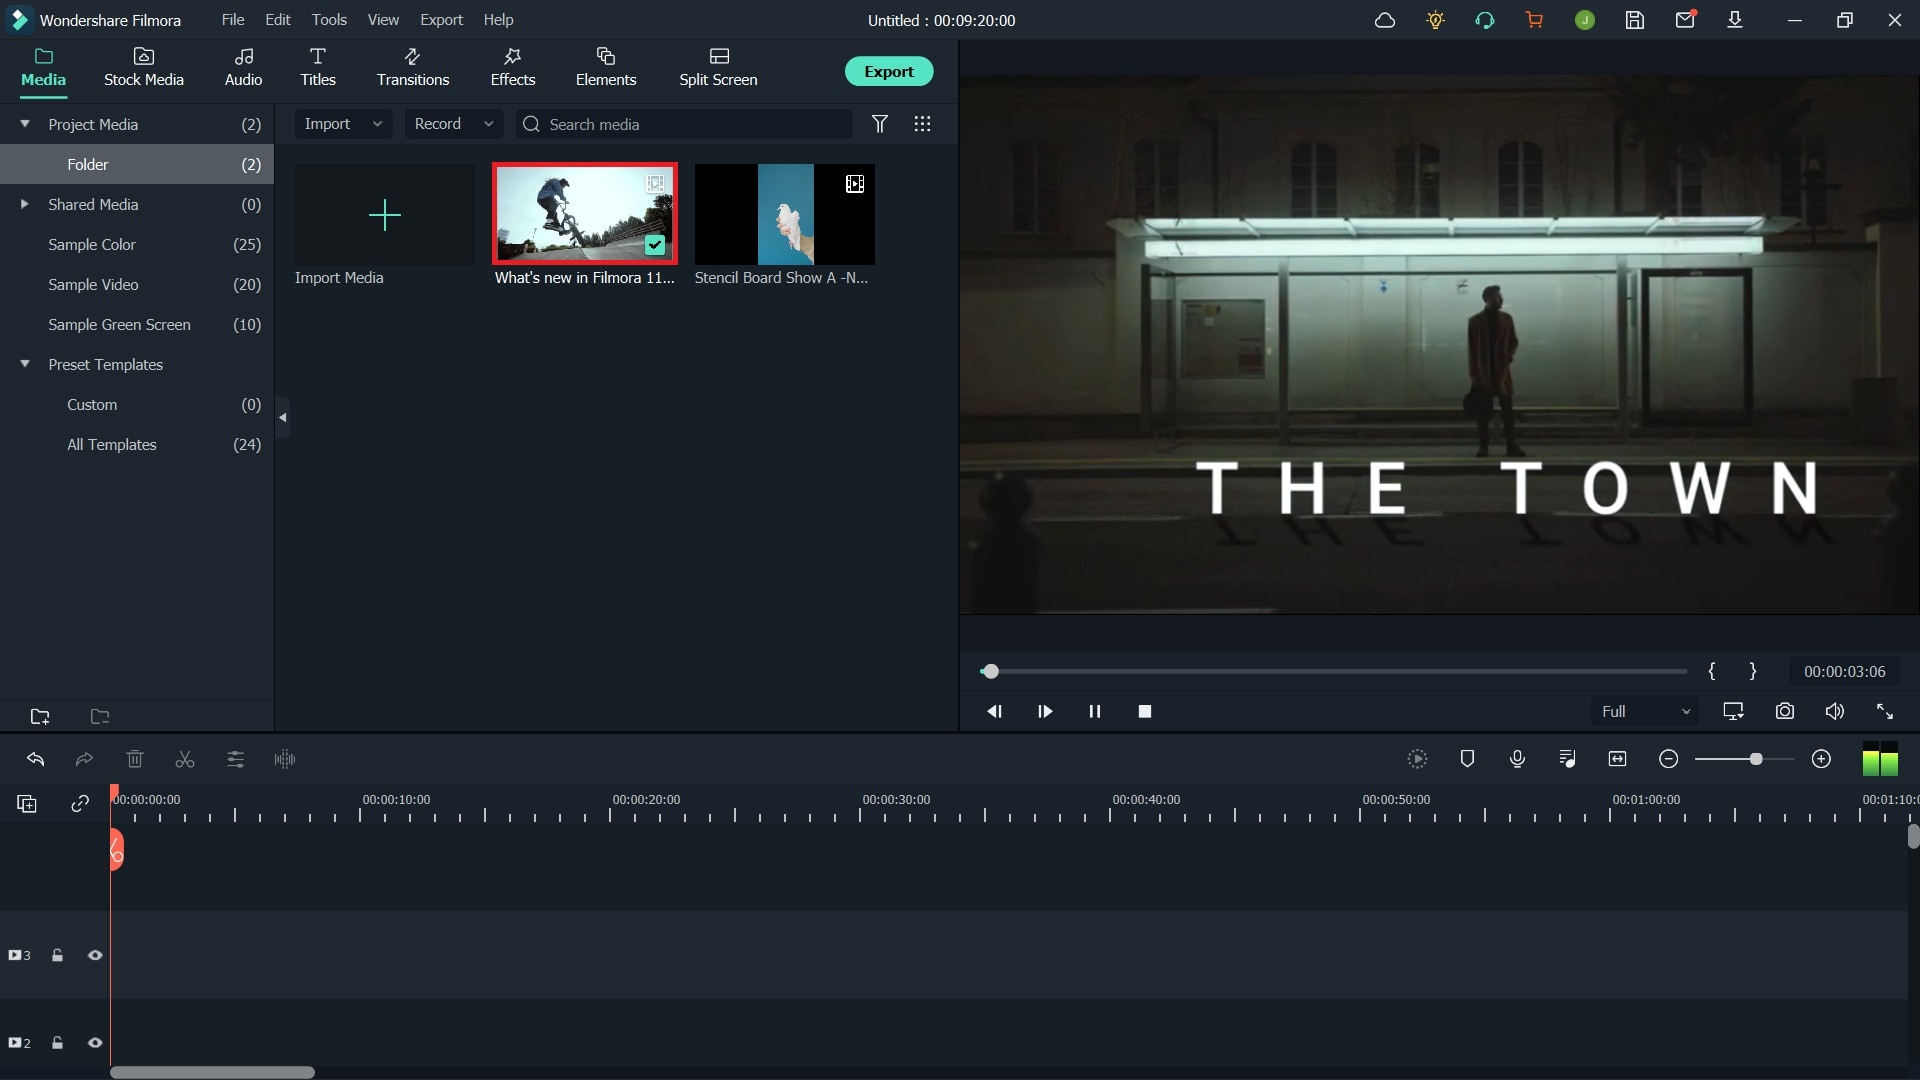
You can add your image or background image to Filmora and then add some filters, texts, overlay, or elements to the photo, and then take a snapshot, since Filmora features the snapshot tool which allows you to pick up the most attractive images from the video and use it as a video thumbnail.
Thumbnail created from a photo in Filmora
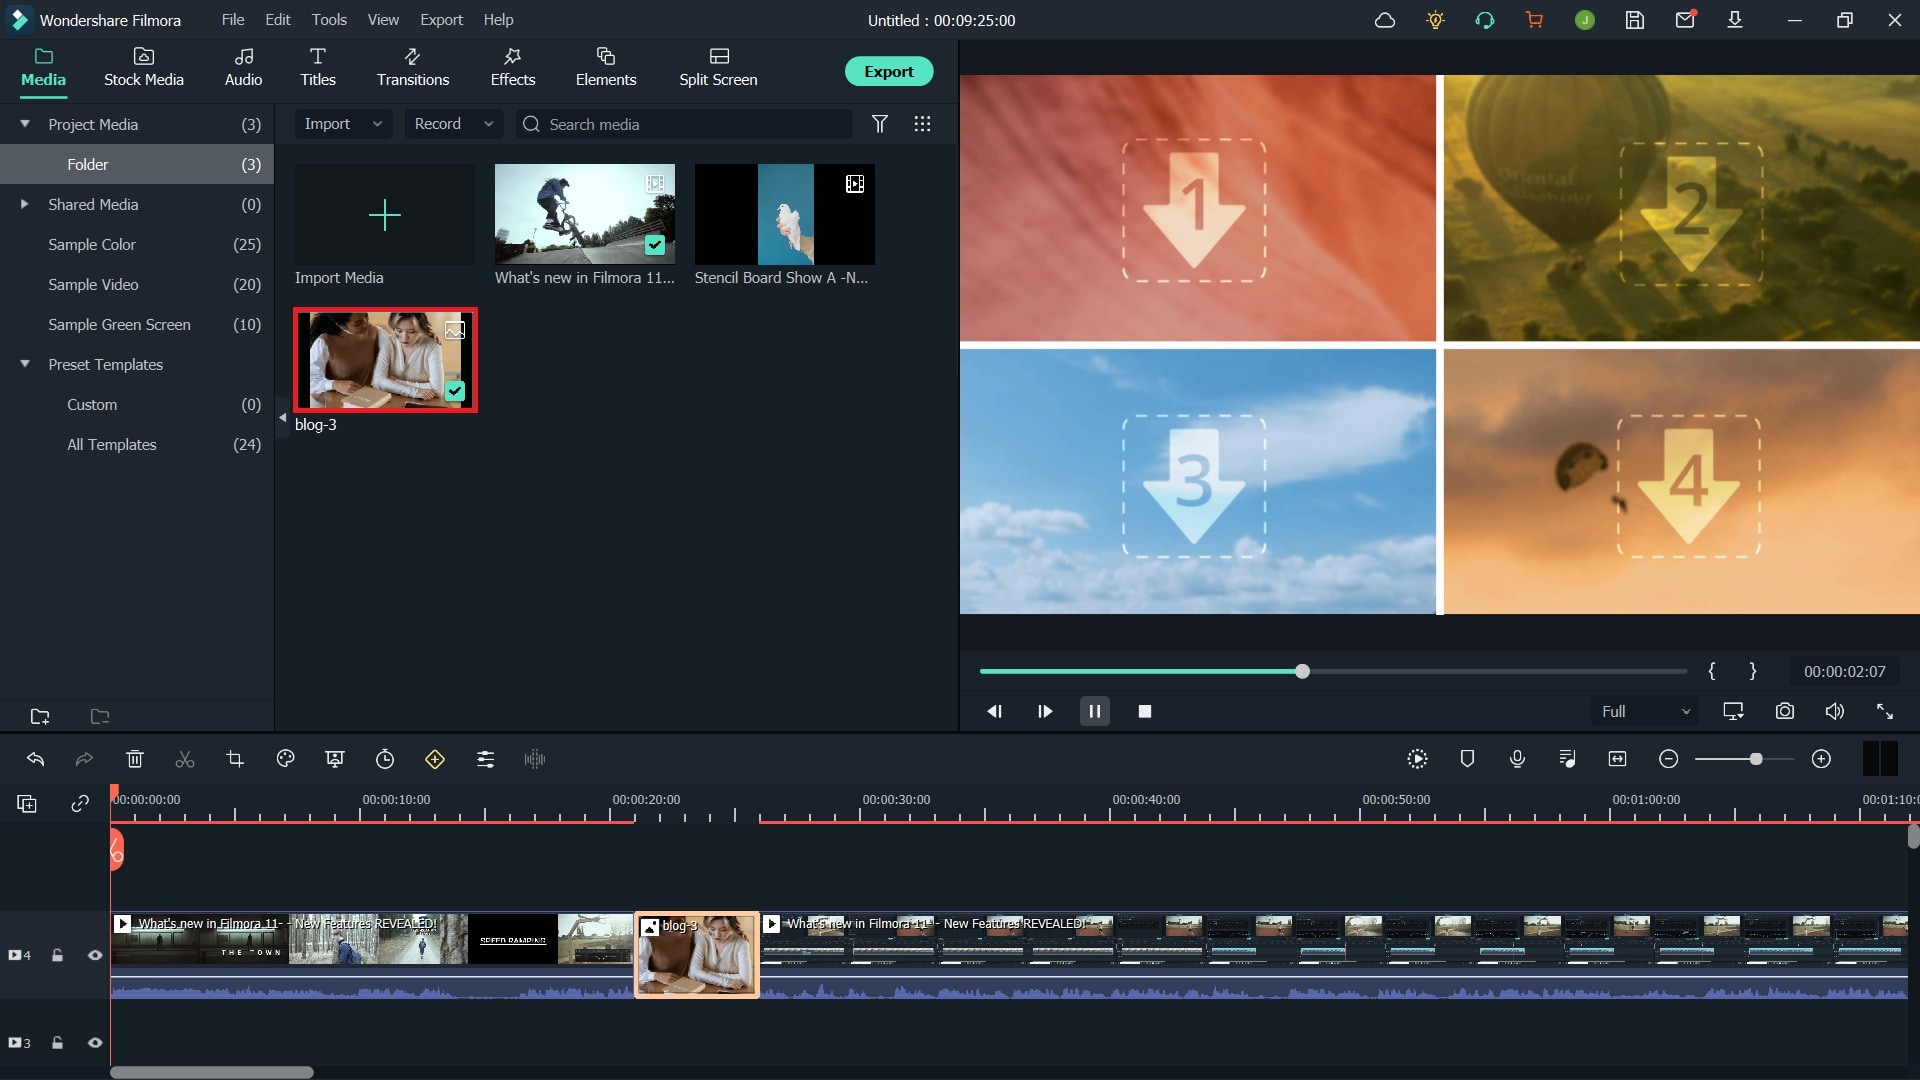
Or, you can extract frames from the video and use it as a thumbnail and upload it to YouTube later.
Thumbnail extracted from video footage in Filmora
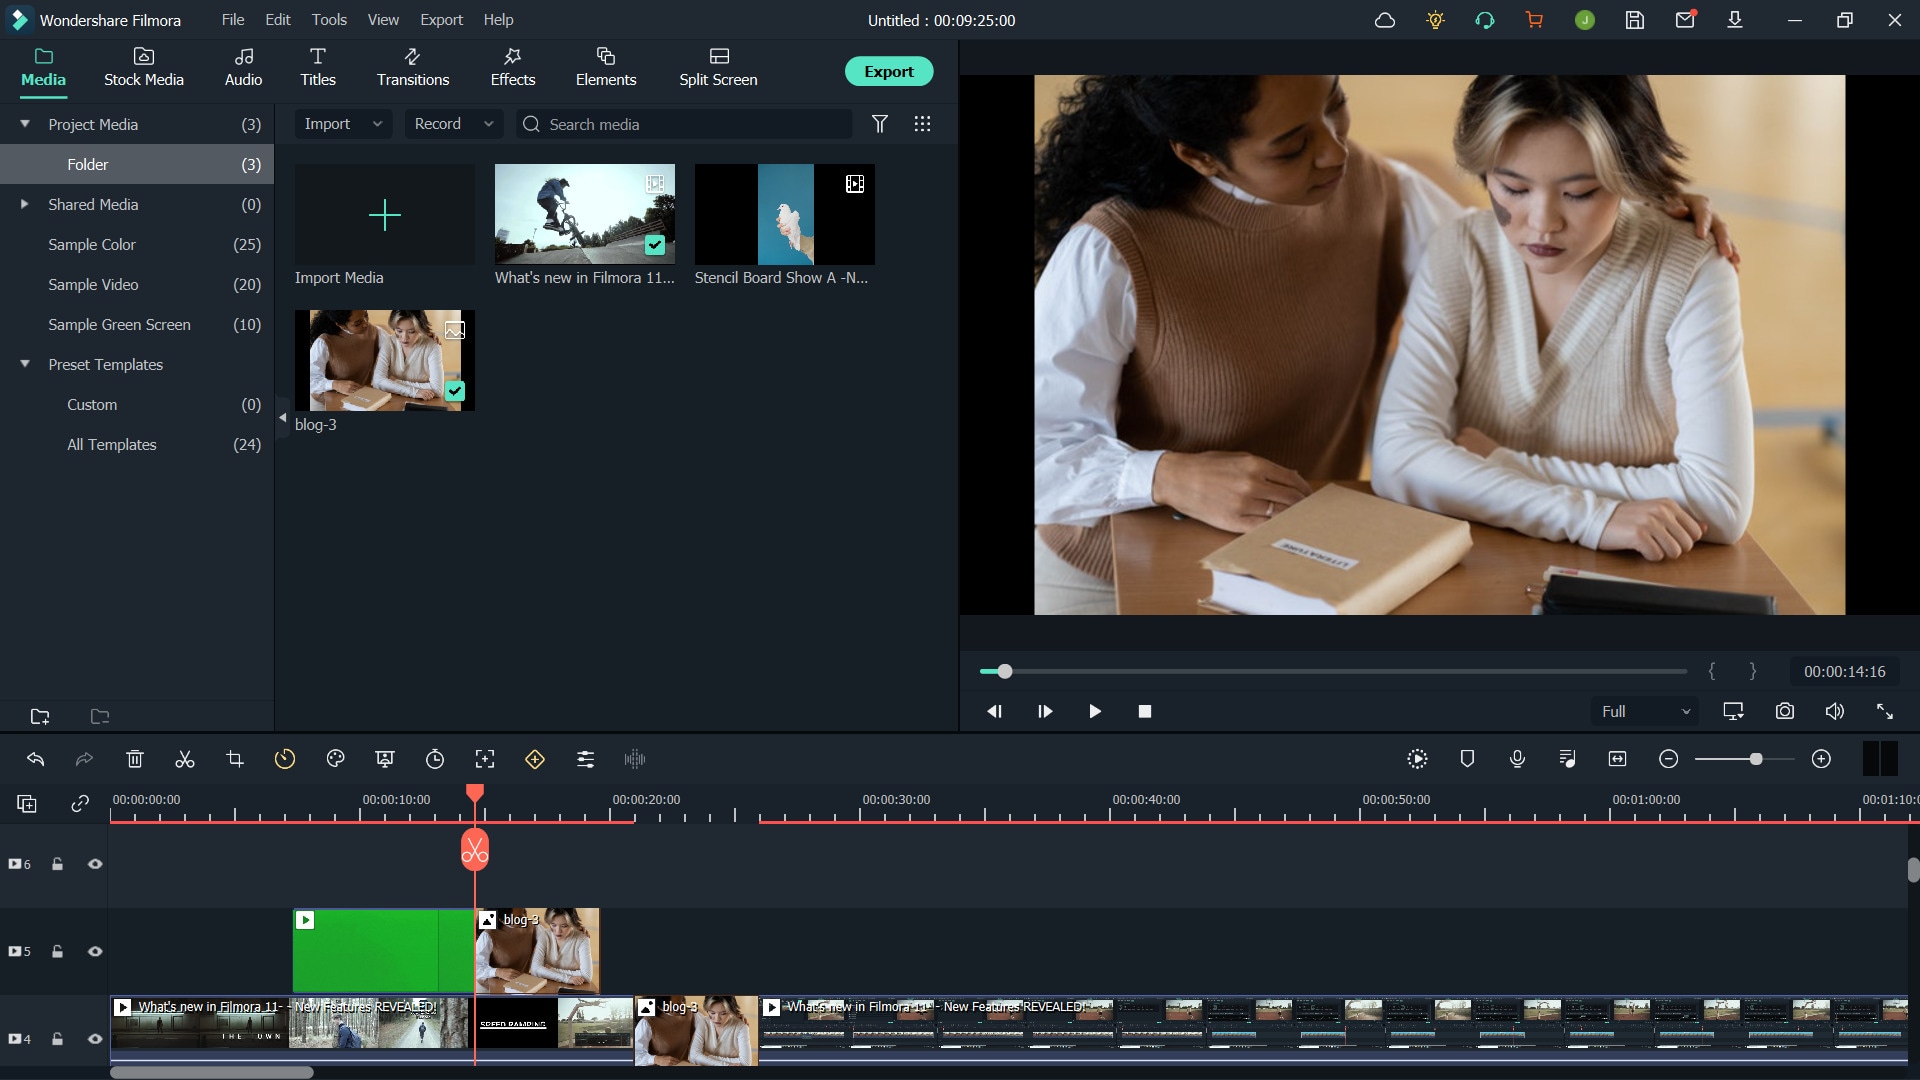
One more creative way is to compositevideo footage with the green screen feature .
Use Green Screen to Create Video Thumbnail in Filmora
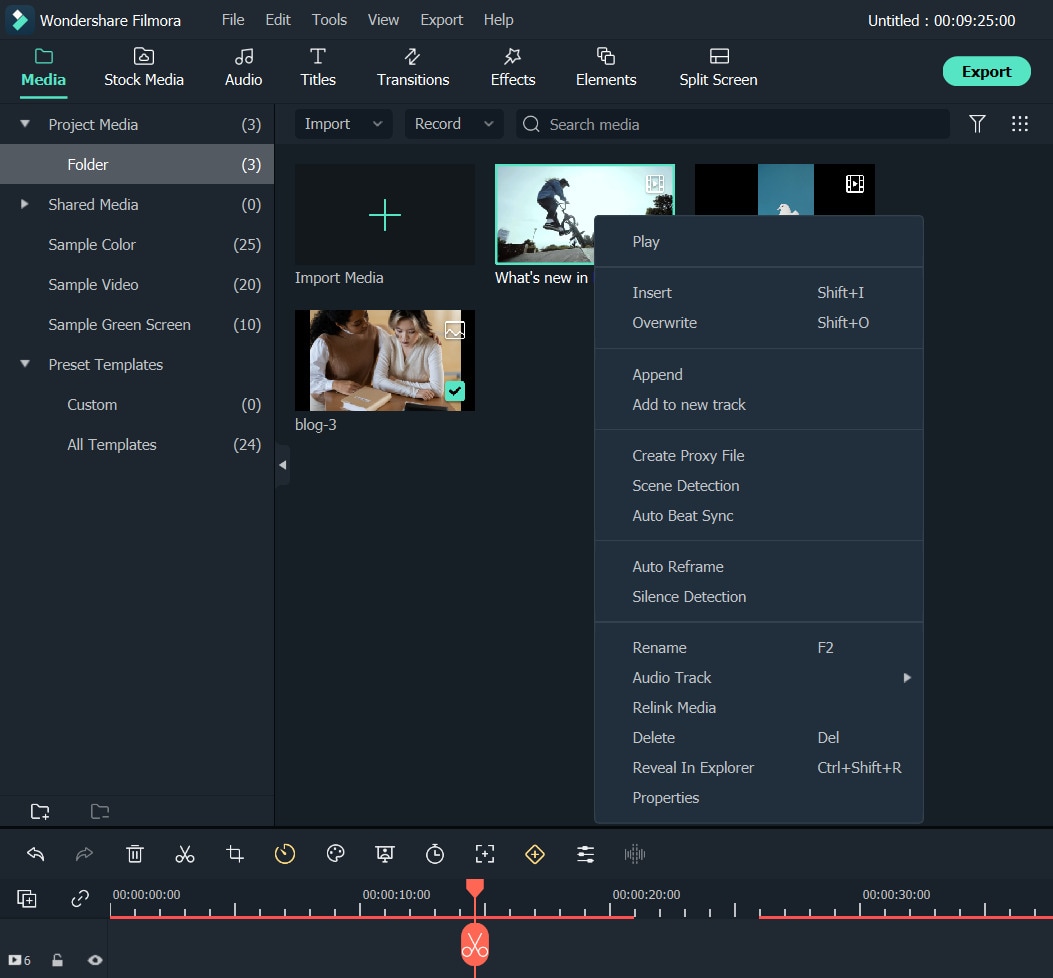
Where to find the thumbnail photo in Wondershare Filmora?
After clicking the Camera icon in Filmora to take a screenshot, you can find the photos by right-clicking the image in the Media library and then selecting Reveal in Explorer to check it.
Download Mac Version ](https://tools.techidaily.com/wondershare/filmora/download/ )
Part 3: FAQs About YouTube Thumbnail
1. What Does Thumbnail Mean on YouTube?
Thumbnails are reduced-size versions of images or videos. The name is an allusion to images being reduced to roughly the size of a human thumbnail. Thumbnails have special significance in YouTube SEO. They are used for drawing the viewers’ attention. A well-made thumbnail can bring millions of views for a YouTuber .
2. Which Is the Best Thumbnail Maker for YouTube?
Besides the thumbnail maker introduced above, the Filmora video editor and be used as an excellent thumbnail maker as well. Instead of going through the hassle of installing or subscribing to a separate program or website, it is better to use the extensive features of Filmora. It can take free snapshots for you, which you can modify within Filmora. There are stunning title templates, effects, overlays, transitions, and a large library of stock content at your service. From Part 2 in this article, you can see that making a YouTube thumbnail in Filmora is easy and efficient.
Richard Bennett
Richard Bennett is a writer and a lover of all things video.
Follow @Richard Bennett
Richard Bennett
Mar 27, 2024• Proven solutions
Video thumbnails are vital to get your videos more views. Many successful YouTubers make nice thumbnails which help them get lots of views and thus tons of subscribers.
If you are searching for software tools that can assist in the creation of YouTube video thumbnails, then you are on the right page because the details available below will provide you with complete information about the top 10+ highly rated YouTube Thumbnail Makers on both desktop and mobile devices. Some of them are free to create YouTube thumbnails; others may need to pay to get more advanced features. Besides, I’ll also show you how to create a thumbnail in the Filmora video editor in detail.
- Part 1: Best Free YouTube Thumbnail Makers for Online Users
- Part 2: How to Make Video Thumbnail with Wondershare Filmora [Creative Ways]
- Part 3: FAQs About YouTube Thumbnail
Before we get started, it is highly recommended to watch this video, teaching you how to make a YouTube Thumbnail in 30 seconds with Filmora.
You might be interested in
- How to Make Fortnite Thumbnail Super Easy and Free >>
- Best Size, Best Practices of Making YouTube Thumbnail >>
Part 1:10+ Free YouTube Thumbnail Makers for Windows/Mac/Online/Android/iPhone/iPad
In this part, we will share with you some Free YouTube Thumbnail Makers that you can use. Some of them are online solutions, so there is no need to download them, some of them can be downloaded on Windows or Mac computers.
If you prefer to edit videos on mobile devices, then it is good to have an app that allows you to create video thumbnails for YouTube videos. So in this part, we have included some video thumbnail maker apps that you can use on iPhone and Android phones.
1. Canva
It is a free thumbnail maker that can be accessed from its official website at Canva.com. This Video Thumbnail Maker is useful for graphic designers as it offers incredible features. The simple to use drag and drop type functions are wonderful, and the effects available for your Thumbnail Creation include free stock-type photos, Illustrations, Lines, Shapes, Frames, Grids, Backgrounds, Text, etc. The quick customer support facility is appreciable. Note: You need to sign up to use the thumbnail templates.
Main Features of this free YouTube Thumbnail Maker:
- It offers a customized YouTube thumbnail design
- You can change images, colors and fonts easily
- You can get more styles and templates if you pay
- Registration needed
2. Wondershare PixStudio
Wondershare PixStudio is an all-in-one and powerful online graphic design maker for everyone. It has various types of templates for YouTube Thumbnails, Logos, Posters, etc. You can create a beautiful design by simply dragging and dropping the elements and photos. The online platform is free to use all templates, just One-Click to download your creations and share to your Facebook, Instagram Story, YouTube Thumbnails, etc. immediately.
Features :
- Various types of templates
- Simple and Fast Design
- Background remover
Available:
Online
iPhone/iPad
Android
3. PicMonkey
This online thumbnail maker provides numerous filters, exclusive overlays, fonts, frames, and extra beautifying touch-up type tools to users with a single registration to Picmonkey’s premium membership. The exclusive effects like Ombre, zombify, premium fonts and Mirror are a really good collection of this tool. Now you can easily design beautiful collages, edit your memories, and create professional thumbnails with Picmonkey.com. Because of its wide range of options, it is probably the second most popular option for YouTubers who want to make professional thumbnails, right after Canva. One major difference between Picmonkey and Canva is that Picmonkey is no longer free. It costs $4 per month.
Features:
- As a youtube thumbnail maker, you also can touch up facial beautification
- Design tools make creative logos
- Provides 100+ designer-crafted thumbnail templates
Available :
Online
iPhone/iPad
Android
4. Fotor
It is possible to get something outstanding even out of your simple content without making much effort because Fotor serves you with all advanced features, and it covers attractive themes from all over the world. Fotor allows you to re-discover your art and skills without any limitation as it offers all quick editing services online. It is very interactive and simple to use with all rich features, so even beginners who haven’t made any thumbnail before can make a video thumbnail with it easily.
Features:
- Your thumbnail will be saved on the cloud
- Fast processing speed while exporting your work
- Provides YouTube thumbnail templates for different scenarios
Available :
Online
iPhone/iPad
Android
5. Fotojet
The fotojet.com online tool provides numerous facilities, whereas it is preferably used for collage making, graphic designing, and as a photo editor. With this advanced thumbnail creator tool, now you can easily rotate, crop, resize or filter your images while creating direct posts for social media pages such as Instagram, Facebook, etc. Fotojet.com possesses more than 600 stunning collage making templates that are suitable for your special events.
Features:
- It owns many templates for you to use
- Easy to have a high-quality thumbnail with only a few clicks
- 3 Steps to make a YouTube thumbnail
Available :
Online
Windows
Mac
6. Backgrounder
It allows you to design masterpieces of customized professional art, avatars, and thumbnails for videos on YouTube, Facebook, Twitter, etc. It is simple to use and contains an interactive user interface that is suitable for professionals as well as beginners.
Features:
- It owns a community that you can share works with other people
- The interface is extremely straightforward
Available :
Online
7. Pixlr:
It is a specially designs app version of well known Pixlr website where you can feel free to add overlays to your thumbnails. The choice of filters is also good for her with a high-end resolution as compared to available online solutions.
Features:
- Its free effects are a great source to come up with a new YouTube thumbnail
- Comprehensive editing tools are handy to use every day
Available :
Online
iPhone/iPad
Android
8. Photo Editor:
Photo Editor is one of the most popular applications that assist users in the easy addition of stickers, frames, etc while it makes adjustment of redeye, brightness, and sharpness much easier. Most people love this application more due to its ability to create memes with available images and text for those images can be adjusted easily. The photo editor also makes it much easier to share edited stuff on Instagram and the quality of edited images use to be very high in this case.
Features:
- Color splash is a great tool to brighten up your thumbnail
- You can easily crop, rotate and flip
Available :
iPhone/iPad
9. Insta Collage:
The name of this application describes its most special feature that is it allows users to create wonderful collages within very little time. This tool comes with easy editing and sharing features so that users can have an easy interface on other platforms too. There are lots of effects that can be added to images while designing thumbnails and it is rated to have an outstanding quality of results.
Features:
- The personalized layout will give you a catchy thumbnail
- It owns 30 patterns and 18 frames to select
Available :
Android
10. Cropic:
Here is one more application for you that you will need for easy customization as well as fast sharing to YouTube as well as Instagram. Users can bring all size types to this platform, and it is also possible to add text at the time of editing. This tool is suggested for beginners as well as professionals due to its great results.
Features:
- You can scale the image by hand and cut it
- Pro version is more powerful for supporting 1224x1224 pixels
Available :
iPhone/iPad
With all these available software tools, it becomes much easier to create video Thumbnails for YouTube. The easy-to-follow steps are well described in different articles on the internet, but first of all, you need to make a selection between whether you need to use the online tool or wish to download the app on your device.
For the second case, you need to spare some memory in your device, whereas for the first one it demands a fast internet connection for easy services. Besides those specially designed YouTube Thumbnail makers, you can also create a thumbnail in Filmora if you’ve already installed it.
11. Snappa:
If you’re looking for a tool that can be upgraded later, then Snappa could be for you. Offering users both free and paid functions, Snappa will allow users to generate some truly alluring thumbnails, while still being able to use the tools for work on other social media platforms.
Features:
- Pre-Made Templates Available
- Easily Customize Backgrounds
- Place Custom Text Anywhere You Want
- Create a Truly Bespoke YouTube Thumbnail
Available :
Online
iPhone/iPad
Android
12. Adobe Spark:
Not only is Adobe recognized for creating images in many different contexts, but it is also able to offer YouTubers a free tool to ensure that their video thumbnails are catching the eye of social network visitors.
Features:
- A Basic and Easy-To-Use Platform
- Ideal for Beginners
- Customize Colors, Backgrounds, and Text with Ease
- Add Additional Images if Needed
Available :
Windows 7 or newer
Mac OS X
Chromebook
Part 2: How to Make YouTube Thumbnails in Wondershare Filmora?
Filmora is easy to use and powerful video editing software for your YouTube videos, which allows you not only to cut, rotate, crop, reverse, or speed up your videos, but also to apply some advanced editing effects like green screen, PIP, audio editing, etc. within clicks.
Here are several creative ways of making thumbnails in Filmora. You can easily create a thumbnail in 30 seconds with Filmora’s new feature, AI portrait.
You can add your image or background image to Filmora and then add some filters, texts, overlay, or elements to the photo, and then take a snapshot, since Filmora features the snapshot tool which allows you to pick up the most attractive images from the video and use it as a video thumbnail.
Thumbnail created from a photo in Filmora
Or, you can extract frames from the video and use it as a thumbnail and upload it to YouTube later.
Thumbnail extracted from video footage in Filmora
One more creative way is to compositevideo footage with the green screen feature .
Use Green Screen to Create Video Thumbnail in Filmora
Where to find the thumbnail photo in Wondershare Filmora?
After clicking the Camera icon in Filmora to take a screenshot, you can find the photos by right-clicking the image in the Media library and then selecting Reveal in Explorer to check it.
Download Mac Version ](https://tools.techidaily.com/wondershare/filmora/download/ )
Part 3: FAQs About YouTube Thumbnail
1. What Does Thumbnail Mean on YouTube?
Thumbnails are reduced-size versions of images or videos. The name is an allusion to images being reduced to roughly the size of a human thumbnail. Thumbnails have special significance in YouTube SEO. They are used for drawing the viewers’ attention. A well-made thumbnail can bring millions of views for a YouTuber .
2. Which Is the Best Thumbnail Maker for YouTube?
Besides the thumbnail maker introduced above, the Filmora video editor and be used as an excellent thumbnail maker as well. Instead of going through the hassle of installing or subscribing to a separate program or website, it is better to use the extensive features of Filmora. It can take free snapshots for you, which you can modify within Filmora. There are stunning title templates, effects, overlays, transitions, and a large library of stock content at your service. From Part 2 in this article, you can see that making a YouTube thumbnail in Filmora is easy and efficient.
Richard Bennett
Richard Bennett is a writer and a lover of all things video.
Follow @Richard Bennett
Also read:
- The Art of Digital Makeup on Video Platforms
- In 2024, Elevating Your Content's Exposure with Ongoing Creative Commons Usage
- Discover How to Design Dynamic YouTube Music Playlists
- 11 Fitness YouTube Video Ideas to Keep You and Your Viewers Moving
- Breakdown of YouTube's Monetization Update for 2024
- 2024 Approved DIY Digital Footprint Creating YouTube Thumbnails From Mobile Devices
- [Updated] Become a Youtube Gif Wizard Your Complete Online Transformation Tutorial
- Upgrade Your Content Reach with YouTube-to-Facebook Posting
- In 2024, Cohesive Title Blueprint for Social & Mobile Platforms
- 80+ Creative Cooking Channel Names to Attract More Audience for 2024
- The Editor's Toolkit Elevating Your YouTube Videos via Windows PC
- 2024 Approved Download and Relive A Compreran Review of Top YouTube Playlist Extractors
- [Updated] Are YouTube Engagement Strategies Justifiable?
- Average Earnings Per View What's the Income for YouTubers per Ad Playback?
- In 2024, Dissecting Biggest FIFA Footage Trends in Graphs
- Dive Deep Into Designing Dynamic YouTube Live Thumbnails
- Efficiency at Fingertips Swiftly Upload Videos From iPhone/iPad to YouTube
- In 2024, Elevating User Engagement with Detailed Video Chapters in YouTube
- Decoding YouTube's Algorithm Behind Prominent Comments
- In 2024, Attract More Viewers Boosting Your YouTube Following
- Dissecting Revenue Allocation for Shortform Content Makers for 2024
- In 2024, Disrupt Bot Patterns for Natural Viewer Increase
- 2024 Approved Audiovisual Rhythm Optimal DJ Content for Gatherings
- How to Optimize Video Engagement Through Resizing Thumbnails on YouTube
- Navigating YouTube's Featured Slot A Detailed Explanimation
- Unlocking YouTube Profits A Comprehensive Manual
- 2024 Approved Discover the Prime Lineup of Affordable Cutting Tools
- In 2024, Boost Engagement Advanced YouTube Tag Strategies Revealed
- [Updated] Essential Techniques for Enhanced YouTube Long-Form Videos
- Prime Gear for YouTube Novices
- [New] Achieving Virality on YouTube Essential Steps Demystified
- [New] Discovering Underrated Gems This Year (Films)
- Youth Empowerment Your Life Story Can Inspire
- [Updated] Charting Your Path to Success in YouTube's Earnings System
- Craft Your Study of the Past with These Top 10 Channels for 2024
- In 2024, Android & iOS The Best Sound Distortion Tools
- Downloading Your YouTube Watch Lists Step by Step
- Crafting Compelling End Screens in YouTube Videos
- Taming the Black Screen Demon of YouTube
- [Updated] Digital Sharpening From YouTube Shorts to MP4
- YouTube Fixed Shorts Are Now Easily Accessible
- [Updated] Effortless Media Transition From MP3 to YouTube Video Posting
- Does Life360 Notify When You Log Out On OnePlus Ace 3? | Dr.fone
- 2024 Approved Premium 1080P Webcam Encoding Programs
- Hassle-Free Ways to Remove FRP Lock from Realme GT Neo 5 SE Phones with/without a PC
- Transform YouTube Live with These Must-Know Secrets for 2024
- In 2024, Remove Device Supervision From your iPhone 6s Plus
- New Create Dynamic Text Animation in Filmora
- New 2024 Approved How to Acquire Rare Bird Sound Samples in Digital Audio Format
- Easy Way to Apply Green Screen to YouTube Videos for 2024
- In 2024, How to Track a Lost Vivo Y56 5G for Free? | Dr.fone
- In 2024, Full Guide on Mirroring Your Tecno Spark 20 Pro to Your PC/Mac | Dr.fone
- In 2024, How to Screen Mirroring ZTE Nubia Z60 Ultra to PC? | Dr.fone
- Top-Rated Traffic Cameras for Automobiles 2023
- [New] In 2024, How to Get 1K Followers Every Month on Instagram
- How to Stream Apple iPhone 7 Plus to Computer? | Dr.fone
- Taking Screenshots on Chromebook [4 Methods] for 2024
- 2024 Approved Compreenhensive Guide to Selecting & Cultivating Valheim Seeds
- [Updated] Compre Written Analysis Hero4 Black Operations
- In 2024, Best Practices in Video Posting – Choosing Correct Orientation
- In 2024, Best Ways on How to Unlock/Bypass/Swipe/Remove Xiaomi Civi 3 Disney 100th Anniversary Edition Fingerprint Lock
- The Finest 12 Tycoons Your Pathway to Gaming Enthusiasm
- [New] Optimal Strategies for Mobile Snapchat Recordings
- 2024 Approved Essential Guide to Premium-Free Phone Video Chat Apps - iOS/Android
- [Updated] Leveraging Twitter's Visual Content on Snapchat for 2024
- [New] Agile Approaches Storing PPT Speeches
- In 2024, Mastering Lock Screen Settings How to Enable and Disable on Samsung Galaxy A15 4G
- 2024 Approved Streamlined Techniques for Sharing Your Desktop/Mobile Screen
- [Updated] Step-by-Step Guide to Instagram Leadership for 2024
- In 2024, Androids Premier Digital Audio Workstation Apps for Top-Notch Music Creation
- Simplified Soundscape A Modern Approach to Adding Sound Effects in Videos for 2024
- iPogo will be the new iSpoofer On Poco C51? | Dr.fone
- How to Fake Snapchat Location on Lenovo ThinkPhone | Dr.fone
- In 2024, Mobile Split Screen Video Editors The Best for iOS and Android
- Dose Life360 Notify Me When Someone Checks My Location On Oppo K11 5G? | Dr.fone
- Luminous Lessons Proven Strategies for Nocturnal Imagery
- Title: Transform Your YT Prompts with Green Savvy
- Author: Steven
- Created at : 2024-05-25 20:36:45
- Updated at : 2024-05-26 20:36:45
- Link: https://youtube-clips.techidaily.com/transform-your-yt-prompts-with-green-savvy/
- License: This work is licensed under CC BY-NC-SA 4.0.
