
:max_bytes(150000):strip_icc():format(webp)/should-you-buy-a-kindle-5270180-b1c49aad9c1142dc8722cfdb5d02072c.jpg)
"Thumbnails Unleashed Elevate Your Video Presence"
Thumbnails Unleashed: Elevate Your Video Presence
The Ultimate Guide to YouTube Thumbnails that Get Views

Richard Bennett
Oct 26, 2023• Proven solutions
Search for any topic on YouTube and you’ll find thousands of videos. How do you decide which of them to watch? Thumbnails play a major role in what viewers decide to click on. They’re often more important than video titles.
Viewers click on thumbnails that both standout and feel relevant to their search. Your task when it comes to creating YouTube thumbnails is to make something that does both of those things while also maintaining your personal style.
- How to Make a YouTube Thumbnail
- How to Upload a YouTube Thumbnail
- YouTube Thumbnail Makers
- How to Make Thumbnails that Get Clicks (Without Clickbait!)
- Animated YouTube Thumbnails
Part 1: How to Make a YouTube Thumbnail
In order to create a custom video thumbnail, you’ll need a program to put it together in. You can use an image editing program like Photoshop if you have one, but if you don’t you can check out these free thumbnail makers.
Here are some examples of popular thumbnail styles.

1. The Classic Thumbnail (Photo or Screenshot)
A photo that shows what happens in your video – whether that means the finished ‘look’ from your makeup tutorial or you posing in front of the landmark you shot your travel vlog in front of – is a great way to let viewers know what to expect. While curiosity can be a big motive behind clicking on a video thumbnail (or anything online), when people have searched for a specific topic they want to be convinced that your video has what they’re looking for.
#1. Choose Your Photo
To start off, either choose a still frame from your video or take a photograph while you’re still set up from your video. A separate photograph is usually a better idea because your video editor might not be able to export a high-quality snapshot, and also because you’re able to choose your facial expression.
Aim to make this shot a close-up or medium close-up and make sure you’re either in the center of the screen or off to one side, as per the ‘rule of thirds’. Many cameras allow you to bring an optional grid up onto your viewfinder. This will divide your screen into three equal segments both vertically and horizontally. Try to make sure your eyes line up with the top line, and if you’re going to be off to one side then make sure you’re on one of the vertical lines. This will ensure your image is visually appealing.
If you want to add text later, it’s a good idea to be off to one side.
Including your face is important for most types of YouTube videos. People are attracted to eye contact and are more likely to click on thumbnails that feature a face. Gamers might choose to use a picture of a video game character instead and it will have the same effect.
Some situations where it isn’t essential to include your face include tech reviews, where viewers will be more interested in seeing the product, and cooking videos where people are looking to be tempted by a yummy food pic.
#2. Add Text and/or Images
This part isn’t essential – in some cases, a photo is enough – but a lot of the thumbnails for the videos ranked highest in YouTube’s search results include either a couple of words of text, a simple graphic (i.e. an emoji), or both.
In some cases you might use text to make it clear what type of video you’ve made, i.e. ‘review’ or ‘tutorial’. It’s best to keep any text you use brief, but you could get a bit more descriptive and write something like ‘fall makeup tutorial’. Three words is probably the most you can get away with. Remember that your text will be shrunk down with the rest of your image; you need to make it big enough to read easily once it’s shrunk, and that means you don’t have a ton of room for text.
You should also avoid fonts that are harder to read. Fonts with a lot of curves can be harder to read, and you want to make sure you choose a color that stands out from your background. Yellow might work against black, but it probably won’t work against the beige wall of your sunny bedroom. Sans serif fonts tend to be best.
Another tactic used in successful thumbnails is to add small graphics, like emojis or small images (i.e. pumpkins for a Halloween video), which are related to your video’s content. As with text, you don’t want to overload your thumbnail with images, but they’re a great way to add something eye-catching that’s a bit different from competing thumbnails.
2. The Emotional Laser (Background + Face Reacting)
One increasingly popular style of YouTube thumbnail is what we’re going to call the ‘Emotional Laser’. It’s bright (like, blindingly bright), it communicates a clear feeling, and it creates high expectations for how exciting the video’s content is going to be.
The three main elements of the Emotional Laser thumbnail are a background (usually bright), your face on the right wearing an over-pronounced expression, and either the thing your expression is in reaction to (i.e. food, a product, the topic of your video in text) or reinforcement of your emotion (i.e an emoji or question marks) on the left.


#1. Ham It Up (Take Your Reaction Photo)
Take a high-quality photograph of yourself conveying strong emotion. Generally, you want to look extremely excited, disgusted, angry, or shocked depending on the theme of the video.
If there’s an object you want to include in your thumbnail, like a product you’ll be talking about, then it’s a good idea to hold it for this photo. Hold it to one side of your head, turn towards it slightly (but not so much that the camera can only see the side of your face) and put on the expression that’s supposed to be a reaction to the object.
It can be a good idea to take this photo in front of a solid color so you can remove the background easily with chroma key.
#2. Choose Your Background
Your background might be scenery, a solid color, or even the room you filmed the video in. Light or bright colors are popular. Make sure there’s nothing that will distract from your expression. If your background is a room, or anything else where there could be things like pictures hanging, you may want to add a blur effect in the next step.
#3. Put It Together
In your thumbnail maker or a program like Photoshop, you’ll need to put your photo and your background together. This will work differently depending on what program you use. If your program has a chroma key tool and your reaction photo was taken against a solid color then you can make that solid color transparent.
What if I don’t have a separate background? If you don’t have a background you want to use, but you still want your reaction to stand out the same way it would if you did, then you can use your photo editor’s blur tool to turn the normal background of your photo into something you can pop-out from.
#4. Add Extras (Text, Emojis, etc.)
If instead of an object you plan to fill the other side of your thumbnail with text, question marks, emojis, or some other graphic element then now is the time to add it.
Part 2: How to Upload a YouTube Thumbnail
When you upload a new video to YouTube, you will see a Custom thumbnail option under Video thumbnails after your upload is complete.
If you want to add a custom thumbnail to a video that’s already up, that’s easy too.
- Go to your Video Manager in the Creator Studio.
- Find the video you want to change the thumbnail for and click Edit next to it.
- Click Custom thumbnail on the right of the preview screen.
- Upload your thumbnail and click Save changes.
Remember when you’re uploading custom thumbnails that you need to use a .JPG, .GIF, .BMP, or .PNG image with an aspect ratio of 16:9 and that your file size has to be under 2MB.
YouTube recommends that thumbnail images have a resolution of 1280x720px, and you cannot upload an image with a width of less than 640 pixels.
Make sure that all of your thumbnails adhere to YouTube’s Community guidelines. Anything sexually suggestive, violent, or otherwise graphic could result in your video being age-restricted.
Part 3: YouTube Thumbnail Makers
You don’t have to go out and buy a photo editor like Photoshop to make custom video thumbnails (although it’s a good thing to use if you already have it). Here are two free online programs you can use instead:
Canva is an intuitive option with templates for Thumbnails, Channel Art, and other social media graphics. There are stock photos and graphics provided, but not all of them are free (paid options cost $1 each). Canva’s templates do tend to include paid resources, so you may want to use them mostly for their layouts or as inspiration and replace everything they provide with your own images.
Generally, using Canva is as easy as dragging and dropping things where you want them. You’ll be able to set the dimensions for your project so the image you export is a perfect size. Adding text and changing the size, font, or color is easy too.
Adobe Spark also has templates for channel art, and it’s also very easy to use. The first time you use it helpful notes will pop up to guide you through the process. Using templates is especially simple because you just click on the elements in the pre-made thumbnail and replace them with your own photos/text.
You can make changes to the colors in your Spark thumbnail easily by selecting a new color scheme or filter. You can even toggle through layouts easily. When you choose a new layout, Spark will rearrange all the pieces of your current thumbnail to align with the new layout so you can quickly see what it looks like instead of having to rebuild.
Click to check more YouTube thumbnail makers
Part 4: How to Make Thumbnails That Get Clicks (Without Clickbait!)
Here are the top 10 best practices for creating effective YouTube thumbnails:
#1. Show What Your Video Is About
Being mysterious and clickbaity can get you views, if you’re already big. For small YouTubers, it pays off to be clear about your video’s topic. You want people to click who want to watch the actual content of your video. Even if you manage to get some clicks by being mysterious, you’ll probably end up with low viewer retention because people are clicking away when they realize your video isn’t what they were looking for. That will make YouTube’s algorithm rank your video lower, and then even fewer people will find it.
If your video is a product review, show the product in the thumbnail and maybe even write ‘review’ on it. If your video is a makeup tutorial, show your face with the finished makeup and maybe even include pictures of the products you used. People want to know what they’re clicking on before they click.
#2. Use a Consistent Layout
As you grow, you’ll want people to be able to see one of your thumbnails and instantly know it’s yours. Building a recognizable brand is about consistency. Try to stick with one basic layout for all of your videos. You can still customize every individual thumbnail by using different facial expressions and different graphics, but try to use similar backgrounds, fonts, and general layouts (i.e. you to the right of the thumbnails, text to the left) over and over.
#3. Use Your Face
Why should people want to watch your videos? If the answer is ‘because I can teach them to create delicious food’ or ‘because they want to learn about the latest iPhone’ then your thumbnail should include that food or that iPhone.
If part of the reason people want to watch your videos is you – your personality and your sense of humor – then you should be in your thumbnail.
Viewers who are on YouTube because they like seeing a creator’s personality like to feel the presence of that personality in the video thumbnail, and eye contact naturally draws attention and clicks.
#4. Add Small Graphics
Adding small graphics, like emojis or hearts, to your thumbnail can help you stand out in a couple different ways. First, if they’re being compared to thumbnails that are just screenshots from the video, your thumbnails will look a lot more polished. Second, they’ll add a splash of color which can draw eyes to your video in a search where other thumbnails are not using those same colors.
#5. Your Text Should Be Huge
Your thumbnail will end up being a fraction of the size it is while you’re creating it in your thumbnail maker, and that means that any text you use will end up being shrunk down. You could probably type a six-word sentence in a size 18 font and have it look fine while you’re making your thumbnail, but after you upload it there’s no way people will be able to read it at a glance.
Aim for a huge font size, and 3 words or less (so your thumbnail doesn’t end up looking crowded).
#6. Check Out The Competition
Type your video’s title or topic into the search engine on YouTube and look at the thumbnails for the videos that come up. These are your competition. You want to make a thumbnail that is similar enough to what comes up that viewers know it’s on the same topic, but different enough that it stands out.
Generally, if most of the thumbnails have the same layout, you’ll want to mimic that layout. Where you can break from the crowd is in the colors, fonts, and graphics you use.
Part 5: Animated YouTube Thumbnails
Whether or not you upload a custom thumbnail to YouTube, YouTube’s A.I will choose what it thinks are the 3 juiciest seconds of your video (you cannot choose for yourself) and play them as a GIF-like animation when people mouseover your video thumbnails.
As of now, this only works in the Google Chrome desktop browser. Videos have to be at least 30 seconds long to get moving thumbnails.
Alright, now that you know everything about YouTube thumbnails, go make one! Tell us in the comments what you’re going to do to make your video thumbnails stand out.
Touch Up YouTube Videos with Effects & Elements in Filmora
As one of the most widely used video editing software in YouTube video editing, Filmora provides lots of templates and effects with an intuitive interface. Download the free trial version and get started now.
Richard Bennett
Richard Bennett is a writer and a lover of all things video.
Follow @Richard Bennett
Richard Bennett
Oct 26, 2023• Proven solutions
Search for any topic on YouTube and you’ll find thousands of videos. How do you decide which of them to watch? Thumbnails play a major role in what viewers decide to click on. They’re often more important than video titles.
Viewers click on thumbnails that both standout and feel relevant to their search. Your task when it comes to creating YouTube thumbnails is to make something that does both of those things while also maintaining your personal style.
- How to Make a YouTube Thumbnail
- How to Upload a YouTube Thumbnail
- YouTube Thumbnail Makers
- How to Make Thumbnails that Get Clicks (Without Clickbait!)
- Animated YouTube Thumbnails
Part 1: How to Make a YouTube Thumbnail
In order to create a custom video thumbnail, you’ll need a program to put it together in. You can use an image editing program like Photoshop if you have one, but if you don’t you can check out these free thumbnail makers.
Here are some examples of popular thumbnail styles.
1. The Classic Thumbnail (Photo or Screenshot)
A photo that shows what happens in your video – whether that means the finished ‘look’ from your makeup tutorial or you posing in front of the landmark you shot your travel vlog in front of – is a great way to let viewers know what to expect. While curiosity can be a big motive behind clicking on a video thumbnail (or anything online), when people have searched for a specific topic they want to be convinced that your video has what they’re looking for.
#1. Choose Your Photo
To start off, either choose a still frame from your video or take a photograph while you’re still set up from your video. A separate photograph is usually a better idea because your video editor might not be able to export a high-quality snapshot, and also because you’re able to choose your facial expression.
Aim to make this shot a close-up or medium close-up and make sure you’re either in the center of the screen or off to one side, as per the ‘rule of thirds’. Many cameras allow you to bring an optional grid up onto your viewfinder. This will divide your screen into three equal segments both vertically and horizontally. Try to make sure your eyes line up with the top line, and if you’re going to be off to one side then make sure you’re on one of the vertical lines. This will ensure your image is visually appealing.
If you want to add text later, it’s a good idea to be off to one side.
Including your face is important for most types of YouTube videos. People are attracted to eye contact and are more likely to click on thumbnails that feature a face. Gamers might choose to use a picture of a video game character instead and it will have the same effect.
Some situations where it isn’t essential to include your face include tech reviews, where viewers will be more interested in seeing the product, and cooking videos where people are looking to be tempted by a yummy food pic.
#2. Add Text and/or Images
This part isn’t essential – in some cases, a photo is enough – but a lot of the thumbnails for the videos ranked highest in YouTube’s search results include either a couple of words of text, a simple graphic (i.e. an emoji), or both.
In some cases you might use text to make it clear what type of video you’ve made, i.e. ‘review’ or ‘tutorial’. It’s best to keep any text you use brief, but you could get a bit more descriptive and write something like ‘fall makeup tutorial’. Three words is probably the most you can get away with. Remember that your text will be shrunk down with the rest of your image; you need to make it big enough to read easily once it’s shrunk, and that means you don’t have a ton of room for text.
You should also avoid fonts that are harder to read. Fonts with a lot of curves can be harder to read, and you want to make sure you choose a color that stands out from your background. Yellow might work against black, but it probably won’t work against the beige wall of your sunny bedroom. Sans serif fonts tend to be best.
Another tactic used in successful thumbnails is to add small graphics, like emojis or small images (i.e. pumpkins for a Halloween video), which are related to your video’s content. As with text, you don’t want to overload your thumbnail with images, but they’re a great way to add something eye-catching that’s a bit different from competing thumbnails.
2. The Emotional Laser (Background + Face Reacting)
One increasingly popular style of YouTube thumbnail is what we’re going to call the ‘Emotional Laser’. It’s bright (like, blindingly bright), it communicates a clear feeling, and it creates high expectations for how exciting the video’s content is going to be.
The three main elements of the Emotional Laser thumbnail are a background (usually bright), your face on the right wearing an over-pronounced expression, and either the thing your expression is in reaction to (i.e. food, a product, the topic of your video in text) or reinforcement of your emotion (i.e an emoji or question marks) on the left.
#1. Ham It Up (Take Your Reaction Photo)
Take a high-quality photograph of yourself conveying strong emotion. Generally, you want to look extremely excited, disgusted, angry, or shocked depending on the theme of the video.
If there’s an object you want to include in your thumbnail, like a product you’ll be talking about, then it’s a good idea to hold it for this photo. Hold it to one side of your head, turn towards it slightly (but not so much that the camera can only see the side of your face) and put on the expression that’s supposed to be a reaction to the object.
It can be a good idea to take this photo in front of a solid color so you can remove the background easily with chroma key.
#2. Choose Your Background
Your background might be scenery, a solid color, or even the room you filmed the video in. Light or bright colors are popular. Make sure there’s nothing that will distract from your expression. If your background is a room, or anything else where there could be things like pictures hanging, you may want to add a blur effect in the next step.
#3. Put It Together
In your thumbnail maker or a program like Photoshop, you’ll need to put your photo and your background together. This will work differently depending on what program you use. If your program has a chroma key tool and your reaction photo was taken against a solid color then you can make that solid color transparent.
What if I don’t have a separate background? If you don’t have a background you want to use, but you still want your reaction to stand out the same way it would if you did, then you can use your photo editor’s blur tool to turn the normal background of your photo into something you can pop-out from.
#4. Add Extras (Text, Emojis, etc.)
If instead of an object you plan to fill the other side of your thumbnail with text, question marks, emojis, or some other graphic element then now is the time to add it.
Part 2: How to Upload a YouTube Thumbnail
When you upload a new video to YouTube, you will see a Custom thumbnail option under Video thumbnails after your upload is complete.
If you want to add a custom thumbnail to a video that’s already up, that’s easy too.
- Go to your Video Manager in the Creator Studio.
- Find the video you want to change the thumbnail for and click Edit next to it.
- Click Custom thumbnail on the right of the preview screen.
- Upload your thumbnail and click Save changes.
Remember when you’re uploading custom thumbnails that you need to use a .JPG, .GIF, .BMP, or .PNG image with an aspect ratio of 16:9 and that your file size has to be under 2MB.
YouTube recommends that thumbnail images have a resolution of 1280x720px, and you cannot upload an image with a width of less than 640 pixels.
Make sure that all of your thumbnails adhere to YouTube’s Community guidelines. Anything sexually suggestive, violent, or otherwise graphic could result in your video being age-restricted.
Part 3: YouTube Thumbnail Makers
You don’t have to go out and buy a photo editor like Photoshop to make custom video thumbnails (although it’s a good thing to use if you already have it). Here are two free online programs you can use instead:
Canva is an intuitive option with templates for Thumbnails, Channel Art, and other social media graphics. There are stock photos and graphics provided, but not all of them are free (paid options cost $1 each). Canva’s templates do tend to include paid resources, so you may want to use them mostly for their layouts or as inspiration and replace everything they provide with your own images.
Generally, using Canva is as easy as dragging and dropping things where you want them. You’ll be able to set the dimensions for your project so the image you export is a perfect size. Adding text and changing the size, font, or color is easy too.
Adobe Spark also has templates for channel art, and it’s also very easy to use. The first time you use it helpful notes will pop up to guide you through the process. Using templates is especially simple because you just click on the elements in the pre-made thumbnail and replace them with your own photos/text.
You can make changes to the colors in your Spark thumbnail easily by selecting a new color scheme or filter. You can even toggle through layouts easily. When you choose a new layout, Spark will rearrange all the pieces of your current thumbnail to align with the new layout so you can quickly see what it looks like instead of having to rebuild.
Click to check more YouTube thumbnail makers
Part 4: How to Make Thumbnails That Get Clicks (Without Clickbait!)
Here are the top 10 best practices for creating effective YouTube thumbnails:
#1. Show What Your Video Is About
Being mysterious and clickbaity can get you views, if you’re already big. For small YouTubers, it pays off to be clear about your video’s topic. You want people to click who want to watch the actual content of your video. Even if you manage to get some clicks by being mysterious, you’ll probably end up with low viewer retention because people are clicking away when they realize your video isn’t what they were looking for. That will make YouTube’s algorithm rank your video lower, and then even fewer people will find it.
If your video is a product review, show the product in the thumbnail and maybe even write ‘review’ on it. If your video is a makeup tutorial, show your face with the finished makeup and maybe even include pictures of the products you used. People want to know what they’re clicking on before they click.
#2. Use a Consistent Layout
As you grow, you’ll want people to be able to see one of your thumbnails and instantly know it’s yours. Building a recognizable brand is about consistency. Try to stick with one basic layout for all of your videos. You can still customize every individual thumbnail by using different facial expressions and different graphics, but try to use similar backgrounds, fonts, and general layouts (i.e. you to the right of the thumbnails, text to the left) over and over.
#3. Use Your Face
Why should people want to watch your videos? If the answer is ‘because I can teach them to create delicious food’ or ‘because they want to learn about the latest iPhone’ then your thumbnail should include that food or that iPhone.
If part of the reason people want to watch your videos is you – your personality and your sense of humor – then you should be in your thumbnail.
Viewers who are on YouTube because they like seeing a creator’s personality like to feel the presence of that personality in the video thumbnail, and eye contact naturally draws attention and clicks.
#4. Add Small Graphics
Adding small graphics, like emojis or hearts, to your thumbnail can help you stand out in a couple different ways. First, if they’re being compared to thumbnails that are just screenshots from the video, your thumbnails will look a lot more polished. Second, they’ll add a splash of color which can draw eyes to your video in a search where other thumbnails are not using those same colors.
#5. Your Text Should Be Huge
Your thumbnail will end up being a fraction of the size it is while you’re creating it in your thumbnail maker, and that means that any text you use will end up being shrunk down. You could probably type a six-word sentence in a size 18 font and have it look fine while you’re making your thumbnail, but after you upload it there’s no way people will be able to read it at a glance.
Aim for a huge font size, and 3 words or less (so your thumbnail doesn’t end up looking crowded).
#6. Check Out The Competition
Type your video’s title or topic into the search engine on YouTube and look at the thumbnails for the videos that come up. These are your competition. You want to make a thumbnail that is similar enough to what comes up that viewers know it’s on the same topic, but different enough that it stands out.
Generally, if most of the thumbnails have the same layout, you’ll want to mimic that layout. Where you can break from the crowd is in the colors, fonts, and graphics you use.
Part 5: Animated YouTube Thumbnails
Whether or not you upload a custom thumbnail to YouTube, YouTube’s A.I will choose what it thinks are the 3 juiciest seconds of your video (you cannot choose for yourself) and play them as a GIF-like animation when people mouseover your video thumbnails.
As of now, this only works in the Google Chrome desktop browser. Videos have to be at least 30 seconds long to get moving thumbnails.
Alright, now that you know everything about YouTube thumbnails, go make one! Tell us in the comments what you’re going to do to make your video thumbnails stand out.
Touch Up YouTube Videos with Effects & Elements in Filmora
As one of the most widely used video editing software in YouTube video editing, Filmora provides lots of templates and effects with an intuitive interface. Download the free trial version and get started now.
Richard Bennett
Richard Bennett is a writer and a lover of all things video.
Follow @Richard Bennett
The Roadmap to Captivating Music Visuals: Lyric Video Maker Guidebook
Best Lyric Video Makers You Should Try
Richard Bennett
Mar 27, 2024• Proven solutions
“We were childhood friends and still in contact for more than 20 years. It’s her birthday next week, and I wish my gift to be a special one making a video of moments we cherished together. I have viewed many free lyric video makers, but I wish to create one on my own with customized lyrics. Where can I find one?”
Are you willing to make an incredible lyric video for your friend for his/her birthday? Ever thought of making a video representing all the memorable moments you both shared for years? Or are you confused about how to make a stunning lyric video to share on social media platforms?
No worries as we are here.
At present, various free lyric video makers in the market make this task a piece of cake. While choosing the best one creates a space of confusion, we have some of the recommended lyric video creators lined-up in today’s article for your help. Scroll down and get to know them!
- Part 1: Benefits of Making Lyric Videos
- Part 2: Excellent Lyric Video Maker for PC and Mobile
- Part 3: How to Make a Stunning Lyric Video with Filmora
Benefits of Making Lyric Videos
For Win 7 or later (64-bit)
 Secure Download
For macOS 10.12 or later
Secure Download
At present, lyric videos are rocking the music industry due to their unique benefits. Many artists are now making their composed music song videos and sharing it on their social media platform, like the YouTube page.
First of all, the lyric videos are affordable as well as attractive. There are many boring or outrageous videos on YouTube. When viewers feel the videos aren’t attention-grabbing, fans become less, and the subscribers reduce. However, the lyrical videos are enjoyable, cheaper to produce, and every single video is unique.
Viewers come to know about the lyrics behind the song while listening to them. Additionally, they are the way of creating momentum proceeding to the release of the official or original video in the film industry.
Every lyric video has a creative background that leaves no space for a dreary mood. Lyrical videos are simple and easy ones to understand. To make a good lyric video, you have to do it on your own. One can get help from the free lyric video maker tools and become an expert in it. To know about the tools slide over.
Excellent Lyric Video Maker for PC and Mobile
Such a lyric video creating process is preferred by the one who is a well-known artist and can afford music video productions. An ordinary person who wishes to make an excellent lyric video can now rejoice because the world has changed a lot. Here are some of the recommended lyric video makers for both PC and Mobile that will be of great help.
Recommended Lyric Video Software for PC
It’s time to empower your imagination with top lyric video maker software for PC that is none other than Filmora and VSDC video editor. With a user-friendly interface, high-quality output, and precise cutting-edge technology, there are two highly recommended picks exclusively.
1. Filmora
For Win 7 or later (64-bit)
Secure Download
For macOS 10.12 or later
Secure Download
Filmora is the software platform developed and introduced by Wondershare primarily intended for video creation and edition. The feature set of Filmora empowers your imagination and helps you to create without limits. While there are infinite ways to express your creativity, discover a refined look with an endless effect in Filmora. Filmora aids in building complex stories with royalty-free video effects, audio, and stock media.
Beyond basic, it’s now time to craft and enter the new world by crafting layering clips, add-ons like green screen effects. When it comes to perfection, Filmora is the best at it with keyframing, background noise removal, and still a lot more. With 4K support technology, Filmora ensures that all the frames are crisp as well as clear as reality.
Features
- Fast processing, adjustable preview quality, and proxy files.
- It helps in fixing cam problems like fisheye and camera shake.
- Fine-tune up your creation and add effects like slow motion, reverse.
- In one-click, change the aesthetic of your video with in-built creative filters, and 3D LUTs.
- Tailor your video and get them uploaded to any social media page with Filmora.
2. VSDC Video Editor
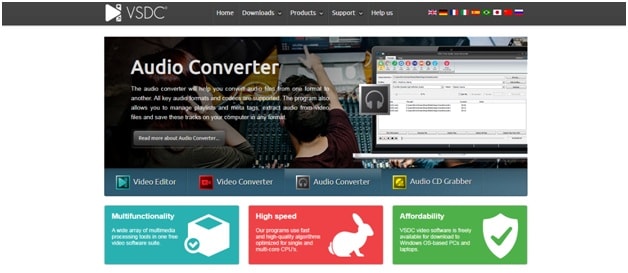
Next to Filmora, here is the VSDC video editor tool that is a free lyric video maker, user-friendly tool, and mighty in carrying out all your video related editing works like lyric video making. Besides video editing, VSDC act as a video converter, audio converter, and Audio CD Grabber.
Suited for both professionals and newbie’s, VSDC helps attain professional-level videos supporting multiple layers of the blend, and synchronization. Starting from mp3 to AVI, all popular audio/video formats are supported as well as converted. Color correction, 360 video editing, charts, zoom tools, convenient export profiles, split-screen effect, picture-in-picture, and hardware acceleration are an additional must to be specified features of VSDC video editor.
Features
- VSDC is a single tool with multiple functionalities that allow an array of multimedia processing.
- With optimized, high-quality algorithms for single and multi-core CPUs, the task done is at a high speed of exceptional quality.
- VSDC video editor is free of cost tool that can be downloaded readily on your desktop to get the job done.
- Removal of green background is made possible with the powerful Chroma Key tool of VSDC.
- Transitions, filters, and trendy video effects are available in VSDC as well.
Recommended Lyric Video Maker App for Mobile
Searching for a lyric video maker app for your Android or iOS device? While there are lyric video creator software platforms for PC, there are some of the recommended lyric video maker apps. As top picks, we have Filmora, and Music video maker, especially for your convenience that makes your video editing process hassle-free.
1. Filmora
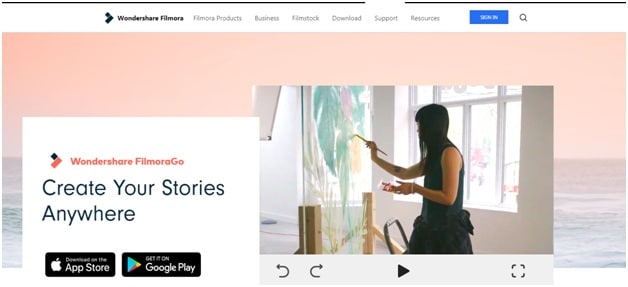
Like Filmora, here is Filmora from the Wondershare organization that aids in video editing anytime, anywhere, for free. With reliability to Android and iOS devices, Filmora comes up with easy-to-use editing features with all essential tools to get an original video as per your taste.
Filmora uplifts your video to the next level with magical effects, including filters, and a unique way of representing text. Exposure to royal-free music, favorite song addition of your choice, in-built sound library, and impressive voiceover options make the Filmora the best recommended lyric video maker app.
Features
- Trim, split and add transitions to your video to make them perfect.
- Add effects like the best aspect ratio, reverse effects, speeding up, and slow-motion effects.
- Let’s add some fun and crazy effects to your creation with stickers in a single tap.
2. Music Video Maker
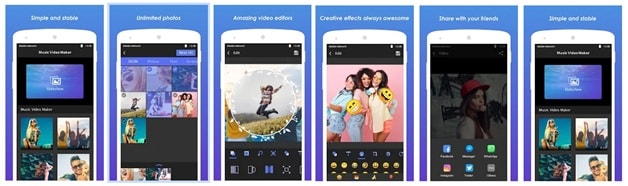
Our next free lyric video maker is the Music video maker that lets one create videos and a slideshow with just photos. It consists of all essential tools to create videos and movies, in turn sharing them online.
With Music video maker, creating montages is made a more manageable job where processing and sharing are at a faster rate. The video range or the photo compilation is not restricted to the file size leading to add-ons like music, text, hyper speed, motion effects, frames, adorable background, and themes.
Features
- This free video editing and creation app come with a user-friendly interface.
- Access to a wide range of in-built editing options to tell stories quickly.
How to Make a Stunning Lyric Video with Filmora
Here is the guide to creating an adorable lyric video with Filmora.
**Step 1:**Launch the Filmora software on your desktop. Navigate to the primary window.
**Step 2:**Now, drag-and-drop the video into the screen. You can use the “Import” option to upload the video to which you want to add the lyrics.
**Step 3:**The videos will now get imported successfully to which you want to add the lyrics.
**Step 4:**Mark the starting of the video by clicking on the icon from the toolbox.
**Step 5:**To add a title to the video, from the left corner, click on the “title” option, and type your video title. You can customize the font settings as per your wish from the title bar.
**Step 6:**In the line track at the bottom, stretch the text layer until the first lyric should appear and mark it again. Then, you can also enter the second line of lyrics in the text box.
**Step 7:**Once all the lyrics get typed for the video, you will see the lyrics’ preview added with a pop-up.
**Step 8:**Hurray! You created a video with the top-most lyric video maker - Filmora. Click on the “Save” option to finish the task.
Conclusion
While creating a lyric video was harder, and time-consuming in the past, the lyric video maker app discussed here are of great assistance. With platforms like VSDC, you can easily create your video at free of cost and share it with your friends. Filmora, the ultimate tool for video creation and edition suits to be the best platform making your video outstanding, stands as the highlight.
Creating a great lyric video for your friend is good to hear, and I am sure that your friends will like it a lot. So, what are you waiting for, download your favorite lyric video maker today and get started!
For Win 7 or later (64-bit)
Secure Download
For macOS 10.12 or later
Secure Download
Richard Bennett
Richard Bennett is a writer and a lover of all things video.
Follow @Richard Bennett
Richard Bennett
Mar 27, 2024• Proven solutions
“We were childhood friends and still in contact for more than 20 years. It’s her birthday next week, and I wish my gift to be a special one making a video of moments we cherished together. I have viewed many free lyric video makers, but I wish to create one on my own with customized lyrics. Where can I find one?”
Are you willing to make an incredible lyric video for your friend for his/her birthday? Ever thought of making a video representing all the memorable moments you both shared for years? Or are you confused about how to make a stunning lyric video to share on social media platforms?
No worries as we are here.
At present, various free lyric video makers in the market make this task a piece of cake. While choosing the best one creates a space of confusion, we have some of the recommended lyric video creators lined-up in today’s article for your help. Scroll down and get to know them!
- Part 1: Benefits of Making Lyric Videos
- Part 2: Excellent Lyric Video Maker for PC and Mobile
- Part 3: How to Make a Stunning Lyric Video with Filmora
Benefits of Making Lyric Videos
For Win 7 or later (64-bit)
Secure Download
For macOS 10.12 or later
Secure Download
At present, lyric videos are rocking the music industry due to their unique benefits. Many artists are now making their composed music song videos and sharing it on their social media platform, like the YouTube page.
First of all, the lyric videos are affordable as well as attractive. There are many boring or outrageous videos on YouTube. When viewers feel the videos aren’t attention-grabbing, fans become less, and the subscribers reduce. However, the lyrical videos are enjoyable, cheaper to produce, and every single video is unique.
Viewers come to know about the lyrics behind the song while listening to them. Additionally, they are the way of creating momentum proceeding to the release of the official or original video in the film industry.
Every lyric video has a creative background that leaves no space for a dreary mood. Lyrical videos are simple and easy ones to understand. To make a good lyric video, you have to do it on your own. One can get help from the free lyric video maker tools and become an expert in it. To know about the tools slide over.
Excellent Lyric Video Maker for PC and Mobile
Such a lyric video creating process is preferred by the one who is a well-known artist and can afford music video productions. An ordinary person who wishes to make an excellent lyric video can now rejoice because the world has changed a lot. Here are some of the recommended lyric video makers for both PC and Mobile that will be of great help.
Recommended Lyric Video Software for PC
It’s time to empower your imagination with top lyric video maker software for PC that is none other than Filmora and VSDC video editor. With a user-friendly interface, high-quality output, and precise cutting-edge technology, there are two highly recommended picks exclusively.
1. Filmora
For Win 7 or later (64-bit)
Secure Download
For macOS 10.12 or later
Secure Download
Filmora is the software platform developed and introduced by Wondershare primarily intended for video creation and edition. The feature set of Filmora empowers your imagination and helps you to create without limits. While there are infinite ways to express your creativity, discover a refined look with an endless effect in Filmora. Filmora aids in building complex stories with royalty-free video effects, audio, and stock media.
Beyond basic, it’s now time to craft and enter the new world by crafting layering clips, add-ons like green screen effects. When it comes to perfection, Filmora is the best at it with keyframing, background noise removal, and still a lot more. With 4K support technology, Filmora ensures that all the frames are crisp as well as clear as reality.
Features
- Fast processing, adjustable preview quality, and proxy files.
- It helps in fixing cam problems like fisheye and camera shake.
- Fine-tune up your creation and add effects like slow motion, reverse.
- In one-click, change the aesthetic of your video with in-built creative filters, and 3D LUTs.
- Tailor your video and get them uploaded to any social media page with Filmora.
2. VSDC Video Editor
Next to Filmora, here is the VSDC video editor tool that is a free lyric video maker, user-friendly tool, and mighty in carrying out all your video related editing works like lyric video making. Besides video editing, VSDC act as a video converter, audio converter, and Audio CD Grabber.
Suited for both professionals and newbie’s, VSDC helps attain professional-level videos supporting multiple layers of the blend, and synchronization. Starting from mp3 to AVI, all popular audio/video formats are supported as well as converted. Color correction, 360 video editing, charts, zoom tools, convenient export profiles, split-screen effect, picture-in-picture, and hardware acceleration are an additional must to be specified features of VSDC video editor.
Features
- VSDC is a single tool with multiple functionalities that allow an array of multimedia processing.
- With optimized, high-quality algorithms for single and multi-core CPUs, the task done is at a high speed of exceptional quality.
- VSDC video editor is free of cost tool that can be downloaded readily on your desktop to get the job done.
- Removal of green background is made possible with the powerful Chroma Key tool of VSDC.
- Transitions, filters, and trendy video effects are available in VSDC as well.
Recommended Lyric Video Maker App for Mobile
Searching for a lyric video maker app for your Android or iOS device? While there are lyric video creator software platforms for PC, there are some of the recommended lyric video maker apps. As top picks, we have Filmora, and Music video maker, especially for your convenience that makes your video editing process hassle-free.
1. Filmora
Like Filmora, here is Filmora from the Wondershare organization that aids in video editing anytime, anywhere, for free. With reliability to Android and iOS devices, Filmora comes up with easy-to-use editing features with all essential tools to get an original video as per your taste.
Filmora uplifts your video to the next level with magical effects, including filters, and a unique way of representing text. Exposure to royal-free music, favorite song addition of your choice, in-built sound library, and impressive voiceover options make the Filmora the best recommended lyric video maker app.
Features
- Trim, split and add transitions to your video to make them perfect.
- Add effects like the best aspect ratio, reverse effects, speeding up, and slow-motion effects.
- Let’s add some fun and crazy effects to your creation with stickers in a single tap.
2. Music Video Maker
Our next free lyric video maker is the Music video maker that lets one create videos and a slideshow with just photos. It consists of all essential tools to create videos and movies, in turn sharing them online.
With Music video maker, creating montages is made a more manageable job where processing and sharing are at a faster rate. The video range or the photo compilation is not restricted to the file size leading to add-ons like music, text, hyper speed, motion effects, frames, adorable background, and themes.
Features
- This free video editing and creation app come with a user-friendly interface.
- Access to a wide range of in-built editing options to tell stories quickly.
How to Make a Stunning Lyric Video with Filmora
Here is the guide to creating an adorable lyric video with Filmora.
**Step 1:**Launch the Filmora software on your desktop. Navigate to the primary window.
**Step 2:**Now, drag-and-drop the video into the screen. You can use the “Import” option to upload the video to which you want to add the lyrics.
**Step 3:**The videos will now get imported successfully to which you want to add the lyrics.
**Step 4:**Mark the starting of the video by clicking on the icon from the toolbox.
**Step 5:**To add a title to the video, from the left corner, click on the “title” option, and type your video title. You can customize the font settings as per your wish from the title bar.
**Step 6:**In the line track at the bottom, stretch the text layer until the first lyric should appear and mark it again. Then, you can also enter the second line of lyrics in the text box.
**Step 7:**Once all the lyrics get typed for the video, you will see the lyrics’ preview added with a pop-up.
**Step 8:**Hurray! You created a video with the top-most lyric video maker - Filmora. Click on the “Save” option to finish the task.
Conclusion
While creating a lyric video was harder, and time-consuming in the past, the lyric video maker app discussed here are of great assistance. With platforms like VSDC, you can easily create your video at free of cost and share it with your friends. Filmora, the ultimate tool for video creation and edition suits to be the best platform making your video outstanding, stands as the highlight.
Creating a great lyric video for your friend is good to hear, and I am sure that your friends will like it a lot. So, what are you waiting for, download your favorite lyric video maker today and get started!
For Win 7 or later (64-bit)
Secure Download
For macOS 10.12 or later
Secure Download
Richard Bennett
Richard Bennett is a writer and a lover of all things video.
Follow @Richard Bennett
Also read:
- 2024 Approved How to Change YouTube Video Playback Speed [Desktop/Mobile]
- Unveiling the Ultimate List of Budget-Friendly Video Editors
- The Dual Approach – Mastering Two-Point of View Techniques in Your YouTube Reaction Video Content
- 2024 Approved Epic YouTube Playback Stories
- Top 10 Digital Yoga Spaces Boosting Well-Beranking
- 2024 Approved Engaging Audiences with Effective Haul Video Strategies
- Elevating Video Revenue YouTube's Path for 2024
- A Step-by-Step Approach to Discard YouTube Watch Later Items for 2024
- In 2024, Efficiency in Conversion A Compact List of the Top 10 Video Transformers
- Discover How to Design Dynamic YouTube Music Playlists
- [Updated] Enhancing Your Visual Mark Implementing Neon-Edged YouTubes
- 2024 Approved Essential Insights How to Choose Among the Top 9 Free YouTube Makers
- Converting Spotify Playlist Content for YouTube Music Compatibility
- Discovering & Perfecting Your Individual Style
- YouTube Monetization Techno Gamerz YouTube Income 2024
- In 2024, Blogging Basics for Business Beginnings
- Elevate Your Video Productions 15 Top-Tier Free Music Websites for 2024
- Ajey's Path to Prosperity Monetizing His Online Presence for 2024
- EpicEditor Hub Innovative PC Cutting with Tunes
- 2024 Approved A Deep Dive Into YouTube View Counts and More
- [Updated] 10+ Top FREE YouTube Image Extractors
- In 2024, Chuckle Trail Your Guide to Hilarious Online Stars
- Everything You Need to Succeed with YouTube Short Videos
- In 2024, Creating Professional Edits Using YouTube Studio Editor
- Achieve Wider Exposure by Transferring Twitch Broadcasts to YouTube
- Unlocking Earnings The Mean Daily Pay From YouTube AdSense per K Viewers
- Tackling the Zero View Conundrum Strategies for YouTube Success
- 2024 Approved Every Creator's Guide to YouTube Revenue
- [New] Endless Entertainment The Science Behind YouTube Loops
- [New] Decision-Making in the Workplace A Neurological Approach to Efficacy and Ethics
- In 2024, Audiovisual Rhythm Optimal DJ Content for Gatherings
- 2024 Approved Top 10 YouTube Video Trimmers Online
- Crafting an Engaging Online Presence The Complete Guide to YouTube Submissions
- From Zero to Hero in YouTubing Equipment Essentials
- In 2024, Discovering Best Phone-Based ASMR Experiences
- [New] Dive Deep Into Designing Dynamic YouTube Live Thumbnails
- In 2024, DIY Video Setups Perfect Self-Portraits for YouTubers
- [Updated] Breaking Down the Most Influential YouTube Personalities
- In 2024, Crafting Motivational Life Vlogs for Fan Engagement
- Effortless Media Incorporation YouTube to Slides for 2024
- In-Depth Analysis of Best YouTube Channel Design Practices
- Maximizing Reach Understanding Tag Importance for Videos
- [Updated] Audience Wave Top Hash Tags to Swell Youtube Views
- [Updated] Break Through Noise Effective Utilization of Video Templates
- From Obscurity to Stardom Trendsetting Tactics for Videos
- [Updated] Designing Effective Video Previews for Channels
- Best Budget Edits 8 No-Charge Video Editing Software for 2024
- Elevating Your Unboxing Channel A Complete How-To for 2024
- Beat Buzzers Up-and-Coming Background Scores For YT Shorts for 2024
- [Updated] The Quest for Perfect Playback APS4 Capturing Essentials for Enthusiasts
- In 2024, How to Unlock Poco C65 Phone Pattern Lock without Factory Reset
- Updated 2024 Approved Mobile Animation Made Easy Top Free 3D Apps for Beginners
- [Updated] In 2024, Elevated Practices to Record Computer Display with TV Broadcasts
- [Updated] Pro's Guide to FREE Screen Recording on Mac Devices for 2024
- In 2024, How to Change Netflix Location to Get More Country Version On Motorola Moto G84 5G | Dr.fone
- [New] 2024 Approved Navigating Video Upload Procedures on Chrome Devices
- In 2024, Easy Video Flipping Tips and Tricks for a Pro-Look
- [New] 2024 Approved Mastering the Stitch for Immersive TikTok Experienines
- In 2024, Captivating HDR Portraits for the Art Enthusiast
- [Updated] In 2024, From Observing to Involved The TikTok Life Journey
- In 2024, Digest This Top #Tiktok Gastronomic Gems
- Thorough Review Easy Approach to HDR Enhancement
- How to use Pokemon Go Joystick on Motorola Defy 2? | Dr.fone
- [Updated] The OBS Strategy for High-Quality Skype Screens for 2024
- Set Your Preferred Job Location on LinkedIn App of your Huawei P60 | Dr.fone
- Inside Clubhouse Dissecting Its Core Ethos, Features, and Significance in the Modern Era for 2024
- A Detailed Guide on Faking Your Location in Mozilla Firefox On Oppo K11 5G | Dr.fone
- [Updated] In 2024, Translate Speech to Text with Ultimate Accuracy, Thanks to Google
- For New GoPro Users, Here Are Essential Accessories
- Social Media Synopsis Top Trending TwitVideos for 2024
- The Ultimate Guide to Samsung Galaxy S24 Ultra Pattern Lock Screen Everything You Need to Know
- New In 2024, Edit On-the-Go Top Mobile Video Editing Apps
- 4 Ways to Unlock iPhone SE (2020) to Use USB Accessories Without Passcode | Dr.fone
- New 2024 Approved Essential Tips for Shooting Talking Head Videos
- Exclusive 8 Video Download Utilities Guide for 2024
- In 2024, Top 5 Car Locator Apps for Motorola Moto G13 | Dr.fone
- 2024 Approved Premium Collaborative Workspaces Online
- New In 2024, Want to Clone Voices in Real-Time? Explore These GitHub Repositories
- [Updated] Communicating with Authority Power Words in Marketing
- [New] 2024 Approved Review & Alternatives Unveiled by AZ Screenshotter
- 6 Ways to Change Spotify Location On Your Honor Magic 5 | Dr.fone
- [New] The Ultimate Selection of 6 Pioneering Instagram Reel Apps
- [Updated] A Comprehensive Guide to Embellishing Images and Vids in Windows 10'S Photo App
- [New] 2024 Approved What to Expect From Your Instagram Experience Now
- [New] In 2024, Cross-Platform Chumming Discord Friend Guide
- [New] 2024 Approved Best Budget Switch Console Clones
- Archival Artifacts Radeon's Revamp for 2024
- New In 2024, Solemn Sonatas Classic Music Selections to Enhance Wedding Cinematography
- Beyond Inshot Essential Laptop Editing Tools for 2024
- 2024 Approved Proven Strategies for Device Screening
- [Updated] The Speedy Blueprint Collecting TikToks with Ease for 2024
- How to Transfer Data from Sony Xperia 1 V to Samsung Phone | Dr.fone
- In 2024, The Updated Method to Bypass ZTE Nubia Z60 Ultra FRP
- 2024 Approved PowerPoint Persona Establishing Your Presentation's Voice
- Title: "Thumbnails Unleashed Elevate Your Video Presence"
- Author: Steven
- Created at : 2024-05-25 20:34:23
- Updated at : 2024-05-26 20:34:23
- Link: https://youtube-clips.techidaily.com/thumbnails-unleashed-elevate-your-video-presence/
- License: This work is licensed under CC BY-NC-SA 4.0.
