
:max_bytes(150000):strip_icc()/han-ede3a766549143e8b4a9856b8128b17b.jpg)
"The Ultimate Voyage Guide From Novice to Esteemed Travel Blogger"
The Ultimate Voyage Guide: From Novice to Esteemed Travel Blogger
How To Become A Travel Vlogger | The Ultimate Guide of Travel Vlogging

Richard Bennett
Oct 26, 2023• Proven solutions
Want to become a travel vlogger?
Traveling around the world is one of life’s most exciting experiences – just ask anyone who has caught the travel bug. It is no wonder that travel videos are a big hit on YouTube. Any viewer can be instantly transported to another part of the world, all from the comfort of their seat.
With all the high-quality cameras and video editing software that are much more accessible to the general public now than even a few years ago, it has never been a better time to make a travel vlog.
Below, I have prepared a comprehensive guide on how to become a travel vlogger.
Create Your Travel Vlog with Wondershare FilmoraX
Wondershare FilmoraX is a video editing application that offers a lot of editing features that can be used both by a beginner and professionals alike. You can easily cut, split and trim your video, and apply transitions, filters, and texts, etc. to your travel vlog. What’s more, its advanced color grading settings and audio keyframing will add a unique flavor to your travel vlog. Just get started and make your video go viral!


PART 1: TRAVEL VLOGGING EQUIPMENT
In order to make travel videos, you’re going to need camera equipment. Below, I’ve prepared a comprehensive list of cameras and accessories that would be good for travel vlogging.
Filmstock Stock Media Library ](https://filmstock.wondershare.com/creative-theme-tourism?spm=rs.filmora%5Fweb&source%5Fchannel=seo%5Farticle )
1.1 Travel Vlogging Cameras
How To Choose A Vlogging Camera
When it comes to travel vlogging, you should look for a camera that ideally has the following eleven qualities:
- It has a fully articulated screen (flip screen)
- It has good continual autofocus while recording video
- It has good focus priority through face recognition
- It has touched to focus
- It has good low-light performance
- It has an external mic jack and a hot/cold shoe bracket
- It has optical image stabilization
- It is lightweight and portable
- It has a good battery life
- It is durable and weather-sealed
- It has hyper-lapse/timelapse/slow-motion shooting modes
For more information on why a lot of these features are ideal to have in a vlogging camera, check out my post on the Top 15 Best Cameras for Vlogging 2020 .
Cameras That Are Good For Travel Vlogging
Considering my list on what to look for in a travel vlogging camera, I’ve prepared a table below of thirteen cameras I’d recommend for travel vlogging:
| Camera | Release Date | Camera Type | Flip Screen | Mic Port | Price | |
|---|---|---|---|---|---|---|
| CanonEOSM50 | 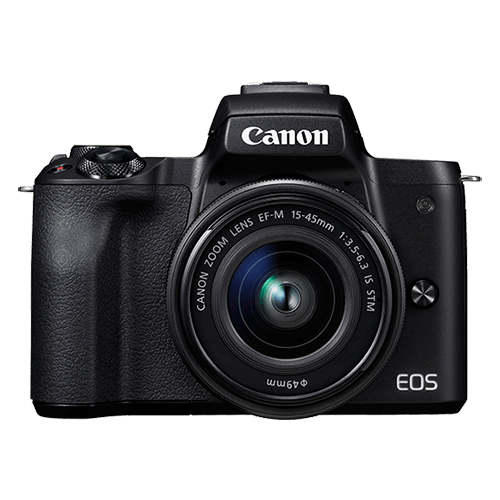 |
February2018 | Mirrorless | Fully Articulated | Yes | $- |
| PanasonicLumixDC-GH5S |  |
January2018 | Mirrorless | Fully Articulated | Yes | $$$ |
| GoProHero6 Black | 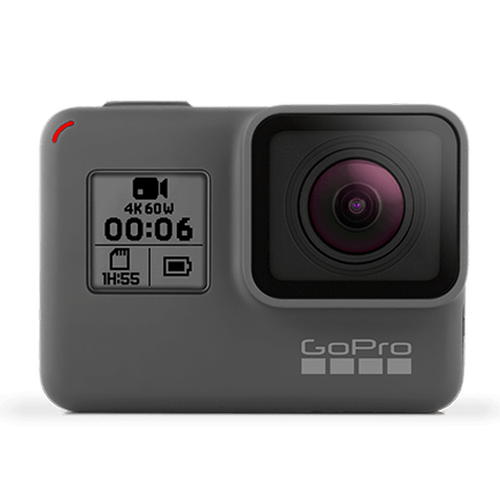 |
September2017 | Action Camera | No | Yes | $- |
| CanonEOSM100 | 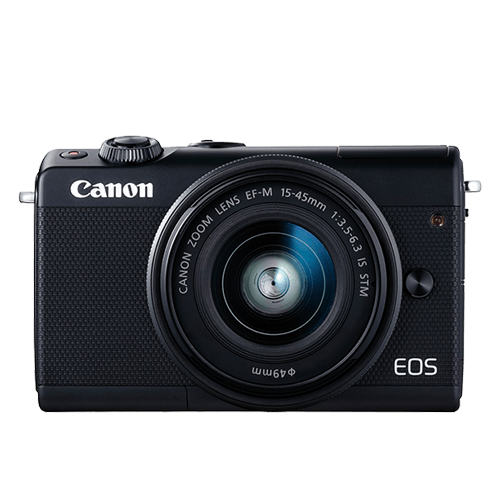 |
August2017 | Mirrorless | Flip-Up | No | $ |
| CanonEOS6D Mark II | 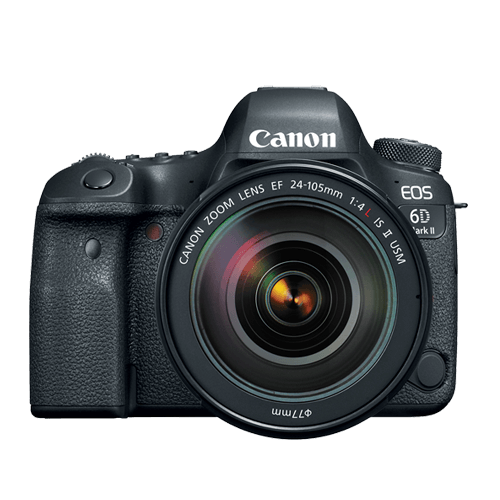 |
June2017 | Mid-size SLR | Fully Articulated | Yes | $$ |
| CanonEOS RebelSL2 | 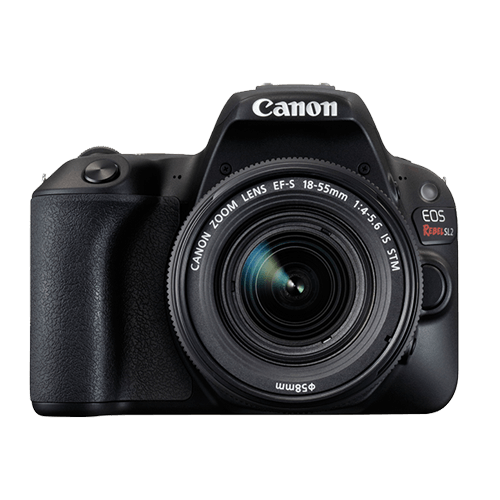 |
June2017 | Compact SLR | Fully Articulated | Yes | $ |
| CanonEOS RebelT7i | 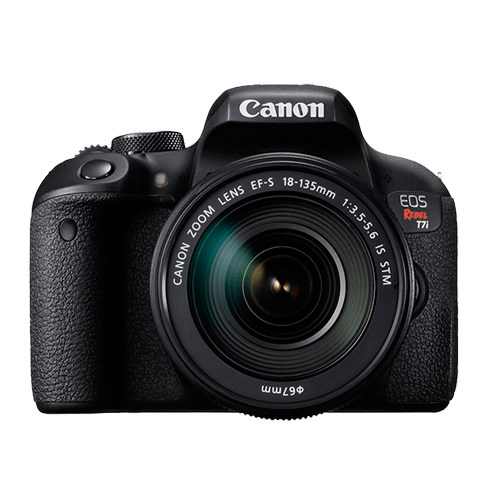 |
February2017 | Mid-size SLR | Fully Articulated | Yes | $- |
| CanonEOSM6 | 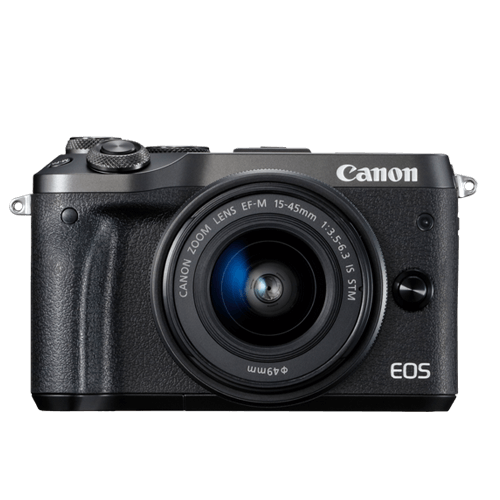 |
February2017 | Mirrorless | Flip-Up | Yes | $ |
| SonyCyber-Shot DSCRX 100 V | 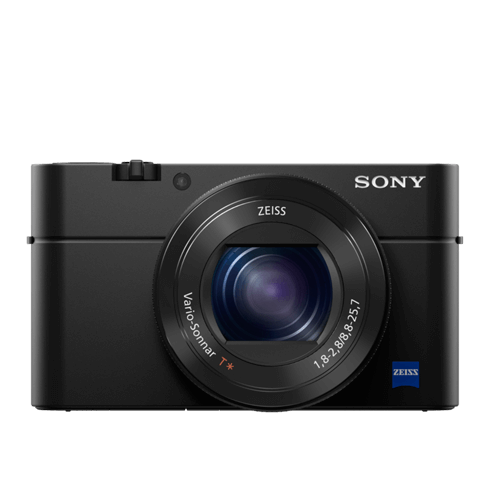 |
October2016 | Compact | Flip-Up | No | $- |
| PanasonicLumix DMCG85 |  |
September2016 | Mirrorless | Fully Articulated | Yes | $- |
| PanasonicLumix DMCLX10 |  |
September2016 | Compact | Flip-Up | No | $ |
| CanonEOS80D |  |
February2016 | Mid-size SLR | Fully Articulated | Yes | $$ |
| CanonPowerShotG7 X Mark II |  |
February2016 | Compact | Flip-Up | No | $ |
Lenses That Are Good For Travel Vlogging
Every travel vlogger should have a wide-angle lens. Wide-angle lenses fit much more of a scene into your camera frame, making it ideal for capturing establishing shots. You’ll also need a wide-angle lens if you plan on holding your camera out in front of yourself with an extended arm to get selfie footage.
As a travel vlogger, you’ll also want to show some close-up shots of the various subjects in your scene. If you don’t mind walking up to these subjects, the lens I recommend for this is a standard lens.
If, however, you want to be able to shoot these close-up shots from a farther distance, you’ll need a telephoto lens.
But you probably don’t want to carry and switch so many lenses as you travel, right? A convenient solution is to get a zoom lens that covers a wide range of focal lengths. For example, travel vlogger Sam Kolder shoots with a Canon EF 24-105mm f/4 lens – that’s a wide-angle lens, standard lens, and telephoto lens all in one lens!
If most of your travel video shooting will be done handheld, you should also definitely look for a lens equipped with optical image stabilization.
Check out my Best Camera Lens for YouTube to gain a more in-depth understanding of lenses and how they work.
1.2 Travel Vlogging Accessories
Camera Accessories That Are Good For Travel Vlogging
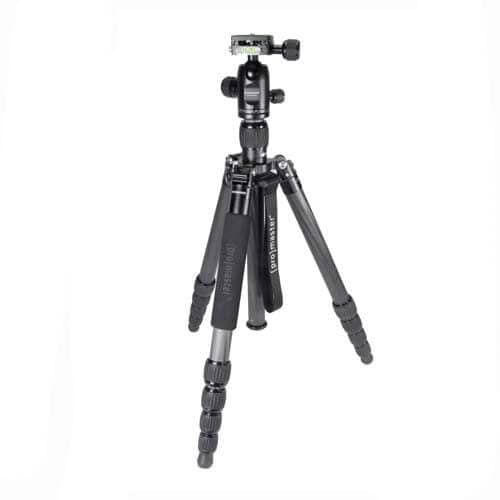 |
1. Tripod Record stabilized shots and timelapse footage with a tripod. |
|---|---|
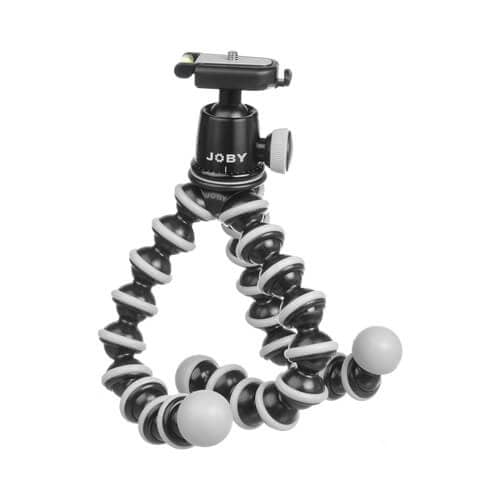 |
2. GorillaPod SLR-Zoom with Ballhead Wrap your camera around structures that your regular tripod can’t stay on. You can also hold out your camera further away from you using the GorillaPod as a selfie stick to fit in more of your background into your selfie shot. |
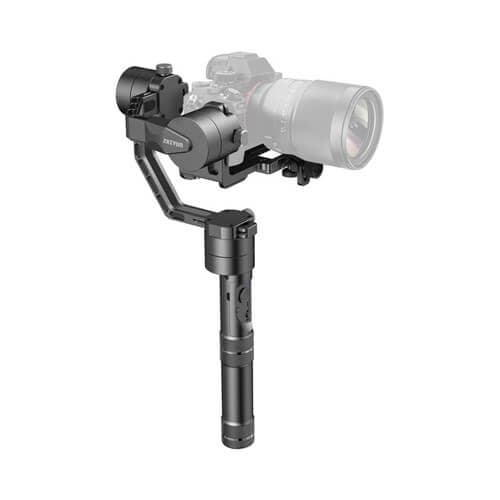 |
3. Stabilizing Gimbal Get super-smooth shots with a stabilizing gimbal. |
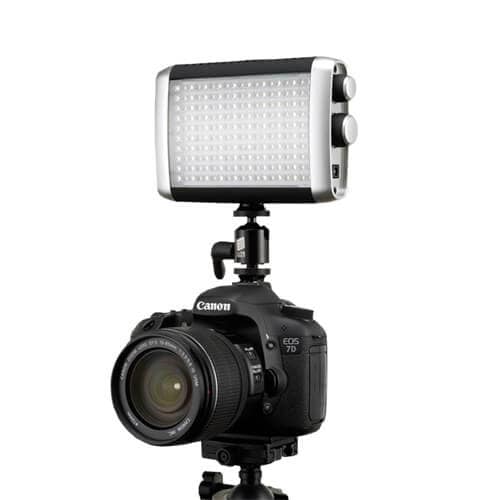 |
4. On-Camera LED Light Is there not enough light? Add an LED light to your camera’s hot/cold shoe. |
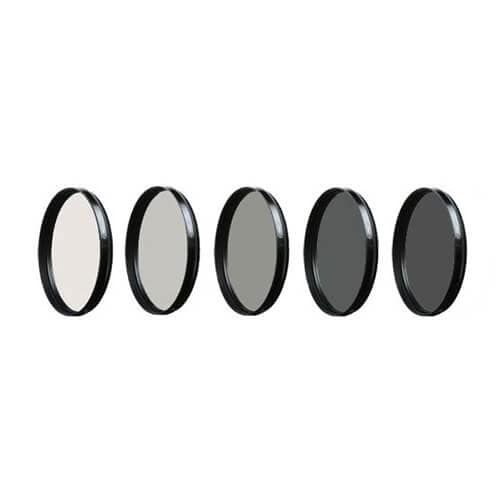 |
5. Neutral Density (ND) Filters Is it too bright outside to have your aperture wide open but you still want to get that cinematic look ? You can add ND filters to your lenses so that you can do just that in very bright conditions. |
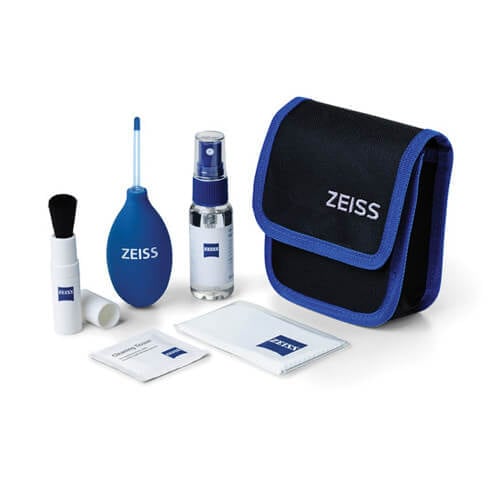 |
6. Camera Cleaning Kit While traveling, you can get all kinds of unwanted substances on your lens and in your camera like dust, dirt, fingerprints, raindrops, snow, and sand, to name a few. If you bring along a portable camera cleaning kit with you on your travels, you can remove those things immediately so that your shots won’t be affected. |
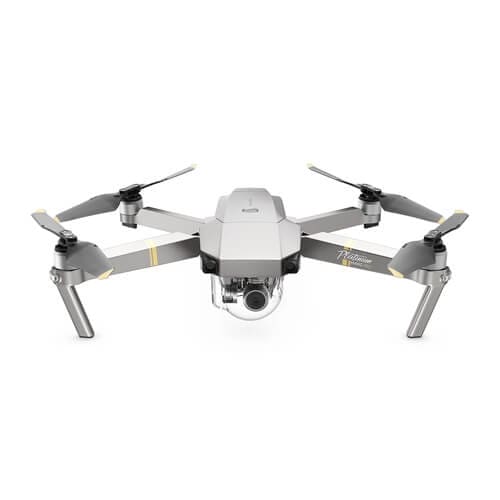 |
7. Drone When it comes to travel vlogging, wide shots that establish the scene and setting are important. Drones are great for taking these kinds of wide shots from high places that you would not be able to get to by foot. |
Smartphone Accessories That Are Good For Travel Vlogging
Using your smartphone as a travel vlogging device is a great idea! Your smartphone is a light and portable piece of equipment that you likely have with you at all times. Upgrade your smartphone travel vlogging setup with any of these 9 Best Smartphone Camera Accessories For Vloggers:
- RAVPower Portable Charger
- Arkon Tripod Mount
- Mega Tiny Anti-Gravity Case
- FLII Selfie Ring Light
- Rode VideoMic Me
- Aukey Optic 3-in-1 Smartphone Lens Set
- iOgrapher Go for Android and iPhone
- Manfrotto TwistGrip System
- Zhiyun Smooth-Q 3-Axis Handheld Gimbal Stabilizer for Smartphones
Read more about each one of these items in my post The 9 Best Smartphone Camera Accessories For Vloggers .
Camera Mounted Shotgun Microphones for Travel Vlogging
 |
 |
 |
 |
|---|
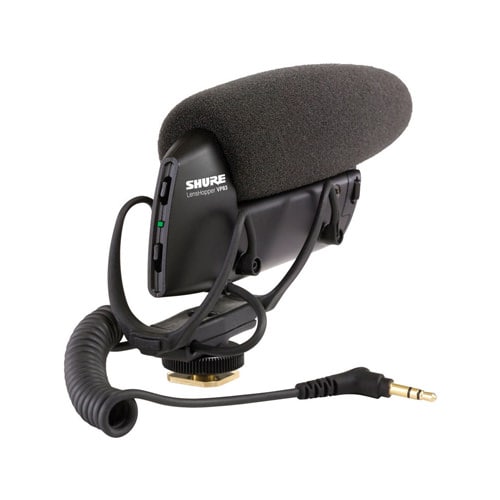
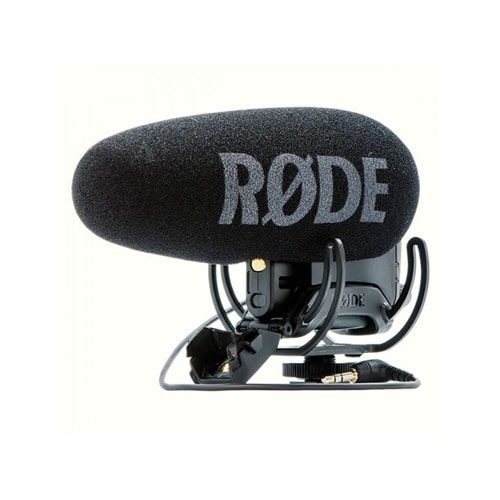
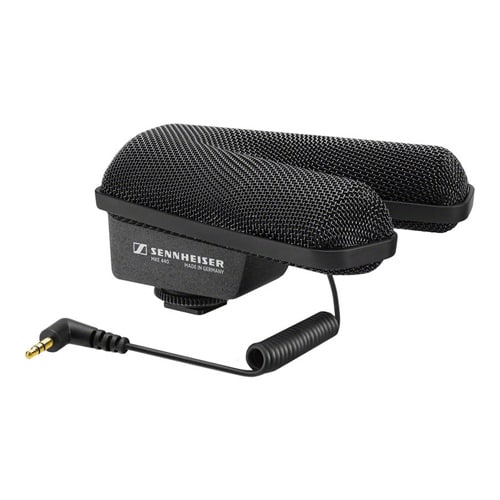
These four shotgun microphones can mount directly onto your camera’s hot/cold shoe:
- Rode VideoMic Go
- Shure VP83
- Rode VideoMic Pro+
- Sennheiser MKE 440
Read more about each one of them in our post about The 19 Best YouTube Microphones 2020 – Options for Music, Voiceovers, Vlogging, and more!
Other Useful Travel Vlogging Accessories
- Camera backpack
- Extra batteries
- Memory cards
- External hard drive
- Power plugs and cables
- USB card reader
- Universal plug
- D-ring clips (to prevent your equipment from slipping out of your grasp)
- Smartphone SD card tray key (if you’re storing your recorded footage in your SD card)
PART 2: TRAVEL VLOGGING IDEAS
If you’re needing some travel video ideas either to get you started or to bring some fresh content into your channel, here are ten travel video ideas that you can try.
1. Travel Vlog
Travel vlogging, the kind where you film yourself just going about your day in a different part of the world, is a great way to not only document your travel moments and memories for yourself, but also a great way to share your experience with others.
Rather than being too picky with your video shots and possibly ending up with a lack of footage to work with, shoot as much as you can.
Try to capture your thoughts and feelings around the things you taste, smell, see and hear. Sharing these details can help your viewers feel more like they’re with you on your travels.
2. Tips or Tricks for Traveling
Although learning from mistakes during your travels can be a rewarding experience, most people want to avoid them and, rather, enjoy their trip as much as they possibly can. After all, travel, for most people, happens in intervals that seem too short. You can help this sizable group by offering travel tips and tricks.
Prepare a list of tips and tricks, a shot list of all the footage you’ll need to go along with those tips, and then capture all your footage. As you go through your list, you can then cut away to your associated travel shots.
3. Video Tour of a Location
Many people are curious about different parts of the world and would love to join a tour without the high cost of flights, hotels, meals, and admission tickets. Give them that experience by making a video tour.
4. Review An Attraction or Experience
A lot of travelers having a limited amount of time and money to enjoy their chosen travel destinations want to know which attractions and experiences to prioritize and which ones to skip. Help them make their decision by making a video review.
5. Timelapse Videos
All you need in addition to your camera is a tripod to get started with making timelapse videos. Your tripod stabilizes your shot as your camera captures all the changes that take place in a given location.
When your footage is sped up, your viewers can appreciate all the changes that take place that they may not have had the patience to sit through in real-time. It’s also interesting to observe the passage of time in a different way.
6. Average Daily Cost
Before going on a trip, many people try to make a budget and figure out how much money to exchange into foreign currency. Making a good budget and getting just enough foreign cash, though, requires you to know how much, on average, things cost.
Make a helpful video on the average cost of daily expenses including meals and transportation like Paolo did in the above video “Average Daily Cost in Tokyo Japan | Is it Expensive?.” His video actually helped me a lot when I was trying to come up with a budget for my recent trip to Japan.
7. Interview Locals
People don’t travel only to see popular attractions. A lot of people travel to connect with and understand people from different parts of the world.
Interviewing locals and sharing their thoughts can help to provide that kind of connection.
8. What’s in My Backpack?
Packing for a trip can say a lot about who you are as a person because it involves prioritizing items based on your personal values.
For your next trip, share a little part of yourself with your audience through a video about the things you’ve packed in your bag.
9. Talk About Your Own Home City
When you’ve lived in your own home city for so long, you might forget that people all over the world may marvel at the things you take for granted because all those things just happen to be at your doorstep.
Take advantage of the expert that you already are in your own home city and make an informative video for others who are taking a trip there.
10. How To Become a Travel Vlogger
After you’ve done a lot of travel vlogging and learned so much along the way, you can make a video about how to be a travel vlogger.
In the above video, Andrew Santos teaches how to make a travel video, all while hilariously poking fun at many of the cliché trends in the travel genre.
PART 3: TRAVEL VIDEO EDITING
Video Editing Software
When it comes to editing your travel video together, there are different kinds of software you can do that with.
| FREE VIDEO EDITING SOFTWARE | PAID VIDEO EDITING SOFTWARE |
|---|---|
| OpenShot Video Editor (Windows, Mac, Linux) ShotCut (Windows, Mac, Linux) Hitfilm Express (Windows, Mac) VideoPad Video Editor (Windows) Lightworks (Windows, Mac, Linux) VSDC Video Editor (Windows) Machete Video Editor Lite (Windows) Avidemux (Windows, Mac, Linux, BSD) Read more about each software in our post about The Best Free Video Editing Software for YouTube – Top 8 Reviews . | Wondershare Filmora X (Windows, Mac) - start at $49.99 for one year license and Free trial Final Cut Pro (Mac) - $299.99, Free trial Vegas Movie Studio (Windows) - $49.99 |
Travel-Themed Video Effects
If you use Filmora Video Editor, you can also take advantage of a variety of travel-themed video effects packs, like the one shown in the above video, filled with titles, transitions, filters, overlays, and other visual elements.
For my recent trip to Japan, I actually used Filmora Effects’ Japanese set.
At the 2:10 mark of the above video, I used an overlay of falling cherry blossom leaves. At the 3:03 mark of the same video, I used an anime-themed overlay.
At the 2:48 mark of the above video, I used a shoji door transition.
Music Libraries
Music is an important component of a lot of travel videos. Here’s where you can get them:
| ROYALTY-FREE MUSIC LIBRARIES | PAID MUSIC LIBRARIES | PAID SUBSCRIPTION MUSIC LIBRARIES |
|---|---|---|
| Audionautix Bensound dig.ccMixter Free Music Archive Free Stock Music Incompetech Josh Woodward Moby Gratis Musopen Purple Planet Music TeknoAXE YouTube Audio Library | Premium Beat Audio Jungle | Audio Network Audio Blocks Epidemic Sound |
Sound Effects
Free Sound Effect Sites
PART 4: TRAVEL VLOGGING TIPS
Vlog/Life Balance
- Give yourself more time at each location if you want to have a good balance between getting the shots you need and enjoying your present moment.
Theft Prevention
- Carry a backpack that doesn’t have zippers on the outside that thieves can easily get to.
- If you’re shooting with a flashy smartphone, make it look less appealing to thieves with a grotesque smartphone case, like an Otterbox.
- In locations with high crime, pre-plan the shots you want to capture and take your SLR camera out of your bag only to take those shots. Otherwise, keep your SLR camera concealed.
- Never leave your equipment unattended in a visible area, not even in a locked car.
Pre-Production and Planning
- Before shooting, make a shot list of all the footage you need.
- Have all your filming equipment that needs to be calibrated all calibrated and ready to use.
Onscreen Performance
- Look into your lens, not the projected image of yourself on your camera’s flip screen.
- Show a lot of energy as you film yourself.
- If you’re nervous about talking to the camera in public, keep your talking head clips short and gradually build your way up to longer clips. You can break up longer sentences by saying a few words from one scene, saying a few more in another, and finishing off your last words, again, in another scene. Later, in editing, you can stitch all of those clips together to make one fluid sentence.
- If you’re nervous about talking to the camera in public, you can capture your talking headshots later when you find a more secluded space.
Audio Recording
- Silence everything you don’t want your mic to record.
- Put your mobile phone in airplane mode.
- Block wind from reaching your mic with windscreens and dead cats.
- Upgrade your mic.
- Adjust your levels.
- Get close to the sound you are wanting to record.
Check out 10 Recording Tips to Get The Best Sound From Your Microphone for more audio recording tips.
Filming
- To avoid crowds, wake up early and grab your footage early while everyone else is still sleeping or getting ready.
- Capture wide shots, medium shots, and close-up shots for better coverage.
- Use the Sun Seeker app to set up your sunrise/sunset shots better.
- If your camera can record 4K footage, record in 4K all the scenes that you want to zoom in closer later in editing without losing quality (your video project in editing has to be at 1920p x 1080p for this to work).
Stabilization
- If you’re trying to get shots with movement by walking, rather than walking as you normally would walk with your knees bent for steadier shots.
- If you’re shooting something in front of your handheld, lean your arm against your own body for steadier shots.
- Use a stabilizing gimbal with your camera.
Timelapse/Hyperlapse
- Select scenes where you can see a lot of change over time (not a still building in front of a cloudless smoggy sky).
- Set longer intervals for scenes that change very slowly over time.
- Pre-set your focus. Turn autofocus off.
- Shoot time-lapses/hyper-lapses in manual mode to prevent the flickering that occurs with changing light conditions in automatic settings.
- If your camera is set on a tripod in a fixed position, turn your optical image stabilization off.
- If you aren’t holding onto your camera as it’s in the middle of making a timelapse video, at least keep your camera and tripod attached by some kind of leash mechanism.
- For moving time-lapses or hyper-lapses, try to keep one point of reference in the same position within your camera frame.
Slow Motion
- Shoot slow-motion videos when there is plenty of light.
- For actions that are as slow as walking, slowing down your footage to 50% of the original speed looks good enough. If your video editing project is in 30 fps, shooting your video in 60 fps will give you a 50% slow-motion video. If your video editing project is in 60 fps, shooting your video in 120 fps will give you a 50% slow-motion video. Any slower is overkill for slowing down the speed of walking.
- For actions that are as fast as water splashing, slowing down your footage as little as 15% of the original speed can look good. For a video editing project in 30 fps, you would need a camera that can shoot at up to 240 fps to slow your footage down this much.
Storage and Back-Up
- If you’re using a phone that can store images and videos on a separate SD card, take advantage of that and record your travel footage onto your SD card. Later, you can easily get to your travel media as it will all be in one place.
- If you have your laptop on you, regularly transfer your media files from your cameras to your external hard drives.
- If you don’t want to bring your laptop on your trip and plan to video edit once you’re back home, use a USB memory card reader that connects with an app on your phone to transfer your files into your external hard drive.
- If you have access to a reliable internet connection and you leave your laptop at your place of accommodation, have your computer upload your files onto cloud storage while you are out to travel vlogging.
- Take advantage of Google Photos’ free, unlimited cloud storage for video files up to 1080p.
Video Editing
- If you’re editing a video project with videos from multiple different cameras, make sure to set the correct time and date on all of them before you start filming. Later, in editing, you can import all your image and video files and sort them in the exact order that they were taken.
- If your video editing software can work with proxies, transcode all your video files into proxy files for much faster editing.
Posting On YouTube
- Choose a title that people will search for. Keep your target keywords at the beginning of your title. “S01E01: My Summer Backpacking Trip” is not an effective title. Instead, a title like “Going Up The Eiffel Tower… Beautiful View of Paris!” would be better.
Ready to Become a Travel Vlogger?
Here in this article, I shared travel vlogging cameras &accessories, travel video ideas& resources, and travel vlogging tips. Did you get more hints to become a travel vlogger? Stay tuned and start your own travel vlog! Leave your comments below if you have any suggestions about this travel vlogger guide.
This past year has been a challenge, so if you want to make a #travelanywhere video without traveling, you can try Wondershare Filmora X video editor.
Richard Bennett
Richard Bennett is a writer and a lover of all things video.
Follow @Richard Bennett
Richard Bennett
Oct 26, 2023• Proven solutions
Want to become a travel vlogger?
Traveling around the world is one of life’s most exciting experiences – just ask anyone who has caught the travel bug. It is no wonder that travel videos are a big hit on YouTube. Any viewer can be instantly transported to another part of the world, all from the comfort of their seat.
With all the high-quality cameras and video editing software that are much more accessible to the general public now than even a few years ago, it has never been a better time to make a travel vlog.
Below, I have prepared a comprehensive guide on how to become a travel vlogger.
Create Your Travel Vlog with Wondershare FilmoraX
Wondershare FilmoraX is a video editing application that offers a lot of editing features that can be used both by a beginner and professionals alike. You can easily cut, split and trim your video, and apply transitions, filters, and texts, etc. to your travel vlog. What’s more, its advanced color grading settings and audio keyframing will add a unique flavor to your travel vlog. Just get started and make your video go viral!
PART 1: TRAVEL VLOGGING EQUIPMENT
In order to make travel videos, you’re going to need camera equipment. Below, I’ve prepared a comprehensive list of cameras and accessories that would be good for travel vlogging.
Filmstock Stock Media Library ](https://filmstock.wondershare.com/creative-theme-tourism?spm=rs.filmora%5Fweb&source%5Fchannel=seo%5Farticle )
1.1 Travel Vlogging Cameras
How To Choose A Vlogging Camera
When it comes to travel vlogging, you should look for a camera that ideally has the following eleven qualities:
- It has a fully articulated screen (flip screen)
- It has good continual autofocus while recording video
- It has good focus priority through face recognition
- It has touched to focus
- It has good low-light performance
- It has an external mic jack and a hot/cold shoe bracket
- It has optical image stabilization
- It is lightweight and portable
- It has a good battery life
- It is durable and weather-sealed
- It has hyper-lapse/timelapse/slow-motion shooting modes
For more information on why a lot of these features are ideal to have in a vlogging camera, check out my post on the Top 15 Best Cameras for Vlogging 2020 .
Cameras That Are Good For Travel Vlogging
Considering my list on what to look for in a travel vlogging camera, I’ve prepared a table below of thirteen cameras I’d recommend for travel vlogging:
| Camera | Release Date | Camera Type | Flip Screen | Mic Port | Price | |
|---|---|---|---|---|---|---|
| CanonEOSM50 | |
February2018 | Mirrorless | Fully Articulated | Yes | $- |
| PanasonicLumixDC-GH5S | |
January2018 | Mirrorless | Fully Articulated | Yes | $$$ |
| GoProHero6 Black | |
September2017 | Action Camera | No | Yes | $- |
| CanonEOSM100 | |
August2017 | Mirrorless | Flip-Up | No | $ |
| CanonEOS6D Mark II | |
June2017 | Mid-size SLR | Fully Articulated | Yes | $$ |
| CanonEOS RebelSL2 | |
June2017 | Compact SLR | Fully Articulated | Yes | $ |
| CanonEOS RebelT7i | |
February2017 | Mid-size SLR | Fully Articulated | Yes | $- |
| CanonEOSM6 | |
February2017 | Mirrorless | Flip-Up | Yes | $ |
| SonyCyber-Shot DSCRX 100 V | |
October2016 | Compact | Flip-Up | No | $- |
| PanasonicLumix DMCG85 | |
September2016 | Mirrorless | Fully Articulated | Yes | $- |
| PanasonicLumix DMCLX10 | |
September2016 | Compact | Flip-Up | No | $ |
| CanonEOS80D | |
February2016 | Mid-size SLR | Fully Articulated | Yes | $$ |
| CanonPowerShotG7 X Mark II | |
February2016 | Compact | Flip-Up | No | $ |
Lenses That Are Good For Travel Vlogging
Every travel vlogger should have a wide-angle lens. Wide-angle lenses fit much more of a scene into your camera frame, making it ideal for capturing establishing shots. You’ll also need a wide-angle lens if you plan on holding your camera out in front of yourself with an extended arm to get selfie footage.
As a travel vlogger, you’ll also want to show some close-up shots of the various subjects in your scene. If you don’t mind walking up to these subjects, the lens I recommend for this is a standard lens.
If, however, you want to be able to shoot these close-up shots from a farther distance, you’ll need a telephoto lens.
But you probably don’t want to carry and switch so many lenses as you travel, right? A convenient solution is to get a zoom lens that covers a wide range of focal lengths. For example, travel vlogger Sam Kolder shoots with a Canon EF 24-105mm f/4 lens – that’s a wide-angle lens, standard lens, and telephoto lens all in one lens!
If most of your travel video shooting will be done handheld, you should also definitely look for a lens equipped with optical image stabilization.
Check out my Best Camera Lens for YouTube to gain a more in-depth understanding of lenses and how they work.
1.2 Travel Vlogging Accessories
Camera Accessories That Are Good For Travel Vlogging
|
1. Tripod Record stabilized shots and timelapse footage with a tripod. |
|---|---|
|
2. GorillaPod SLR-Zoom with Ballhead Wrap your camera around structures that your regular tripod can’t stay on. You can also hold out your camera further away from you using the GorillaPod as a selfie stick to fit in more of your background into your selfie shot. |
|
3. Stabilizing Gimbal Get super-smooth shots with a stabilizing gimbal. |
|
4. On-Camera LED Light Is there not enough light? Add an LED light to your camera’s hot/cold shoe. |
|
5. Neutral Density (ND) Filters Is it too bright outside to have your aperture wide open but you still want to get that cinematic look ? You can add ND filters to your lenses so that you can do just that in very bright conditions. |
|
6. Camera Cleaning Kit While traveling, you can get all kinds of unwanted substances on your lens and in your camera like dust, dirt, fingerprints, raindrops, snow, and sand, to name a few. If you bring along a portable camera cleaning kit with you on your travels, you can remove those things immediately so that your shots won’t be affected. |
|
7. Drone When it comes to travel vlogging, wide shots that establish the scene and setting are important. Drones are great for taking these kinds of wide shots from high places that you would not be able to get to by foot. |
Smartphone Accessories That Are Good For Travel Vlogging
Using your smartphone as a travel vlogging device is a great idea! Your smartphone is a light and portable piece of equipment that you likely have with you at all times. Upgrade your smartphone travel vlogging setup with any of these 9 Best Smartphone Camera Accessories For Vloggers:
- RAVPower Portable Charger
- Arkon Tripod Mount
- Mega Tiny Anti-Gravity Case
- FLII Selfie Ring Light
- Rode VideoMic Me
- Aukey Optic 3-in-1 Smartphone Lens Set
- iOgrapher Go for Android and iPhone
- Manfrotto TwistGrip System
- Zhiyun Smooth-Q 3-Axis Handheld Gimbal Stabilizer for Smartphones
Read more about each one of these items in my post The 9 Best Smartphone Camera Accessories For Vloggers .
Camera Mounted Shotgun Microphones for Travel Vlogging
|
|
|
|
|---|
These four shotgun microphones can mount directly onto your camera’s hot/cold shoe:
- Rode VideoMic Go
- Shure VP83
- Rode VideoMic Pro+
- Sennheiser MKE 440
Read more about each one of them in our post about The 19 Best YouTube Microphones 2020 – Options for Music, Voiceovers, Vlogging, and more!
Other Useful Travel Vlogging Accessories
- Camera backpack
- Extra batteries
- Memory cards
- External hard drive
- Power plugs and cables
- USB card reader
- Universal plug
- D-ring clips (to prevent your equipment from slipping out of your grasp)
- Smartphone SD card tray key (if you’re storing your recorded footage in your SD card)
PART 2: TRAVEL VLOGGING IDEAS
If you’re needing some travel video ideas either to get you started or to bring some fresh content into your channel, here are ten travel video ideas that you can try.
1. Travel Vlog
Travel vlogging, the kind where you film yourself just going about your day in a different part of the world, is a great way to not only document your travel moments and memories for yourself, but also a great way to share your experience with others.
Rather than being too picky with your video shots and possibly ending up with a lack of footage to work with, shoot as much as you can.
Try to capture your thoughts and feelings around the things you taste, smell, see and hear. Sharing these details can help your viewers feel more like they’re with you on your travels.
2. Tips or Tricks for Traveling
Although learning from mistakes during your travels can be a rewarding experience, most people want to avoid them and, rather, enjoy their trip as much as they possibly can. After all, travel, for most people, happens in intervals that seem too short. You can help this sizable group by offering travel tips and tricks.
Prepare a list of tips and tricks, a shot list of all the footage you’ll need to go along with those tips, and then capture all your footage. As you go through your list, you can then cut away to your associated travel shots.
3. Video Tour of a Location
Many people are curious about different parts of the world and would love to join a tour without the high cost of flights, hotels, meals, and admission tickets. Give them that experience by making a video tour.
4. Review An Attraction or Experience
A lot of travelers having a limited amount of time and money to enjoy their chosen travel destinations want to know which attractions and experiences to prioritize and which ones to skip. Help them make their decision by making a video review.
5. Timelapse Videos
All you need in addition to your camera is a tripod to get started with making timelapse videos. Your tripod stabilizes your shot as your camera captures all the changes that take place in a given location.
When your footage is sped up, your viewers can appreciate all the changes that take place that they may not have had the patience to sit through in real-time. It’s also interesting to observe the passage of time in a different way.
6. Average Daily Cost
Before going on a trip, many people try to make a budget and figure out how much money to exchange into foreign currency. Making a good budget and getting just enough foreign cash, though, requires you to know how much, on average, things cost.
Make a helpful video on the average cost of daily expenses including meals and transportation like Paolo did in the above video “Average Daily Cost in Tokyo Japan | Is it Expensive?.” His video actually helped me a lot when I was trying to come up with a budget for my recent trip to Japan.
7. Interview Locals
People don’t travel only to see popular attractions. A lot of people travel to connect with and understand people from different parts of the world.
Interviewing locals and sharing their thoughts can help to provide that kind of connection.
8. What’s in My Backpack?
Packing for a trip can say a lot about who you are as a person because it involves prioritizing items based on your personal values.
For your next trip, share a little part of yourself with your audience through a video about the things you’ve packed in your bag.
9. Talk About Your Own Home City
When you’ve lived in your own home city for so long, you might forget that people all over the world may marvel at the things you take for granted because all those things just happen to be at your doorstep.
Take advantage of the expert that you already are in your own home city and make an informative video for others who are taking a trip there.
10. How To Become a Travel Vlogger
After you’ve done a lot of travel vlogging and learned so much along the way, you can make a video about how to be a travel vlogger.
In the above video, Andrew Santos teaches how to make a travel video, all while hilariously poking fun at many of the cliché trends in the travel genre.
PART 3: TRAVEL VIDEO EDITING
Video Editing Software
When it comes to editing your travel video together, there are different kinds of software you can do that with.
| FREE VIDEO EDITING SOFTWARE | PAID VIDEO EDITING SOFTWARE |
|---|---|
| OpenShot Video Editor (Windows, Mac, Linux) ShotCut (Windows, Mac, Linux) Hitfilm Express (Windows, Mac) VideoPad Video Editor (Windows) Lightworks (Windows, Mac, Linux) VSDC Video Editor (Windows) Machete Video Editor Lite (Windows) Avidemux (Windows, Mac, Linux, BSD) Read more about each software in our post about The Best Free Video Editing Software for YouTube – Top 8 Reviews . | Wondershare Filmora X (Windows, Mac) - start at $49.99 for one year license and Free trial Final Cut Pro (Mac) - $299.99, Free trial Vegas Movie Studio (Windows) - $49.99 |
Travel-Themed Video Effects
If you use Filmora Video Editor, you can also take advantage of a variety of travel-themed video effects packs, like the one shown in the above video, filled with titles, transitions, filters, overlays, and other visual elements.
For my recent trip to Japan, I actually used Filmora Effects’ Japanese set.
At the 2:10 mark of the above video, I used an overlay of falling cherry blossom leaves. At the 3:03 mark of the same video, I used an anime-themed overlay.
At the 2:48 mark of the above video, I used a shoji door transition.
Music Libraries
Music is an important component of a lot of travel videos. Here’s where you can get them:
| ROYALTY-FREE MUSIC LIBRARIES | PAID MUSIC LIBRARIES | PAID SUBSCRIPTION MUSIC LIBRARIES |
|---|---|---|
| Audionautix Bensound dig.ccMixter Free Music Archive Free Stock Music Incompetech Josh Woodward Moby Gratis Musopen Purple Planet Music TeknoAXE YouTube Audio Library | Premium Beat Audio Jungle | Audio Network Audio Blocks Epidemic Sound |
Sound Effects
Free Sound Effect Sites
PART 4: TRAVEL VLOGGING TIPS
Vlog/Life Balance
- Give yourself more time at each location if you want to have a good balance between getting the shots you need and enjoying your present moment.
Theft Prevention
- Carry a backpack that doesn’t have zippers on the outside that thieves can easily get to.
- If you’re shooting with a flashy smartphone, make it look less appealing to thieves with a grotesque smartphone case, like an Otterbox.
- In locations with high crime, pre-plan the shots you want to capture and take your SLR camera out of your bag only to take those shots. Otherwise, keep your SLR camera concealed.
- Never leave your equipment unattended in a visible area, not even in a locked car.
Pre-Production and Planning
- Before shooting, make a shot list of all the footage you need.
- Have all your filming equipment that needs to be calibrated all calibrated and ready to use.
Onscreen Performance
- Look into your lens, not the projected image of yourself on your camera’s flip screen.
- Show a lot of energy as you film yourself.
- If you’re nervous about talking to the camera in public, keep your talking head clips short and gradually build your way up to longer clips. You can break up longer sentences by saying a few words from one scene, saying a few more in another, and finishing off your last words, again, in another scene. Later, in editing, you can stitch all of those clips together to make one fluid sentence.
- If you’re nervous about talking to the camera in public, you can capture your talking headshots later when you find a more secluded space.
Audio Recording
- Silence everything you don’t want your mic to record.
- Put your mobile phone in airplane mode.
- Block wind from reaching your mic with windscreens and dead cats.
- Upgrade your mic.
- Adjust your levels.
- Get close to the sound you are wanting to record.
Check out 10 Recording Tips to Get The Best Sound From Your Microphone for more audio recording tips.
Filming
- To avoid crowds, wake up early and grab your footage early while everyone else is still sleeping or getting ready.
- Capture wide shots, medium shots, and close-up shots for better coverage.
- Use the Sun Seeker app to set up your sunrise/sunset shots better.
- If your camera can record 4K footage, record in 4K all the scenes that you want to zoom in closer later in editing without losing quality (your video project in editing has to be at 1920p x 1080p for this to work).
Stabilization
- If you’re trying to get shots with movement by walking, rather than walking as you normally would walk with your knees bent for steadier shots.
- If you’re shooting something in front of your handheld, lean your arm against your own body for steadier shots.
- Use a stabilizing gimbal with your camera.
Timelapse/Hyperlapse
- Select scenes where you can see a lot of change over time (not a still building in front of a cloudless smoggy sky).
- Set longer intervals for scenes that change very slowly over time.
- Pre-set your focus. Turn autofocus off.
- Shoot time-lapses/hyper-lapses in manual mode to prevent the flickering that occurs with changing light conditions in automatic settings.
- If your camera is set on a tripod in a fixed position, turn your optical image stabilization off.
- If you aren’t holding onto your camera as it’s in the middle of making a timelapse video, at least keep your camera and tripod attached by some kind of leash mechanism.
- For moving time-lapses or hyper-lapses, try to keep one point of reference in the same position within your camera frame.
Slow Motion
- Shoot slow-motion videos when there is plenty of light.
- For actions that are as slow as walking, slowing down your footage to 50% of the original speed looks good enough. If your video editing project is in 30 fps, shooting your video in 60 fps will give you a 50% slow-motion video. If your video editing project is in 60 fps, shooting your video in 120 fps will give you a 50% slow-motion video. Any slower is overkill for slowing down the speed of walking.
- For actions that are as fast as water splashing, slowing down your footage as little as 15% of the original speed can look good. For a video editing project in 30 fps, you would need a camera that can shoot at up to 240 fps to slow your footage down this much.
Storage and Back-Up
- If you’re using a phone that can store images and videos on a separate SD card, take advantage of that and record your travel footage onto your SD card. Later, you can easily get to your travel media as it will all be in one place.
- If you have your laptop on you, regularly transfer your media files from your cameras to your external hard drives.
- If you don’t want to bring your laptop on your trip and plan to video edit once you’re back home, use a USB memory card reader that connects with an app on your phone to transfer your files into your external hard drive.
- If you have access to a reliable internet connection and you leave your laptop at your place of accommodation, have your computer upload your files onto cloud storage while you are out to travel vlogging.
- Take advantage of Google Photos’ free, unlimited cloud storage for video files up to 1080p.
Video Editing
- If you’re editing a video project with videos from multiple different cameras, make sure to set the correct time and date on all of them before you start filming. Later, in editing, you can import all your image and video files and sort them in the exact order that they were taken.
- If your video editing software can work with proxies, transcode all your video files into proxy files for much faster editing.
Posting On YouTube
- Choose a title that people will search for. Keep your target keywords at the beginning of your title. “S01E01: My Summer Backpacking Trip” is not an effective title. Instead, a title like “Going Up The Eiffel Tower… Beautiful View of Paris!” would be better.
Ready to Become a Travel Vlogger?
Here in this article, I shared travel vlogging cameras &accessories, travel video ideas& resources, and travel vlogging tips. Did you get more hints to become a travel vlogger? Stay tuned and start your own travel vlog! Leave your comments below if you have any suggestions about this travel vlogger guide.
This past year has been a challenge, so if you want to make a #travelanywhere video without traveling, you can try Wondershare Filmora X video editor.
Richard Bennett
Richard Bennett is a writer and a lover of all things video.
Follow @Richard Bennett
Essential Tips for Spectacular Product Releases
Versatile Video Editor - Wondershare Filmora
An easy yet powerful editor
Numerous effects to choose from
Detailed tutorials provided by the official channel
Unboxing videos are a bizarre trend. However, these videos are getting the highest traction, and more videos are getting onboard about various products.
And, if you haven’t already checked one, an unboxing video is what it sounds like. At its core, “unboxing” is the procedure of recording the moment when a particular product is removed and opened from the packaging sold in.
Again, you’re probably thinking:
‘Why would anybody gaze at other folks opening their product packaging?’
More than 90,000 people type ‘unboxing’ into YouTube each month, and that’s quite interesting as well as strange. Also, these are just a few of the insane statistics about the eCommerce trend of unboxing videos.
In this article, you’ll see the science behind such unboxing videos and learn how to create an attractive one by taking inspiration from others.
So whether you’re not sure why we admire unboxing videos or you wish to know how to use them to your benefit, you’re in the right place!
In this article
02 5 Best YouTube Unboxing Channels
03 How to Create a Killer Unboxing Video
Part 1: What is an Unboxing Video?
Within the unboxing videos, people open boxes and narrate their actions. Unboxing videos are incredibly famous with kids, grabbing up tons of millions of subscribers as well as millions of views. Such videos are also usually great for kids to watch (with a few caveats). But the matter of the subject of some unboxing videos is not age-appropriate. And, there are niche-specific videos as well on different channels.
Are unboxers paid by the companies whose services or products they consider opening on YouTube? Companies don’t generally pay the YouTuber directly for featuring their products in a video. When an unboxer becomes super popular (with subscribers and tens of millions of views), companies may send the products for free, but not always. Sometimes hosts disclose this, sometimes not. However, companies do sponsor highly famous and influential YouTubers in other areas. For instance, they may pay the YouTuber to make a personal appearance at a toy store or convention.
Part 2: 5 Best YouTube Unboxing Channels
There are considerable merits to offering your customers a branded and personalized unboxing experience.
Even if you decide to get your products featured in a YouTuber’s unboxing videos, you can help promote your brand and improve brand awareness. So which is the perfect or ideal YouTube channel for unboxing videos for you to try to get featured on? The answer is: “It depends!”
Not every YouTuber is the best for every eCommerce business—and a YouTube channel simply being huge and influential doesn’t make it relevant for your brand. So it’s essential to consider brand suitability while trying looking for a YouTuber to create unboxing videos.
This means considering whether they use harsh language or if their target audience has some overlap with your target audience.
Keeping it in mind, here are some of the top YouTube unboxing channels for inspiration:
1. Unbox Therapy
With around 17 million-plus subscribers, Unbox Therapy is a great channel with a ten-year history of sharing various videos presenting the hottest and most excellent products on the planet. According to their YouTube stats, tech gadgets are a regular feature on the channel, and they have amassed four billion-plus views.
2. Ryan’s World
This titan of teeny the unboxing video world is one of the immensely paid YouTubers for a reason. This channel features fun animation and unboxing videos, simple science experiments for kids, and other educational content. Those interested in doing the best unboxing videos for a younger audience could learn a lot from this platform.
3. Tech Unboxing
At 700k plus subscribers, Tech Unboxing may not be the most significant content creator on this list, but it’s no slouch. The channel mentions everything about the high-tech gadgets and isn’t afraid to brag about the products reviewed. The track also hosts frequent giveaways of tech products and unboxing videos that the host likes that other tech enthusiasts may look at it with fun.
4. Dr. DeBox
DrDebox looks at tech, gadgets, and other products ordered from online sites and offers viewers rundowns of their functions and how they operate. With 590k plus subscribers and billions of video views, DrDebox has a prominent audience and presence on YouTube that can help improve awareness for the products he reviews.
5. UNBOXING Fashion & Sports
Unboxing Fashion & Sports is a channel specializing in well unboxing videos for a range of sports and fashion apparel (frequently shoe brands like Nike or Adidas). Its content generally features a close-up of the reviewer taking products out of the box and moving them around. At the same time, text highlights relevant product features—all set to catchy music without being disturbing. With 17k plus subscribers and a strong focus on sports apparel, this YouTuber knows how to attract a target market.
Part 3: How to Create a Killer Unboxing Video
Firstly, you have to take note of the following points to create the best unboxing videos.
1. Select an Unboxing Niche
2. Practice Speaking Clearly and Slowly
3. Use the Best Unboxing Set-Up
4. Make Sure to Timely Unbox the Products
5. Don’t Delay the Unboxing in Your Video
6. Show the Product in Use
One of the prominent factors about unboxing videos is that anyone can make them. You don’t need to be uniquely talented but go with the products that have broad appeal. Once you create such videos, you can share them on your social media networks or personal website.
Do you want to create your creative unboxing videos for others to find? Do you like to introduce your customers to your products in your own YouTube Channel, so you have total control over the content and messaging of each video?
Here is a step by step guide to help you revamp the creation of your unboxing video:
1. Use a Good Camera & Video Editing Software
While you probably don’t require that high-tech camera that professional Hollywood filmmakers would consider shooting or filming 8k+ ultra-HD movies, you need a good camera that can capture HD footage (preferably at least 1080p). This allows providing your unboxing videos just enough of a professional look to not deactivate or disable the interest of potential viewers.
In addition to a camera, ensure that you have a stand or a decent tripod for it. This way, you don’t have to hold onto your camera by yourself (or have an assistant hold it) while you’re filming. In addition, this minimizes camera shake, which assists in making easy-to-watch videos.
On the other hand, video editing software is a must for taking all of your video compiling and recording into a cohesive video that will be attractive for viewers to watch. There are tons of accessible video editing tools to choose from and some paid options that may have helpful features. However, our favorite pick is Wondershare Filmora due to its beginner-friendly yet professional editing elements. Let us know what you can’t do with this software! It’s a combination of professionalism and reliability you can consider for all your video editing needs.
The hottest feature of Wondershare Filmora for making attractive unboxing videos is audio ducking. With this feature, you can effectively lower the background vocals while adding your voiceovers. And, that’s extremely valuable in making these kinds of videos.
Wondershare Filmora
Get started easily with Filmora’s powerful performance, intuitive interface, and countless effects!
Try It Free Try It Free Try It Free Learn More >

2. Prepare Your Stage/Photo Lightbox
If you look at some famous unboxing channels listed above, you’ll notice that much of their content is shot in a well-framed space where there isn’t much in the background to disturb them from the product being viewed.
Often, this is a “photo lightbox” or an empty table (a small container with a smooth white backdrop that enhances lighting while reducing shadows for making photos look greater). Lightboxes can also be helpful when you’re taking snapshots of your products to put up on your eCommerce website, so it’s a great idea to make (or buy) one that can fit your products.
3. Practice Making Videos
Before uploading videos to YouTube, take some time to practice making your unboxing videos using random items or already-opened products. This way, you can work upon setting up your stage and camera, keeping the product within an aim, narrating your unboxing video, editing footage to reduce the “dead air” where nothing is being done or said, and more!
When you’re over making your first test video, play it back and look for issues like excessive “ums, ahs,” or things that are out of focus and other sentence fillers. Don’t worry if your first video isn’t that great—that’s what practice (and your video editing software) are for!
4. Don’t Waste Your Viewers’ Time
If you want to make the best unboxing videos, ensure that you get to the “unboxing” section quite instantly! As indicated by the Expert Voice: “remember that you compete for viewers’ attention with lots of other video content. Keep your introductions brief and quickly get to the unboxing.” If you take too much time to get to the section of unboxing video, you risk losing your audience’s interest and them going away from your content before you can introduce your product.
5. Compile Things Up Once in a While
If you unbox your products, you might instantly run out of content ideas to make. You may look up your YouTube channel losing traction without the new content. So, try to compile things up once in a while—as the Ryan’s World channel discussed earlier.
Creating other kinds of content, such as how-to videos and advice videos for specific products, product updates, and simple news, or even short promotional bits, can help keep your publishing frequency top-notch.
Just remember: everything you publish or post should still be related to your brand and your channel’s core content!
6. Promote Your YouTube Video or Channel on Social Media
There are specific odds that your eCommerce business is active on other social media channels, such as LinkedIn, Facebook, Twitter, etc. Taking benefit of your audience on other social media platforms to promote your YouTube channel can assist you promptly earning some easy subscribers and allow you better promote your products for the current followers.
Part 4: FAQs about Unboxing Videos
1 - What should be included in the unboxing video?
As discussed earlier, you can include products related to your channel’s niche in your unboxing videos.
2 - How long should an unboxing video be?
Time will vary depending on the actual unboxing product, but try to keep it below 5 minutes.
3 - Can you monetize unboxing videos?
No. Text-based commentary isn’t acceptable for monetization. It must be vocal, and for you to show your face as well would be even better.
Conclusion
Unboxing videos are a bang on that; hate them or love them, they are here to stay. Whether you’re a brand owner, a consumer, or both, you’ve probably considered one or two while purposelessly browsing.
You can use the above tips or strategies to create a compelling unboxing experience for small brands to get the most out of a best unboxing video.
What are some of your favorite unboxing videos? Comment down below!
Unboxing videos are a bizarre trend. However, these videos are getting the highest traction, and more videos are getting onboard about various products.
And, if you haven’t already checked one, an unboxing video is what it sounds like. At its core, “unboxing” is the procedure of recording the moment when a particular product is removed and opened from the packaging sold in.
Again, you’re probably thinking:
‘Why would anybody gaze at other folks opening their product packaging?’
More than 90,000 people type ‘unboxing’ into YouTube each month, and that’s quite interesting as well as strange. Also, these are just a few of the insane statistics about the eCommerce trend of unboxing videos.
In this article, you’ll see the science behind such unboxing videos and learn how to create an attractive one by taking inspiration from others.
So whether you’re not sure why we admire unboxing videos or you wish to know how to use them to your benefit, you’re in the right place!
In this article
02 5 Best YouTube Unboxing Channels
03 How to Create a Killer Unboxing Video
Part 1: What is an Unboxing Video?
Within the unboxing videos, people open boxes and narrate their actions. Unboxing videos are incredibly famous with kids, grabbing up tons of millions of subscribers as well as millions of views. Such videos are also usually great for kids to watch (with a few caveats). But the matter of the subject of some unboxing videos is not age-appropriate. And, there are niche-specific videos as well on different channels.
Are unboxers paid by the companies whose services or products they consider opening on YouTube? Companies don’t generally pay the YouTuber directly for featuring their products in a video. When an unboxer becomes super popular (with subscribers and tens of millions of views), companies may send the products for free, but not always. Sometimes hosts disclose this, sometimes not. However, companies do sponsor highly famous and influential YouTubers in other areas. For instance, they may pay the YouTuber to make a personal appearance at a toy store or convention.
Part 2: 5 Best YouTube Unboxing Channels
There are considerable merits to offering your customers a branded and personalized unboxing experience.
Even if you decide to get your products featured in a YouTuber’s unboxing videos, you can help promote your brand and improve brand awareness. So which is the perfect or ideal YouTube channel for unboxing videos for you to try to get featured on? The answer is: “It depends!”
Not every YouTuber is the best for every eCommerce business—and a YouTube channel simply being huge and influential doesn’t make it relevant for your brand. So it’s essential to consider brand suitability while trying looking for a YouTuber to create unboxing videos.
This means considering whether they use harsh language or if their target audience has some overlap with your target audience.
Keeping it in mind, here are some of the top YouTube unboxing channels for inspiration:
1. Unbox Therapy
With around 17 million-plus subscribers, Unbox Therapy is a great channel with a ten-year history of sharing various videos presenting the hottest and most excellent products on the planet. According to their YouTube stats, tech gadgets are a regular feature on the channel, and they have amassed four billion-plus views.
2. Ryan’s World
This titan of teeny the unboxing video world is one of the immensely paid YouTubers for a reason. This channel features fun animation and unboxing videos, simple science experiments for kids, and other educational content. Those interested in doing the best unboxing videos for a younger audience could learn a lot from this platform.
3. Tech Unboxing
At 700k plus subscribers, Tech Unboxing may not be the most significant content creator on this list, but it’s no slouch. The channel mentions everything about the high-tech gadgets and isn’t afraid to brag about the products reviewed. The track also hosts frequent giveaways of tech products and unboxing videos that the host likes that other tech enthusiasts may look at it with fun.
4. Dr. DeBox
DrDebox looks at tech, gadgets, and other products ordered from online sites and offers viewers rundowns of their functions and how they operate. With 590k plus subscribers and billions of video views, DrDebox has a prominent audience and presence on YouTube that can help improve awareness for the products he reviews.
5. UNBOXING Fashion & Sports
Unboxing Fashion & Sports is a channel specializing in well unboxing videos for a range of sports and fashion apparel (frequently shoe brands like Nike or Adidas). Its content generally features a close-up of the reviewer taking products out of the box and moving them around. At the same time, text highlights relevant product features—all set to catchy music without being disturbing. With 17k plus subscribers and a strong focus on sports apparel, this YouTuber knows how to attract a target market.
Part 3: How to Create a Killer Unboxing Video
Firstly, you have to take note of the following points to create the best unboxing videos.
1. Select an Unboxing Niche
2. Practice Speaking Clearly and Slowly
3. Use the Best Unboxing Set-Up
4. Make Sure to Timely Unbox the Products
5. Don’t Delay the Unboxing in Your Video
6. Show the Product in Use
One of the prominent factors about unboxing videos is that anyone can make them. You don’t need to be uniquely talented but go with the products that have broad appeal. Once you create such videos, you can share them on your social media networks or personal website.
Do you want to create your creative unboxing videos for others to find? Do you like to introduce your customers to your products in your own YouTube Channel, so you have total control over the content and messaging of each video?
Here is a step by step guide to help you revamp the creation of your unboxing video:
1. Use a Good Camera & Video Editing Software
While you probably don’t require that high-tech camera that professional Hollywood filmmakers would consider shooting or filming 8k+ ultra-HD movies, you need a good camera that can capture HD footage (preferably at least 1080p). This allows providing your unboxing videos just enough of a professional look to not deactivate or disable the interest of potential viewers.
In addition to a camera, ensure that you have a stand or a decent tripod for it. This way, you don’t have to hold onto your camera by yourself (or have an assistant hold it) while you’re filming. In addition, this minimizes camera shake, which assists in making easy-to-watch videos.
On the other hand, video editing software is a must for taking all of your video compiling and recording into a cohesive video that will be attractive for viewers to watch. There are tons of accessible video editing tools to choose from and some paid options that may have helpful features. However, our favorite pick is Wondershare Filmora due to its beginner-friendly yet professional editing elements. Let us know what you can’t do with this software! It’s a combination of professionalism and reliability you can consider for all your video editing needs.
The hottest feature of Wondershare Filmora for making attractive unboxing videos is audio ducking. With this feature, you can effectively lower the background vocals while adding your voiceovers. And, that’s extremely valuable in making these kinds of videos.
Wondershare Filmora
Get started easily with Filmora’s powerful performance, intuitive interface, and countless effects!
Try It Free Try It Free Try It Free Learn More >
2. Prepare Your Stage/Photo Lightbox
If you look at some famous unboxing channels listed above, you’ll notice that much of their content is shot in a well-framed space where there isn’t much in the background to disturb them from the product being viewed.
Often, this is a “photo lightbox” or an empty table (a small container with a smooth white backdrop that enhances lighting while reducing shadows for making photos look greater). Lightboxes can also be helpful when you’re taking snapshots of your products to put up on your eCommerce website, so it’s a great idea to make (or buy) one that can fit your products.
3. Practice Making Videos
Before uploading videos to YouTube, take some time to practice making your unboxing videos using random items or already-opened products. This way, you can work upon setting up your stage and camera, keeping the product within an aim, narrating your unboxing video, editing footage to reduce the “dead air” where nothing is being done or said, and more!
When you’re over making your first test video, play it back and look for issues like excessive “ums, ahs,” or things that are out of focus and other sentence fillers. Don’t worry if your first video isn’t that great—that’s what practice (and your video editing software) are for!
4. Don’t Waste Your Viewers’ Time
If you want to make the best unboxing videos, ensure that you get to the “unboxing” section quite instantly! As indicated by the Expert Voice: “remember that you compete for viewers’ attention with lots of other video content. Keep your introductions brief and quickly get to the unboxing.” If you take too much time to get to the section of unboxing video, you risk losing your audience’s interest and them going away from your content before you can introduce your product.
5. Compile Things Up Once in a While
If you unbox your products, you might instantly run out of content ideas to make. You may look up your YouTube channel losing traction without the new content. So, try to compile things up once in a while—as the Ryan’s World channel discussed earlier.
Creating other kinds of content, such as how-to videos and advice videos for specific products, product updates, and simple news, or even short promotional bits, can help keep your publishing frequency top-notch.
Just remember: everything you publish or post should still be related to your brand and your channel’s core content!
6. Promote Your YouTube Video or Channel on Social Media
There are specific odds that your eCommerce business is active on other social media channels, such as LinkedIn, Facebook, Twitter, etc. Taking benefit of your audience on other social media platforms to promote your YouTube channel can assist you promptly earning some easy subscribers and allow you better promote your products for the current followers.
Part 4: FAQs about Unboxing Videos
1 - What should be included in the unboxing video?
As discussed earlier, you can include products related to your channel’s niche in your unboxing videos.
2 - How long should an unboxing video be?
Time will vary depending on the actual unboxing product, but try to keep it below 5 minutes.
3 - Can you monetize unboxing videos?
No. Text-based commentary isn’t acceptable for monetization. It must be vocal, and for you to show your face as well would be even better.
Conclusion
Unboxing videos are a bang on that; hate them or love them, they are here to stay. Whether you’re a brand owner, a consumer, or both, you’ve probably considered one or two while purposelessly browsing.
You can use the above tips or strategies to create a compelling unboxing experience for small brands to get the most out of a best unboxing video.
What are some of your favorite unboxing videos? Comment down below!
Also read:
- In 2024, Access Free Photographic Treasures Through Favored 4 Youtube Clips
- In 2024, Download YouTube Snippets with Perfection
- [New] Charting the Course with YouTube's Top Makeup Influencers
- Elevate Your Vlogs Optimizing Title, Description & Tags
- [Updated] 24/7 Real-Time Follower Analysis
- 2024 Approved Digital Footprint How to Share Your Short Videos on Computers & Phones
- In 2024, Child Prodigy Ryan Kaji Dominates YouTube Revenue Race
- Unlocking Viewership on Multiple Channels (YouTube & Friends)
- [New] A Visual Journey Uncovering the Best Icons & Logos Online
- Brand Your Content Download Complimentary Templates for YouTube Makers for 2024
- Ultimate List of 16 Key YouTube Videos for Higher Engagement
- Blueprinting Engaging Content Layouts on YouTube
- Elevate Audience Reach Through Collaborative YouTube Videos for 2024
- In 2024, Channel Boosting Strategies Effortless Sponsorship Securing Tips
- [Updated] Adding Tag to YouTube Video? Better Read This First
- Step 1 to 50 Building a Foundation for Mukbang Creation
- Mastering Time 10 Outstanding YouTube Channels on History
- [Updated] Accelerate Your Content's View Count 1K+ in Time
- [Updated] Content Composer Arena
- Prowess in Phrasing Best Tags for Gamer Videos
- YouTube Shortcuts You Should Know
- From Buffer to Broadcast Learn How to Convert Your YouTube Viewing Into a Screenshot for Free.
- Creating Memorable YouTube Shorts - 10 Must-Do Tips
- [New] Eco-Friendly Cities Redefining Urban Spaces for Nature
- Effortless Guide to Share Your Videos as Shorts on Computers & Phones
- Gearing Up for a Leisurely View Three Methods to Tame Video Speed on YouTube (60 Chars, Minor Exception Due to Title Length but Offers Comprehensive Insight)
- Zeroing in on Audio Quality Achievable Sans Mic
- [New] Cutting Edge Cadence Exclusive, Perfected DJ Templates Online
- Overcoming the Zero View Challenge 10 Actionable Tips
- 2024 Approved Bridging Mac & Monetization IMovie Editing to YouTube Success
- [New] Defending Your Videos Against YouTube Copyright Strikes
- [New] Editing Excellence The Ultimate Guide to Top Notebooks
- Unveiling Top ASMR for iPhone Users
- FrameTaker High-Quality Edition
- In 2024, Lock Your Xiaomi 13T Phone in Style The Top 5 Gesture Lock Screen Apps
- A How-To Guide on Bypassing the Apple iPhone 15 Pro iCloud Lock
- updated 2024 Approved An Exhaustive List of Lip Sync Apps for Vibrant Video Creation
- 2024 Approved Masterful Bordering Techniques for Stellar Instagram Videos
- [Updated] Masterclass in Real-Time TwitVid Engagement for 2024
- New Tips for Smooth Installation/Uninstallation of Audacity on Your Chromebook for 2024
- How to Quickly Fix Bluetooth Not Working on Infinix Zero 5G 2023 Turbo | Dr.fone
- In 2024, Change Location on Yik Yak For your ZTE Nubia Z60 Ultra to Enjoy More Fun | Dr.fone
- Undelete lost pictures from ROG Phone 8.
- 2024 Approved Bidding on Shadows The 2023 Virtual Vault Showdown
- New In 2024, The Ultimate Search Discovering the Best FLAC File Converter
- How to Easily Hard reset my Infinix GT 10 Pro | Dr.fone
- Title: "The Ultimate Voyage Guide From Novice to Esteemed Travel Blogger"
- Author: Steven
- Created at : 2024-05-25 20:33:47
- Updated at : 2024-05-26 20:33:47
- Link: https://youtube-clips.techidaily.com/the-ultimate-voyage-guide-from-novice-to-esteemed-travel-blogger/
- License: This work is licensed under CC BY-NC-SA 4.0.
