
:max_bytes(150000):strip_icc()/how-to-use-bing-ai-on-google-chrome-b20360fadcd3487aa24a859d59d92852.jpg)
"Swift Introduction The Art of Green Screening"
Swift Introduction: The Art of Green Screening
The world of video-making owes much of its magic to small leaps of innovation. One of these leaps is the use of the chroma key background, which most people know by the more colloquial term—green screen.

Chroma key, also known as green screen or blue screen, is a cool hack for seamless visual storytelling, allowing content creators to replace backgrounds with any image or video they want. This technique is widely embraced in film, television, and online content, and has opened the door to limitless creative possibilities. Aside from its ability to maximize creativity, it is also cheap to employ and convenient to set up, which has made it a staple for everyone who works with visuals.
In this simple guide, we’ll delve into the fundamentals of the chroma key effect, how it is used for video making, and how to leverage that as you perfect your visual content.
YouTube Video Background Creating realistic video scenes at your will is easy to complete with Filmora green screen removal.
Create Video Backgrounds Create Video Backgrounds Learn Green Screen

How Does Chroma Key Work?

Chroma Keying is done by singling out a specific color (usually green or blue) from the foreground, removing it, and replacing it with a different background (for example, a sunset). This process typically follows a series of steps:
- Background Selection:
A solid, single-color background, often green or blue, that contrasts well with the subject must be used. The color chosen should not be present in the subject or any props in the camera field to avoid unintentional transparency.
- Color Keying:
This requires the use of specialized visual effects software to key out the chosen color. The green or blue background is designated as transparent, making everything of that color see-through. The software distinguishes between the keyed color and the subject, creating a mask for the transparent areas.
- Foreground Filming:
This involves filming the subject against the live chroma key background. During filming, the chosen background color (green or blue) won’t appear in the final result due to its transparency. The subject is captured as if separately from the isolated background.
- Post-Processing:
In post-production processing, the editor takes the keyed-out color and replaces it with the new background of their choice. This step creates the illusion that the subject is in a different setting or environment. The transparent areas become filled with the chosen background which, if done right, results in a cohesive and visually appealing composition.
Why Green?
Theoretically, the chroma key background can be any solid color. However, the most commonly used colors are studio blue and bright green, with the latter far more common.
The choice of background color depends on the specific requirements of the production and the colors present in the scenes being filmed.
Free Download For Win 7 or later(64-bit)
Free Download For macOS 10.14 or later
Contrast
The less similar your chosen background color is to natural skin tones, the easier to isolate and replace in your footage. Bright green provides a strong contrast to most human skin tones and is less likely to be present in costumes or natural surroundings, making it easier to isolate subjects during the color separation.
Luminance
The color green emits light with greater intensity than blue, allowing for far more effective isolation by cameras during filming. This also means that blue screens demand increased lighting for proper exposure compared to green. This situation may be less than ideal if you lack powerful lighting or you don’t have the big bucks for them.
Digital Sensors
Many digital cameras and sensors are more sensitive to green wavelengths, resulting in cleaner and more accurate color keying during post-processing. Modern technology has also evolved to optimize for a green background, making it a more practical choice for the chroma key effect.
Wardrobe and Set Design
Bright green occurs less naturally in costumes and set designs than other colors, making green the optimal choice for reducing the likelihood of color spill and keying issues. However, if you know your scene will have lots of green, it is probably best to film with a blue screen, so there’s less risk of color spill and less post-production work.
Setting up Your Own Chroma Key Studio
Setting up your chroma key is convenient and straightforward, but there are some key factors to consider while setting up to ensure maximal performance.
Choosing the Right Background Color
The first step in the chroma key setup is selecting the right background color to be keyed out. This choice determines your effective color separation and ensures a smooth keying process during editing. Choosing a chroma-key background color that contrasts distinctly with the subject’s colors is essential for effective color separation. This prevents unintentional transparency, color spill, and ensures a polished final result.
Lighting Considerations
Lighting is an important part of the chroma-keying process. Bold, uniform, and consistent lighting on both the subject and the background makes it easy to delineate one from the other fully. This minimizes shadows and variations in color, creating a smooth and seamless keying process. Multiple diffuse lights from different angles are often used to illuminate the green screen evenly.
Positioning/Camera
Proper subject and camera placement are necessary to ensure an even color-keying process during post-production. To prevent shadow interference, the green screen should be smooth, tense, and without wrinkles or shadows.
High-quality cameras are essential every time, especially for chroma keying. Images with better definition are easier to key, so camera quality significantly affects the outcome. Even if your camera isn’t the best, merely shooting well can ensure a clean color-keying process during editing, resulting in professional-looking visuals.
Recording Tips for Chroma Key
- Proper Lighting
Maintaining uniform and well-defined lighting during recording is essential for a successful chroma-keying process. This consistency ensures a seamless keying process during post-production.
- Keep Distance from the Green Screen
The optimal distance between the subject and the green screen minimizes color spill and allows for natural movements. Proper distance between subject and background allows for easier isolation of the background and much smoother post-editing. A recommended starting point for the issue is around 6 to 10 feet from the background.
- Subjects and Clothing
As mentioned before, the choice of costume for Selecting appropriate clothing that doesn’t match the chroma key color prevents transparency issues. Subjects also have to be positioned in such a way that there is minimal light interference and reflection. These contribute to a flawless chroma key outcome.
3 Basic Troubleshooting Strategies
- Color Spill
Sometimes, reflected light from your green background can be cast on your subject and may remain so when the background light is keyed out. This phenomenon is known as a color spill. It is usually because of uneven lighting or shooting around reflecting surfaces. Avoiding spill can differentiate between good and lousy chroma key aftereffects.
Human hair is one area where color spill can show up unsuspectingly. Due to the translucency of hair, it is common for some unintended light to seep through. This allows some background visibility, which you do not want with a chroma key. This is especially notable with lighter hair colors like blond hair.
There are ways to account for this. Many video-editing software have features such as spill suppression and screen matte adjustments that can enhance the final footage. Specialized plugins also go a long way in ensuring minimizing spill. Addressing spill correction tackles unwanted green artifacts and ensures a clean keying process.
- Poor Lighting
Suboptimal green screen lighting can lead to inconsistencies in keying and editing, undermining your product. One way to avoid this is to light the screen and subject separately. Another tip, although expensive, is using multiple diffuse light sources and trying to maintain even lighting across every square foot of your scene. Super bright or dark spots can ruin your output, so it’s worth the extra effort if you don’t want to deal with problematic post-production.
- Poorly Refined Edges
Chroma keying should leave your videos with crisp, defined, natural-looking edges. But post-production editing can make all the difference if it doesn’t come out to your taste. Softening and refining edges make a smoother transition between the foreground object and the new background. Light adjustments to edge thickness and screen matte settings can also help enhance overall visual quality and add finesse to your work.
Conclusion
Green screen photography produces excellent results, and its ease of use makes it indispensable for videographers of all levels. In this guide, we’ve discussed chroma key technology, its role in the industry, and how to apply it to your craft to elevate visual content.
Chroma key, also known as green screen or blue screen, is a cool hack for seamless visual storytelling, allowing content creators to replace backgrounds with any image or video they want. This technique is widely embraced in film, television, and online content, and has opened the door to limitless creative possibilities. Aside from its ability to maximize creativity, it is also cheap to employ and convenient to set up, which has made it a staple for everyone who works with visuals.
In this simple guide, we’ll delve into the fundamentals of the chroma key effect, how it is used for video making, and how to leverage that as you perfect your visual content.
YouTube Video Background Creating realistic video scenes at your will is easy to complete with Filmora green screen removal.
Create Video Backgrounds Create Video Backgrounds Learn Green Screen
How Does Chroma Key Work?
Chroma Keying is done by singling out a specific color (usually green or blue) from the foreground, removing it, and replacing it with a different background (for example, a sunset). This process typically follows a series of steps:
- Background Selection:
A solid, single-color background, often green or blue, that contrasts well with the subject must be used. The color chosen should not be present in the subject or any props in the camera field to avoid unintentional transparency.
- Color Keying:
This requires the use of specialized visual effects software to key out the chosen color. The green or blue background is designated as transparent, making everything of that color see-through. The software distinguishes between the keyed color and the subject, creating a mask for the transparent areas.
- Foreground Filming:
This involves filming the subject against the live chroma key background. During filming, the chosen background color (green or blue) won’t appear in the final result due to its transparency. The subject is captured as if separately from the isolated background.
- Post-Processing:
In post-production processing, the editor takes the keyed-out color and replaces it with the new background of their choice. This step creates the illusion that the subject is in a different setting or environment. The transparent areas become filled with the chosen background which, if done right, results in a cohesive and visually appealing composition.
Why Green?
Theoretically, the chroma key background can be any solid color. However, the most commonly used colors are studio blue and bright green, with the latter far more common.
The choice of background color depends on the specific requirements of the production and the colors present in the scenes being filmed.
Free Download For Win 7 or later(64-bit)
Free Download For macOS 10.14 or later
Contrast
The less similar your chosen background color is to natural skin tones, the easier to isolate and replace in your footage. Bright green provides a strong contrast to most human skin tones and is less likely to be present in costumes or natural surroundings, making it easier to isolate subjects during the color separation.
Luminance
The color green emits light with greater intensity than blue, allowing for far more effective isolation by cameras during filming. This also means that blue screens demand increased lighting for proper exposure compared to green. This situation may be less than ideal if you lack powerful lighting or you don’t have the big bucks for them.
Digital Sensors
Many digital cameras and sensors are more sensitive to green wavelengths, resulting in cleaner and more accurate color keying during post-processing. Modern technology has also evolved to optimize for a green background, making it a more practical choice for the chroma key effect.
Wardrobe and Set Design
Bright green occurs less naturally in costumes and set designs than other colors, making green the optimal choice for reducing the likelihood of color spill and keying issues. However, if you know your scene will have lots of green, it is probably best to film with a blue screen, so there’s less risk of color spill and less post-production work.
Setting up Your Own Chroma Key Studio
Setting up your chroma key is convenient and straightforward, but there are some key factors to consider while setting up to ensure maximal performance.
Choosing the Right Background Color
The first step in the chroma key setup is selecting the right background color to be keyed out. This choice determines your effective color separation and ensures a smooth keying process during editing. Choosing a chroma-key background color that contrasts distinctly with the subject’s colors is essential for effective color separation. This prevents unintentional transparency, color spill, and ensures a polished final result.
Lighting Considerations
Lighting is an important part of the chroma-keying process. Bold, uniform, and consistent lighting on both the subject and the background makes it easy to delineate one from the other fully. This minimizes shadows and variations in color, creating a smooth and seamless keying process. Multiple diffuse lights from different angles are often used to illuminate the green screen evenly.
Positioning/Camera
Proper subject and camera placement are necessary to ensure an even color-keying process during post-production. To prevent shadow interference, the green screen should be smooth, tense, and without wrinkles or shadows.
High-quality cameras are essential every time, especially for chroma keying. Images with better definition are easier to key, so camera quality significantly affects the outcome. Even if your camera isn’t the best, merely shooting well can ensure a clean color-keying process during editing, resulting in professional-looking visuals.
Recording Tips for Chroma Key
- Proper Lighting
Maintaining uniform and well-defined lighting during recording is essential for a successful chroma-keying process. This consistency ensures a seamless keying process during post-production.
- Keep Distance from the Green Screen
The optimal distance between the subject and the green screen minimizes color spill and allows for natural movements. Proper distance between subject and background allows for easier isolation of the background and much smoother post-editing. A recommended starting point for the issue is around 6 to 10 feet from the background.
- Subjects and Clothing
As mentioned before, the choice of costume for Selecting appropriate clothing that doesn’t match the chroma key color prevents transparency issues. Subjects also have to be positioned in such a way that there is minimal light interference and reflection. These contribute to a flawless chroma key outcome.
3 Basic Troubleshooting Strategies
- Color Spill
Sometimes, reflected light from your green background can be cast on your subject and may remain so when the background light is keyed out. This phenomenon is known as a color spill. It is usually because of uneven lighting or shooting around reflecting surfaces. Avoiding spill can differentiate between good and lousy chroma key aftereffects.
Human hair is one area where color spill can show up unsuspectingly. Due to the translucency of hair, it is common for some unintended light to seep through. This allows some background visibility, which you do not want with a chroma key. This is especially notable with lighter hair colors like blond hair.
There are ways to account for this. Many video-editing software have features such as spill suppression and screen matte adjustments that can enhance the final footage. Specialized plugins also go a long way in ensuring minimizing spill. Addressing spill correction tackles unwanted green artifacts and ensures a clean keying process.
- Poor Lighting
Suboptimal green screen lighting can lead to inconsistencies in keying and editing, undermining your product. One way to avoid this is to light the screen and subject separately. Another tip, although expensive, is using multiple diffuse light sources and trying to maintain even lighting across every square foot of your scene. Super bright or dark spots can ruin your output, so it’s worth the extra effort if you don’t want to deal with problematic post-production.
- Poorly Refined Edges
Chroma keying should leave your videos with crisp, defined, natural-looking edges. But post-production editing can make all the difference if it doesn’t come out to your taste. Softening and refining edges make a smoother transition between the foreground object and the new background. Light adjustments to edge thickness and screen matte settings can also help enhance overall visual quality and add finesse to your work.
Conclusion
Green screen photography produces excellent results, and its ease of use makes it indispensable for videographers of all levels. In this guide, we’ve discussed chroma key technology, its role in the industry, and how to apply it to your craft to elevate visual content.
The Essential Camera Toolkit for YT Enthusiasts
The Best Cameras for YouTube from Beginners to Professionals

Max Wales
Mar 27, 2024• Proven solutions
Whether you’re a beginner or a pro as a YouTuber, your YouTube equipment shouldn’t be the thing that holds you back from becoming a YouTube star. But, how do you find the best camera for making YouTube videos? What options do you have?
In this article, we’re going to explore some of the best cameras for YouTube. We’ll label each one based on what we believe is best for particular uses, so that you can better parse what it is that you want to purchase. All of this is in hopes that you can find the video camera for YouTube that is right for you and what you need.
Part 1: 7 Best Best Camera for Youtube to Make Videos
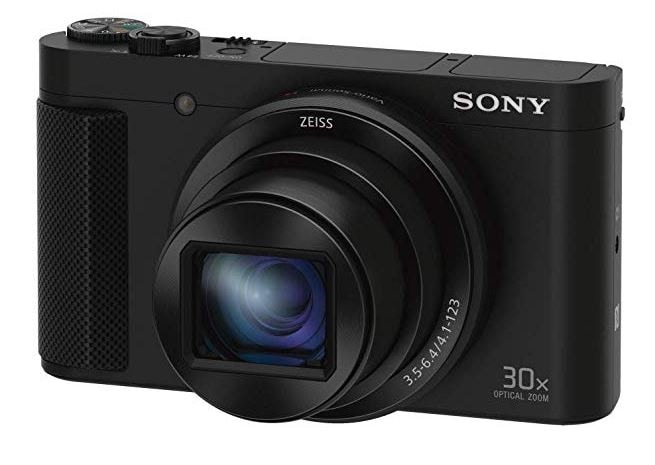
1. Sony DSC WX350 Digital Camera – Best Point and Shoot Video Camera
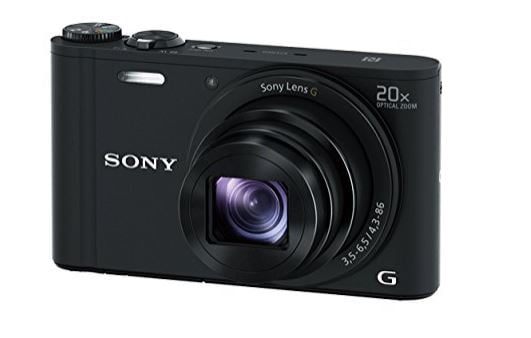
Specifications:
- 40x clear image zoom; 20x optical zoom
- Lock-on Auto Focus
- Wi-Fi with NFC3 connectivity for mobile devices
- 4 megapixels
- CMOS sensor that provides top quality images, even in low lighting
- Motion shot video with up to 4k quality output
Description: Have you been looking for a 20x zoom camera that fits in your pocket ? Get the best pictures with the Sony DSC WX350. This camera offers both still photos and video recording, using technology that minimizes how much the camera shakes, even if you’re filming on the go.
Pros: The image stabilizer makes this one of the best cameras for making YouTube videos out there, alongside of the 20x optical zoom. The battery life is quite long as well, which means you can get a lot of content done without any problems. Lastly, you can film in HD, which makes any YouTube influencer happy.
Cons: The LED screen can be quite dim, so it’s hard to see it when you’re out in bright sunlight; be sure you make adjustments before you go outside. There is also not your typical viewfinder installed, so experienced videographers may not like using it.
2. GoPro HERO8 Action Camera - Best Wearable Sports Camera
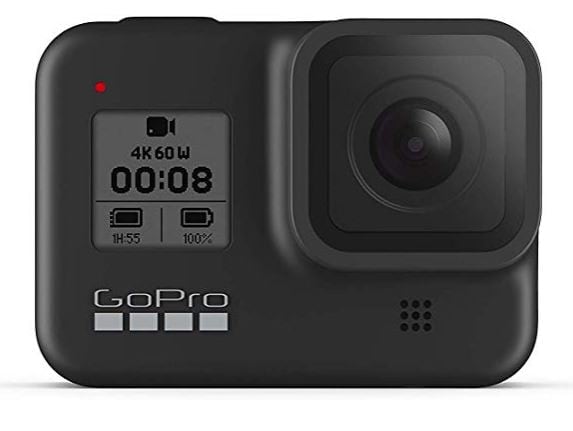
Specifications:
- Up to 60 FPS
- 4k and HD capabilities
- HyperSmooth 2.0 stabilization options.
- Optional Battery Mod available.
- Integrated Mount
- Crisp, easy to use and navigate LCD.
Description: If you need an on-the-go video camera for YouTube, there’s nothing better than a GoPro. With their HERO series of GoPros, they have all sorts of great features that allow you to capture the smoothest video, even when you’re out and on the go. Their top end stabilization makes their cameras the best for the active YouTuber.
Pros: The rugged, waterproof design of the HERO7 is a great option for anyone who is looking to be on the go with their YouTube. The integrated mount makes it simple for anyone who wants to put it on a selfie stick or something else, and it even has a companion app for easy, on the go editing!
Cons: The Wi-Fi capabilities are great, but the video transfer can take a bit of time due to how large the files may be. So, if you’re uploading the transfer, you may want to consider using the USB port instead. Also, the memory card slot is in an awkward place near the mount, so those with larger fingers may have trouble putting a card in there.
3. Logitech BRIO HD Webcam for Video – Best Video Recording and Streaming Camera
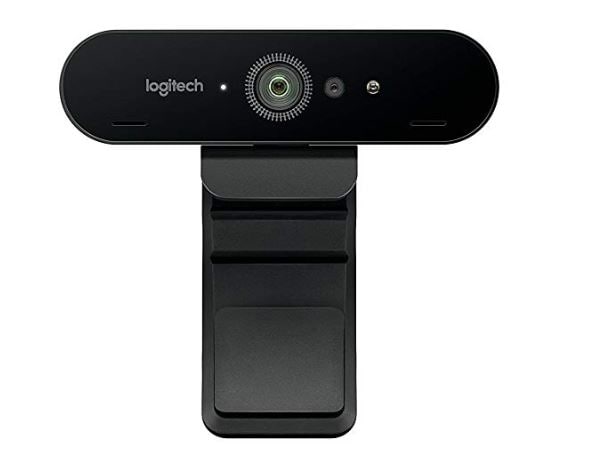
Specifications:
- 5x zoom
- Premium glass lens
- 4k image sensor for videoing and HDR with autofocus
- Light exposure automatically adjusts for whatever lighting that you’re filming in.
- Streaming and recording available.
- Enterprise ready for any use.
- Plug and play software automatically installs upon first use.
- Cover clip so you can cover the camera quickly, when needed.
Description: If you need an easy to use, simple to install option for filming and streaming from your computer, then this Logitech is the best camera for YouTube videos of this type. With multiple features and a design that has been made for streamers like you, you’ll always be able to just turn it on, make adjustments with ease, and get streaming in no time.
Pros: The camera is incredibly easy to use and install; it connects to your PC with a USB type C to USB type 3.0 cord (backwards compatible to 2.0). You can easily tinker with all of the settings and such in the included software.
Cons: The arm is designed for thick edges; those with flat monitors or borderless monitors may find that it’s difficult to attach it to your monitor. The software is easy to use, but it’s missing a handful of settings that more experienced streamers would want to have available. There is a crop out background feature, but it can be hard to find and use.
4. PANASONIC Lumix G7 4K Digital Camera - Best Mirrorless Camera for Professionals

Specifications:
- 16 megapixels
- No pass filter with four thirds sensor
- Wi-Fi capability
- 4k and HD video capture available at 30 frames per second.
- Aperture and shutter settings are adjusted via knobs, not menus.
- 3 inch tilt and swivel display
- High resolution viewfinder
Description: If you want to have professional looking photos and videos, the PANASONIC Lumix G7 4K is a solid choice for a mirrorless camera. All of the controls make it easy to get things the way that you want it, and it comes with multiple ports so that you can plug it into any device and get it ready to go.
Pros: This one of the best 4k video options out there, and you don’t need to spend an arm and a leg on it. The dual control dials and the variable touch LCD allow for maximum control, making it simple to film what you want with minimal editing after you’ve filmed.
Cons: There is a tracking focus, which can be good, but it makes the burst rate (which helps with motion blur) a lot slower. It does have a plastic build, rather than metal, so it’s not as heavy duty as other options. And, you need to purchase it with everything included, instead of just purchasing the body.
5. Sony CX405 Full HD - Best Camcorder (Only) for Video
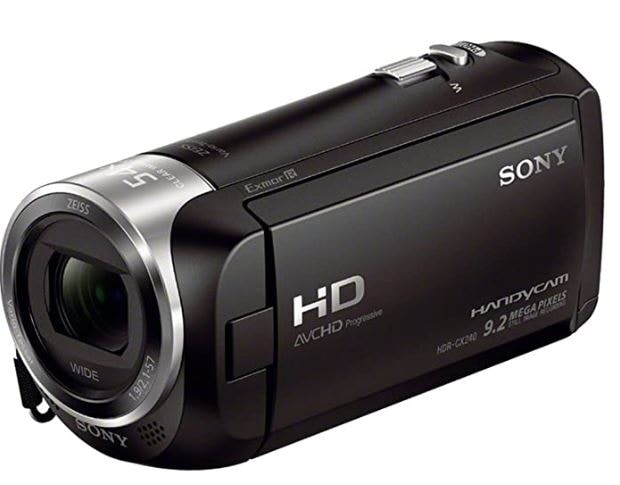
Specifications:
- 60x clear image zoom with Zeiss Lens
- 50 Mbps XAVC
- MP4 and AVCHD codecs
- SteadyShot image stabilization
- Built-in USB cable
- Face detection and noise reduction
- 7 picture effects for video
Description: If you’re looking for the best cheap camera for YouTube, this is a pretty solid option. It has a Carl Zeiss lens (low light capable) and SteadyShot technology for stabilization. It’s the starter camera that beginners dream of due to its ease of use and affordability.
Pros: The image stabilization is some of the best out there, and it’s got a user friendly interface. Dual recording options make for great YouTube and other social media use. Lightweight makes it easy to take anywhere.
Cons: Connectivity ports are in strange spots, and can be hard to get to. You cannot add an external mic, so you have to use the on-board ones. After extensive use of the ports, the on-board USB cable may have some issues with connectivity over time.
6. DJI OSMO Handheld Gimbal – Best Easy to Use Holder for Camera Phone for Beginners
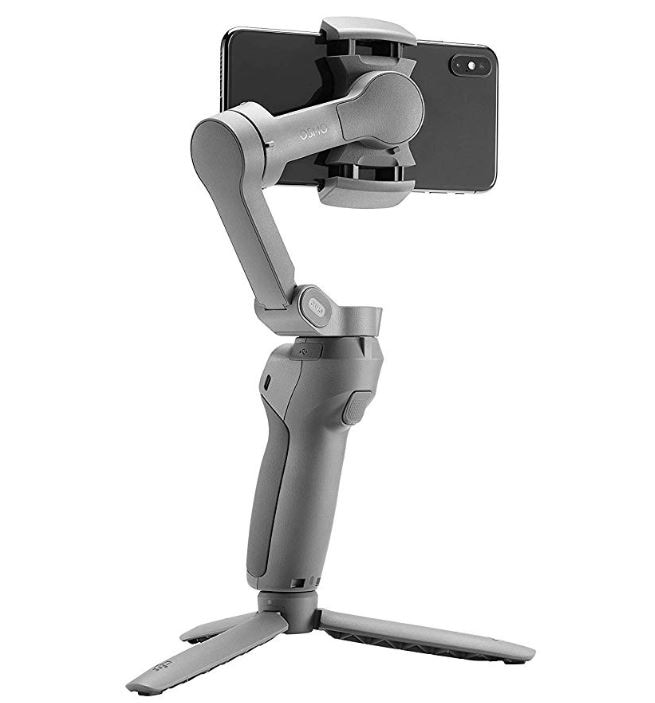
Specifications:
- 3 axis Gimbal that reduces shaky footage
- Ultra-responsive design reacts in real time.
- Easily folds up for maximum portability
- Battery operated ensures that you don’t always need a connection
- Comfortable grip allows you to use the gimbal without discomfort or pain.
Description: If your phone is currently the best camera for YouTube videos, then the DJI OSMO Handheld Gimbal makes it really easy for you to use it on the go. This has been designed to keep your camera flat, no matter where you’re moving, and it helps you take some pretty great shots. This is an option if you need freedom in your movement.
Pros: The DJI OSMO Handheld Gimbal is really easy to use and compatible with most mobile phones that are out there. With multiple settings and options, you can easily turn your phone into the very best option for getting footage, even if your regular video camera isn’t nearby.
Cons: Some people note that it doesn’t work with wide-screen mobile devices or “phablets” as they are called. Another complaint is that it can be difficult to get used the construction of the Gimbal, but that’s something that you can sort out with practice.
7. Canon Digital SLR Camera Kit – Best Cheap SLR Choice
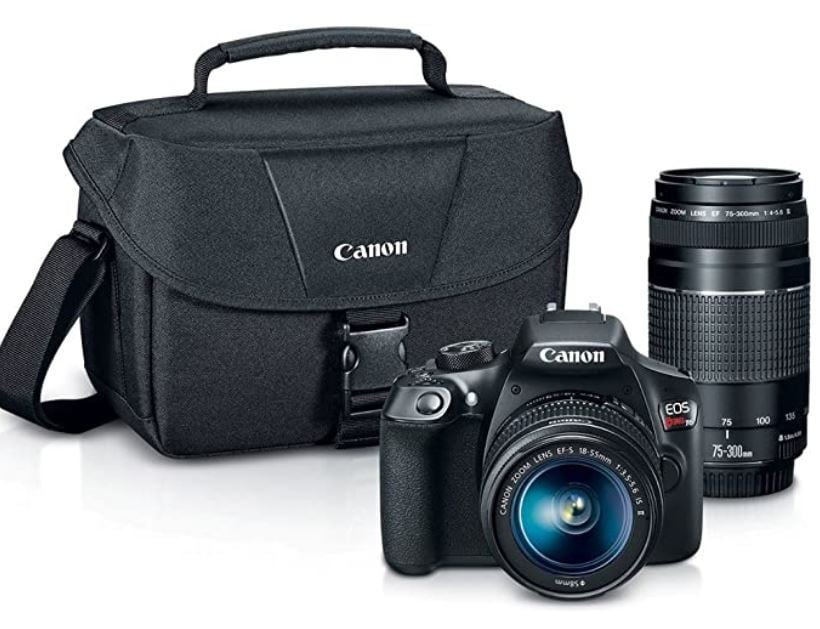
Specifications:
- Wi-Fi and NFC built in for ease of video and photo transfer
- 18 Megapixel
- Image sensor with an IS of 100 to 6400 (and the option to expand to 12800)
- Full HD videos with manual controls for focus and exposure
- 3 inch LCD monitor turns and adjusts as needed.
- Interchangeable lens, Bayonet mount for tripods and selfie sticks.
Description: The Canon Digital SLR Camera Kit is an all-in-one kit that makes it simple for you to start making videos right out of the bag. Complete with everything that you need in order to use an SLR well, you’ll find it’s quite simple to get the hang of, and that you have a lot of flexibility in how you use it.
Pros: The Canon Digital SLR Camera Kit has Wi-Fi capability, offers a great auto focus and is made from heavy duty materials. Plus, it can shoot stills, video, and rolls, which makes it really versatile for anyone.
Cons: This particular set doesn’t have Bluetooth with it, so you can’t connect a remote. Its lens is interchangeable, but you can only use Canon lenses and flashes with it, so that decreases the number of options you have here.
Want to know more about camera? Watch this!
What Gear Do Creators Actually Use | Vidcon 2023 | Sony vs Canon
Part 2: Frequently Asked Questions
1. What is a good camera for YouTube beginners?
Sony DSCHX80/B Point & Shoot Camera is the best cheap camera for YouTube that you can find if you’re on any sort of budget. It has a 60x clear image zoom and incredibly versatile video with multiple viewfinder and autofocus options. It’s selfie ready with a multi-angle LCD display and you can customize your setting sin whatever way that you wish to do so. It also comes with pretty much anything that you need in the box, so you’re ready to start filming as soon as you charge it.
2. What equipment do you need to start a YouTube channel?
- A camera that meets all of your needs and purposes.
- A microphone that is easy to use and produces high quality audio options.
- A sturdy, reliable tripod that is compatible with your camera
- Lighting equipment for the space that you’re filming in.
- An idea as to what you’re going to do and how you’d like to proceed.
3. What software do YouTubers use to edit videos?
There are a number of different options that you can consider if you’re looking to edit your videos well. Here is a quick list of some of the top options that you’ll see them using alongside of the best cameras for YouTube
Beginners
- Filmora : A simple to download and use option which can create high-quality videos in just a few clicks.
- iMovie: Only for Macs, this is a simple to use, intuitively designed video editor has a lot of features, and comes pre-installed on most Macs.
- Adobe Rush: Adobe Rush is a simple to use, browser based, video editing program that is also available as a phone app.
Professional
- Adobe Premiere: One of the top programs out there for editing video, this is part of the Adobe series and has endless options and features.
- Final Cut Pro: A Mac-Only, high end video editing software, many people who use the best YouTube camera also use this.
Max Wales
Max Wales is a writer and a lover of all things video.
Follow @Max Wales
Max Wales
Mar 27, 2024• Proven solutions
Whether you’re a beginner or a pro as a YouTuber, your YouTube equipment shouldn’t be the thing that holds you back from becoming a YouTube star. But, how do you find the best camera for making YouTube videos? What options do you have?
In this article, we’re going to explore some of the best cameras for YouTube. We’ll label each one based on what we believe is best for particular uses, so that you can better parse what it is that you want to purchase. All of this is in hopes that you can find the video camera for YouTube that is right for you and what you need.
Part 1: 7 Best Best Camera for Youtube to Make Videos
1. Sony DSC WX350 Digital Camera – Best Point and Shoot Video Camera
Specifications:
- 40x clear image zoom; 20x optical zoom
- Lock-on Auto Focus
- Wi-Fi with NFC3 connectivity for mobile devices
- 4 megapixels
- CMOS sensor that provides top quality images, even in low lighting
- Motion shot video with up to 4k quality output
Description: Have you been looking for a 20x zoom camera that fits in your pocket ? Get the best pictures with the Sony DSC WX350. This camera offers both still photos and video recording, using technology that minimizes how much the camera shakes, even if you’re filming on the go.
Pros: The image stabilizer makes this one of the best cameras for making YouTube videos out there, alongside of the 20x optical zoom. The battery life is quite long as well, which means you can get a lot of content done without any problems. Lastly, you can film in HD, which makes any YouTube influencer happy.
Cons: The LED screen can be quite dim, so it’s hard to see it when you’re out in bright sunlight; be sure you make adjustments before you go outside. There is also not your typical viewfinder installed, so experienced videographers may not like using it.
2. GoPro HERO8 Action Camera - Best Wearable Sports Camera
Specifications:
- Up to 60 FPS
- 4k and HD capabilities
- HyperSmooth 2.0 stabilization options.
- Optional Battery Mod available.
- Integrated Mount
- Crisp, easy to use and navigate LCD.
Description: If you need an on-the-go video camera for YouTube, there’s nothing better than a GoPro. With their HERO series of GoPros, they have all sorts of great features that allow you to capture the smoothest video, even when you’re out and on the go. Their top end stabilization makes their cameras the best for the active YouTuber.
Pros: The rugged, waterproof design of the HERO7 is a great option for anyone who is looking to be on the go with their YouTube. The integrated mount makes it simple for anyone who wants to put it on a selfie stick or something else, and it even has a companion app for easy, on the go editing!
Cons: The Wi-Fi capabilities are great, but the video transfer can take a bit of time due to how large the files may be. So, if you’re uploading the transfer, you may want to consider using the USB port instead. Also, the memory card slot is in an awkward place near the mount, so those with larger fingers may have trouble putting a card in there.
3. Logitech BRIO HD Webcam for Video – Best Video Recording and Streaming Camera
Specifications:
- 5x zoom
- Premium glass lens
- 4k image sensor for videoing and HDR with autofocus
- Light exposure automatically adjusts for whatever lighting that you’re filming in.
- Streaming and recording available.
- Enterprise ready for any use.
- Plug and play software automatically installs upon first use.
- Cover clip so you can cover the camera quickly, when needed.
Description: If you need an easy to use, simple to install option for filming and streaming from your computer, then this Logitech is the best camera for YouTube videos of this type. With multiple features and a design that has been made for streamers like you, you’ll always be able to just turn it on, make adjustments with ease, and get streaming in no time.
Pros: The camera is incredibly easy to use and install; it connects to your PC with a USB type C to USB type 3.0 cord (backwards compatible to 2.0). You can easily tinker with all of the settings and such in the included software.
Cons: The arm is designed for thick edges; those with flat monitors or borderless monitors may find that it’s difficult to attach it to your monitor. The software is easy to use, but it’s missing a handful of settings that more experienced streamers would want to have available. There is a crop out background feature, but it can be hard to find and use.
4. PANASONIC Lumix G7 4K Digital Camera - Best Mirrorless Camera for Professionals
Specifications:
- 16 megapixels
- No pass filter with four thirds sensor
- Wi-Fi capability
- 4k and HD video capture available at 30 frames per second.
- Aperture and shutter settings are adjusted via knobs, not menus.
- 3 inch tilt and swivel display
- High resolution viewfinder
Description: If you want to have professional looking photos and videos, the PANASONIC Lumix G7 4K is a solid choice for a mirrorless camera. All of the controls make it easy to get things the way that you want it, and it comes with multiple ports so that you can plug it into any device and get it ready to go.
Pros: This one of the best 4k video options out there, and you don’t need to spend an arm and a leg on it. The dual control dials and the variable touch LCD allow for maximum control, making it simple to film what you want with minimal editing after you’ve filmed.
Cons: There is a tracking focus, which can be good, but it makes the burst rate (which helps with motion blur) a lot slower. It does have a plastic build, rather than metal, so it’s not as heavy duty as other options. And, you need to purchase it with everything included, instead of just purchasing the body.
5. Sony CX405 Full HD - Best Camcorder (Only) for Video
Specifications:
- 60x clear image zoom with Zeiss Lens
- 50 Mbps XAVC
- MP4 and AVCHD codecs
- SteadyShot image stabilization
- Built-in USB cable
- Face detection and noise reduction
- 7 picture effects for video
Description: If you’re looking for the best cheap camera for YouTube, this is a pretty solid option. It has a Carl Zeiss lens (low light capable) and SteadyShot technology for stabilization. It’s the starter camera that beginners dream of due to its ease of use and affordability.
Pros: The image stabilization is some of the best out there, and it’s got a user friendly interface. Dual recording options make for great YouTube and other social media use. Lightweight makes it easy to take anywhere.
Cons: Connectivity ports are in strange spots, and can be hard to get to. You cannot add an external mic, so you have to use the on-board ones. After extensive use of the ports, the on-board USB cable may have some issues with connectivity over time.
6. DJI OSMO Handheld Gimbal – Best Easy to Use Holder for Camera Phone for Beginners
Specifications:
- 3 axis Gimbal that reduces shaky footage
- Ultra-responsive design reacts in real time.
- Easily folds up for maximum portability
- Battery operated ensures that you don’t always need a connection
- Comfortable grip allows you to use the gimbal without discomfort or pain.
Description: If your phone is currently the best camera for YouTube videos, then the DJI OSMO Handheld Gimbal makes it really easy for you to use it on the go. This has been designed to keep your camera flat, no matter where you’re moving, and it helps you take some pretty great shots. This is an option if you need freedom in your movement.
Pros: The DJI OSMO Handheld Gimbal is really easy to use and compatible with most mobile phones that are out there. With multiple settings and options, you can easily turn your phone into the very best option for getting footage, even if your regular video camera isn’t nearby.
Cons: Some people note that it doesn’t work with wide-screen mobile devices or “phablets” as they are called. Another complaint is that it can be difficult to get used the construction of the Gimbal, but that’s something that you can sort out with practice.
7. Canon Digital SLR Camera Kit – Best Cheap SLR Choice
Specifications:
- Wi-Fi and NFC built in for ease of video and photo transfer
- 18 Megapixel
- Image sensor with an IS of 100 to 6400 (and the option to expand to 12800)
- Full HD videos with manual controls for focus and exposure
- 3 inch LCD monitor turns and adjusts as needed.
- Interchangeable lens, Bayonet mount for tripods and selfie sticks.
Description: The Canon Digital SLR Camera Kit is an all-in-one kit that makes it simple for you to start making videos right out of the bag. Complete with everything that you need in order to use an SLR well, you’ll find it’s quite simple to get the hang of, and that you have a lot of flexibility in how you use it.
Pros: The Canon Digital SLR Camera Kit has Wi-Fi capability, offers a great auto focus and is made from heavy duty materials. Plus, it can shoot stills, video, and rolls, which makes it really versatile for anyone.
Cons: This particular set doesn’t have Bluetooth with it, so you can’t connect a remote. Its lens is interchangeable, but you can only use Canon lenses and flashes with it, so that decreases the number of options you have here.
Want to know more about camera? Watch this!
What Gear Do Creators Actually Use | Vidcon 2023 | Sony vs Canon
Part 2: Frequently Asked Questions
1. What is a good camera for YouTube beginners?
Sony DSCHX80/B Point & Shoot Camera is the best cheap camera for YouTube that you can find if you’re on any sort of budget. It has a 60x clear image zoom and incredibly versatile video with multiple viewfinder and autofocus options. It’s selfie ready with a multi-angle LCD display and you can customize your setting sin whatever way that you wish to do so. It also comes with pretty much anything that you need in the box, so you’re ready to start filming as soon as you charge it.
2. What equipment do you need to start a YouTube channel?
- A camera that meets all of your needs and purposes.
- A microphone that is easy to use and produces high quality audio options.
- A sturdy, reliable tripod that is compatible with your camera
- Lighting equipment for the space that you’re filming in.
- An idea as to what you’re going to do and how you’d like to proceed.
3. What software do YouTubers use to edit videos?
There are a number of different options that you can consider if you’re looking to edit your videos well. Here is a quick list of some of the top options that you’ll see them using alongside of the best cameras for YouTube
Beginners
- Filmora : A simple to download and use option which can create high-quality videos in just a few clicks.
- iMovie: Only for Macs, this is a simple to use, intuitively designed video editor has a lot of features, and comes pre-installed on most Macs.
- Adobe Rush: Adobe Rush is a simple to use, browser based, video editing program that is also available as a phone app.
Professional
- Adobe Premiere: One of the top programs out there for editing video, this is part of the Adobe series and has endless options and features.
- Final Cut Pro: A Mac-Only, high end video editing software, many people who use the best YouTube camera also use this.
Max Wales
Max Wales is a writer and a lover of all things video.
Follow @Max Wales
Also read:
- In 2024, Access Unlimited Stock Photos via Four Noteworthy YouTubes
- Global Viewer Count Triumphs Play Button Honors
- From Bite-Sized to Detailed Converting Shorts to Editable MP4
- Social Trends in Visual Forms, '23 Edition
- In 2024, Deciphering How to Spot Your Video Enthusiasts
- PixelPie Slicer
- In 2024, Advanced Google Slides Techniques Adding YouTube Media
- [Updated] Content Kings & Queens 8 YT's Booming Stars
- [New] Essential Strategies for Successful Mukbang Production
- Boost Video Appeal with These 20 Best Thumbnail Fonts for 2024
- The Essential Guide to Understanding YouTube's Earnings Mechanics (CPM)
- [Updated] Elevate Video Decks Smart Description Templates
- The Haven Guide Top 3 Non-Youtube Video Portals
- Leveraging YT Playlist Features for Site Enhancement
- Channel Transformation via Musical Additions for 2024
- [Updated] Backtrack with Flair Ingenious Ways to Watch Youtube Reverse
- [New] Building Your First Channel Essential Video Gear List
- [New] Dial in the Perfect Moment YouTube Optimal Posting
- [Updated] Entry-Level Expenditure Cost-Effective Platforms for YouTube Purchases
- [New] 5 Key Aspects to Consider When Sizing Your YouTube Thumbnail
- Demystifying the Math of YouTube Ratio Perfection
- Step-by-Step Throwing Epic Intros with iMovie
- [New] Calculating Monetary Gain for a Milion of YouTube Watchers
- Dynamic Slideshows Embedding YouTube Content
- [Updated] Customizable MCB Visuals for YouTube Banners
- Stream Freedom on the Go Download Your Favorite YouTube Tracks iOS
- [Updated] Crafting Content Masterpieces with These Essential YouTube Tips
- Startups' Guide to Earnings on YouTube Platform
- [Updated] DSLR's Place Among Mirrorless Cameras for Videos
- In 2024, Cultivate Inner Peace & Physical Strength with These Channels
- 2024 Approved 10 Strategies for Educators Starting Their Own YouTube Series
- [Updated] Discover the Power of YouTube Editing A Compre Written in Code The Intricacies of JavaScript Functions
- Comprehensive iTunes Update Upload YouTube Videos Guide
- In 2024, Efficient Guide Image Conversion to Professional YouTube Thumbnails
- Banish YouTube Shorts Forever with Ease
- [Updated] Building a YouTube Subscription Direct Link
- [New] 2024 Approved How to Edit Video for TikTok on Mac
- [New] In 2024, Discover the 10 Cutest/Scariest TikTok Filters Ever
- Catch or Beat Sleeping Snorlax on Pokemon Go For Apple iPhone 15 | Dr.fone
- Updated Enhance Your Footage Color Correction in Final Cut Pro 2023 for 2024
- New 2024 Approved Steps for Taking Control of Your iPhones Volume Settings by Eliminating Audio Leveling
- [New] Velocity Ventures Discover the Freshest 5 Virtual Race Titles for 2024
- How to Upgrade iPhone 8 without Data Loss? | Dr.fone
- Complete Examination The Video Show App
- New How to Add Audio to QuickTime Video Files
- Excellent Live Broadcast Achieving Ultra-HD FB Video for 2024
- [Updated] From Outdated to Outstanding Personalizing Your TikTok Profile for 2024
- Full Guide How To Fix Connection Is Not Private on Nokia C210 | Dr.fone
- In 2024, How to Bypass Google FRP Lock from Tecno Pova 5 Devices
- Title: "Swift Introduction The Art of Green Screening"
- Author: Steven
- Created at : 2024-05-25 20:27:35
- Updated at : 2024-05-26 20:27:35
- Link: https://youtube-clips.techidaily.com/swift-introduction-the-art-of-green-screening/
- License: This work is licensed under CC BY-NC-SA 4.0.
