
:max_bytes(150000):strip_icc()/white-office-desk-table-with-a-lot-of-things-on-it--top-view-with-copy-space--637047700-5a24617b4e46ba001a6d6d23.jpg)
Streamline Your VFX Workflow with These 8 Online Backdrop Banks
Streamline Your VFX Workflow with These 8 Online Backdrop Banks
Top 8 Sites to Get Free Green Screen Backgrounds and Footage

Richard Bennett
Mar 27, 2024• Proven solutions
Green screen or also known as chroma key is used when you swap the background of a video with another background. It provides you the opportunity to create fancy YouTube videos without forming an expensive set or going to a distant location and will reduce your cost! You can shoot your video at any place, at any time you want and then you can just swap the background with a fancy animation!
In this article, we are going to show you 8 sites to download green screen footage and how to make green screen videos for free.
- Part1: Top 8 site for free green screen background videos
- Part2: How to make and apply a green screen background video
- Part3: How to use the green screen in video
The best video editor for YouTubers - Wondershare Filmora , not only allows you to cut, crop, rotate, reverse videos, but also offers advanced features like PIP, Green Screen , or audio mixing. What’s more, you can find lots of effects on Fashion, gaming, education, tutorial, sports, etc. Check this article to know more.
In the video tutorial below, we will walk you through the steps to transforming your video into a cinematic marvel. With a few simple clicks and adjustments, you can take your audience to another world.
 Download Mac Version ](https://tools.techidaily.com/wondershare/filmora/download/ )
Part 1: Top 8 sites to get free green screen videos
With the latest release, you can now download video effects, video footage, stock image, and royalty-free sound effect and music from the effects store Wondershare Filmstock .

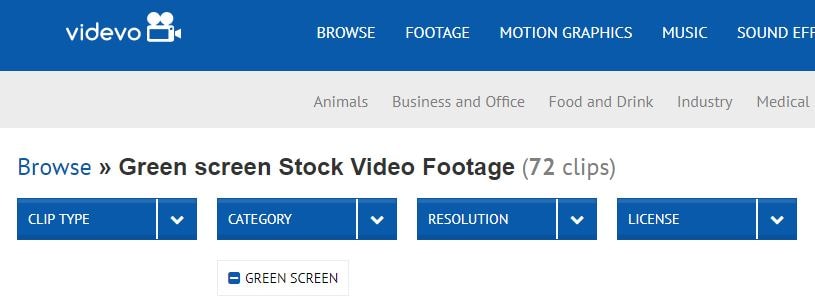
1. Videvo
Get amazing and high-quality videos that are free of the copyright at Videvo. It is a free stock website for videos that also offers free stock motion graphics that can be used in any projects you want. There are 4 segments that are clip-type, category, resolution, and license with further sub-categories for you to choose from. Only the videos with the Creative Commons license 3.0 must be given credit to the original creator.
The features of Videvo include-
- Use video clips free of charge.
- Offers free stock videos and motion graphics.
- Use the video for any types of production, personal or commercial.
- You may browse free green screen background videos.
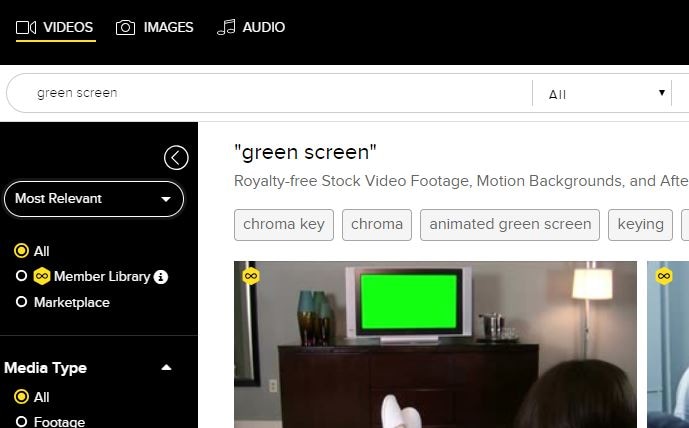
2. VideoBlocks
Download high-quality free stock video at VideoBlocks. Started in the year 2009, VideoBlocks offers animated free green screen background to 4k videos and after-effect templates.
The features are-
- Offers royalty-free stock video footages.
- Choose from the background, after-effects, and collections.
- From Chroma key to blue screen and touchscreen gestures.
- Come in 3 types of pricing plans basic, unlimited, and enterprise.
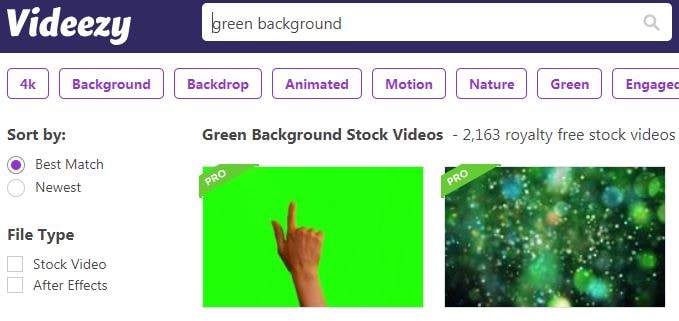
3. Videezy
From sharing HD quality videos to free green screen backgrounds and amazingly cool video footages, Videezy is a platform with numerous free stock video clips, backgrounds and more.
The features of Videezy include-
- All videos on this platform are licensed CC0.
- Share free green screen backgrounds.
- Offer ultra HD resolution.
- A range of themes.
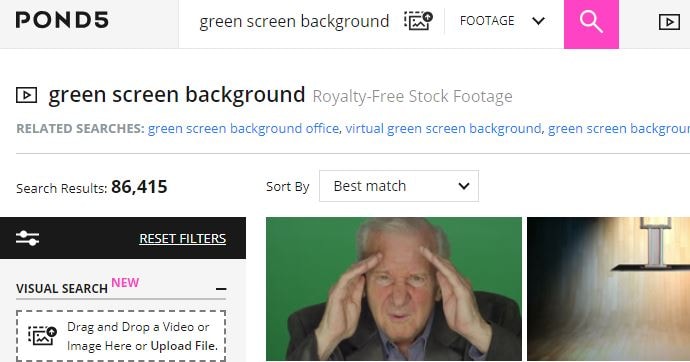
4. Pond5
You can now license your videos with Pond5 which is an international community of brands and media creators. It is a website with more than 60000 contributors of content from about 150 countries. Over 10000 videos are uploaded on Pond5 each day.
The features of Pond5 include-
- Browse more than 700k royalty-free video production tracks.
- Discover HD and 4K clips from filmmakers renowned globally.
- Easy visual search with drag and drop video feature.
- Free green screen background with animated HD videos.
- Several filters to present your green background video amazingly.
5. iStock
If you wish to search for millions of premium quality images, try iStock that handpicks and maintains the leading stock content globally.
The features of iStock include-
- From the green background to blue and orange backgrounds, iStock offers all.
- Find HD Video and 4K footage with green screen background at a nominal price just for the video and not the size.
- Pricing is flexible.

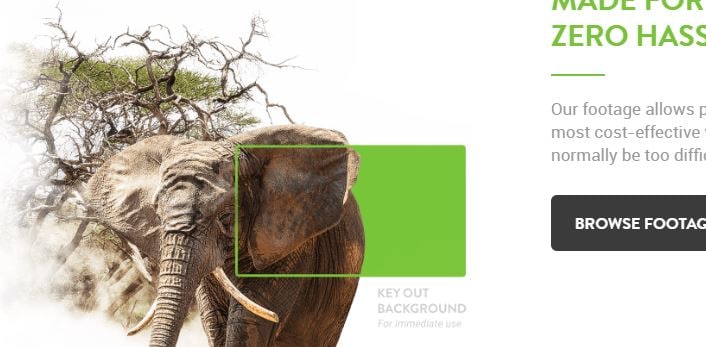
6. Green Screen Animals
The animals are truly difficult to capture. With the Green Screen Animals, you get the easiest and cost-effective access to high-quality video clips of domestic and exotic animals on a free green screen background.
The features are-
- Offers ultra HD 6k resolution video footage.
- You get access to any format as per your requirement.
- Use 3D chimpanzee models in your project with the green screen background.
- Getting performance from the animals can be a tough call, Green Screen Animals makes it easy.
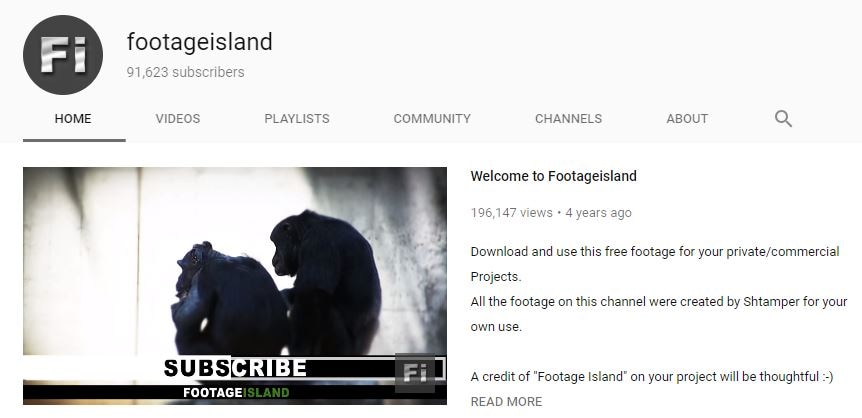
7. Footage Island
Get video footage for both private and commercial use completely free. You just need to give credit to Footage Island and use the content free.
- Free green screen background footages available.
- Free download for both personal and commercial use with just credits to the channel.
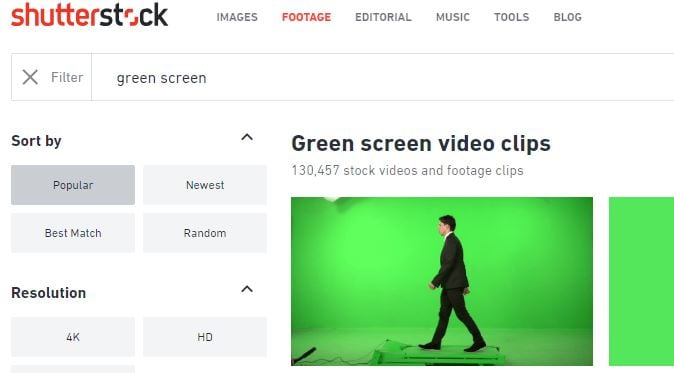
8. Shutterstock
You can sort green screen videos from shutterstock using various search options like popular, latest, best match, and random. You may also select SD, 4k or HD resolution, choose a character from people, animals or abstract, categories and more.
The features include-
- Over 1 lakh stock videos and video clips.
- Curated video collection.
- Categories like entertainment, news, sports, royalty.
- Add music to your free green screen background video.
- Easy editing tools for a great video.
Part 2: How to make and apply a green screen background
In our last article, we have shared with you how to make and use green screen footage .
While, in this article, we won’t repeat it but just share with you some tips for making and applying green screen footage in video editings.
The core objective is to have a smooth one colored background which is easy to replace in post-production. Since the green screen is employed in the film industry on a mega scale, professional green screen kits are quite expensive. Hence it is much more feasible that a DIY solution is employed for the required results.
For a good quality result from a DIY green screen, you need to take care of the following items:
1. Screen Quality
Green screens can be wall painted with a chroma key, a large sheet of cloth hung without any creases, or a portable setup canvas that can cover the given area.
2. Lightning
The most important thing to be kept in mind is that your background should be lit evenly. Any shadows on the background should be avoided. The distance of the subject should be at least ten feet from the background, to minimize any kind of shadow.
You may also like: >> Blue Screen VS Green Screen: All You Need to Know
Part 3: How to composite green screen video footage
The next step is to utilize the downloaded free green screen footage with your video.
The best green screen software for personal and semi-professional use is Filmora. It allows you to import and work on videos shot in any format (AVI, MPEG, MKV, MP4, etc.) and seamlessly integrate your video with the background.
We have already demonstrated the steps of compositing and editing green screen videos at the beginning of the article. While in the video tutorial below, you can check the samples of using Filmora to compositing downloaded free green screen footage.
You can edit a video with green screen using Filmora easily. Check the below video to learn how to manage it.
Download Mac Version ](https://tools.techidaily.com/wondershare/filmora/download/ )
Richard Bennett
Richard Bennett is a writer and a lover of all things video.
Follow @Richard Bennett
Richard Bennett
Mar 27, 2024• Proven solutions
Green screen or also known as chroma key is used when you swap the background of a video with another background. It provides you the opportunity to create fancy YouTube videos without forming an expensive set or going to a distant location and will reduce your cost! You can shoot your video at any place, at any time you want and then you can just swap the background with a fancy animation!
In this article, we are going to show you 8 sites to download green screen footage and how to make green screen videos for free.
- Part1: Top 8 site for free green screen background videos
- Part2: How to make and apply a green screen background video
- Part3: How to use the green screen in video
The best video editor for YouTubers - Wondershare Filmora , not only allows you to cut, crop, rotate, reverse videos, but also offers advanced features like PIP, Green Screen , or audio mixing. What’s more, you can find lots of effects on Fashion, gaming, education, tutorial, sports, etc. Check this article to know more.
In the video tutorial below, we will walk you through the steps to transforming your video into a cinematic marvel. With a few simple clicks and adjustments, you can take your audience to another world.
Download Mac Version ](https://tools.techidaily.com/wondershare/filmora/download/ )
Part 1: Top 8 sites to get free green screen videos
With the latest release, you can now download video effects, video footage, stock image, and royalty-free sound effect and music from the effects store Wondershare Filmstock .
1. Videvo
Get amazing and high-quality videos that are free of the copyright at Videvo. It is a free stock website for videos that also offers free stock motion graphics that can be used in any projects you want. There are 4 segments that are clip-type, category, resolution, and license with further sub-categories for you to choose from. Only the videos with the Creative Commons license 3.0 must be given credit to the original creator.
The features of Videvo include-
- Use video clips free of charge.
- Offers free stock videos and motion graphics.
- Use the video for any types of production, personal or commercial.
- You may browse free green screen background videos.
2. VideoBlocks
Download high-quality free stock video at VideoBlocks. Started in the year 2009, VideoBlocks offers animated free green screen background to 4k videos and after-effect templates.
The features are-
- Offers royalty-free stock video footages.
- Choose from the background, after-effects, and collections.
- From Chroma key to blue screen and touchscreen gestures.
- Come in 3 types of pricing plans basic, unlimited, and enterprise.
3. Videezy
From sharing HD quality videos to free green screen backgrounds and amazingly cool video footages, Videezy is a platform with numerous free stock video clips, backgrounds and more.
The features of Videezy include-
- All videos on this platform are licensed CC0.
- Share free green screen backgrounds.
- Offer ultra HD resolution.
- A range of themes.
4. Pond5
You can now license your videos with Pond5 which is an international community of brands and media creators. It is a website with more than 60000 contributors of content from about 150 countries. Over 10000 videos are uploaded on Pond5 each day.
The features of Pond5 include-
- Browse more than 700k royalty-free video production tracks.
- Discover HD and 4K clips from filmmakers renowned globally.
- Easy visual search with drag and drop video feature.
- Free green screen background with animated HD videos.
- Several filters to present your green background video amazingly.
5. iStock
If you wish to search for millions of premium quality images, try iStock that handpicks and maintains the leading stock content globally.
The features of iStock include-
- From the green background to blue and orange backgrounds, iStock offers all.
- Find HD Video and 4K footage with green screen background at a nominal price just for the video and not the size.
- Pricing is flexible.
6. Green Screen Animals
The animals are truly difficult to capture. With the Green Screen Animals, you get the easiest and cost-effective access to high-quality video clips of domestic and exotic animals on a free green screen background.
The features are-
- Offers ultra HD 6k resolution video footage.
- You get access to any format as per your requirement.
- Use 3D chimpanzee models in your project with the green screen background.
- Getting performance from the animals can be a tough call, Green Screen Animals makes it easy.
7. Footage Island
Get video footage for both private and commercial use completely free. You just need to give credit to Footage Island and use the content free.
- Free green screen background footages available.
- Free download for both personal and commercial use with just credits to the channel.
8. Shutterstock
You can sort green screen videos from shutterstock using various search options like popular, latest, best match, and random. You may also select SD, 4k or HD resolution, choose a character from people, animals or abstract, categories and more.
The features include-
- Over 1 lakh stock videos and video clips.
- Curated video collection.
- Categories like entertainment, news, sports, royalty.
- Add music to your free green screen background video.
- Easy editing tools for a great video.
Part 2: How to make and apply a green screen background
In our last article, we have shared with you how to make and use green screen footage .
While, in this article, we won’t repeat it but just share with you some tips for making and applying green screen footage in video editings.
The core objective is to have a smooth one colored background which is easy to replace in post-production. Since the green screen is employed in the film industry on a mega scale, professional green screen kits are quite expensive. Hence it is much more feasible that a DIY solution is employed for the required results.
For a good quality result from a DIY green screen, you need to take care of the following items:
1. Screen Quality
Green screens can be wall painted with a chroma key, a large sheet of cloth hung without any creases, or a portable setup canvas that can cover the given area.
2. Lightning
The most important thing to be kept in mind is that your background should be lit evenly. Any shadows on the background should be avoided. The distance of the subject should be at least ten feet from the background, to minimize any kind of shadow.
You may also like: >> Blue Screen VS Green Screen: All You Need to Know
Part 3: How to composite green screen video footage
The next step is to utilize the downloaded free green screen footage with your video.
The best green screen software for personal and semi-professional use is Filmora. It allows you to import and work on videos shot in any format (AVI, MPEG, MKV, MP4, etc.) and seamlessly integrate your video with the background.
We have already demonstrated the steps of compositing and editing green screen videos at the beginning of the article. While in the video tutorial below, you can check the samples of using Filmora to compositing downloaded free green screen footage.
You can edit a video with green screen using Filmora easily. Check the below video to learn how to manage it.
Download Mac Version ](https://tools.techidaily.com/wondershare/filmora/download/ )
Richard Bennett
Richard Bennett is a writer and a lover of all things video.
Follow @Richard Bennett
Optimized Video Sharing: Apple Devices & YouTube Connection
Create High-Quality Video - Wondershare Filmora
An easy and powerful YouTube video editor
Numerous video and audio effects to choose from
Detailed tutorials provided by the official channel
Initially, iOS users had the option to load videos directly to YouTube via the tap-to-upload feature. However, this option is missing in the recent iOS devices versions. Therefore, many users search for possible ways to post a video on YouTube from iPhone. For this, you have to put some considerations into place before moving on. The video title length should not exceed 100 characters, while the description is maintained at 5,000 characters. Also, ensure the video length doesn’t exceed 15 minutes. Let’s roll out the best ways to upload your videos and make that big catch on subscribers.

In this article
01 [ How to upload a video to YouTube from iPhone or iPad](#Part 1)
02 [Why your phone doesn’t post videos to YouTube](#Part 2)
03 [Make your YouTube video better with Filmora](#Part 3)
How to upload a video to YouTube from iPhone or iPad
Are you ready to start on that big adventure and share your videos on YouTube? Follow these steps to learn how to upload a video to YouTube from your iPhone.
Method 1: Upload using the YouTube iOS app
Using the YouTube app is the simplest way to upload your YouTube videos. The YouTube app should be installed on your iOS device.
Step 1. Launch the YouTube app on your device, then sign in to your account. If you don’t have an account yet, you will need to “Sign up” for a new one before continuing the upload process.
Step 2. Click on the “+” icon found at the bottom of the screen.
Step 3. Then choose the “Upload a video” option from the populated list of options.
Step 4. Check out the pop-up that appears and “Allow access” to it.
Step 5. Edit your video to your preference by trimming or cropping as you desire. Then click on the “Next” option.

Step 6. Add “title and description” to your video. Remember, the title should contain less than 100 characters and the description no more than 500 characters.
Step 7. Then set the visibility mode as “Public” to enable you to share your video over the internet.
Step 8. Click on the “Upload” button to finally upload your video to YouTube.

Method 2: Upload using Photo App
The Photo App has a “Share” option that you can use to upload your videos to YouTube. Here is the guide.
Step 1. Go to your iOS device and tap on the “Photos” app.
Step 2. Then tap on the “Videos Folder” to locate the video you wish to upload to YouTube.

Step 3. Next, tap on the video that you want to upload.
Step 4. Then tap on the “Share” icon located at the bottom left of your iOS device screen.
Step 5. You’ll then access a “Share” menu from where you have various share options for your video.
Step 6. Choose the “YouTube” option to continue to share your video there. At this juncture, ensure you have logged in to your Google Account.

Step 7. You need to provide a “Title” and “Description” of your video. Then go to the “Privacy” Options and make your video “Public.”
Step 8. Finally, tap on the “Publish” tab found at the top-right corner of your screen to make your video viewable by the public.

Method 3: Upload video to YouTube using Safari
Safari is another alternative method to upload a video to YouTube.
Step 1. First, go to “youtube.com” on Safari and sign in.

Step 2. Then tap on the “account” icon at the top right side of the screen.
Step 3. Hit on the “Upload” icon and wait to be redirected to the YouTube Studio desktop site.
Step 4. Click on the “Select Files” option.
Step 5. Choose the video you wish to add to YouTube from the “Photo” library and tap on the “Add” button.

Step 6. Add your video’s “title and description” and hit the “Next” button.
Step 7. Tap on the “Next” button once more to go to the “Visibility” page.
Step 8. Select the “Public” option to upload your video to the public.
Why your phone doesn’t post videos to YouTube
Despite learning how to upload to YouTube from iPhone, you may be perplexed to realize that your phone refuses to post videos to YouTube. What could be the reason?
1) YouTube issues
In most cases, the problem doesn’t arise from your phone but from YouTube. This streaming app may also experience some hitches along the way. Remember that even if your phone sync with your YouTube account to upload videos from the “Camera Roll,” YouTube isn’t managed from the Camera Roll but the YouTube app directly. You can solve the issue by signing out of your YouTube account and signing back in.
2) Connection Strength
Some videos may appear quite large and cause a time-out during the upload process. Check your Wi-Fi or internet connection strength to determine if it needs a boost or wait until the streaming strength is strong for a quick upload. Test your internet speed by searching “internet test speed” on Google. Then click the “Run Speed Test” in the search box. A window will open and give you an estimate of the Mbps that your connection is operating at. If too low, switch to other alternatives.
3) Verify your YouTube account
Verifying your account will help you to enjoy YouTube’s full features. It’s then that you’ll manage to upload videos without any drawbacks. Also, that’s when you’ll manage to upload longer videos that go beyond the 15-minute duration.
4) Pay attention to the video size
There is a limit for videos to post to YouTube. If it is too large or long, the upload will cancel before completion.
5) Be patient
YouTube can save your partial upload for 24 hours. So, you can continue to upload from where you left. Learn to be patient as there could be a surge of user traffic, especially during evenings.
Make your YouTube video better with Filmora
Good video quality will make you go miles ahead of your marketing gig. You can use Filmora mobile application to make your videos look better before uploading them to YouTube. This intuitive video editing app has advanced features and several ways to compose creative videos.
- Stunning video effects that let you add animated text to video
- Easily record your voice-overs with its perfect sound effects
- Split functionality that allows you to slice your video footage into two or more separate video clips
- Playback your clips in reverse and adjust the speed for fast or slow motion
- Select the best aspect ratio for your video
- Advanced camera to create emoji selfies and other video beautification
- Directly share your videos to social media sites like YouTube and Facebook.
Check out the steps to edit your video with Filmora on your iOS device
Step 1. Download and install Filmora
For iOS devices, go to the “Apple Store” to download and install the app. Also, allow it to access your videos, camera, and pictures in the process.
Step 2. Import video
You may already have a video in your library that you wish to upload to YouTube. Nonetheless, you can shoot a video afresh to add. To shoot one, you need to settle on a topic before recording and downloading other images you may need. Ensure you watch what you are filming and use adequate lighting during the shooting process.
Next, begin to import your video file. Just open the application and select the “Create new video” option. Then choose the “Video” icon and select a folder that contains the video to be added. Hit the “Add” button from the bottom right corner.
Step 3. Edit video
Filmora has several editing features to make your video better. Use the “Edit tools” feature to turn your video into an impeccable piece. Easily add filters, adjust the speed, or create subtitles, among other functions. You can also split, trim, or delete the unwanted clip parts.
It is important to add a title and description to your video. Just use the “Titles” button to add the title. Other precepts that you can add include transitions, sound like voice-over,
Step 4. Export and share
You’ve just finished creating and editing your video. Click on the “Save” tab and let the application export your video. Then select the “Save to Camera Roll” option to save the video to your iPhone. Finally, you can upload and share the video directly to your YouTube account.
Conclusion
● However, it appears to be a difficult task; you must have found relief after going through these procedures. You don’t need prior knowledge on how to upload a video to YouTube from your iPhone. Several options are at your disposal. You can use the Safari, YouTube app, or the Photo app to upload your videos. The better part is that you can create top-notch videos with Filmora. This mobile video editing app has a lot to offer, ensuring quality content.
Initially, iOS users had the option to load videos directly to YouTube via the tap-to-upload feature. However, this option is missing in the recent iOS devices versions. Therefore, many users search for possible ways to post a video on YouTube from iPhone. For this, you have to put some considerations into place before moving on. The video title length should not exceed 100 characters, while the description is maintained at 5,000 characters. Also, ensure the video length doesn’t exceed 15 minutes. Let’s roll out the best ways to upload your videos and make that big catch on subscribers.
In this article
01 [ How to upload a video to YouTube from iPhone or iPad](#Part 1)
02 [Why your phone doesn’t post videos to YouTube](#Part 2)
03 [Make your YouTube video better with Filmora](#Part 3)
How to upload a video to YouTube from iPhone or iPad
Are you ready to start on that big adventure and share your videos on YouTube? Follow these steps to learn how to upload a video to YouTube from your iPhone.
Method 1: Upload using the YouTube iOS app
Using the YouTube app is the simplest way to upload your YouTube videos. The YouTube app should be installed on your iOS device.
Step 1. Launch the YouTube app on your device, then sign in to your account. If you don’t have an account yet, you will need to “Sign up” for a new one before continuing the upload process.
Step 2. Click on the “+” icon found at the bottom of the screen.
Step 3. Then choose the “Upload a video” option from the populated list of options.
Step 4. Check out the pop-up that appears and “Allow access” to it.
Step 5. Edit your video to your preference by trimming or cropping as you desire. Then click on the “Next” option.
Step 6. Add “title and description” to your video. Remember, the title should contain less than 100 characters and the description no more than 500 characters.
Step 7. Then set the visibility mode as “Public” to enable you to share your video over the internet.
Step 8. Click on the “Upload” button to finally upload your video to YouTube.
Method 2: Upload using Photo App
The Photo App has a “Share” option that you can use to upload your videos to YouTube. Here is the guide.
Step 1. Go to your iOS device and tap on the “Photos” app.
Step 2. Then tap on the “Videos Folder” to locate the video you wish to upload to YouTube.
Step 3. Next, tap on the video that you want to upload.
Step 4. Then tap on the “Share” icon located at the bottom left of your iOS device screen.
Step 5. You’ll then access a “Share” menu from where you have various share options for your video.
Step 6. Choose the “YouTube” option to continue to share your video there. At this juncture, ensure you have logged in to your Google Account.
Step 7. You need to provide a “Title” and “Description” of your video. Then go to the “Privacy” Options and make your video “Public.”
Step 8. Finally, tap on the “Publish” tab found at the top-right corner of your screen to make your video viewable by the public.
Method 3: Upload video to YouTube using Safari
Safari is another alternative method to upload a video to YouTube.
Step 1. First, go to “youtube.com” on Safari and sign in.
Step 2. Then tap on the “account” icon at the top right side of the screen.
Step 3. Hit on the “Upload” icon and wait to be redirected to the YouTube Studio desktop site.
Step 4. Click on the “Select Files” option.
Step 5. Choose the video you wish to add to YouTube from the “Photo” library and tap on the “Add” button.
Step 6. Add your video’s “title and description” and hit the “Next” button.
Step 7. Tap on the “Next” button once more to go to the “Visibility” page.
Step 8. Select the “Public” option to upload your video to the public.
Why your phone doesn’t post videos to YouTube
Despite learning how to upload to YouTube from iPhone, you may be perplexed to realize that your phone refuses to post videos to YouTube. What could be the reason?
1) YouTube issues
In most cases, the problem doesn’t arise from your phone but from YouTube. This streaming app may also experience some hitches along the way. Remember that even if your phone sync with your YouTube account to upload videos from the “Camera Roll,” YouTube isn’t managed from the Camera Roll but the YouTube app directly. You can solve the issue by signing out of your YouTube account and signing back in.
2) Connection Strength
Some videos may appear quite large and cause a time-out during the upload process. Check your Wi-Fi or internet connection strength to determine if it needs a boost or wait until the streaming strength is strong for a quick upload. Test your internet speed by searching “internet test speed” on Google. Then click the “Run Speed Test” in the search box. A window will open and give you an estimate of the Mbps that your connection is operating at. If too low, switch to other alternatives.
3) Verify your YouTube account
Verifying your account will help you to enjoy YouTube’s full features. It’s then that you’ll manage to upload videos without any drawbacks. Also, that’s when you’ll manage to upload longer videos that go beyond the 15-minute duration.
4) Pay attention to the video size
There is a limit for videos to post to YouTube. If it is too large or long, the upload will cancel before completion.
5) Be patient
YouTube can save your partial upload for 24 hours. So, you can continue to upload from where you left. Learn to be patient as there could be a surge of user traffic, especially during evenings.
Make your YouTube video better with Filmora
Good video quality will make you go miles ahead of your marketing gig. You can use Filmora mobile application to make your videos look better before uploading them to YouTube. This intuitive video editing app has advanced features and several ways to compose creative videos.
- Stunning video effects that let you add animated text to video
- Easily record your voice-overs with its perfect sound effects
- Split functionality that allows you to slice your video footage into two or more separate video clips
- Playback your clips in reverse and adjust the speed for fast or slow motion
- Select the best aspect ratio for your video
- Advanced camera to create emoji selfies and other video beautification
- Directly share your videos to social media sites like YouTube and Facebook.
Check out the steps to edit your video with Filmora on your iOS device
Step 1. Download and install Filmora
For iOS devices, go to the “Apple Store” to download and install the app. Also, allow it to access your videos, camera, and pictures in the process.
Step 2. Import video
You may already have a video in your library that you wish to upload to YouTube. Nonetheless, you can shoot a video afresh to add. To shoot one, you need to settle on a topic before recording and downloading other images you may need. Ensure you watch what you are filming and use adequate lighting during the shooting process.
Next, begin to import your video file. Just open the application and select the “Create new video” option. Then choose the “Video” icon and select a folder that contains the video to be added. Hit the “Add” button from the bottom right corner.
Step 3. Edit video
Filmora has several editing features to make your video better. Use the “Edit tools” feature to turn your video into an impeccable piece. Easily add filters, adjust the speed, or create subtitles, among other functions. You can also split, trim, or delete the unwanted clip parts.
It is important to add a title and description to your video. Just use the “Titles” button to add the title. Other precepts that you can add include transitions, sound like voice-over,
Step 4. Export and share
You’ve just finished creating and editing your video. Click on the “Save” tab and let the application export your video. Then select the “Save to Camera Roll” option to save the video to your iPhone. Finally, you can upload and share the video directly to your YouTube account.
Conclusion
● However, it appears to be a difficult task; you must have found relief after going through these procedures. You don’t need prior knowledge on how to upload a video to YouTube from your iPhone. Several options are at your disposal. You can use the Safari, YouTube app, or the Photo app to upload your videos. The better part is that you can create top-notch videos with Filmora. This mobile video editing app has a lot to offer, ensuring quality content.
Also read:
- Digital Cinematographer Hub
- 2024 Approved How To Add Custom Thumbnails to Your YouTube Videos
- [Updated] A Step-by-Step Manual on Repetitive Watch Experiences in YT
- [Updated] Affluent Animator Architects
- Channel Boost Achieve YouTube Affiliate Milestone with 10K Vistas
- The Greatest Satirical Serenades
- No More Black Fringe in YouTube Videos
- Enhancing Engagement Through Thoughtful YouTube Tags for 2024
- [Updated] Decoding the Payment Structure on YouTube
- The Ultimate Guide to Refining Your YouTube Videos After Publishing
- In 2024, Breaking Down the Process for YouTube Comment Highlights
- From YouTube to TikTok Crafting the Perfect Cross-Platform Strategy
- Free & Legal YouTube Downloader Tools - Recommendations
- In 2024, Epicurean Epiphanies Filming Feast Creation
- Streamlining Long Videos on YouTube Through Effective Chapter Management
- [New] Elevate Your Videography Premiere to YouTube Upload
- In 2024, Elevating Live Play with Professional Gear Lists
- Host Smart and Cheap Your Guide to Youtube Seminars
- 2024 Approved Choosing the Right Format – Boosting Your YouTube Videos’ Performance
- Captivating Imagery with These 20 Top Video Thumbnail Fonts for 2024
- Mastering YouTube Monetization Minimum Required Views to Profit
- Novice Networking Affordable Channel Buy Options
- The Filmmaker's Roadmap Creating YouTube Trailers Using Filmora
- Navigating to Your Subscription Statistics
- In 2024, Avoid Ad Dollars – Boost Your View Count for Free
- 2024 Approved A Taste of Film Home Cook's Visual Journey
- 2024 Approved Easily Download Your Favorites Handpicked Tools Reviewed
- From Average to Exceptional Discover the Finest Free Intra Designs
- [New] Discover the Leading Free Naming Resources - 11 Must-Have Makers
- Best Transcription Aid for Your YouTube Videos for 2024
- 2024 Approved Elevate Your Video Entrance with These Tools
- 2024 Approved Elevate Your Presence The Best 5 Practices for Max Viewers
- [Updated] Elevating Your YouTube Content Selecting Professional Gear
- Strategies to Avoid Copyright Strikes on YouTube Videos
- [New] Elevate Your Content with These Top 5 YouTube Marketing Methods
- The Future of TV Watching A Closer Look at YouTube TV
- [Updated] Creative Channel Titling Techniques for Growth
- Delightful, No-Cost Access to YouTube's Nine Full-Length Yule Celebrations for 2024
- Exclusive Guide Choosing Among Top 9 Free Logo Creators
- Unveiling the Secrets to YouTube Highlighted Remarks
- Mastering the Art of YouTube Closings [Inclusive Guide]
- Unveiling the Numbers Comprehensive Guide to Count Views, Clicks, and Cash in YouTube
- Playlist Extraction - Step by Step From YouTube's Archive
- [New] Boost Your Channel's Subscribers on a Shoestring Budget
- [Updated] 2024 Approved Analyzing Team Chat Platforms Is Slack Superior to Discord in Performance?
- Updated 2024 Approved Pinpoint Wolfs Howling Frequency
- 2024 Approved Download Free Animated Emojis Explore These 9 Hidden Websites
- High Quality Cinematography Made Easy With OIS Technology
- Loop Video Magic Keep Your Followers Hooked with Instagram Boomers
- 5 Best Route Generator Apps You Should Try On Motorola Moto G34 5G | Dr.fone
- How to Unlock Oppo Find N3 Phone without PIN
- [New] Spins That Stun The Ultimate Manual for Flipping Photos on Instagram Platforms for 2024
- New 2024 Approved How to Respectfully Extract Spotify Tracks with the Latest Tools
- 4 Ways to Sync Audio to Video Automatically In
- [Updated] Inside Look Everything About Discord Stickers for 2024
- Stuck at Android System Recovery Of Vivo Y100A ? Fix It Easily | Dr.fone
- Fix Unfortunately Settings Has Stopped on Honor X9b Quickly | Dr.fone
- [Updated] In 2024, Instagram Photo Perfection Applying Stylish Borders
- [New] 2024 Approved How to Make Thumbnails
- [New] Securing Sims' Legacy Proven Strategies for Documenting Virtual Escapades
- How to Unlock Apple ID On your iPhone 7 Plus without Security Questions?
- [New] Best Script Innovation Place
- Title: Streamline Your VFX Workflow with These 8 Online Backdrop Banks
- Author: Steven
- Created at : 2024-05-25 20:26:37
- Updated at : 2024-05-26 20:26:37
- Link: https://youtube-clips.techidaily.com/streamline-your-vfx-workflow-with-these-8-online-backdrop-banks/
- License: This work is licensed under CC BY-NC-SA 4.0.
