
:max_bytes(150000):strip_icc()/how-to-whitelist-email-addresses-4588603-9-5c7f62fec9e77c00012f82fa.png)
"Prime Recording Option Elevate Your YouTube Channel"
Prime Recording Option: Elevate Your YouTube Channel
Best Screen Recorder for YouTube

Richard Bennett
Mar 27, 2024• Proven solutions
Taking viewers ‘in app’ is an effective way to show them how you work or play. A screen recording is a footage recorded not from your camera, but directly from the interface of your computer or mobile device. A screen recording might be footage from a game, a software tutorial, or a demonstration of your creative process in a program.
We have picked up the best 10 paid screen recorders for YouTube on Windows and Mac, but if you are looking for a complete solution to record videos on Windows, Mac, Android or iOS phone to make tutorial videos, how-to videos, or demonstration videos, or products/software review videos, or gameplay videos on YouTube, here is the all the information you need. This article will introduce you to the best screen recorders on computers, Android devices, and iPhones for YouTube.
- Part 1: Best Screen Recording Software for Recording Windows/Mac Screen for YouTube
- Part 2: Best Screen Capturing Apps for Recording Your Android Screen (No Root)
- Part 3: Best Screen Recording Apps for Recording on iOS Devices for YouTube Videos
Part 1: Best Software for Recording Your Computer Screen for YouTube Videos
1.Filmora Video Editor [Windows & Mac, Freemium]


In addition to being a powerful editing tool, Filmora can also be used to record your computer screen. In Filmora, just select Media and then Record. In the Record menu, click Record PC Screen. The recording window will pop up and you will be able to decide whether you want to record your full screen, a customized selection of it, or a specific target window. After you have finished recording your clip will automatically appear in the Media menu in your Filmora project so you can edit it right away. You can download Filmora from Filmora.wondershare.com if you do not have it yet.
If you just want to make a how-to video with some captured screens, Filmora will be a good choice. Check the video below about how to record Screen with Filmora.
2.Wondershare DemoCreator
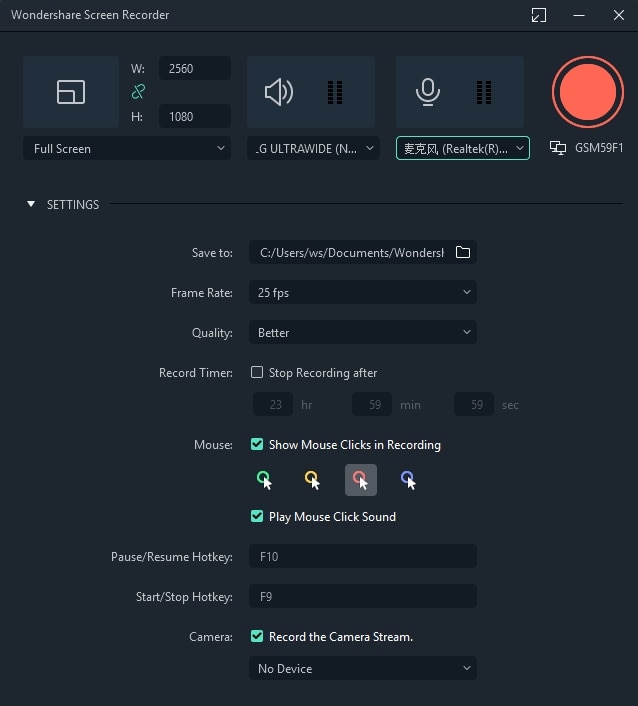
DemoCreator is a specially designed screen recording software from Wondershare for both gameplay recording, tutorial making, screen capturing, and webcam recording as well. You can use it to record the full screen of your Windows or Mac computer or a particular part on the screen. The best part is that you can both record and edit the video in DemoCreator and upload it to YouTube directly. This screen recorder for YouTube is a perfect solution for those who want to capture 120 frames per second and 4K videos.
3.VLC Media Player [Windows & Mac & Linux, Free]
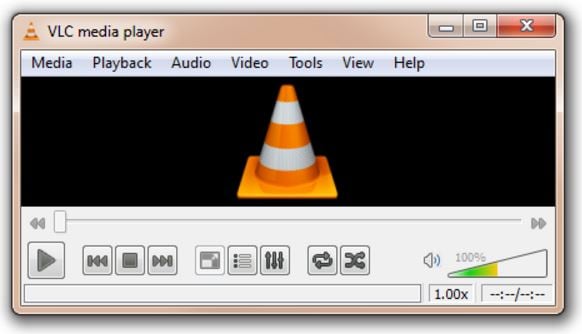
VLC Media Player is a free media player that has a great screen recording feature. You can download it from Video LAN.org. In order to take a screen recording using VLC you first need to click on View and Advanced Controls. A lot of the more advanced features, like screen recording, are initially hidden so as not to confuse users, but selecting Advanced Controls will make them visible. Then you can go to Media and Open Capture Device. In the window that opens choose Desktop next to Capture Mode and click Play. VLC will start displaying your desktop in the player window. Now you just have to click Record.
Learn more details about how to record YouTube videos with VLC
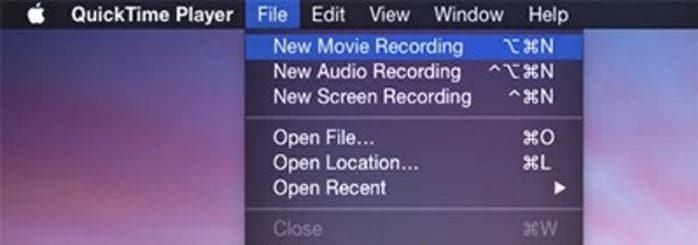
4.QuickTime [Mac, Free]

QuickTime is the default media player for Mac users. To access QuickTime’s screen recording feature select File and New Screen Recording. In the window that pops up click on the arrow next to the Record button and choose a microphone. Then you can press Record. Your recording will not start right away. First, a window will pop up explaining that you can stop your recording by pressing ‘command-control-escape’. Although QuickTime is available for PCs the PC version does not have a screen recording feature.
Learn more details about how to record YouTube video and audio with QuickTime Player on Mac
Part 2: Recording Your Android Screen for YouTube Videos (No Root)
We have already described 4 ways of recording screen videos on Android , while in this part, we will introduce some useful screen recording apps for recording YouTube videos on Android phones.
1. AZ Screen Recorder
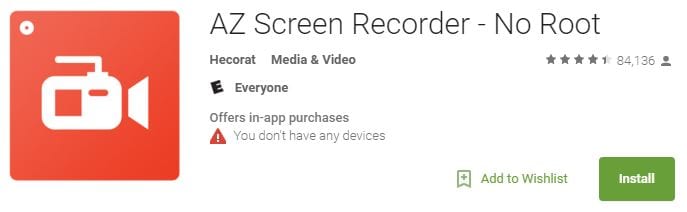
AZ Screen Recorder is free screen recording app for Android 5.0 Lollipop. Using AZ Screen Recorder you can simultaneously record from your phone’s camera and screen. This is useful if you want to shoot a video of yourself explaining an app to add into your final video. Although the basic version of AZ Screen Recorder is free there are in-app purchases.
2.Unlimited Screen Recorder
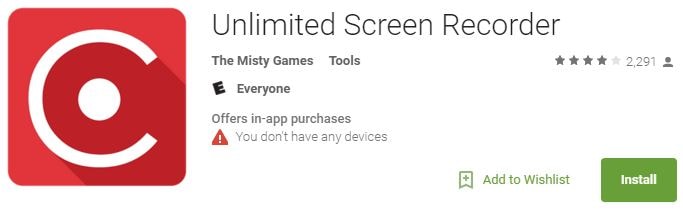
Unlimited Screen Recorder is also for 5.0 Lollipop and is free with in-app purchases. Like the name ‘Unlimited’ suggests you can use this app to record for as long as you want. There is no time limit. You can also record audio through Unlimited Screen Recorder so it is convenient to make a voiceover for your video.
There are very few options available for recording Android devices older than Lollipop without rooting your device.
Click here to check more screen recording apps to capture videos on Android
Part 3: Recording Your iOS Device Screen for YouTube Videos
With the release of iOS 11, recording on iPhone and iPad is much easier with the built-in screen recording tool . If your iOS is above 11 (including 11) version, you can record the screen with its in-app application, check this video to know the details:
Apart from recording with the built-in recording tool, you can also use some best iOS screen recording apps to record YouTube videos, or use some mirror software to record iPhone/iPad on Windows and Mac and create a YouTube video.
1.QuickTime
QuickTime can be used to record the screen of your iPhone or iPad in addition to the screen of your Mac. First you need to connect your device to your computer with a USB port. Instead of selecting ‘New Screen Recording’ in QuickTime, the way you would when recording your computer screen, select ‘New Movie Recording’. In the recording window click on the arrow next to the ‘Record’ button and choose your iOS device where it asks you to choose a camera. This method only works with the Mac version of QuickTime.
2.Reflector
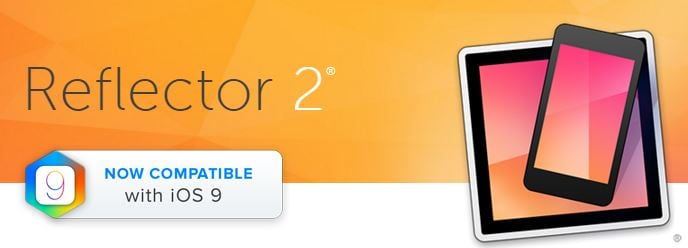
Reflector is mirroring software available for Mac or PC. Mirroring software creates a clone of your device’s interface on your computer screen. Once your device is being displayed on the screen of your computer you can capture it by recording your computer screen. You can download Reflector from Airsquirrels.com.
In order to use Reflector to mirror your device, you will also need to use AirPlay on your iPhone or iPad, and your device and your computer will need to be connected to the same wifi network. In AirPlay, make sure mirroring is on and select your computer as a receiver. Your computer will not show up as an option if you do not have Reflector running.
Conclusion
Above are the screen and video recording software programs that we picked up for you to make a YouTube tutorial, how-to or software review video on most popular platforms including Windows and Mac computer and Android and iOS smartphones. Besides recording, you may also need thebest video editing software for editing YouTube videos . Watch the video tutorial to check how to edit your YouTube videos and get to know some terms in video editing. Remember to download Filmora and have a try today.
Richard Bennett
Richard Bennett is a writer and a lover of all things video.
Follow @Richard Bennett
Richard Bennett
Mar 27, 2024• Proven solutions
Taking viewers ‘in app’ is an effective way to show them how you work or play. A screen recording is a footage recorded not from your camera, but directly from the interface of your computer or mobile device. A screen recording might be footage from a game, a software tutorial, or a demonstration of your creative process in a program.
We have picked up the best 10 paid screen recorders for YouTube on Windows and Mac, but if you are looking for a complete solution to record videos on Windows, Mac, Android or iOS phone to make tutorial videos, how-to videos, or demonstration videos, or products/software review videos, or gameplay videos on YouTube, here is the all the information you need. This article will introduce you to the best screen recorders on computers, Android devices, and iPhones for YouTube.
- Part 1: Best Screen Recording Software for Recording Windows/Mac Screen for YouTube
- Part 2: Best Screen Capturing Apps for Recording Your Android Screen (No Root)
- Part 3: Best Screen Recording Apps for Recording on iOS Devices for YouTube Videos
Part 1: Best Software for Recording Your Computer Screen for YouTube Videos
1.Filmora Video Editor [Windows & Mac, Freemium]
In addition to being a powerful editing tool, Filmora can also be used to record your computer screen. In Filmora, just select Media and then Record. In the Record menu, click Record PC Screen. The recording window will pop up and you will be able to decide whether you want to record your full screen, a customized selection of it, or a specific target window. After you have finished recording your clip will automatically appear in the Media menu in your Filmora project so you can edit it right away. You can download Filmora from Filmora.wondershare.com if you do not have it yet.
If you just want to make a how-to video with some captured screens, Filmora will be a good choice. Check the video below about how to record Screen with Filmora.
2.Wondershare DemoCreator
DemoCreator is a specially designed screen recording software from Wondershare for both gameplay recording, tutorial making, screen capturing, and webcam recording as well. You can use it to record the full screen of your Windows or Mac computer or a particular part on the screen. The best part is that you can both record and edit the video in DemoCreator and upload it to YouTube directly. This screen recorder for YouTube is a perfect solution for those who want to capture 120 frames per second and 4K videos.
3.VLC Media Player [Windows & Mac & Linux, Free]
VLC Media Player is a free media player that has a great screen recording feature. You can download it from Video LAN.org. In order to take a screen recording using VLC you first need to click on View and Advanced Controls. A lot of the more advanced features, like screen recording, are initially hidden so as not to confuse users, but selecting Advanced Controls will make them visible. Then you can go to Media and Open Capture Device. In the window that opens choose Desktop next to Capture Mode and click Play. VLC will start displaying your desktop in the player window. Now you just have to click Record.
Learn more details about how to record YouTube videos with VLC
4.QuickTime [Mac, Free]
QuickTime is the default media player for Mac users. To access QuickTime’s screen recording feature select File and New Screen Recording. In the window that pops up click on the arrow next to the Record button and choose a microphone. Then you can press Record. Your recording will not start right away. First, a window will pop up explaining that you can stop your recording by pressing ‘command-control-escape’. Although QuickTime is available for PCs the PC version does not have a screen recording feature.
Learn more details about how to record YouTube video and audio with QuickTime Player on Mac
Part 2: Recording Your Android Screen for YouTube Videos (No Root)
We have already described 4 ways of recording screen videos on Android , while in this part, we will introduce some useful screen recording apps for recording YouTube videos on Android phones.
1. AZ Screen Recorder
AZ Screen Recorder is free screen recording app for Android 5.0 Lollipop. Using AZ Screen Recorder you can simultaneously record from your phone’s camera and screen. This is useful if you want to shoot a video of yourself explaining an app to add into your final video. Although the basic version of AZ Screen Recorder is free there are in-app purchases.
2.Unlimited Screen Recorder
Unlimited Screen Recorder is also for 5.0 Lollipop and is free with in-app purchases. Like the name ‘Unlimited’ suggests you can use this app to record for as long as you want. There is no time limit. You can also record audio through Unlimited Screen Recorder so it is convenient to make a voiceover for your video.
There are very few options available for recording Android devices older than Lollipop without rooting your device.
Click here to check more screen recording apps to capture videos on Android
Part 3: Recording Your iOS Device Screen for YouTube Videos
With the release of iOS 11, recording on iPhone and iPad is much easier with the built-in screen recording tool . If your iOS is above 11 (including 11) version, you can record the screen with its in-app application, check this video to know the details:
Apart from recording with the built-in recording tool, you can also use some best iOS screen recording apps to record YouTube videos, or use some mirror software to record iPhone/iPad on Windows and Mac and create a YouTube video.
1.QuickTime
QuickTime can be used to record the screen of your iPhone or iPad in addition to the screen of your Mac. First you need to connect your device to your computer with a USB port. Instead of selecting ‘New Screen Recording’ in QuickTime, the way you would when recording your computer screen, select ‘New Movie Recording’. In the recording window click on the arrow next to the ‘Record’ button and choose your iOS device where it asks you to choose a camera. This method only works with the Mac version of QuickTime.
2.Reflector
Reflector is mirroring software available for Mac or PC. Mirroring software creates a clone of your device’s interface on your computer screen. Once your device is being displayed on the screen of your computer you can capture it by recording your computer screen. You can download Reflector from Airsquirrels.com.
In order to use Reflector to mirror your device, you will also need to use AirPlay on your iPhone or iPad, and your device and your computer will need to be connected to the same wifi network. In AirPlay, make sure mirroring is on and select your computer as a receiver. Your computer will not show up as an option if you do not have Reflector running.
Conclusion
Above are the screen and video recording software programs that we picked up for you to make a YouTube tutorial, how-to or software review video on most popular platforms including Windows and Mac computer and Android and iOS smartphones. Besides recording, you may also need thebest video editing software for editing YouTube videos . Watch the video tutorial to check how to edit your YouTube videos and get to know some terms in video editing. Remember to download Filmora and have a try today.
Richard Bennett
Richard Bennett is a writer and a lover of all things video.
Follow @Richard Bennett
Elevate Your Content: PC Video Editing for Effective YouTube Presentations
How to Edit Videos for YouTube on PC
Richard Bennett
Mar 27, 2024• Proven solutions
To create a successful YouTube video, you need to shoot the video and edit it on Windows or Mac. (You can find the whole processing of making a YouTube video if needed.) If you have always wanted to make your own videos and upload to YouTube to share, but you don’t know the best way to go about, then you shouldn’t miss this article. In the following part, I’ll share with you some best tools that you will need to edit YouTube videos and at the end of it, I’ll show you the detailed steps of how to edit YouTube videos with the video editor Filmora on computer.
- Part 1: Tools you need to edit YouTube videos on PC
- Part 2: Editing Videos for YouTube on PC [Detailed Steps]
Best Tools for Editing YouTube Videos on PC
Before editing, you need to choose a good enough video editor for YouTube video which can combine your footage clips seamlessly and export in high quality. To be honest, there are so many video editing software for YouTube available on the market and quite a number of tools used for editing YouTube videos on PC, some are paid while others are available for free. To save your time in picking the best one, we’ve listed some of the best tools for you to Edit YouTube videos.
Top 3 Recommended Video Editor Tools for Editing YouTube Videos on PC
The following are some of the most versatile video editor tools currently available for editing videos on PC
1. Wondershare Filmora – Best Video Editor for Beginners to Edit YouTube Videos
Filmora is an intuitive video editor with a wide range of advanced tools and video effects. We listed Filmora at the first spot because it is recommended by many users and reviewers as the best video editor for beginners and also provides sophisticated features.
Download Mac Version ](https://tools.techidaily.com/wondershare/filmora/download/ )
Filmora is a simpler way for those who are serous with editing YouTube videos on PC and Mac and you don’t have to install any other editing tools. As an all in one video editor, Filmora gives you the power to edit audios and videos, record PC screen, edit audio and add custom colors and voice over with a lot of ease. The following are some of the specific benefits and features you will be entitled to when you use Wondershare Filmora to edit YouTube videos on PC and Mac. You can download the trial version to have a try and share with me about your opinion .
Why choose Wondershare Filmora
- Ability to record the screen of your PC together with the voice
- Edit all your audios with audio mixers and equalizers
- Has wonderful filters, overlays, and text effects
- Has a color turning tool to allow you correct white balances and much more
- Let you to upload videos directly to YouTube, Vimeo and Facebook
You may also like:How to Edit YouTube Videos on iPhone >>
2. Window Movie Maker –
Windows Movie Maker is a totally free video editor available for Windows7/8 users, so if you’re a YouTube beginner without no budget for video editing software, you can start with it. It is easy and intuitive to use, though it lacks some of the advanced functionalities needed for professional video editing. After being skilled in video editing, you may need some alternatives to Windows Movie Maker, in this case, check our picks of thebest free video editing software for Windows.

Windows Movie Maker Interface
3. Adobe Premiere Pro –
This is one of the professional video editors available for PC and it is not a free tool. It comes with advanced features and functionalities needed for professional video editing and for you to use it you will have to pay with about $19.99 - $74.99 per month.

Screenshot from Adobe Premiere Pro CC Release Video
Professional Screen Recorder Tools for YouTube Videos
If you are making a tutorial video, a software how-to video or a gameplay video on YouTube, you may also need a screen recording software to record what happening on your computer and show it with your viewers. In this case, we’ve picked some screen recording tools that you may need. Some of them both feature the video editing tools and screen recording tools.
1. Filmora scrn – A high quality screen recorder with editing features.
 -
- 
2. ScreenFlow –ScreenFlow has a free version you could use for high quality screen captures, but for you to get the most from it, you will have to upgrade to the paid versions.
For more information on screen recorders for Windows, kindly check our picks about best screen recorder for YouTub. .
Note: Filmora now also feature a more powerful recording features, so you can now record screen and audio and edit video in one place.
Professional Audio Editors for YouTube Videos Editing
1. Audacity
Audacity has an intuitive user interface, featuring a simple design without unnecessary features to clog things up. Its footprint is relatively small and it can run on PC nonstop. The only thing you won’t like about it is that you will only be able to get as far as bedroom recording with it.
2. WavePad
This audio editor has a fully customizable user interface that will work both for beginners as well as professionals. It is easy to use and will suffice most of your needs as far as editing YouTube videos on PC is concerned.
For more information about audio editing tools and tips, check out How to Add Audio to Video .
Professional Color Grading Tools for YouTube Videos
To adjust the brightness, white balance, tone or apply 3D LUT effects to your video, you can complete all of these in Filmora or use the following color correction software.
Adobe SpeedGrade
When you use this together with Premiere Pro, you will have the fastest color grading experience in the world. The only caveats to using it are that the tracking is not the best and the workflow when using it on Windows is not that streamlined either.
Looking for more professional color grading tools? Check Best Color Grading & Correction Software>>
Part 2: Editing videos for YouTube on PC [Detailed Steps]
Irrespective of the editing software you use, following the steps outlined below will make it is easy for you to edit videos for YouTube on PC. Assuming you already have made your mind on the editing software of choice, use the following steps to edit and export your completed work. To better demonstrate the steps of YouTube video editing, I’ll use Filmra9 video editor to edit YouTube Video.
1.Split or combine your video clips
Most of the editing programs you use will have a timeline view of your work where you can easily cut or drop your shots. Each of the shots taken is actually a separate file which you will have to combine with others to make the video. The split feature in Filmora can cut footage into parts and then you can move it to desired position or just delete the unnecessary part. You can choose any part of the video quickly with the Quick Trim feature in preview. Besides, Filmora supports almost all popular video and photo formats, so there will be no obstacle when you want to combine footage shot with different devices. You can add photos to video or audio to video.

To combine several footages into one, just place all clips in the video track in order. Form the timeline view, move the shots around, cut, trim or shorten them as you desire. You can also add transitions between shots so that your final production may have a professional look.
2. Crop, Rotate, Pan & Zoom
You can rotate the video at any angle at any direction and change the scale of video footage or other transform. If you want viewers to focus on some part of the frame, you can use try the Pan & Zoom feature.

Learn more about How to Zoom in Video After It’s Recorded or Saved?
3.Add texts, Music and other effects

Once the individual shots have been edited into a single video, it is now time for you to add the special effects. This is the time to add stuff such as texts, music and other special effect you may want to see on the video. If you are worried about doing this, just know that you don’t have to be a pro editor to do all these since most of the program will guide you through on how to add all the special effects.
4.Save and export
After you have done with adding all the special effects, choose the file format for saving your video then export it. YouTube accepts major file formats and these include MP4, AVI or WMA hence you will be okay when you use any of them.

Filmora also allows you to upload videos to YouTube platform directly since it will choose the format and frame rate or codec which suit best.
These are the basic steps you will use when you want to edit YouTube videos on PC. Just remember to use the right widescreen format and also render your files in either 1080i or 720p high definition.
YouTuber Jamie Keet from Teacher’s Tech channel has made a tutorial about how to edit videos on Filmora. This video is detailed and let us know if you think it is helpful in the comment below.
Richard Bennett
Richard Bennett is a writer and a lover of all things video.
Follow @Richard Bennett
Richard Bennett
Mar 27, 2024• Proven solutions
To create a successful YouTube video, you need to shoot the video and edit it on Windows or Mac. (You can find the whole processing of making a YouTube video if needed.) If you have always wanted to make your own videos and upload to YouTube to share, but you don’t know the best way to go about, then you shouldn’t miss this article. In the following part, I’ll share with you some best tools that you will need to edit YouTube videos and at the end of it, I’ll show you the detailed steps of how to edit YouTube videos with the video editor Filmora on computer.
- Part 1: Tools you need to edit YouTube videos on PC
- Part 2: Editing Videos for YouTube on PC [Detailed Steps]
Best Tools for Editing YouTube Videos on PC
Before editing, you need to choose a good enough video editor for YouTube video which can combine your footage clips seamlessly and export in high quality. To be honest, there are so many video editing software for YouTube available on the market and quite a number of tools used for editing YouTube videos on PC, some are paid while others are available for free. To save your time in picking the best one, we’ve listed some of the best tools for you to Edit YouTube videos.
Top 3 Recommended Video Editor Tools for Editing YouTube Videos on PC
The following are some of the most versatile video editor tools currently available for editing videos on PC
1. Wondershare Filmora – Best Video Editor for Beginners to Edit YouTube Videos
Filmora is an intuitive video editor with a wide range of advanced tools and video effects. We listed Filmora at the first spot because it is recommended by many users and reviewers as the best video editor for beginners and also provides sophisticated features.
Download Mac Version ](https://tools.techidaily.com/wondershare/filmora/download/ )
Filmora is a simpler way for those who are serous with editing YouTube videos on PC and Mac and you don’t have to install any other editing tools. As an all in one video editor, Filmora gives you the power to edit audios and videos, record PC screen, edit audio and add custom colors and voice over with a lot of ease. The following are some of the specific benefits and features you will be entitled to when you use Wondershare Filmora to edit YouTube videos on PC and Mac. You can download the trial version to have a try and share with me about your opinion .
Why choose Wondershare Filmora
- Ability to record the screen of your PC together with the voice
- Edit all your audios with audio mixers and equalizers
- Has wonderful filters, overlays, and text effects
- Has a color turning tool to allow you correct white balances and much more
- Let you to upload videos directly to YouTube, Vimeo and Facebook
You may also like:How to Edit YouTube Videos on iPhone >>
2. Window Movie Maker –
Windows Movie Maker is a totally free video editor available for Windows7/8 users, so if you’re a YouTube beginner without no budget for video editing software, you can start with it. It is easy and intuitive to use, though it lacks some of the advanced functionalities needed for professional video editing. After being skilled in video editing, you may need some alternatives to Windows Movie Maker, in this case, check our picks of thebest free video editing software for Windows.
Windows Movie Maker Interface
3. Adobe Premiere Pro –
This is one of the professional video editors available for PC and it is not a free tool. It comes with advanced features and functionalities needed for professional video editing and for you to use it you will have to pay with about $19.99 - $74.99 per month.
Screenshot from Adobe Premiere Pro CC Release Video
Professional Screen Recorder Tools for YouTube Videos
If you are making a tutorial video, a software how-to video or a gameplay video on YouTube, you may also need a screen recording software to record what happening on your computer and show it with your viewers. In this case, we’ve picked some screen recording tools that you may need. Some of them both feature the video editing tools and screen recording tools.
1. Filmora scrn – A high quality screen recorder with editing features.
-
2. ScreenFlow –ScreenFlow has a free version you could use for high quality screen captures, but for you to get the most from it, you will have to upgrade to the paid versions.
For more information on screen recorders for Windows, kindly check our picks about best screen recorder for YouTub. .
Note: Filmora now also feature a more powerful recording features, so you can now record screen and audio and edit video in one place.
Professional Audio Editors for YouTube Videos Editing
1. Audacity
Audacity has an intuitive user interface, featuring a simple design without unnecessary features to clog things up. Its footprint is relatively small and it can run on PC nonstop. The only thing you won’t like about it is that you will only be able to get as far as bedroom recording with it.
2. WavePad
This audio editor has a fully customizable user interface that will work both for beginners as well as professionals. It is easy to use and will suffice most of your needs as far as editing YouTube videos on PC is concerned.
For more information about audio editing tools and tips, check out How to Add Audio to Video .
Professional Color Grading Tools for YouTube Videos
To adjust the brightness, white balance, tone or apply 3D LUT effects to your video, you can complete all of these in Filmora or use the following color correction software.
Adobe SpeedGrade
When you use this together with Premiere Pro, you will have the fastest color grading experience in the world. The only caveats to using it are that the tracking is not the best and the workflow when using it on Windows is not that streamlined either.
Looking for more professional color grading tools? Check Best Color Grading & Correction Software>>
Part 2: Editing videos for YouTube on PC [Detailed Steps]
Irrespective of the editing software you use, following the steps outlined below will make it is easy for you to edit videos for YouTube on PC. Assuming you already have made your mind on the editing software of choice, use the following steps to edit and export your completed work. To better demonstrate the steps of YouTube video editing, I’ll use Filmra9 video editor to edit YouTube Video.
1.Split or combine your video clips
Most of the editing programs you use will have a timeline view of your work where you can easily cut or drop your shots. Each of the shots taken is actually a separate file which you will have to combine with others to make the video. The split feature in Filmora can cut footage into parts and then you can move it to desired position or just delete the unnecessary part. You can choose any part of the video quickly with the Quick Trim feature in preview. Besides, Filmora supports almost all popular video and photo formats, so there will be no obstacle when you want to combine footage shot with different devices. You can add photos to video or audio to video.
To combine several footages into one, just place all clips in the video track in order. Form the timeline view, move the shots around, cut, trim or shorten them as you desire. You can also add transitions between shots so that your final production may have a professional look.
2. Crop, Rotate, Pan & Zoom
You can rotate the video at any angle at any direction and change the scale of video footage or other transform. If you want viewers to focus on some part of the frame, you can use try the Pan & Zoom feature.
Learn more about How to Zoom in Video After It’s Recorded or Saved?
3.Add texts, Music and other effects
Once the individual shots have been edited into a single video, it is now time for you to add the special effects. This is the time to add stuff such as texts, music and other special effect you may want to see on the video. If you are worried about doing this, just know that you don’t have to be a pro editor to do all these since most of the program will guide you through on how to add all the special effects.
4.Save and export
After you have done with adding all the special effects, choose the file format for saving your video then export it. YouTube accepts major file formats and these include MP4, AVI or WMA hence you will be okay when you use any of them.
Filmora also allows you to upload videos to YouTube platform directly since it will choose the format and frame rate or codec which suit best.
These are the basic steps you will use when you want to edit YouTube videos on PC. Just remember to use the right widescreen format and also render your files in either 1080i or 720p high definition.
YouTuber Jamie Keet from Teacher’s Tech channel has made a tutorial about how to edit videos on Filmora. This video is detailed and let us know if you think it is helpful in the comment below.
Richard Bennett
Richard Bennett is a writer and a lover of all things video.
Follow @Richard Bennett
Also read:
- Creating a Viral Traction with 6 Strategic Steps in YouTube Marketing
- Essential Knowledge for Engaging with ASMR Videos
- Design Strategies for Top-Tier Valorant Thumbnails on Social Media for 2024
- 2024 Approved A Professional's Approach to Video Editing on YouTube
- In 2024, Becoming a Video Virtuoso Essential Tips for Upside-Down Youtube Livestreams
- Creating Engaging Stream Content Shorts for 2024
- Get More Out of YouTube with 8 Handpicked Download Apps
- [Updated] Cross-Platform Titling Guidelines for Mobile & Social Apps
- In 2024, Bridging the Gap Integrating Spotify and YouTube Music Playlists
- In 2024, Essential Mobile Privacy The Best 7 AdBlocker Apps for Android
- [New] Ethical Approaches to Achieve One Million YouTube Subscribers
- In 2024, Directors Academy YouTube Channels for Cinematic Innovation
- [New] Coherent and Curated YouTube Playlists Online & Mobile Assembly Guide
- Seamlessly Transferring YouTube Videos to Your Instagram Account
- Economical Audio Devices for Vloggers on a Budget for 2024
- In 2024, Adjust Cutting Room Time for YouTube
- Tripod Alignment Secrets for Clearer Videos
- 15 Top-Rated YouTube Downloaders - Your Offline Viewing Solution
- Leaders Shaping the Marvel Online Experience
- Identifying and Nurturing Your Brand's Character
- In 2024, Essential Leaderboard Scratcher YouTube Trending Analysis
- Financial Fortitude for YouTubers Beyond Basic Earnings
- 2024 Approved Elevate Your Gaming YT Presence A Hashtag-Focused Manual
- Crafting a Winning Edge Mastering Keywords in Digital Marketing for 2024
- [Updated] 10 Prime Yoga Videos to Transform Your Body & Mind
- [Updated] Are There Legal Constraints in Capturing Online Video Screenshots?
- [New] Digital Dominion #1 to #10 Most Watched YouTube Videos in a Day
- Organizing Chaos A Guide to YouTube List Shuffling
- 2024 Approved Dissecting Video Platform Features YouTube Vs. DailyMention
- Eliminating Grey Edges on Video A YouTube Fix Guide
- Cured Non-Appearance of Tiny Vid Content
- From Viewers to Profits An Authoritative Guide on YouTube Revenue and Popularity Analysis
- Choreographing Climactic Crescendos for 2024
- Elevate Your Edits A Selection of Top 9 Free Software Choices for 2024
- Brand Pixels Customizing Gaming Banners with Style
- Learn to Add YouTube Videos for Richer Google Slate Decks
- [Updated] Essential Tools for Android & iOS Users Seeking Playlist Extractors
- [Updated] Essential Banner Design Rules for Top YouTube Channels
- Rise of the Alternative Top 3 Video Sharing Websites
- Best Routes to Collecting Visual Content for 2024
- In 2024, Apple Music's Role in Professional Video Production
- 2024 Approved Mastering Google's Audio to Text Translations A Comprehensible Guide
- [New] 2024 Approved Elite Free Screen Partnership Adventures
- Ultimate Fidelity in Mac Screen & Audio Recording
- [Updated] Become a Snapchat Boomerang Pro Complete Tutorial for 2024
- How to Factory Reset Realme 10T 5G without Losing Data | Dr.fone
- Top 4 Ways to Trace Realme 12 5G Location | Dr.fone
- In 2024, Easiest Guide How to Clone Xiaomi Redmi Note 12 5G Phone? | Dr.fone
- Updated 2024 Approved Make a Killer First Impression Best Gaming Intro Makers for Windows and Mac
- In 2024, 5 Easy Ways to Copy Contacts from Vivo V27 to iPhone 14 and 15 | Dr.fone
- How To Unlock A Found Apple iPhone 14 Pro? | Dr.fone
- [Updated] Mastering Instagram’s Latest Features Reels & Stories for 2024
- [New] In 2024, Facebook to MP3 Converter Tool
- Legends of Arcade Combat Nintendo's Top Ten on Switch for 2024
- In 2024, How does the stardust trade cost In pokemon go On Honor X9a? | Dr.fone
- New In 2024, Comprehensive Guide Capturing Soundscapes with Windows 10
- Final Cut Pro Tutorial Reversing Video Clips Made Easy
- Professional Tips for Superior Screen Capture Footage
- Exclusive Guide to Priceless Cam Screen Recorders
- Update your drivers with Device Manager in Windows 10 & 7
- In 2024, How To Leave a Life360 Group On Vivo V29e Without Anyone Knowing? | Dr.fone
- In 2024, A Comprehensible Guide to Mastering Pixelated Photography
- 6 Methods for Switching from Apple iPhone 13 mini to Samsung | Dr.fone
- 2024 Approved Aurora's Influence on Modern Image Processing Techniques
- In 2024, 4 solution to get rid of pokemon fail to detect location On Apple iPhone 15 Plus | Dr.fone
- Does Xiaomi Redmi 13C Have Find My Friends? | Dr.fone
- Don't Skip This Week's Hot TikTok Tests
- In 2024, Pokemon Go No GPS Signal? Heres Every Possible Solution On Vivo V29e | Dr.fone
- 5 Ways to Track Poco M6 Pro 4G without App | Dr.fone
- [New] Covertly Crafted Covers for iPhones & Androids for 2024
- Updated Free Online Video Editing Software The Top 10 Contenders for 2024
- [Updated] Streamline Your Content 5 Efficient Ways to Manipulate Vimeo Videos for 2024
- How to Change GPS Location on Oppo Reno 9A Easily & Safely | Dr.fone
- Comparing the Best in Class for 4K Screen Reality for 2024
- Easily Fast-Track Your Windows Documentation
- Quick Tips Efficiently Post Videos on IGTV for 2024
- Title: "Prime Recording Option Elevate Your YouTube Channel"
- Author: Steven
- Created at : 2024-05-25 20:18:57
- Updated at : 2024-05-26 20:18:57
- Link: https://youtube-clips.techidaily.com/prime-recording-option-elevate-your-youtube-channel/
- License: This work is licensed under CC BY-NC-SA 4.0.
