
:max_bytes(150000):strip_icc()/ImagefromiOS5-ca6e3fd0fecb4cf8b7022b98e9e1ffaf.jpg)
Optimal Mics Tailored to YouTube Professionals
Optimal Mics Tailored to YouTube Professionals
Best Microphone for YouTubers

Richard Bennett
Mar 27, 2024• Proven solutions
If you want your viewers to be glued to their screens then quality audio is just as important as quality video for your YouTube channel. People will watch your vlog because they want to hear what you are saying. It can be tempting to use the audio your camera records rather than buy a separate microphone. Unfortunately, the microphones built into most cameras will only record mediocre audio. In this case, we have researched and found out the following best microphones for YouTube videos based on its price and performance. Besides, we will also highlight the best microphones for different recording scenarios. Whether you’re making gaming videos or recording yourself singing, or filming inside or outside, you will get to know which one is best for your situation. Let’s check out now.
- Best Microphones for YouTube Videos
- Best Microphones for Different Types of YouTube Creators
- Tips for Recording YouTube Audio
- How to Sync your Audio in Filmora
Part 1: Best Microphones for YouTube Videos [Best for All]
Here are examples of some of the best external microphones for YouTube:
1. Blue Snowball USB Mic - $60
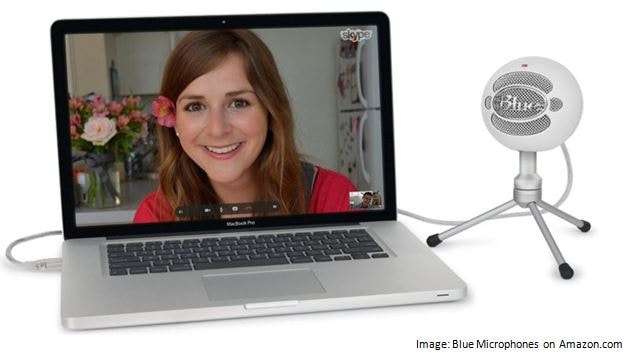
The Snowball is especially good for vlogging from your webcam because it is easy to hook up to your computer using a USB port. It will record your audio simultaneously while you are using your webcam. The biggest drawback of the Snowball is that it needs to be close to you while your record. This combined with its larger size means that it will probably need to be in your shot.
2. RØDE Video Shotgun Mic - $140
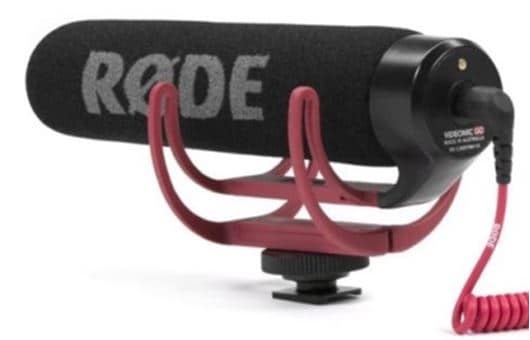
The Shotgun attaches to your DSLR camera and is great for capturing specific sounds, like dialogue, without a lot of background noise. To work well it needs to be pointing at the person who is speaking, and it should be fairly close to them as well. This means that the camera cannot be too far back from you while you vlog.
3. Audio-Technica AT875R Line + Gradient Condenser Microphone - $240
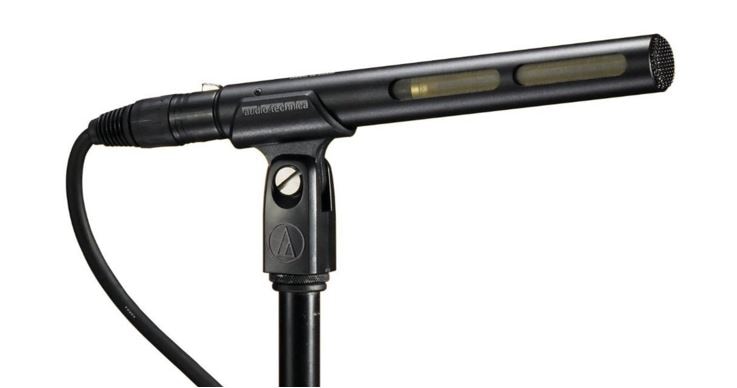
This microphone is similar to the ones you think of being mounted on boom poles on professional sets, and it can easily be mounted onto a pole and used the same way. This gradient condenser mic is good at picking up sound at a distance, and at only picking up sound coming from directly in front of it. If you are working alone then you can set this mic up on a stand so it is pointing at you, or if you have a friend to help you you can ask them to hold it on a boom pole.
4. Sony LAV Wireless Mic System - $600
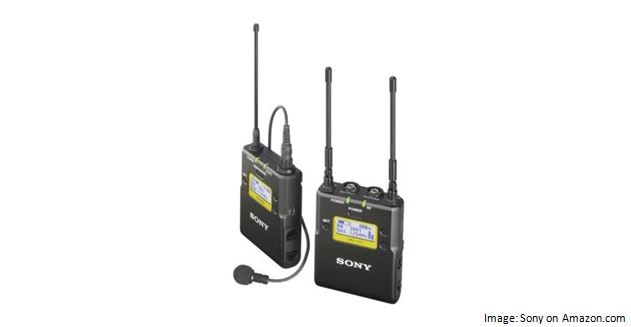
A LAV Mic, also called a lavalier or lapel mic, is a small microphone which can be clipped onto clothing. Wearing a LAV Mic while you vlog will allow you to move around freely and still capture great audio, rather than being stuck in range of a stationary mic. There are both wired and wireless options available in LAV Mics.
5. Roland R-05 WAVE/MP3 Recorder - $200
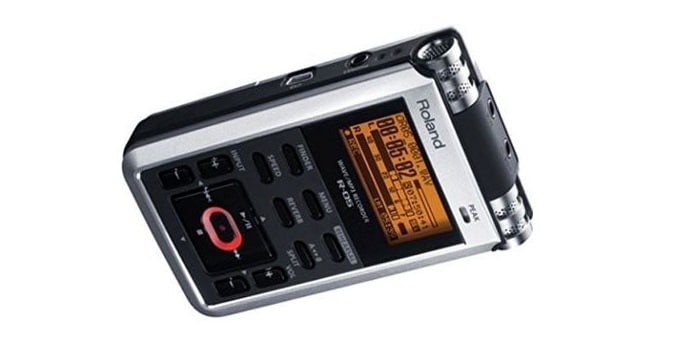
The R-05 is a pocket recorder that captures flawless audio. Its small size means you can hide it in your pocket and it will not show up in your video. Also, since it does not need to hook up to your camera or computer you will have freedom of movement.
Part 2: Best Microphones for All Types of YouTube Creators
If you have to invest in a new piece of equipment for your YouTube channel, consider upgrading your microphones. Your viewers can forgive your grainy video footage, poor lighting, and unsteady camera handling, but if your audio sounds like you’re speaking across the road on a busy highway, all your hard work will be wasted, because nobody will want to watch it.
But the thing about microphones is that they are not all created equal. Depending on the type of videos you’re filming and the environment where you’re recording, the capabilities of the microphone will differ.
1. Best Microphone for Live Streamers and Gamers
Blue Yeti USB - $150
As a live streamer, gamer, or vlogger such as beauty or lifestyle, you’ll want a balance of easy setup and high-quality audio. The Blue Yeti USB delivers on that.
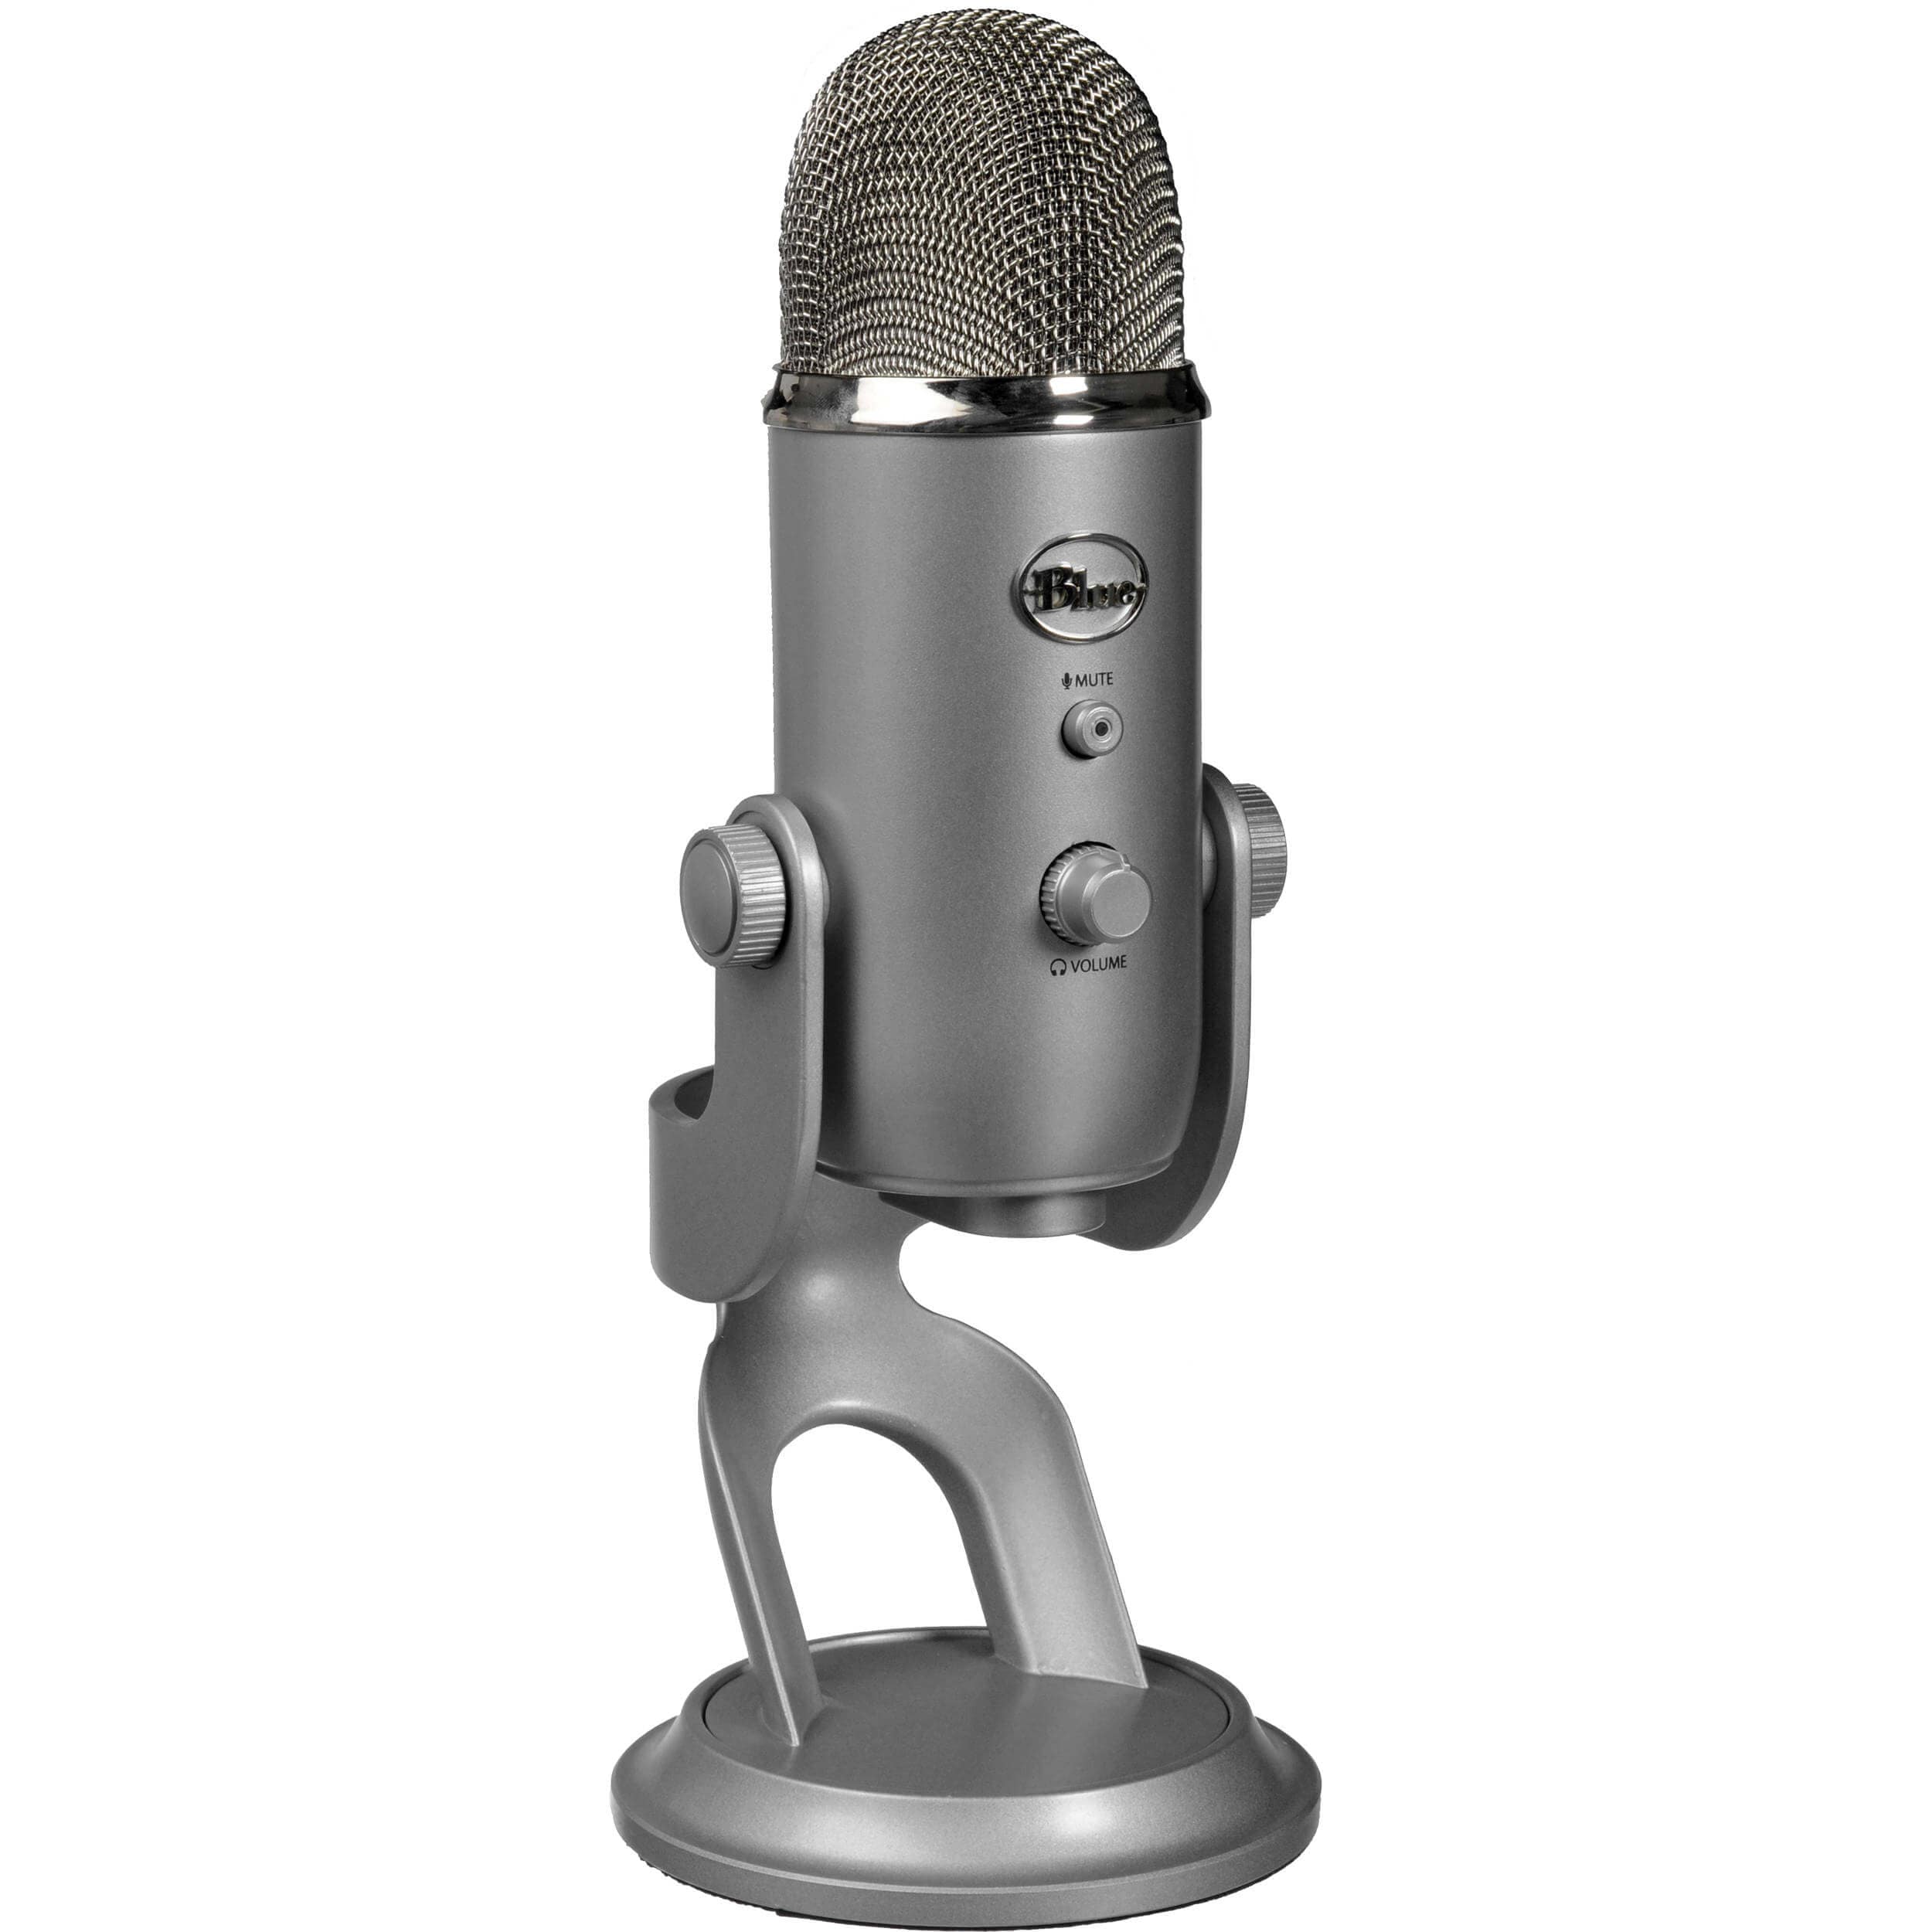
It’s the closest budget microphone to a professional studio mic on the market, and it feels that way when you hold its solid metal frame for the first time. Connecting directly to your computer via USB, the Blue Yeti comes with a 6-feet long USB cable. Out of the box, it sits upon a sturdy stand, which can be removed and the mic can be threaded a shock mount.
The Blue Yeti can pick up audio in four different polar patterns: cardioid, bidirectional, omnidirectional, and stereo. This makes it incredibly versatile, but if you are streaming, I recommend keeping it on cardioid.
Tip: In cardioid mode, speak into the front of the mic, not the top of it.
2. Best Microphones for Outdoor Locations
Rode VideoMic Pro Compact VMP Shotgun Microphone - $268
When you are filming outside, you are dealing with audio from all different directions: distant traffic, a gust of wind, the neighbor’s kids, etc.
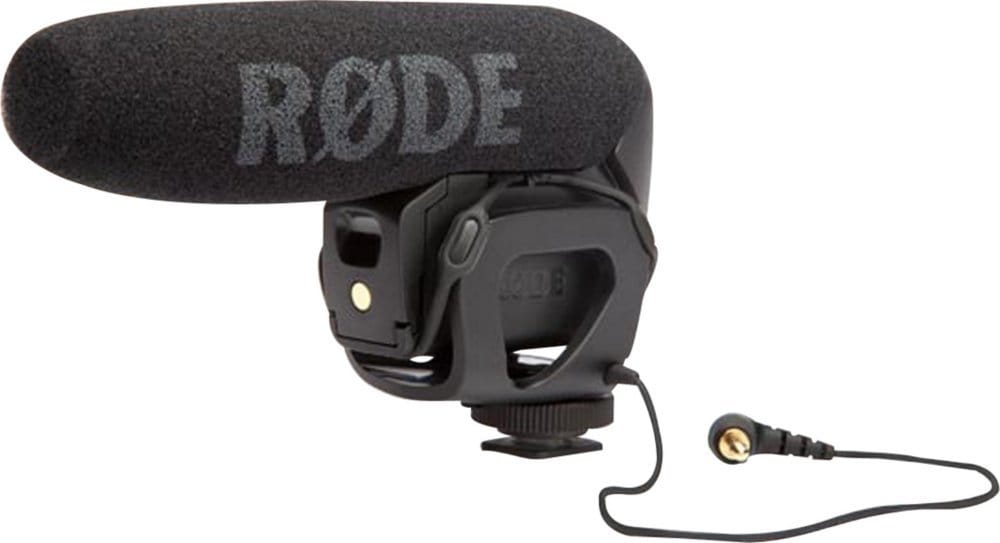
That’s why a shotgun mic is better than an omnidirectional one for outdoor situations. Shotgun microphones, such as the Rode VideoMic Pro, picks up audio only in the direction it’s pointing in. You can aim it at your subject and it will give you clear audio without a lot of background noises.
The Rode VideoMic Pro comes with a mount that attaches on top of your camera, if you are filming outdoors. So if you are holding the camera and vlogging, then the audio will be great. However, if you want to take advantage of the space, and set the camera further away, you should attach the mic on a boom or a stand to get the best audio.
Tip: With Rode VideoMic Pro, and any mic you use to shoot outdoors, always do a sound check to make sure the quality is up to standard. Ten seconds of your subject talking at the level they will be speaking in will be enough to judge the sound quality.
3. Best Microphone for Music (Vocals)
Audio-Technica AT2035 - $163
If you are a serious musician on YouTube, then you will need a serious microphone like the Audio-Technica AT2035. This microphone connects via an XLR cable and requires phantom power, so you will need to invest in an audio interface, if you don’t already have one.
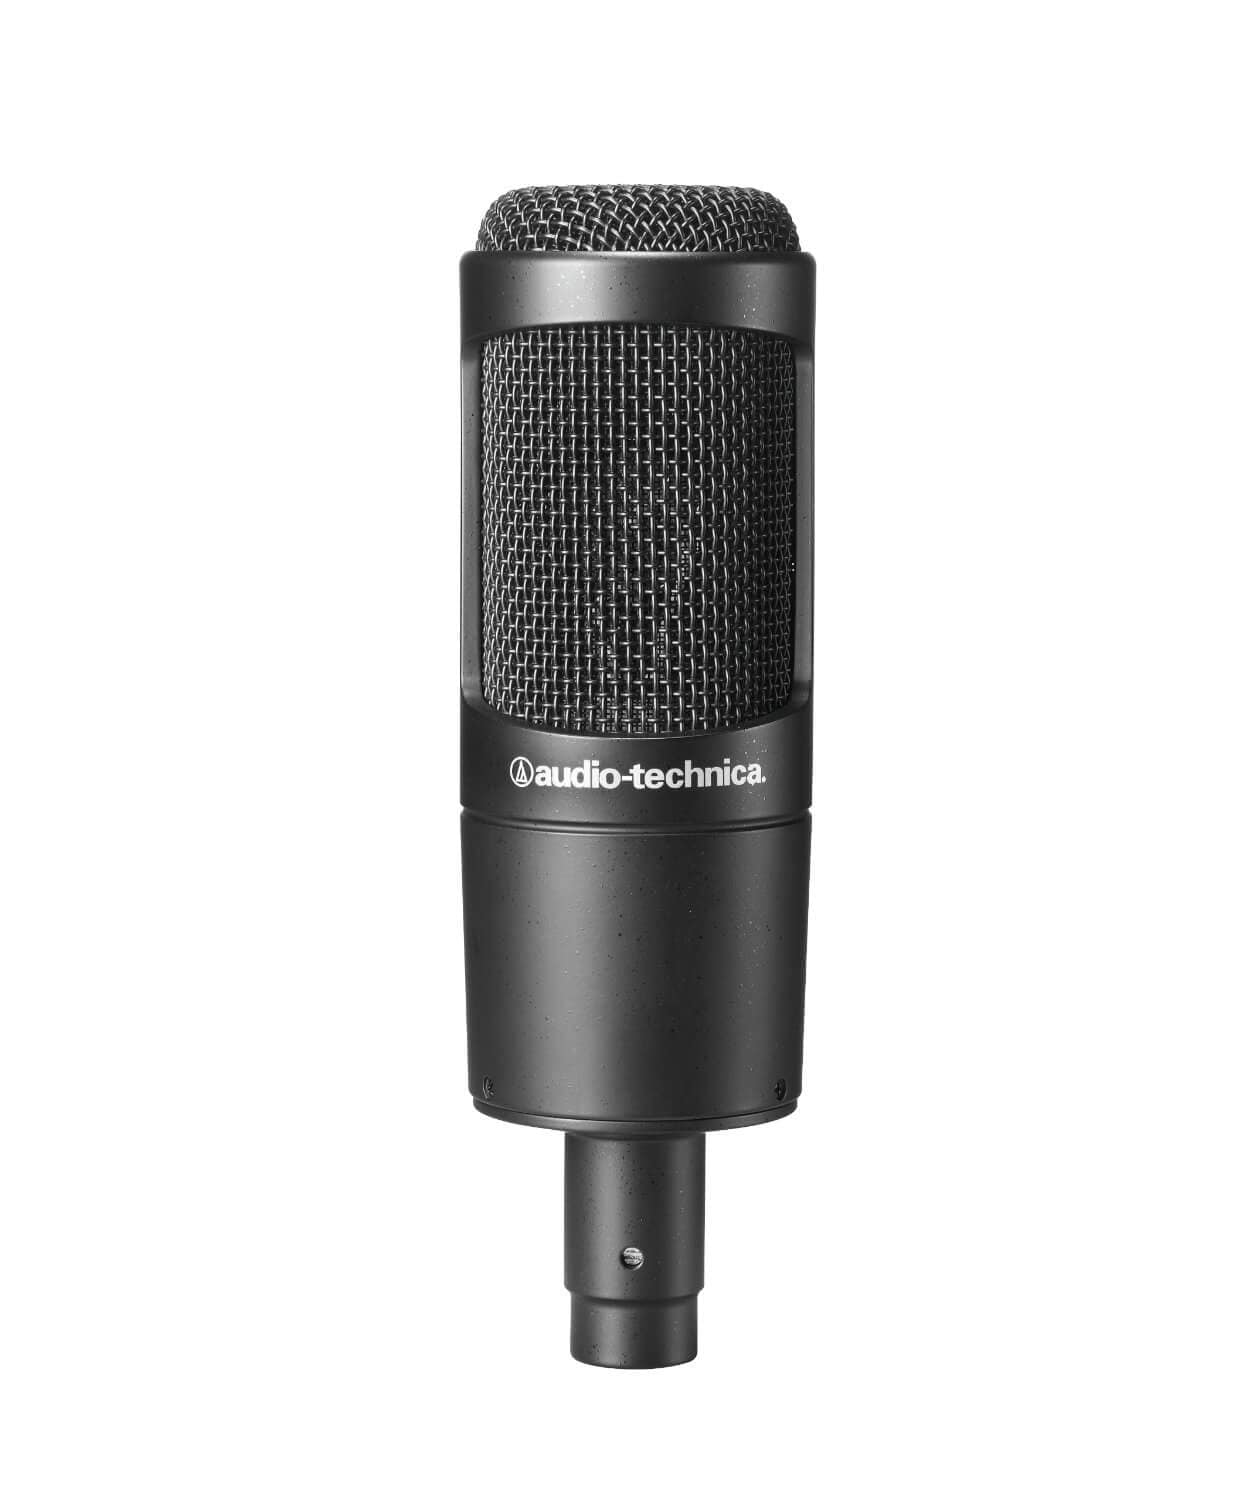
Nevertheless, this microphone does a fantastic job isolating the source of sound and eliminating background noise. Even if you’re recording in your bedroom, and not a professional studio, you’ll still get high quality vocals from this microphone.
Tip : Position yourself 8-12 inches away from the mic when singing. This allows your voice to sound more natural (too close and it’ll sound bassy) and it prevents the audio volume from fluctuating too dramatically as you move around or sing loudly one part and quietly at another.
4. Best Microphone for Voice Over
Rode NTK Tube Condenser Microphone - $529
The Rode NTK Tube is arguably one of the best microphone for its price. You can spend a thousand dollars and get a professional studio microphone, but you can’t do much better than the Rode NTK.
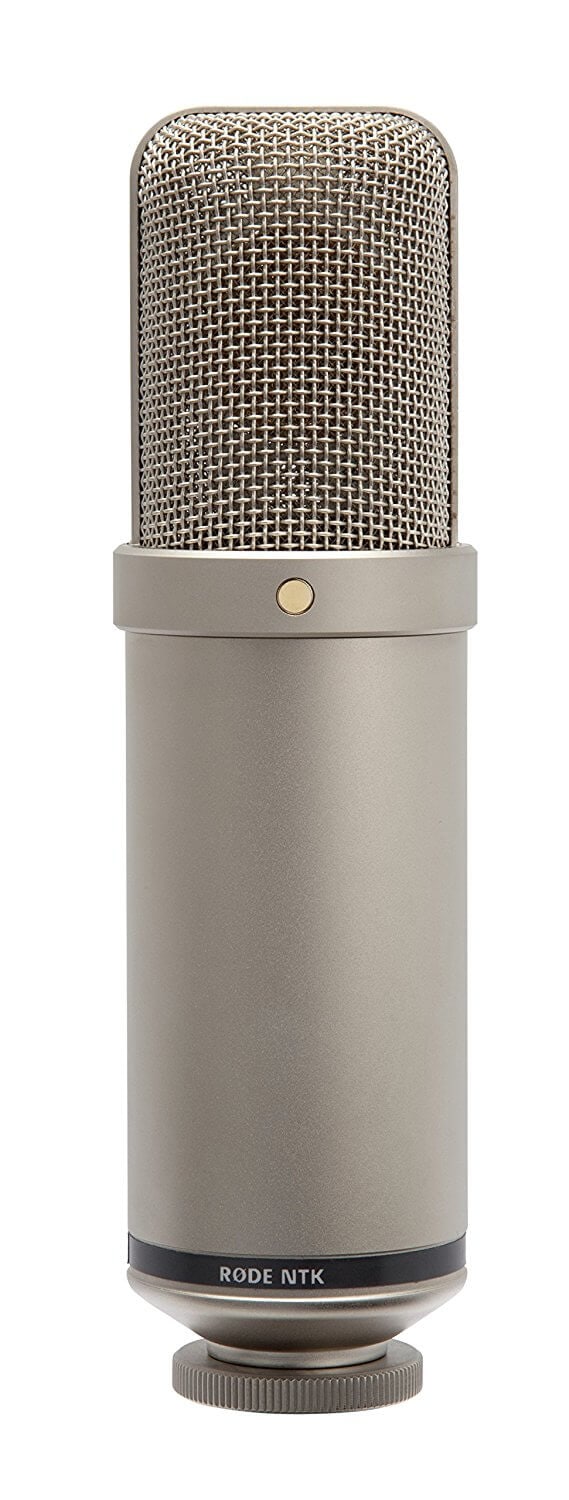
If you’re recording out of a studio environment, whether it’s a professional, semi-professional, or a closet with soft padded walls, the Rode NTK will give warmth and richness to every word you speak, while still offering crispness. Allow it to warm up for a few minutes before you start recording, and you’ll have awesome audio for your voice over.
This mic is great for YouTubers who are creating video essays, ADR, animated videos, or other videos that require top quality narrations.
Tip: Make sure you have a mic stand that you can raise to your standing height. Standing while recording voice over allows you diaphragm to open up, which will improve the quality of your voice.
5. Best Microphone for Big Echoey Space
Sennheiser MD 421 II Cardioid Dynamic Mic - $449
Commonly used to record isolated percussions or brass instruments, the Sennheiser MD 421 II is also wonderful if you need to record vocals in a large room. As a versatile dynamic mic, it doesn’t allow background noises or reverberations to bleed into the source vocal.
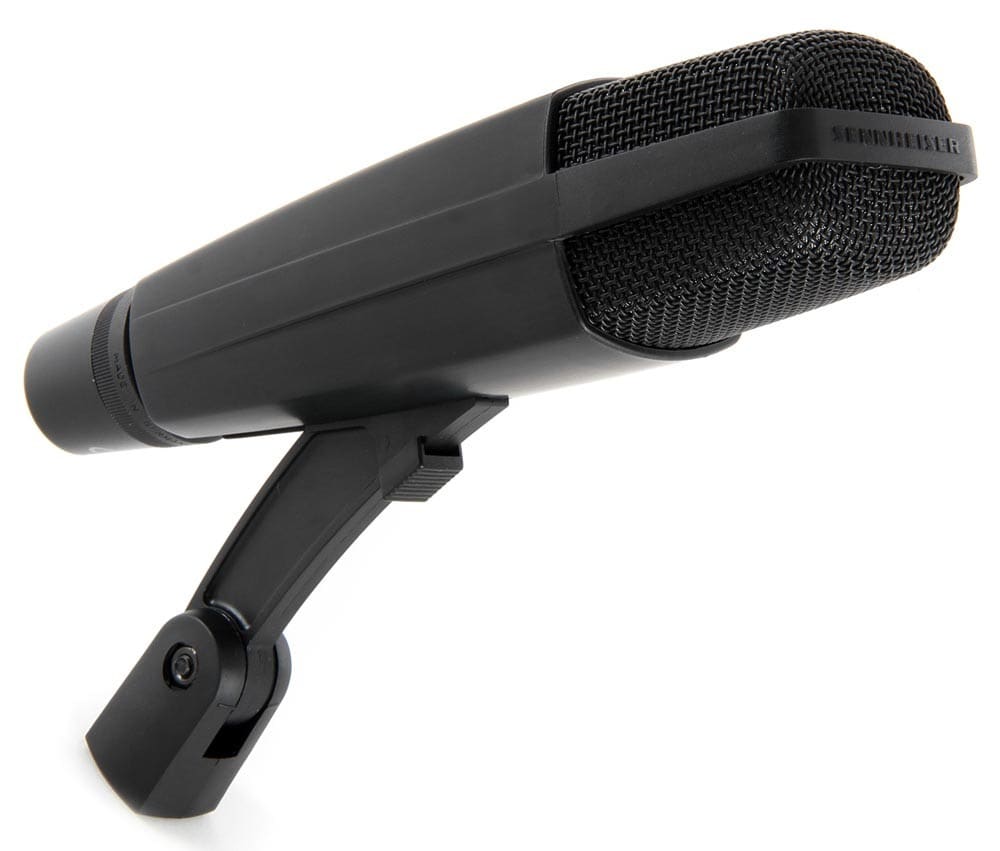
The Sennheiser MD 421 II has a rugged design as it’s built for live situations, such as concerts. This is a great microphone to have in your arsenal, should you end up recording in a large venue such as a conference or an arena.
If you are a YouTuber who makes a lot of video in warehouses, workshops, or rehearsal halls, then you should consider investing in a Sennheiser MD 421 II to get the most out of these acoustically complicated locations.
Tip : Sometimes audio in a loud, big environment can’t be saved by the best microphone. If that’s the case, film the source of the background noise. Get b-roll of people walking around, machinery operating, or whatever challenging sound you are dealing with in the large space. Cutting to these noise makers will give the audience a reference for the background noise, which helps conceal it.
6. Best Handheld Microphone for Interviews
Zoom ZH1 H1 Handy Portable Digital Recorder - $68.99
This unidirectional microphone delivers clear and crisp audio. Compact, portable, and lightweight, the Zoom ZH1 H1 is a terrific choice for YouTubers who are looking for a handheld option for a microphone.
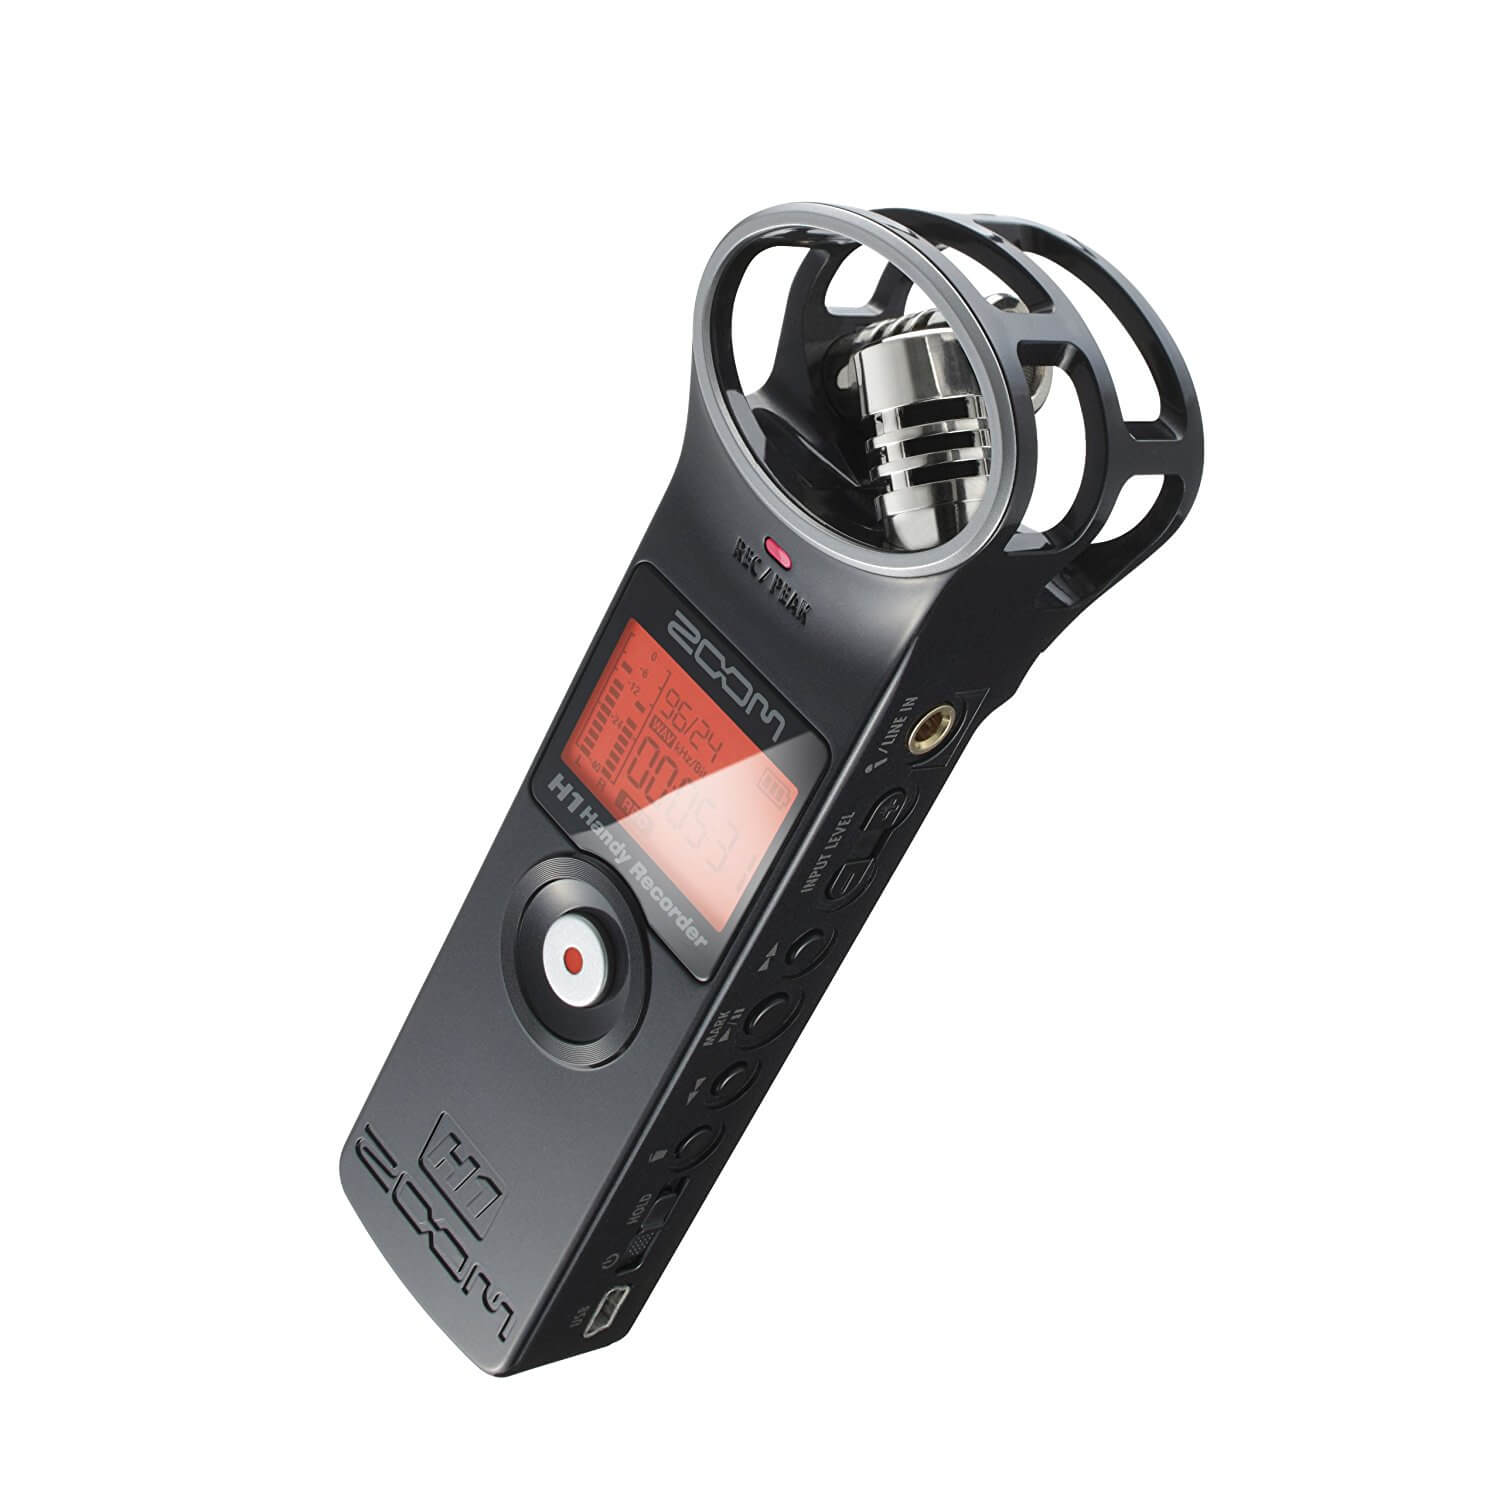
As a YouTuber, you may not have a crew to help you wrangle cable or a team member to help you monitor your audio levels, that is what makes Zoom ZH1 H1 a solid choice, as it is wireless and you can check the levels right in the palm of your hands as you record and even hear playback on the device.
The only thing that might slow you down, is that the audio will be captured directly onto the device, which means that you will need to sync up your audio to video afterward.
Tip : Before you start your interview, hit record on video and audio and then clap on camera, causing the audio to spike and giving you a video reference. This will give you a clear mark for syncing up, the sound of the clap and your hands coming together on camera.
7. Best Microphone for Action and Fitness
Rode VMPR VideoMic Pro R with Rycote Lyre Shockmount - $214.90
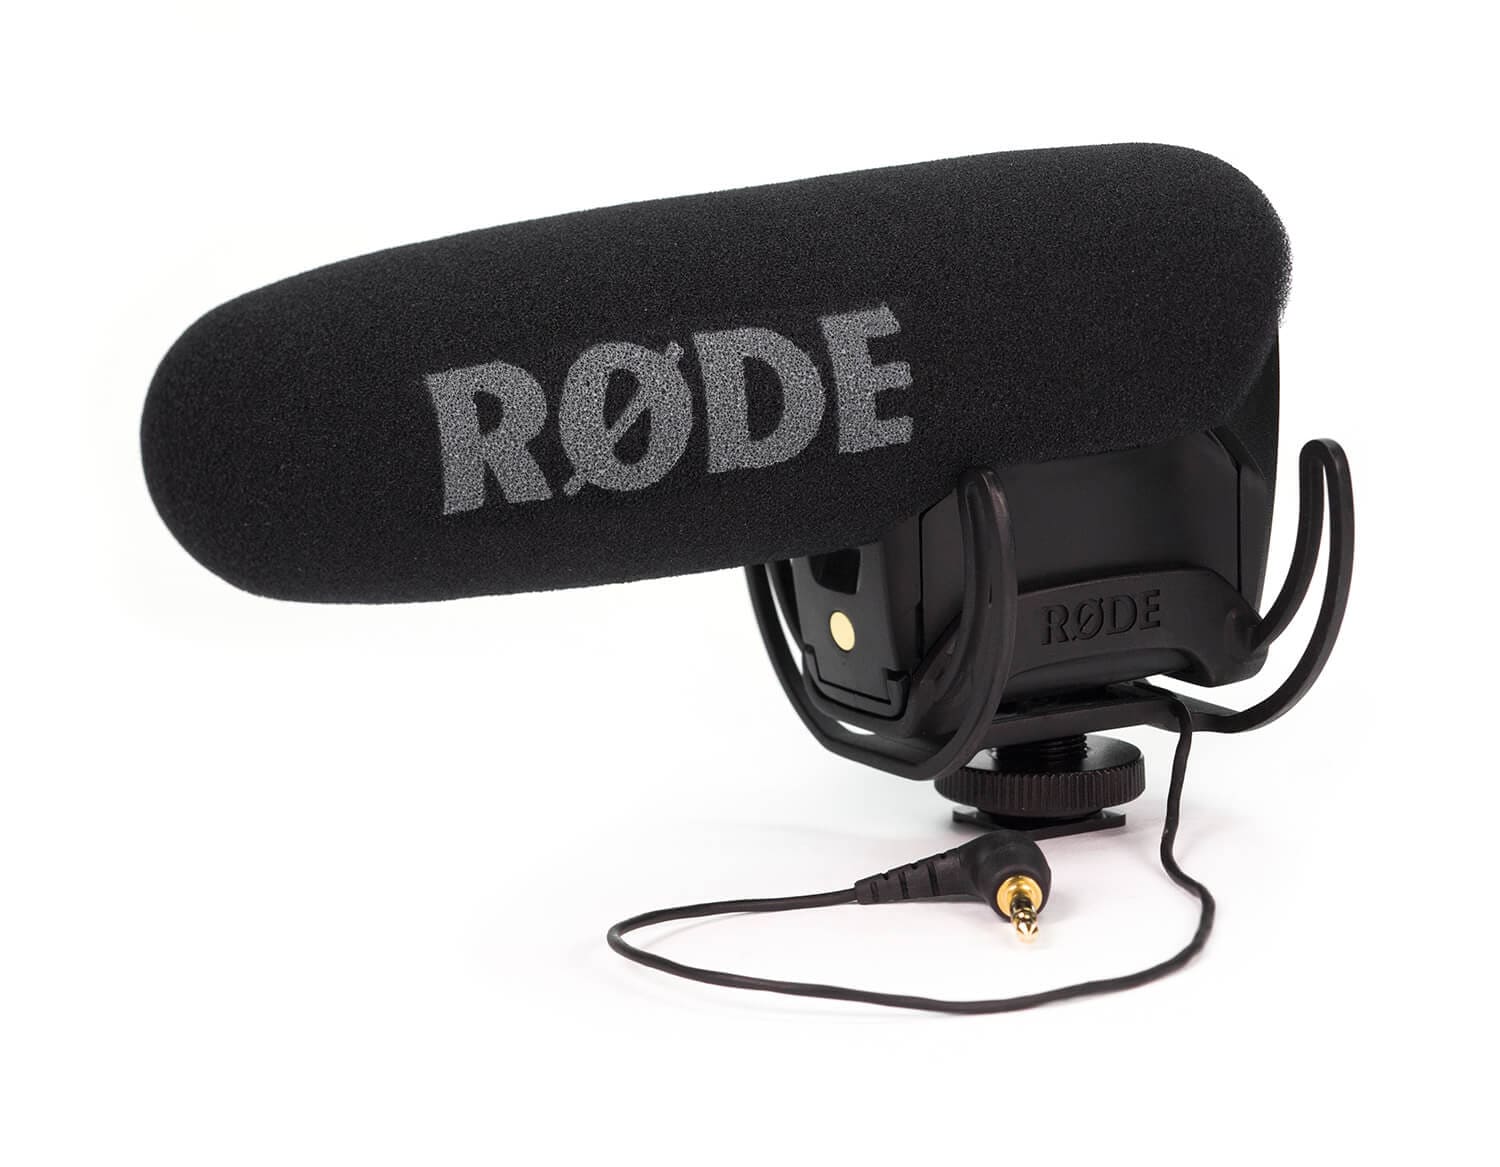
If you’re a YouTuber who films a lot of action shots or fitness videos, where you, your camera and your microphone are in motion, then I recommend the Rode VMPR VideoMic Pro R with Rycote Lyre Shockmount.
The Rode VMRP VideoMic Pro is a shotgun microphone that can focus on your subject in front of the camera with a low self-noise. This is excellent when you’re filming action shots, because you can always direct your mic at what you want to record knowing you won’t capture too much from other angles.
The Rycote Lyre shock mount eliminates any external audio that can be caused by movements to the microphone and camera. The shock mount is made of an elastic solution, so it’s incredibly durable.
Tip : For a greater range, the Rode VMRP Video Mic Pro can be mounted onto a boom pole, should the subject need to move around within the shot or if the camera needs to move away from the subject.
8. Best Waterproof Microphone
Sennheiser MKE 2 elements - Action Mic for the GoPro HERO4 - $200
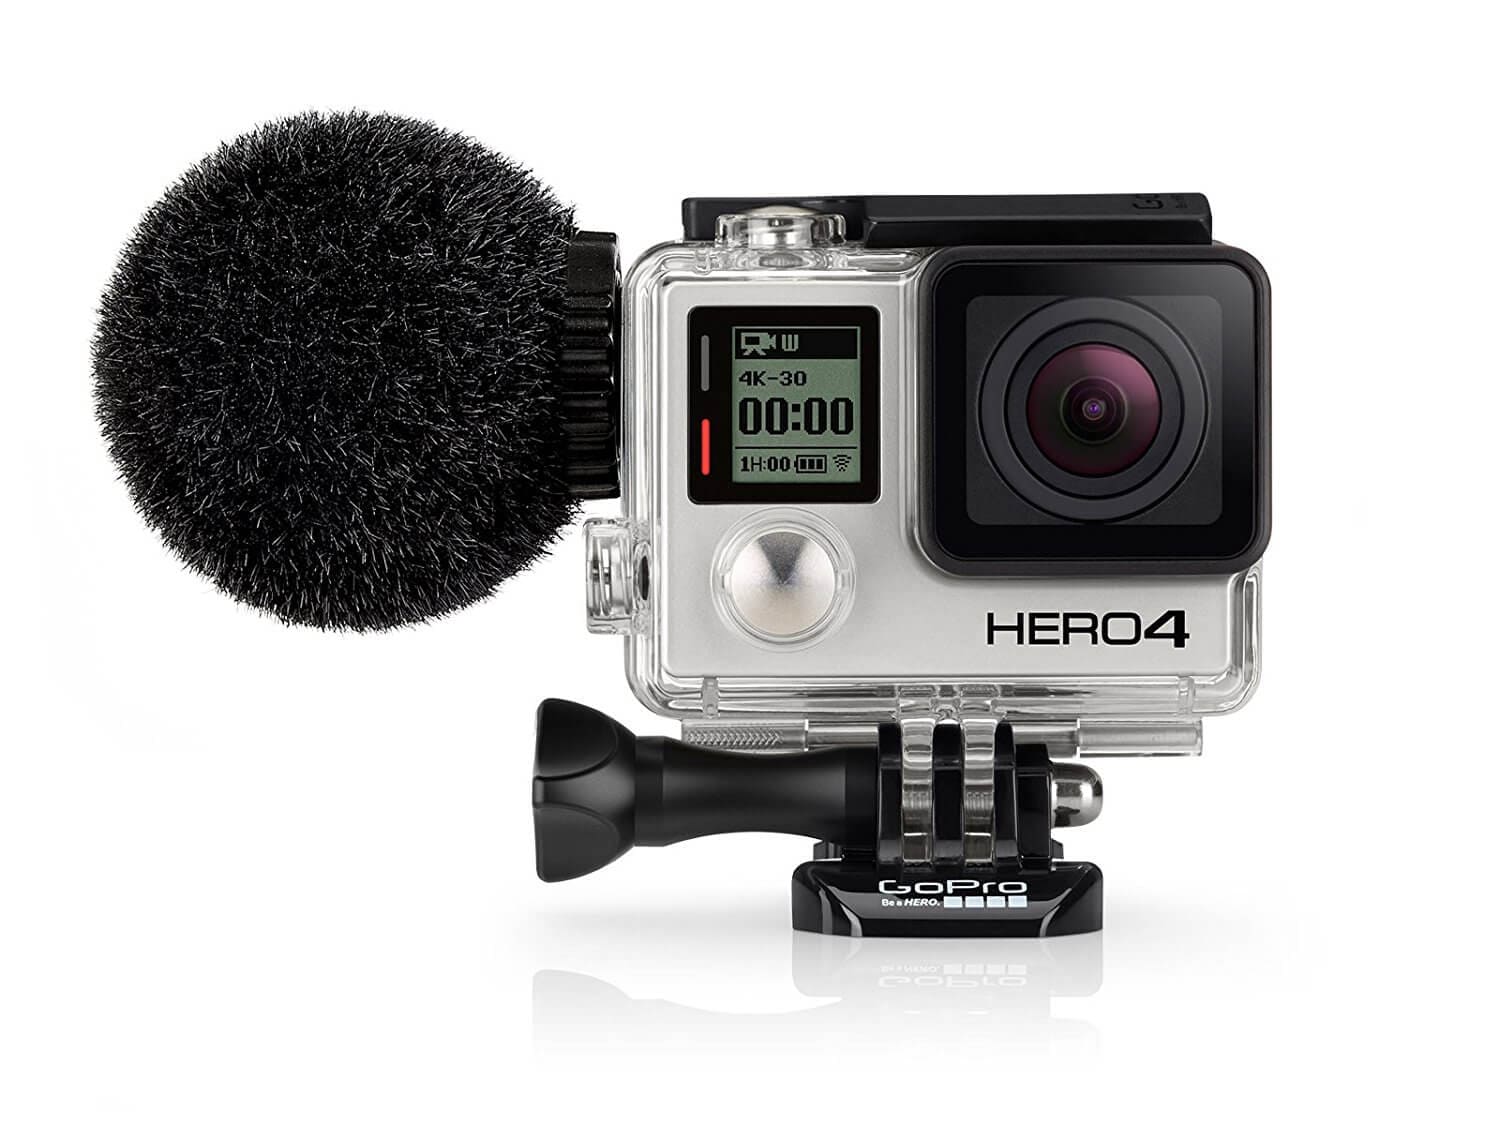
In or around water, nothing can ruin a day of shooting faster than getting your equipment wet. If you’re using GoPro Hero4 for shooting all your intense water shots, you would be familiar with the awful audio you capture when the camera is inside the waterproof casing.
Lucky for you, Sennheiser has developed a waterproof microphone, the MKE 2 elements. This little furry ball that connects to your GoPro Hero4 can withstand up to 1 meter of water. Because underwater sound is captured differently (via a hydrophone ), the Sennheiser MKE 2 elements can’t actually record audio underwater, however, it’ll be ready to keep recording quality audio once it resurfaces.
Tip: Double check to make sure that the mic cable is not blocking the seal of the waterproof case of the camera before launching it into the water.
Different situations call for different equipment. This is the true for tradespeople, golfers, and YouTubers. If you want to get the best audio, it’s more than simply buying the most expensive one, you’ll also need to find the microphone most suited for that situation.
I hope this post helped you improve your audio quality. If you are having challenges finding a good microphone for a particular scenario, let us know in the comments below!
Part 3: 10 Tips for Recording YouTube Audio [Video Tutorial]
After picking up the best microphone based on your need, you can record your audio now. But wait, here are 10 tips for using the microphones to record better audio for your YouTube video. In case that you are in a hurry, we have summarized the following tips for a quick look.
- Silence everything you don’t want your mic to record.
- Put your mobile phone in airplane mode.
- Minimize echo.
- Block wind from reaching your mic.
- Upgrade your mic.
- Adjust your levels.
- Start with a sound cue if you’re planning to do some syncing in post.
- Get close to the sound.
- ADR.
- Record Ambient Sound.
 Download Mac Version ](https://tools.techidaily.com/wondershare/filmora/download/ )
Part 4: How to Sync your Audio in Filmora
Both the LAV Mics and the R-05 will create separate audio clips which you will need to sync up with your video when you are finished recording.
Note: when you start recording, clap two or three times. This will create distinct and visible audio spikes for you to look for when you sync the audio with video.
1. Import Video and Audio Files
Once you have finished recording and have opened up Filmora Video Editor , import your video and drag and drop it into your timeline. The audio recorded with the built in camera mic is already lined with your video clip and your audio and video will both automatically share the video track.
Now import the audio from your external microphone and drag and drop it to your audio track. The audio track is initially hidden, but it will appear when you pull an audio file into the timeline.
Download Mac Version ](https://tools.techidaily.com/wondershare/filmora/download/ )
2.Detach Default Audio from Video
Since you have recorded a separate audio file, you should detach the original audio recorded with the built-in camera mic from the video. To do this, just right click the video clip in the timeline and select Audio Detach from the drop down menu.

3.Align Spikes in Video Audio and Recorded Audio
Find the spikes that represent your clapping in both audio tracks. Then, adjust your external audio so its clapping patterns are in line with those in your camera’s audio track. You can magnify your timeline for a better control.
Once your external audio is synced to your camera’s audio it will also be synced to your video. You no longer need your camera’s audio and can delete it.
Watch the video below to check more features about Filmora.

Richard Bennett
Richard Bennett is a writer and a lover of all things video.
Follow @Richard Bennett
Richard Bennett
Mar 27, 2024• Proven solutions
If you want your viewers to be glued to their screens then quality audio is just as important as quality video for your YouTube channel. People will watch your vlog because they want to hear what you are saying. It can be tempting to use the audio your camera records rather than buy a separate microphone. Unfortunately, the microphones built into most cameras will only record mediocre audio. In this case, we have researched and found out the following best microphones for YouTube videos based on its price and performance. Besides, we will also highlight the best microphones for different recording scenarios. Whether you’re making gaming videos or recording yourself singing, or filming inside or outside, you will get to know which one is best for your situation. Let’s check out now.
- Best Microphones for YouTube Videos
- Best Microphones for Different Types of YouTube Creators
- Tips for Recording YouTube Audio
- How to Sync your Audio in Filmora
Part 1: Best Microphones for YouTube Videos [Best for All]
Here are examples of some of the best external microphones for YouTube:
1. Blue Snowball USB Mic - $60
The Snowball is especially good for vlogging from your webcam because it is easy to hook up to your computer using a USB port. It will record your audio simultaneously while you are using your webcam. The biggest drawback of the Snowball is that it needs to be close to you while your record. This combined with its larger size means that it will probably need to be in your shot.
2. RØDE Video Shotgun Mic - $140
The Shotgun attaches to your DSLR camera and is great for capturing specific sounds, like dialogue, without a lot of background noise. To work well it needs to be pointing at the person who is speaking, and it should be fairly close to them as well. This means that the camera cannot be too far back from you while you vlog.
3. Audio-Technica AT875R Line + Gradient Condenser Microphone - $240
This microphone is similar to the ones you think of being mounted on boom poles on professional sets, and it can easily be mounted onto a pole and used the same way. This gradient condenser mic is good at picking up sound at a distance, and at only picking up sound coming from directly in front of it. If you are working alone then you can set this mic up on a stand so it is pointing at you, or if you have a friend to help you you can ask them to hold it on a boom pole.
4. Sony LAV Wireless Mic System - $600
A LAV Mic, also called a lavalier or lapel mic, is a small microphone which can be clipped onto clothing. Wearing a LAV Mic while you vlog will allow you to move around freely and still capture great audio, rather than being stuck in range of a stationary mic. There are both wired and wireless options available in LAV Mics.
5. Roland R-05 WAVE/MP3 Recorder - $200
The R-05 is a pocket recorder that captures flawless audio. Its small size means you can hide it in your pocket and it will not show up in your video. Also, since it does not need to hook up to your camera or computer you will have freedom of movement.
Part 2: Best Microphones for All Types of YouTube Creators
If you have to invest in a new piece of equipment for your YouTube channel, consider upgrading your microphones. Your viewers can forgive your grainy video footage, poor lighting, and unsteady camera handling, but if your audio sounds like you’re speaking across the road on a busy highway, all your hard work will be wasted, because nobody will want to watch it.
But the thing about microphones is that they are not all created equal. Depending on the type of videos you’re filming and the environment where you’re recording, the capabilities of the microphone will differ.
1. Best Microphone for Live Streamers and Gamers
Blue Yeti USB - $150
As a live streamer, gamer, or vlogger such as beauty or lifestyle, you’ll want a balance of easy setup and high-quality audio. The Blue Yeti USB delivers on that.
It’s the closest budget microphone to a professional studio mic on the market, and it feels that way when you hold its solid metal frame for the first time. Connecting directly to your computer via USB, the Blue Yeti comes with a 6-feet long USB cable. Out of the box, it sits upon a sturdy stand, which can be removed and the mic can be threaded a shock mount.
The Blue Yeti can pick up audio in four different polar patterns: cardioid, bidirectional, omnidirectional, and stereo. This makes it incredibly versatile, but if you are streaming, I recommend keeping it on cardioid.
Tip: In cardioid mode, speak into the front of the mic, not the top of it.
2. Best Microphones for Outdoor Locations
Rode VideoMic Pro Compact VMP Shotgun Microphone - $268
When you are filming outside, you are dealing with audio from all different directions: distant traffic, a gust of wind, the neighbor’s kids, etc.
That’s why a shotgun mic is better than an omnidirectional one for outdoor situations. Shotgun microphones, such as the Rode VideoMic Pro, picks up audio only in the direction it’s pointing in. You can aim it at your subject and it will give you clear audio without a lot of background noises.
The Rode VideoMic Pro comes with a mount that attaches on top of your camera, if you are filming outdoors. So if you are holding the camera and vlogging, then the audio will be great. However, if you want to take advantage of the space, and set the camera further away, you should attach the mic on a boom or a stand to get the best audio.
Tip: With Rode VideoMic Pro, and any mic you use to shoot outdoors, always do a sound check to make sure the quality is up to standard. Ten seconds of your subject talking at the level they will be speaking in will be enough to judge the sound quality.
3. Best Microphone for Music (Vocals)
Audio-Technica AT2035 - $163
If you are a serious musician on YouTube, then you will need a serious microphone like the Audio-Technica AT2035. This microphone connects via an XLR cable and requires phantom power, so you will need to invest in an audio interface, if you don’t already have one.
Nevertheless, this microphone does a fantastic job isolating the source of sound and eliminating background noise. Even if you’re recording in your bedroom, and not a professional studio, you’ll still get high quality vocals from this microphone.
Tip : Position yourself 8-12 inches away from the mic when singing. This allows your voice to sound more natural (too close and it’ll sound bassy) and it prevents the audio volume from fluctuating too dramatically as you move around or sing loudly one part and quietly at another.
4. Best Microphone for Voice Over
Rode NTK Tube Condenser Microphone - $529
The Rode NTK Tube is arguably one of the best microphone for its price. You can spend a thousand dollars and get a professional studio microphone, but you can’t do much better than the Rode NTK.
If you’re recording out of a studio environment, whether it’s a professional, semi-professional, or a closet with soft padded walls, the Rode NTK will give warmth and richness to every word you speak, while still offering crispness. Allow it to warm up for a few minutes before you start recording, and you’ll have awesome audio for your voice over.
This mic is great for YouTubers who are creating video essays, ADR, animated videos, or other videos that require top quality narrations.
Tip: Make sure you have a mic stand that you can raise to your standing height. Standing while recording voice over allows you diaphragm to open up, which will improve the quality of your voice.
5. Best Microphone for Big Echoey Space
Sennheiser MD 421 II Cardioid Dynamic Mic - $449
Commonly used to record isolated percussions or brass instruments, the Sennheiser MD 421 II is also wonderful if you need to record vocals in a large room. As a versatile dynamic mic, it doesn’t allow background noises or reverberations to bleed into the source vocal.
The Sennheiser MD 421 II has a rugged design as it’s built for live situations, such as concerts. This is a great microphone to have in your arsenal, should you end up recording in a large venue such as a conference or an arena.
If you are a YouTuber who makes a lot of video in warehouses, workshops, or rehearsal halls, then you should consider investing in a Sennheiser MD 421 II to get the most out of these acoustically complicated locations.
Tip : Sometimes audio in a loud, big environment can’t be saved by the best microphone. If that’s the case, film the source of the background noise. Get b-roll of people walking around, machinery operating, or whatever challenging sound you are dealing with in the large space. Cutting to these noise makers will give the audience a reference for the background noise, which helps conceal it.
6. Best Handheld Microphone for Interviews
Zoom ZH1 H1 Handy Portable Digital Recorder - $68.99
This unidirectional microphone delivers clear and crisp audio. Compact, portable, and lightweight, the Zoom ZH1 H1 is a terrific choice for YouTubers who are looking for a handheld option for a microphone.
As a YouTuber, you may not have a crew to help you wrangle cable or a team member to help you monitor your audio levels, that is what makes Zoom ZH1 H1 a solid choice, as it is wireless and you can check the levels right in the palm of your hands as you record and even hear playback on the device.
The only thing that might slow you down, is that the audio will be captured directly onto the device, which means that you will need to sync up your audio to video afterward.
Tip : Before you start your interview, hit record on video and audio and then clap on camera, causing the audio to spike and giving you a video reference. This will give you a clear mark for syncing up, the sound of the clap and your hands coming together on camera.
7. Best Microphone for Action and Fitness
Rode VMPR VideoMic Pro R with Rycote Lyre Shockmount - $214.90
If you’re a YouTuber who films a lot of action shots or fitness videos, where you, your camera and your microphone are in motion, then I recommend the Rode VMPR VideoMic Pro R with Rycote Lyre Shockmount.
The Rode VMRP VideoMic Pro is a shotgun microphone that can focus on your subject in front of the camera with a low self-noise. This is excellent when you’re filming action shots, because you can always direct your mic at what you want to record knowing you won’t capture too much from other angles.
The Rycote Lyre shock mount eliminates any external audio that can be caused by movements to the microphone and camera. The shock mount is made of an elastic solution, so it’s incredibly durable.
Tip : For a greater range, the Rode VMRP Video Mic Pro can be mounted onto a boom pole, should the subject need to move around within the shot or if the camera needs to move away from the subject.
8. Best Waterproof Microphone
Sennheiser MKE 2 elements - Action Mic for the GoPro HERO4 - $200
In or around water, nothing can ruin a day of shooting faster than getting your equipment wet. If you’re using GoPro Hero4 for shooting all your intense water shots, you would be familiar with the awful audio you capture when the camera is inside the waterproof casing.
Lucky for you, Sennheiser has developed a waterproof microphone, the MKE 2 elements. This little furry ball that connects to your GoPro Hero4 can withstand up to 1 meter of water. Because underwater sound is captured differently (via a hydrophone ), the Sennheiser MKE 2 elements can’t actually record audio underwater, however, it’ll be ready to keep recording quality audio once it resurfaces.
Tip: Double check to make sure that the mic cable is not blocking the seal of the waterproof case of the camera before launching it into the water.
Different situations call for different equipment. This is the true for tradespeople, golfers, and YouTubers. If you want to get the best audio, it’s more than simply buying the most expensive one, you’ll also need to find the microphone most suited for that situation.
I hope this post helped you improve your audio quality. If you are having challenges finding a good microphone for a particular scenario, let us know in the comments below!
Part 3: 10 Tips for Recording YouTube Audio [Video Tutorial]
After picking up the best microphone based on your need, you can record your audio now. But wait, here are 10 tips for using the microphones to record better audio for your YouTube video. In case that you are in a hurry, we have summarized the following tips for a quick look.
- Silence everything you don’t want your mic to record.
- Put your mobile phone in airplane mode.
- Minimize echo.
- Block wind from reaching your mic.
- Upgrade your mic.
- Adjust your levels.
- Start with a sound cue if you’re planning to do some syncing in post.
- Get close to the sound.
- ADR.
- Record Ambient Sound.
Download Mac Version ](https://tools.techidaily.com/wondershare/filmora/download/ )
Part 4: How to Sync your Audio in Filmora
Both the LAV Mics and the R-05 will create separate audio clips which you will need to sync up with your video when you are finished recording.
Note: when you start recording, clap two or three times. This will create distinct and visible audio spikes for you to look for when you sync the audio with video.
1. Import Video and Audio Files
Once you have finished recording and have opened up Filmora Video Editor , import your video and drag and drop it into your timeline. The audio recorded with the built in camera mic is already lined with your video clip and your audio and video will both automatically share the video track.
Now import the audio from your external microphone and drag and drop it to your audio track. The audio track is initially hidden, but it will appear when you pull an audio file into the timeline.
Download Mac Version ](https://tools.techidaily.com/wondershare/filmora/download/ )
2.Detach Default Audio from Video
Since you have recorded a separate audio file, you should detach the original audio recorded with the built-in camera mic from the video. To do this, just right click the video clip in the timeline and select Audio Detach from the drop down menu.
3.Align Spikes in Video Audio and Recorded Audio
Find the spikes that represent your clapping in both audio tracks. Then, adjust your external audio so its clapping patterns are in line with those in your camera’s audio track. You can magnify your timeline for a better control.
Once your external audio is synced to your camera’s audio it will also be synced to your video. You no longer need your camera’s audio and can delete it.
Watch the video below to check more features about Filmora.
Richard Bennett
Richard Bennett is a writer and a lover of all things video.
Follow @Richard Bennett
Prime Top 10 Free Transcript Harvesters for Videos
If you’ve tried to add subtitles to videos on YouTube before, you may have noticed it’s a bit of a pain. Usually, you have to copy the translation and paste it into your clips, which is time-consuming and requires an advanced level of skill.
Therefore, to help you understand YouTube videos and take notes from their content, we’ve brought a complete review of the best YouTube subtitle extractors that will automatically get the required SRT file in no time. In addition, we’ll also provide a bonus tip to edit your subtitles using Filmora.
So, let’s get into the details of each of these tools one by one.
- Wondershare UniConverter
- DVDVideoSoft Free YouTube Subtitles Downloader
- 4K Video Downloader
- ByClick Downloader
10 Free YouTube Subtitle Extractors & Downloaders
We’ve rounded up a list of 10 YouTube subtitle extractors and downloader services to simplify your life and enable you to get the SRT files.
These tools are simple to use and can help you save a lot of time and effort. However, keep in mind that with these software programs, you can only download videos with subtitles automatically generated by YouTube.
![]()
Note: if you want to create subtitles, you can also use the Speech to text function.
Online Free Youtube Subtitle Extractor
You can use one of the following subtitle extractor tools if you only need the SRT file:
1. DownSub
DownSub is an online tool that can help you extract subtitles for your favorite YouTube movies or shows. The tool is entirely free and easy to use. Simply paste the link to the video you want to get subtitles for, click download, and DownSub will do the rest.

Some of the key features of DownSub are as follows:
- Download subtitles from YouTube in multiple languages
- Supports multiple formats, including SRT, TXT, and VTT
- Extracts directly from YouTube, Viki, VIU, and more
2. Checksub
Checksub is a handy tool for extracting subtitles for your YouTube video. To use the tool, create your account on the website, drag and drop your file or upload the URL, and wait for Checksub to extract the SRT file.

Here are some of the cool features of the Checksub tool:
- Adds subtitles and translates or dubs your videos
- Ability to edit subtitles
- Supports over 190 languages
- Adds automatic voiceover in a foreign language
3. EasySub
EasySub is another simple and fast-to-use tool that can help you extract YouTube subtitles in no time without installing any software or extensions. Moreover, it supports multiple file formats, such as VTT, SRT, ass, and TXT.

The following are some key features of EasySub:
- Free to use
- Simple and easy to use
- Automatic transcription
- Uses an advanced AI algorithm
- Multi-language support
4. SaveSubs
SaveSubs is a browser-based Youtube subtitles downloader that does not require its users to install any software or touch any code. Just paste the YouTube video link with subtitles, click “Download,” and you can download the file instantly on your device.

Below are a few key features of the SaveSubs tool:
- Download subtitles in multiple formats, such as VTT, SRT, and TXT
- Clear and simple UI
- Supports editable subtitles
- Comes with a social sharing feature
5. YouSubtitles
With its massive subtitle database, YouSubtitles stands out from other online tools. This tool has an easy-to-use UI and can help you get your required file effortlessly. Furthermore, you can even select the translated version of the file after the download.

Here’s why YouSubtitles is one of the best YouTube subtitles extractor online:
- Free to use
- Huge subtitle database
- Supports multiple formats and languages
6. DVDVideoSoft
Another trusted source for YouTube subtitle extraction is DVDVideoSoft. With this tool, you can quickly get the required SRT file by providing the URL of the content. Moreover, you can also use it to download music and videos from Youtube.

Some key features of DVDVideoSoft are as follows:
- Can set the language, interval, and timestamp for the subtitles
- Supports YouTube to MP3 converter and YouTube downloader
- Free to use
- Perfect for downloading subtitles from a particular segment of a video
Youtube Subtitle Downloader Software
Youtube’s automatic subtitles are sometimes inaccurate while using an online tool. Therefore, we recommend you use dedicated software to make adjustments to the content. Some of these programs are as follows:
1. Wondershare UniConverter
Wondershare UniConverter is an easy-to-use software for Windows and Mac that can help you create, add, and generate subtitles for your favorite Youtube videos in just a few clicks.
Price:
- Quarter: $29.99
- Annual: $39.99
- 2-year: $55.99
- Perpetual (one-time): $79.99

Key Features:
Here are some of the things UniConverter can do:
- Auto-generates subtitles from videos in over 100 languages
- Supports multiple video and audio formats
- Customizable subtitle styles
- Comes with a visual subtitle timeline for real-time preview
- Converts TXT to SRT format
- Ability to download the YouTube video on your device
2. DVDVideoSoft Free YouTube Subtitles Downloader
Another customizable and powerful software for downloading YouTube SRT is the DVDVideoSoft Free YouTube Downloader. With this tool, you can get subtitles in multiple languages for any video on YouTube with closed captions.
Price: Free

Key Features:
Here are some key features of the DVDVideoSoft Free YouTube Subtitles Downloader:
- Supports TXT and SRT file formats
- Available for Windows
- Ability to extract subtitles from certain intervals
- Available as a browser-based tool
3. 4K Video Downloader
With the 4K Video Downloader user-friendly GUI, you can download videos from YouTube, Facebook, and many other video sites in high definition. It is also possible to extract YouTube video subtitles in over 50 languages.

Price: Free
Key Features:
Below are the key features of the 4K Video Downloader software:
- Download the video in 4K
- Supports over 50 languages for YouTube subtitles extraction
- Can download an entire playlist
4. ByClick Downloader
ByClick Downloader is another great option to quickly download YouTube videos with subtitles in any format you want. Not only that, you can convert files into MP3, MP4, FLV, AVI, WMV,3GP, WAV, and WEBM formats with just a few clicks!

Price: Free
Key Features:
Key features of the ByClick Downloader are as follows:
- Downloads videos from over 50 different sources
- Excellent user interface
- Quickly downloads YouTube subtitles.
- Supports multiple formats
Bonus Tips: Easily Edit Your Subtitle With Filmora
Since most of the above tools only extract or download the YouTube subtitles and do not offer editing features, we recommend using Wondershare Filmora , where you can quickly apply changes to your SRT file.
Free Download For Win 7 or later(64-bit)
Free Download For macOS 10.14 or later
Filmora is a powerful video editing software that lets you create and edit clips like a pro. With its easy-to-use UI and wide range of features, you can also create and edit subtitles for your YouTube video using different parameters, animations, text styles, templates, and colors.

Here’s how you can add and edit subtitles on your videos using Filmora:
Step 1 Open the Filmora software on your laptop or desktop and click the “Create New Project” option in the main interface. Select the “Click here to import media” option and upload your YouTube video. Alternatively, you can drag and drop your file.

Step 2 Drag the YouTube video, drop it in the timeline, and click the “Play” icon. Listen to the voiceover on your video footage and press the “M” key to add a marker. Next, click “Titles” from the toolbar and open the “Subtitles” tab from the left menu. Double-click the subtitle to download and preview it.
Step 3 Drag the downloaded subtitle template and drop it in the timeline. Now, adjust it in your video along with the marker point. Double-click the subtitle template in the timeline and type the text from the video voiceover.
You can also add color or template and adjust the text space to make them more visible on your video clip.

Step 4 Click the “Advanced” option, delete the preset text, and set the one you’ve just typed. Next, head to the “Animation” tab to apply any animation effect and click “OK.” Finally, repeat the steps to add subtitles to the whole video.
Conclusion
In this article, we’ve provided a detailed review of the ten best YouTube subtitle extractors and downloaders to help you automatically extract SRT files without much effort.
We’ve also recommended the Filmora software for quickly downloading and editing YouTube subtitles to make them more engaging and clear using various templates, styles, and animations.
Hopefully, you’ve found this article helpful and can now get the SRT files for your favorite YouTube video in a matter of minutes.
- Wondershare UniConverter
- DVDVideoSoft Free YouTube Subtitles Downloader
- 4K Video Downloader
- ByClick Downloader
- Bonus Tips: Easily Edit Your Subtitle With Filmora
10 Free YouTube Subtitle Extractors & Downloaders
We’ve rounded up a list of 10 YouTube subtitle extractors and downloader services to simplify your life and enable you to get the SRT files.
These tools are simple to use and can help you save a lot of time and effort. However, keep in mind that with these software programs, you can only download videos with subtitles automatically generated by YouTube.
![]()
Note: if you want to create subtitles, you can also use the Speech to text function.
Online Free Youtube Subtitle Extractor
You can use one of the following subtitle extractor tools if you only need the SRT file:
1. DownSub
DownSub is an online tool that can help you extract subtitles for your favorite YouTube movies or shows. The tool is entirely free and easy to use. Simply paste the link to the video you want to get subtitles for, click download, and DownSub will do the rest.
Some of the key features of DownSub are as follows:
- Download subtitles from YouTube in multiple languages
- Supports multiple formats, including SRT, TXT, and VTT
- Extracts directly from YouTube, Viki, VIU, and more
2. Checksub
Checksub is a handy tool for extracting subtitles for your YouTube video. To use the tool, create your account on the website, drag and drop your file or upload the URL, and wait for Checksub to extract the SRT file.
Here are some of the cool features of the Checksub tool:
- Adds subtitles and translates or dubs your videos
- Ability to edit subtitles
- Supports over 190 languages
- Adds automatic voiceover in a foreign language
3. EasySub
EasySub is another simple and fast-to-use tool that can help you extract YouTube subtitles in no time without installing any software or extensions. Moreover, it supports multiple file formats, such as VTT, SRT, ass, and TXT.
The following are some key features of EasySub:
- Free to use
- Simple and easy to use
- Automatic transcription
- Uses an advanced AI algorithm
- Multi-language support
4. SaveSubs
SaveSubs is a browser-based Youtube subtitles downloader that does not require its users to install any software or touch any code. Just paste the YouTube video link with subtitles, click “Download,” and you can download the file instantly on your device.
Below are a few key features of the SaveSubs tool:
- Download subtitles in multiple formats, such as VTT, SRT, and TXT
- Clear and simple UI
- Supports editable subtitles
- Comes with a social sharing feature
5. YouSubtitles
With its massive subtitle database, YouSubtitles stands out from other online tools. This tool has an easy-to-use UI and can help you get your required file effortlessly. Furthermore, you can even select the translated version of the file after the download.
Here’s why YouSubtitles is one of the best YouTube subtitles extractor online:
- Free to use
- Huge subtitle database
- Supports multiple formats and languages
6. DVDVideoSoft
Another trusted source for YouTube subtitle extraction is DVDVideoSoft. With this tool, you can quickly get the required SRT file by providing the URL of the content. Moreover, you can also use it to download music and videos from Youtube.
Some key features of DVDVideoSoft are as follows:
- Can set the language, interval, and timestamp for the subtitles
- Supports YouTube to MP3 converter and YouTube downloader
- Free to use
- Perfect for downloading subtitles from a particular segment of a video
Youtube Subtitle Downloader Software
Youtube’s automatic subtitles are sometimes inaccurate while using an online tool. Therefore, we recommend you use dedicated software to make adjustments to the content. Some of these programs are as follows:
1. Wondershare UniConverter
Wondershare UniConverter is an easy-to-use software for Windows and Mac that can help you create, add, and generate subtitles for your favorite Youtube videos in just a few clicks.
Price:
- Quarter: $29.99
- Annual: $39.99
- 2-year: $55.99
- Perpetual (one-time): $79.99
Key Features:
Here are some of the things UniConverter can do:
- Auto-generates subtitles from videos in over 100 languages
- Supports multiple video and audio formats
- Customizable subtitle styles
- Comes with a visual subtitle timeline for real-time preview
- Converts TXT to SRT format
- Ability to download the YouTube video on your device
2. DVDVideoSoft Free YouTube Subtitles Downloader
Another customizable and powerful software for downloading YouTube SRT is the DVDVideoSoft Free YouTube Downloader. With this tool, you can get subtitles in multiple languages for any video on YouTube with closed captions.
Price: Free
Key Features:
Here are some key features of the DVDVideoSoft Free YouTube Subtitles Downloader:
- Supports TXT and SRT file formats
- Available for Windows
- Ability to extract subtitles from certain intervals
- Available as a browser-based tool
3. 4K Video Downloader
With the 4K Video Downloader user-friendly GUI, you can download videos from YouTube, Facebook, and many other video sites in high definition. It is also possible to extract YouTube video subtitles in over 50 languages.
Price: Free
Key Features:
Below are the key features of the 4K Video Downloader software:
- Download the video in 4K
- Supports over 50 languages for YouTube subtitles extraction
- Can download an entire playlist
4. ByClick Downloader
ByClick Downloader is another great option to quickly download YouTube videos with subtitles in any format you want. Not only that, you can convert files into MP3, MP4, FLV, AVI, WMV,3GP, WAV, and WEBM formats with just a few clicks!
Price: Free
Key Features:
Key features of the ByClick Downloader are as follows:
- Downloads videos from over 50 different sources
- Excellent user interface
- Quickly downloads YouTube subtitles.
- Supports multiple formats
Bonus Tips: Easily Edit Your Subtitle With Filmora
Since most of the above tools only extract or download the YouTube subtitles and do not offer editing features, we recommend using Wondershare Filmora , where you can quickly apply changes to your SRT file.
Free Download For Win 7 or later(64-bit)
Free Download For macOS 10.14 or later
Filmora is a powerful video editing software that lets you create and edit clips like a pro. With its easy-to-use UI and wide range of features, you can also create and edit subtitles for your YouTube video using different parameters, animations, text styles, templates, and colors.
Here’s how you can add and edit subtitles on your videos using Filmora:
Step 1 Open the Filmora software on your laptop or desktop and click the “Create New Project” option in the main interface. Select the “Click here to import media” option and upload your YouTube video. Alternatively, you can drag and drop your file.
Step 2 Drag the YouTube video, drop it in the timeline, and click the “Play” icon. Listen to the voiceover on your video footage and press the “M” key to add a marker. Next, click “Titles” from the toolbar and open the “Subtitles” tab from the left menu. Double-click the subtitle to download and preview it.
Step 3 Drag the downloaded subtitle template and drop it in the timeline. Now, adjust it in your video along with the marker point. Double-click the subtitle template in the timeline and type the text from the video voiceover.
You can also add color or template and adjust the text space to make them more visible on your video clip.
Step 4 Click the “Advanced” option, delete the preset text, and set the one you’ve just typed. Next, head to the “Animation” tab to apply any animation effect and click “OK.” Finally, repeat the steps to add subtitles to the whole video.
Conclusion
In this article, we’ve provided a detailed review of the ten best YouTube subtitle extractors and downloaders to help you automatically extract SRT files without much effort.
We’ve also recommended the Filmora software for quickly downloading and editing YouTube subtitles to make them more engaging and clear using various templates, styles, and animations.
Hopefully, you’ve found this article helpful and can now get the SRT files for your favorite YouTube video in a matter of minutes.
Also read:
- Antique Cinematography in the Digital Realm for 2024
- In 2024, Easy Paths to Profitable YouTube Business Channels, Top 10 List
- Final Goodbye to YouTube's Minis A Step-by-Step Process
- Masterclass in YouTube Video Previews and Trailers
- The Money Trail for YouTube Creators Revenue Realization
- Amplifying Your Brand The FameBit Approach to YouTube Affiliates for 2024
- Professional Choice High-Quality Laptops for Media Workers
- 2024 Approved Breaking Barriers Increasing Viewership on YouTube
- Best Practices in YouTube Keyword Selection
- Affordable Tactics for Combining Media with Literature for 2024
- In 2024, Best Free Downloaders Download YouTube Thumbnail for Free[Online/Win/Mac]
- [New] Audience Connection – Mastering the Art of Viewpoint-Based YouTube Reaction Vids (2 POV Method)
- Strategies for Deleting Watch Later Items on YouTube
- [New] Charting a Course to Riches YouTube's Monetary Milestones
- A Compreehensive Guide to YouTube Thumbnail Creation (Mac)
- [New] Boosting Engagement with Effective YouTube Banners & Thumbnails
- From Raw Footage to Final Cut YouTube Studio Edition
- Best of the Best Top 10 YouTube Trimmers Reviewed
- The Great Livestream Debate FACEbook Vs. YOUTube Live & Twitter Periscope
- In 2024, Essential Templates & Makers' Insights for End Credits
- [Updated] Essential MP4 Software Elevate Your Mac Productions
- [New] Critical Selection The Best 10 Video Cards for Seamless Playback
- 2024 Approved Captivating Cuts Editor Apps That Liberate Android Users
- Profit Potential Per Viewer YouTube's Financial Dynamics
- Choosing Creativity's Canvas Youtube Vs. TikTok
- [Updated] Crafting the Perfect Harmony Fusing Lyrics & Images with Lyric Video Maker
- Synchronized Screenscapes YouTube Clips in TV Loops
- In 2024, Dynamic Descriptor Constructor
- Integrating Jobs & Passion Projects Effectively
- Creating Seamless Connections Spotify to YouTube Music Conversion
- 2024 Approved Broadcasting Brevity News Outro Tips
- [Updated] 2024 Approved In-Depth Review The Complete Guide to Streamlabs OBS
- In 2024, Advanced Movie File Management - Six Tips for the Modern User in Windows 11
- Top 6 Apps/Services to Trace Any Realme C55 Location By Mobile Number | Dr.fone
- [Updated] The Art of Visual Storytelling for Online Platforms for 2024
- [New] Circulation Crafting Kit
- Uploading and Embedding SRT Text in Social Media Videos
- 9 Best Free Android Monitoring Apps to Monitor Phone Remotely For your Oppo A18 | Dr.fone
- [Updated] In 2024, Cutting-Edge Techniques for Captivate Content
- How PGSharp Save You from Ban While Spoofing Pokemon Go On Realme GT 5 Pro? | Dr.fone
- [Updated] Blur No More! Top 10 Web Photo Sharpening Apps
- Title: Optimal Mics Tailored to YouTube Professionals
- Author: Steven
- Created at : 2024-05-25 20:16:35
- Updated at : 2024-05-26 20:16:35
- Link: https://youtube-clips.techidaily.com/optimal-mics-tailored-to-youtube-professionals/
- License: This work is licensed under CC BY-NC-SA 4.0.
