
![[New] Elevate Your Content with These Top 5 YouTube Marketing Methods](https://www.lifewire.com/thmb/he26hNDyU2vpo9vDwma05qKk-R8=/400x300/filters:no_upscale():max_bytes(150000):strip_icc():format(webp)/espnplus-6d79c347f2df42d7a38cdb0ba9a2472b.jpg)
[New] Elevate Your Content with These Top 5 YouTube Marketing Methods
Elevate Your Content with These Top 5 YouTube Marketing Methods
YouTube is undoubtedly the most famous video sharing platform in the world. More than 5 billion videos are watched every single minute on YouTube. And the ever-growing user base has propelled YouTube to the status of 2nd most popular social media platform in the world, and the second most visited website after Google in 2021.
YouTube marketing is great for both businesses and individuals who want to make careers out of YouTube. Many businesses make use of YouTube ads to get their products to their customers and it’s really effective. However, you can make more organic traffic using YouTube video marketing. With a successful YouTube video marketing strategy, you can generate leads without any ad investments.
And in this guide, we will discuss some YouTube video marketing tips that will help you get more subscribers and build your brand outreach.
Tip #1: Create A Roadmap Leading To Your Main Goal
A roadmap is basically a level by level approach to your vision. Instead of just looking at the end plan, you are building your platform up through short attainable goals. There is immense power in setting short term goals. Some serious questions that you should ask yourself are:
Step 1: Start with the question of why you need a YouTube channel in the first place! Decide on what your channel should be about and how the viewers are going to benefit from it.
Step 2: The next step is to prepare a content plan. Here must decide the type of videos and how often it will be published on your channel.
Step 3: What is your target in terms of subscribers and traffic conversion. Do you plan to take the audience to a separate landing or are you planning on making money solely from YouTube?
Planning out such specifics will help you build your platform gradually to the main goal.
Tip #2: Do tests within your strategy
Understanding the audience preferences is paramount to the success of YouTube channels. There are some important tests that you can do to understand the genre that you are targeting.
a. Test video duration
Nobody likes to see a 2 hour long YouTube video unless it’s super interesting. Thankfully, there have been studies that have been conducted to measure the audience reaction to videos of different lengths.
By default, when you create a YouTube account, the maximum upload length is restricted to just 15 minutes. You can go past this limit by verifying your account on YouTube.
When you look at the most trending videos on YouTube, they generally fall within 10 minutes. The average video size on YouTube is 4.4 minutes .
For example, let us look at YouTube videos that explain the same concept, but with different video lengths and see if the audience engagement differs with the videos. we have ensured that both videos are from channels who have a similar subscriber count in order to eliminate disproportionality that arises from viewer base.
This video gives an excellent explanation of the string theory. The Video is From TED-Ed and you can see the audience response in the comments where they praise Physicist Brian Greene for his talk. Note that the video has 2.4 million views.
Now, look at the above video that explains String Theory in less than half the time from TED-Ed. Notice how the video has more than four times the views with an impressive 10 million views. It comes to show that if you can condense your content in such a way that you can get the maximum meaning across in minimum time, you will rack up more views!
b. Test different formats/scenarios
Having a monotonous nature throughout your videos can be quite tiring for the viewer after some time. Make sure to mix things up a bit by introducing new types of video formats or scenarios that keeps the users engaged.
Such a format change will also be invaluable in testing the audience reaction to the different types of videos that you make. These new formats can be in the form of a separate video series that is different from your main content. It can also be something that directly engages the viewers like a live video stream, Ask Me Anything or Q&A type of content, etc.
For example, let us take one among the most popular cooking channels on YouTube – Tasty. If you were to browse through their content, you can see how they got their fame with cookery videos that are short and sweet like the one below:
However, they do not just stick to that same format all the time. you can also see how they mix in lengthier videos of different format. For example:
And many videos that aren’t specifically cooking at all!
And it is evident that these new formats have also become crowd favorites. Now do all their videos hit the 1 million mark? No, that just shows they are constantly testing out the waters go ahead with what works and discard what doesn’t!
c. Try Giveaways and gifts
You can boost the viewership and subscriber count for your channel by setting up occasional giveaways or gifts to the viewers. Make sure that you set the winning criteria to have the viewers subscribe to the channel.
For example, let’s take another popular YouTube channel Unbox Therapy. On Jun 27, 2018, the channel did an announcement that they were giving 106 OnePlus 6 smartphones!
And the result of the announcement was evident in the subscribers count.
From June 23rd to June 27th, 2018, Unbox therapy had gained 12,583 subscribers. However, from the announcement date that is June 27th to June 30th, 2018, the channel saw an increase of a whopping 52,173 subscribers ! Till date, the video has over 14 million views
We do not advise you to try this out when you are just starting your YouTube career. Only venture out to such investments when you are stable when it comes to earnings.
Tip#3: Ask your audience for Feedback
All your videos must be created with the audience in mind. However, sometimes what you may think would work might not fit well with the audience. Hence, it is imperative that you understand their likes and dislikes.
And the best way to improve your videos is to take suggestions from the audience themselves. You can ask them specific questions on how to improve your videos or what they want to see in your future creations. Take notes on what they have to offer and start building your content taking in those suggestions.
There is also another facet to incorporating audience feedback as it projects your YouTube channel to be responsive to the audience, something that is vital to building a strong and loyal viewer base on YouTube.
Tip #4: Analyse your YouTube videos traffic sources
YouTube has made it easier for you to track the sources from which your videos are getting the views. Sign in to YouTube Studio Beta and the click Reach from the Analytics menu provided on the left panel. Now click on Traffic source types.
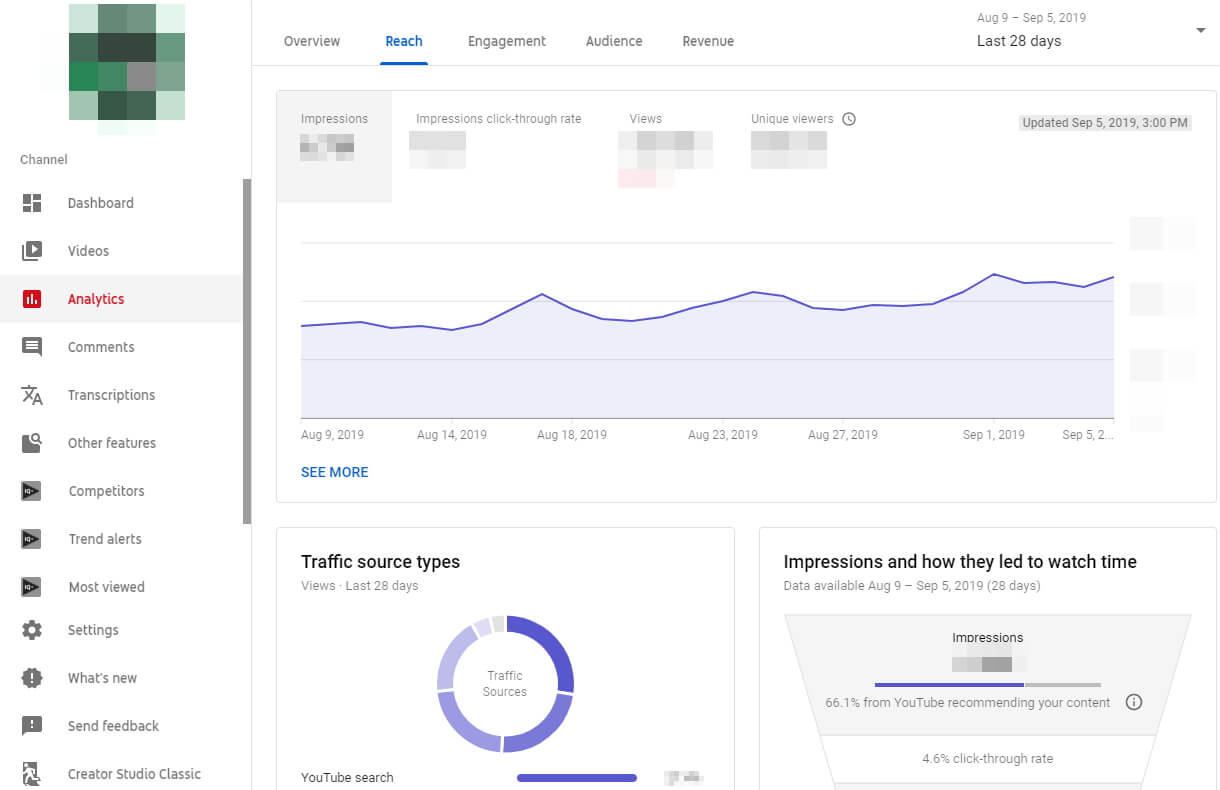
In this window, you can see the different sources that led viewers to your video. Generally, it can be a mix of websites, YouTube recommendation’s, YouTube search, etc. Metrics like Watch Time gives you an idea of how long viewers watch your videos and Audience Retention shows how consistent they are at watching them. These are just two of the many metrics you can use to your advantage.
Analyzing YouTube videos will help you structure your future videos in a way that it is more susceptible to being clicked.
Tip #5: Track the effectiveness of your videos
You must have an eye on the metrics that your videos garner over the days. While the number of views, likes, and dislikes are great indicators in determining the popularity of the videos, but there are many more factors at play.
Your video ranking is important as it determines the position of your videos when a keyword is typed into the search box. The ranks are calculated by the YouTube algorithm, but you have a certain degree of power in raising the ranks by leveraging the following parameters of the video;
Thumbnail: The first thing that the viewer is going it see when they are browsing through a list of videos is the thumbnail. Make sure that it is attractive and stands out!
Title: The next element that gets the most attention from both the user and the YouTube algorithm is the title. Ensure that the main keyword you are targeting is included in the title.
Description: This is where you can play a lot with keywords, both short and long tail. Be very descriptive about your video, but do not just use a big chunk of text. The description must be succinct and informative. It can also have links to your landing page or sponsors.
Tags: Tags are words or phrases that are used to help YouTube better understand the video. Make sure the tags that you are giving are related to the video that they represent.
Category: YouTube has some predefined categories and the videos that you upload must be put in the right one to get maximum reach.
Subtitles: Subtitles do not carry much weight in terms of SEO or ranking, but they are a much-appreciated addition in the audience point of view.
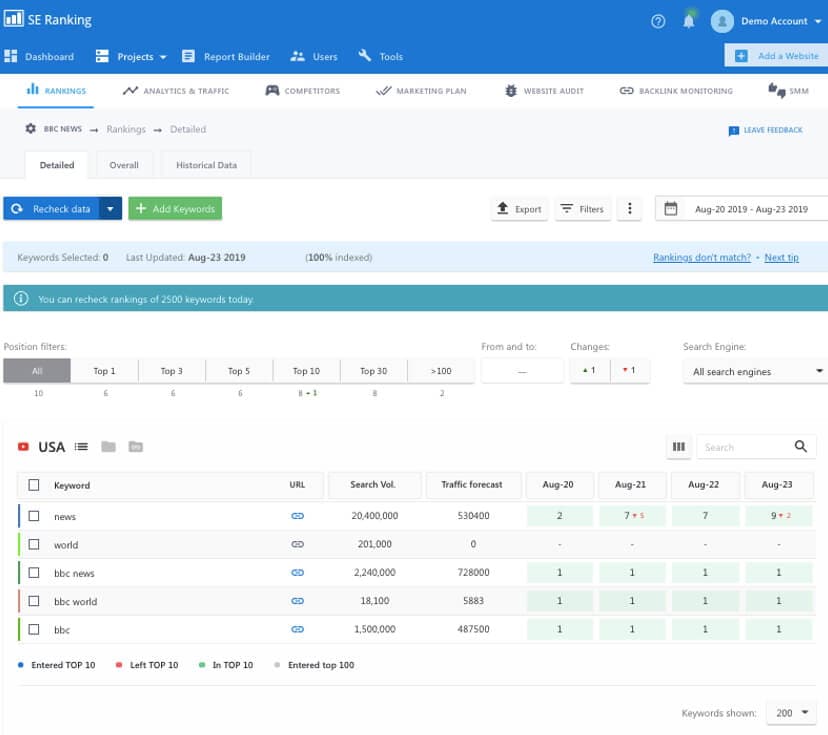
Yes, it can be quite meticulous but the results are worth the effort. Having a rank tracker like the one from SE Ranking or Tubebuddy can be quite handy at times like these. The software basically tracks everything about your videos and presents them in a neatly organized dashboard, which is cuts the effort significantly for YouTube marketers.
Do not leave the video by itself to garner views, it often fails to register any results because elements like the title, description and the keywords play an important role in getting the videos to the users.
You may also like: How to Convert YouTube to MP4 Safely? [Step by Step Guide] >>
Tip #6: Choose a suitable video creator
Creating attractive videos is a key to make success in Youtube video marketing. So you will need to have a suitable video editor to help you. There are quite a few choices in marketing now, such as Adobe Premiere Pro. However, there is a better choice for most average users - Filmora Video Editor , which provides powerful video editing features and huge transitions, effects, and filters resources.
To know more about Filmora Video Editor, visit its page: https://filmora.wondershare.com/video-editor/

Conclusion
YouTube marketing has evolved over the years to a point where you need a carefully crafted plan to have a successful YouTube career. In this guide, we have mentioned some useful YouTube marketing tips that will help you alo12ng the way.
The greatest takeaway from this guide should be that you must be patient and have persistence. Do not stop what you are doing just because you didn’t see any results on day one. Keep the fire burning and you will reach there in no time!
This video gives an excellent explanation of the string theory. The Video is From TED-Ed and you can see the audience response in the comments where they praise Physicist Brian Greene for his talk. Note that the video has 2.4 million views.
Now, look at the above video that explains String Theory in less than half the time from TED-Ed. Notice how the video has more than four times the views with an impressive 10 million views. It comes to show that if you can condense your content in such a way that you can get the maximum meaning across in minimum time, you will rack up more views!
b. Test different formats/scenarios
Having a monotonous nature throughout your videos can be quite tiring for the viewer after some time. Make sure to mix things up a bit by introducing new types of video formats or scenarios that keeps the users engaged.
Such a format change will also be invaluable in testing the audience reaction to the different types of videos that you make. These new formats can be in the form of a separate video series that is different from your main content. It can also be something that directly engages the viewers like a live video stream, Ask Me Anything or Q&A type of content, etc.
For example, let us take one among the most popular cooking channels on YouTube – Tasty. If you were to browse through their content, you can see how they got their fame with cookery videos that are short and sweet like the one below:
However, they do not just stick to that same format all the time. you can also see how they mix in lengthier videos of different format. For example:
And many videos that aren’t specifically cooking at all!
And it is evident that these new formats have also become crowd favorites. Now do all their videos hit the 1 million mark? No, that just shows they are constantly testing out the waters go ahead with what works and discard what doesn’t!
c. Try Giveaways and gifts
You can boost the viewership and subscriber count for your channel by setting up occasional giveaways or gifts to the viewers. Make sure that you set the winning criteria to have the viewers subscribe to the channel.
For example, let’s take another popular YouTube channel Unbox Therapy. On Jun 27, 2018, the channel did an announcement that they were giving 106 OnePlus 6 smartphones!
And the result of the announcement was evident in the subscribers count.
From June 23rd to June 27th, 2018, Unbox therapy had gained 12,583 subscribers. However, from the announcement date that is June 27th to June 30th, 2018, the channel saw an increase of a whopping 52,173 subscribers ! Till date, the video has over 14 million views
We do not advise you to try this out when you are just starting your YouTube career. Only venture out to such investments when you are stable when it comes to earnings.
Tip#3: Ask your audience for Feedback
All your videos must be created with the audience in mind. However, sometimes what you may think would work might not fit well with the audience. Hence, it is imperative that you understand their likes and dislikes.
And the best way to improve your videos is to take suggestions from the audience themselves. You can ask them specific questions on how to improve your videos or what they want to see in your future creations. Take notes on what they have to offer and start building your content taking in those suggestions.
There is also another facet to incorporating audience feedback as it projects your YouTube channel to be responsive to the audience, something that is vital to building a strong and loyal viewer base on YouTube.
Tip #4: Analyse your YouTube videos traffic sources
YouTube has made it easier for you to track the sources from which your videos are getting the views. Sign in to YouTube Studio Beta and the click Reach from the Analytics menu provided on the left panel. Now click on Traffic source types.
In this window, you can see the different sources that led viewers to your video. Generally, it can be a mix of websites, YouTube recommendation’s, YouTube search, etc. Metrics like Watch Time gives you an idea of how long viewers watch your videos and Audience Retention shows how consistent they are at watching them. These are just two of the many metrics you can use to your advantage.
Analyzing YouTube videos will help you structure your future videos in a way that it is more susceptible to being clicked.
Tip #5: Track the effectiveness of your videos
You must have an eye on the metrics that your videos garner over the days. While the number of views, likes, and dislikes are great indicators in determining the popularity of the videos, but there are many more factors at play.
Your video ranking is important as it determines the position of your videos when a keyword is typed into the search box. The ranks are calculated by the YouTube algorithm, but you have a certain degree of power in raising the ranks by leveraging the following parameters of the video;
Thumbnail: The first thing that the viewer is going it see when they are browsing through a list of videos is the thumbnail. Make sure that it is attractive and stands out!
Title: The next element that gets the most attention from both the user and the YouTube algorithm is the title. Ensure that the main keyword you are targeting is included in the title.
Description: This is where you can play a lot with keywords, both short and long tail. Be very descriptive about your video, but do not just use a big chunk of text. The description must be succinct and informative. It can also have links to your landing page or sponsors.
Tags: Tags are words or phrases that are used to help YouTube better understand the video. Make sure the tags that you are giving are related to the video that they represent.
Category: YouTube has some predefined categories and the videos that you upload must be put in the right one to get maximum reach.
Subtitles: Subtitles do not carry much weight in terms of SEO or ranking, but they are a much-appreciated addition in the audience point of view.
Yes, it can be quite meticulous but the results are worth the effort. Having a rank tracker like the one from SE Ranking or Tubebuddy can be quite handy at times like these. The software basically tracks everything about your videos and presents them in a neatly organized dashboard, which is cuts the effort significantly for YouTube marketers.
Do not leave the video by itself to garner views, it often fails to register any results because elements like the title, description and the keywords play an important role in getting the videos to the users.
You may also like: How to Convert YouTube to MP4 Safely? [Step by Step Guide] >>
Tip #6: Choose a suitable video creator
Creating attractive videos is a key to make success in Youtube video marketing. So you will need to have a suitable video editor to help you. There are quite a few choices in marketing now, such as Adobe Premiere Pro. However, there is a better choice for most average users - Filmora Video Editor , which provides powerful video editing features and huge transitions, effects, and filters resources.
To know more about Filmora Video Editor, visit its page: https://filmora.wondershare.com/video-editor/
Conclusion
YouTube marketing has evolved over the years to a point where you need a carefully crafted plan to have a successful YouTube career. In this guide, we have mentioned some useful YouTube marketing tips that will help you alo12ng the way.
The greatest takeaway from this guide should be that you must be patient and have persistence. Do not stop what you are doing just because you didn’t see any results on day one. Keep the fire burning and you will reach there in no time!
Cross-Platform Title Framework: YTB to Other Apps
Versatile Video Editor - Wondershare Filmora
An easy yet powerful editor
Numerous effects to choose from
Detailed tutorials provided by the official channel
The vertical video went to a mainstream media style. Nowadays, it’s common for online video, especially on social apps. Mobile video has become the most common way to watch online videos. It makes sense then that vertical is the preferred familiarization for videos. Users don’t want to twist their phones to watch a 30-second ad. Knowing YouTube shorts vertical size is important as well as Facebook vertical video specs.
Social juggernauts like Facebook and YouTube have adopted vertical video size or formats in current years. The newer social apps, like Snapchat and TikTok, use vertical video completely. While most platforms now prefer vertical video, they each have different patterns. Even Instagram vertical video dimensions premiere is different.
Users tinkering in video marketing know it’s essential to stay updated on social media video sizes across all platforms. But, we also know that it is time-consuming to dig through each technical specification of each social app. For that purpose, we have covered all network video sizes for each platform. So, browse the table of contents below and find the video dimensions, aspect ratios, and file sizes you need.
In this article
01 [What Vertical Video Size Do We Usually Use?](#Part 1)
02 [Vertical Video Dimension for Different Social Apps](#Part 2)
03 [Tips: How to Adjust Vertical Videos Size](#Part 3)
Part 1 What Vertical Video Size Do We Usually Use?
Videos come in different sizes. However, one principle is standard in creating them, the vertical video aspect ratio (width to height). This refers to how you compare and create the video height to video ratio (how you intend to record and produce your video).
Ideally, it is what you and viewers will see while watching your video. To create a perfect video, any video creator should decide on the relationship between the video height and width.
When creating YouTube vertical video dimensions, the width is usually longer than the height. Most television videos have a standard ratio of 4:3 and 16:9. However, social media videos are created using a 1:1 and 9:16 ratio.

A smartphone can shoot vertical videos perfectly, but some media players like cameras require editing and adjusting the sizes to get the correct aspect ratio. Experts won’t have difficulties adjusting horizontally shot videos, but an amateur will. Fortunately, you can avoid taking unprofessional shoots by focusing on the frame’s center to capture your subject wholly without clipping important aspects. While editing Facebook vertical video dimensions and other social apps, the results could vary depending on the editing software. But you can rotate the video within the software to get the correct dimensions lest you get ugly videos full of black backgrounds filling the frame.
Most cameras and video recorders have inbuilt settings that switch to aspect ratio when you start recording. And the good thing is that you can adjust the settings to your desired dimensions in the settings section. If you are shooting a vertical video without a preset aspect ratio, then:
- Shoot gently without switching your camera horizontally, especially if you are capturing a narrow view.
- Avoid fast spans as it appears intense on the camera that could result in blurry animations.
- Focus on what you are capturing, and if need be, zoom in to capture every essential detail.
The importance of applying aspect ratio in videos is to ensure your images and videos have excellent resolution. This way, you have a chance to present (market) your idea professionally.
Part 2 Vertical Video Dimension for Different Social Apps
Here is a guide on how to shoot vertical dimensions for various social apps –
1. YouTube Vertical Video Dimension Guide
It is common for viewers to switch to YouTube and watch videos, and this is why you need the work on the perfect YouTube vertical video size. Initially, you could display YouTube videos in different dimensions, but this is no longer the case since the app’s dynamic innovation to view animations in preferred sizes.

Usually, YouTube videos are recorded at a standard aspect ratio of 16: 9. It means that you cannot customize the dimensions as this is this ratio is the default.
Though the 16:9 dimensions are standard, you can also shoot your videos using different ratios like 1:1 (square), 4:3, or 9:16 (vertically). In this case, your video will fit different YouTube videos on each device but will display white or grey padding on the frames by default.
Manually adding padding to your videos reduces the ability to adjust them to different ratios on various devices. If you are yet to switch to YouTube vertical video dimensions, you are missing to increase brand awareness.
2. Facebook Vertical Video Dimension Guide
Facebook vertical video specs have mainly been using the 16:9 ratio. And since the app attracts billions of global users, it’s high time to optimize your snapshots and try posting in different formats.

For your next FB vertical video size for feed videos, think of square snapshots (1:1), 2:3, 4:5, or 16:9. If you love creating Facebook stories, you can stick to the 9:16 ratio. And for Facebook live videos, stick with the Facebook video vertical size, 16:9 dimensions. Note that most Facebook video posts will automatically have a standard measurement of 16:9.
3. Instagram Vertical Video Dimensions Guide
Since the inception of Instagram vertical video dimensions premiere, the ratio has always been 1:1. This dimension makes it optimal for phones and small-sized screens. Here is the ultimate guide for your new Instagram animations:
- 1:1 for square videos.
- 4:5 for portrait shots.
- 9:16 when shooting vertical animations.
If you are going live on Instagram, we recommend 9:16, while you can shoot in 1:1, 4:5, and 16:9 ratios for feed videos. For Instagram stories, we suggest 9:16, but you can always work around 1:1, 4:9, and 16:9.

4. Twitter Vertical Video Dimension Guide
Twitter is quite different when considering feed video dimensions; portrait and square. The former (portrait) is a favorite for ads and marketing videos display (increase brand visibility), whereas the latter is perfect for displaying videos on multiple devices.
Twitter videos can be perfect in the below dimensions:
- Promotional video ads 1:2 39 to 2.39:1
- Six-second short ads 1:2.39 – 2.39:1
- First video ads 1:2.39 – 2.39:1
- Personal portrait (vertical) videos 9:16
- Personal horizontal animations 1:2.39 – 2.39:1

5. WhatsApp Vertical Video Dimension Guide
Most people don’t know the importance of resizing WhatsApp videos. Sharing videos on your WhatsApp status is a marketing strategy, but you must resize your videos well. Most video WhatsApp vertical videos have 4:3 dimensions and a 1080 × 1920 pixels size.
Part 3 Tips: How to Adjust Vertical Videos Size
The smartphone has become the primary tool for taking photos or recording videos, but we hold our mobile phone in a different direction while shooting videos, which causes the wrong adjustment while uploading it. Fortunately, there are ways, and your video can fit any screen without any compromises. Bellow, we are going to tell you two methods to adjust vertical video size
Method 1: Filmora
Filmora allows users to rotate your video to any point they want. What’s more, you can zoom in or crop the undesired parts in the video with a snap. It also offers you preset aspect ratios like 16:9, 9:16; 4:5, 1:1, etc., to help you quickly find the perfect aspect ratio for YouTube, Instagram, and other social apps. Let’s see how to change video adjustment in Filmora.
How to crop aspect ratio at the starting interface:
In this method, you must upload the animation first. Follow these steps:
Step 1: Upload your video into the editing panel.
Step2: Scroll to the drop-down menu to see various dimensions (1:1. 4:3, 9:16, 16:9, and 21:9).
Step3: Select the desired ratio and apply.

Modifying aspect ratio in project settings:
This method allows you to preset the ratios before uploading your media. Most files are preset to a 4:3 ratio, but you can adjust as you wish. Note that uploading a video with other aspect ratios will automatically switch to the default one. However, you can change the ratio by clicking on the project settings tab.

Changing aspect ratio when editing:
You can crop your video after importing it to the Filmora panel using the crop and zoom tools.
Step 1: Right-click on the file in the panel.
Step 2: Select crop and zoom.
Step 3: Click on the desired ratio from the suggestions (16:9, 4:3, 1:1, and 9:16) and confirm the action by clicking OK.

You can also modify the aspect ratio manually, add filters, and blur the background to enhance resolution when editing.
Auto reframing:
Latest Filmora running versions like V10.5 have the auto-reframe feature that can help crop aspect ratio seamlessly. The good thing about this feature is that it detects any object and can remove it if need be. Plus, this video editor also comes with preset aspect ratios that conveniently suit different social apps.
You can auto reframe by:
Step 1: Import the video to the panel. Right-click on the file and select the auto-reframe icon.

Step 2: Choose the desired aspect ratio.

Step 3: Click the analyze icon and wait for the results in a preview window.
Step 4: Adjust the frame by dragging the box to balance the object or leave it if you love the results.

Step 5: When done, rename it and click the export feature to save your new file.

Step 6: Edit (add effects) as desired.
Modifying aspect ratio when exporting:
After saving your file, you can export it to your desired media display device and change the aspect ratio based on your platform settings, as discussed above.

Method 2: Final Cut Pro
Apple’s Final Cut Pro is a compelling software for video editing and compositing. The interface is designed similar with many other video editing programs such as Adobe Premiere and Combustion etc.
To prepare:
- Take vertical videos.
- Connect iPhone to an editing system.
- Enter a password on the iPhone.
- Started Final Cut Pro.
- Create a new library, named it “Vertical Video”.
Steps to adjust vertical video size with Final cut pro:
Step 1: To import the video clip, you want to edit, click on the File > Import Media. The connected iPhone screen appears in the top left corner. The circle icon shows that FCP is still collecting data from the phone and the pointing arrow allows to disconnect.
Step 2: When the iPhone is chosen in the sidebar, thumbnails appear at the bottom of the Media Import window. For example, you can see the four vertical video clips, choose one to edit.
Step 3: The iPhone compresses MP4 video. While editing a simple project, you don’t need to generate optimized media. However, optimizing media will save you time in the long run if you plan to add lots of effects.
Step 4: Now, generate a new project and apply the Automatic settings.
Step 5: Next, edit a vertical clip into the empty new project. Even if this isn’t the first clip you want the audience to see, it is essential because FCP uses this clip to configure the project settings.
Step 6: When that first video clip is edited into the timeline, this dialog arrives. Note that the frame size is already fixed by the size of the video you shot on the iPhone. Don’t change any settings. It allows FCP to automatically configure the project to match the specs of this clip. If you’ve done this correctly, your clip appears vertically in the Viewer.
Wondershare Filmora
Get started easily with Filmora’s powerful performance, intuitive interface, and countless effects!
Try It Free Try It Free Try It Free Learn More >

AI Portrait – The best feature of Wondershare Filmora for gameplay editing
The AI Portrait is a new add-on in Wondershare Filmora. It can easily remove video backgrounds without using a green screen or chroma key, allowing you to add borders, glitch effects, pixelated, noise, or segmentation video effects.

Conclusion
As you can tell, video dimensions significantly influence your media resolution and impact. Aspect ratio is the standard way to modify your media to fit YouTube, Instagram, Facebook, and other social apps. Changing dimensions is a DIY process; you can edit YouTube vertical video dimensions and other social apps like Facebook and Instagram through Filmora or Final Cut Pro.
The vertical video went to a mainstream media style. Nowadays, it’s common for online video, especially on social apps. Mobile video has become the most common way to watch online videos. It makes sense then that vertical is the preferred familiarization for videos. Users don’t want to twist their phones to watch a 30-second ad. Knowing YouTube shorts vertical size is important as well as Facebook vertical video specs.
Social juggernauts like Facebook and YouTube have adopted vertical video size or formats in current years. The newer social apps, like Snapchat and TikTok, use vertical video completely. While most platforms now prefer vertical video, they each have different patterns. Even Instagram vertical video dimensions premiere is different.
Users tinkering in video marketing know it’s essential to stay updated on social media video sizes across all platforms. But, we also know that it is time-consuming to dig through each technical specification of each social app. For that purpose, we have covered all network video sizes for each platform. So, browse the table of contents below and find the video dimensions, aspect ratios, and file sizes you need.
In this article
01 [What Vertical Video Size Do We Usually Use?](#Part 1)
02 [Vertical Video Dimension for Different Social Apps](#Part 2)
03 [Tips: How to Adjust Vertical Videos Size](#Part 3)
Part 1 What Vertical Video Size Do We Usually Use?
Videos come in different sizes. However, one principle is standard in creating them, the vertical video aspect ratio (width to height). This refers to how you compare and create the video height to video ratio (how you intend to record and produce your video).
Ideally, it is what you and viewers will see while watching your video. To create a perfect video, any video creator should decide on the relationship between the video height and width.
When creating YouTube vertical video dimensions, the width is usually longer than the height. Most television videos have a standard ratio of 4:3 and 16:9. However, social media videos are created using a 1:1 and 9:16 ratio.
A smartphone can shoot vertical videos perfectly, but some media players like cameras require editing and adjusting the sizes to get the correct aspect ratio. Experts won’t have difficulties adjusting horizontally shot videos, but an amateur will. Fortunately, you can avoid taking unprofessional shoots by focusing on the frame’s center to capture your subject wholly without clipping important aspects. While editing Facebook vertical video dimensions and other social apps, the results could vary depending on the editing software. But you can rotate the video within the software to get the correct dimensions lest you get ugly videos full of black backgrounds filling the frame.
Most cameras and video recorders have inbuilt settings that switch to aspect ratio when you start recording. And the good thing is that you can adjust the settings to your desired dimensions in the settings section. If you are shooting a vertical video without a preset aspect ratio, then:
- Shoot gently without switching your camera horizontally, especially if you are capturing a narrow view.
- Avoid fast spans as it appears intense on the camera that could result in blurry animations.
- Focus on what you are capturing, and if need be, zoom in to capture every essential detail.
The importance of applying aspect ratio in videos is to ensure your images and videos have excellent resolution. This way, you have a chance to present (market) your idea professionally.
Part 2 Vertical Video Dimension for Different Social Apps
Here is a guide on how to shoot vertical dimensions for various social apps –
1. YouTube Vertical Video Dimension Guide
It is common for viewers to switch to YouTube and watch videos, and this is why you need the work on the perfect YouTube vertical video size. Initially, you could display YouTube videos in different dimensions, but this is no longer the case since the app’s dynamic innovation to view animations in preferred sizes.
Usually, YouTube videos are recorded at a standard aspect ratio of 16: 9. It means that you cannot customize the dimensions as this is this ratio is the default.
Though the 16:9 dimensions are standard, you can also shoot your videos using different ratios like 1:1 (square), 4:3, or 9:16 (vertically). In this case, your video will fit different YouTube videos on each device but will display white or grey padding on the frames by default.
Manually adding padding to your videos reduces the ability to adjust them to different ratios on various devices. If you are yet to switch to YouTube vertical video dimensions, you are missing to increase brand awareness.
2. Facebook Vertical Video Dimension Guide
Facebook vertical video specs have mainly been using the 16:9 ratio. And since the app attracts billions of global users, it’s high time to optimize your snapshots and try posting in different formats.
For your next FB vertical video size for feed videos, think of square snapshots (1:1), 2:3, 4:5, or 16:9. If you love creating Facebook stories, you can stick to the 9:16 ratio. And for Facebook live videos, stick with the Facebook video vertical size, 16:9 dimensions. Note that most Facebook video posts will automatically have a standard measurement of 16:9.
3. Instagram Vertical Video Dimensions Guide
Since the inception of Instagram vertical video dimensions premiere, the ratio has always been 1:1. This dimension makes it optimal for phones and small-sized screens. Here is the ultimate guide for your new Instagram animations:
- 1:1 for square videos.
- 4:5 for portrait shots.
- 9:16 when shooting vertical animations.
If you are going live on Instagram, we recommend 9:16, while you can shoot in 1:1, 4:5, and 16:9 ratios for feed videos. For Instagram stories, we suggest 9:16, but you can always work around 1:1, 4:9, and 16:9.
4. Twitter Vertical Video Dimension Guide
Twitter is quite different when considering feed video dimensions; portrait and square. The former (portrait) is a favorite for ads and marketing videos display (increase brand visibility), whereas the latter is perfect for displaying videos on multiple devices.
Twitter videos can be perfect in the below dimensions:
- Promotional video ads 1:2 39 to 2.39:1
- Six-second short ads 1:2.39 – 2.39:1
- First video ads 1:2.39 – 2.39:1
- Personal portrait (vertical) videos 9:16
- Personal horizontal animations 1:2.39 – 2.39:1
5. WhatsApp Vertical Video Dimension Guide
Most people don’t know the importance of resizing WhatsApp videos. Sharing videos on your WhatsApp status is a marketing strategy, but you must resize your videos well. Most video WhatsApp vertical videos have 4:3 dimensions and a 1080 × 1920 pixels size.
Part 3 Tips: How to Adjust Vertical Videos Size
The smartphone has become the primary tool for taking photos or recording videos, but we hold our mobile phone in a different direction while shooting videos, which causes the wrong adjustment while uploading it. Fortunately, there are ways, and your video can fit any screen without any compromises. Bellow, we are going to tell you two methods to adjust vertical video size
Method 1: Filmora
Filmora allows users to rotate your video to any point they want. What’s more, you can zoom in or crop the undesired parts in the video with a snap. It also offers you preset aspect ratios like 16:9, 9:16; 4:5, 1:1, etc., to help you quickly find the perfect aspect ratio for YouTube, Instagram, and other social apps. Let’s see how to change video adjustment in Filmora.
How to crop aspect ratio at the starting interface:
In this method, you must upload the animation first. Follow these steps:
Step 1: Upload your video into the editing panel.
Step2: Scroll to the drop-down menu to see various dimensions (1:1. 4:3, 9:16, 16:9, and 21:9).
Step3: Select the desired ratio and apply.
Modifying aspect ratio in project settings:
This method allows you to preset the ratios before uploading your media. Most files are preset to a 4:3 ratio, but you can adjust as you wish. Note that uploading a video with other aspect ratios will automatically switch to the default one. However, you can change the ratio by clicking on the project settings tab.
Changing aspect ratio when editing:
You can crop your video after importing it to the Filmora panel using the crop and zoom tools.
Step 1: Right-click on the file in the panel.
Step 2: Select crop and zoom.
Step 3: Click on the desired ratio from the suggestions (16:9, 4:3, 1:1, and 9:16) and confirm the action by clicking OK.
You can also modify the aspect ratio manually, add filters, and blur the background to enhance resolution when editing.
Auto reframing:
Latest Filmora running versions like V10.5 have the auto-reframe feature that can help crop aspect ratio seamlessly. The good thing about this feature is that it detects any object and can remove it if need be. Plus, this video editor also comes with preset aspect ratios that conveniently suit different social apps.
You can auto reframe by:
Step 1: Import the video to the panel. Right-click on the file and select the auto-reframe icon.
Step 2: Choose the desired aspect ratio.
Step 3: Click the analyze icon and wait for the results in a preview window.
Step 4: Adjust the frame by dragging the box to balance the object or leave it if you love the results.
Step 5: When done, rename it and click the export feature to save your new file.
Step 6: Edit (add effects) as desired.
Modifying aspect ratio when exporting:
After saving your file, you can export it to your desired media display device and change the aspect ratio based on your platform settings, as discussed above.
Method 2: Final Cut Pro
Apple’s Final Cut Pro is a compelling software for video editing and compositing. The interface is designed similar with many other video editing programs such as Adobe Premiere and Combustion etc.
To prepare:
- Take vertical videos.
- Connect iPhone to an editing system.
- Enter a password on the iPhone.
- Started Final Cut Pro.
- Create a new library, named it “Vertical Video”.
Steps to adjust vertical video size with Final cut pro:
Step 1: To import the video clip, you want to edit, click on the File > Import Media. The connected iPhone screen appears in the top left corner. The circle icon shows that FCP is still collecting data from the phone and the pointing arrow allows to disconnect.
Step 2: When the iPhone is chosen in the sidebar, thumbnails appear at the bottom of the Media Import window. For example, you can see the four vertical video clips, choose one to edit.
Step 3: The iPhone compresses MP4 video. While editing a simple project, you don’t need to generate optimized media. However, optimizing media will save you time in the long run if you plan to add lots of effects.
Step 4: Now, generate a new project and apply the Automatic settings.
Step 5: Next, edit a vertical clip into the empty new project. Even if this isn’t the first clip you want the audience to see, it is essential because FCP uses this clip to configure the project settings.
Step 6: When that first video clip is edited into the timeline, this dialog arrives. Note that the frame size is already fixed by the size of the video you shot on the iPhone. Don’t change any settings. It allows FCP to automatically configure the project to match the specs of this clip. If you’ve done this correctly, your clip appears vertically in the Viewer.
Wondershare Filmora
Get started easily with Filmora’s powerful performance, intuitive interface, and countless effects!
Try It Free Try It Free Try It Free Learn More >
AI Portrait – The best feature of Wondershare Filmora for gameplay editing
The AI Portrait is a new add-on in Wondershare Filmora. It can easily remove video backgrounds without using a green screen or chroma key, allowing you to add borders, glitch effects, pixelated, noise, or segmentation video effects.
Conclusion
As you can tell, video dimensions significantly influence your media resolution and impact. Aspect ratio is the standard way to modify your media to fit YouTube, Instagram, Facebook, and other social apps. Changing dimensions is a DIY process; you can edit YouTube vertical video dimensions and other social apps like Facebook and Instagram through Filmora or Final Cut Pro.
Also read:
- Deciphering Your YouTube Viewership Stats
- Propel Your YouTube Presence with Google Analytics Skills
- In 2024, Deciphering How to Spot Your Video Enthusiasts
- Maximizing Your YouTube Time Multi-Stream Techniques
- Mind Matters Top Educational YouTube Picks
- 2024 Approved Boosting YouTube Traffic Outsmarting Automated Viewers
- 2024 Approved Conciseness in Content Editing Your YouTube Videos Smartly
- Key View Figures for Earning Living on YouTube
- Uploading Tunes A Guide to Posting on YouTube
- [Updated] Elevated Viewership Status Symbolized by Buttons
- Converting YouTube Journeys Into Animated Expressions A Comprehensive Guide for Mobile/Desktop Users
- Mastering the Art of Attention Retention on YouTube with These 6 Tactics
- Common Issues with YouTube Shorts Thumbnails for 2024
- Exclusive YouTube Snippet Access - High Quality, Free Download
- In 2024, Analyzing Channels Monetization Status at a Glance
- 2024 Approved Dissecting Video Platform Features YouTube Vs. DailyMention
- Innovative Tips to Create Effective Free Video Advertisements on YouTube
- Deciphering the Superior Video-Sharing Platform TikTok or YouTube Shorts?
- [Updated] DIY Guide Screen Capture & Sound From YouTube
- Mastering Your Camera Essential Tactics for Hit YouTube Videos
- In 2024, Confirming YouTube Ad Revenue Accrual
- [New] 2024 Streamline for Success Understanding YouTube Membership
- Chuckle Chest Selecting 15 Hilarious Video Treasures for Your Viewing Pleasure
- The Top 8 Choices Mirrorless Cameras for Excellent Vlogs
- [New] Cutting-Edge Strategies for YouTube Shorts to MP4 Exportation
- Decoding Hashtags' Role in Elevating Your YouTube Gaming Experience
- Digital Broadcasting Battle Comparing Facebook LIVE, YouTube Live, & Twitter Spaces for 2024
- Duality of Delivery Engaging Audiences Through Alternative Perspectives for Reaction Videos
- Elevate Your Views Degrees of Rotation on YouTube - A 2023 Guide
- [Updated] Designing Youtube Ads That Grab Attention A Compreeher Guide
- Elevate Your Content Game Studio Aptitude Essentials for 2024
- 2024 Approved Achieving Video Popularity Mastering YouTube Thumbnail Selection
- 2024 Approved Discover Why AV1 Is a Game Changer for YouTube Viewers
- [Updated] Digital Warriors YouTube’s #Top Ten Women
- 2024 Approved 5 Leading Voice Modification Software for Instant Impact ( Rankings)
- [Updated] 2024 Approved Instagram Video Dimension [Guide for Best Video Format 2023]
- In 2024, Stream the Hottest Trailers Top 10 iPhone and iPad Movie Apps
- [New] 2024 Approved Patience Pays Off The Art of Slow-Motion Video Crafting
- 5 Ways to Track Honor X9a without App | Dr.fone
- [Updated] Cut Out Clutter in Audio Audacity’s Noise Suppression Tips
- VisionMaster vs ScreenCapturer for 2024
- [New] In 2024, Brighter Boundaries Three Strategies for Instagram Spotlight
- [Updated] 2024 Approved Navigating Inverted Video Flows on Instagram [Guide]
- Guide to Completely Erase Data on iPhone X to Avoid Privacy Leak | Stellar
- 6 Solutions to Fix Error 505 in Google Play Store on Samsung Galaxy S23 Tactical Edition | Dr.fone
- New 2024 Approved The 5 Most Advanced Tools for Shaping and Sculpting Sound
- In 2024, How to Unlock Realme C67 5G Phone without Google Account?
- Undelete lost contacts from Asus ROG Phone 8.
- [New] Secret ScreenGrabs Elusive Methods for Concealed Photo-Taking
- In 2024, Full Guide to Catch 100 IV Pokémon Using a Map On Realme 12+ 5G | Dr.fone
- Here are Some of the Best Pokemon Discord Servers to Join On Itel S23 | Dr.fone
- [New] The Art of Audio Alteration For Stories and Reels on IG
- [Updated] Grandest Clash of Titans A Compilation of the Top 7 Total War Skirmishes for 2024
- 2024 Approved Tech's Elite Selection The Top 10 Video Recorders Online
- Here are Some Pro Tips for Pokemon Go PvP Battles On Xiaomi Redmi Note 12R | Dr.fone
- Why Does My Honor X50 Keep Turning Off By Itself? 6 Fixes Are Here | Dr.fone
- Title: [New] Elevate Your Content with These Top 5 YouTube Marketing Methods
- Author: Steven
- Created at : 2024-05-25 20:12:25
- Updated at : 2024-05-26 20:12:25
- Link: https://youtube-clips.techidaily.com/new-elevate-your-content-with-these-top-5-youtube-marketing-methods/
- License: This work is licensed under CC BY-NC-SA 4.0.
