![[New] Discover Why AV1 Is a Game Changer for YouTube Viewers](https://www.lifewire.com/thmb/YkH2TPUz_UegJxp6uXTF-0IHlaM=/210x138/filters:no_upscale():max_bytes(150000):strip_icc()/GettyImages-1407509890-920de041a49448b4970783337d3d00ff.jpg)
[New] Discover Why AV1 Is a Game Changer for YouTube Viewers
Discover Why AV1 Is a Game Changer for YouTube Viewers
Do you notice that many YouTube videos have been streamed in AV1? YouTube AV1 just happened suddenly a few years ago. This article will inform you about all the things you want to know about AV1 Youtube settings. I will let you know the tutorial to turn in AV1 settings on YouTube and the reason why should choose AV1 along with the others, and some more things about AV1.
Part 1: How to turn on AV1 settings on YouTube?
Do you wonder how to turn on AV1 settings on YouTube? For your information, AV1 is a video codec that is developed by a consortium of companies. It offers you advanced compression, enabling you to do smoother HD streaming and data savings for the video. Google also has already implemented AV1 use on YouTube. To turn on AV1 settings on YouTube, here are the steps:
Step1Go to playback and performance
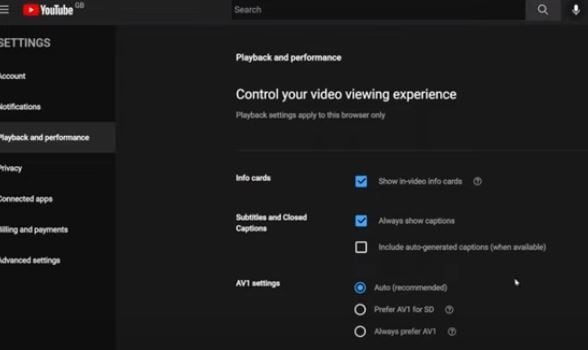
- To turn on the AV1 settings, go to your YouTube account, after that click “Playback and Performance”.
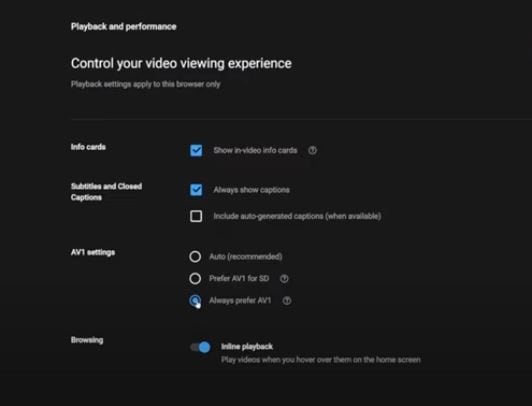
- In the AV1 settings. Besides “Auto (Recommended)”, there are other two options, which are “Prefer AV1 for SD” and also “Always prefer SD”.
- “Always Prefer AV1” uses the codec whenever it is available for a video while “Prefer AV1 for SD” limits it to SD videos. There are two options to avoid low-performance devices when AV1 videos are played on YouTube. You can select “Always Prefer AV1” to see if your device performance is good enough when you play videos on YouTube that support AV1.
Step2Test if the AV1 settings are already enabled in your video
You may ask how to confirm your YouTube videos are playing with AV1 Codec. Well, you can search playlist on YouTube with the keywords “4K, 5K, and 8K videos with the new AV1 Codec “. You can test it by playing one of the videos. You have to right-click on the media player and then select “Stats for nerd”. If it shows the av01 codec there, then the AV1 settings are enabled already.
Part 2: Why choose AV1 over VP9 and other formats?
Now, do you need a reason why you should choose AV1 compared to VP9 and the others? As you know, there is also another video codec like VP9. There are also the others such as VVC, and many more. So what is the superiority of AV1 over the others? I will let you know why you should choose AV1 in this part.
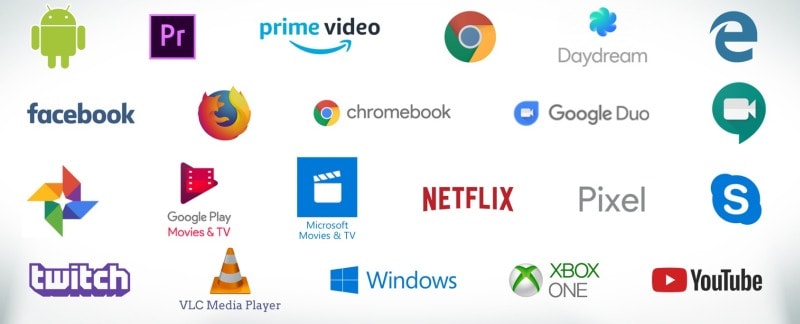
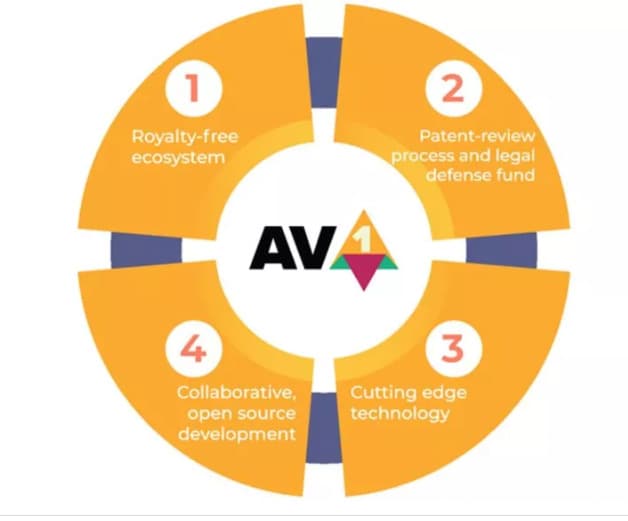
The main thing is, as mentioned before, AV1 is developed by a consortium of companies founded in 2015. It is supported by The Alliance for Open Media (AOMedia) such as Amazon, Facebook, Google, Microsoft, and Netflix, and also by web browser developers and semiconductor firms. Aomedia made it clear the algorithm is free-to-use. It means that there are no greedy negotiators that will be dependent on the developers.
Also, these days, with a format that provides a much smaller workload for internet providers. Their today focus is, that AV1 can reach the quality but can get the job done with 20% more efficiency. Then, with AV1 encoding, a “standard” 4K movie will be much more accessible than it is now. These are some more reasons why you should choose AV1.
1. Royalty-free
As mentioned before, AV1 is royalty-free. AV1 is such a next-generation of royalty video codec. It means that it is not just free to use, but also free of charge, obligations, or even liability. It is an open and royalty-free video codec that the video platform will not charge to pay royalties to the Moving Picture Experts Group (MPEG), the developer of video codecs.
When it comes to the group that will ask for the royalty, MPEG is not the only one. There are also other patent groups and companies that can ask for it. Aomedia integrated Google, Mozilla, and Cisco, while they were busy creating their new video codec. However, the three companies joined together to create one codec to beat them all.
2. Better performance
It is said that the AV1 codec is 30% more efficient. According to the tests conducted by Moscow State University, AV1 can outperform AV1 by about 28% in the efficiency of encoding and decoding. As per the performance graph from the Graphics & Media Lab Video Group, MSU below, AV1 can offer the exactly same quality as X264 at 55% of the average bitrate.
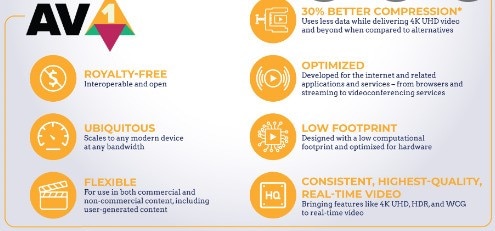
AV1 is designed so exclusively to function better than all the other codecs in the market. It is an open-sourced codec with simple patent licensing, and the integration manages to save, as mentioned, up to 30% of the bandwidth for the exactly same image quality. In other words, with AV1, distributors can send streams much faster and cheaper and we can enjoy higher definitions in the same bandwidth.
3. AV2 to come in the future
AV1 is undoubtedly superior if we compare it to other available video codecs and the exploration of the codec technology AV2 has already begun. This is such an early performance evaluation. There is some interesting part of the exploration development of AV2, such as multiple line selection for Intra prediction can make you select not just neighboring row/column for directional prediction. The same tool also exists in VVC.
There are also three essential improvements, which are simplifying the existing feature (also complete removal) and picking the tool used by VVC/H.266 (It is lack originality but so much work on it) and improvement periodically improvement of an existing tool, it is too few and also not original. We haven’t known yet when AV2 will be done completely though, maybe there still be some more essential improvements.
Part 3: What’s the best video editor for YouTubers with AV1 format?
When we talk about YouTube, it feels incomplete if we don’t talk about the video editor. So, what is the best video editing software for YouTubers with AV1 format? Yes, it is Filmora . It is such a great video editing software that allows you to import and edit many video file formats. Filmora also allows users to export AV1 MP4 format video and then can directly upload it to YouTube.

Filmora gives some ways to export your videos. Here are the five ways. You can also customize the export settings then you can save them to reuse the same settings next time. The first is you can export your project file and video to the local computer. It supports export as MP4, AVI, WMV, AV1, MOV, GoPro Cineform, F4V, MKV, TS, and 3GP.
After that, you can export your video to any device you want, such as iPhone, iPad, Apple TV, Apple TV 4K, iPod, Samsung Galaxy, Smart Phone, Android Generic, Google Pixel, Xbox One, PlayStation 4, PSP, and Smart TV. Then you can upload it to YouTube, Filmora provides you to export your video to Youtube directly. All you need to do is logging your Youtube account and export.
Free Download For Win 7 or later(64-bit)
Free Download For macOS 10.14 or later
Part 4: FAQ: Does YouTube use AV1 or VP9?
For today, YouTube encodes all the videos with the VP9 codec, but for some reason displays for low view count videos. AV1 usage also had been pushed to very low view counts. When it comes to cost or quality tradeoffs, AV1 took about 18 times longer to encode than x264.
Maximize Engagement with Custom YouTube Thumbnails
There is a saying that first impressions last, and this is proven true, especially when it comes to YouTube video viewership. For sure, you have experienced watching a video out of curiosity because of its thumbnail. That is why content creators take time to resize YouTube thumbnails or use a YouTube thumbnail size converter to customize the preview images that represent their videos.
This technique not only attract viewers to watch your video, but it also gives a glimpse of your content. In this article, we will provide you with a quick tutorial on how to resize a YouTube thumbnail and suggest handy tools you can use to create the perfect YouTube video thumbnail!

Best YouTube Thumbnail Size
According to YouTube’s help center, there are some things to remember when creating a thumbnail for your YouTube videos.
- First, make sure that the thumbnail size is 1280 pixels by 720 pixels and 640 pixels wide. It is the best YouTube thumbnail size.
- When it comes to the thumbnail dimension, make sure to use an aspect ratio of 16:9.
- Also, your YouTube thumbnail image should not exceed 2MB and is in either JPG, GIF or PNG format.
How To Resize Your YouTube Thumbnail
The primary reason for changing the YouTube thumbnail size is to gain more audience. If you are a content creator, your main goal is to introduce your content to a wider range of viewers, right? So you have to pay attention to even the smallest detail, such as YouTube thumbnails to increase viewership and top YouTube SEO.
In fact, YouTube recommends this technique to get more viewers. Also, resizing your YouTube thumbnail will prevent you from getting the “file larger than 2MB error” which can cause your thumbnail to be discarded.
So, how can you use this technique? Check our tutorial below as we walk you through various recommended methods for resizing a YouTube thumbnail:
Method 1: Resize YouTube Thumbnail With Windows Default App
The easiest way to resize YouTube thumbnails is through the Windows default app. Within just a few modifications, you can resize your thumbnail to fit as a preview image for your YouTube video.
Please take note that your image should be at least 2 megabytes or less to achieve the perfect YouTube thumbnail fit. If your image exceeds the limit, your thumbnail will either be rejected, or your image will have a black screen around it-which is not ideal at all.
Now, let us start the tutorial.
Step1 Open an image you want to set as a thumbnail. Then, Right-click> Resize.

Step2 Select “Define custom dimensions.”

Step3 Set the width to 1280 and the height to 720. Then tick the box for “Maintain Aspect Ratio “and click “Save Resized Copy.”

Step4 Click the upload thumbnail button on YouTube and import your resized image.

Method 2. Online YouTube Thumbnail Size Converter
The second method you can use is the online YouTube thumbnail size converter. As it completely works in browsers, you do not need to worry about any app installation to access the feature. Furthermore, using online YouTube thumbnail size converters ensures you maintain your image resolution and prevents it from getting blurry or pixelated.
There are various YouTube thumbnail resizers available online. Some of the most popular are Fotor, Super Image Converter, Pixelied, Super Image Converter , Adobe Express , Newisty, and Promo . Let us focus on the last online tool and the steps on how to use it.
Promo is a free online software you can use to convert an image to a YouTube thumbnail. It is one of the best YouTube Thumbnail tools as it uses simple operation steps and automatically resizes your image without losing its quality.

Here are the steps on how to use the Promo YouTube thumbnail size converter:
Step1 Go to Promo’s official website and import your image

Step2 Scroll down and find the YouTube thumbnail size where your resized image is displayed. Then, click “Download.”

Method 3: Convert the Image to YouTube Thumbnail Using Wondershare Filmora
It is without a doubt that online YouTube thumbnail resizers are great tools for converting your image to an ideal YouTube thumbnail. But it would be much better if you resize your video using the same app you use for editing. That way, you will save time using two separate apps, and your task will be much more efficient using an all-in-one video editing tool.
Wondershare Filmora , one of the most well-known software for creating high-quality and compelling videos, combines these functions in one app. Filmora is not just an excellent software for crafting YouTube videos but also a reliable tool you can use in creating and resizing YouTube thumbnails.
Free Download For Win 7 or later(64-bit)
Free Download For macOS 10.14 or later
Here is the step-by-step tutorial on how to use Filmora in resizing your YouTube thumbnail. It is divided into two parts:
1. Take a Snapshot as the Thumbnail with Filmora
Step1 Open the video in the timeline, click the play icon in the player window, and pause when you reach the desired frame for the YouTube thumbnail. Click the camera icon to take a snapshot.

Step2 In the snapshot window, choose to save the snapshot as a PNG or JPG file.
Step3 Select the output storage location and click OK.

2. Resize the YouTube Thumbnail
Step1 Import the image into the app timeline.

Step2 Drag and drop the image into the timeline and click the green “Export“ button. In the popup Export window, select GIF. Next, click “Settings“ to adjust the resolution.

Step3 As the recommended size of a YouTube Thumbnail is 1280 * 720 pixels, you can set the resolution to 1280 * 720. Then click Apply and Export the GIF. You can now upload the GIF thumbnail to your YouTube account.

Method 4. Convert Images to YouTube Thumbnail Using Third-Party Software
In addition to using dedicated video editing software, several third-party image editing programs can be used to resize images for use as YouTube thumbnails. Programs like GIMP are popular for this purpose, as it offers a wide range of tools and features for editing and resizing images.
This program allows you to import an image, resize it to the dimensions required for a YouTube thumbnail (typically 1280 x 720 pixels), and save the edited version to your desired location. Using an image editing program can be a good option if you need more control over the appearance of your thumbnail or if you want to make more extensive edits beyond simply resizing the image.
To resize an image using an image editing program like GIMP, follow these steps:
Step1 Install and launch GIMP on your computer.

Step2 Click on “File“ > “Open,” then search for the file you want to resize.

Step3 Click on “Image“ > “Scale Image“ and make sure that the resolution is 1920 by 1080.

Step4 Click on “File“ > “Export As“ and toggle the “Select File Type (By Extension)“ option. Choose JPG/JPEG format because it can compress the thumbnail enough to stay within the limit of 2 megabytes.

Step5 You can change the quality of the image and click the “Export“ button to save the thumbnail.

Comparison of These 4 YouTube Thumbnail Resizing Methods
Now that we’ve explored the four methods for resizing YouTube thumbnails, it’s time to compare the pros and cons of each method. In this section, we’ll consider factors such as ease of use, speed, quality, cost, and compatibility to help you determine the best option for your needs.
Take a look at the table below for a more detailed comparison.
| | Windows Default App | Online YouTube Thumbnail Size Converter | Wondershare Filmora | Third-Party Software | |
| ————————————————– | ——————————————- | ———————– | ———————— | ——– |
| Other Software Required or Not | No | Yes (Internet Browser) | Yes | Yes |
| Internet Connection Required | No | Yes | No | No |
| Complexity of Operations | Easy | Easy | Easy | Moderate |
| Support Other Editing of the YouTube Thumbnail | No | No | Yes | Yes |
| File Size Limit | None | 25MB | None | None |
Resizing YouTube thumbnails using the Windows default app is a quick and easy method that requires no additional software or tools. However, the quality of the resized thumbnail may improve if the original image is low resolution, and this method is only suitable for users on Windows operating systems.
Online YouTube thumbnail size converters are convenient and easy to use, and they can be accessed from any device with an internet connection. They also typically preserve the quality of the original image. However, some online converters may have size limits or require a subscription to unlock all features, and using an online converter can be slower than using a dedicated software tool.
Using Wondershare Filmora allows you to create and edit YouTube thumbnails within a single application, which can be a time-saving advantage if you’re already using Filmora for other video editing tasks. However, Filmora is a paid software, so there is a cost associated with using it, and it may have a steeper learning curve for users new to video editing.
Image editing programs like GIMP offer many features and tools for customizing your thumbnail, including adding text, applying filters, and making more extensive edits beyond simply resizing the image. They also typically offer more control over the quality and appearance of the resized thumbnail.
However, using a third-party image editing program may require a learning curve and maybe more time-consuming than other methods, and there may be a cost associated with purchasing the software.
Each of the four methods for resizing YouTube thumbnails has its pros and cons, and the best method will depend on the user’s specific needs and preferences.
Conclusion
This article explored four methods for resizing YouTube thumbnails: using the Windows default app, online converters, Wondershare Filmora, and image editing programs like GIMP. Each method has advantages and disadvantages; the best one depends on your specific needs and preferences. No matter your chosen method, you can resize YouTube thumbnails confidently with these tools and techniques.
Free Download For macOS 10.14 or later
Here is the step-by-step tutorial on how to use Filmora in resizing your YouTube thumbnail. It is divided into two parts:
1. Take a Snapshot as the Thumbnail with Filmora
Step1 Open the video in the timeline, click the play icon in the player window, and pause when you reach the desired frame for the YouTube thumbnail. Click the camera icon to take a snapshot.
Step2 In the snapshot window, choose to save the snapshot as a PNG or JPG file.
Step3 Select the output storage location and click OK.
2. Resize the YouTube Thumbnail
Step1 Import the image into the app timeline.
Step2 Drag and drop the image into the timeline and click the green “Export“ button. In the popup Export window, select GIF. Next, click “Settings“ to adjust the resolution.
Step3 As the recommended size of a YouTube Thumbnail is 1280 * 720 pixels, you can set the resolution to 1280 * 720. Then click Apply and Export the GIF. You can now upload the GIF thumbnail to your YouTube account.
Method 4. Convert Images to YouTube Thumbnail Using Third-Party Software
In addition to using dedicated video editing software, several third-party image editing programs can be used to resize images for use as YouTube thumbnails. Programs like GIMP are popular for this purpose, as it offers a wide range of tools and features for editing and resizing images.
This program allows you to import an image, resize it to the dimensions required for a YouTube thumbnail (typically 1280 x 720 pixels), and save the edited version to your desired location. Using an image editing program can be a good option if you need more control over the appearance of your thumbnail or if you want to make more extensive edits beyond simply resizing the image.
To resize an image using an image editing program like GIMP, follow these steps:
Step1 Install and launch GIMP on your computer.
Step2 Click on “File“ > “Open,” then search for the file you want to resize.
Step3 Click on “Image“ > “Scale Image“ and make sure that the resolution is 1920 by 1080.
Step4 Click on “File“ > “Export As“ and toggle the “Select File Type (By Extension)“ option. Choose JPG/JPEG format because it can compress the thumbnail enough to stay within the limit of 2 megabytes.
Step5 You can change the quality of the image and click the “Export“ button to save the thumbnail.
Comparison of These 4 YouTube Thumbnail Resizing Methods
Now that we’ve explored the four methods for resizing YouTube thumbnails, it’s time to compare the pros and cons of each method. In this section, we’ll consider factors such as ease of use, speed, quality, cost, and compatibility to help you determine the best option for your needs.
Take a look at the table below for a more detailed comparison.
| | Windows Default App | Online YouTube Thumbnail Size Converter | Wondershare Filmora | Third-Party Software | |
| ————————————————– | ——————————————- | ———————– | ———————— | ——– |
| Other Software Required or Not | No | Yes (Internet Browser) | Yes | Yes |
| Internet Connection Required | No | Yes | No | No |
| Complexity of Operations | Easy | Easy | Easy | Moderate |
| Support Other Editing of the YouTube Thumbnail | No | No | Yes | Yes |
| File Size Limit | None | 25MB | None | None |
Resizing YouTube thumbnails using the Windows default app is a quick and easy method that requires no additional software or tools. However, the quality of the resized thumbnail may improve if the original image is low resolution, and this method is only suitable for users on Windows operating systems.
Online YouTube thumbnail size converters are convenient and easy to use, and they can be accessed from any device with an internet connection. They also typically preserve the quality of the original image. However, some online converters may have size limits or require a subscription to unlock all features, and using an online converter can be slower than using a dedicated software tool.
Using Wondershare Filmora allows you to create and edit YouTube thumbnails within a single application, which can be a time-saving advantage if you’re already using Filmora for other video editing tasks. However, Filmora is a paid software, so there is a cost associated with using it, and it may have a steeper learning curve for users new to video editing.
Image editing programs like GIMP offer many features and tools for customizing your thumbnail, including adding text, applying filters, and making more extensive edits beyond simply resizing the image. They also typically offer more control over the quality and appearance of the resized thumbnail.
However, using a third-party image editing program may require a learning curve and maybe more time-consuming than other methods, and there may be a cost associated with purchasing the software.
Each of the four methods for resizing YouTube thumbnails has its pros and cons, and the best method will depend on the user’s specific needs and preferences.
Conclusion
This article explored four methods for resizing YouTube thumbnails: using the Windows default app, online converters, Wondershare Filmora, and image editing programs like GIMP. Each method has advantages and disadvantages; the best one depends on your specific needs and preferences. No matter your chosen method, you can resize YouTube thumbnails confidently with these tools and techniques.
Also read:
- [Updated] 2024 Approved Innovative Adventures Unveiled The Ultimate Top-10 Game Showcase
- [Updated] Earn Wisely The Simple Triad Method for Scrutinizing YouTube Profits
- [Updated] In 2024, Click and Groove An Insider's Guide to Making TikTok Dance Videos for Mac
- Bridging the Gap YouTube Editing Mastered in iMovie Workflows
- Brighten Up Techniques for Improving Video Lighting on YouTube for 2024
- Comprehensive List Securing Monetized YouTube Content for 2024
- Find Deleted or Missed Notifications on iPhone: A Step-by-Step Guide
- How to Screen Mirroring Vivo Y17s? | Dr.fone
- In 2024, The Detective's Playbook for Scouring Secret YouTube Content
- Integrating Playlist Videos From YouTube on Websites
- Integrating YouTube Media Into Instagram Experience
- Leveraging FameBit's Expertise for Maximum YouTube Affiliate Gains
- Preserve Cognitive Health: Expert Tips on Preventing Memory Decline by YL Software Experts
- Title: [New] Discover Why AV1 Is a Game Changer for YouTube Viewers
- Author: Steven
- Created at : 2024-12-10 17:03:10
- Updated at : 2024-12-16 18:16:35
- Link: https://youtube-clips.techidaily.com/new-discover-why-av1-is-a-game-changer-for-youtube-viewers/
- License: This work is licensed under CC BY-NC-SA 4.0.