
!["[New] Decoding Monetization How Much Creators Earn Per Ad on YouTube?"](https://thmb.techidaily.com/e874e7774ed1bae47e14908261fcbf31de304eed1c8fec16cc5f931b201e9fca.jpg)
"[New] Decoding Monetization How Much Creators Earn Per Ad on YouTube?"
Decoding Monetization: How Much Creators Earn Per Ad on YouTube?
YouTube is a great way to make money online through sponsorship and selling merchandise and sponsorships. However, a big chunk of the creator generates their revenue from Google ads. The YouTube monetization rates defines how much you can make from the ads. In this article, we talk about YouTube monetization rates and what you need to start making money.
YouTububer Monetization Helper A cross-platform for creating visually appealing and engaging videos that will increase the chances of monetization on YouTube!
Free Download Free Download Learn More

Part 1. How Much Do YouTubers Make Per View?
Are you curious about how much YouTubers make per view? Most people are. The Influencer Marketing Hub estimates that the average YouTuber makes $0.018 per view. These rates vary from $0.10 to $0.30 per ad view depending on the type of video and location.

The YouTube monetization rates vary significantly because of various factors:
- The number of views a video receives
- The number of clicks an ad receives
- Ad blockers
- Ad Quality
- Video length
Part 2. How Much Do YouTubers Make Per 1,000 Views
A YouTube channel is a great way to generate revenye. Quality content attracts a large audience, enabling a way to generate ad revenue. Although it may be difficult to grow a YouTube channel, the revenue generated is worth. The youtube monetization rates determine the amount you can earn for every 1,000 views on your videos.
Allowing advertiser to run their ads on your channel through Google AdSense is an effective way of monetizing YouTube Content. The advertisers pay YouTube to display their products on the platform. YouTube then pays YouTubers for displaying the ads on their videos. Although the YouTube monetization rates may vary, overall revenue generated is usually substantial.
Each view will generate $0.10 to $0.30 or an average of $0.018. The YouTuber will be paid $18 on average for a video with 1,000 ad views. The amount paid depends on the CPM (Cost per Mille), which is the cost of advertising to 1,000 people. Brands will incur between $4 and $24 on YouTube to advertise on YouTube. However, the revenue generated by the Youtuber will be lower because not all the 1,000 views will be ad views.
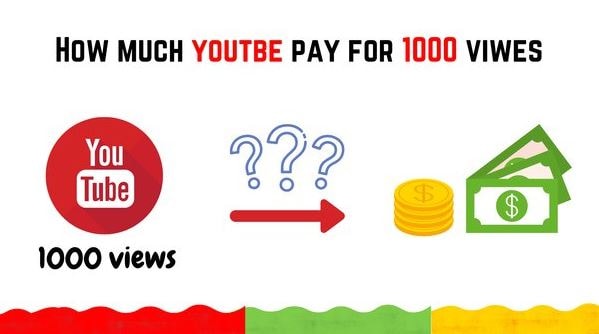
Most YouTubers report to earn around $5 to $7 from 1,000 views of their videos. Here is a breakdown of the earnings from this:
- Top talent on YouTube will likely earn $5 per 1,000
- Garnering 1 million views will earn the YouTuber $5,000
- Garnering 1 million views with 5 videos will earn the YouTuber $25,000
The figures above are just estimates. YouTubers often make more or less this amount.
Part 3. How Many Views Do YouTubers Need to Get Paid?
To get paid from revenues, you need to be eligible for the YouTube Partner Program (YPP). The following is the eligibility criteria.

The specific eligibility criteria include the following:
- Subscribers - At least 1,000
- YouTube Reach – At least 4,000 valid public watch hours in the past 12 months or at least 10M public Shorts views in the last 90 days
- YouTube Shorts Reach -
- Sign and agree to the terms and conditions
- Have an AdSense account
- Get reviewed and approved
Once approved for the YPP, you have the potential to start earning through ads. The revenue-sharing program allows you to earn income for the ads that show on your channel. Specifically, Google will pay you 68% of the revenue from the ads displayed with AdSense. For instance, a video that generates $1,000 from AdSense revenue will pay the YouTuber $680.
Part 4. The Top 6 Highest Paid YouTubers
YouTube creates a clear path for the birth of a new breed of celebrities. They have a huge following, and grow their wealth by sharing content with them. Let’s have a look at the top 6 paid YouTubers right now:
- Beast (Jimmy Donaldson) - $54 Million
- Jake Paul - $45 million
- Markiplier - $38 Million
- Rhett and Link - $30 million
- Unspeakable - $28.5 million
- Nastya - $28 million
1. Mr. Beast (Jimmy Donaldson) - $54 Million

Ranked first among the highest-paid YouTubers, Jimmy has the most popular channel. With more than 150 million subscribers, he creates videos about challenges, pranks, and giveaways. The videos have accumulated billions of views, contributing to his estimated net worth of over $100 million. Another important source of income is the Mr. Beast Burger app and menu that lets fans order MrBeast-banded meals from over 1,600 restaurants across the country.
2. Jake Paul - $45 million

Jake Paul is a renowned American professional boxer. Widely famous on social media, his YouTube is also one of the most highly ranked. He shares different kinds of videos from his boxing games. He also does pranks and reviews about different products.
3. Markiplier - $38 Million

Markiplier makes videos about playing games. The YouTube channel, which started in 2021 is renowned for moving merch. In addition to ad revenue, Markiplier records high sales of T-shirts, hoodies, and other items tied to the Unus Annus series.
4. Rhett and Link - $30 million

This YouTube channel started as the duo hosting a nerdy daily talk show called Good Mythical Morning. It quickly grew into an empire with brand extensions and spinoffs that boosted its views and earnings on YouTube.
5. Unspeakable - $28.5 million
Unspeakable talks about Minecraft in the channel. Nathan Graham posts videos of himself playing this and other games. He also posts other kinds of entertaining content such as filling a room with live alligators. His creativity has allowed him to collaborate with brands in making different ads and promotions.
6. Nastya - $28 million

Nastya immigrated from Russia with her parents. With over 88 million subscribers on her channel, she chronicles her life in prosaic installments. In 2021, she did a Spotter deal and added other brand extensions like merchandise and NFT collection that contributed added income.
Part 5. Edit Your Videos for Monetization with Wondershare Filmora
The amount of money a YouTuber earns depends on several factors. However, the amount can be increased by uploading quality videos. YouTube will quality and engaging content attract more audience, increasing the opportunities for revenue generation. Wondershare Filmora is one such software, that allows you to tell your story in a better way.
Free Download For Win 7 or later(64-bit)
Free Download For macOS 10.14 or later
With the integration of AI, Filmora now offers a wide range of editing features that you can use to automate editing. Instantly generate images, remove image background, and now. These features help create visually appealing and engaging videos that will increase the chances of monetization on YouTube. One of the AI features that stands out is Instant Mode.
Filmora Instant Mode
The Instant Mode helps beginners design slideshow videos with minimal effort. You probably have no video editing experience or a professional content creator with no time to make more videos. With Instant Mode, you can create a video within minutes. Let’s have a look at the steps involved:
Step 1 – Start Instant Mode on Filmora
After opening Filmora on your device, click on Instant Mode. This feature is on the left side of the screen.

Step 2 – Choose a Template
From the Instant Mode window, choose the video template you want to use. Click on it and play to preview the Video. Once satisfied, click om the Download Slideshow button to start editing your video.

Step 3 – Import Media Items
Click on the Import Your Media icon, and add all the media files you want to use for the video. Make sure to import more media files for better use, and press the Auto Create icon to move to the next step.

Step 4 – Implement Text Titles
From the top-left corner of the screen, click the “Titles” category. Then choose from the options available for the required title template.

Step 5 – Replace Needed Media Items
Review all the media items in the timeline, and replace any that you want with another option. The Replace icon allows you to seamlessly achieve this. You can also import new files to replace it with.

Step 6: Add Project to Timeline
Once you are satisfied with your slideshow video, click on the Timeline button. This will take you to Filmora’s editing environment where you can add effects and other elements to enhance the video.

Step 7 – Preview and Export Your Video
Click on the Play icon to preview the edited video. Then export it in MP4 format for quick upload to YouTube.

Other Useful Filmora Video Editing Features
- AI Portrait – Remove the background of your videos with high accuracy and choose over 70 portrait and sticker effects.
- AI Copywriting : Get inspiration for your video through AI-generated scripts, and automatically generate text during video editing.
- AI Image – Generate an image automatically by typing what you want. Choose from 3 resolutions and use the image directly for your video project
- Auto Reframe – Automatically resize your videos within minutes to use on both YouTube and Shorts.
- Auto Beat Sync – Automatically match the footage with music, giving your video a smooth flow with the music you choose.
Conclusion
Running a YouTube Channel is lucrative. Although it may take time to build a following, YouTube is a great platform for generating revenue. Most YouTubers have monetized their channels through the YPP program. The program allows you to earn revenue from the ads that show up in your videos. This means that a successful YouTube needs high-quality videos. We recommend Wondershare Filmora for editing your videos and improving their rate of engagement with the audience. This is a key step in building recurring revenue with YouTube monetization options.
Free Download Free Download Learn More
Part 1. How Much Do YouTubers Make Per View?
Are you curious about how much YouTubers make per view? Most people are. The Influencer Marketing Hub estimates that the average YouTuber makes $0.018 per view. These rates vary from $0.10 to $0.30 per ad view depending on the type of video and location.
The YouTube monetization rates vary significantly because of various factors:
- The number of views a video receives
- The number of clicks an ad receives
- Ad blockers
- Ad Quality
- Video length
Part 2. How Much Do YouTubers Make Per 1,000 Views
A YouTube channel is a great way to generate revenye. Quality content attracts a large audience, enabling a way to generate ad revenue. Although it may be difficult to grow a YouTube channel, the revenue generated is worth. The youtube monetization rates determine the amount you can earn for every 1,000 views on your videos.
Allowing advertiser to run their ads on your channel through Google AdSense is an effective way of monetizing YouTube Content. The advertisers pay YouTube to display their products on the platform. YouTube then pays YouTubers for displaying the ads on their videos. Although the YouTube monetization rates may vary, overall revenue generated is usually substantial.
Each view will generate $0.10 to $0.30 or an average of $0.018. The YouTuber will be paid $18 on average for a video with 1,000 ad views. The amount paid depends on the CPM (Cost per Mille), which is the cost of advertising to 1,000 people. Brands will incur between $4 and $24 on YouTube to advertise on YouTube. However, the revenue generated by the Youtuber will be lower because not all the 1,000 views will be ad views.
Most YouTubers report to earn around $5 to $7 from 1,000 views of their videos. Here is a breakdown of the earnings from this:
- Top talent on YouTube will likely earn $5 per 1,000
- Garnering 1 million views will earn the YouTuber $5,000
- Garnering 1 million views with 5 videos will earn the YouTuber $25,000
The figures above are just estimates. YouTubers often make more or less this amount.
Part 3. How Many Views Do YouTubers Need to Get Paid?
To get paid from revenues, you need to be eligible for the YouTube Partner Program (YPP). The following is the eligibility criteria.
The specific eligibility criteria include the following:
- Subscribers - At least 1,000
- YouTube Reach – At least 4,000 valid public watch hours in the past 12 months or at least 10M public Shorts views in the last 90 days
- YouTube Shorts Reach -
- Sign and agree to the terms and conditions
- Have an AdSense account
- Get reviewed and approved
Once approved for the YPP, you have the potential to start earning through ads. The revenue-sharing program allows you to earn income for the ads that show on your channel. Specifically, Google will pay you 68% of the revenue from the ads displayed with AdSense. For instance, a video that generates $1,000 from AdSense revenue will pay the YouTuber $680.
Part 4. The Top 6 Highest Paid YouTubers
YouTube creates a clear path for the birth of a new breed of celebrities. They have a huge following, and grow their wealth by sharing content with them. Let’s have a look at the top 6 paid YouTubers right now:
- Beast (Jimmy Donaldson) - $54 Million
- Jake Paul - $45 million
- Markiplier - $38 Million
- Rhett and Link - $30 million
- Unspeakable - $28.5 million
- Nastya - $28 million
1. Mr. Beast (Jimmy Donaldson) - $54 Million
Ranked first among the highest-paid YouTubers, Jimmy has the most popular channel. With more than 150 million subscribers, he creates videos about challenges, pranks, and giveaways. The videos have accumulated billions of views, contributing to his estimated net worth of over $100 million. Another important source of income is the Mr. Beast Burger app and menu that lets fans order MrBeast-banded meals from over 1,600 restaurants across the country.
2. Jake Paul - $45 million
Jake Paul is a renowned American professional boxer. Widely famous on social media, his YouTube is also one of the most highly ranked. He shares different kinds of videos from his boxing games. He also does pranks and reviews about different products.
3. Markiplier - $38 Million
Markiplier makes videos about playing games. The YouTube channel, which started in 2021 is renowned for moving merch. In addition to ad revenue, Markiplier records high sales of T-shirts, hoodies, and other items tied to the Unus Annus series.
4. Rhett and Link - $30 million
This YouTube channel started as the duo hosting a nerdy daily talk show called Good Mythical Morning. It quickly grew into an empire with brand extensions and spinoffs that boosted its views and earnings on YouTube.
5. Unspeakable - $28.5 million
Unspeakable talks about Minecraft in the channel. Nathan Graham posts videos of himself playing this and other games. He also posts other kinds of entertaining content such as filling a room with live alligators. His creativity has allowed him to collaborate with brands in making different ads and promotions.
6. Nastya - $28 million
Nastya immigrated from Russia with her parents. With over 88 million subscribers on her channel, she chronicles her life in prosaic installments. In 2021, she did a Spotter deal and added other brand extensions like merchandise and NFT collection that contributed added income.
Part 5. Edit Your Videos for Monetization with Wondershare Filmora
The amount of money a YouTuber earns depends on several factors. However, the amount can be increased by uploading quality videos. YouTube will quality and engaging content attract more audience, increasing the opportunities for revenue generation. Wondershare Filmora is one such software, that allows you to tell your story in a better way.
Free Download For Win 7 or later(64-bit)
Free Download For macOS 10.14 or later
With the integration of AI, Filmora now offers a wide range of editing features that you can use to automate editing. Instantly generate images, remove image background, and now. These features help create visually appealing and engaging videos that will increase the chances of monetization on YouTube. One of the AI features that stands out is Instant Mode.
Filmora Instant Mode
The Instant Mode helps beginners design slideshow videos with minimal effort. You probably have no video editing experience or a professional content creator with no time to make more videos. With Instant Mode, you can create a video within minutes. Let’s have a look at the steps involved:
Step 1 – Start Instant Mode on Filmora
After opening Filmora on your device, click on Instant Mode. This feature is on the left side of the screen.
Step 2 – Choose a Template
From the Instant Mode window, choose the video template you want to use. Click on it and play to preview the Video. Once satisfied, click om the Download Slideshow button to start editing your video.
Step 3 – Import Media Items
Click on the Import Your Media icon, and add all the media files you want to use for the video. Make sure to import more media files for better use, and press the Auto Create icon to move to the next step.
Step 4 – Implement Text Titles
From the top-left corner of the screen, click the “Titles” category. Then choose from the options available for the required title template.
Step 5 – Replace Needed Media Items
Review all the media items in the timeline, and replace any that you want with another option. The Replace icon allows you to seamlessly achieve this. You can also import new files to replace it with.
Step 6: Add Project to Timeline
Once you are satisfied with your slideshow video, click on the Timeline button. This will take you to Filmora’s editing environment where you can add effects and other elements to enhance the video.
Step 7 – Preview and Export Your Video
Click on the Play icon to preview the edited video. Then export it in MP4 format for quick upload to YouTube.
Other Useful Filmora Video Editing Features
- AI Portrait – Remove the background of your videos with high accuracy and choose over 70 portrait and sticker effects.
- AI Copywriting : Get inspiration for your video through AI-generated scripts, and automatically generate text during video editing.
- AI Image – Generate an image automatically by typing what you want. Choose from 3 resolutions and use the image directly for your video project
- Auto Reframe – Automatically resize your videos within minutes to use on both YouTube and Shorts.
- Auto Beat Sync – Automatically match the footage with music, giving your video a smooth flow with the music you choose.
Conclusion
Running a YouTube Channel is lucrative. Although it may take time to build a following, YouTube is a great platform for generating revenue. Most YouTubers have monetized their channels through the YPP program. The program allows you to earn revenue from the ads that show up in your videos. This means that a successful YouTube needs high-quality videos. We recommend Wondershare Filmora for editing your videos and improving their rate of engagement with the audience. This is a key step in building recurring revenue with YouTube monetization options.
Efficiently Transfer Vids From Premiere to YouTube
How Do I Use Adobe Premiere To Upload YouTube Videos?

Benjamin Arango
Mar 27, 2024• Proven solutions
Whilst getting the editing and post work just right on any project is what we all aim for, the ultimate aim is for other people to see our creations, and the most popular way to achieve that is YouTube . Chances are, if you are producing video, you will be putting some of it on YouTube at some point, so let’s have a look at the most efficient way to get your work from Premiere to YouTube.
Check if your computer meet the Premiere System Requirements >>
This is a basic tutorial about Adobe Premiere, professional video editing software. However, if video editing is new to you, consider Wondershare Filmora , which is a powerful but easy-to-use tool for users just starting out. Download the free trial version below.
 Download Mac Version ](https://tools.techidaily.com/wondershare/filmora/download/ )
How Do I Use Adobe Premiere To Upload YouTube Videos
1. Master Copy
Before exporting your work, it is important to first create a master copy of your project that is ‘as is’, in that it reflects the settings and codecs used in the original footage.
To do this you simply select the sequence within the Timeline or in the Project Panel, and go through the menu tree via File > Export > Media to bring up the export dialogue.

To create your Master Copy, simply select the first option of ‘Match Sequence Settings’, this exports a file that is of the same quality as your original footage, essentially producing a digital copy of the work for archiving before anything else is done.
With you work safe and secure it is now time to look at ensuring the project is suitable for YouTube. With our sequence selected in the Timeline or Project Panel again, we go through the same File > Export > Media path to bring up the media export dialogue as before.
2. Container
The first option we have to consider is the file format that our finished video needs to be in. Here you should refer to YouTube for its guidelines, whilst they do accept a number of file formats, digging through the YouTube help system to find the settings for highest quality we find that they recommend MPEG4 as the container, using the codec.

We can also see further recommended settings in this screenshot that will be covered later.
The good news is that Premiere automatically selects the appropriate container for us when we select our codec, however it is worth knowing the file type YouTube is expecting just to check yourself.
3. Video Codec
So having established that YouTube recommends the MPEG4 container using the codec, the first option we need to look for in the media export dialogue is to select the appropriate Format.
This is the first drop down in the dialogue box, and in this case we simply select from the list.

Once you select you can check the ‘output name’ field and see that premiere is automatically set the output file to .mp4 which is exactly what we need.
4. Preset
The next field we come to is the ‘Preset’ dropdown menu. This is a major help to most people, as Adobe have very kindly included large numbers of presets to quickly adapt video settings to suit specific uses. They vary depending on the exact version of Premiere you are using, and each format type does have its own list of presets, as we can see has a large number for YouTube, but also has many presets for specific devices (presets for iPad, Kindle, Nook, various other tablets and phones, Vimeo and a host of others) to make getting the right settings that bit easier for us.

It is important here to select the correct preset from the various YouTube options. You want to select the resolution and frame rate that match your source file, for the best results. So, if your source file is 1080p with a frame rate of 29.97 fps then that is the YouTube setting you would select.
Once a preset is selected a summary of the settings is displayed below, normally these will be well suited to your project, however you can fine tune anything you wish by selecting the video or audio tabs at the bottom which give you the chance to adjust each parameter individually. If you do this, you can save these changes as a custom preset by clicking the button at the side of the Preset dropdown menu and simply use it on later projects by selecting it from the list the same as any other, a great time saving tool.

5. Rendering
Once you are satisfied with the settings, either from the Preset alone or if you have adjusted anything yourself, you are nearly ready to render the file and export it.
For YouTube it is recommended you select the ‘Use Maximum Render Quality’ option to maintain the best output you can, it does add time to the render process but if you value the quality of your work it is worthwhile.
Finally you can choose a suitable filename and the destination of the file by clicking on the ‘Output Name’ field.
I normally use a filename that includes the destination medium so I can differentiate between different versions of a project and know which one to upload where, in this case I include ‘youtube’, but if I were planning on uploading clips of the project to vimeo as well for instance there may be a cut of the project with ‘vimeo’ in the name too. The destination is personal preference, because I do use filenames to differentiate versions I can put the various iterations into a single project file, others have folder structures for each type of file , so all YouTube output goes into a single folder and so on, how you organize is entirely dependent on how you work.

Once those are selected clicking ‘Export’ starts the rendering process, and eventually (how long depends on the speed of your computer and the size and type of file involved), you will end up with your YouTube optimized video in the location you chose.
Here I created 4 key frames that let the ‘Animation’ object move around the ‘Demo Text’ Object and finally come to rest below it. Whilst this type of effect does look very effective on screen, such is the ease of use of After Effects it really is just a few minutes work to achieve.
Learn more details about How to add text in Premiere >>
6. Uploading
Now you have your file, the next step is to go to your YouTube account and log in if you need to.
On the top of your homepage on the right is the upload button, selecting that brings up the select file menu as below.

You can either drag your file into the window or click on it to open a standard file browser to locate the desired file, click and the upload will begin. The dropdown underneath allows you to set the video as Public, Unlisted or Private. You can change this at any time once the video is uploaded as well.
This opens the upload progress window, where you can add in a name, description and tags as well as add the video to a playlist or adjust the privacy settings as the video is uploading.

Once the upload as finished, you can do final adjustments to settings and choose a thumbnail for the video. The final step is to click the ‘Publish’ button and your video will be processed and go live.

Benjamin Arango
Benjamin Arango is a writer and a lover of all things video.
Follow @Benjamin Arango
Benjamin Arango
Mar 27, 2024• Proven solutions
Whilst getting the editing and post work just right on any project is what we all aim for, the ultimate aim is for other people to see our creations, and the most popular way to achieve that is YouTube . Chances are, if you are producing video, you will be putting some of it on YouTube at some point, so let’s have a look at the most efficient way to get your work from Premiere to YouTube.
Check if your computer meet the Premiere System Requirements >>
This is a basic tutorial about Adobe Premiere, professional video editing software. However, if video editing is new to you, consider Wondershare Filmora , which is a powerful but easy-to-use tool for users just starting out. Download the free trial version below.
Download Mac Version ](https://tools.techidaily.com/wondershare/filmora/download/ )
How Do I Use Adobe Premiere To Upload YouTube Videos
1. Master Copy
Before exporting your work, it is important to first create a master copy of your project that is ‘as is’, in that it reflects the settings and codecs used in the original footage.
To do this you simply select the sequence within the Timeline or in the Project Panel, and go through the menu tree via File > Export > Media to bring up the export dialogue.
To create your Master Copy, simply select the first option of ‘Match Sequence Settings’, this exports a file that is of the same quality as your original footage, essentially producing a digital copy of the work for archiving before anything else is done.
With you work safe and secure it is now time to look at ensuring the project is suitable for YouTube. With our sequence selected in the Timeline or Project Panel again, we go through the same File > Export > Media path to bring up the media export dialogue as before.
2. Container
The first option we have to consider is the file format that our finished video needs to be in. Here you should refer to YouTube for its guidelines, whilst they do accept a number of file formats, digging through the YouTube help system to find the settings for highest quality we find that they recommend MPEG4 as the container, using the codec.
We can also see further recommended settings in this screenshot that will be covered later.
The good news is that Premiere automatically selects the appropriate container for us when we select our codec, however it is worth knowing the file type YouTube is expecting just to check yourself.
3. Video Codec
So having established that YouTube recommends the MPEG4 container using the codec, the first option we need to look for in the media export dialogue is to select the appropriate Format.
This is the first drop down in the dialogue box, and in this case we simply select from the list.
Once you select you can check the ‘output name’ field and see that premiere is automatically set the output file to .mp4 which is exactly what we need.
4. Preset
The next field we come to is the ‘Preset’ dropdown menu. This is a major help to most people, as Adobe have very kindly included large numbers of presets to quickly adapt video settings to suit specific uses. They vary depending on the exact version of Premiere you are using, and each format type does have its own list of presets, as we can see has a large number for YouTube, but also has many presets for specific devices (presets for iPad, Kindle, Nook, various other tablets and phones, Vimeo and a host of others) to make getting the right settings that bit easier for us.
It is important here to select the correct preset from the various YouTube options. You want to select the resolution and frame rate that match your source file, for the best results. So, if your source file is 1080p with a frame rate of 29.97 fps then that is the YouTube setting you would select.
Once a preset is selected a summary of the settings is displayed below, normally these will be well suited to your project, however you can fine tune anything you wish by selecting the video or audio tabs at the bottom which give you the chance to adjust each parameter individually. If you do this, you can save these changes as a custom preset by clicking the button at the side of the Preset dropdown menu and simply use it on later projects by selecting it from the list the same as any other, a great time saving tool.
5. Rendering
Once you are satisfied with the settings, either from the Preset alone or if you have adjusted anything yourself, you are nearly ready to render the file and export it.
For YouTube it is recommended you select the ‘Use Maximum Render Quality’ option to maintain the best output you can, it does add time to the render process but if you value the quality of your work it is worthwhile.
Finally you can choose a suitable filename and the destination of the file by clicking on the ‘Output Name’ field.
I normally use a filename that includes the destination medium so I can differentiate between different versions of a project and know which one to upload where, in this case I include ‘youtube’, but if I were planning on uploading clips of the project to vimeo as well for instance there may be a cut of the project with ‘vimeo’ in the name too. The destination is personal preference, because I do use filenames to differentiate versions I can put the various iterations into a single project file, others have folder structures for each type of file , so all YouTube output goes into a single folder and so on, how you organize is entirely dependent on how you work.
Once those are selected clicking ‘Export’ starts the rendering process, and eventually (how long depends on the speed of your computer and the size and type of file involved), you will end up with your YouTube optimized video in the location you chose.
Here I created 4 key frames that let the ‘Animation’ object move around the ‘Demo Text’ Object and finally come to rest below it. Whilst this type of effect does look very effective on screen, such is the ease of use of After Effects it really is just a few minutes work to achieve.
Learn more details about How to add text in Premiere >>
6. Uploading
Now you have your file, the next step is to go to your YouTube account and log in if you need to.
On the top of your homepage on the right is the upload button, selecting that brings up the select file menu as below.
You can either drag your file into the window or click on it to open a standard file browser to locate the desired file, click and the upload will begin. The dropdown underneath allows you to set the video as Public, Unlisted or Private. You can change this at any time once the video is uploaded as well.
This opens the upload progress window, where you can add in a name, description and tags as well as add the video to a playlist or adjust the privacy settings as the video is uploading.
Once the upload as finished, you can do final adjustments to settings and choose a thumbnail for the video. The final step is to click the ‘Publish’ button and your video will be processed and go live.
Benjamin Arango
Benjamin Arango is a writer and a lover of all things video.
Follow @Benjamin Arango
Also read:
- [New] Becoming a Top YouTuber with Gaming Livestreams
- Youtube Shorts Earnings Guide Must-Knows & Future Potential
- Channel Design Mastery Selecting the Right YT Banner & Art Sizes for 2024
- [New] Avoiding Files, Enjoying Animated GIFs YouTube Video Mastery
- 2024 Approved Discover the Best Anime Vids on YouTube (List)
- [Updated] Creative Channel Titling Techniques for Growth
- Filmmaker's Lounge App
- [New] Claim Cost-Free Visuals From Highest-Rated 4 YouTube Sources
- [New] Best 3D Entrance Makers for YouTube Creators
- Channel Up Your Wealth Profit From Effective Use of YouTube Shorts for 2024
- Achieving Financial Independence on YouTube via Views
- In 2024, Essential Steps to Add Custom Imagery in YouTube Videos
- The Editor's Playbook Mastering the Art of YouTube Cuts
- [Updated] Create Professional Minecraft Graphics
- Pioneering Brands Spotlight on Top 9 Free YouTube Logos Craftors
- [Updated] Creating Compelling Valorant Thumbnails for Digital Viewers
- [New] Detailed Guide to Dollar Counts A Stepwise Strategy to Track YouTube Earnings
- In 2024, Channel Makeovers Made Easy - Top 10 Online Tools for Artists
- In 2024, Best Free Downloaders Download YouTube Thumbnail for Free[Online/Win/Mac]
- Harmonize Your Listens The Complete Path to YouTube Playlist Making (Web/Mobile)
- The Ultimate Guide to Free Converting YouTube Videos to WAV
- [New] Avoiding Common Pitfalls in PC-Based YouTube Video Editing
- 2024 Approved A New Era of Streaming Leading Voices of Female Creators
- Visionary Video Planning Using the Power of Google Trends
- [New] A Comprehensive Guide to Earnings From YouTube Short Videos
- [Updated] Elevating Creative Content Vimeo vs YouTube's Approach
- [Updated] Does Investing in Video Growth Pay Off on YT?
- [Updated] Building Interest with Budget-Friendly YouTube Video Intros
- [Updated] Best Practices for Producing Encouragement-Driven Vlogs
- Rank Your Videos Right - Top Tools Uncovered for YouTube Success
- [New] Enhance Visibility With Any Channel Title Through Free Makers
- In 2024, Convert Your Shorts to Mp4 Video Enhancement Techniques
- How to Make Outstanding YouTube Outro?
- Efficient Strategies for Saving Youtube Thumbnails on Any OS for 2024
- Enhancing Your YouTube Content with Right Camera Gear
- In 2024, 10 Leading FLV to YouTube Video Converters
- From Creators to Profit-Makers The 2024 YouTube Monetization Playbook
- In 2024, Digital Dollars Kings & Queens YouTube Edition
- Best ASMR Apps for Android and iOS
- Revolutionizing Content Breakthroughs in YouTube Editing
- Engage Enthusiastically, Earn Enticingly The Entrepreneurial Editor’s Handbook for 2024
- 2024 Approved Essential Techniques to Elevate Your Channel's Visibility
- Smartphone Cinematography Mastery Designing Impactful YouTube Thumbnails
- Unleash Potential Best Gaming Content to Elevate Your Channel
- Quick Guide to Correcting Hidden Shorts on YouTube
- 2024 Approved 2023'S iOS Leading PSP Emulators Ranked The Crème De La Crème
- How to Reset your Vivo T2 Pro 5G Lock Screen Password
- Speedy Skimmer of Windows Imagery
- Updated TikTok Watermark Remover Reviews Choose the Best
- Tackling Blurry YouTube Videos Fixing Visual Fuzziness for 2024
- 2024 Approved Crafting a Graceful Exit From Discord Communities
- Advanced Audio Engineering Applying Real-Time Volume Automation in Windows Edition of Adobe Premiere Pro for 2024
- Process of Screen Sharing OnePlus Ace 3 to PC- Detailed Steps | Dr.fone
- 4 Feasible Ways to Fake Location on Facebook For your Itel P55T | Dr.fone
- How To Unlock a Infinix Smart 8 Pro Easily?
- Does MP4 play on Edge 40 Pro?
- New 2024 Approved Top 12 AI Video Generators to Pick
- Appreciative Adjacencies Templates for Any Spend Plan
- [Updated] Learn to Convert Your Vids Into Music on Instagram Today
- Smiles, Snorts & Sighs Top 10 IG Meme Communities of the Decade for 2024
- 2024 Approved Video Rotation Made Simple A Fast and Easy Guide
- [New] 2024 Approved Perfecting Your Instagram Format IMovie Square Video Creation
- 2024 Approved High-Definition Recorders Revealed 5 Devices to Watch
- [New] 2024 Approved How to Produce Silent Soundtracks The Power of Audacity's De-Noising Tools
- [New] The Art of Audio Mastery with iPhone's Voice Recording for 2024
- Insider Tips Selecting the Best IG Video Editors for Success
- How to Bypass FRP from Xiaomi Redmi Note 12 Pro 4G?
- [New] 2024 Approved In-Depth Viewer Tool for Chilled Pleasures
- [New] Boost Your Income with Effective Snapchat Ads
- 6 Fixes to Unfortunately WhatsApp has stopped Error Popups On Realme Narzo 60 5G | Dr.fone
- New In 2024, 5 Tips for Faster Editing in Filmora Video Editor
- [New] 2024 Approved [Solved] OBS Full Screen Not Working
- Updated Add a Miniature Effect on Your Video for Filmy Looks. To Add This Effect, Read the Complete Guide and Make Your Video Cinematic by Wondershare Filmora
- New Free Windows Video Editing Software 10 Alternatives to Movie Maker
- Easily Sync Audio With Video With Filmora
- Title: "[New] Decoding Monetization How Much Creators Earn Per Ad on YouTube?"
- Author: Steven
- Created at : 2024-06-10 01:41:27
- Updated at : 2024-06-11 01:41:27
- Link: https://youtube-clips.techidaily.com/new-decoding-monetization-how-much-creators-earn-per-ad-on-youtube/
- License: This work is licensed under CC BY-NC-SA 4.0.
