![[New] Cutting-Edge Techniques Mastering YouTube Subtitle/CC Additions](https://thmb.techidaily.com/1621022f15bae9f90515e95f15edd431dd0fad0e7e4a31a614efb85ef8dac6ad.JPG)
"[New] Cutting-Edge Techniques Mastering YouTube Subtitle/CC Additions"
Cutting-Edge Techniques: Mastering YouTube Subtitle/CC Additions
How to Easily Add Subtitles and Closed Captions to YouTube Video

Richard Bennett
Mar 27, 2024• Proven solutions
In this article, we are going to show you how important it is to add subtitle and closed captions in your YouTube video, and how to add them.
The best video editor for YouTubers - Wondershare Filmora , not only allows you to cut, crop, rotate, reverse videos, but also offers your advanced features like PIP, Green Screen, or audio mixing. What’s more, you can find lots of effects for Fashion, gaming, education, tutorial, sports, etc. Check this article to know more.


Why subtitle and closed captions are important for YouTube videos?
- Forced closed captions and subtitles actually help the viewers to understand the content in your video if the audio quality of your video is bad, muffled or barely audible. Reading makes it easier for them to understand.
- This also helps people with hearing impairments. People with troubled ears can still watch and understand your content.
- It’s a great aid to such videos which have been recorded in other foreign languages that you don’t understand. Hence it will increase the number of viewers all around the world.
- They both are generally added for easy accessibility to the viewers who wish to watch in sound sensitive environments.
So, here we are going to show you two ways to add subtittles to video: directly or uploading caption or transcript files
Adding subtitles and closed captions manually
To add subtitles and closed captions to your YouTube video, fisrt, you should sign in to your YouTube account. On left right below ‘Home’ you will find ‘My Channel’. It will direct you to your personal YouTube page. On the top, right next to your subscribers lays the ‘Video manager’, giving you the list of your uploaded videos.
Select the video and click on edit to get a drop down menu. Click on subtitles and CC. This will take you to the subtitling interface. To the right of video select ‘add new subtitles’ and then ‘create new subtitles’. Select the subtitle language. Play the video to listen to the content and type down in the box. Click on ‘+’ button once you are done.
This will create a subtitle timeline right beneath the video. You can manage by dragging and expanding the subtitle duration according to the audio of the video. The subtitle will appear at the bottom of the video screen. Click ‘publish’ once done.
An interruption might occur with appearing of subtitles in accordance with video. Hence a lot precision is required while doing so.
Uploading Caption or Transcript Files automatically
To upload Caption or Transcript Files to YouTube Videos you first need to create a format on a text editor. For windows use Notepad and for Mac you may use TextEdit. Create a format of putting the number of subtitle first, time stamp and then text of the subtitle. For example
1\
00:02:34:12 using a format of (hour : minute : second : millisecond)
2. *text*
This is the sample text for first subtitle at zero hours, two minutes, thirty four seconds and twelve milliseconds. Once done with this. Go to file, select ‘save as’. Write the file name with an extension of .srt and select ‘All files’ for type of file. Click encoding menu and select UTF-8. Once saved, sign in to your YouTube account.
On left right below ‘Home’ you will find ‘My Channel’. It will direct you to your personal YouTube page. On the top, right next to your subscribers lays the ‘Video manager’, giving you the list of your uploaded videos.
Select the video and click on edit to get a drop down menu. Click on subtitles and CC. Go to ‘add subtitles’ and then ‘upload a file’. A pop-up menu will appear select ‘subtitles file’. Click upload. The file will send subtitles to your video.
This will create a subtitle timeline right beneath the video. You can manage by dragging and expanding the subtitle duration according to the audio of the video. The subtitle will appear at the bottom of the video screen. Click ‘publish’ once done.
3 Best Tools for add/managing video Subtitles/CC
1. Amara
Amara is a smart video editor which helps insert captions and subtitles to videos. It also helps in transcribing the videos. It takes help of crowd sourcing to subtitle any YouTube video. They take help from viewers to subtitle the videos. By making crowd subtitling available for any YouTube creator, they are allowing them to reach more viewers in more languages
2. DIY Captions
DIY captions help you to transcribe the YouTube videos, if not in most accurate manner, then in a little easier way. All you have to do is just paste the URL of the YouTube video and it will provide you all the subtitles. These may not be accurate but will provide you major base material which can be tweaked a bit here and there and is far better than making all the subtitles starting from scratch.
3 Subtitles for YouTube
Subtitles for YouTube is a Google Chrome extension which provides subtitles for YouTube videos. For this you will have to provide a subtitle file with .srt extension. The attractive feature of this is that you won’t have to download the video and still run the subtitles on it. This is very much helpful for people who work on YouTube or watch movies without subtitles.
Richard Bennett
Richard Bennett is a writer and a lover of all things video.
Follow @Richard Bennett
Richard Bennett
Mar 27, 2024• Proven solutions
In this article, we are going to show you how important it is to add subtitle and closed captions in your YouTube video, and how to add them.
The best video editor for YouTubers - Wondershare Filmora , not only allows you to cut, crop, rotate, reverse videos, but also offers your advanced features like PIP, Green Screen, or audio mixing. What’s more, you can find lots of effects for Fashion, gaming, education, tutorial, sports, etc. Check this article to know more.
Why subtitle and closed captions are important for YouTube videos?
- Forced closed captions and subtitles actually help the viewers to understand the content in your video if the audio quality of your video is bad, muffled or barely audible. Reading makes it easier for them to understand.
- This also helps people with hearing impairments. People with troubled ears can still watch and understand your content.
- It’s a great aid to such videos which have been recorded in other foreign languages that you don’t understand. Hence it will increase the number of viewers all around the world.
- They both are generally added for easy accessibility to the viewers who wish to watch in sound sensitive environments.
So, here we are going to show you two ways to add subtittles to video: directly or uploading caption or transcript files
Adding subtitles and closed captions manually
To add subtitles and closed captions to your YouTube video, fisrt, you should sign in to your YouTube account. On left right below ‘Home’ you will find ‘My Channel’. It will direct you to your personal YouTube page. On the top, right next to your subscribers lays the ‘Video manager’, giving you the list of your uploaded videos.
Select the video and click on edit to get a drop down menu. Click on subtitles and CC. This will take you to the subtitling interface. To the right of video select ‘add new subtitles’ and then ‘create new subtitles’. Select the subtitle language. Play the video to listen to the content and type down in the box. Click on ‘+’ button once you are done.
This will create a subtitle timeline right beneath the video. You can manage by dragging and expanding the subtitle duration according to the audio of the video. The subtitle will appear at the bottom of the video screen. Click ‘publish’ once done.
An interruption might occur with appearing of subtitles in accordance with video. Hence a lot precision is required while doing so.
Uploading Caption or Transcript Files automatically
To upload Caption or Transcript Files to YouTube Videos you first need to create a format on a text editor. For windows use Notepad and for Mac you may use TextEdit. Create a format of putting the number of subtitle first, time stamp and then text of the subtitle. For example
1\
00:02:34:12 using a format of (hour : minute : second : millisecond)
2. *text*
This is the sample text for first subtitle at zero hours, two minutes, thirty four seconds and twelve milliseconds. Once done with this. Go to file, select ‘save as’. Write the file name with an extension of .srt and select ‘All files’ for type of file. Click encoding menu and select UTF-8. Once saved, sign in to your YouTube account.
On left right below ‘Home’ you will find ‘My Channel’. It will direct you to your personal YouTube page. On the top, right next to your subscribers lays the ‘Video manager’, giving you the list of your uploaded videos.
Select the video and click on edit to get a drop down menu. Click on subtitles and CC. Go to ‘add subtitles’ and then ‘upload a file’. A pop-up menu will appear select ‘subtitles file’. Click upload. The file will send subtitles to your video.
This will create a subtitle timeline right beneath the video. You can manage by dragging and expanding the subtitle duration according to the audio of the video. The subtitle will appear at the bottom of the video screen. Click ‘publish’ once done.
3 Best Tools for add/managing video Subtitles/CC
1. Amara
Amara is a smart video editor which helps insert captions and subtitles to videos. It also helps in transcribing the videos. It takes help of crowd sourcing to subtitle any YouTube video. They take help from viewers to subtitle the videos. By making crowd subtitling available for any YouTube creator, they are allowing them to reach more viewers in more languages
2. DIY Captions
DIY captions help you to transcribe the YouTube videos, if not in most accurate manner, then in a little easier way. All you have to do is just paste the URL of the YouTube video and it will provide you all the subtitles. These may not be accurate but will provide you major base material which can be tweaked a bit here and there and is far better than making all the subtitles starting from scratch.
3 Subtitles for YouTube
Subtitles for YouTube is a Google Chrome extension which provides subtitles for YouTube videos. For this you will have to provide a subtitle file with .srt extension. The attractive feature of this is that you won’t have to download the video and still run the subtitles on it. This is very much helpful for people who work on YouTube or watch movies without subtitles.
Richard Bennett
Richard Bennett is a writer and a lover of all things video.
Follow @Richard Bennett
Master the Art of Video Sending: From YouTube to Dailymotion
How to Transfer Video From YouTube to Dailymotion?

Ollie Mattison
Mar 27, 2024• Proven solutions
It is significant for a business to stay connected to its customers and videos are a wonderful medium to build that connect! Dailymotion gives you a golden opportunity and platform to share your videos on websites other than YouTube. This means that you can transfer your videos from YouTube to dailymotion in few minutes and increase the audience. There is no direct transfer feature in YouTube and hence this post will help in guiding how can you transfer the video content from YouTube to Dailymotion!
- Method 1: Download YouTube video and upload to Dailymotion
- Method 2: Sync YouTube videos to Dailymotion
Note: We resolutely oppose all forms of copyright-infringing downloads. This tutorial is only for downloading YouTube videos/audio materials from your own channel.
Method 1: Download YouTube video and upload to Dailymotion
This one is little longer but many people vote for it as a safer one! All you have to do is to login to your YouTube official account and download all the videos that you have uploaded in MP4 format by clicking on Edit option appearing at right of the video.
Ready to learn How to Download YouTube Videos . It’s easy, fun and a great way to share your movies with the world.
Save it to the desired folder on your PC and navigate to the Dailymotion account page. Sign in with your credentials and click on upload video. Browse the video from the location where you saved, give it a title and description.
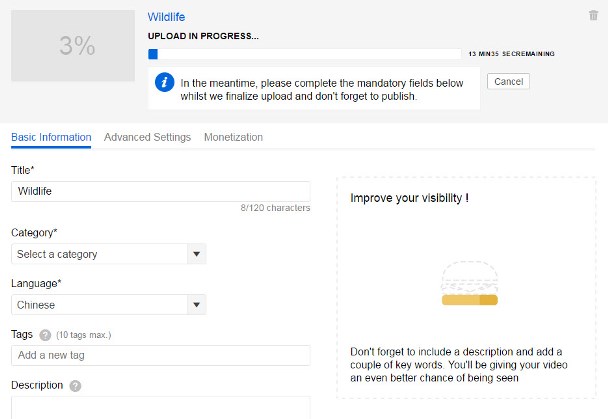
Next, click on channel drop-down menu and choose a category which best describes your video. Besides this, you would see a ‘Tags’ text box. You can add one or more tags (maximum 10) and select the privacy options as per your requirement. Tags act as a criterion for SEO optimization and help people in finding your video. Finally, just click on save to upload the video on dailymotion.
Method 2: Sync YouTube videos to Dailymotion
You can do this by liaising with Freedom MCN Network as it allows you to grow faster on Dailymotion. All you have to do is to search for ‘dashboard.tm’ on Google and sign in using you email and password. It will direct you to Dailymotion page; you can also opt to sign in with your Facebook credentials. When you will press enter and login, the first screen only will show the prompt if you want to synch YouTube and Dailymotion channels? Since, our answer is yes, the screen will ask you to login into your YouTube account and the screen will navigate you to the login into Google account linked to your YouTube account. Just like in all apps, you have to allow Freedom to access the data from your YouTube account. The next screen will list down number of videos that have been uploaded to your YouTube Account and the ones which are already synched with Dailymotion will have a check against their name. The ones which are not synched will have a box; you can simply check it and click on ‘Synch videos’ at the top right corner.
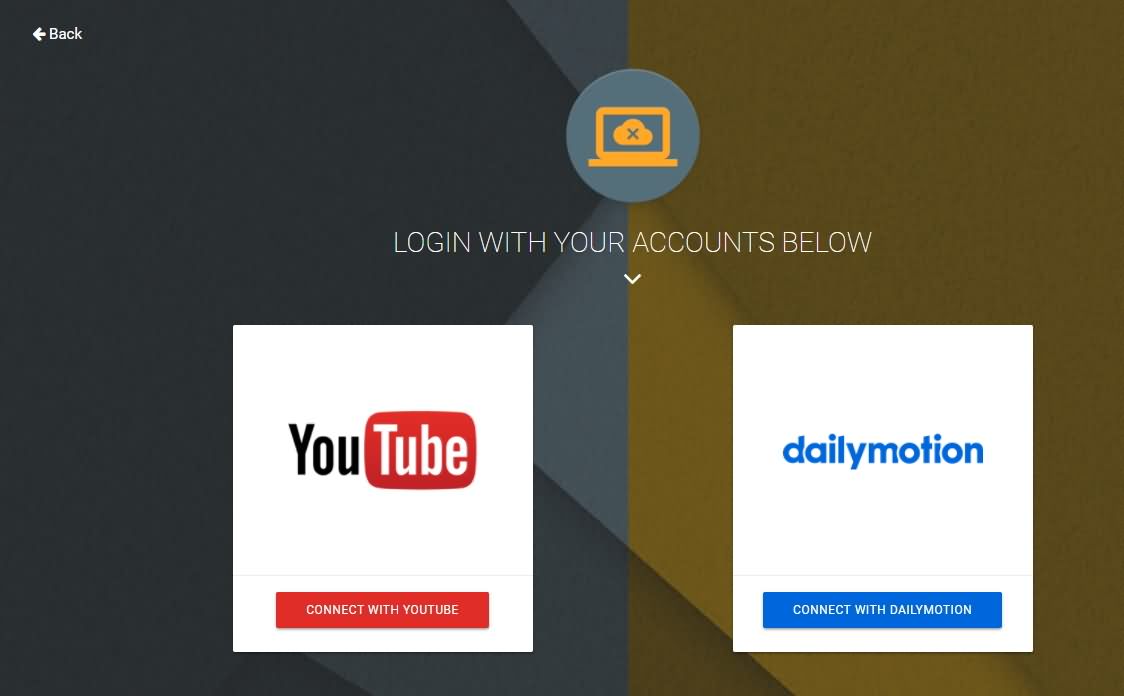
It will ask for your email address to get notifications, put in your email ID and click on Sync. Once they are active and synched you will receive a notification on your email with a subject ‘Done reuploading’ followed by the tile of the video. This simply means that you need not upload any video separately on dailymotion, you can simply synch it with YouTube and put in your efforts of uploading only once!
Ollie Mattison
Ollie Mattison is a writer and a lover of all things video.
Follow @Ollie Mattison
Ollie Mattison
Mar 27, 2024• Proven solutions
It is significant for a business to stay connected to its customers and videos are a wonderful medium to build that connect! Dailymotion gives you a golden opportunity and platform to share your videos on websites other than YouTube. This means that you can transfer your videos from YouTube to dailymotion in few minutes and increase the audience. There is no direct transfer feature in YouTube and hence this post will help in guiding how can you transfer the video content from YouTube to Dailymotion!
- Method 1: Download YouTube video and upload to Dailymotion
- Method 2: Sync YouTube videos to Dailymotion
Note: We resolutely oppose all forms of copyright-infringing downloads. This tutorial is only for downloading YouTube videos/audio materials from your own channel.
Method 1: Download YouTube video and upload to Dailymotion
This one is little longer but many people vote for it as a safer one! All you have to do is to login to your YouTube official account and download all the videos that you have uploaded in MP4 format by clicking on Edit option appearing at right of the video.
Ready to learn How to Download YouTube Videos . It’s easy, fun and a great way to share your movies with the world.
Save it to the desired folder on your PC and navigate to the Dailymotion account page. Sign in with your credentials and click on upload video. Browse the video from the location where you saved, give it a title and description.
Next, click on channel drop-down menu and choose a category which best describes your video. Besides this, you would see a ‘Tags’ text box. You can add one or more tags (maximum 10) and select the privacy options as per your requirement. Tags act as a criterion for SEO optimization and help people in finding your video. Finally, just click on save to upload the video on dailymotion.
Method 2: Sync YouTube videos to Dailymotion
You can do this by liaising with Freedom MCN Network as it allows you to grow faster on Dailymotion. All you have to do is to search for ‘dashboard.tm’ on Google and sign in using you email and password. It will direct you to Dailymotion page; you can also opt to sign in with your Facebook credentials. When you will press enter and login, the first screen only will show the prompt if you want to synch YouTube and Dailymotion channels? Since, our answer is yes, the screen will ask you to login into your YouTube account and the screen will navigate you to the login into Google account linked to your YouTube account. Just like in all apps, you have to allow Freedom to access the data from your YouTube account. The next screen will list down number of videos that have been uploaded to your YouTube Account and the ones which are already synched with Dailymotion will have a check against their name. The ones which are not synched will have a box; you can simply check it and click on ‘Synch videos’ at the top right corner.
It will ask for your email address to get notifications, put in your email ID and click on Sync. Once they are active and synched you will receive a notification on your email with a subject ‘Done reuploading’ followed by the tile of the video. This simply means that you need not upload any video separately on dailymotion, you can simply synch it with YouTube and put in your efforts of uploading only once!
Ollie Mattison
Ollie Mattison is a writer and a lover of all things video.
Follow @Ollie Mattison
Also read:
- [New] Deciphering the World of YouTube Media Conglomerates
- [Updated] Top 10 Game Bar Alternative Recorders for 2024
- Controversial Response to Microsoft's Stealth Release Unveiled by ZDNet
- Earnings Update Navigating YouTube Monetization
- Enhancing Visual Tasks with ChatGPT’s Advanced Computer Vision Tech
- How Efficient Is AI at Tailoring Drinks?
- How to Change GPS Location on Vivo Y02T Easily & Safely | Dr.fone
- In 2024, Balancing Acts The Power of Alternate Perspectives in Crafting Engaging Reaction Videos on YouTube (2 POV Method)
- In 2024, Creative Reactors The 10 Premier Video Responses
- Newcomer Needs Efficient Purchases of Monetizing Platforms
- Strategies for Adding Value YouTube's Card System
- The Hidden Dynamics of Live Video Images on YouTube
- Trouble with Windows nT 10 SysImage Recovery? Explore These Effective Solutions Now!
- Win11's Video Flow: Clean, Continuous Performance After Update
- Wisdom from the Waters | Free Book
- Title: [New] Cutting-Edge Techniques Mastering YouTube Subtitle/CC Additions
- Author: Steven
- Created at : 2024-12-13 16:21:37
- Updated at : 2024-12-16 16:53:42
- Link: https://youtube-clips.techidaily.com/new-cutting-edge-techniques-mastering-youtube-subtitlecc-additions/
- License: This work is licensed under CC BY-NC-SA 4.0.