
!["[New] Cut Costs and Boost Creativity 8 Online Spots Offering Free Eco-Backdrops"](https://www.lifewire.com/thmb/6jBqlViPTqYHPeyAITr4PSJvrVk=/400x300/filters:no_upscale():max_bytes(150000):strip_icc()/89794567-56a6a56a3df78cf7728f9185.jpg)
"[New] Cut Costs and Boost Creativity 8 Online Spots Offering Free Eco-Backdrops"
Cut Costs and Boost Creativity: 8 Online Spots Offering Free Eco-Backdrops
Top 8 Sites to Get Free Green Screen Backgrounds and Footage

Richard Bennett
Mar 27, 2024• Proven solutions
Green screen or also known as chroma key is used when you swap the background of a video with another background. It provides you the opportunity to create fancy YouTube videos without forming an expensive set or going to a distant location and will reduce your cost! You can shoot your video at any place, at any time you want and then you can just swap the background with a fancy animation!
In this article, we are going to show you 8 sites to download green screen footage and how to make green screen videos for free.
- Part1: Top 8 site for free green screen background videos
- Part2: How to make and apply a green screen background video
- Part3: How to use the green screen in video
The best video editor for YouTubers - Wondershare Filmora , not only allows you to cut, crop, rotate, reverse videos, but also offers advanced features like PIP, Green Screen , or audio mixing. What’s more, you can find lots of effects on Fashion, gaming, education, tutorial, sports, etc. Check this article to know more.
In the video tutorial below, we will walk you through the steps to transforming your video into a cinematic marvel. With a few simple clicks and adjustments, you can take your audience to another world.
 Download Mac Version ](https://tools.techidaily.com/wondershare/filmora/download/ )
Part 1: Top 8 sites to get free green screen videos
With the latest release, you can now download video effects, video footage, stock image, and royalty-free sound effect and music from the effects store Wondershare Filmstock .

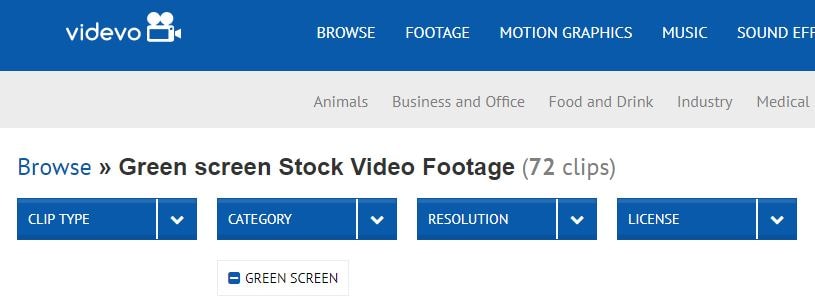
1. Videvo
Get amazing and high-quality videos that are free of the copyright at Videvo. It is a free stock website for videos that also offers free stock motion graphics that can be used in any projects you want. There are 4 segments that are clip-type, category, resolution, and license with further sub-categories for you to choose from. Only the videos with the Creative Commons license 3.0 must be given credit to the original creator.
The features of Videvo include-
- Use video clips free of charge.
- Offers free stock videos and motion graphics.
- Use the video for any types of production, personal or commercial.
- You may browse free green screen background videos.
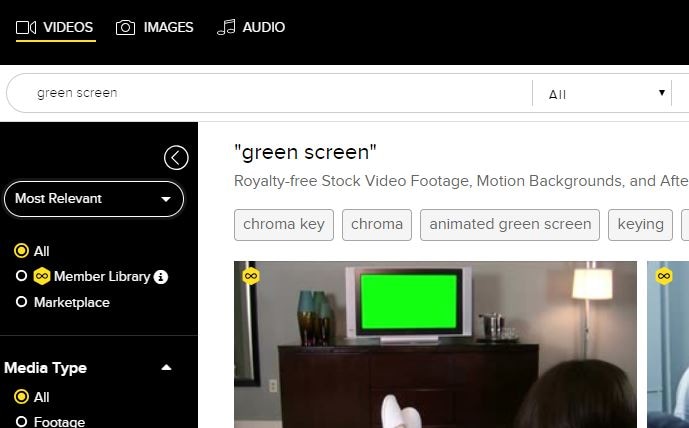
2. VideoBlocks
Download high-quality free stock video at VideoBlocks. Started in the year 2009, VideoBlocks offers animated free green screen background to 4k videos and after-effect templates.
The features are-
- Offers royalty-free stock video footages.
- Choose from the background, after-effects, and collections.
- From Chroma key to blue screen and touchscreen gestures.
- Come in 3 types of pricing plans basic, unlimited, and enterprise.
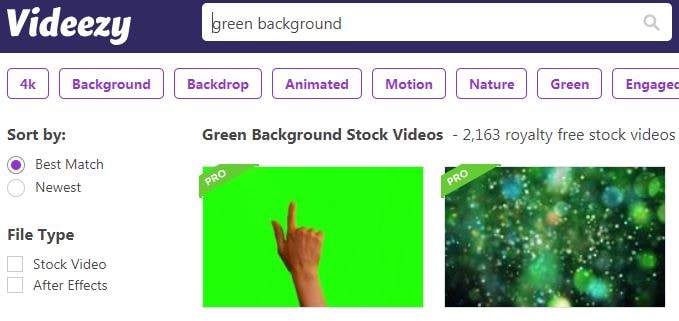
3. Videezy
From sharing HD quality videos to free green screen backgrounds and amazingly cool video footages, Videezy is a platform with numerous free stock video clips, backgrounds and more.
The features of Videezy include-
- All videos on this platform are licensed CC0.
- Share free green screen backgrounds.
- Offer ultra HD resolution.
- A range of themes.
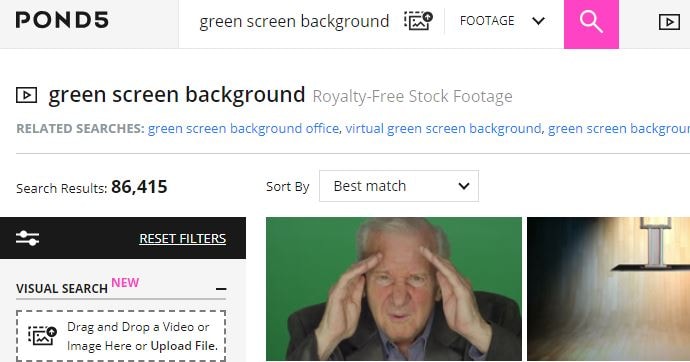
4. Pond5
You can now license your videos with Pond5 which is an international community of brands and media creators. It is a website with more than 60000 contributors of content from about 150 countries. Over 10000 videos are uploaded on Pond5 each day.
The features of Pond5 include-
- Browse more than 700k royalty-free video production tracks.
- Discover HD and 4K clips from filmmakers renowned globally.
- Easy visual search with drag and drop video feature.
- Free green screen background with animated HD videos.
- Several filters to present your green background video amazingly.
5. iStock
If you wish to search for millions of premium quality images, try iStock that handpicks and maintains the leading stock content globally.
The features of iStock include-
- From the green background to blue and orange backgrounds, iStock offers all.
- Find HD Video and 4K footage with green screen background at a nominal price just for the video and not the size.
- Pricing is flexible.

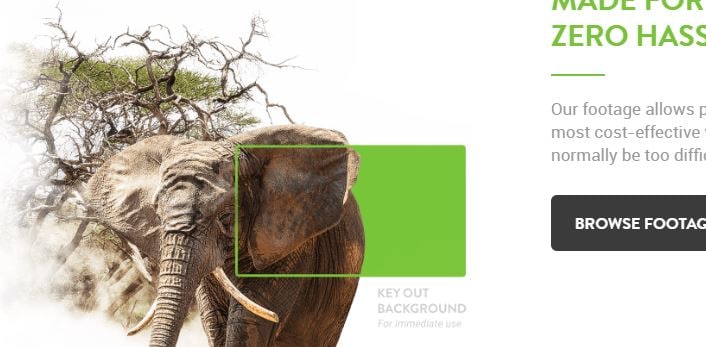
6. Green Screen Animals
The animals are truly difficult to capture. With the Green Screen Animals, you get the easiest and cost-effective access to high-quality video clips of domestic and exotic animals on a free green screen background.
The features are-
- Offers ultra HD 6k resolution video footage.
- You get access to any format as per your requirement.
- Use 3D chimpanzee models in your project with the green screen background.
- Getting performance from the animals can be a tough call, Green Screen Animals makes it easy.
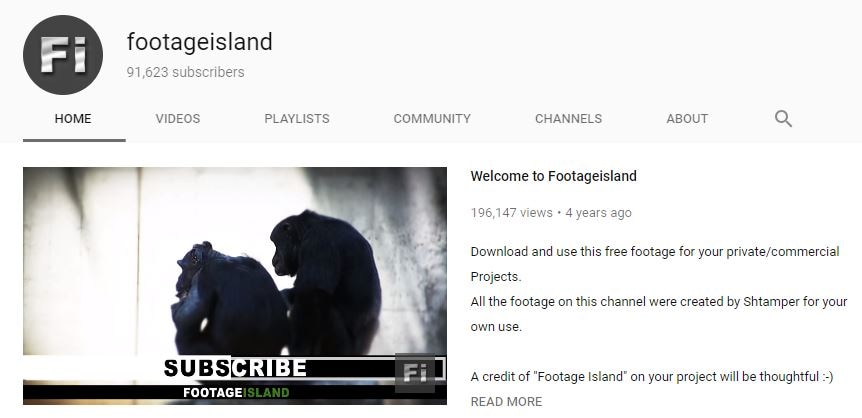
7. Footage Island
Get video footage for both private and commercial use completely free. You just need to give credit to Footage Island and use the content free.
- Free green screen background footages available.
- Free download for both personal and commercial use with just credits to the channel.
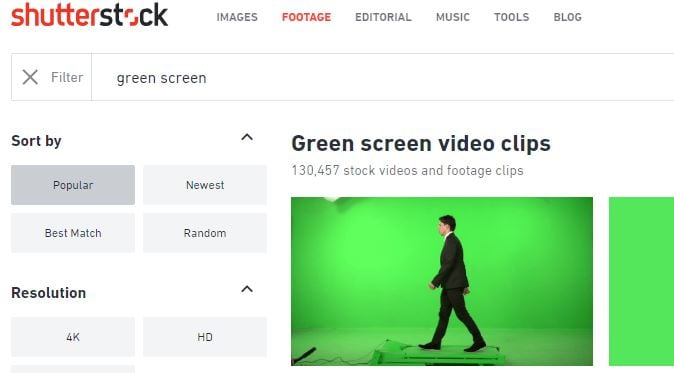
8. Shutterstock
You can sort green screen videos from shutterstock using various search options like popular, latest, best match, and random. You may also select SD, 4k or HD resolution, choose a character from people, animals or abstract, categories and more.
The features include-
- Over 1 lakh stock videos and video clips.
- Curated video collection.
- Categories like entertainment, news, sports, royalty.
- Add music to your free green screen background video.
- Easy editing tools for a great video.
Part 2: How to make and apply a green screen background
In our last article, we have shared with you how to make and use green screen footage .
While, in this article, we won’t repeat it but just share with you some tips for making and applying green screen footage in video editings.
The core objective is to have a smooth one colored background which is easy to replace in post-production. Since the green screen is employed in the film industry on a mega scale, professional green screen kits are quite expensive. Hence it is much more feasible that a DIY solution is employed for the required results.
For a good quality result from a DIY green screen, you need to take care of the following items:
1. Screen Quality
Green screens can be wall painted with a chroma key, a large sheet of cloth hung without any creases, or a portable setup canvas that can cover the given area.
2. Lightning
The most important thing to be kept in mind is that your background should be lit evenly. Any shadows on the background should be avoided. The distance of the subject should be at least ten feet from the background, to minimize any kind of shadow.
You may also like: >> Blue Screen VS Green Screen: All You Need to Know
Part 3: How to composite green screen video footage
The next step is to utilize the downloaded free green screen footage with your video.
The best green screen software for personal and semi-professional use is Filmora. It allows you to import and work on videos shot in any format (AVI, MPEG, MKV, MP4, etc.) and seamlessly integrate your video with the background.
We have already demonstrated the steps of compositing and editing green screen videos at the beginning of the article. While in the video tutorial below, you can check the samples of using Filmora to compositing downloaded free green screen footage.
You can edit a video with green screen using Filmora easily. Check the below video to learn how to manage it.
Download Mac Version ](https://tools.techidaily.com/wondershare/filmora/download/ )
Richard Bennett
Richard Bennett is a writer and a lover of all things video.
Follow @Richard Bennett
Richard Bennett
Mar 27, 2024• Proven solutions
Green screen or also known as chroma key is used when you swap the background of a video with another background. It provides you the opportunity to create fancy YouTube videos without forming an expensive set or going to a distant location and will reduce your cost! You can shoot your video at any place, at any time you want and then you can just swap the background with a fancy animation!
In this article, we are going to show you 8 sites to download green screen footage and how to make green screen videos for free.
- Part1: Top 8 site for free green screen background videos
- Part2: How to make and apply a green screen background video
- Part3: How to use the green screen in video
The best video editor for YouTubers - Wondershare Filmora , not only allows you to cut, crop, rotate, reverse videos, but also offers advanced features like PIP, Green Screen , or audio mixing. What’s more, you can find lots of effects on Fashion, gaming, education, tutorial, sports, etc. Check this article to know more.
In the video tutorial below, we will walk you through the steps to transforming your video into a cinematic marvel. With a few simple clicks and adjustments, you can take your audience to another world.
Download Mac Version ](https://tools.techidaily.com/wondershare/filmora/download/ )
Part 1: Top 8 sites to get free green screen videos
With the latest release, you can now download video effects, video footage, stock image, and royalty-free sound effect and music from the effects store Wondershare Filmstock .
1. Videvo
Get amazing and high-quality videos that are free of the copyright at Videvo. It is a free stock website for videos that also offers free stock motion graphics that can be used in any projects you want. There are 4 segments that are clip-type, category, resolution, and license with further sub-categories for you to choose from. Only the videos with the Creative Commons license 3.0 must be given credit to the original creator.
The features of Videvo include-
- Use video clips free of charge.
- Offers free stock videos and motion graphics.
- Use the video for any types of production, personal or commercial.
- You may browse free green screen background videos.
2. VideoBlocks
Download high-quality free stock video at VideoBlocks. Started in the year 2009, VideoBlocks offers animated free green screen background to 4k videos and after-effect templates.
The features are-
- Offers royalty-free stock video footages.
- Choose from the background, after-effects, and collections.
- From Chroma key to blue screen and touchscreen gestures.
- Come in 3 types of pricing plans basic, unlimited, and enterprise.
3. Videezy
From sharing HD quality videos to free green screen backgrounds and amazingly cool video footages, Videezy is a platform with numerous free stock video clips, backgrounds and more.
The features of Videezy include-
- All videos on this platform are licensed CC0.
- Share free green screen backgrounds.
- Offer ultra HD resolution.
- A range of themes.
4. Pond5
You can now license your videos with Pond5 which is an international community of brands and media creators. It is a website with more than 60000 contributors of content from about 150 countries. Over 10000 videos are uploaded on Pond5 each day.
The features of Pond5 include-
- Browse more than 700k royalty-free video production tracks.
- Discover HD and 4K clips from filmmakers renowned globally.
- Easy visual search with drag and drop video feature.
- Free green screen background with animated HD videos.
- Several filters to present your green background video amazingly.
5. iStock
If you wish to search for millions of premium quality images, try iStock that handpicks and maintains the leading stock content globally.
The features of iStock include-
- From the green background to blue and orange backgrounds, iStock offers all.
- Find HD Video and 4K footage with green screen background at a nominal price just for the video and not the size.
- Pricing is flexible.
6. Green Screen Animals
The animals are truly difficult to capture. With the Green Screen Animals, you get the easiest and cost-effective access to high-quality video clips of domestic and exotic animals on a free green screen background.
The features are-
- Offers ultra HD 6k resolution video footage.
- You get access to any format as per your requirement.
- Use 3D chimpanzee models in your project with the green screen background.
- Getting performance from the animals can be a tough call, Green Screen Animals makes it easy.
7. Footage Island
Get video footage for both private and commercial use completely free. You just need to give credit to Footage Island and use the content free.
- Free green screen background footages available.
- Free download for both personal and commercial use with just credits to the channel.
8. Shutterstock
You can sort green screen videos from shutterstock using various search options like popular, latest, best match, and random. You may also select SD, 4k or HD resolution, choose a character from people, animals or abstract, categories and more.
The features include-
- Over 1 lakh stock videos and video clips.
- Curated video collection.
- Categories like entertainment, news, sports, royalty.
- Add music to your free green screen background video.
- Easy editing tools for a great video.
Part 2: How to make and apply a green screen background
In our last article, we have shared with you how to make and use green screen footage .
While, in this article, we won’t repeat it but just share with you some tips for making and applying green screen footage in video editings.
The core objective is to have a smooth one colored background which is easy to replace in post-production. Since the green screen is employed in the film industry on a mega scale, professional green screen kits are quite expensive. Hence it is much more feasible that a DIY solution is employed for the required results.
For a good quality result from a DIY green screen, you need to take care of the following items:
1. Screen Quality
Green screens can be wall painted with a chroma key, a large sheet of cloth hung without any creases, or a portable setup canvas that can cover the given area.
2. Lightning
The most important thing to be kept in mind is that your background should be lit evenly. Any shadows on the background should be avoided. The distance of the subject should be at least ten feet from the background, to minimize any kind of shadow.
You may also like: >> Blue Screen VS Green Screen: All You Need to Know
Part 3: How to composite green screen video footage
The next step is to utilize the downloaded free green screen footage with your video.
The best green screen software for personal and semi-professional use is Filmora. It allows you to import and work on videos shot in any format (AVI, MPEG, MKV, MP4, etc.) and seamlessly integrate your video with the background.
We have already demonstrated the steps of compositing and editing green screen videos at the beginning of the article. While in the video tutorial below, you can check the samples of using Filmora to compositing downloaded free green screen footage.
You can edit a video with green screen using Filmora easily. Check the below video to learn how to manage it.
Download Mac Version ](https://tools.techidaily.com/wondershare/filmora/download/ )
Richard Bennett
Richard Bennett is a writer and a lover of all things video.
Follow @Richard Bennett
Propel Your YouTube Content: Faster Render & Efficient Upload Processes
How to Render and Upload YouTube Videos Faster?
Richard Bennett
Oct 26, 2023• Proven solutions
You’ve shot a video you’re proud of and you can’t wait to post it! But, slow down, you have to edit all your clips together first. And then you have to export your video from the editing program, which can take a while. Then you have to wait for it to upload to YouTube, and once it’s up you have to write your description, add cards, and do a handful of other things.
The period between finishing a video and actually posting it for your subscribers to see can be long and tiresome. A lot of videos have probably died in these stages because their creators ran out of energy and patience.
Don’t let this happen to your videos! Here are 4 ways you can save time and avoid headaches during post-production:
3. Use default descriptions and tags
4. TubeBuddy’s bulk features and tagging tools
1. Create mini-projects
When you have alarge editing project with lots of different titles, animations, clip sequences, and PIP tracks it can get hard to keep track of everything. That’s especially true if you need to go back and make changes. A change to one part of your video could affect other parts of it.
Also, the more complex your video is the longer it will take to render/export.
There is a way you can keep your project more organized, save time making minor adjustments, and speed up rendering: create sub-projects of different segments of your video and import them into your main project as their own clips.
This helps you in 3 ways:
1. If there are a lot of effects it’ll be faster to render a shorter video.
2. If you import your sequence as its own clip you won’t have to worry about adjusting little parts of it whenever you change earlier sections of your video.
3. If you do want to make adjustments to your sequence you can open up your mini-project and change it without affecting anything in your main project.
2. Optimize your upload speed
At home, your videos will upload fastest if all of your internet resources are devoted to the upload. That means you should not have any other windows open on your computer while you are uploading. You should also make sure there aren’t other devices competing for wifi like smart tvs, cell phones, or really fancy coffee makers.
If you have neighbors on the same wifi signal as you and they are online at the same time, this will slow you down too.
Because there is so much that can interfere with wifi, you might want to consider a wired Ethernet cable. Ethernet connections are faster in general, and you won’t have any problems with other devices competing for resources like you get with wifi.
If you’re doing everything you can to optimize your upload speed at home and still find that it takes an unreasonable amount of time to upload videos to YouTube, go somewhere with a better connection. Save your video to a USB drive and take it to a library or college to upload. Connections in these kinds of places tend to be very strong.
3. Use default descriptions and tags
In your Creator Studio, go to Channel > Upload defaults. Here you can write in titles, descriptions, and tags which will automatically be applied to every video you upload.

Note: in the latest YouTube Studio, the upload interface is changed but the main process is similar.

You probably have tags you use for almost every video you post. For example, if your channel is about vegan cooking then every one of your videos is probably tagged ‘vegan’, ‘food’, and ‘cooking’. If you type those tags in here then you don’t have to keep adding them to every new video, and you can still add or remove tags from individual uploads so you aren’t stuck using the exact same set of tags every time.
Similarly, you probably have some default text that goes in the description of every one of your videos (i.e. a link to your personal website or a brief introduction of yourself). If you type in a default description then that text will appear automatically in every new video description and you can just add to it when you need to for individual videos.
Using defaults might only save you a couple of minutes per video, but those minutes add up.
4. TubeBuddy’s bulk features and tagging tools
TubeBuddy is a channel management tool for YouTube. Most of its features are more geared towards very large channels or companies with a YouTube presence, but there are also features that can help small or mid-sized YouTubers save time and stay organized.
Some of these tools include templates for things like cards and end screens and bulk processing tools for when you want to change a lot of things at once. For example, if you wanted to update the links in every card in every one of your videos at once then TubeBuddy could help with that.
Some of TubeBuddy’s best features for growing channels are the tagging features. TubeBuddy will help you discover tags, suggest new tags, and even copy whole lists of tags from rival videos.
There are different levels of pricing for TubeBuddy (including a free version, although it’s very limited) and you get a discount on the Pro version if you have less than 50,000 lifetime views on your channel. It ends up being $4.50USD a month (or $3.60 USD a month if you pay for a year in advance). It’s a good investment for someone who’s starting to see some growth on YouTube, but probably not if you’re still trying to reach milestones like 500 subs or 10,000 views.
You have to work hard to get anywhere on YouTube, but that doesn’t mean you should be toiling away at tedious stuff like typing in the same tags over and over. If you have any time-saving tips then make sure to share them with everyone in the comments!
Remember that your time is valuable =)

If you are using Filmora to edit YouTube videos, you can upload the video to YouTube directly from Filmora without download it again first, which can save you time. Besides, if you don’t want the video to be public, you can change Privacy to unlisted or private in Filmora.
Richard Bennett
Richard Bennett is a writer and a lover of all things video.
Follow @Richard Bennett
Richard Bennett
Oct 26, 2023• Proven solutions
You’ve shot a video you’re proud of and you can’t wait to post it! But, slow down, you have to edit all your clips together first. And then you have to export your video from the editing program, which can take a while. Then you have to wait for it to upload to YouTube, and once it’s up you have to write your description, add cards, and do a handful of other things.
The period between finishing a video and actually posting it for your subscribers to see can be long and tiresome. A lot of videos have probably died in these stages because their creators ran out of energy and patience.
Don’t let this happen to your videos! Here are 4 ways you can save time and avoid headaches during post-production:
3. Use default descriptions and tags
4. TubeBuddy’s bulk features and tagging tools
1. Create mini-projects
When you have alarge editing project with lots of different titles, animations, clip sequences, and PIP tracks it can get hard to keep track of everything. That’s especially true if you need to go back and make changes. A change to one part of your video could affect other parts of it.
Also, the more complex your video is the longer it will take to render/export.
There is a way you can keep your project more organized, save time making minor adjustments, and speed up rendering: create sub-projects of different segments of your video and import them into your main project as their own clips.
This helps you in 3 ways:
1. If there are a lot of effects it’ll be faster to render a shorter video.
2. If you import your sequence as its own clip you won’t have to worry about adjusting little parts of it whenever you change earlier sections of your video.
3. If you do want to make adjustments to your sequence you can open up your mini-project and change it without affecting anything in your main project.
2. Optimize your upload speed
At home, your videos will upload fastest if all of your internet resources are devoted to the upload. That means you should not have any other windows open on your computer while you are uploading. You should also make sure there aren’t other devices competing for wifi like smart tvs, cell phones, or really fancy coffee makers.
If you have neighbors on the same wifi signal as you and they are online at the same time, this will slow you down too.
Because there is so much that can interfere with wifi, you might want to consider a wired Ethernet cable. Ethernet connections are faster in general, and you won’t have any problems with other devices competing for resources like you get with wifi.
If you’re doing everything you can to optimize your upload speed at home and still find that it takes an unreasonable amount of time to upload videos to YouTube, go somewhere with a better connection. Save your video to a USB drive and take it to a library or college to upload. Connections in these kinds of places tend to be very strong.
3. Use default descriptions and tags
In your Creator Studio, go to Channel > Upload defaults. Here you can write in titles, descriptions, and tags which will automatically be applied to every video you upload.
Note: in the latest YouTube Studio, the upload interface is changed but the main process is similar.
You probably have tags you use for almost every video you post. For example, if your channel is about vegan cooking then every one of your videos is probably tagged ‘vegan’, ‘food’, and ‘cooking’. If you type those tags in here then you don’t have to keep adding them to every new video, and you can still add or remove tags from individual uploads so you aren’t stuck using the exact same set of tags every time.
Similarly, you probably have some default text that goes in the description of every one of your videos (i.e. a link to your personal website or a brief introduction of yourself). If you type in a default description then that text will appear automatically in every new video description and you can just add to it when you need to for individual videos.
Using defaults might only save you a couple of minutes per video, but those minutes add up.
4. TubeBuddy’s bulk features and tagging tools
TubeBuddy is a channel management tool for YouTube. Most of its features are more geared towards very large channels or companies with a YouTube presence, but there are also features that can help small or mid-sized YouTubers save time and stay organized.
Some of these tools include templates for things like cards and end screens and bulk processing tools for when you want to change a lot of things at once. For example, if you wanted to update the links in every card in every one of your videos at once then TubeBuddy could help with that.
Some of TubeBuddy’s best features for growing channels are the tagging features. TubeBuddy will help you discover tags, suggest new tags, and even copy whole lists of tags from rival videos.
There are different levels of pricing for TubeBuddy (including a free version, although it’s very limited) and you get a discount on the Pro version if you have less than 50,000 lifetime views on your channel. It ends up being $4.50USD a month (or $3.60 USD a month if you pay for a year in advance). It’s a good investment for someone who’s starting to see some growth on YouTube, but probably not if you’re still trying to reach milestones like 500 subs or 10,000 views.
You have to work hard to get anywhere on YouTube, but that doesn’t mean you should be toiling away at tedious stuff like typing in the same tags over and over. If you have any time-saving tips then make sure to share them with everyone in the comments!
Remember that your time is valuable =)
If you are using Filmora to edit YouTube videos, you can upload the video to YouTube directly from Filmora without download it again first, which can save you time. Besides, if you don’t want the video to be public, you can change Privacy to unlisted or private in Filmora.
Richard Bennett
Richard Bennett is a writer and a lover of all things video.
Follow @Richard Bennett
Also read:
- [New] Essential YouTube SEO Techniques for Enhanced Video Rankings
- Professional & Amateur Cameras A YouTube Journey
- 9 Zero Price Programs to Take Your Videos From Average to Amazing for 2024
- Elevate Views Prime SEO Equipment for Videos for 2024
- Top 10 Ultimate Apps for Seamless YouTube to WebM Conversion
- [Updated] Cyberspace Celebs Top YouTube Personalities by Views
- 2024 Approved Breaking Down the System Behind Highlighted Video Comments
- MCB Branding Elements Download Free Pack
- [Updated] Curating Historical Wisdom The Ultimate Student-Friendly Channel List (#1-10)
- Dodge Digital Duplicates to Increase YouTube Exposure for 2024
- 2024 Approved Chuckle Collective Top 15 Hilarious YouTubers for Boredom Beaters
- 2024 Approved Elevate Your Channels Optimal Use of Templated Content in YT Descs
- Mastering Handheld Shots No Tripod Necessary
- [Updated] Bulk Buy Subscribers Cost-Effective Growth Strategy
- Inspiring Leadership The Top 35 Recruiter Talks
- 2024 Approved Engaging Presentations Tips for Uploading YouTube Videos Into Slides
- [New] Discovering 8 Prime Video Advancement Aids
- Maximizing Video Reach Through Title & Tag Synergy
- Video Sharing Platform Showdown Which Is Ideal for Your Individual Usage?
- In 2024, Crafting Engaging Live-Streamed Gaming Experiences
- [Updated] Educational Synergy Enhancing Learning with YouTube Videos
- In 2024, Vimeo vs YouTube Differences Between Vimeo and YouTube
- Avoiding Malpractice How to Safely Grow a Million Fanbase for 2024
- Reinstate Windows Photo Viewer Quickly on Your Windows 10 PC
- In 2024, How to Watch Hulu Outside US On Samsung Galaxy S23 Tactical Edition | Dr.fone
- [New] Farewell to Friends How to Leave a Discord Server for 2024
- [Updated] 2024 Approved Elevating Your PPT Experience Tips for GMeet Users, Laptops/Tablets
- 2024 Approved Step-by-Step Perfecting the Art of Mi 11 Screen Recording
- How to Mirror Samsung Galaxy M54 5G to Mac? | Dr.fone
- 2024 Approved Ultimate Playlist Creation 10 Must-Have Recorders to Capture Favorite Melodies Effortlessly
- Updated 2024 Approved Premiere on Linux? No Problem! Top 10 Alternative Video Editors
- [New] 2024 Approved Sonic Steps to Better Snapchat Videos
- [New] Smooth Scene Grabs The Top 8 Non-Lagging Tools for 2024
- Easy steps to recover deleted call history from Nokia 150 (2023)
- In 2024, The Ultimate Guide to Get the Rare Candy on Pokemon Go Fire Red On Vivo X90S | Dr.fone
- How to Lock Apps on Samsung Galaxy S24 to Protect Your Individual Information
- Updated In 2024, Get Started with Mac Video Editing Choosing the Best Movie Maker Software
- 2024 Approved Bridging Audio Gaps How to Convert Your MP3 Playlists to MP4
- [Updated] Story Stream Sequencer App
- New 2024 Approved FCPX Essentials Working with Freeze Frames and Slow Motion Video
- Complete Tutorial to Use GPS Joystick to Fake GPS Location On Xiaomi 14 Pro | Dr.fone
- [Updated] Adding Personal Touch The Art of Typeface Integration in AE
- In 2024, Top-Rated Free iPhone Video Rotators You Need
- [New] 4 Ways to Record PS3 Gameplay for 2024
- Updated The Ultimate Guide to GoPro Quik & Its PC Alternatives for Video Editing Mastery
- Title: "[New] Cut Costs and Boost Creativity 8 Online Spots Offering Free Eco-Backdrops"
- Author: Steven
- Created at : 2024-05-25 20:07:09
- Updated at : 2024-05-26 20:07:09
- Link: https://youtube-clips.techidaily.com/new-cut-costs-and-boost-creativity-8-online-spots-offering-free-eco-backdrops/
- License: This work is licensed under CC BY-NC-SA 4.0.
