
![[New] Connoisseur of Cinematic Composition](https://www.lifewire.com/thmb/xqHkNazJkUZujRm-WPAwphMd5JY=/300x200/filters:no_upscale():max_bytes(150000):strip_icc()/1all-key-finders-d6e7ccbb518848669814cb15fdc30d0d.jpg)
[New] Connoisseur of Cinematic Composition
Connoisseur of Cinematic Composition
People capture loads of photos of the places they visit and the events they attend for social media and future memories. If you check the online trend, users are shifting from static photos to short videos for a better visual experience. That is why you can consider creating videos out of the photos you have captured and adding suitable music in the background to make your memories visually pleasing.
All you need is a video maker with music and pictures. There is no dearth of video makers, but not all live up to the expectation. There are online video markers as well as video maker software applications available. In this article, we have picked the best video maker with photos and music and illustrated how to make a video with music and photos. We have also listed the popular video makers for your consideration.
Part 1. Best Video maker with music and pictures
We recommend Wondershare Filmora as the best video maker with photos and music. Filmora is considered one of the best video makers and editors in the world. Filmora allows you to import photos of different file formats so that you can make slideshow-like video. There are loads of transitions as well as effects available that you can place in between the photos so that the transition becomes eye-pleasing.
Similarly, you can import any audio or music file. Besides, there are stock music files available that you can apply to your slideshow video. You can even add colourful titles and graphical elements to enhance the video content. Here are the steps on how to make a video with your photos and music.
For Win 7 or later (64-bit)
For macOS 10.12 or later
Step 1: Install Filmora and Start Your Project
Download and install Wondershare Filmora as per your operating system. Filmora is available for Windows and Mac. Launch Filmora and click on New Project. Drag and drop your photos on Project Media folder.
Step 2: Import Photos and Arrange Them in Order
Drag and drop the photos on the timeline as per your sequence you want in your slideshow video. You can change the order of the photos as well as stretch durations of photos in the video from the timeline. You have to arrange the photos side by side without any gap so that there is no black screen in between the transition.

Step 3: Add Transition Effects
After arranging the photos side by side, you have to apply transition effects so that the change from one photo to another is eye-soothing. There are loads of transitions available and you can get them from Transition option located at the top bar.
Go through the different categories of transitions. Drag and drop the transition you want on to the photo after which you want the transition effect to play. Do the same for all photos except the last one. You can apply different transitions effects for different photos as per your preference.

Step 4: Add Background Music
Now it is time to add a background music to the entire video. You can drag and drop any music file from your hard drive to Filmora Project Media. Thereafter, you can drag and drop the audio file on the audio timeline below the photo timeline. You can also add audio effects from the top bar if required.

Step 5: Export Your Video
Once you are done adding photos, transitions, and music, you should play the video on Filmora and make adjustments wherever required. Thereafter, click on Export button and save the video file on your hard drive in your desired file format.

Part 2. Popular video makers with photos and music
Here is the list of the popular premium and free video maker with music and pictures that you can consider for making slideshow videos.
1. Invideo
Invideo is a popular online video maker with music and pictures along with 5000 customizable templates. These templates help users to transform photos into videos with background music in a few minutes. Besides, the platform offers a wide range of stock media files. You can create videos in more than 70 languages, and the editor is user-friendly for users of all ages.
All you need to do is select a template and customize it if required. Thereafter, you need to import the photos, add text effects, and finally add music. There are options for trimming, cropping, and adding stickers, texts and transitions. The free version lets you export 60 videos per month but with a watermark. Here are the top features of Invideo.
- 5000+ customizable templates for all video types.
- 9+ million stocks videos, photos, and audio files.
- Add transitions, stickers, animations, and texts to videos.
- Trim and crop videos and audio files.
- Add voiceover as well as fade-in and fade-out effects.
- Work in collaboration with team members.

2. Icecream slideshow maker
Icecream slideshow maker is a free video maker with music and pictures for Windows users only. The software is compatible with Windows 10, 8, 7 and XP. You can create a high-quality video from your photos with music instantly. There is no need for any prior experience to use the video maker. There are beautiful transitions available that will enhance the video quality and make your presentation stand out. The free version allows up to 10 slides per video and saving the video in Webm file format. You can upgrade to Pro version to get rid of the limitations.
You can change photo and transition duration as per requirements. The software supports various audio file formats that you can import for your video. You can also add animations to texts so that they can shine in your video. The software allows sharing the video directly to YouTube. Besides, you can save it on Google Drive and Dropbox. Here are all the features of Icecream slideshow maker that you should be aware of.
- Super intuitive user interface for all users.
- Add colourful text, transitions, and animations.
- Save and resume project work as per time availability.
- Pro version allows saving video in 4K resolution.
- Video output in MP4, AVI, MOV and WEBM formats.
- Suitable for low-end computers.

3. PhotoStage Slideshow
PhotoStage Slideshow by NCH Software is another video maker software for Windows users. The software comes with an easy and automated wizard for users to transform photos with a video instantly. There is also an image editor available to adjust different parameters of your photos before making a video out of them.
Besides, there are various transitions available to apply and you can add captions and narration as per your requirements. In fact, along with photos, you can add video clips to create the ultimate video. Moreover, there are tools available to edit your audio and music file and add different effects. Here are the top features of PhotoStage Slideshow Software.
- Supports Full HD and 4K video resolution.
- Edit and fine-tune photos and add captions.
- Wide range of eye-catching and popular transitions.
- Edit audio and music file and add different effects.
- Save video file in MOV, MP4, GIF, AVI, 3GP and more.
- Directly share on YouTube, Vimeo, Flickr, HTML5.

4. Clideo video maker
Clideo Video Maker is a free online video maker with song. All you need to do is upload photos from your hard drive and choose a preset depending on the online platform where you want to upload the video. Thereafter, add audio and trim it as per video length. Then add smooth transitions and the video will be ready to export on your hard drive or cloud storage.
The online video maker supports different video and audio file format for importing and exporting. You can use the editor on any device starting from Windows and Mac to Android and iPhone. The user interface is very simple to use and it does not store video files for more than a day. Here are all the features of Clideo video maker.
- Upload photos from hard drive, and cloud storage.
- Presets for Instagram, Stories, YouTube, and Facebook videos.
- Add different photos, audio, and video clips to make videos.
- Zoom & crop option along with image duration elongation.
- Suitable for computer and mobile phone users.

5. Movavi Slideshow Maker
Movavi Slideshow Maker is available for both Windows and Mac users. The software comes with a wizard to allow users to create video from photos. However, advanced users can create video from photos manually as well. You get to add photos, audio files and video clips of different file formats. Most importantly, there are various templates available to create professional-quality videos.
There are loads of effects, filters, titles, and stickers available to apply on your video. The free version is limited to seven days usage. The output video will have watermark on it and you can purchase the premium version to avoid all limitations. Here are the top features of Movavi Slideshow Maker.
- Slideshow wizard for fast and easy video creation.
- Manual mode for advanced users to create customized video.
- Supports different types of media file formats.
- Different types of templates for instant video making.
- Wide ranges of transitions, filters, titles, and stickers.

Conclusion
If you are making a video from your photos, you can use an online video maker with photos and music free. If you are someone who wants to make professional-quality videos from photos, a premium video maker is best for you. If you are going to upload your slideshow videos on social media and video streaming platforms, we recommend Wondershare Filmora as the best video maker with music and pictures.
For macOS 10.12 or later
Step 1: Install Filmora and Start Your Project
Download and install Wondershare Filmora as per your operating system. Filmora is available for Windows and Mac. Launch Filmora and click on New Project. Drag and drop your photos on Project Media folder.
Step 2: Import Photos and Arrange Them in Order
Drag and drop the photos on the timeline as per your sequence you want in your slideshow video. You can change the order of the photos as well as stretch durations of photos in the video from the timeline. You have to arrange the photos side by side without any gap so that there is no black screen in between the transition.
Step 3: Add Transition Effects
After arranging the photos side by side, you have to apply transition effects so that the change from one photo to another is eye-soothing. There are loads of transitions available and you can get them from Transition option located at the top bar.
Go through the different categories of transitions. Drag and drop the transition you want on to the photo after which you want the transition effect to play. Do the same for all photos except the last one. You can apply different transitions effects for different photos as per your preference.
Step 4: Add Background Music
Now it is time to add a background music to the entire video. You can drag and drop any music file from your hard drive to Filmora Project Media. Thereafter, you can drag and drop the audio file on the audio timeline below the photo timeline. You can also add audio effects from the top bar if required.
Step 5: Export Your Video
Once you are done adding photos, transitions, and music, you should play the video on Filmora and make adjustments wherever required. Thereafter, click on Export button and save the video file on your hard drive in your desired file format.
Part 2. Popular video makers with photos and music
Here is the list of the popular premium and free video maker with music and pictures that you can consider for making slideshow videos.
1. Invideo
Invideo is a popular online video maker with music and pictures along with 5000 customizable templates. These templates help users to transform photos into videos with background music in a few minutes. Besides, the platform offers a wide range of stock media files. You can create videos in more than 70 languages, and the editor is user-friendly for users of all ages.
All you need to do is select a template and customize it if required. Thereafter, you need to import the photos, add text effects, and finally add music. There are options for trimming, cropping, and adding stickers, texts and transitions. The free version lets you export 60 videos per month but with a watermark. Here are the top features of Invideo.
- 5000+ customizable templates for all video types.
- 9+ million stocks videos, photos, and audio files.
- Add transitions, stickers, animations, and texts to videos.
- Trim and crop videos and audio files.
- Add voiceover as well as fade-in and fade-out effects.
- Work in collaboration with team members.
2. Icecream slideshow maker
Icecream slideshow maker is a free video maker with music and pictures for Windows users only. The software is compatible with Windows 10, 8, 7 and XP. You can create a high-quality video from your photos with music instantly. There is no need for any prior experience to use the video maker. There are beautiful transitions available that will enhance the video quality and make your presentation stand out. The free version allows up to 10 slides per video and saving the video in Webm file format. You can upgrade to Pro version to get rid of the limitations.
You can change photo and transition duration as per requirements. The software supports various audio file formats that you can import for your video. You can also add animations to texts so that they can shine in your video. The software allows sharing the video directly to YouTube. Besides, you can save it on Google Drive and Dropbox. Here are all the features of Icecream slideshow maker that you should be aware of.
- Super intuitive user interface for all users.
- Add colourful text, transitions, and animations.
- Save and resume project work as per time availability.
- Pro version allows saving video in 4K resolution.
- Video output in MP4, AVI, MOV and WEBM formats.
- Suitable for low-end computers.
3. PhotoStage Slideshow
PhotoStage Slideshow by NCH Software is another video maker software for Windows users. The software comes with an easy and automated wizard for users to transform photos with a video instantly. There is also an image editor available to adjust different parameters of your photos before making a video out of them.
Besides, there are various transitions available to apply and you can add captions and narration as per your requirements. In fact, along with photos, you can add video clips to create the ultimate video. Moreover, there are tools available to edit your audio and music file and add different effects. Here are the top features of PhotoStage Slideshow Software.
- Supports Full HD and 4K video resolution.
- Edit and fine-tune photos and add captions.
- Wide range of eye-catching and popular transitions.
- Edit audio and music file and add different effects.
- Save video file in MOV, MP4, GIF, AVI, 3GP and more.
- Directly share on YouTube, Vimeo, Flickr, HTML5.
4. Clideo video maker
Clideo Video Maker is a free online video maker with song. All you need to do is upload photos from your hard drive and choose a preset depending on the online platform where you want to upload the video. Thereafter, add audio and trim it as per video length. Then add smooth transitions and the video will be ready to export on your hard drive or cloud storage.
The online video maker supports different video and audio file format for importing and exporting. You can use the editor on any device starting from Windows and Mac to Android and iPhone. The user interface is very simple to use and it does not store video files for more than a day. Here are all the features of Clideo video maker.
- Upload photos from hard drive, and cloud storage.
- Presets for Instagram, Stories, YouTube, and Facebook videos.
- Add different photos, audio, and video clips to make videos.
- Zoom & crop option along with image duration elongation.
- Suitable for computer and mobile phone users.
5. Movavi Slideshow Maker
Movavi Slideshow Maker is available for both Windows and Mac users. The software comes with a wizard to allow users to create video from photos. However, advanced users can create video from photos manually as well. You get to add photos, audio files and video clips of different file formats. Most importantly, there are various templates available to create professional-quality videos.
There are loads of effects, filters, titles, and stickers available to apply on your video. The free version is limited to seven days usage. The output video will have watermark on it and you can purchase the premium version to avoid all limitations. Here are the top features of Movavi Slideshow Maker.
- Slideshow wizard for fast and easy video creation.
- Manual mode for advanced users to create customized video.
- Supports different types of media file formats.
- Different types of templates for instant video making.
- Wide ranges of transitions, filters, titles, and stickers.
Conclusion
If you are making a video from your photos, you can use an online video maker with photos and music free. If you are someone who wants to make professional-quality videos from photos, a premium video maker is best for you. If you are going to upload your slideshow videos on social media and video streaming platforms, we recommend Wondershare Filmora as the best video maker with music and pictures.
Cutting-Edge Chapter Tactics to Complement Your YouTube Presentations
How to Add Chapters to YouTube Videos

Richard Bennett
Mar 27, 2024• Proven solutions
If you have seen chapter markers on YouTube of our official channel, you might be wondering how someone can create chapters on YouTube? What is the way to mark different parts of the videos, and how can you add markers to all the existing videos on YouTube? Don’t worry; this article will discuss everything about YouTube chapters that you need to know. Keep reading to find all the details and learn the step-by-step instructions to add chapters to your YouTube videos for better engagement.
- Part 1: What Are YouTube Chapters?
- Part 2: How to Add Chapter to YouTube Video Progress Bar?
- Part 3: Why Add Chapters to Videos?
- Part 4: When Add Chapters on YouTube?
- Part 5: Will Chapter Decrease Watching Time?
- Part 6: Video Chapter Adding Tips
- Part 7: Why YouTube Chapter is Not Working?
Part 1: What Are YouTube Chapters?
YouTube video chapters are an excellent way to optimize your YouTube content. When you have chapters for your YouTube video, each chapter will have an individual preview. Chapters will break your YouTube video into multiple parts allowing your audience to have better context and information.
As per YouTube, chapters let the audience navigate better through videos. Chapters will let your audience watch different video parts, which will eventually lead to better engagement. If you want to organize your YouTube content, chapters are one of the best ways to go about it. By using labeled timestamps, your video will be divided into multiple sections. Your audience will be able to see the preview of the content and easily skip to the part they want to see within the video’s progress bar.
Part 2: How to Add Chapter to YouTube Video Progress Bar?
If you are a YouTube creator and want to know how you can add chapters to your YouTube content, here’s what you need to do. Follow these instructions carefully:
Step 1: First things first, please sign in to your YouTube account.
Step 2: Select the video that you want to edit and add chapters.
Step 3: Click on the edit video option. This option will be there under the video.
Step 4: On the add details page, you will see the description box. Here, you need to add the list of titles and timestamps.

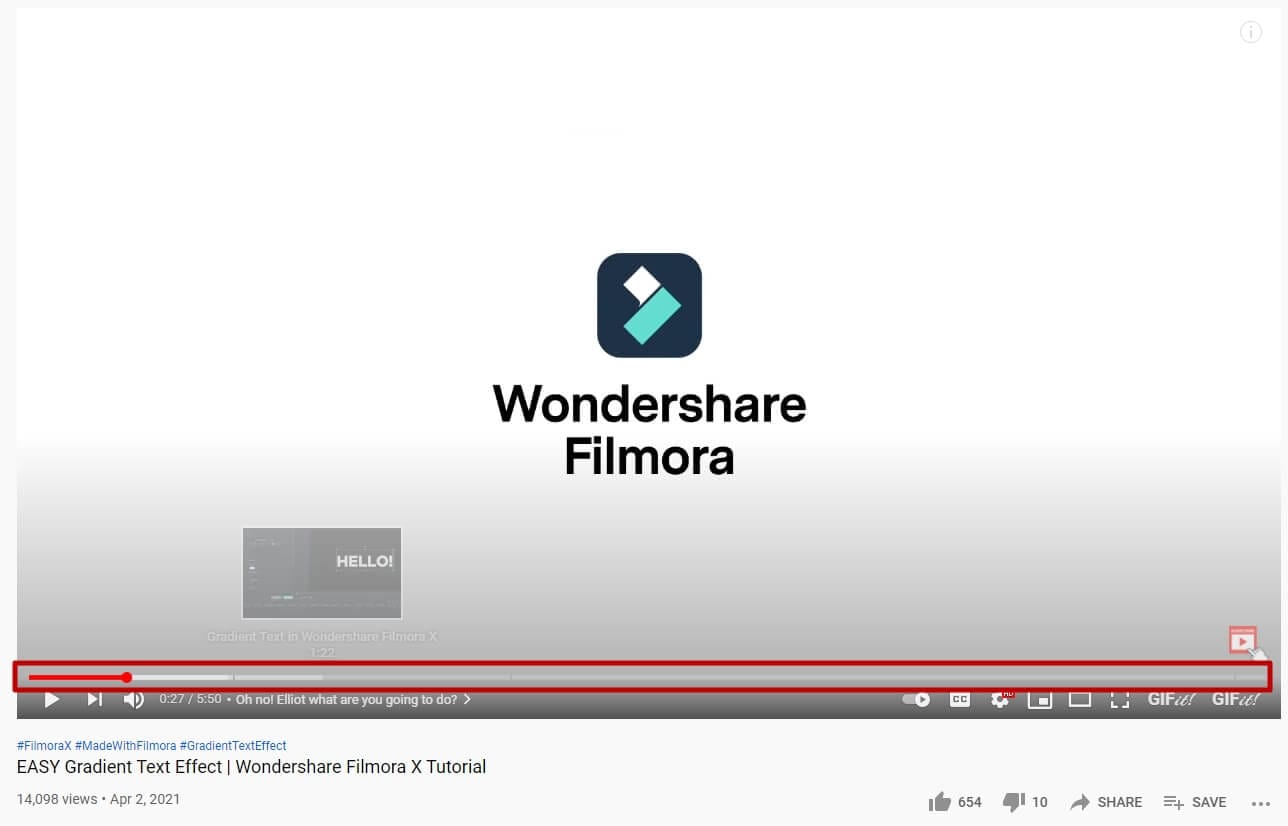
Please keep in mind that you must add the first timestamp with “00:00”. You will have to add a minimum of three timestamps with a minimum of 10 seconds for each chapter. Here is how it looks like in the description after published.

Part 3: Why YouTubers Should Add Chapters to videos?
There are two primary advantages of adding chapters to your YouTube videos. Apart from making your YouTube video look organized and neat, chapters will let you provide a better user experience to everyone watching your video because they will find all the information about your video faster and easier within a video. And the second benefit is that your YouTube video will show up in search results. This is a way to optimize your content for more users to find your content.
YouTube chapters are beneficial for both creators and viewers. On the progress bar, these clickable chapters can be added. This will allow a viewer to skip and scrub through a video quickly and skip to parts they actually want to watch.
This feature is quite helpful for videos that are pretty long. Chapters will let you segment the videos into important chapters so that the viewer can rewatch already watched chapters or skip to other chapters in the video. YouTube chapters have been recently added to this platform for better navigation and engagement.
Better User Experience for Users
Just like Google wants browsers to find what they are looking for when they add a keyword, YouTube also wants to help viewers find what they are looking for. Chapters can be immensely beneficial for extended content. For example, if you are uploading a video of your convert video, let the users jump straight to their favorite songs.
Even in tutorial video content, viewers will now have a chance to get straight to the main part of the video. With chapters being added, viewers will have an opportunity to decide whether they want to watch the whole video or not. They won’t have to keep skipping one part to another blindly. Chapters will allow them to find what they are looking for in an instant.
For Creators: Increased Visibility
If you know about the Google algorithm, you must be aware that it regularly changes its algorithm to let people find the information they are looking for easily. Adding chapters to your video will encourage Google to display them more often when someone searches for them, and this will include adding your videos to its featured snippets.
While adding chapters, you need to make sure that it is labeled with correct keywords, and it is clear and descriptive. YouTube videos are often showed as Google snippet when someone tries to find something on the search engine. Adding a chapter will let Google understand the content better, thereby letting your videos gain more search traffic.
Part 4: When should I add or not chapters on YouTube?
If you are wondering whether all videos on YouTube should have chapters, the answer to this is no. A two minutes long video won’t require chapters because it won’t make sense. Think about whether you would want your audience to have reduced watch time. Another thing to pay attention to is audience retention.
We mentioned earlier that adding chapters to long videos will be a good idea, but before you jump in and start adding chapters, you need to understand whether it will help you and should be done in your particular case?
If you are uploading a video on education, science and technology, how-to, news and politics, Q and A, and other similar videos, adding chapters will definitely help. In these kinds of videos, you will let your audience rewatch a section they liked the most over and over again.
However, if you are uploading music, entertainment, comedy, and film and animation videos, we will recommend not to add chapters because this will reduce the watch time.
Part 5: Do YouTube Video Chapters Decrease Channel Watch Time?
One of the most commonly asked questions regarding adding chapters to YouTube videos is whether it will reduce the watch time of a video. Video chapters are a pretty good feature and can enable your videos to engage with the viewers.
Since chapters allow your audience to skip through video content, they are not really watching the whole video, which can’t be suitable for audience retention! Here’s what we have to say to this: don’t put your 100% focus on watch time right now. Your focus should be creating informative and engaging content, which will keep your audience hooked to their screens. Even if you add chapters, if your audience doesn’t find it engaging, they will choose not to go on with the content.
Video chapters are a tiny part of the overall content. Chapters provide value to your audience, and you should try them. If you are uploading a concise video, animation video, funny video, and more, don’t add chapters.
Even some of the most watched videos on YouTube have chapters. Learn from them. These video makers could have thought about numbers rather than giving value to their audience, but they did just the opposite, and here they are with over a million views!
Part 6: Tips for adding chapters to YouTube video
Each video on YouTube is different, and that’s why there is no one-size-fits-all answer. There are some cases where you should not think about adding chapters at all. Whereas in other cases, you will have to experiment a bit before adding chapters.
Here are some tips that will help you.
Do Some Testing
Before adding chapters to a new video that you are thinking to upload, try adding chapters to an old video. See what happens to that video. Have the views increased? How about average view duration? Track these metrics first, and then try adding chapters to your upcoming videos to benefit from videos. Along with these metrics, you will also have to evaluate if adding chapters decreases or increases the watch time and number of views.
Label Your Chapters Using Keywords
Another thing to do that will help you have better traction is using a good keyword strategy. Look at what people are using while searching for content, which is similar to yours? Using names based on keywords that have better search volume will help your videos to rank higher.
Part 7: Why Video Chapter is Not working? [Problem solved]
There are a few mandatory things that you need to do before adding chapters to your YouTube video. Here are some of the common reasons why the video chapter is not working. See if any one of them is true in your case, and rectify it right away.
- Your video doesn’t have the 00:00 timestamp.
- Your video has less than three chapters.
- You have added a chapter that is less than 10 seconds long.
- You have not added the timestamps in chronological order.
- Rather than using “:” you have entered “.” for timecodes.
- If your channel has active copyright strikes, video chapters won’t work.
- Your channel doesn’t have more than 1k subscribers.
- Your video chapters are not suitable for some viewers.
Richard Bennett
Richard Bennett is a writer and a lover of all things video.
Follow @Richard Bennett
Richard Bennett
Mar 27, 2024• Proven solutions
If you have seen chapter markers on YouTube of our official channel, you might be wondering how someone can create chapters on YouTube? What is the way to mark different parts of the videos, and how can you add markers to all the existing videos on YouTube? Don’t worry; this article will discuss everything about YouTube chapters that you need to know. Keep reading to find all the details and learn the step-by-step instructions to add chapters to your YouTube videos for better engagement.
- Part 1: What Are YouTube Chapters?
- Part 2: How to Add Chapter to YouTube Video Progress Bar?
- Part 3: Why Add Chapters to Videos?
- Part 4: When Add Chapters on YouTube?
- Part 5: Will Chapter Decrease Watching Time?
- Part 6: Video Chapter Adding Tips
- Part 7: Why YouTube Chapter is Not Working?
Part 1: What Are YouTube Chapters?
YouTube video chapters are an excellent way to optimize your YouTube content. When you have chapters for your YouTube video, each chapter will have an individual preview. Chapters will break your YouTube video into multiple parts allowing your audience to have better context and information.
As per YouTube, chapters let the audience navigate better through videos. Chapters will let your audience watch different video parts, which will eventually lead to better engagement. If you want to organize your YouTube content, chapters are one of the best ways to go about it. By using labeled timestamps, your video will be divided into multiple sections. Your audience will be able to see the preview of the content and easily skip to the part they want to see within the video’s progress bar.
Part 2: How to Add Chapter to YouTube Video Progress Bar?
If you are a YouTube creator and want to know how you can add chapters to your YouTube content, here’s what you need to do. Follow these instructions carefully:
Step 1: First things first, please sign in to your YouTube account.
Step 2: Select the video that you want to edit and add chapters.
Step 3: Click on the edit video option. This option will be there under the video.
Step 4: On the add details page, you will see the description box. Here, you need to add the list of titles and timestamps.
Please keep in mind that you must add the first timestamp with “00:00”. You will have to add a minimum of three timestamps with a minimum of 10 seconds for each chapter. Here is how it looks like in the description after published.
Part 3: Why YouTubers Should Add Chapters to videos?
There are two primary advantages of adding chapters to your YouTube videos. Apart from making your YouTube video look organized and neat, chapters will let you provide a better user experience to everyone watching your video because they will find all the information about your video faster and easier within a video. And the second benefit is that your YouTube video will show up in search results. This is a way to optimize your content for more users to find your content.
YouTube chapters are beneficial for both creators and viewers. On the progress bar, these clickable chapters can be added. This will allow a viewer to skip and scrub through a video quickly and skip to parts they actually want to watch.
This feature is quite helpful for videos that are pretty long. Chapters will let you segment the videos into important chapters so that the viewer can rewatch already watched chapters or skip to other chapters in the video. YouTube chapters have been recently added to this platform for better navigation and engagement.
Better User Experience for Users
Just like Google wants browsers to find what they are looking for when they add a keyword, YouTube also wants to help viewers find what they are looking for. Chapters can be immensely beneficial for extended content. For example, if you are uploading a video of your convert video, let the users jump straight to their favorite songs.
Even in tutorial video content, viewers will now have a chance to get straight to the main part of the video. With chapters being added, viewers will have an opportunity to decide whether they want to watch the whole video or not. They won’t have to keep skipping one part to another blindly. Chapters will allow them to find what they are looking for in an instant.
For Creators: Increased Visibility
If you know about the Google algorithm, you must be aware that it regularly changes its algorithm to let people find the information they are looking for easily. Adding chapters to your video will encourage Google to display them more often when someone searches for them, and this will include adding your videos to its featured snippets.
While adding chapters, you need to make sure that it is labeled with correct keywords, and it is clear and descriptive. YouTube videos are often showed as Google snippet when someone tries to find something on the search engine. Adding a chapter will let Google understand the content better, thereby letting your videos gain more search traffic.
Part 4: When should I add or not chapters on YouTube?
If you are wondering whether all videos on YouTube should have chapters, the answer to this is no. A two minutes long video won’t require chapters because it won’t make sense. Think about whether you would want your audience to have reduced watch time. Another thing to pay attention to is audience retention.
We mentioned earlier that adding chapters to long videos will be a good idea, but before you jump in and start adding chapters, you need to understand whether it will help you and should be done in your particular case?
If you are uploading a video on education, science and technology, how-to, news and politics, Q and A, and other similar videos, adding chapters will definitely help. In these kinds of videos, you will let your audience rewatch a section they liked the most over and over again.
However, if you are uploading music, entertainment, comedy, and film and animation videos, we will recommend not to add chapters because this will reduce the watch time.
Part 5: Do YouTube Video Chapters Decrease Channel Watch Time?
One of the most commonly asked questions regarding adding chapters to YouTube videos is whether it will reduce the watch time of a video. Video chapters are a pretty good feature and can enable your videos to engage with the viewers.
Since chapters allow your audience to skip through video content, they are not really watching the whole video, which can’t be suitable for audience retention! Here’s what we have to say to this: don’t put your 100% focus on watch time right now. Your focus should be creating informative and engaging content, which will keep your audience hooked to their screens. Even if you add chapters, if your audience doesn’t find it engaging, they will choose not to go on with the content.
Video chapters are a tiny part of the overall content. Chapters provide value to your audience, and you should try them. If you are uploading a concise video, animation video, funny video, and more, don’t add chapters.
Even some of the most watched videos on YouTube have chapters. Learn from them. These video makers could have thought about numbers rather than giving value to their audience, but they did just the opposite, and here they are with over a million views!
Part 6: Tips for adding chapters to YouTube video
Each video on YouTube is different, and that’s why there is no one-size-fits-all answer. There are some cases where you should not think about adding chapters at all. Whereas in other cases, you will have to experiment a bit before adding chapters.
Here are some tips that will help you.
Do Some Testing
Before adding chapters to a new video that you are thinking to upload, try adding chapters to an old video. See what happens to that video. Have the views increased? How about average view duration? Track these metrics first, and then try adding chapters to your upcoming videos to benefit from videos. Along with these metrics, you will also have to evaluate if adding chapters decreases or increases the watch time and number of views.
Label Your Chapters Using Keywords
Another thing to do that will help you have better traction is using a good keyword strategy. Look at what people are using while searching for content, which is similar to yours? Using names based on keywords that have better search volume will help your videos to rank higher.
Part 7: Why Video Chapter is Not working? [Problem solved]
There are a few mandatory things that you need to do before adding chapters to your YouTube video. Here are some of the common reasons why the video chapter is not working. See if any one of them is true in your case, and rectify it right away.
- Your video doesn’t have the 00:00 timestamp.
- Your video has less than three chapters.
- You have added a chapter that is less than 10 seconds long.
- You have not added the timestamps in chronological order.
- Rather than using “:” you have entered “.” for timecodes.
- If your channel has active copyright strikes, video chapters won’t work.
- Your channel doesn’t have more than 1k subscribers.
- Your video chapters are not suitable for some viewers.
Richard Bennett
Richard Bennett is a writer and a lover of all things video.
Follow @Richard Bennett
Also read:
- 2024 Approved Banishing Blackout Blues From YouTube Videos
- Mastering the Art & Size Game Your Guide to Top-Tier YT Banners
- In 2024, 3 Techniques to Retrieve & Save YouTube's Iconic Images
- Unlocking Emotional Depth in Self-Narrated Videos YT
- 2024 Approved Essential iMovie Techniques to Upgrade Your YouTube Content
- [New] Boosting YouTube Engagement Top 11 SEO Strategies Revealed
- Unlocking Online Potential - Top 5 Strategic Approaches to YouTube Marketing
- Discovering Ideal Hashtags for Your YouTube Videos
- In 2024, Discover the Best in Class Our List of 12 High-Performing Flip Cameras
- In 2024, Effortless Methods Amp Up Your YT Video Quality
- Transforming Raw Footage Into YouTube Gold via Sony Vegas
- Spectacular Backdrops to Elevate Thumbnails
- Dance Dictates Selecting Perfect Audio-Visuals
- [Updated] Craft Engaging Videos Insights Into YouTube Movie Maker
- 2024 Approved Activating or Deactivating User Feedback on Videos
- Smart Strategies Uploading Videos From iOS Devices
- Decoding the Mechanics of Subscriber Tracking
- Mastering Channel Promotion YouTube's Featured Channels Guide
- In 2024, Best Bits of Bulb Tech - Top 17 Choices
- [New] Acquiring Free Music YouTube Video Edition
- In 2024, Elevating Channel Excellence with Ideas & Vision
- Elite Visionaries Video Realm
- A Deep Dive Into YouTube Content Ownership Laws
- 2024 Approved Break It Down Free Techniques to Go Frame by Frame on YouTube
- Personalize Your YouTube Experience with Altered Rhythms
- Propel Your Digital Presence Past the Thousand Mark
- [Updated] In 2024, Harness the Art of Visual Storytelling on Snapchat
- [New] OBS Timer Mastery Building a Custom Countdown Timer for 2024
- How to use Snapchat Location Spoofer to Protect Your Privacy On Nubia Red Magic 8S Pro+? | Dr.fone
- Smoother Soundscapes Advanced Techniques for Noise Reduction in Adobe Premiere Pro Videos
- New For Artists Who Are Making Videos for Show Their Knowledge or Projects, Add some Effects for the Video Can Always Provoke Interests and Attention. This Article Will Show You How to Do that Easily for 2024
- [New] In 2024, Proven Strategies for Saving Your Digital Discussions (Google Meets)
- In 2024, Full Tutorial to Bypass Your Nokia C02 Face Lock?
- In 2024, Crafting Time-Lapses with Your iPad Easefully
- In 2024, Forgot iPhone 14 Backup Password? Heres What to Do | Dr.fone
- In 2024, How to Change/Add Location Filters on Snapchat For your Realme 12 5G | Dr.fone
- Title: [New] Connoisseur of Cinematic Composition
- Author: Steven
- Created at : 2024-05-25 20:05:05
- Updated at : 2024-05-26 20:05:05
- Link: https://youtube-clips.techidaily.com/new-connoisseur-of-cinematic-composition/
- License: This work is licensed under CC BY-NC-SA 4.0.
