
!["[New] Channel Your Creativity Convert YouTube Clips Into Dynamic Gifs"](https://www.lifewire.com/thmb/E-bplQlBHLm0L2wSA_D5laHXhBM=/400x300/filters:no_upscale():max_bytes(150000):strip_icc()/google-meet-camera-not-working-how-to-fix-the-problem-5201889-1-266a66056f7f4b3e945b24c0de3a729b.jpg)
"[New] Channel Your Creativity Convert YouTube Clips Into Dynamic Gifs"
Channel Your Creativity: Convert YouTube Clips Into Dynamic Gifs
How to Convert YouTube Videos to GIFs

Shanoon Cox
Mar 27, 2024• Proven solutions
A GIF adds an extra element to any conversation and makes the reader feel connected to the post. Using GIF can turn useful if done rightly. It narrates a story in a single animated image for social media conversation. In this article, we will brief you about how to convert YouTube to gif, various GIF converters, their uses, and the pros and cons of each converter.
Let’s get started!
How to Convert a YouTube Video into GIFs?
1. YouTube to GIF Directly
Here is a quick way to convert the YouTube video to GIFs without typing a YouTube to GIF website.
Gif.com is a free and easy-to-use video editor available with multiple effects. This converter was created keeping in mind how people spend hours and money on paid platforms.
Follow the below steps to convert a YouTube video into gifs.
- In the YouTube video page, add gif before youtube.com. For example, I want to convert the YouTube video https://www.youtube.com/watch?v=40fuGLmwHwk to GIFs, here is how it looks like after adding gif at the beginning: https://www.gifyoutube.com/watch?v=40fuGLmwHwk . Press the enter button on your keyboard and you will enter the gifs.com directly.

- In gifs.com, you can play and pause the YouTube video and drag the bar to select a desired moment for gif. Press the “Create Gif” button on the top right side to convert the specific part of the YouTube video to gif.
- You will then be directed to the result page to see your GIF created using the YouTube video, and you can change the GIF title and the tag.
- Lastly, you need to copy the link and share it!
Pros of converting YouTube to GIFs with Gifs.com:
- The interface is easy to use and it provides lots of tools to adjust.
- Simple functionality.
Cons:
- The watermark on your created GIF can be removed only after purchasing the premium version.
- GIFs can be downloaded only by registered users.
2. FreeGifMaker.me
FreeGifMaker is one simple online tool that allows the creation of animated Gifs for free. A minimum of two pictures has to be uploaded out of ten. It takes few seconds and is super easy to make a GIF from a YouTube video. You can use FreeGifMaker.me in some easy steps.
- Open the website http://freegifmaker.me/youtube-to-gif/ on your desktop.
- Go to YouTube and copy the video URL you want to create a GIF of and paste it on the website mentioned above.
- Then click “Load YouTube Video” below the URL and wait for a few seconds while the tool checks the video source.
- Once the YouTube video is loaded, enter the gif duration, start time, and click on the “Make a GIF button.” It will redirect you to the result page.
- Pros:
- Conversion size is unlimited**.**
- There is no usage of ads.
- Easy to make Gifs.
- Cons:
- The upload speed is slow.
- The converter gives limited options for editing.
3. Wondershare Online UniConverter
Online UniConverter converts video into a high-quality animated GIF and allows editing. It is a simple converter with unique features.
If you want to convert your YouTube video into a GIF, follow the steps.
- You need to upload your video through the “Choose Files” option. You can also copy the link from YouTube.
- Wait for some time once you upload the file; you can then set your start time, end time, frame rate according to your needs.
- Lastly, click on “Create GIF” and download your GIF. You can also save it through the dropdown option available besides “Download.”
- Pros:
- Easy to handle.
- A wide range of customization tools is available.
- Zero ads.
- Cons:
- Upload speed is slow.
- Conversion size is limited.
4. GifRun
It is a video maker that started in 2013, and GifRun converts videos from YouTube, Facebook, and other sources to high-quality GIFs. You can create Gifs free of cost from GifRun.
Here is how you can use Gifrun.
- Open the website and paste the URL you want to convert into Gif. Later, press “Get Video” option below the URL box.
- In this step, you can adjust the duration, start time, add text, and also pause and preview the video. Once you’re done altering the video, click “Create GIF.”
- Lastly, click on the “Download” button beside the add text button, or share the link directly.
- Pros:
- Fast conversion and download.
- There is no upload limit.
- The video preview feature is available.
- Cons:
- UI is ad-infested.
- Supports YouTube videos only.
5. Makeagif
This GIF converter creates high-quality GIFs in no time. You need to paste the URL in Makeagif and nothing much. It can make GIFs from Instagram, Facebook, Twitter, and other platforms easily.
The only issue is that it supports one type of conversion with a maximum limit of 25MB.
Here is how you can make your favorite GIF in few steps.
- Open makeagif.com and paste the YouTube URL in the box available.
- Once you paste the URL, the website will automatically take you to the edit page to edit GIF length, start time, speed, and add caption and stickers. The next step is to select the category to which the video belongs available on the left side of the screen.
- After editing, click on “Continue to publishing” then “Create GIF” at the lower right corner of the screen. Voila! Your GIF is ready to use.
- Pros:
- The UI is user-friendly.
- Ads are minimal
- Various GIF conversions are supported.
- Cons:
- The conversion size is small.
- Batch conversions are not available.
6. ImgFlip
It is a creative GIF website supporting various videos from other websites such as Vimeo and YouTube. ImgFlip has innovative customization tools for cropping, reshaping, adding text and, a lot more, but you just need to be aware of the ads.
Want to know how to create GIF? Go through these simple steps.
- You can make GIFs both from Video and Images. To make GIF from a video, paste the YouTube URL in the box at the top, upload the tape from your device’s file.
- After pasting the URL, you will be given lots of customization options. Choose the effect of your choice for your GIF.
- Lastly, click on “Generate GIF” available on the right side of the screen. You can now share the GIF via your device or download it.
- Pros:
- Plenty of customization options.
- Fast conversion.
- Easy to upload and use.
- Cons:
- Ads pop up frequently.
- Offline conversion is unavailable.
7. GIPHY
It is a free GIF converter that helps you download free YouTube GIFs. You can also make GIFs from your photos, videos available on your device along with video URLs and images. The only problem is, to use Giphy you first have to log in to the app.
Follow the below steps to create a GIF from YouTube videos with Giphy:
- Open Giphy on your device and click on “Create” on the top right-side of your screen.
- Paste the URL in the space given below. A pop-up will tell you to log in. Log in to the website to continue.
- The video you choose should be less than 15 seconds and under 100MB. You will be given editing options from which you can select the start time and duration of your GIF along with Captions and Tags.
- In the end, press the “Create GIF” button to make the GIF. When it’s done, you will be redirected to the GIF page. You can then share your GIF on any social media site.
- Pros:
- Ads are absent
- Uploading is fast
- Wide range of free GIFs available
- Cons:
- Not perfect for green hands
8. Imgur
It is one of the best apps that offers tons of images, memes, and GIFs. You can make GIFs of less than 60 seconds with high quality, which you can share anywhere.
Here are three easy steps to make GIFs
- Visit the page “imgur.com/vidgif” and paste your YouTube URL there.
- Set a start time by clicking or dragging on the timeline. The total runtime is also adjustable, with 60 seconds as the maximum time for GIFs.
- Lastly, press on “Create GIF” to see the magic. The GIF is converted from the YouTube video.
- Pros:
- The users can share the post of their choice
- Users can save posts.
- Great collection of short GIFs and videos.
- Cons:
- During loading, the screen flashes.
9 VEED.IO
Veed is a simple YouTube video converter that makes your work super easy. It converts YouTube videos into GIFs with various editing options like crop, trim, text ads, and many more.
Check out how to use VEED in 3 steps.
- Start by pasting the URL of your YouTube video into VEED, Your video will be ready to convert into GIF.
- Now you are all set to edit your video. You have the option to crop and trim the video. You can also include different font styles, colors, and sizes of your choice.
- Lastly, download the GIF you made in VEED.
- Pros:
- Downloading the software is not mandatory.
- UI is simple and easy to navigate.
- The subtitle option is present.
- Cons:
- It takes a lot of time to upload video.
- Many basic tools.
10. Kapwing
Kapwing is a helpful video converter that can easily turn any video into GIFs with a click. It can also convert different files such as 3GP, GIF, WEBM.
To create beautiful GIFs with this video editor, follow these easy steps.
- Open Kapwing video editor and upload your video from YouTube.
- Choose the “Export dropdown” option and choose the format you wish to convert.
You can also preview the GIF and customize it as per your choice.
- In the final step, export the video by clicking the “Export Video” button. Save and download the newly created GIF and share it anywhere with your friends.
- Pros:
- Great editing tools.
- Easy to use.
- Cons:
- Available only on the website.
- Too many tools for the same purpose.
Final Thoughts
With the increased use of GIFs on social media, you can now easily convert your favorite YouTube videos into GIFs on your own. All you have to do is simply choose the tools mentioned above and share it with your friends.
Shanoon Cox
Shanoon Cox is a writer and a lover of all things video.
Follow @Shanoon Cox
Shanoon Cox
Mar 27, 2024• Proven solutions
A GIF adds an extra element to any conversation and makes the reader feel connected to the post. Using GIF can turn useful if done rightly. It narrates a story in a single animated image for social media conversation. In this article, we will brief you about how to convert YouTube to gif, various GIF converters, their uses, and the pros and cons of each converter.
Let’s get started!
How to Convert a YouTube Video into GIFs?
1. YouTube to GIF Directly
Here is a quick way to convert the YouTube video to GIFs without typing a YouTube to GIF website.
Gif.com is a free and easy-to-use video editor available with multiple effects. This converter was created keeping in mind how people spend hours and money on paid platforms.
Follow the below steps to convert a YouTube video into gifs.
- In the YouTube video page, add gif before youtube.com. For example, I want to convert the YouTube video https://www.youtube.com/watch?v=40fuGLmwHwk to GIFs, here is how it looks like after adding gif at the beginning: https://www.gifyoutube.com/watch?v=40fuGLmwHwk . Press the enter button on your keyboard and you will enter the gifs.com directly.
- In gifs.com, you can play and pause the YouTube video and drag the bar to select a desired moment for gif. Press the “Create Gif” button on the top right side to convert the specific part of the YouTube video to gif.
- You will then be directed to the result page to see your GIF created using the YouTube video, and you can change the GIF title and the tag.
- Lastly, you need to copy the link and share it!
Pros of converting YouTube to GIFs with Gifs.com:
- The interface is easy to use and it provides lots of tools to adjust.
- Simple functionality.
Cons:
- The watermark on your created GIF can be removed only after purchasing the premium version.
- GIFs can be downloaded only by registered users.
2. FreeGifMaker.me
FreeGifMaker is one simple online tool that allows the creation of animated Gifs for free. A minimum of two pictures has to be uploaded out of ten. It takes few seconds and is super easy to make a GIF from a YouTube video. You can use FreeGifMaker.me in some easy steps.
- Open the website http://freegifmaker.me/youtube-to-gif/ on your desktop.
- Go to YouTube and copy the video URL you want to create a GIF of and paste it on the website mentioned above.
- Then click “Load YouTube Video” below the URL and wait for a few seconds while the tool checks the video source.
- Once the YouTube video is loaded, enter the gif duration, start time, and click on the “Make a GIF button.” It will redirect you to the result page.
- Pros:
- Conversion size is unlimited**.**
- There is no usage of ads.
- Easy to make Gifs.
- Cons:
- The upload speed is slow.
- The converter gives limited options for editing.
3. Wondershare Online UniConverter
Online UniConverter converts video into a high-quality animated GIF and allows editing. It is a simple converter with unique features.
If you want to convert your YouTube video into a GIF, follow the steps.
- You need to upload your video through the “Choose Files” option. You can also copy the link from YouTube.
- Wait for some time once you upload the file; you can then set your start time, end time, frame rate according to your needs.
- Lastly, click on “Create GIF” and download your GIF. You can also save it through the dropdown option available besides “Download.”
- Pros:
- Easy to handle.
- A wide range of customization tools is available.
- Zero ads.
- Cons:
- Upload speed is slow.
- Conversion size is limited.
4. GifRun
It is a video maker that started in 2013, and GifRun converts videos from YouTube, Facebook, and other sources to high-quality GIFs. You can create Gifs free of cost from GifRun.
Here is how you can use Gifrun.
- Open the website and paste the URL you want to convert into Gif. Later, press “Get Video” option below the URL box.
- In this step, you can adjust the duration, start time, add text, and also pause and preview the video. Once you’re done altering the video, click “Create GIF.”
- Lastly, click on the “Download” button beside the add text button, or share the link directly.
- Pros:
- Fast conversion and download.
- There is no upload limit.
- The video preview feature is available.
- Cons:
- UI is ad-infested.
- Supports YouTube videos only.
5. Makeagif
This GIF converter creates high-quality GIFs in no time. You need to paste the URL in Makeagif and nothing much. It can make GIFs from Instagram, Facebook, Twitter, and other platforms easily.
The only issue is that it supports one type of conversion with a maximum limit of 25MB.
Here is how you can make your favorite GIF in few steps.
- Open makeagif.com and paste the YouTube URL in the box available.
- Once you paste the URL, the website will automatically take you to the edit page to edit GIF length, start time, speed, and add caption and stickers. The next step is to select the category to which the video belongs available on the left side of the screen.
- After editing, click on “Continue to publishing” then “Create GIF” at the lower right corner of the screen. Voila! Your GIF is ready to use.
- Pros:
- The UI is user-friendly.
- Ads are minimal
- Various GIF conversions are supported.
- Cons:
- The conversion size is small.
- Batch conversions are not available.
6. ImgFlip
It is a creative GIF website supporting various videos from other websites such as Vimeo and YouTube. ImgFlip has innovative customization tools for cropping, reshaping, adding text and, a lot more, but you just need to be aware of the ads.
Want to know how to create GIF? Go through these simple steps.
- You can make GIFs both from Video and Images. To make GIF from a video, paste the YouTube URL in the box at the top, upload the tape from your device’s file.
- After pasting the URL, you will be given lots of customization options. Choose the effect of your choice for your GIF.
- Lastly, click on “Generate GIF” available on the right side of the screen. You can now share the GIF via your device or download it.
- Pros:
- Plenty of customization options.
- Fast conversion.
- Easy to upload and use.
- Cons:
- Ads pop up frequently.
- Offline conversion is unavailable.
7. GIPHY
It is a free GIF converter that helps you download free YouTube GIFs. You can also make GIFs from your photos, videos available on your device along with video URLs and images. The only problem is, to use Giphy you first have to log in to the app.
Follow the below steps to create a GIF from YouTube videos with Giphy:
- Open Giphy on your device and click on “Create” on the top right-side of your screen.
- Paste the URL in the space given below. A pop-up will tell you to log in. Log in to the website to continue.
- The video you choose should be less than 15 seconds and under 100MB. You will be given editing options from which you can select the start time and duration of your GIF along with Captions and Tags.
- In the end, press the “Create GIF” button to make the GIF. When it’s done, you will be redirected to the GIF page. You can then share your GIF on any social media site.
- Pros:
- Ads are absent
- Uploading is fast
- Wide range of free GIFs available
- Cons:
- Not perfect for green hands
8. Imgur
It is one of the best apps that offers tons of images, memes, and GIFs. You can make GIFs of less than 60 seconds with high quality, which you can share anywhere.
Here are three easy steps to make GIFs
- Visit the page “imgur.com/vidgif” and paste your YouTube URL there.
- Set a start time by clicking or dragging on the timeline. The total runtime is also adjustable, with 60 seconds as the maximum time for GIFs.
- Lastly, press on “Create GIF” to see the magic. The GIF is converted from the YouTube video.
- Pros:
- The users can share the post of their choice
- Users can save posts.
- Great collection of short GIFs and videos.
- Cons:
- During loading, the screen flashes.
9 VEED.IO
Veed is a simple YouTube video converter that makes your work super easy. It converts YouTube videos into GIFs with various editing options like crop, trim, text ads, and many more.
Check out how to use VEED in 3 steps.
- Start by pasting the URL of your YouTube video into VEED, Your video will be ready to convert into GIF.
- Now you are all set to edit your video. You have the option to crop and trim the video. You can also include different font styles, colors, and sizes of your choice.
- Lastly, download the GIF you made in VEED.
- Pros:
- Downloading the software is not mandatory.
- UI is simple and easy to navigate.
- The subtitle option is present.
- Cons:
- It takes a lot of time to upload video.
- Many basic tools.
10. Kapwing
Kapwing is a helpful video converter that can easily turn any video into GIFs with a click. It can also convert different files such as 3GP, GIF, WEBM.
To create beautiful GIFs with this video editor, follow these easy steps.
- Open Kapwing video editor and upload your video from YouTube.
- Choose the “Export dropdown” option and choose the format you wish to convert.
You can also preview the GIF and customize it as per your choice.
- In the final step, export the video by clicking the “Export Video” button. Save and download the newly created GIF and share it anywhere with your friends.
- Pros:
- Great editing tools.
- Easy to use.
- Cons:
- Available only on the website.
- Too many tools for the same purpose.
Final Thoughts
With the increased use of GIFs on social media, you can now easily convert your favorite YouTube videos into GIFs on your own. All you have to do is simply choose the tools mentioned above and share it with your friends.
Shanoon Cox
Shanoon Cox is a writer and a lover of all things video.
Follow @Shanoon Cox
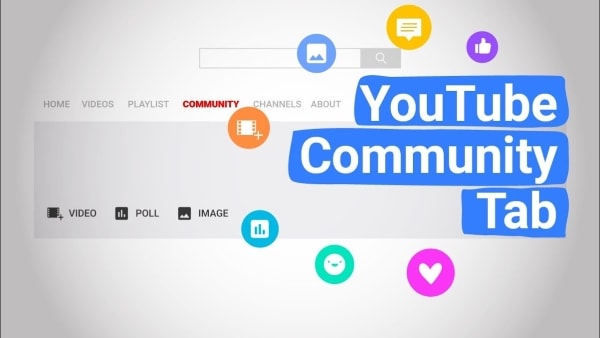
Essential Rules of Engagement on YouTube
YouTube has become more than an entertainment now. Most content creators are using the platform to earn and bring their skills to some use. Good knowledge of YouTube Community Guidelines would work in the long run.
The article introduces the YouTube Community and covers how to make community posts on YouTube. Additionally, stay tuned to find out how to get the community tab on YouTube. So let us begin!
In this article
02 How to Make A Community Post on YouTube?
03 How to Get Community Tab on YouTube?
04 How to Make Good Use of Community Tab on YouTube?
Part 1: What is YouTube Community?
Before getting into YouTube community posts, it is crucial to understand what YouTube Community is and how it affects the content creators. The YouTube community is an extensive range of viewers or followers that one needs to grow their channel. Creating a connection with the viewers helps because you have loyal followers; you have got it all.
It is because the trusted followers would go above and beyond to share your content to their social media accounts and give you instant feedback. YouTube community tab works like a charm for creators to engage with the audience. They can use YouTube community posts such as polls, ask questions, use GIFs, and interact with the community.
Part 2: How to Make A Community Post on YouTube?
The first question to arise in one’s mind revolves around how to make a community post on YouTube. The community post YouTube helps in interaction with the general public and community. To make community posts YouTube via computer and mobile device, follow the guidelines below in detail.
Community Post YouTube Via Computer
The steps below shall help the reader to make a YouTube community post through the system.
Step 1: Launch YouTube from your browser and log in to your account. Now, click on the “Upload” button located at the top right corner of the screen.

Step 2: Tap on “Create Post” and type the message in the textbox. You can insert an image, GIF, or video as required. Now, pick the type of post.
Step 3: Hit “Post” afterward. The “Community” posts can be accessed from the “Community” tab in your account channel.

Community Post YouTube Via Mobile Phone
To know How to make community posts on YouTube mobile, follow the guidelines below:
Step 1: Launch the YouTube application from your iPhone or Android. Hit the “Create” icon that looks like a video camera located in the top right corner.

Step 2: Click on “Create Post,” add the post to the textbox and upload any required media. Choose the type of post and tap “Post.”
Part 3: How to Get Community Tab on YouTube?
The vital concern to be addressed in this section spins around how to enable a community tab on YouTube. On October 12, 2021, YouTube updated the policy that stated that a channel must have a minimal 500+ subscribers to get community tab YouTube.

Before October, the threshold for subscribers used to be 1000+. Now it has been reduced so that most channels can communicate and engage with the audience. The content creators can access the community tab on YouTube faster by following some pointers and tips.
For once, they can interact with the audience more and find ways to keep them in a loop. It creates a strong community of followers and subscribers. To do so, the account owners can reply to every comment, ask different questions, and pin the best comments. Additionally, you can ask for feedback and opinions in the comment tab to enable the community tab on YouTube.
Ask people their take on a certain stereotype, have a tip from viewers that can be shared with the community, and how they want to see the future. It also makes the community ponder upon the cruel realities of the world and express themselves out loud. You can also make more quality content videos to be a part of the community for good.
Part 4: How to Make Good Use of Community Tab on YouTube?
The users know how to get the community tab on your YouTube channel and how to post community posts on YouTube. It is time to know how to make good use of the community tab on YouTube. Having this knowledge shall help the new and old content creators to use their skills and bring good to the world.
So, without wasting any time, let us begin the process.
Showcase Behind the Scenes and Bloopers
Most viewers crave authenticity more than ever. The regular videos and updates on a channel and scripted and well-crafted, so there is no window for error. However, upload your life updates and BTS scenes from video production to engage the audience and use the community tab to its full potential.
Cross Channel Promotion Process
The community tab helps promote your various vlog or podcasts. It means that you can support new creators in the market and establish a cross-channel promotion network. Engaging with other creators helps the audience know about your community tab YouTube.
Use Teasers and Promos
Using different teasers and promos plays a significant role in developing the well-deserved hype for the show or video. It compels the audience to stay tuned to whatever the channel is bringing to the table. Moreover, the time between working on the video and uploading it can be filled by teasers that promote the upcoming project big time.
Exceptional and Planned Giveaways
Giveaways appear to be a devious plan to lure in the audience. However, if your content is worthy enough to stick around, you don’t need to worry much. Therefore, plan a giveaway and set some rules for it. The circle of interest is widely enhanced using this tactic from the platform of community tab on YouTube.
Hosting Q/A Sessions
Another effective way to use the YouTube community tab to its full potential revolves around hosting a Questions and Answer Session. The general public likes to relate to the bloggers and influencers and know about them. A Q/A session sparks the connection between the two where the viewers ask different personal and professional questions.
It is a huge possibility that you gain new followers, and they stick to the way you communicate and give importance to your subscribers.
Ask for Inspiration and Video
The most common practice of renowned content creators is to engage the audience and ask them for inspiration in the following video. You can ask your subscribers what they want to see you act on and what topic should be covered. Do not hesitate to use polls and gauge interest in general and stereotypical subjects.
Conclusion
YouTube has become a one-stop shop for watching impeccable content and earning through the creation of media. It is vital to know YouTube community guidelines to work better and efficiently.
To create good intros and outros for your YouTube channels, incorporate the usage of Wondershare Filmora . It offers some moving effects and transitions to create a spell-bound impact on the viewers.
Versatile Video Editor - Wondershare Filmora
An easy yet powerful editor
Numerous effects to choose from
Detailed tutorials provided by the official channel
02 How to Make A Community Post on YouTube?
03 How to Get Community Tab on YouTube?
04 How to Make Good Use of Community Tab on YouTube?
Part 1: What is YouTube Community?
Before getting into YouTube community posts, it is crucial to understand what YouTube Community is and how it affects the content creators. The YouTube community is an extensive range of viewers or followers that one needs to grow their channel. Creating a connection with the viewers helps because you have loyal followers; you have got it all.
It is because the trusted followers would go above and beyond to share your content to their social media accounts and give you instant feedback. YouTube community tab works like a charm for creators to engage with the audience. They can use YouTube community posts such as polls, ask questions, use GIFs, and interact with the community.
Part 2: How to Make A Community Post on YouTube?
The first question to arise in one’s mind revolves around how to make a community post on YouTube. The community post YouTube helps in interaction with the general public and community. To make community posts YouTube via computer and mobile device, follow the guidelines below in detail.
Community Post YouTube Via Computer
The steps below shall help the reader to make a YouTube community post through the system.
Step 1: Launch YouTube from your browser and log in to your account. Now, click on the “Upload” button located at the top right corner of the screen.
Step 2: Tap on “Create Post” and type the message in the textbox. You can insert an image, GIF, or video as required. Now, pick the type of post.
Step 3: Hit “Post” afterward. The “Community” posts can be accessed from the “Community” tab in your account channel.
Community Post YouTube Via Mobile Phone
To know How to make community posts on YouTube mobile, follow the guidelines below:
Step 1: Launch the YouTube application from your iPhone or Android. Hit the “Create” icon that looks like a video camera located in the top right corner.
Step 2: Click on “Create Post,” add the post to the textbox and upload any required media. Choose the type of post and tap “Post.”
Part 3: How to Get Community Tab on YouTube?
The vital concern to be addressed in this section spins around how to enable a community tab on YouTube. On October 12, 2021, YouTube updated the policy that stated that a channel must have a minimal 500+ subscribers to get community tab YouTube.
Before October, the threshold for subscribers used to be 1000+. Now it has been reduced so that most channels can communicate and engage with the audience. The content creators can access the community tab on YouTube faster by following some pointers and tips.
For once, they can interact with the audience more and find ways to keep them in a loop. It creates a strong community of followers and subscribers. To do so, the account owners can reply to every comment, ask different questions, and pin the best comments. Additionally, you can ask for feedback and opinions in the comment tab to enable the community tab on YouTube.
Ask people their take on a certain stereotype, have a tip from viewers that can be shared with the community, and how they want to see the future. It also makes the community ponder upon the cruel realities of the world and express themselves out loud. You can also make more quality content videos to be a part of the community for good.
Part 4: How to Make Good Use of Community Tab on YouTube?
The users know how to get the community tab on your YouTube channel and how to post community posts on YouTube. It is time to know how to make good use of the community tab on YouTube. Having this knowledge shall help the new and old content creators to use their skills and bring good to the world.
So, without wasting any time, let us begin the process.
Showcase Behind the Scenes and Bloopers
Most viewers crave authenticity more than ever. The regular videos and updates on a channel and scripted and well-crafted, so there is no window for error. However, upload your life updates and BTS scenes from video production to engage the audience and use the community tab to its full potential.
Cross Channel Promotion Process
The community tab helps promote your various vlog or podcasts. It means that you can support new creators in the market and establish a cross-channel promotion network. Engaging with other creators helps the audience know about your community tab YouTube.
Use Teasers and Promos
Using different teasers and promos plays a significant role in developing the well-deserved hype for the show or video. It compels the audience to stay tuned to whatever the channel is bringing to the table. Moreover, the time between working on the video and uploading it can be filled by teasers that promote the upcoming project big time.
Exceptional and Planned Giveaways
Giveaways appear to be a devious plan to lure in the audience. However, if your content is worthy enough to stick around, you don’t need to worry much. Therefore, plan a giveaway and set some rules for it. The circle of interest is widely enhanced using this tactic from the platform of community tab on YouTube.
Hosting Q/A Sessions
Another effective way to use the YouTube community tab to its full potential revolves around hosting a Questions and Answer Session. The general public likes to relate to the bloggers and influencers and know about them. A Q/A session sparks the connection between the two where the viewers ask different personal and professional questions.
It is a huge possibility that you gain new followers, and they stick to the way you communicate and give importance to your subscribers.
Ask for Inspiration and Video
The most common practice of renowned content creators is to engage the audience and ask them for inspiration in the following video. You can ask your subscribers what they want to see you act on and what topic should be covered. Do not hesitate to use polls and gauge interest in general and stereotypical subjects.
Conclusion
YouTube has become a one-stop shop for watching impeccable content and earning through the creation of media. It is vital to know YouTube community guidelines to work better and efficiently.
To create good intros and outros for your YouTube channels, incorporate the usage of Wondershare Filmora . It offers some moving effects and transitions to create a spell-bound impact on the viewers.
Versatile Video Editor - Wondershare Filmora
An easy yet powerful editor
Numerous effects to choose from
Detailed tutorials provided by the official channel
Also read:
- Enjoy Uninterrupted Viewing Top 20 YouTube Download Apps
- Adapting Shorts Strategy for Multiple Platforms for 2024
- [New] Breaking Down the System Behind Highlighted Video Comments
- Thriving Onscreen Financial Growth in the YouTube Arena
- Master Your Videos with These 10 Top-Rated Trimmers
- Master the Art of Time Stamp Addition for Better Viewership
- [Updated] Does Rapid Subscription Improve Video Watching?
- Effective Team Videos Boosting Channelnode Growth Rate for 2024
- [Updated] Best Microphone for YouTubers
- [Updated] Cutting-Edge Content Summit
- Smooth Cinematography Best Stabilizers Listed
- In 2024, Craft Your Channel Studio or Beta Innovation Comparison
- Transforming Your Videos for IGTV Excellence (3 Methods)
- In 2024, Crafting Captivating Intros on Mobile Platforms
- In 2024, Engage More Viewers Unveiling Top YouTube Font Secrets
- 15 Inspiring YouTube Guides for Aspiring Singers and Instrumentalists
- Unblock Your YouTube Experience Easy Solutions for Chrome/Firefox
- 2024 Approved Analyze YouTube Data Efficiently with Social Blade Tools
- Enjoy Endless Creativity Discover the Best in Cheap, Online Video Downloading for 2024
- [New] Choosing Your Go-To YouTube Video Downloaders on Android Platform
- 2024 Approved Breaking Down the Barriers to Knowing Your Fans
- 2024 Approved Best Cameras for Quality YouTube Content
- In 2024, Chart-Toppers Top 10 YouTube Personalities in Views
- Step-by-Step to Subscription The YouTube Partner Program Route
- From Idea to Internet Fame Becoming a VTuber?
- Transform YouTube Shorts Into Mp4 Files Seamlessly
- Double Your Watch Time on YouTube with These Tips
- [Updated] Dissecting the Safety of Using Subforsup For YouTube Growth
- In 2024, A Visual Journey to Crafting a User-Friendly Subscribe Link
- Navigating Facebook Sharing of YouTube Videos
- 2024 Approved Converting Your Clips Upload to YouTube Via Premiere
- Easy OBS YouTube Live Streaming Guide
- Avoiding Files, Enjoying Animated GIFs YouTube Video Mastery for 2024
- Transform Footage Into Visual Art with YouTube Studio
- In 2024, Dreamy Thumbnails Captivating Borders
- Million Visioners Dissecting the Money Behind the Numbers
- In 2024, Cutting Through the Clutter YouTube's Copyright Evolution
- New The Ultimate Guide to Removing TikTok Watermarks Online
- [New] Innovative Recording Solutions Top 8 Sound Techniques for 2024
- Optimize Your Facebook Video Cover A Guide to Perfect Sizing
- Updated Want to Make a Fun and Cinematic Video with an Introductory Text Title? Learn the Stages of Editing with Filmora for This Effect Here
- Spoofing Life360 How to Do it on Vivo V30? | Dr.fone
- New In 2024, Windows Live Movie Maker Tutorial Splitting Videos Like a Pro
- In 2024, Using AI to Replace Skies Finding the Right Methods
- [Updated] In 2024, Winning at Gaming Memory Capture Essentials on Windows 10
- Ultimate Guide to Eye-Catching After Effects Texture
- [Updated] In 2024, Deep Dive Into Du Recorder's Design and Functionality
- New Audience Approval Acoustic Amplifier
- In 2024, How to Change/Add Location Filters on Snapchat For your Oppo Reno 9A | Dr.fone
- In 2024, Fake Android Location without Rooting For Your Realme 12 5G | Dr.fone
- [Updated] Get Smart Capturing Your Screen in Minutes for 2024
- Title: "[New] Channel Your Creativity Convert YouTube Clips Into Dynamic Gifs"
- Author: Steven
- Created at : 2024-05-25 20:03:48
- Updated at : 2024-05-26 20:03:48
- Link: https://youtube-clips.techidaily.com/new-channel-your-creativity-convert-youtube-clips-into-dynamic-gifs/
- License: This work is licensed under CC BY-NC-SA 4.0.
