
!["[New] Beginner's Ultimate List of Must-Have Video Tech"](https://www.lifewire.com/thmb/BFOZLRPtmY5Iuc2MJZlceiBaqCc=/400x300/filters:no_upscale():max_bytes(150000):strip_icc()/samsung-un65nu7100fxza-aaa-5b3bf3f1c9e77c00370afe54.jpg)
"[New] Beginner's Ultimate List of Must-Have Video Tech"
Beginner’s Ultimate List of Must-Have Video Tech
YouTube Equipment Starter Guide For Beginners

Sumia Rafique
Feb 19, 2024• Proven solutions
If you want to start creating videos and uploading them onto YouTube, you’ll need to have access to some basic equipment. This guide will go over everything you’ll need to be a YouTuber.
Part 1: YOUTUBE EQUIPMENT: CAMERA
The best camera for beginners is the one you already have. Most smartphones these days already come equipped with a powerful camera that can record HD videos. If you still want to add a camera to your equipment list as a beginner YouTuber, you should look for a camera with the following eight qualities:
What To Look For In A Camera As A YouTuber
1. Fully articulated screen (flip screen)
2. Good continual auto focus while recording video
3. Good focus priority through face recognition
4. Touch to focus
5. Good low-light performance
6. external mic jack, hot/cold shoe bracket
7. optical image stabilization
8. good battery life
Check out my full list of 10 Things To Look For In A Vlogging Camera to understand the importance of these camera features.
Best Cheap Vlogging Cameras
Below are the best cheap vlogging cameras that you can get for under $500. They all record at least 1080p HD video and all but the Sony Alpha a5100 come with optical image stabilization (if you want OIS with the Sony a5100, you’ll have it get it in the lens).
| Camera | Release Date | Camera Type | Flip Screen | 4K | Price | |
|---|---|---|---|---|---|---|
| Yi 4KAction Camera | 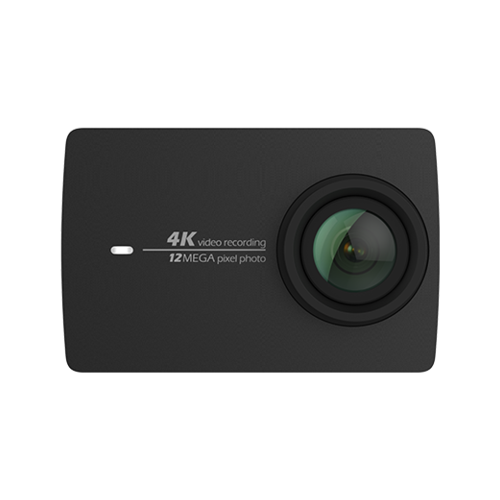 |
February2017 | Action Camera | No | Yes | $169 (MSRP) |
| NikonCoolpixA900 | 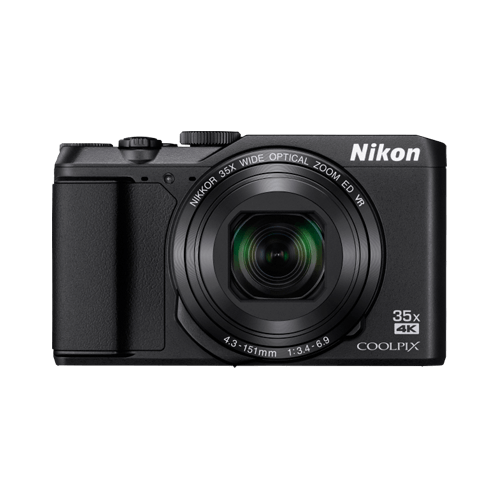 |
February2016 | Compact | Flip Up | Yes | $399 (MSRP) |
| NikonCoolpixB500 | 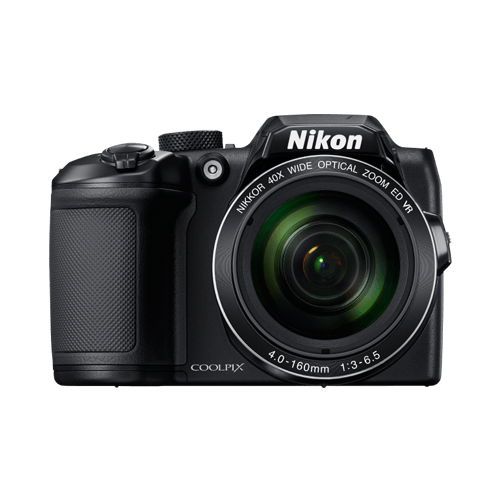 |
February2016 | SLR-like (bridge) | Tilting | No | $250 (MSRP) |
| PolaroidCube+ | 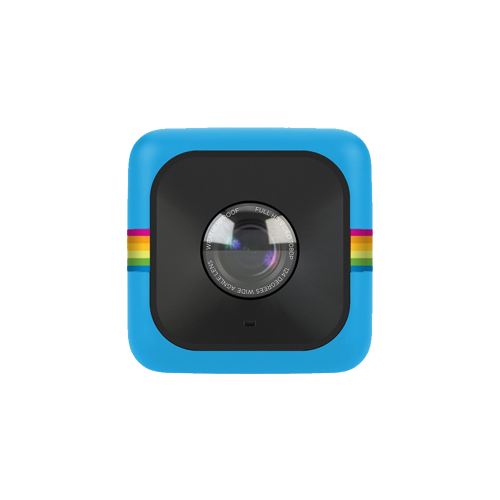 |
June2015 | Action Camera | No | No | $99 (MSRP) |
| SonyAlphaa5100 | 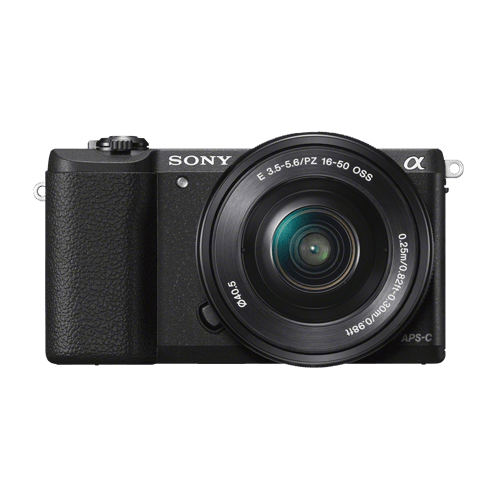 |
August2014 | Mirrorless | Flip Up | No | $450 (MSRP) |
|
Best cheap vlogging camera under $100: Polaroid Cube+ Even before GoPro released their GoPro Session, Polaroid was the first to come out with a 1.4-inch, cube-shaped action camera, small enough to mount on a bike or a helmet. This camera has built-in magnets so that you can attach them to metal surfaces. This action camera is water-resistant, shock-proof, and weather-proof. It can record full HD 1080p videos at 60 fps with its wide-angle lens. You can connect this camera with your phone to preview and take your shots. |
|---|---|
|
Best cheap vlogging camera under $200: Yi 4K At $200, you can record 4K videos with the Yi 4K action camera. Like many other action cameras, this camera is small, durable, and shoots through a wide-angle lens. You won’t be able to take this camera underwater though because it isn’t waterproof. You’ll need to buy the right accessories for that. |
|
Best cheap vlogging camera under $300: Nikon B500 The Nikon B500 gives you a non-interchangeable zoom lens so that you have more control over how you compose your shots. This camera records full HD 1080p videos at either 30 or 25 fps. You can only set its ISO as high as 3200, so it’s not going to perform the best in low-light conditions. The tilting LCD screen does not have touchscreen and cannot be fully flipped up or flipped to the side, it only tilts. For a camera in its price range, the Nikon B500 offers a lot of features. |
|
Best cheap vlogging camera under $400: Nikon A900 The Nikon A900 not only comes with a non-interchangeable zoom lens, but it can also record videos in UHD 4K quality. Like the Nikon B500, the A900’s ISO goes only up to 3200, making it a weak performer in poorly lit conditions. |
|
Best cheap vlogging camera under $500: Sony a5100 Among the cameras listed in our top cheap cameras list, the Sony a5100 is the only one you can interchange lenses with. All Sony E-mount lenses are compatible with this camera. This camera can record up to 1080p videos at 60 fps. Out of all of the above top cheap cameras, this one also auto focuses the best. |
Best Entry-Level and Mid-Range Vlogging Cameras
If you have a bigger budget to work with, the following vlogging cameras are great options:
| Camera | Release Date | Camera Type | Flip Screen | Mic Port | Price | |
|---|---|---|---|---|---|---|
| CanonEOSM50 | 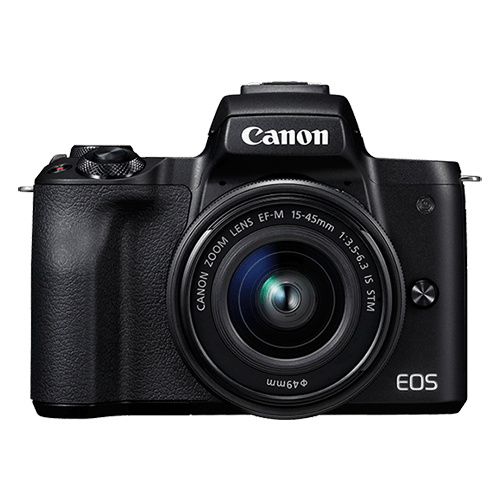 |
February2018 | Mirrorless | Fully Articulated | Yes | $- |
| CanonEOSM100 | 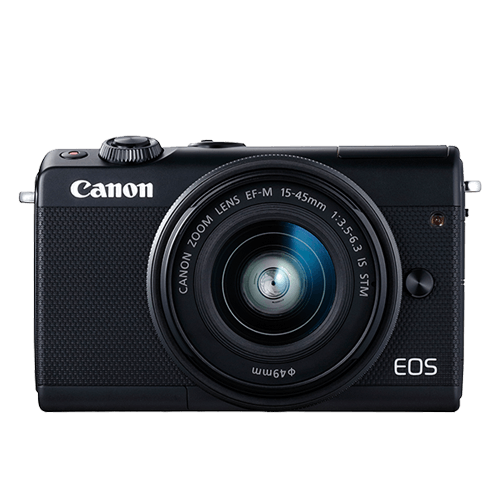 |
August2017 | Mirrorless | Flip Up | No | $ |
| CanonEOS RebelSL2 | 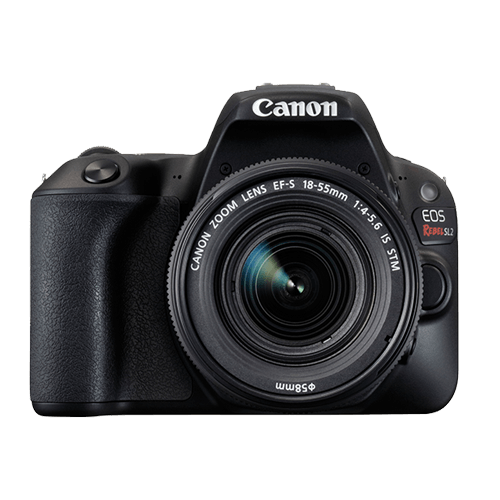 |
June2017 | Compact SLR | Fully Articulated | Yes | $ |
| CanonEOS RebelT7i |  |
February2017 | Mid-size SLR | Fully Articulated | Yes | $- |
| CanonEOS80D | 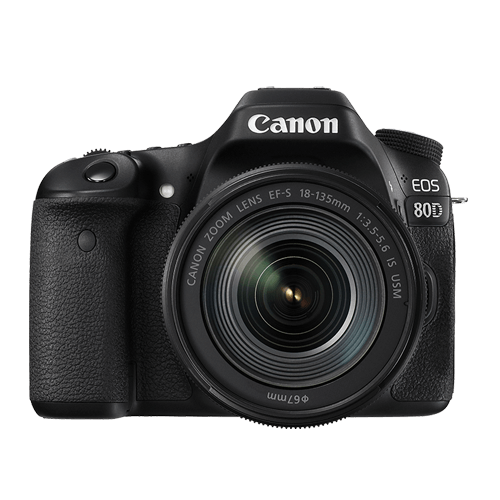 |
February2016 | Mid-size SLR | Fully Articulated | Yes | $$ |
|
Best entry-level mirrorless camera for vlogging: Canon EOS M100 The Canon M100 is a small and powerful camera that can shoot full HD (1080p) videos up to 60 fps. The touchscreen LCD of this camera flips up so that you can see yourself as you vlog in selfie mode. |
|---|---|
|
Best mid-range mirrorless camera for vlogging: Canon EOS M50 The Canon EOS M50 can shoot UHD 4K videos at 23.98 fps. You can also record 120 fps slow-motion videos at 720p. Unlike the M100, which only has a flip up screen, the M50 has a fully articulated screen, so you can use this camera in selfie mode, all while using an on-camera shotgun microphone attached to the camera hot/cold shoe. |
|
Best DSLR camera for daily vlogging: Canon EOS T7i The Canon EOS T7i is a great DSLR camera for daily vlogging. It can record full HD 1080p videos at 60 fps, it can create HDR and time-lapse movies, and it also has a fully articulated screen. |
|
Best entry-level DSLR camera for vlogging: Canon EOS SL2 The Canon EOS SL2 delivers a lot of power at a low price. This DSLR camera can capture full HD 1080p videos at 60 fps. |
|
Best mid-range DSLR camera for vlogging: Canon EOS 80D The Canon 80D is an exceptional mid-range DSLR vlogging camera with many features. Coming with a 45-point all cross phase detection autofocusing and a dual pixel CMOS AF system, the camera is great at finding the right focus while recording video. |
Part 2: YOUTUBE EQUIPMENT: LENS
A lot of compact cameras already come with the lens as a part of the camera body. When it comes to these kinds of cameras, you won’t have to worry about which lens is right for you since the decision has already been made for you!
When you start looking into bigger cameras, though, you’ll have to think about which lens you want to shoot with.
The Wide-Angle Lens
Every YouTuber should have a wide-angle lens. With this kind of lens, you can fit much more of a scene into your camera frame, including your own face when you’re just an arm’s length away from your camera. This is especially important for YouTubers because most YouTubers have to operate their camera on their own, without the assistance of an additional camera person.
Optical Image Stabilization
You should also look for a lens with optical image stabilization if you’re shooting a lot of your YouTube videos handheld.
For more information on camera lenses, check out my Vlogger’s Guide To Camera Lenses .
Part 3: YOUTUBE EQUIPMENT: TRIPOD
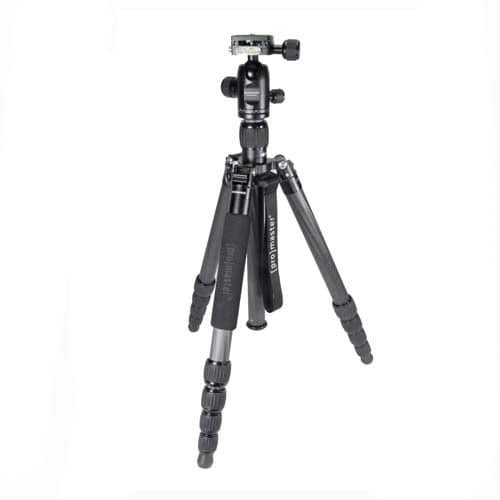 |
Tripod If you plan to film yourself talking in front of the same, unchanging background for an extended period of time, it doesn’t make sense to film yourself handheld the entire time. You’ll just end up tiring your arm out and adding distracting shakiness to your footage. A tripod is a great solution to this problem. You can set up your framing once, press record, and leave your camera in its fixed position while you talk with both hands free. |
|---|---|
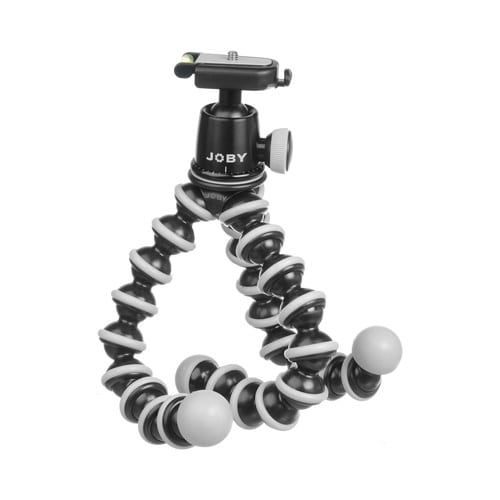 |
Joby GorillaPod With Ballhead When you film yourself handheld, it’s difficult to keep your arm higher up so that your camera shoots down at an ideal angle. You may also notice that a lot of your arm gets into your shot, which you and other viewers might find distracting. Holding your camera up by a GorillaPod, however, can give you the extension you need to get that higher angle shot more easily, all without so much of your arm getting into your shot. |
Part 4: YOUTUBE EQUIPMENT: MICROPHONE
Most vlogging cameras come with a built-in microphone that gets the job done. If you want higher quality audio recordings, though, you should check out the following list of top microphones.
| Top Condenser Mics For Music and Singing | Top Condenser Mics For Voiceovers-Podcasts, Interviews | Top On-Camera Shotgun Mics | Top Shotgun Mics | Top Low-Profile Lavalier Mics |
|---|---|---|---|---|
| Audio-Technica AT2035 Rode NT1-A AKG C214 | Apogee Mic 96K Blue Yeti Rode NT-USB Blue Snowball Audio-Technica AT2020 Rode Procaster | Rode VideoMic Go Shure VP83 Rode VideoMic Pro+ Sennheiser MKE 440 | Rode NTG-3 Audio-Technica AT4053B Sennheiser MKH416 | Rode SmartLav+ Audio-Technica ATR3350iS Sennheiser ME2 |
To read more about each of these microphones, check out our post on The 19 Best YouTube Microphones 2018 – Options for Music, Voiceovers, Vlogging, and more!
Part 5: YOUTUBE EQUIPMENT: SMARTPHONE ACCESSORIES

Using your smartphone’s camera to film your YouTube videos is a great idea since it’s light, portable, and most likely always with you. The following six smartphone accessories can help you make better YouTube videos:
- Arkon Tripod Mount
- FLII Selfie Ring Light
- RODE VideoMic Me
- Aukey Optic 3-in-1 Smartphone Lens Set
- iOgrapher Go for Android and iPhone
- Manfrotto TwistGrip System
Read about each one of these items and more in The 9 Best Smartphone Camera Accessories For Vloggers .
Part 6: YOUTUBE EQUIPMENT: LIGHT
Lighting for home living and lighting for filming is very different. If you try to make use of just the lights you have at home, you may find that your footage is too dark, grainy, and orange-tinted.
The solution to this problem is getting additional video lighting equipment with daytime light bulbs.
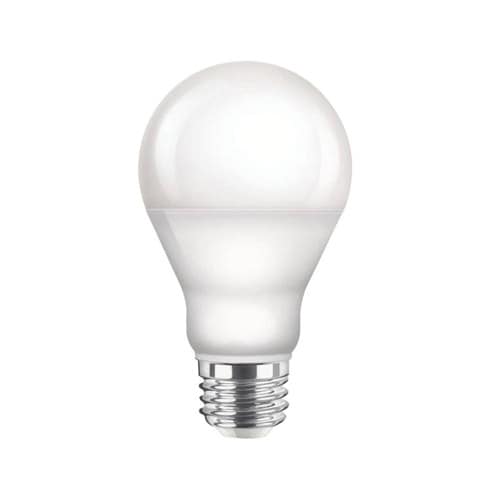 |
Daytime Light Bulbs Your home is most likely lit with incandescent light bulbs that illuminate orange-tinted light. You can remove those light bulbs and replace them with daytime light bulbs that illuminate more of a white colored light. |
|---|---|
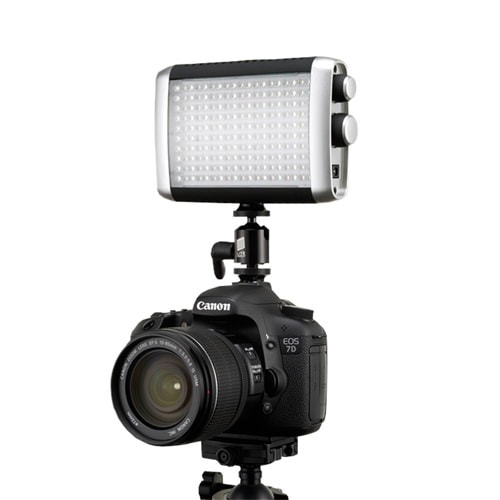 |
On-Camera LED Light If you need more light just in front of the camera and you need this light to be portable, LED lights that attach to your camera’s hot/cold shoe will do the job. |
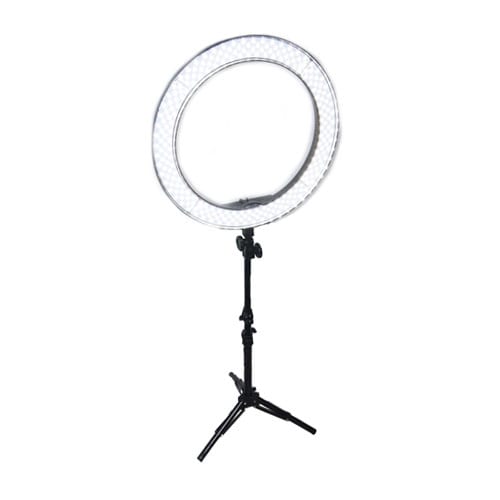 |
LED Ring Light If you need more light just in front of the camera, you don’t have a lot of space, and you don’t need this light to be small and portable, an LED ring light is the best piece of equipment for you. You can position your camera inside the circular space of the ring light. This kind of light also gives your eyes the circular shaped highlight that many people like to see. |
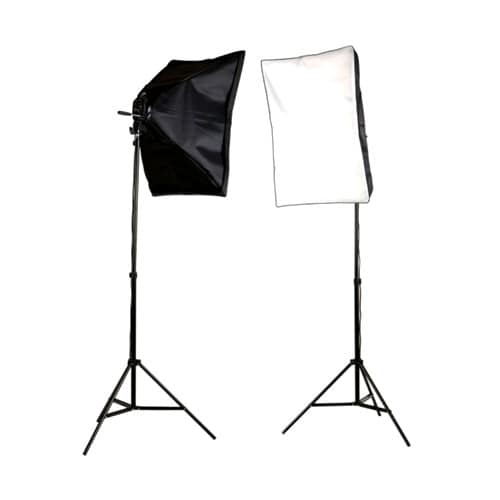 |
Softbox Video Light If you need more light and have more space, another piece of lighting equipment good for beginners is a softbox video light. |
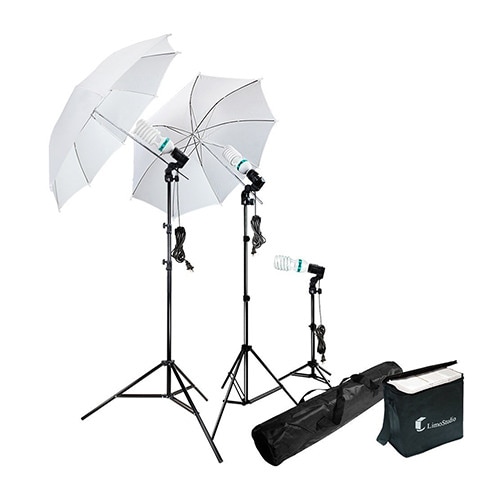 |
Umbrella Video Light Umbrella video lights are very portable and affordable. The direction of the light from umbrella lights are more difficult to control than the light from softbox video lights. |
If you’re looking for recommendations on which piece of lighting equipment to buy, check out my list of the Top 17 Video Lighting Equipment For YouTubers .
Part 7: YOUTUBE EQUIPMENT: COMPUTER
After you’ve recorded all your footage, you’ll need a computer to edit your video clips together. You can perform basic video editing tasks and upload your video onto YouTube with any computer less than ten years old.
Laptop computers are popular among YouTubers because their portability allows you to work on your videos from anywhere. This way, you can finish and upload your videos more frequently, which is another important part of being a YouTuber.
The following three laptop computers handle video editing very well:
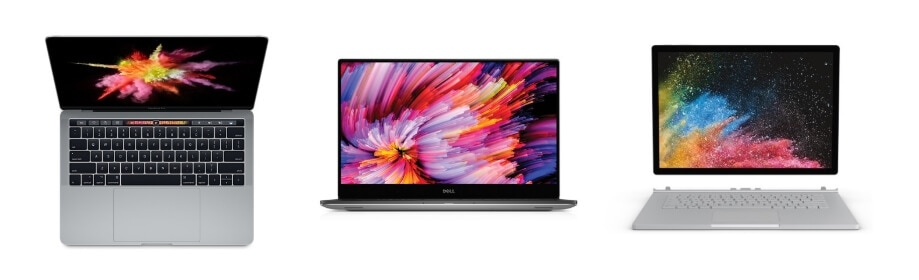
- MacBook Pro With Touch Bar
- Dell XPS 15
- Microsoft Surface Book 2
Read more about these laptop computers for 4K video editing in The Best Laptops for 4K Video Editing .
Part 8: YOUTUBE EQUIPMENT: VIDEO EDITING SOFTWARE


| FREE VIDEO EDITING SOFTWARES | PAID VIDEO EDITING SOFTWARES |
|---|---|
| OpenShot Video Editor (Windows, Mac, Linux) ShotCut (Windows, Mac, Linux) Hitfilm Express (Windows, Mac) VideoPad Video Editor (Windows) Lightworks (Windows, Mac, Linux) VSDC Video Editor (Windows) Machete Video Editor Lite (Windows) Avidemux (Windows, Mac, Linux, BSD) Read more about each of these softwares in our post about The Best Free Video Editing Software for YouTube . | Filmora Video Editor (Windows, Mac) - $40 one year license, $79.99 perpetual license. Free trial Final Cut Pro (Mac) - $299.99, Free trial Vegas Movie Studio (Windows) - $49.99 |
YOUTUBE EQUIPMENT: AUDIO
Music Libraries
Music is an important part of YouTube video creation. Here’s where you can get access to music:
| ROYALTY-FREE MUSIC LIBRARIES | PAID MUSIC LIBRARIES | PAID SUBSCRIPTION MUSIC LIBRARIES |
|---|---|---|
| Audionautix Bensound dig.ccMixter Free Music Archive Free Stock Music Incompetech Josh Woodward Moby Gratis Musopen Purple Planet Music TeknoAXE YouTube Audio Library | Premium Beat Audio Jungle | Audio Network Audio Blocks Epidemic Sound |
Sound Effects
Free Sound Effect Sites
- Filmstock Sound Effects
- Freesound
- PacDV
- Sound Bible
- Sound Gator
- Sounds Crate
- Zapsplat
Sumia Rafique
Sumia Rafique is a writer and a lover of all things video.
Follow @Sumia Rafique
Sumia Rafique
Feb 19, 2024• Proven solutions
If you want to start creating videos and uploading them onto YouTube, you’ll need to have access to some basic equipment. This guide will go over everything you’ll need to be a YouTuber.
Part 1: YOUTUBE EQUIPMENT: CAMERA
The best camera for beginners is the one you already have. Most smartphones these days already come equipped with a powerful camera that can record HD videos. If you still want to add a camera to your equipment list as a beginner YouTuber, you should look for a camera with the following eight qualities:
What To Look For In A Camera As A YouTuber
1. Fully articulated screen (flip screen)
2. Good continual auto focus while recording video
3. Good focus priority through face recognition
4. Touch to focus
5. Good low-light performance
6. external mic jack, hot/cold shoe bracket
7. optical image stabilization
8. good battery life
Check out my full list of 10 Things To Look For In A Vlogging Camera to understand the importance of these camera features.
Best Cheap Vlogging Cameras
Below are the best cheap vlogging cameras that you can get for under $500. They all record at least 1080p HD video and all but the Sony Alpha a5100 come with optical image stabilization (if you want OIS with the Sony a5100, you’ll have it get it in the lens).
| Camera | Release Date | Camera Type | Flip Screen | 4K | Price | |
|---|---|---|---|---|---|---|
| Yi 4KAction Camera | |
February2017 | Action Camera | No | Yes | $169 (MSRP) |
| NikonCoolpixA900 | |
February2016 | Compact | Flip Up | Yes | $399 (MSRP) |
| NikonCoolpixB500 | |
February2016 | SLR-like (bridge) | Tilting | No | $250 (MSRP) |
| PolaroidCube+ | |
June2015 | Action Camera | No | No | $99 (MSRP) |
| SonyAlphaa5100 | |
August2014 | Mirrorless | Flip Up | No | $450 (MSRP) |
|
Best cheap vlogging camera under $100: Polaroid Cube+ Even before GoPro released their GoPro Session, Polaroid was the first to come out with a 1.4-inch, cube-shaped action camera, small enough to mount on a bike or a helmet. This camera has built-in magnets so that you can attach them to metal surfaces. This action camera is water-resistant, shock-proof, and weather-proof. It can record full HD 1080p videos at 60 fps with its wide-angle lens. You can connect this camera with your phone to preview and take your shots. |
|---|---|
|
Best cheap vlogging camera under $200: Yi 4K At $200, you can record 4K videos with the Yi 4K action camera. Like many other action cameras, this camera is small, durable, and shoots through a wide-angle lens. You won’t be able to take this camera underwater though because it isn’t waterproof. You’ll need to buy the right accessories for that. |
|
Best cheap vlogging camera under $300: Nikon B500 The Nikon B500 gives you a non-interchangeable zoom lens so that you have more control over how you compose your shots. This camera records full HD 1080p videos at either 30 or 25 fps. You can only set its ISO as high as 3200, so it’s not going to perform the best in low-light conditions. The tilting LCD screen does not have touchscreen and cannot be fully flipped up or flipped to the side, it only tilts. For a camera in its price range, the Nikon B500 offers a lot of features. |
|
Best cheap vlogging camera under $400: Nikon A900 The Nikon A900 not only comes with a non-interchangeable zoom lens, but it can also record videos in UHD 4K quality. Like the Nikon B500, the A900’s ISO goes only up to 3200, making it a weak performer in poorly lit conditions. |
|
Best cheap vlogging camera under $500: Sony a5100 Among the cameras listed in our top cheap cameras list, the Sony a5100 is the only one you can interchange lenses with. All Sony E-mount lenses are compatible with this camera. This camera can record up to 1080p videos at 60 fps. Out of all of the above top cheap cameras, this one also auto focuses the best. |
Best Entry-Level and Mid-Range Vlogging Cameras
If you have a bigger budget to work with, the following vlogging cameras are great options:
| Camera | Release Date | Camera Type | Flip Screen | Mic Port | Price | |
|---|---|---|---|---|---|---|
| CanonEOSM50 | |
February2018 | Mirrorless | Fully Articulated | Yes | $- |
| CanonEOSM100 | |
August2017 | Mirrorless | Flip Up | No | $ |
| CanonEOS RebelSL2 | |
June2017 | Compact SLR | Fully Articulated | Yes | $ |
| CanonEOS RebelT7i | |
February2017 | Mid-size SLR | Fully Articulated | Yes | $- |
| CanonEOS80D | |
February2016 | Mid-size SLR | Fully Articulated | Yes | $$ |
|
Best entry-level mirrorless camera for vlogging: Canon EOS M100 The Canon M100 is a small and powerful camera that can shoot full HD (1080p) videos up to 60 fps. The touchscreen LCD of this camera flips up so that you can see yourself as you vlog in selfie mode. |
|---|---|
|
Best mid-range mirrorless camera for vlogging: Canon EOS M50 The Canon EOS M50 can shoot UHD 4K videos at 23.98 fps. You can also record 120 fps slow-motion videos at 720p. Unlike the M100, which only has a flip up screen, the M50 has a fully articulated screen, so you can use this camera in selfie mode, all while using an on-camera shotgun microphone attached to the camera hot/cold shoe. |
|
Best DSLR camera for daily vlogging: Canon EOS T7i The Canon EOS T7i is a great DSLR camera for daily vlogging. It can record full HD 1080p videos at 60 fps, it can create HDR and time-lapse movies, and it also has a fully articulated screen. |
|
Best entry-level DSLR camera for vlogging: Canon EOS SL2 The Canon EOS SL2 delivers a lot of power at a low price. This DSLR camera can capture full HD 1080p videos at 60 fps. |
|
Best mid-range DSLR camera for vlogging: Canon EOS 80D The Canon 80D is an exceptional mid-range DSLR vlogging camera with many features. Coming with a 45-point all cross phase detection autofocusing and a dual pixel CMOS AF system, the camera is great at finding the right focus while recording video. |
Part 2: YOUTUBE EQUIPMENT: LENS
A lot of compact cameras already come with the lens as a part of the camera body. When it comes to these kinds of cameras, you won’t have to worry about which lens is right for you since the decision has already been made for you!
When you start looking into bigger cameras, though, you’ll have to think about which lens you want to shoot with.
The Wide-Angle Lens
Every YouTuber should have a wide-angle lens. With this kind of lens, you can fit much more of a scene into your camera frame, including your own face when you’re just an arm’s length away from your camera. This is especially important for YouTubers because most YouTubers have to operate their camera on their own, without the assistance of an additional camera person.
Optical Image Stabilization
You should also look for a lens with optical image stabilization if you’re shooting a lot of your YouTube videos handheld.
For more information on camera lenses, check out my Vlogger’s Guide To Camera Lenses .
Part 3: YOUTUBE EQUIPMENT: TRIPOD
|
Tripod If you plan to film yourself talking in front of the same, unchanging background for an extended period of time, it doesn’t make sense to film yourself handheld the entire time. You’ll just end up tiring your arm out and adding distracting shakiness to your footage. A tripod is a great solution to this problem. You can set up your framing once, press record, and leave your camera in its fixed position while you talk with both hands free. |
|---|---|
|
Joby GorillaPod With Ballhead When you film yourself handheld, it’s difficult to keep your arm higher up so that your camera shoots down at an ideal angle. You may also notice that a lot of your arm gets into your shot, which you and other viewers might find distracting. Holding your camera up by a GorillaPod, however, can give you the extension you need to get that higher angle shot more easily, all without so much of your arm getting into your shot. |
Part 4: YOUTUBE EQUIPMENT: MICROPHONE
Most vlogging cameras come with a built-in microphone that gets the job done. If you want higher quality audio recordings, though, you should check out the following list of top microphones.
| Top Condenser Mics For Music and Singing | Top Condenser Mics For Voiceovers-Podcasts, Interviews | Top On-Camera Shotgun Mics | Top Shotgun Mics | Top Low-Profile Lavalier Mics |
|---|---|---|---|---|
| Audio-Technica AT2035 Rode NT1-A AKG C214 | Apogee Mic 96K Blue Yeti Rode NT-USB Blue Snowball Audio-Technica AT2020 Rode Procaster | Rode VideoMic Go Shure VP83 Rode VideoMic Pro+ Sennheiser MKE 440 | Rode NTG-3 Audio-Technica AT4053B Sennheiser MKH416 | Rode SmartLav+ Audio-Technica ATR3350iS Sennheiser ME2 |
To read more about each of these microphones, check out our post on The 19 Best YouTube Microphones 2018 – Options for Music, Voiceovers, Vlogging, and more!
Part 5: YOUTUBE EQUIPMENT: SMARTPHONE ACCESSORIES
Using your smartphone’s camera to film your YouTube videos is a great idea since it’s light, portable, and most likely always with you. The following six smartphone accessories can help you make better YouTube videos:
- Arkon Tripod Mount
- FLII Selfie Ring Light
- RODE VideoMic Me
- Aukey Optic 3-in-1 Smartphone Lens Set
- iOgrapher Go for Android and iPhone
- Manfrotto TwistGrip System
Read about each one of these items and more in The 9 Best Smartphone Camera Accessories For Vloggers .
Part 6: YOUTUBE EQUIPMENT: LIGHT
Lighting for home living and lighting for filming is very different. If you try to make use of just the lights you have at home, you may find that your footage is too dark, grainy, and orange-tinted.
The solution to this problem is getting additional video lighting equipment with daytime light bulbs.
|
Daytime Light Bulbs Your home is most likely lit with incandescent light bulbs that illuminate orange-tinted light. You can remove those light bulbs and replace them with daytime light bulbs that illuminate more of a white colored light. |
|---|---|
|
On-Camera LED Light If you need more light just in front of the camera and you need this light to be portable, LED lights that attach to your camera’s hot/cold shoe will do the job. |
|
LED Ring Light If you need more light just in front of the camera, you don’t have a lot of space, and you don’t need this light to be small and portable, an LED ring light is the best piece of equipment for you. You can position your camera inside the circular space of the ring light. This kind of light also gives your eyes the circular shaped highlight that many people like to see. |
|
Softbox Video Light If you need more light and have more space, another piece of lighting equipment good for beginners is a softbox video light. |
|
Umbrella Video Light Umbrella video lights are very portable and affordable. The direction of the light from umbrella lights are more difficult to control than the light from softbox video lights. |
If you’re looking for recommendations on which piece of lighting equipment to buy, check out my list of the Top 17 Video Lighting Equipment For YouTubers .
Part 7: YOUTUBE EQUIPMENT: COMPUTER
After you’ve recorded all your footage, you’ll need a computer to edit your video clips together. You can perform basic video editing tasks and upload your video onto YouTube with any computer less than ten years old.
Laptop computers are popular among YouTubers because their portability allows you to work on your videos from anywhere. This way, you can finish and upload your videos more frequently, which is another important part of being a YouTuber.
The following three laptop computers handle video editing very well:
- MacBook Pro With Touch Bar
- Dell XPS 15
- Microsoft Surface Book 2
Read more about these laptop computers for 4K video editing in The Best Laptops for 4K Video Editing .
Part 8: YOUTUBE EQUIPMENT: VIDEO EDITING SOFTWARE
| FREE VIDEO EDITING SOFTWARES | PAID VIDEO EDITING SOFTWARES |
|---|---|
| OpenShot Video Editor (Windows, Mac, Linux) ShotCut (Windows, Mac, Linux) Hitfilm Express (Windows, Mac) VideoPad Video Editor (Windows) Lightworks (Windows, Mac, Linux) VSDC Video Editor (Windows) Machete Video Editor Lite (Windows) Avidemux (Windows, Mac, Linux, BSD) Read more about each of these softwares in our post about The Best Free Video Editing Software for YouTube . | Filmora Video Editor (Windows, Mac) - $40 one year license, $79.99 perpetual license. Free trial Final Cut Pro (Mac) - $299.99, Free trial Vegas Movie Studio (Windows) - $49.99 |
YOUTUBE EQUIPMENT: AUDIO
Music Libraries
Music is an important part of YouTube video creation. Here’s where you can get access to music:
| ROYALTY-FREE MUSIC LIBRARIES | PAID MUSIC LIBRARIES | PAID SUBSCRIPTION MUSIC LIBRARIES |
|---|---|---|
| Audionautix Bensound dig.ccMixter Free Music Archive Free Stock Music Incompetech Josh Woodward Moby Gratis Musopen Purple Planet Music TeknoAXE YouTube Audio Library | Premium Beat Audio Jungle | Audio Network Audio Blocks Epidemic Sound |
Sound Effects
Free Sound Effect Sites
- Filmstock Sound Effects
- Freesound
- PacDV
- Sound Bible
- Sound Gator
- Sounds Crate
- Zapsplat
Sumia Rafique
Sumia Rafique is a writer and a lover of all things video.
Follow @Sumia Rafique
Advanced Techniques for YouTube Shorts and Mp4 Exportation
Create Your YouTube Shorts with Wondershare Filmora
An easy and powerful YouTube Shorts editor
Numerous video and audio effects to choose from
Detailed tutorials provided by the official channel
Video production entails a lot more than just composing and sharing your videos. You need the correct format to accomplish some tasks, especially when sharing them online. People use different devices and versions that are not automatically compatible with all video file formats. YouTube Shorts is one such video production platform that lets creators compose compelling short videos for sharing with their audience. More so, Shorts lets you record music, edit your video and get it ready for sharing. But not all roses are smooth, some are thorny and you may find it necessary to convert YouTube Shorts to MP4 to enable access by your audience.
In this article
01 Why do we need to download and convert YouTube Shorts video?
02 How can we convert YouTube shorts to mp4?
03 Tutorial for How to Record on GarageBand
Why do we need to download and convert YouTube Shorts video?
Most YouTube Shorts are not easily accessible on mobile devices. Occasionally, users experience YouTube Shorts not showing issue , which prompts them to look for solutions for resolving the problem. You might be wondering whether converting your files is one such solution. Ideally yes! Find below, possible reasons for downloading and converting YouTube Shorts to MP4.
1) Content optimization for other devices
Mobile technology keeps changing and various devices’ versions are continually on the rise. Some devices aren’t compatible with various video formats and codecs . Converting the videos to MP4 opens avenues for access on any device and platform like emails. This is because MP4 files are supported by almost all modern devices and you can optimize videos for operating systems like Android, iOS, Windows, etc.
2) Compression
YouTube Shorts are designed to run for about 15 seconds. This is an indication that they are not fully compressed in terms of codec. Converting the files to MP4 format ensures that the file size is reduced, enabling playing on any platform without buffering. Luckily, there is no quality loss but it’s just the size is made smaller to fit any device.
3) To support animated GIFs
Animated GIFs add value to your videos. However, social media does not support GIFs among other formats. To keep the fun going, you will need to convert your video to accommodate formats like GIFs, among others.
4) Portability
Another reason to get YouTube shorts to MP4 is for portability issues. Since MP4 are highly accessible on numerous devices and platforms, you can easily import your files via USB flash drive and other external hard disks to other devices. With this, there is also no hindrance in sharing your files online and on other platforms.
5) Lossless quality
MP4 file format supports a high degree of lossless output quality as compared to other file formats. MP4 is highly preferred so that the recipient achieves the original output quality of the converted file. With MP4, you can also retain other parameters like title, sample rate, and channel among others.
How can we convert YouTube shorts to mp4?
The importance of converting videos to MP4 format is weighty. But how do you convert YouTube Shorts to MP4? Plenty of apps are available for easy conversion. Both free, paid, and online converter apps can serve the purpose. Let’s check how to convert your files for free with the Freemake app, via an online app, and using the reliable tool, Filmora.
1. Convert YouTube Shorts video to MP4 with Freemake
This is an easy-to-use converter that you use freely to trim your videos as well as convert them to various formats. The drawbacks are that it leaves a watermark on your videos and will bundle you with extra software for installation with its free version. You, however, can evade this if you upgrade to the Premium version.

Step 1. Download Freemake
First, use any browser to download the Freemake app on your computer. Then choose custom installation. You also have the chance to deselect popping optional applications that present themselves for installation.
Step 2. Launch the app
Then open the app and click on the “+” video button. Next, navigate to the video that you wish to convert from YouTube Shorts.
Step 3. Choose the MP4 file
From the list of files, choose to convert your files to MP4 file format. Also, choose a name and location to save your converted video.
Step 4. Convert your video
Finally, click on the “Convert” tab to start the conversion process of your video. You can also make other changes like customizing the output parameters such as codec and resolution to your preferences. Once done, hit the “OK” button to complete the process.
2. 2) Convert YouTube Shorts to MP4 online
Easily engage an online tool to convert YouTube shorts to MP4 popular format with CloudConvert MP4 converter. Besides MP4, this app supports over 200 file formats like WEBM, AVI, MOV, among other formats. More so, you can use the options to control your video resolution and quality. When you convert your video to MP4, you can now easily share your videos over the internet, and converting it online gives you an upper hand. CloudConvert is trusted for data security as it won’t keep any files on its database. It will also give you high-quality file conversions.
Step 1. Select file
First, choose the YouTube Short video that you wish to convert to MP4. You can add your file from your computer or online sources like YouTube into the converter.

Step 2. Customize settings
CloudConvert lets you customize the output settings like video codec, bitrate, resolution, and file format. Just click on the drop-down arrow on every section and choose your preferences. Then hit the “Okay” button at the bottom-right corner of the screen.
Step 3. Convert file to MP4
Wait for the YouTube Shorts to be converted to MP4 format. You can then save your files to your computer and share them with friends via other social media apps like Instagram and Facebook. You can also directly post to Shorts as MP4 files.

3) Convert YouTube video to MP4 using Filmora
Using a free video converter like Freemake will leave a watermark on your videos and hinder the quality. You will not also get lossless quality as the original content on YouTube Shorts. In this case, you can engage the best video converter, Filmora, to losslessly convert your videos to quality output.
Key Features of Filmora
- Create high-quality as it gives you lossless content.
- Transform your video into spectacular output with overlays and filters.
- Add background music for optimum entertainment.
- Change your video background with the special effects from the Chroma key tool.
- Advanced editing of text by color, size, font, and animation among other features.
For Win 7 or later (64-bit)
For macOS 10.12 or later
How to convert YouTube Shorts to MP4 with Filmora
Filmora is easy to use and will accommodate both professional and beginner video editors. Follow these steps to convert YouTube Shorts to MP4.
Step 1. Import video clip to Filmora
You can use any device for the conversion process. Filmora supports an array of OS devices like iOS, Android, etc. First, launch the app on your device then click on the “Import Media Files” option.

Step 2. Organize footage
The next step is to drag and drop your video footage to the timeline. Filmora accommodates the merging of several video footages. You can make your videos into one big file. Just organize them according to how you want.
Step 3. Edit your video
Even though this is optional, you can edit your video to add more juice. These include splitting your video via the Splitter button. You can also delete unwanted areas and even add filters and other effects to your preferences.

Step 4. Convert and Export
When you are certain you have the perfect video, click on the “Export” tab to convert your files to MP4 format. Remember to set the final output to MP4 format among the available output options. Then freely play your video on any device and share it with friends on other platforms. There’ll be no hindrance anymore concerning compatibility issues.

Conclusion
You are not limited to using any video file format. Several reasons may also compel you to convert YouTube Shorts to MP4. And this is the best move if you want to reach as many audiences as possible. Remember that users employ different devices and platforms to access such videos. These range from mobile phones, media players, emails, among others. Converting your videos to MP4 enables easy sharing on any platform effortlessly. The best converter tool, Filmora, serves the purpose quite well. You won’t experience any data loss and be assured that your audience gets the same quality as the original file.
Video production entails a lot more than just composing and sharing your videos. You need the correct format to accomplish some tasks, especially when sharing them online. People use different devices and versions that are not automatically compatible with all video file formats. YouTube Shorts is one such video production platform that lets creators compose compelling short videos for sharing with their audience. More so, Shorts lets you record music, edit your video and get it ready for sharing. But not all roses are smooth, some are thorny and you may find it necessary to convert YouTube Shorts to MP4 to enable access by your audience.
In this article
01 Why do we need to download and convert YouTube Shorts video?
02 How can we convert YouTube shorts to mp4?
03 Tutorial for How to Record on GarageBand
Why do we need to download and convert YouTube Shorts video?
Most YouTube Shorts are not easily accessible on mobile devices. Occasionally, users experience YouTube Shorts not showing issue , which prompts them to look for solutions for resolving the problem. You might be wondering whether converting your files is one such solution. Ideally yes! Find below, possible reasons for downloading and converting YouTube Shorts to MP4.
1) Content optimization for other devices
Mobile technology keeps changing and various devices’ versions are continually on the rise. Some devices aren’t compatible with various video formats and codecs . Converting the videos to MP4 opens avenues for access on any device and platform like emails. This is because MP4 files are supported by almost all modern devices and you can optimize videos for operating systems like Android, iOS, Windows, etc.
2) Compression
YouTube Shorts are designed to run for about 15 seconds. This is an indication that they are not fully compressed in terms of codec. Converting the files to MP4 format ensures that the file size is reduced, enabling playing on any platform without buffering. Luckily, there is no quality loss but it’s just the size is made smaller to fit any device.
3) To support animated GIFs
Animated GIFs add value to your videos. However, social media does not support GIFs among other formats. To keep the fun going, you will need to convert your video to accommodate formats like GIFs, among others.
4) Portability
Another reason to get YouTube shorts to MP4 is for portability issues. Since MP4 are highly accessible on numerous devices and platforms, you can easily import your files via USB flash drive and other external hard disks to other devices. With this, there is also no hindrance in sharing your files online and on other platforms.
5) Lossless quality
MP4 file format supports a high degree of lossless output quality as compared to other file formats. MP4 is highly preferred so that the recipient achieves the original output quality of the converted file. With MP4, you can also retain other parameters like title, sample rate, and channel among others.
How can we convert YouTube shorts to mp4?
The importance of converting videos to MP4 format is weighty. But how do you convert YouTube Shorts to MP4? Plenty of apps are available for easy conversion. Both free, paid, and online converter apps can serve the purpose. Let’s check how to convert your files for free with the Freemake app, via an online app, and using the reliable tool, Filmora.
1. Convert YouTube Shorts video to MP4 with Freemake
This is an easy-to-use converter that you use freely to trim your videos as well as convert them to various formats. The drawbacks are that it leaves a watermark on your videos and will bundle you with extra software for installation with its free version. You, however, can evade this if you upgrade to the Premium version.
Step 1. Download Freemake
First, use any browser to download the Freemake app on your computer. Then choose custom installation. You also have the chance to deselect popping optional applications that present themselves for installation.
Step 2. Launch the app
Then open the app and click on the “+” video button. Next, navigate to the video that you wish to convert from YouTube Shorts.
Step 3. Choose the MP4 file
From the list of files, choose to convert your files to MP4 file format. Also, choose a name and location to save your converted video.
Step 4. Convert your video
Finally, click on the “Convert” tab to start the conversion process of your video. You can also make other changes like customizing the output parameters such as codec and resolution to your preferences. Once done, hit the “OK” button to complete the process.
2. 2) Convert YouTube Shorts to MP4 online
Easily engage an online tool to convert YouTube shorts to MP4 popular format with CloudConvert MP4 converter. Besides MP4, this app supports over 200 file formats like WEBM, AVI, MOV, among other formats. More so, you can use the options to control your video resolution and quality. When you convert your video to MP4, you can now easily share your videos over the internet, and converting it online gives you an upper hand. CloudConvert is trusted for data security as it won’t keep any files on its database. It will also give you high-quality file conversions.
Step 1. Select file
First, choose the YouTube Short video that you wish to convert to MP4. You can add your file from your computer or online sources like YouTube into the converter.
Step 2. Customize settings
CloudConvert lets you customize the output settings like video codec, bitrate, resolution, and file format. Just click on the drop-down arrow on every section and choose your preferences. Then hit the “Okay” button at the bottom-right corner of the screen.
Step 3. Convert file to MP4
Wait for the YouTube Shorts to be converted to MP4 format. You can then save your files to your computer and share them with friends via other social media apps like Instagram and Facebook. You can also directly post to Shorts as MP4 files.
3) Convert YouTube video to MP4 using Filmora
Using a free video converter like Freemake will leave a watermark on your videos and hinder the quality. You will not also get lossless quality as the original content on YouTube Shorts. In this case, you can engage the best video converter, Filmora, to losslessly convert your videos to quality output.
Key Features of Filmora
- Create high-quality as it gives you lossless content.
- Transform your video into spectacular output with overlays and filters.
- Add background music for optimum entertainment.
- Change your video background with the special effects from the Chroma key tool.
- Advanced editing of text by color, size, font, and animation among other features.
For Win 7 or later (64-bit)
For macOS 10.12 or later
How to convert YouTube Shorts to MP4 with Filmora
Filmora is easy to use and will accommodate both professional and beginner video editors. Follow these steps to convert YouTube Shorts to MP4.
Step 1. Import video clip to Filmora
You can use any device for the conversion process. Filmora supports an array of OS devices like iOS, Android, etc. First, launch the app on your device then click on the “Import Media Files” option.
Step 2. Organize footage
The next step is to drag and drop your video footage to the timeline. Filmora accommodates the merging of several video footages. You can make your videos into one big file. Just organize them according to how you want.
Step 3. Edit your video
Even though this is optional, you can edit your video to add more juice. These include splitting your video via the Splitter button. You can also delete unwanted areas and even add filters and other effects to your preferences.
Step 4. Convert and Export
When you are certain you have the perfect video, click on the “Export” tab to convert your files to MP4 format. Remember to set the final output to MP4 format among the available output options. Then freely play your video on any device and share it with friends on other platforms. There’ll be no hindrance anymore concerning compatibility issues.
Conclusion
You are not limited to using any video file format. Several reasons may also compel you to convert YouTube Shorts to MP4. And this is the best move if you want to reach as many audiences as possible. Remember that users employ different devices and platforms to access such videos. These range from mobile phones, media players, emails, among others. Converting your videos to MP4 enables easy sharing on any platform effortlessly. The best converter tool, Filmora, serves the purpose quite well. You won’t experience any data loss and be assured that your audience gets the same quality as the original file.
Also read:
- [Updated] Crafting a Revenue-Driven Approach to YouTube Content Creation
- Adapting Your Favorite Songs From Spotify to YouTube Music Service
- In 2024, Discovering the Stars of YouTube's Best Music Videos, 2023
- Step Into Successful Online Broadcasting Top YouTube Webcam Choices
- [New] Channel Visuals Hub Icon & Banner Crafting Tips
- Mastering YouTube Legalities A Comprehensive Overview
- Monetizing CarryMinati Journey to 2023 Income
- Epic Editing Illusions YouTube Edition for 2024
- Insights Into YouTube Shorts Business Model
- Scale Up Influence Crafting Content That Resonates
- Unveiling YouTube's Behind-the-Scenes Editor Space
- Step-by-Step Approach Fine-Tuning Your YouTube Videos' Dimensions & Sizes
- Embracing Resilience Against Online Detractors
- [Updated] Accelerate Thumbnail Designs for Professional Valorant Portraits
- [New] Elevate Your YouTube Presence with Custom Animated Subscription Buttons in Filmora
- In-Depth How Vimeo Stacks Up Against YouTube
- 2024 Approved Achieve Financial Success with YouTube Ad Profit Techniques
- A Step-by-Step Approach to Discard YouTube Watch Later Items for 2024
- Aspect Ratios for Stellar Youtube Thumbnails
- [New] Creating Memorable YouTube Shorts - 10 Must-Do Tips
- Guidelines for Optimal YouTube Video Brightness
- [New] Channel Your Creativity Convert YouTube Clips Into Dynamic Gifs
- Optimizing Your Content Aspect Ratios Explained for YouTube Users
- YouTube Soundwaves Flow Into iMovie Effortlessly
- Learning with Legends Top History YouTube Content for Learners
- Emotionally-Enhanced YouTube Commentary for 2024
- Stepping Up Your Game Understanding MCNs and Their Impact on Creators
- From Unconfident to Impactful Embracing YouTube Blogging
- Essential Insights How to Choose Among the Top 9 Free YouTube Makers for 2024
- In 2024, Comprehensible Guide to High-Quality Audios on YouTube
- In 2024, How to Add Audio to MKV-2023 Update
- How to Fake Snapchat Location on Apple iPhone 13 Pro | Dr.fone
- Quick Guide Automating Mac Screenshot via Shortcuts
- The Best Audio Converter Software for Every Need for 2024
- New Ultimate Playlist The 10 Most Motivational Tunes for Creative Projects for 2024
- Updated Cinematic Slow Motion Top Video Editors for Dramatic Effects for 2024
- From Ordinary Snaps to Captivating Creations Editing on Snapchat
- How to Quickly Fix Bluetooth Not Working on Realme 11 5G | Dr.fone
- [New] Simplified Approach to Broadcasting Recorded Vids on Social Media
- Updated In 2024, The Ultimate Guide to Video Makers with Music for Android & iPhone
- How to Bypass Google FRP Lock on Infinix Note 30 Devices
- Top 7 Color Match Paint Apps
- How to Change/Add Location Filters on Snapchat For your Xiaomi Redmi Note 12R | Dr.fone
- Updated Music-Infused Video Editing Top Picks for Android and iPhone
- In 2024, Catch or Beat Sleeping Snorlax on Pokemon Go For Oppo Reno 10 5G | Dr.fone
- How to use Snapchat Location Spoofer to Protect Your Privacy On Nubia Red Magic 9 Pro? | Dr.fone
- [Updated] Pure Joy of Gratuitous Screen Mingle Games for 2024
- [Updated] In 2024, The Clone's Playbook Secrets to Mirror Success on the TikTok Sphere
- In 2024, Amplify Your Sound Mastering the Art of a High-Pitched Voice in Filmmaking
- [Updated] In 2024, Top Picks Ultimate Tools for Efficient Scheduling Screen Captures
- 5 Ways to Track Vivo V29e without App | Dr.fone
- Title: "[New] Beginner's Ultimate List of Must-Have Video Tech"
- Author: Steven
- Created at : 2024-05-25 20:00:23
- Updated at : 2024-05-26 20:00:23
- Link: https://youtube-clips.techidaily.com/new-beginners-ultimate-list-of-must-have-video-tech/
- License: This work is licensed under CC BY-NC-SA 4.0.
