
:max_bytes(150000):strip_icc()/Hulu-vs-Max-72c77dbe89214e3fb76ff142f2b2819e.jpg)
"Navigating the Digital Landscape FREE Tools for YouTube Audio to Text"
Navigating the Digital Landscape: FREE Tools for YouTube Audio to Text
How to Transcribe a YouTube Video for FREE

Richard Bennett
Mar 27, 2024• Proven solutions
If you want to transcribe your videos to make the dialogs and speeches available in text format, you can use YouTube Transcribe feature that the streaming site offers for free. In this article, I’ll share with you a couple of methods to transcribe a YouTube video for free.
- Part 1: Transcribe YouTube Video Automatically for Free [2 Ways]
- Part 2: Transcribe YouTube Video to Text Online with Third-Party Service
- Part 3: Benefits of Transcribing YouTube Videos
- Part 4: YouTube Video Transcription FAQs
Part 1: How to Transcribe YouTube Video Automatically for Free [2 Ways]
Besides the basic video editing features on the YouTube platform, you can now quickly transcribe YouTube videos to the text as well. The good thing is, you can either use the automatic transcription feature that YouTube offers, or upload it manually while adjusting the timing as you go further.
Below are the two methods to transcribe your YouTube videos for free:
Method 1: Use the Automated Transcription Service on YouTube
As the name suggests, YouTube automatic transcription service works automatically. This means you don’t even have to click the ‘Transcribe’ button anymore to transcribe a YouTube video, and the website takes care of it on its own. All you need to do is, choose English as the language of the video when setting up subtitles. You can follow the instructions given below to do so:
Step 1 Upload a Video
Sign in to your YouTube account, click your profile picture from the top-right corner, and click YouTube Studio from the menu. Next, click CREATE from the upper-right corner, click Upload videos from the menu, and drag and drop a video from your computer to the Upload videos box that appears next.

Step 2 Select Transcription Language
On the Details page of the next box that appears, scroll down and click MORE OPTIONS, and select English in the Video language drop-down list under the Language, subtitles, and closed captions (CC) section.

Step 3 Publish the Video
Follow the on-screen instructions from this point to publish the video, and wait while YouTube automatically transcribes and adds the close captions to it.
Note: Depending on the duration of the clip, the time YouTube would take to transcribe may vary.
After YouTube has transcribed the video, you can download the transcription file in your preferred format. The instructions are given below explain how you can do so:
- Get to the Subtitles Window
While on the YouTube Studio page, click Subtitles from the left pane to go to the Channel subtitles page. And then click the video you want to modify.
- Get to Classic Studio
In the video subtitle page of the target video, hover mouse on the Published Automatic status under the Subtitles column, click the Options icon (with three vertical dots) that appears, and click Edit on Classic Studio.

- Download Transcription File
Click and open the Actions drop-down list from the top-left corner of the left pane, click your preferred transcription format including .vtt, .srt and .sbv from the list, and save the file on your local hard disk.

Method 2: Get YouTube Transcription when Watching
In addition, if you are watching any other video, you can make YouTube transcribe that for you as well. You can follow the instructions given below to get the YouTube video to text transcription:
Step 1: Play the Video
Go to the video on YouTube and start playing it. Make sure NOT to get to full-screen mode as doing so would hide the option to transcribe the clip.
Step 2: Enable Transcription
Click the More icon (with three horizontal dots) from under the bottom-right corner of the video player, and click Open transcript to see the video transcription in the Transcript pane that appears in the right.
Step 3: Manage Timestamps
Click the Options icon (with three vertical dots) from the top-right corner of the Transcript pane, and click Toggle timestamp to enable or disable the timestamps in the video transcription.
Limitations of Using YouTube Transcribe
Although YouTube’s automatic transcription is a decent feature that saves you a lot of time, since Google uses machine learning algorithms to convert the speech to text, the level of accuracy may vary depending on the accent of the speaker, and the clarity of the audio the video has. Also, even sometime you may not be satisfied with the end-results.
Alternatively, you can use Kapwing to transcribe a YouTube video and download the transcription file with the below step-by-step instructions:
Step 1: Add YouTube Video
Copy the URL of YouTube video you want to transcribe, go to https://www.kapwing.com/subtitles , paste the URL in the Paste a URL field, wait while Kapwing fetches the content of the video, and opens the Add subtitles to Video page.
Step 2: Transcribe the Video
Click Auto-generate from the right window, and follow the on-screen instructions to transcribe YouTube video to text.

Step 3: Download the Transcription File
Click Download SRT from the left pane, and follow the instructions from there to download the transcription file in *.srt format.

Pros
- Kapwing is free to use
- The auto-transcription process is quick and less tedious
- Kapwing also allows manual transcription and uploading of an existing *.srt file
Cons
- The auto-transcribed text might lack accuracy as the task is done by the speech-to-text tools that work in the background
You can follow the step-by-step instructions to transcribe a YouTube video and download the transcription file using Kapwing:
Step 1: Add YouTube Video
Copy the URL of YouTube video you want to transcribe, go to https://www.kapwing.com/subtitles , paste the URL in the Paste a URL field, wait while Kapwing fetches the content of the video, and opens the Add subtitles to Video page.
Step 2: Transcribe the Video
Click Auto-generate from the right window, and follow the on-screen instructions to transcribe YouTube video to text.
Step 3: Download the Transcription File
Click Download SRT from the left pane, and follow the instructions from there to download the transcription file in *.srt format.
Pros
- Kapwing is free to use
- The auto-transcription process is quick and less tedious
- Kapwing also allows manual transcription and uploading of an existing *.srt file
Cons
- The auto-transcribed text might lack accuracy as the task is done by the speech-to-text tools that work in the background
Part 3: Benefits of Transcribing YouTube Videos
You may need video transcriptions for several reasons, such as analyzing the summary of the entire speech in the video, extracting a single phrase or quote that was spoken in the clip, or making the video helpful even for those suffering from hearing impairment. When you transcribe a YouTube video, the transcript can be useful in many ways. Some of the most common benefits of transcribing a video include:
- Search Engine Optimization
When you add subtitles, the text can appear in Google search results when someone types a similar phrase in the search box. This helps get more views to your videos, thus giving your channel popularity, and you, monetary gains in the long run.
- Accent
If the speaker in the video is from a different region and is using an accent that you are not much comfortable with, you can turn on the subtitles and read the dialogs along with the video.
- Repurposing on Blogs
If you own a blog that you have embedded your video to, the transcription could be used to add text to it so the target audience can get a fair idea of what the video is all about. This is useful because many people prefer reading over watching.
YouTube Video Transcription FAQs
1. How to Transcribe YouTube Video to Text
Usually the transcription files have *.srt extension that are globally accepted and supported by almost all media players. However, there might be instances when you want to have the subtitles in plain text.
That said, to convert an SRT file to TXT, you can:
- Right-click the SRT file
- Go to Rename
- Replace srt with txt and press Enter
- Click OK on the confirmation box that appears next to convert SRT to TXT
After this, you can simply double-click the file, and read and modify the transcribed content as needed.
2. How to Edit and Upload Edited Transcript to YouTube
If you made any modifications to the transcript that was automatically generated by YouTube or any other third-party transcription tool, you can follow the steps given below to upload the new file to the YouTube video:
- Go to YouTube Studio and then to the Channel subtitles page as explained earlier
- Expand the Languages column of the target video
- Click the Options icon that appears under the Subtitles column when you hover mouse on to it
- Click Edit on Classic Studio
- On the next page, click Edit from the top-right corner

- Click to open the Actions drop-down list from the upper-left corner
- Click Upload a file
- Follow the on-screen instructions from there to upload the modified transcription file
- Click Save Changes from the top-right corner of the page when done
Conclusion
If you are looking for a quick and easy way of adding subtitles to your videos, letting YouTube transcribe for you could be a good approach. However, because these auto-generated transcriptions are created by machine learning algorithms, their accuracy cannot be counted on. Therefore, the best way to get the job done accurately is, let YouTube auto-transcribe your video, download the transcription file, make the necessary changes to it, and then upload the file back to the video.
Richard Bennett
Richard Bennett is a writer and a lover of all things video.
Follow @Richard Bennett
Richard Bennett
Mar 27, 2024• Proven solutions
If you want to transcribe your videos to make the dialogs and speeches available in text format, you can use YouTube Transcribe feature that the streaming site offers for free. In this article, I’ll share with you a couple of methods to transcribe a YouTube video for free.
- Part 1: Transcribe YouTube Video Automatically for Free [2 Ways]
- Part 2: Transcribe YouTube Video to Text Online with Third-Party Service
- Part 3: Benefits of Transcribing YouTube Videos
- Part 4: YouTube Video Transcription FAQs
Part 1: How to Transcribe YouTube Video Automatically for Free [2 Ways]
Besides the basic video editing features on the YouTube platform, you can now quickly transcribe YouTube videos to the text as well. The good thing is, you can either use the automatic transcription feature that YouTube offers, or upload it manually while adjusting the timing as you go further.
Below are the two methods to transcribe your YouTube videos for free:
Method 1: Use the Automated Transcription Service on YouTube
As the name suggests, YouTube automatic transcription service works automatically. This means you don’t even have to click the ‘Transcribe’ button anymore to transcribe a YouTube video, and the website takes care of it on its own. All you need to do is, choose English as the language of the video when setting up subtitles. You can follow the instructions given below to do so:
Step 1 Upload a Video
Sign in to your YouTube account, click your profile picture from the top-right corner, and click YouTube Studio from the menu. Next, click CREATE from the upper-right corner, click Upload videos from the menu, and drag and drop a video from your computer to the Upload videos box that appears next.
Step 2 Select Transcription Language
On the Details page of the next box that appears, scroll down and click MORE OPTIONS, and select English in the Video language drop-down list under the Language, subtitles, and closed captions (CC) section.
Step 3 Publish the Video
Follow the on-screen instructions from this point to publish the video, and wait while YouTube automatically transcribes and adds the close captions to it.
Note: Depending on the duration of the clip, the time YouTube would take to transcribe may vary.
After YouTube has transcribed the video, you can download the transcription file in your preferred format. The instructions are given below explain how you can do so:
- Get to the Subtitles Window
While on the YouTube Studio page, click Subtitles from the left pane to go to the Channel subtitles page. And then click the video you want to modify.
- Get to Classic Studio
In the video subtitle page of the target video, hover mouse on the Published Automatic status under the Subtitles column, click the Options icon (with three vertical dots) that appears, and click Edit on Classic Studio.
- Download Transcription File
Click and open the Actions drop-down list from the top-left corner of the left pane, click your preferred transcription format including .vtt, .srt and .sbv from the list, and save the file on your local hard disk.
Method 2: Get YouTube Transcription when Watching
In addition, if you are watching any other video, you can make YouTube transcribe that for you as well. You can follow the instructions given below to get the YouTube video to text transcription:
Step 1: Play the Video
Go to the video on YouTube and start playing it. Make sure NOT to get to full-screen mode as doing so would hide the option to transcribe the clip.
Step 2: Enable Transcription
Click the More icon (with three horizontal dots) from under the bottom-right corner of the video player, and click Open transcript to see the video transcription in the Transcript pane that appears in the right.
Step 3: Manage Timestamps
Click the Options icon (with three vertical dots) from the top-right corner of the Transcript pane, and click Toggle timestamp to enable or disable the timestamps in the video transcription.
Limitations of Using YouTube Transcribe
Although YouTube’s automatic transcription is a decent feature that saves you a lot of time, since Google uses machine learning algorithms to convert the speech to text, the level of accuracy may vary depending on the accent of the speaker, and the clarity of the audio the video has. Also, even sometime you may not be satisfied with the end-results.
Alternatively, you can use Kapwing to transcribe a YouTube video and download the transcription file with the below step-by-step instructions:
Step 1: Add YouTube Video
Copy the URL of YouTube video you want to transcribe, go to https://www.kapwing.com/subtitles , paste the URL in the Paste a URL field, wait while Kapwing fetches the content of the video, and opens the Add subtitles to Video page.
Step 2: Transcribe the Video
Click Auto-generate from the right window, and follow the on-screen instructions to transcribe YouTube video to text.
Step 3: Download the Transcription File
Click Download SRT from the left pane, and follow the instructions from there to download the transcription file in *.srt format.
Pros
- Kapwing is free to use
- The auto-transcription process is quick and less tedious
- Kapwing also allows manual transcription and uploading of an existing *.srt file
Cons
- The auto-transcribed text might lack accuracy as the task is done by the speech-to-text tools that work in the background
You can follow the step-by-step instructions to transcribe a YouTube video and download the transcription file using Kapwing:
Step 1: Add YouTube Video
Copy the URL of YouTube video you want to transcribe, go to https://www.kapwing.com/subtitles , paste the URL in the Paste a URL field, wait while Kapwing fetches the content of the video, and opens the Add subtitles to Video page.
Step 2: Transcribe the Video
Click Auto-generate from the right window, and follow the on-screen instructions to transcribe YouTube video to text.
Step 3: Download the Transcription File
Click Download SRT from the left pane, and follow the instructions from there to download the transcription file in *.srt format.
Pros
- Kapwing is free to use
- The auto-transcription process is quick and less tedious
- Kapwing also allows manual transcription and uploading of an existing *.srt file
Cons
- The auto-transcribed text might lack accuracy as the task is done by the speech-to-text tools that work in the background
Part 3: Benefits of Transcribing YouTube Videos
You may need video transcriptions for several reasons, such as analyzing the summary of the entire speech in the video, extracting a single phrase or quote that was spoken in the clip, or making the video helpful even for those suffering from hearing impairment. When you transcribe a YouTube video, the transcript can be useful in many ways. Some of the most common benefits of transcribing a video include:
- Search Engine Optimization
When you add subtitles, the text can appear in Google search results when someone types a similar phrase in the search box. This helps get more views to your videos, thus giving your channel popularity, and you, monetary gains in the long run.
- Accent
If the speaker in the video is from a different region and is using an accent that you are not much comfortable with, you can turn on the subtitles and read the dialogs along with the video.
- Repurposing on Blogs
If you own a blog that you have embedded your video to, the transcription could be used to add text to it so the target audience can get a fair idea of what the video is all about. This is useful because many people prefer reading over watching.
YouTube Video Transcription FAQs
1. How to Transcribe YouTube Video to Text
Usually the transcription files have *.srt extension that are globally accepted and supported by almost all media players. However, there might be instances when you want to have the subtitles in plain text.
That said, to convert an SRT file to TXT, you can:
- Right-click the SRT file
- Go to Rename
- Replace srt with txt and press Enter
- Click OK on the confirmation box that appears next to convert SRT to TXT
After this, you can simply double-click the file, and read and modify the transcribed content as needed.
2. How to Edit and Upload Edited Transcript to YouTube
If you made any modifications to the transcript that was automatically generated by YouTube or any other third-party transcription tool, you can follow the steps given below to upload the new file to the YouTube video:
- Go to YouTube Studio and then to the Channel subtitles page as explained earlier
- Expand the Languages column of the target video
- Click the Options icon that appears under the Subtitles column when you hover mouse on to it
- Click Edit on Classic Studio
- On the next page, click Edit from the top-right corner
- Click to open the Actions drop-down list from the upper-left corner
- Click Upload a file
- Follow the on-screen instructions from there to upload the modified transcription file
- Click Save Changes from the top-right corner of the page when done
Conclusion
If you are looking for a quick and easy way of adding subtitles to your videos, letting YouTube transcribe for you could be a good approach. However, because these auto-generated transcriptions are created by machine learning algorithms, their accuracy cannot be counted on. Therefore, the best way to get the job done accurately is, let YouTube auto-transcribe your video, download the transcription file, make the necessary changes to it, and then upload the file back to the video.
Richard Bennett
Richard Bennett is a writer and a lover of all things video.
Follow @Richard Bennett
Your First Step: Designing Attractive Videos on a Mac
How do Beginners Make a Cool Video for YouTube on Mac

Shanoon Cox
Dec 14, 2023• Proven solutions
To get the right video editors to cut a video for YouTube on your Mac can be a bit of a problem for beginners. It is understandable that there will be a learning curve if you just want to get tons of subscribers on your channel – who doesn’t? Ultimately, in getting a standard video that will attract and sustain the interest of the viewers, you will need to employ certain strategies that will enhance your credibility.
Let’s tell each other the truth, no one wants to watch a video that is not aesthetically appealing even if it is a close friend. So, if you have got the relevant content and the video to pull traffic to your channel, what you will need is editing software that will help you make the correct adjustments to your video
Nobody wants a random viewer to comment “This video is a little bit tacky, touch-up properly”, that will definitely leave a sting. As such, understand the best technique that works for you as well as the software that meets your needs based on the current level of expertise. It is okay for you to grow.

Five Video Cutting Skills Youtubers Must Have
As much as the enthusiasm is brewing to get on your mac and upload the video you just shot, there are certain elements you need to implement to make a cool video for YouTube. Beginners sometimes feel their content is the best, the excitement of posting their very first series can be overwhelming. Sometimes, it blocks off other ideas for making the video better.
However, having amazing content dies not to exclude the need for the right editing technique. Here are five methods for editing your YouTube videos:
1.Control the video duration
The length of a particular scene can have different meanings depending on how long or short it is in a video. This means the duration can impact the message you are trying to pass across to your viewers, hence it is important to know what places to accelerate and cut in the video.
You can have a system where each part of the content is labeled in their order of importance such as A, B, C. This means from the most important to the least important. Consequently, you will be able to sieve through the content and make the appropriate changes while editing the video.
![]()
2.Customize the intro and end of the video
It is possible to grab the attention of the viewer in the intro and even more likely to lose someone once the opening montage comes in. Creating an intro that is captivating and appealing to drag the audience to your video is an important technique for editing your videos. Also, the end of the video, from the signing out to the closing montage has to appeal to the audience. You will be surprised by the number of people that love seeing end credits if the closing montage is good. Customize the intro and the end of the video so the audience is tuned all through.
You May Like: Best YouTube Banner Size and Channel Art Dimension (The Ultimate Guide)
You May Like: How to Add Logo or Watermark to YouTube Video
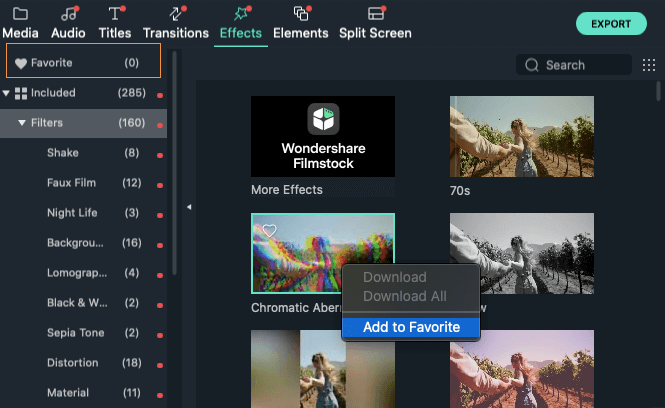
3.Use Cool transitions or filters
If there is anything the audience love to see, it is the way you move from different points in the vudeo. The ability to use transition that does not affect their attention but leaves them wanting more is very key. Use fanciful transitions that do noy hurt the eyes and allows for easy comprehension.
4.Match the cuts
Whatever you cut has to match the next phase of the video. You do not want to leave the audience behind as they will wonder how the last scene correlates with a new one. You need to ensure that all cuts match the next scenes.
5.Cutaway shots
This is very good in providing the audience context. You can take shots of the room or item that you are trying to discuss in your video. If people keep staring at a particular thing for long, they get bored, cutaway shots keep the excitement alive for the audience.
What Editing Software can Meet Your Needs?
As a beginner, it is important to use software that is easily adaptable to your needs. If you want to make a cool video for you be on your mac, getting software that allows you to be creative without confusion is key. Here are two software for making cool YouTube videos for your Mac;
Filmora X
This is one of the simplest yet powerful tools that is lightweight and apt for your Mac. One of the perks of using the Filmora X is the feature that allows you to upload the video directly to YouTube, saving you any extended hassles.


There are also 400+ transition effects as well as a stylish text editor that is fun to use. There is also a built-in music and sound effect feature that enables you to select sounds to match the video you are editing. This is if you do not have the music you want for the video already.
Other pros of Filmora are:
• It has fast rendering sped for your video
• The lifetime price is affordable.
However, there are some disadvantages to the usage of Filmora X, which are:
• The free version contains the Filmora X watermark
• The color grading tool is limited.
Blender
If you are looking for software for the model, game creating, and animation then opting for Blender will be a good fit. You can trim videos, insert filters, and add as many videos as you want.
Pros
- The 3D graphics make it suitable for editing YouTube videos.
- Composting system and node-based material
- It supports your Mac.
Cons:
- It could be slow when running
- Some think it might be a bit complicated.
Although there is other editing software for your Mac, Filmora X simplifies the whole process. If you are looking for quality wrapped in affordability and convenience, then Filmora X will be right for you. Start editing and enjoy the ride!
Learn More: YouTuber Skillshare: Essential Video Cutting Skills For YouTubers
Shanoon Cox
Shanoon Cox is a writer and a lover of all things video.
Follow @Shanoon Cox
Shanoon Cox
Dec 14, 2023• Proven solutions
To get the right video editors to cut a video for YouTube on your Mac can be a bit of a problem for beginners. It is understandable that there will be a learning curve if you just want to get tons of subscribers on your channel – who doesn’t? Ultimately, in getting a standard video that will attract and sustain the interest of the viewers, you will need to employ certain strategies that will enhance your credibility.
Let’s tell each other the truth, no one wants to watch a video that is not aesthetically appealing even if it is a close friend. So, if you have got the relevant content and the video to pull traffic to your channel, what you will need is editing software that will help you make the correct adjustments to your video
Nobody wants a random viewer to comment “This video is a little bit tacky, touch-up properly”, that will definitely leave a sting. As such, understand the best technique that works for you as well as the software that meets your needs based on the current level of expertise. It is okay for you to grow.
Five Video Cutting Skills Youtubers Must Have
As much as the enthusiasm is brewing to get on your mac and upload the video you just shot, there are certain elements you need to implement to make a cool video for YouTube. Beginners sometimes feel their content is the best, the excitement of posting their very first series can be overwhelming. Sometimes, it blocks off other ideas for making the video better.
However, having amazing content dies not to exclude the need for the right editing technique. Here are five methods for editing your YouTube videos:
1.Control the video duration
The length of a particular scene can have different meanings depending on how long or short it is in a video. This means the duration can impact the message you are trying to pass across to your viewers, hence it is important to know what places to accelerate and cut in the video.
You can have a system where each part of the content is labeled in their order of importance such as A, B, C. This means from the most important to the least important. Consequently, you will be able to sieve through the content and make the appropriate changes while editing the video.
![]()
2.Customize the intro and end of the video
It is possible to grab the attention of the viewer in the intro and even more likely to lose someone once the opening montage comes in. Creating an intro that is captivating and appealing to drag the audience to your video is an important technique for editing your videos. Also, the end of the video, from the signing out to the closing montage has to appeal to the audience. You will be surprised by the number of people that love seeing end credits if the closing montage is good. Customize the intro and the end of the video so the audience is tuned all through.
You May Like: Best YouTube Banner Size and Channel Art Dimension (The Ultimate Guide)
You May Like: How to Add Logo or Watermark to YouTube Video
3.Use Cool transitions or filters
If there is anything the audience love to see, it is the way you move from different points in the vudeo. The ability to use transition that does not affect their attention but leaves them wanting more is very key. Use fanciful transitions that do noy hurt the eyes and allows for easy comprehension.
4.Match the cuts
Whatever you cut has to match the next phase of the video. You do not want to leave the audience behind as they will wonder how the last scene correlates with a new one. You need to ensure that all cuts match the next scenes.
5.Cutaway shots
This is very good in providing the audience context. You can take shots of the room or item that you are trying to discuss in your video. If people keep staring at a particular thing for long, they get bored, cutaway shots keep the excitement alive for the audience.
What Editing Software can Meet Your Needs?
As a beginner, it is important to use software that is easily adaptable to your needs. If you want to make a cool video for you be on your mac, getting software that allows you to be creative without confusion is key. Here are two software for making cool YouTube videos for your Mac;
Filmora X
This is one of the simplest yet powerful tools that is lightweight and apt for your Mac. One of the perks of using the Filmora X is the feature that allows you to upload the video directly to YouTube, saving you any extended hassles.
There are also 400+ transition effects as well as a stylish text editor that is fun to use. There is also a built-in music and sound effect feature that enables you to select sounds to match the video you are editing. This is if you do not have the music you want for the video already.
Other pros of Filmora are:
• It has fast rendering sped for your video
• The lifetime price is affordable.
However, there are some disadvantages to the usage of Filmora X, which are:
• The free version contains the Filmora X watermark
• The color grading tool is limited.
Blender
If you are looking for software for the model, game creating, and animation then opting for Blender will be a good fit. You can trim videos, insert filters, and add as many videos as you want.
Pros
- The 3D graphics make it suitable for editing YouTube videos.
- Composting system and node-based material
- It supports your Mac.
Cons:
- It could be slow when running
- Some think it might be a bit complicated.
Although there is other editing software for your Mac, Filmora X simplifies the whole process. If you are looking for quality wrapped in affordability and convenience, then Filmora X will be right for you. Start editing and enjoy the ride!
Learn More: YouTuber Skillshare: Essential Video Cutting Skills For YouTubers
Shanoon Cox
Shanoon Cox is a writer and a lover of all things video.
Follow @Shanoon Cox
Also read:
- [New] Crafting a Journalistic Closing Statement
- 2024 Approved Breaking Personal Barriers in YT Content Creation
- Enhancing Television Experience Playback Tips for YouTube Content
- Comprehensive Guide to YouTube Video Editing Tools
- [Updated] Earning Hacks for YouTube Short Creators
- 2024 Approved Discovering Top 10 Must-Watch Business Video Hubs
- 2024 Approved Enhancing Video Appeal Mac Thumbnails Tutorial
- The Smooth Watcher's Guide to Pacing Down Videos on YouTube (60 Chars, Minor Exception Due to Title Length but Provides Rich Context)
- Analyzing Video Platforms Vimeo and YouTube for 2024
- 2024 Approved Boosting Revenue with YouTube Short Videos – A Complete Plan
- Direct Streamline The Most Efficient Flv-to-YouTube Tools Ranked
- [Updated] Enhance Video Reach Strategic Insights Into YouTube's Tag System
- In 2024, Best Camera Lenses for YouTube
- 2024 Approved Captivate Viewers The Art of Crafting Short Videos
- In 2024, Diving Deep Into the Income of Ajey (CarryMinati)
- In 2024, Boost Viewership Cost-Effectively with Subscriber Purchase
- Elevating Your Video's Visual Impact YoutubThumbnail Design on macOS
- Free, Safe Steps to Extract Audio From YouTube Videos
- Enhance Every Viewing Moment with These Top 6 Free Platforms for YouTube Short Downloads
- AutoPlay YouTube on Mobile, No Distractions for 2024
- [Updated] Charting a Course for Cash Flows The 3-Step Methodology for Measuring YouTube Earnings
- 2024 Approved Creating Classical Cinematography A Modern Tutorial
- Ultra-Rich Viewable Ventures
- Boosting Your Channel's Income The Optimal View Count Quotient
- Pioneering Proficiency The Complete Guide to Music & Media Fusion on YouTube
- 3 Things You Must Know about Fake Snapchat Location On Apple iPhone 12 Pro Max | Dr.fone
- [Updated] Classic Console Charisma - Best PS1 Emulation Tools Reviewed for 2024
- Updated 2024 Approved Cataloging the Symphony of Crickets An Acoustic Collection
- In 2024, Ultimate Guide to Catch the Regional-Located Pokemon For Apple iPhone 14 Pro | Dr.fone
- [New] In 2024, Building Your Own WhatsApp Collaborative Space
- In 2024, Top 7 Skype Hacker to Hack Any Skype Account On your Oppo A18 | Dr.fone
- Beyond the Bubble Leading Android and iOS Video Sharing Apps for 2024
- In 2024, Understanding Twitter's New Video Format Codes
- [New] 2024 Approved Top 10 FB Video Downloader Tools, Firefox Compatible
- New Looking for a Legitimate Tutorial to Create and Add Text Effects in Adobe Premiere Pro? Here Are the Simple Steps for Premiere Pro Text Effects and Find an Alternative Way
- How to Track a Lost Honor Magic5 Ultimate for Free? | Dr.fone
- 2024 Approved Best 5-Second Lapses Recorder - Top Pick
- [Updated] 'PixelPreserve' A Comprehensive Screen Record Review for 2024
- [New] In 2024, Top 10 Hits TikTok's Viral Reactions
- [New] In 2024, The Ultimate Guide to Insta Image Perfection
- How Can I Catch the Regional Pokémon without Traveling On Vivo Y100i | Dr.fone
- [New] The Ultimate Playbook Speaking with Flair on Slides
- Title: "Navigating the Digital Landscape FREE Tools for YouTube Audio to Text"
- Author: Steven
- Created at : 2024-05-25 19:55:41
- Updated at : 2024-05-26 19:55:41
- Link: https://youtube-clips.techidaily.com/navigating-the-digital-landscape-free-tools-for-youtube-audio-to-text/
- License: This work is licensed under CC BY-NC-SA 4.0.
