"Mobile Mastery YouTube Video Thumbnails Made Easy"
Mobile Mastery: YouTube Video Thumbnails Made Easy
As a content creator, you know the importance of a visually appealing thumbnail for YouTube videos. It gives your viewers a sneak peek of what they can expect from your video and helps it stand out in the crowded world of YouTube.
When creating your thumbnail, it’s important to remember that the recommended size is 1280 x 720 pixels and a minimum width of 640 pixels. With these dimensions in mind, let’s dive into how you can easily create stunning thumbnails for your YouTube videos using your mobile phone.

Method 1. Make a YouTube Thumbnail on iPhone With the iPhone Photos App
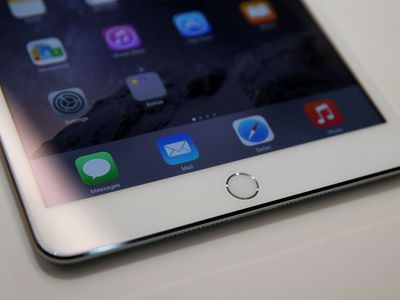
One way to create a thumbnail for your YouTube video on your iPhone is to use the built-in Photos app. The Photos app comes pre-installed on all iPhones and offers a range of editing tools you can use to create a thumbnail.
The Photos app on your iPhone offers a range of features that you can use to create a custom thumbnail for your YouTube video. Here are some of the features you can use:
- Crop: The crop tool allows you to resize and reposition your thumbnail image by trimming away any unnecessary parts of the image.
- Rotate: The rotate tool lets you adjust the orientation of your thumbnail image. You can rotate the image clockwise or counterclockwise to achieve the desired angle.
- Adjust lighting and color: The lighting and color tools allow you to adjust the brightness, contrast, saturation, and other aspects of the thumbnail image to enhance its overall appearance.
- Add text: You can use the text tool to add words or phrases to your thumbnail image. This can be a great way to include a call-to-action or to highlight a key feature of your video.
- Add filters and stickers: The Photos app includes a range of filters and stickers that you can use to give your thumbnail image a unique look. You can experiment with filters and stickers to find the perfect one for your thumbnail.
To create a thumbnail using the Photos app on your iPhone, follow these steps:
Step1 Open the Photos app and find the image you want to use as your thumbnail. Tap on the image to open it.

Step2 Tap the Edit button in the top right corner of the screen. Use the crop and rotate tools to adjust the perspective and the aspect ratio of 16:9.

Step3 Tap the Filters button to access the filter effects. Scroll through the available filters and tap on one to apply it to your thumbnail image.

Step4 To write or draw on the image, tap the Markup button. This will open a toolbar with a variety of drawing and text tools. Use these tools to add your personal touch to the thumbnail.

Step5 When you’re satisfied with your thumbnail, tap Done in the top right corner of the screen.

Pros
- Convenient
- Easy to use
- Versatile
Cons
- Limited customization option
- Lower image quality
This method is best for users looking for a quick and easy way to create a thumbnail on the go and doesn’t need many customization options. It’s also a good option for users needing computer or graphic design software access. If you’re looking for more advanced customization options or higher image quality, consider using other methods or software.
Method 2. Make YouTube Thumbnails on Android/iPhone With Third-Party Apps
In addition to using the built-in Photos app on your iPhone or Android device, there are also many third-party apps that you can use to create YouTube thumbnails. Some popular options include Canva, Adobe Spark, and FotoJet. These apps offer a wider range of customization options and design templates, making it easy to create professional-looking thumbnails even if you have yet to gain graphic design experience.
One popular third-party app for creating YouTube thumbnails on both iPhone and Android devices is PixelLab. PixelLab is a powerful graphic design app with many features and tools for creating custom thumbnails. With PixelLab, you can add text, shapes, and stickers to your thumbnail image and adjust the image’s color, lighting, and other aspects to get the perfect look. You can also import your images or graphics for your thumbnail design.
Here are the steps to create a thumbnail using PixelLab on your Android or iOS device:
Step1 Open the Play Store and search for PixelLab. Install the app.
![]()
Step2 Tap the “+” icon to add an image from your gallery.
![]()
Step3 Edit the image using the available tools, such as cropping, rotating, and adjusting the color and lighting.
![]()
Step4 Add text to the image and customize it to your liking.
![]()
Step5 Change the resolution of the image to 1280 x 720 pixels.
![]()
Step6 Save the image to your gallery by exporting it.
![]()
Pros
- More customization options
- Advanced editing tools
- High image quality
Cons
- Requires a separate app download
- It may require a learning curve
This method is best for users looking for more advanced customization options and higher image quality for their YouTube thumbnails. It’s also a good option for users with experience with graphic design software and who are comfortable using advanced editing tools. If you’re looking for a quick and easy way to create a thumbnail and only need a few customization options, consider using the built-in Photos app or other simpler methods.
How To Add Thumbnails to YouTube Videos on Mobile
Once you’ve created your thumbnail image, it’s time to add it to your YouTube video. Adding a thumbnail to your YouTube video on your mobile device is a simple process that only requires a few steps.
Here’s how to do it on your mobile device:
Step1 Open the YouTube app on your mobile device and sign in to your account.

Step2 Tap on the My Videos tab to view a list of your uploaded videos.

Step3 Tap on the video and tap the “Edit“ button in the top right corner of the screen.

Step4 Tap the Custom thumbnail button and upload the image you want to use from your photo library.

Step5 Tap Save in the top right corner to upload the thumbnail to your video.

That’s it! Your new thumbnail will now be displayed on your YouTube video, helping it stand out and attract more views. You can repeat this process for other videos if you want to add a custom thumbnail.
It May Interest You – Make YouTube Thumbnails on Windows/Mac
While it’s convenient to create YouTube thumbnails on your mobile device, there may be times when you need to create a thumbnail on your Windows or Mac computer.
For example, if you need to create a thumbnail with a higher resolution or more advanced customization options, you may find it easier to do so on a computer. Additionally, a computer may be more efficient if you’re working on a larger thumbnail project and need to create multiple thumbnails simultaneously.
One popular tool for creating YouTube thumbnails on a Windows or Mac computer is Filmora. Wondershare Filmora is a powerful video editing software that allows you to easily edit and enhance your YouTube videos and create custom thumbnails for your videos.
Free Download For Win 7 or later(64-bit)
Free Download For macOS 10.14 or later
With Filmora, you can add text, graphics, and special effects to your thumbnail image and import and edit multiple images. Filmora is a great tool for creating professional-looking YouTube thumbnails on your Windows or Mac computer.
To create a thumbnail using Filmora on your Windows or Mac computer, follow these steps:
Step1 Launch Filmora, add the picture to the timeline and select the AI Portrait option in the Effects panel to cut out the subject from the background.

Step2 Scale up and reposition the photo.

Step3 Add a new background to the track below the picture. Use the other editing tools in Filmora to customize the image as desired, such as adding text, graphics, and special effects.

Step4 When you are done editing the thumbnail, take a snapshot by clicking the camera icon.

Step5 Locate the thumbnail in your local drive.

For more detailed instructions and a visual guide, you can watch the following video tutorial:
Add a video
This video will show you how to use Filmora to create a custom thumbnail for your YouTube video, step by step.
People Also Ask
Here are some common questions that people have when it comes to creating YouTube thumbnails on mobile.
Q1. What App Do Youtubers Use To Make Thumbnails?
There are many different apps and tools that YouTubers use to create thumbnails for their videos. The best app for creating YouTube thumbnails will depend on your needs and skill level.
If you’re looking for a quick and easy way to create a thumbnail on your mobile device, start with the built-in Photos app or a third-party app like Canva. If you need more advanced customization options or are comfortable with graphic design software, consider using Adobe Photoshop or another tool.
Q2. What Is YouTube Thumbnail Size?
The recommended size for YouTube thumbnails is 1280 x 720 pixels. This size balances quality and file size, ensuring that your thumbnail looks sharp and loads quickly. It’s also important to note that YouTube thumbnails are displayed at different sizes depending on the device and context in which they are viewed.
For example, a thumbnail may be displayed at a larger size when it’s shown as the main thumbnail for a video but smaller when it’s shown in a list of related videos.
Q3. What Thumbnail Gets the Most Clicks?
There is no one-size-fits-all answer to this question, as the thumbnail that gets the most clicks can vary depending on the topic of your video, your target audience, and other factors.
However, the key to getting clicks on your thumbnail is to make it visually appealing and relevant to your video. Experiment with different thumbnail designs and track which ones get the most clicks to help you identify what works best for your channel.
Conclusion
Many tools are available for creating YouTube thumbnails, including the built-in Photos app on mobile devices and third-party apps like Pixelab. One particularly powerful option is Filmora, a video editing software with features for creating custom thumbnails, such as adding text, graphics, and special effects.
Whether you create your thumbnails on your mobile device or your computer, use a high-quality image and make the thumbnail relevant to your video to increase the chances of it getting clicked.
This method is best for users looking for a quick and easy way to create a thumbnail on the go and doesn’t need many customization options. It’s also a good option for users needing computer or graphic design software access. If you’re looking for more advanced customization options or higher image quality, consider using other methods or software.
Method 2. Make YouTube Thumbnails on Android/iPhone With Third-Party Apps
In addition to using the built-in Photos app on your iPhone or Android device, there are also many third-party apps that you can use to create YouTube thumbnails. Some popular options include Canva, Adobe Spark, and FotoJet. These apps offer a wider range of customization options and design templates, making it easy to create professional-looking thumbnails even if you have yet to gain graphic design experience.
One popular third-party app for creating YouTube thumbnails on both iPhone and Android devices is PixelLab. PixelLab is a powerful graphic design app with many features and tools for creating custom thumbnails. With PixelLab, you can add text, shapes, and stickers to your thumbnail image and adjust the image’s color, lighting, and other aspects to get the perfect look. You can also import your images or graphics for your thumbnail design.
Here are the steps to create a thumbnail using PixelLab on your Android or iOS device:
Step1 Open the Play Store and search for PixelLab. Install the app.
![]()
Step2 Tap the “+” icon to add an image from your gallery.
![]()
Step3 Edit the image using the available tools, such as cropping, rotating, and adjusting the color and lighting.
![]()
Step4 Add text to the image and customize it to your liking.
![]()
Step5 Change the resolution of the image to 1280 x 720 pixels.
![]()
Step6 Save the image to your gallery by exporting it.
![]()
Pros
- More customization options
- Advanced editing tools
- High image quality
Cons
- Requires a separate app download
- It may require a learning curve
This method is best for users looking for more advanced customization options and higher image quality for their YouTube thumbnails. It’s also a good option for users with experience with graphic design software and who are comfortable using advanced editing tools. If you’re looking for a quick and easy way to create a thumbnail and only need a few customization options, consider using the built-in Photos app or other simpler methods.
How To Add Thumbnails to YouTube Videos on Mobile
Once you’ve created your thumbnail image, it’s time to add it to your YouTube video. Adding a thumbnail to your YouTube video on your mobile device is a simple process that only requires a few steps.
Here’s how to do it on your mobile device:
Step1 Open the YouTube app on your mobile device and sign in to your account.
Step2 Tap on the My Videos tab to view a list of your uploaded videos.
Step3 Tap on the video and tap the “Edit“ button in the top right corner of the screen.
Step4 Tap the Custom thumbnail button and upload the image you want to use from your photo library.
Step5 Tap Save in the top right corner to upload the thumbnail to your video.
That’s it! Your new thumbnail will now be displayed on your YouTube video, helping it stand out and attract more views. You can repeat this process for other videos if you want to add a custom thumbnail.
It May Interest You – Make YouTube Thumbnails on Windows/Mac
While it’s convenient to create YouTube thumbnails on your mobile device, there may be times when you need to create a thumbnail on your Windows or Mac computer.
For example, if you need to create a thumbnail with a higher resolution or more advanced customization options, you may find it easier to do so on a computer. Additionally, a computer may be more efficient if you’re working on a larger thumbnail project and need to create multiple thumbnails simultaneously.
One popular tool for creating YouTube thumbnails on a Windows or Mac computer is Filmora. Wondershare Filmora is a powerful video editing software that allows you to easily edit and enhance your YouTube videos and create custom thumbnails for your videos.
Free Download For Win 7 or later(64-bit)
Free Download For macOS 10.14 or later
With Filmora, you can add text, graphics, and special effects to your thumbnail image and import and edit multiple images. Filmora is a great tool for creating professional-looking YouTube thumbnails on your Windows or Mac computer.
To create a thumbnail using Filmora on your Windows or Mac computer, follow these steps:
Step1 Launch Filmora, add the picture to the timeline and select the AI Portrait option in the Effects panel to cut out the subject from the background.
Step2 Scale up and reposition the photo.
Step3 Add a new background to the track below the picture. Use the other editing tools in Filmora to customize the image as desired, such as adding text, graphics, and special effects.
Step4 When you are done editing the thumbnail, take a snapshot by clicking the camera icon.
Step5 Locate the thumbnail in your local drive.
For more detailed instructions and a visual guide, you can watch the following video tutorial:
Add a video
This video will show you how to use Filmora to create a custom thumbnail for your YouTube video, step by step.
People Also Ask
Here are some common questions that people have when it comes to creating YouTube thumbnails on mobile.
Q1. What App Do Youtubers Use To Make Thumbnails?
There are many different apps and tools that YouTubers use to create thumbnails for their videos. The best app for creating YouTube thumbnails will depend on your needs and skill level.
If you’re looking for a quick and easy way to create a thumbnail on your mobile device, start with the built-in Photos app or a third-party app like Canva. If you need more advanced customization options or are comfortable with graphic design software, consider using Adobe Photoshop or another tool.
Q2. What Is YouTube Thumbnail Size?
The recommended size for YouTube thumbnails is 1280 x 720 pixels. This size balances quality and file size, ensuring that your thumbnail looks sharp and loads quickly. It’s also important to note that YouTube thumbnails are displayed at different sizes depending on the device and context in which they are viewed.
For example, a thumbnail may be displayed at a larger size when it’s shown as the main thumbnail for a video but smaller when it’s shown in a list of related videos.
Q3. What Thumbnail Gets the Most Clicks?
There is no one-size-fits-all answer to this question, as the thumbnail that gets the most clicks can vary depending on the topic of your video, your target audience, and other factors.
However, the key to getting clicks on your thumbnail is to make it visually appealing and relevant to your video. Experiment with different thumbnail designs and track which ones get the most clicks to help you identify what works best for your channel.
Conclusion
Many tools are available for creating YouTube thumbnails, including the built-in Photos app on mobile devices and third-party apps like Pixelab. One particularly powerful option is Filmora, a video editing software with features for creating custom thumbnails, such as adding text, graphics, and special effects.
Whether you create your thumbnails on your mobile device or your computer, use a high-quality image and make the thumbnail relevant to your video to increase the chances of it getting clicked.
Audio Overhaul Methods for Content Creators Online
How To Remove Background Noise from Your Youtube Video

Richard Bennett
Mar 27, 2024• Proven solutions
There are few things more annoying to viewers on YouTube than background noise. It is distracting and makes it difficult to engage with the content of a video. If there is noticeable background noise in a video, even a small noise like the faint hum of a computer fan, then it will increase the chances of viewers clicking away. The good news is that these kinds of noises are fairly easy to get rid of.
In order to remove background noise from your video clip, you will first need to create an MP3 of your audio. Then you will be able to take out the unwanted noise in a free program called Audacity and reintroduce your corrected audio into your Filmora project. This article will walk you through the audio editing process.

How To Remove Background Noise from Your Youtube Video
Background Noise Removal


Open up Filmora, import your clip, and drag it into the timeline. Then, play your clip and listen for background noise. If you hear a noise that you wish to remove move on to the first step of background noise removal .
1. Creating An MP3
If you do not already have it you will need to download VLC Media Player from videoLAN.org. VLC is a completely free media player that can play almost any type of file, is great for converting files, and can even be used as a screen recorder. If you consume a lot of media online then chances are you already have VLC. You could also use is Free Video to MP3 Converter by DVDVideoSoft.
If you choose to use VLC, open it up and select Convert/Save under Media. Select your video in the Open Media window that pops up. After you click Convert/Save you will be able to choose your format, in this case, MP3, under Save as type.
2. Removing Background Noise in Audacity
You can download Audacity for free at Audacityteam.org.
Once you have Audacity use it to open your MP3. Then, find a section of your audio that is silent aside from your background noise and highlight it by clicking and dragging. The idea is to point out to the program exactly what sound is a problem for you so it knows what to remove. If you have trouble finding a significant stretch of background noise that does not also include dialogue remember to record a pause before or after the content of your video next time you film.
With your section of background noise highlighted, go to Effect and then Noise Reduction. Then, click on Get Noise Profile. After that, you will select your entire audio timeline before going back to Noise Reduction under Effect. This time click on OK (the default settings are the best in most situations so you do not need to worry about changing them).
Audacity will remove everything that sounds like the sound profile, eliminating your background noise. Sometimes this method will also dull your dialogue, which can be fixed by selecting your entire track and then going to Effect and Amplify. Increasing amplification will fix any muffling of your audio.
3. Syncing in Filmora
Export your corrected MP3 from Audacity and import it into Filmora. Then, drag it into your music track. Syncing your audio should not be difficult, but you can always use your original audio to help you line it up properly if you need to. Just look for a significant spike in your audio waves in both your MP3 and the original audio and make sure they are right on top of each other.
Then, since you no longer need your original audio, you can delete it. Right-click on your clip and select Audio Detach. Once your audio is on its own track just select it and click delete.
Covering Background Noise
Sometimes background noise is so minor that you do not want to bother going through the process of removing it. In these situations, it may be easier to cover up your background noise than to remove it. This is as simple as dragging a song into the music track of your timeline and adjusting its volume so it is not loud enough to draw attention away from your dialogue. Chances are you want to add background music anyways and this is not even an extra step.
Richard Bennett
Richard Bennett is a writer and a lover of all things video.
Follow @Richard Bennett
Richard Bennett
Mar 27, 2024• Proven solutions
There are few things more annoying to viewers on YouTube than background noise. It is distracting and makes it difficult to engage with the content of a video. If there is noticeable background noise in a video, even a small noise like the faint hum of a computer fan, then it will increase the chances of viewers clicking away. The good news is that these kinds of noises are fairly easy to get rid of.
In order to remove background noise from your video clip, you will first need to create an MP3 of your audio. Then you will be able to take out the unwanted noise in a free program called Audacity and reintroduce your corrected audio into your Filmora project. This article will walk you through the audio editing process.
How To Remove Background Noise from Your Youtube Video
Background Noise Removal
Open up Filmora, import your clip, and drag it into the timeline. Then, play your clip and listen for background noise. If you hear a noise that you wish to remove move on to the first step of background noise removal .
1. Creating An MP3
If you do not already have it you will need to download VLC Media Player from videoLAN.org. VLC is a completely free media player that can play almost any type of file, is great for converting files, and can even be used as a screen recorder. If you consume a lot of media online then chances are you already have VLC. You could also use is Free Video to MP3 Converter by DVDVideoSoft.
If you choose to use VLC, open it up and select Convert/Save under Media. Select your video in the Open Media window that pops up. After you click Convert/Save you will be able to choose your format, in this case, MP3, under Save as type.
2. Removing Background Noise in Audacity
You can download Audacity for free at Audacityteam.org.
Once you have Audacity use it to open your MP3. Then, find a section of your audio that is silent aside from your background noise and highlight it by clicking and dragging. The idea is to point out to the program exactly what sound is a problem for you so it knows what to remove. If you have trouble finding a significant stretch of background noise that does not also include dialogue remember to record a pause before or after the content of your video next time you film.
With your section of background noise highlighted, go to Effect and then Noise Reduction. Then, click on Get Noise Profile. After that, you will select your entire audio timeline before going back to Noise Reduction under Effect. This time click on OK (the default settings are the best in most situations so you do not need to worry about changing them).
Audacity will remove everything that sounds like the sound profile, eliminating your background noise. Sometimes this method will also dull your dialogue, which can be fixed by selecting your entire track and then going to Effect and Amplify. Increasing amplification will fix any muffling of your audio.
3. Syncing in Filmora
Export your corrected MP3 from Audacity and import it into Filmora. Then, drag it into your music track. Syncing your audio should not be difficult, but you can always use your original audio to help you line it up properly if you need to. Just look for a significant spike in your audio waves in both your MP3 and the original audio and make sure they are right on top of each other.
Then, since you no longer need your original audio, you can delete it. Right-click on your clip and select Audio Detach. Once your audio is on its own track just select it and click delete.
Covering Background Noise
Sometimes background noise is so minor that you do not want to bother going through the process of removing it. In these situations, it may be easier to cover up your background noise than to remove it. This is as simple as dragging a song into the music track of your timeline and adjusting its volume so it is not loud enough to draw attention away from your dialogue. Chances are you want to add background music anyways and this is not even an extra step.
Richard Bennett
Richard Bennett is a writer and a lover of all things video.
Follow @Richard Bennett
Also read:
- [New] 2024 Approved Mastering Chrome OS 4 Screenshots Tricks
- [New] Detailed Insights Into YouTube's Monthly Income Model
- [New] In 2024, Automated Calendar Management for Remote Teams
- [Updated] 2024 Approved How to Record a PowerPoint Presentation
- 2024 Approved Boost Visibility with Customized Channel Names
- 2024 Approved Cutting Edge Techniques YouTube Trailers Through Filmora's Lens
- 2024 Approved The Ultimate Guide to Creating Fluid Edits
- Brand Your Channel Innovative Banner Templates for Gamers
- Deutsche Wochentage: Einfache Lerneinheit
- Digital Diving Into YouTube’s Veiled Video Vaults
- Essential Audio Recording Gear for iDevices
- Expert Advice for Embedding YouTube Playlists with Ease
- In 2024, Deciphering Finances How Much Do YouTubers Earn Per Ad?
- In 2024, How Infinix Smart 8 Plus Mirror Screen to PC? | Dr.fone
- In 2024, How to Reset Gmail Password on Infinix Hot 30i Devices
- In 2024, How to Watch Hulu Outside US On Huawei Nova Y91 | Dr.fone
- Step-by-Step Guide: Increasing Windows 11 PIN Length
- Streamlining Your YouTube Tracks A Sound Guide
- Troubleshoot Black Screen Woes in Youtube Playback
- Title: Mobile Mastery YouTube Video Thumbnails Made Easy
- Author: Steven
- Created at : 2024-12-30 00:00:56
- Updated at : 2025-01-03 21:24:22
- Link: https://youtube-clips.techidaily.com/mobile-mastery-youtube-video-thumbnails-made-easy/
- License: This work is licensed under CC BY-NC-SA 4.0.