
Maximize YouTube Exposure in 156 Characters or Less
Maximize YouTube Exposure in 156 Characters or Less
Easy Ways To Get Free Views on YouTube! Alternative Methods

Richard Bennett
Oct 26, 2023• Proven solutions
If you’re looking to get free views on YouTube, rather than just assuming views are free, it probably means you’re looking into alternative ways to jumpstart the growth of your channel (i.e. buying views ). The best way to grow your channel is to focus on putting out quality content consistently. We do not recommend the following methods, but they do exist. Here are a couple of alternatives to purchasing views which are along those same lines (if you want to know how to grow organically without resorting to tactics like these, click here ) When YouTube first started, getting views and subscribers was a lot easier. That’s not to say that creator didn’t have to work hard on their channels, just that they had a lot less competition.
YouTube has become so popular now that it is not uncommon for creators to look for alternative ways to stand out. Some might choose to buy views to kick start the organic growth of their channels (which is not a good idea), while others are looking for free ways of getting those views.
Two of these alternative methods are:
Part 1: Get More Views with View Exchange Platforms
Part 2: Get More YouTube Views with Bots

#1: View Exchange Platforms
There are a variety of websites to choose from, but the main purpose is the same: you watch other people’s videos in order for them to watch your videos.
Here are the most popular view exchange platforms:
1. View2be

View2be accounts are free. After you sign up, you will need to start watching videos from other YouTube publishers who are also members at View2be in order to earn coins. One of the differences between View2be and other view exchange platforms is that here, you can also complete some other tasks such as liking videos in order to earn more coins.
You can then spend the coins on views and likes for your own videos.
2. GrowViews
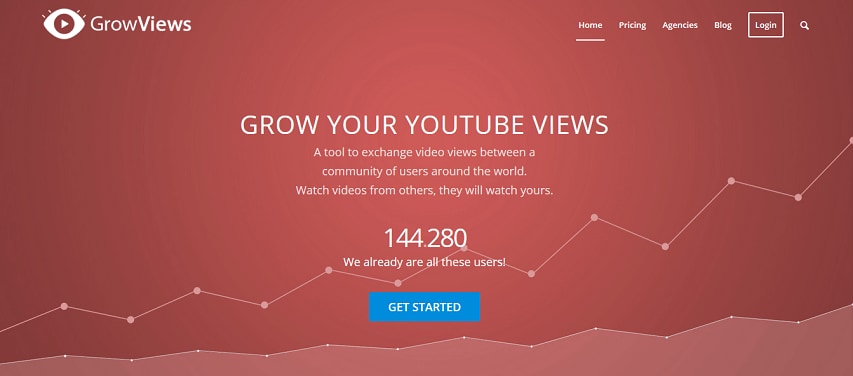
With GrowViews, you will need to login with your YouTube account. This is how the platform lists your YouTube videos.
After signing in, you just need to click on the Play button. The site’s player will work on the background, playing videos from other YouTube creators.
For each video that you watch, you will get 1 credit that you can then exchange for views on your own videos.
3. YTMonster
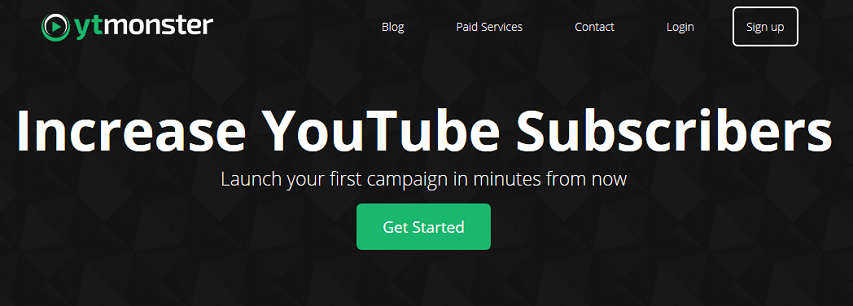
Just like with the previous two view exchange platforms mentioned, you can also create a free account with YTMonster. This will give you access to a dashboard where you can choose how to use the credits that you earn as well as keep track of what you have already spent credits on.
With YTMonster, you will be able to contact other video publishers like you and exchange not only views but comments, likes, and even subscriptions as well. You can even start campaigns to grow your YouTube channel as quickly as you can.
4. KingdomLikes

At KingdomLikes, you also create a free account. This platform isn’t only for YouTube views, it is for the exchange of social actions across multiple websites. One of the main advantages of using the KingdomLikes is that you can also use this same platform to get likes or views on Facebook, Twitter, or Instagram, as well as on YouTube.
Just like with the other platforms, you will need to watch other people’s videos in order to earn views for yourself.
5. AddVisits
After creating your free account on AddVisits you’ll get to a dashboard where you’ll need to enter the URL of the YouTube video you want free views for.
AddVisits reviews each video submitted in this way to ensure that it complies with YouTube’s Terms of Service. Once your video is approved, you define how many points you are willing to give to people who watch your videos or like them. In exchange, you watch other people’s videos and get points as compensation. You can then exchange those points for more views or likes.
#2: Get More Views with YouTube View Bots
When most people think about getting free views on YouTube, they immediately think about bots.
Bots can be dangerous for your channel. The wrong bot can really hurt your search rankings and if you get caught using bots you can lose your account.
If you are going to try a bot, make sure you choose one that offers high retention views (most can’t, but may say they can). High retention views mean YouTube interprets the data as someone watching your video for a period of time, vs just clicking on it and then leaving the page. A bot that can’t offer high retention views just ends up making it look like a lot of people clicked on your video, but none of them liked it enough to watch. That will cause YouTube to rank your video very low in its search results.
Making great content and polishing up your YouTube SEO skills will help you grow your channel over time, and this is probably the best way to go. However, you have a lot of options for how to get free views on YouTube if you want to try to kick start that growth. Besides, using a good video editing software is also important. Filmora provides lots of templates and effects which allows you to edit YouTube videos faster and better.


Richard Bennett
Richard Bennett is a writer and a lover of all things video.
Follow @Richard Bennett
Richard Bennett
Oct 26, 2023• Proven solutions
If you’re looking to get free views on YouTube, rather than just assuming views are free, it probably means you’re looking into alternative ways to jumpstart the growth of your channel (i.e. buying views ). The best way to grow your channel is to focus on putting out quality content consistently. We do not recommend the following methods, but they do exist. Here are a couple of alternatives to purchasing views which are along those same lines (if you want to know how to grow organically without resorting to tactics like these, click here ) When YouTube first started, getting views and subscribers was a lot easier. That’s not to say that creator didn’t have to work hard on their channels, just that they had a lot less competition.
YouTube has become so popular now that it is not uncommon for creators to look for alternative ways to stand out. Some might choose to buy views to kick start the organic growth of their channels (which is not a good idea), while others are looking for free ways of getting those views.
Two of these alternative methods are:
Part 1: Get More Views with View Exchange Platforms
Part 2: Get More YouTube Views with Bots
#1: View Exchange Platforms
There are a variety of websites to choose from, but the main purpose is the same: you watch other people’s videos in order for them to watch your videos.
Here are the most popular view exchange platforms:
1. View2be
View2be accounts are free. After you sign up, you will need to start watching videos from other YouTube publishers who are also members at View2be in order to earn coins. One of the differences between View2be and other view exchange platforms is that here, you can also complete some other tasks such as liking videos in order to earn more coins.
You can then spend the coins on views and likes for your own videos.
2. GrowViews
With GrowViews, you will need to login with your YouTube account. This is how the platform lists your YouTube videos.
After signing in, you just need to click on the Play button. The site’s player will work on the background, playing videos from other YouTube creators.
For each video that you watch, you will get 1 credit that you can then exchange for views on your own videos.
3. YTMonster
Just like with the previous two view exchange platforms mentioned, you can also create a free account with YTMonster. This will give you access to a dashboard where you can choose how to use the credits that you earn as well as keep track of what you have already spent credits on.
With YTMonster, you will be able to contact other video publishers like you and exchange not only views but comments, likes, and even subscriptions as well. You can even start campaigns to grow your YouTube channel as quickly as you can.
4. KingdomLikes
At KingdomLikes, you also create a free account. This platform isn’t only for YouTube views, it is for the exchange of social actions across multiple websites. One of the main advantages of using the KingdomLikes is that you can also use this same platform to get likes or views on Facebook, Twitter, or Instagram, as well as on YouTube.
Just like with the other platforms, you will need to watch other people’s videos in order to earn views for yourself.
5. AddVisits
After creating your free account on AddVisits you’ll get to a dashboard where you’ll need to enter the URL of the YouTube video you want free views for.
AddVisits reviews each video submitted in this way to ensure that it complies with YouTube’s Terms of Service. Once your video is approved, you define how many points you are willing to give to people who watch your videos or like them. In exchange, you watch other people’s videos and get points as compensation. You can then exchange those points for more views or likes.
#2: Get More Views with YouTube View Bots
When most people think about getting free views on YouTube, they immediately think about bots.
Bots can be dangerous for your channel. The wrong bot can really hurt your search rankings and if you get caught using bots you can lose your account.
If you are going to try a bot, make sure you choose one that offers high retention views (most can’t, but may say they can). High retention views mean YouTube interprets the data as someone watching your video for a period of time, vs just clicking on it and then leaving the page. A bot that can’t offer high retention views just ends up making it look like a lot of people clicked on your video, but none of them liked it enough to watch. That will cause YouTube to rank your video very low in its search results.
Making great content and polishing up your YouTube SEO skills will help you grow your channel over time, and this is probably the best way to go. However, you have a lot of options for how to get free views on YouTube if you want to try to kick start that growth. Besides, using a good video editing software is also important. Filmora provides lots of templates and effects which allows you to edit YouTube videos faster and better.
Richard Bennett
Richard Bennett is a writer and a lover of all things video.
Follow @Richard Bennett
Audiophile’s Guide: Techniques to Elevate Sound Recording
10 Recording Tips for Recording Audio with High Quality
Richard Bennett
Oct 26, 2023• Proven solutions
Getting the best sound for your recording is not as simplistic as buying an expensive microphone. There are many different things you can do to record your audio more clearly. Here are 10 recording tips to record high-quality audio.
1. Silence everything you don’t want your microphone to record
2. Put your mobile phone in airplane mode
3. Minimize echo
4. Block wind from reaching your microphone
5. Upgrade your microphone
6. Adjust your levels
7. Start with a sound cue if you’re planning to do some syncing in post
8. Get close to the sound
9. ADR
10. Record Ambient Sound
Bonus Tip-Record Your Audio with Wondershare Filmora
Wondershare Filmora has great recording features that enable you to record screen , voiceover, and webcam. Just connect the recording device to your computer, and start the recording in Wondershare Filmora and you will get high-quality audio. And you can also easily pick a song from the royalty-free music library on Wondershare Filmora. These audio features on Filmora are rare and very simple to use, you only need to click a few times and your video will have a new sound and background song.
1. Silence everything you don’t want your microphone to record
When you’re recording audio, you have to be more aware of the subtle sounds that drone on in your background. These sounds may include humming from machines with fans, buzzing from lights, and jingling from your pet’s collar. Observe your recording space and find ways to silence everything that you don’t want in your audio recording.
2. Put your mobile phone in airplane mode
Although it may be quite obvious to turn your phone’s ring tone off when you’re recording, it may not be as obvious to put your phone in airplane mode. When phones receive calls or perform searches as part of their background processes, they emit signals that can get picked up by your recording system. Avoid ruining good takes with unwanted sounds of phone signals by putting your phones in airplane mode.
3. Minimize echo
If you are recording yourself talk or sing, make sure to set up your recording space in a way where the sound projected from your voice bounces minimally off the walls and back to your microphone. Bare walls and hardwood floors will cause a lot of bouncing. Make use of materials that will absorb your sound rather than bounce it, like a thick rug or a comforter. If you want your voice to echo, that’s something you should do in post-production.
4. Block wind from reaching your microphone
Although it might not sound so loud and distracting to the naked ear, wind sounds terribly loud through a microphone recording and can cause your audio to clip (distortion of waveform due to output of sound exceeding maximum capacity or 0 dB point). This includes the “wind” that comes out of your mouth when you pronounce words starting with the letter “p.” Use pop filters, windscreens, and deadcats to block wind from reaching your microphone.
5. Upgrade your microphone
As much as you try to control all the noise in your surroundings, your greatest recording limitation will come from the hardware that you use. Improve your recordings by plugging in an external microphone into your camera’s microphone jack or record audio completely separately with a professional microphone.
Need help with deciding on a microphone to buy? Check out our recommended list of microphones.
6. Adjust your levels
Before pressing the record button, see how loudly your microphone picks up the sound you wish to record. Adjust your levels (sensitivity of your microphone) until the sound sits in between -6 dBs and -12dBs. This range gives the source of your sound some room to get louder without the recorded audio getting clipped. When you first listen to audio recorded within this range, it may sound very quiet. No need to worry though because you can increase the volume later in editing.
7. Start with a sound cue if you’re planning to do some syncing in post
If you’re recording separate audio that you plan to sync to your video later in editing, start your recording with a short and loud sound cue like a clap or a high pitched “beep” tone. Later, when you’re editing, it’ll be much easier for you to find the section where your video and additional audio match.
8. Get close to the sound
Unless you’re aiming to record ambient sound, bring your microphone close to the source of sound you are wanting to record. The closer your microphone is to the source of sound, the lower your sensitivity setting can be on your microphone. As a result of lowering your levels, sounds you are not meaning to record will also sound fainter.
9. ADR
When you need to record a scene in a loud setting where you have very little control over the noise, record additional vocals later and replace the original vocals through a process called automated dialogue replacement.
10. Record Ambient Sound
Remember to record ambient sound or “room tone.” You can use these recordings to fill in the blanks if you run out of audio and also smooth out parts of your audio where you hear pops, clicks, and other unwanted noise.
Richard Bennett
Richard Bennett is a writer and a lover of all things video.
Follow @Richard Bennett
Richard Bennett
Oct 26, 2023• Proven solutions
Getting the best sound for your recording is not as simplistic as buying an expensive microphone. There are many different things you can do to record your audio more clearly. Here are 10 recording tips to record high-quality audio.
1. Silence everything you don’t want your microphone to record
2. Put your mobile phone in airplane mode
3. Minimize echo
4. Block wind from reaching your microphone
5. Upgrade your microphone
6. Adjust your levels
7. Start with a sound cue if you’re planning to do some syncing in post
8. Get close to the sound
9. ADR
10. Record Ambient Sound
Bonus Tip-Record Your Audio with Wondershare Filmora
Wondershare Filmora has great recording features that enable you to record screen , voiceover, and webcam. Just connect the recording device to your computer, and start the recording in Wondershare Filmora and you will get high-quality audio. And you can also easily pick a song from the royalty-free music library on Wondershare Filmora. These audio features on Filmora are rare and very simple to use, you only need to click a few times and your video will have a new sound and background song.
1. Silence everything you don’t want your microphone to record
When you’re recording audio, you have to be more aware of the subtle sounds that drone on in your background. These sounds may include humming from machines with fans, buzzing from lights, and jingling from your pet’s collar. Observe your recording space and find ways to silence everything that you don’t want in your audio recording.
2. Put your mobile phone in airplane mode
Although it may be quite obvious to turn your phone’s ring tone off when you’re recording, it may not be as obvious to put your phone in airplane mode. When phones receive calls or perform searches as part of their background processes, they emit signals that can get picked up by your recording system. Avoid ruining good takes with unwanted sounds of phone signals by putting your phones in airplane mode.
3. Minimize echo
If you are recording yourself talk or sing, make sure to set up your recording space in a way where the sound projected from your voice bounces minimally off the walls and back to your microphone. Bare walls and hardwood floors will cause a lot of bouncing. Make use of materials that will absorb your sound rather than bounce it, like a thick rug or a comforter. If you want your voice to echo, that’s something you should do in post-production.
4. Block wind from reaching your microphone
Although it might not sound so loud and distracting to the naked ear, wind sounds terribly loud through a microphone recording and can cause your audio to clip (distortion of waveform due to output of sound exceeding maximum capacity or 0 dB point). This includes the “wind” that comes out of your mouth when you pronounce words starting with the letter “p.” Use pop filters, windscreens, and deadcats to block wind from reaching your microphone.
5. Upgrade your microphone
As much as you try to control all the noise in your surroundings, your greatest recording limitation will come from the hardware that you use. Improve your recordings by plugging in an external microphone into your camera’s microphone jack or record audio completely separately with a professional microphone.
Need help with deciding on a microphone to buy? Check out our recommended list of microphones.
6. Adjust your levels
Before pressing the record button, see how loudly your microphone picks up the sound you wish to record. Adjust your levels (sensitivity of your microphone) until the sound sits in between -6 dBs and -12dBs. This range gives the source of your sound some room to get louder without the recorded audio getting clipped. When you first listen to audio recorded within this range, it may sound very quiet. No need to worry though because you can increase the volume later in editing.
7. Start with a sound cue if you’re planning to do some syncing in post
If you’re recording separate audio that you plan to sync to your video later in editing, start your recording with a short and loud sound cue like a clap or a high pitched “beep” tone. Later, when you’re editing, it’ll be much easier for you to find the section where your video and additional audio match.
8. Get close to the sound
Unless you’re aiming to record ambient sound, bring your microphone close to the source of sound you are wanting to record. The closer your microphone is to the source of sound, the lower your sensitivity setting can be on your microphone. As a result of lowering your levels, sounds you are not meaning to record will also sound fainter.
9. ADR
When you need to record a scene in a loud setting where you have very little control over the noise, record additional vocals later and replace the original vocals through a process called automated dialogue replacement.
10. Record Ambient Sound
Remember to record ambient sound or “room tone.” You can use these recordings to fill in the blanks if you run out of audio and also smooth out parts of your audio where you hear pops, clicks, and other unwanted noise.
Richard Bennett
Richard Bennett is a writer and a lover of all things video.
Follow @Richard Bennett
Also read:
- [New] Enhancing Your YouTube Content Basic Premiere Pro Edits
- [New] In 2024, Cutting-Edge Tips for Drone Video Refining
- [Updated] Optimizing Live Periscope Video Speed
- 2024 Approved Essential iMovie Techniques to Upgrade Your YouTube Content
- 2024 Approved Streamlabs Vs. Top Embedding Platforms
- Debunking 7 Myths: The Limited Value of Ray Tracing
- Decoding Tablet Sizes and Weights for the Ideal Purchase Decision
- Get Ahead with Technology: Introducing The New Enhancements for Apple AirPods Pro 2 - Step-by-Step Update Instructions
- How to recover deleted photos from Android Gallery after format on Oppo A1 5G
- How to Unlock iPhone XS Max Without Passcode? | Dr.fone
- The Essential Guide to Editing YouTube Videos Seamlessly in iMovie
- YouTube's Essential Learning Resources for Upcoming Directors
- Title: Maximize YouTube Exposure in 156 Characters or Less
- Author: Steven
- Created at : 2024-12-28 20:22:19
- Updated at : 2025-01-03 21:35:48
- Link: https://youtube-clips.techidaily.com/maximize-youtube-exposure-in-156-characters-or-less/
- License: This work is licensed under CC BY-NC-SA 4.0.