
:max_bytes(150000):strip_icc()/henry-perks-BJXAxQ1L7dI-unsplash-8268774140134c6a8d61b7c4037a3629.jpg)
"Maximize Your YouTube Yields Small Channel Sponsorship Strategies"
Maximize Your YouTube Yields: Small Channel Sponsorship Strategies
How to Get YouTube Sponsorship for Small Channels (Easy)

Richard Bennett
Mar 27, 2024• Proven solutions
Are you looking for YouTube sponsorship? Getting YouTube sponsorship for small channels might seem to be a very difficult goal. Whenever the word sponsors strikes your mind, you think of the big and expensive commercials.
However, if you lower your expectation from the big commercial companies, there are several other companies in the market that can help you with the YouTube sponsorship.
In this article, you will learn how to get YouTube sponsorship and make money out of it.
- Part1: Before You Start Applying For Sponsorship
- Part2: How To Get A Sponsor For Youtube Channel
- Part3: Types of Sponsorship
Part 1: Before You Start Applying For Sponsorship
1. Read YouTube Rules
As you are a small channel, you must be very cautious about the YouTube rules. Never put up any abusive content on your channel that degrades the value of YouTube. Ensure that your channel’s content fits the directions and guidelines of YouTube.
The supporters of YouTube sponsorship for small channels would never wish to get associated with channels that might be erased due to the strategy infringement of YouTube. So, be careful before uploading your content.

2. Quality Content Is Important
The content you offer through your channel must offer valuable content. Not just that, you must have a library of valuable content so that the potential sponsors can browse through several materials in your channel. Uploading once in a blue moon or just a few contents in the beginning and expecting YouTube sponsorships to pour in is not the way out to acquire supporters.

3. Leave Your Business Email
Always add a business email ID to your channel, which shows that you would love to receive business inquiries. This is the ID where you will receive notifications for friend requests, video comments, and even the battering messages once you have a large fan following.

4. Try to Make Your Video Eye-catching
A high-quality video will also attract sponsors. Don’t just put your footage together and upload it to YouTube, add some transitions, elements, and effects to make it more entertaining and attractive. Yet not everyone is able to edit videos perfectly, that’s why we would like to recommend Filmora for you.
Filmora is a video editing software for people of different levels. For beginners, the Instant Mode, Template Mode saves you from the trouble of finding the proper transitions or elements. For experienced, the Green Screen, Split Screen, Speed Ramping, and more allow you to add more effects to your video.
Check the below videos to find out the features of Filmora and download it to get started with video editing.


Part 2: How To Get A Sponsor For Youtube Channel
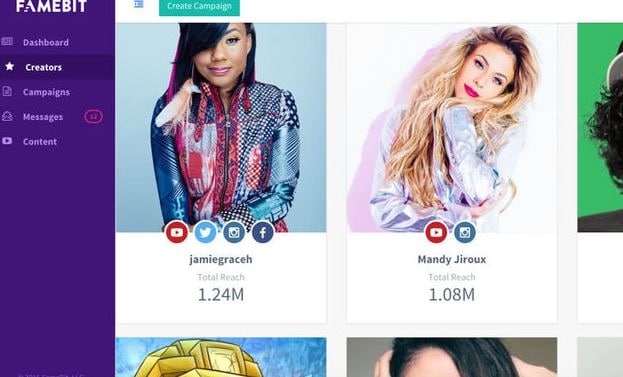
1. Use YouTube Sponsorship Platform – Famebit
If you are searching for YouTube sponsorship for small channels, Famebit is a trusted platform that can be considered. It is an interface for the advertisers and the video creators who require sponsorship for their content.
Utilizing Famebit can be beneficial in acquiring more than the average amount of cash as it is added by Google. If you have 5000 endorsers for your channel, you can very well utilize Famebit to obtain YouTube sponsorship for small channels.
You can explore various items like contraptions, innovations, designs, and more when you get to their commercial center by making a free record. Famebit charges 10% of the sponsored amount and the installment is made by check or PayPal.
2. Reach Out Directly
Reaching out to the people directly is one of the tried and tested ways to acquire YouTube sponsorship for small channels. Research and try to find 50 to 100 companies that would be interested in your channel.
It will not be much difficult to search for that one person within this list whom you can connect with directly. Once you have the company’s list and detailed contact information of those companies, send a mail inviting them to check your channel and show your interest to partner with them.
It is essential to make yourself stand out in the colossal crowd. Ensure your channel is unique and somewhat different from the rest because the contacted companies keep receiving partnering submissions from several other content creators too.
One important thing is not to send out the same old letter to all 50 companies and keep hoping to receive a positive response from at least one. Try to focus on your channel’s USP and highlight the same in your letter to the companies while trying to contact the companies for YouTube Sponsorship.

3. Remember To Attend Exhibition
The trade shows and exhibitions are a great way to search for YouTube sponsorship for small channels. The exhibitions that focus on new media give a huge platform for you to find a sponsor when you participate in it.
Such events offer tricks and tips, helps you to talk to other content creators, and also lets you connect with the brand managers who can offer your channel with YouTube sponsorship.

Part 3: Types of Sponsorship
1. Product Sponsorships
When you are searching for sponsorship for a particular product, ensure that it is relevant to your channel. Never approach the sponsors without ensuring the same as you might put off your viewers and your sponsors will not achieve their expected results. You might lose both your sponsors and audiences in such a case.
When you try to get YouTube sponsorship for small channels, it is quite difficult as the promotion of the product becomes limited to whatever small following they have. Product reviews and tutorials are the best ways to obtain product sponsorships.
2. Paid Sponsorship
Among all sponsorships, paid sponsorship is the most challenging one. Usually, when you review the products of the affiliate links in your videos, you earn revenues, but, in the paid sponsorship you earn by advertising product and company links on your channel.
When you add the company’s products to your videos, you earn money. It appears at the beginning and at the end of your videos after it is played on your YouTube channel.
3. Affiliate Sponsorship
It is the easiest of all sponsorships but also the least revenue-generating one too. Affiliate sponsorship works by sharing affiliate codes and links. It is used by your audiences to obtain discounts or offer you a reward.
There are two types in which affiliate sponsorship works. One is the discounting option where the code is shared and the viewers use these codes to get discounts anywhere between 5-15% in shopping products from that same site. Another option is to use the affiliate code to integrate it into an URL that offers profits to a content creator in form of traffic.
Conclusion
Not just the popular channels, the newbies can also earn YouTube sponsorship when they know the way outs. Follow the above tricks to get the youtube sponsorship for small channels without much effort. If your content is unique and your process to reach the sponsors is right, you can definitely make money through this medium. If you want to edit a YouTube video, Filmora can help you with its powerful features.
Richard Bennett
Richard Bennett is a writer and a lover of all things video.
Follow @Richard Bennett
Richard Bennett
Mar 27, 2024• Proven solutions
Are you looking for YouTube sponsorship? Getting YouTube sponsorship for small channels might seem to be a very difficult goal. Whenever the word sponsors strikes your mind, you think of the big and expensive commercials.
However, if you lower your expectation from the big commercial companies, there are several other companies in the market that can help you with the YouTube sponsorship.
In this article, you will learn how to get YouTube sponsorship and make money out of it.
- Part1: Before You Start Applying For Sponsorship
- Part2: How To Get A Sponsor For Youtube Channel
- Part3: Types of Sponsorship
Part 1: Before You Start Applying For Sponsorship
1. Read YouTube Rules
As you are a small channel, you must be very cautious about the YouTube rules. Never put up any abusive content on your channel that degrades the value of YouTube. Ensure that your channel’s content fits the directions and guidelines of YouTube.
The supporters of YouTube sponsorship for small channels would never wish to get associated with channels that might be erased due to the strategy infringement of YouTube. So, be careful before uploading your content.
2. Quality Content Is Important
The content you offer through your channel must offer valuable content. Not just that, you must have a library of valuable content so that the potential sponsors can browse through several materials in your channel. Uploading once in a blue moon or just a few contents in the beginning and expecting YouTube sponsorships to pour in is not the way out to acquire supporters.
3. Leave Your Business Email
Always add a business email ID to your channel, which shows that you would love to receive business inquiries. This is the ID where you will receive notifications for friend requests, video comments, and even the battering messages once you have a large fan following.
4. Try to Make Your Video Eye-catching
A high-quality video will also attract sponsors. Don’t just put your footage together and upload it to YouTube, add some transitions, elements, and effects to make it more entertaining and attractive. Yet not everyone is able to edit videos perfectly, that’s why we would like to recommend Filmora for you.
Filmora is a video editing software for people of different levels. For beginners, the Instant Mode, Template Mode saves you from the trouble of finding the proper transitions or elements. For experienced, the Green Screen, Split Screen, Speed Ramping, and more allow you to add more effects to your video.
Check the below videos to find out the features of Filmora and download it to get started with video editing.
Part 2: How To Get A Sponsor For Youtube Channel
1. Use YouTube Sponsorship Platform – Famebit
If you are searching for YouTube sponsorship for small channels, Famebit is a trusted platform that can be considered. It is an interface for the advertisers and the video creators who require sponsorship for their content.
Utilizing Famebit can be beneficial in acquiring more than the average amount of cash as it is added by Google. If you have 5000 endorsers for your channel, you can very well utilize Famebit to obtain YouTube sponsorship for small channels.
You can explore various items like contraptions, innovations, designs, and more when you get to their commercial center by making a free record. Famebit charges 10% of the sponsored amount and the installment is made by check or PayPal.
2. Reach Out Directly
Reaching out to the people directly is one of the tried and tested ways to acquire YouTube sponsorship for small channels. Research and try to find 50 to 100 companies that would be interested in your channel.
It will not be much difficult to search for that one person within this list whom you can connect with directly. Once you have the company’s list and detailed contact information of those companies, send a mail inviting them to check your channel and show your interest to partner with them.
It is essential to make yourself stand out in the colossal crowd. Ensure your channel is unique and somewhat different from the rest because the contacted companies keep receiving partnering submissions from several other content creators too.
One important thing is not to send out the same old letter to all 50 companies and keep hoping to receive a positive response from at least one. Try to focus on your channel’s USP and highlight the same in your letter to the companies while trying to contact the companies for YouTube Sponsorship.
3. Remember To Attend Exhibition
The trade shows and exhibitions are a great way to search for YouTube sponsorship for small channels. The exhibitions that focus on new media give a huge platform for you to find a sponsor when you participate in it.
Such events offer tricks and tips, helps you to talk to other content creators, and also lets you connect with the brand managers who can offer your channel with YouTube sponsorship.
Part 3: Types of Sponsorship
1. Product Sponsorships
When you are searching for sponsorship for a particular product, ensure that it is relevant to your channel. Never approach the sponsors without ensuring the same as you might put off your viewers and your sponsors will not achieve their expected results. You might lose both your sponsors and audiences in such a case.
When you try to get YouTube sponsorship for small channels, it is quite difficult as the promotion of the product becomes limited to whatever small following they have. Product reviews and tutorials are the best ways to obtain product sponsorships.
2. Paid Sponsorship
Among all sponsorships, paid sponsorship is the most challenging one. Usually, when you review the products of the affiliate links in your videos, you earn revenues, but, in the paid sponsorship you earn by advertising product and company links on your channel.
When you add the company’s products to your videos, you earn money. It appears at the beginning and at the end of your videos after it is played on your YouTube channel.
3. Affiliate Sponsorship
It is the easiest of all sponsorships but also the least revenue-generating one too. Affiliate sponsorship works by sharing affiliate codes and links. It is used by your audiences to obtain discounts or offer you a reward.
There are two types in which affiliate sponsorship works. One is the discounting option where the code is shared and the viewers use these codes to get discounts anywhere between 5-15% in shopping products from that same site. Another option is to use the affiliate code to integrate it into an URL that offers profits to a content creator in form of traffic.
Conclusion
Not just the popular channels, the newbies can also earn YouTube sponsorship when they know the way outs. Follow the above tricks to get the youtube sponsorship for small channels without much effort. If your content is unique and your process to reach the sponsors is right, you can definitely make money through this medium. If you want to edit a YouTube video, Filmora can help you with its powerful features.
Richard Bennett
Richard Bennett is a writer and a lover of all things video.
Follow @Richard Bennett
Step-by-Step: Using Premiere for Video Upload
How Do I Use Adobe Premiere To Upload YouTube Videos?

Benjamin Arango
Mar 27, 2024• Proven solutions
Whilst getting the editing and post work just right on any project is what we all aim for, the ultimate aim is for other people to see our creations, and the most popular way to achieve that is YouTube . Chances are, if you are producing video, you will be putting some of it on YouTube at some point, so let’s have a look at the most efficient way to get your work from Premiere to YouTube.
Check if your computer meet the Premiere System Requirements >>
This is a basic tutorial about Adobe Premiere, professional video editing software. However, if video editing is new to you, consider Wondershare Filmora , which is a powerful but easy-to-use tool for users just starting out. Download the free trial version below.
Download Mac Version ](https://tools.techidaily.com/wondershare/filmora/download/ )
How Do I Use Adobe Premiere To Upload YouTube Videos
1. Master Copy
Before exporting your work, it is important to first create a master copy of your project that is ‘as is’, in that it reflects the settings and codecs used in the original footage.
To do this you simply select the sequence within the Timeline or in the Project Panel, and go through the menu tree via File > Export > Media to bring up the export dialogue.

To create your Master Copy, simply select the first option of ‘Match Sequence Settings’, this exports a file that is of the same quality as your original footage, essentially producing a digital copy of the work for archiving before anything else is done.
With you work safe and secure it is now time to look at ensuring the project is suitable for YouTube. With our sequence selected in the Timeline or Project Panel again, we go through the same File > Export > Media path to bring up the media export dialogue as before.
2. Container
The first option we have to consider is the file format that our finished video needs to be in. Here you should refer to YouTube for its guidelines, whilst they do accept a number of file formats, digging through the YouTube help system to find the settings for highest quality we find that they recommend MPEG4 as the container, using the codec.

We can also see further recommended settings in this screenshot that will be covered later.
The good news is that Premiere automatically selects the appropriate container for us when we select our codec, however it is worth knowing the file type YouTube is expecting just to check yourself.
3. Video Codec
So having established that YouTube recommends the MPEG4 container using the codec, the first option we need to look for in the media export dialogue is to select the appropriate Format.
This is the first drop down in the dialogue box, and in this case we simply select from the list.

Once you select you can check the ‘output name’ field and see that premiere is automatically set the output file to .mp4 which is exactly what we need.
4. Preset
The next field we come to is the ‘Preset’ dropdown menu. This is a major help to most people, as Adobe have very kindly included large numbers of presets to quickly adapt video settings to suit specific uses. They vary depending on the exact version of Premiere you are using, and each format type does have its own list of presets, as we can see has a large number for YouTube, but also has many presets for specific devices (presets for iPad, Kindle, Nook, various other tablets and phones, Vimeo and a host of others) to make getting the right settings that bit easier for us.

It is important here to select the correct preset from the various YouTube options. You want to select the resolution and frame rate that match your source file, for the best results. So, if your source file is 1080p with a frame rate of 29.97 fps then that is the YouTube setting you would select.
Once a preset is selected a summary of the settings is displayed below, normally these will be well suited to your project, however you can fine tune anything you wish by selecting the video or audio tabs at the bottom which give you the chance to adjust each parameter individually. If you do this, you can save these changes as a custom preset by clicking the button at the side of the Preset dropdown menu and simply use it on later projects by selecting it from the list the same as any other, a great time saving tool.

5. Rendering
Once you are satisfied with the settings, either from the Preset alone or if you have adjusted anything yourself, you are nearly ready to render the file and export it.
For YouTube it is recommended you select the ‘Use Maximum Render Quality’ option to maintain the best output you can, it does add time to the render process but if you value the quality of your work it is worthwhile.
Finally you can choose a suitable filename and the destination of the file by clicking on the ‘Output Name’ field.
I normally use a filename that includes the destination medium so I can differentiate between different versions of a project and know which one to upload where, in this case I include ‘youtube’, but if I were planning on uploading clips of the project to vimeo as well for instance there may be a cut of the project with ‘vimeo’ in the name too. The destination is personal preference, because I do use filenames to differentiate versions I can put the various iterations into a single project file, others have folder structures for each type of file , so all YouTube output goes into a single folder and so on, how you organize is entirely dependent on how you work.

Once those are selected clicking ‘Export’ starts the rendering process, and eventually (how long depends on the speed of your computer and the size and type of file involved), you will end up with your YouTube optimized video in the location you chose.
Here I created 4 key frames that let the ‘Animation’ object move around the ‘Demo Text’ Object and finally come to rest below it. Whilst this type of effect does look very effective on screen, such is the ease of use of After Effects it really is just a few minutes work to achieve.
Learn more details about How to add text in Premiere >>
6. Uploading
Now you have your file, the next step is to go to your YouTube account and log in if you need to.
On the top of your homepage on the right is the upload button, selecting that brings up the select file menu as below.

You can either drag your file into the window or click on it to open a standard file browser to locate the desired file, click and the upload will begin. The dropdown underneath allows you to set the video as Public, Unlisted or Private. You can change this at any time once the video is uploaded as well.
This opens the upload progress window, where you can add in a name, description and tags as well as add the video to a playlist or adjust the privacy settings as the video is uploading.

Once the upload as finished, you can do final adjustments to settings and choose a thumbnail for the video. The final step is to click the ‘Publish’ button and your video will be processed and go live.
Benjamin Arango
Benjamin Arango is a writer and a lover of all things video.
Follow @Benjamin Arango
Benjamin Arango
Mar 27, 2024• Proven solutions
Whilst getting the editing and post work just right on any project is what we all aim for, the ultimate aim is for other people to see our creations, and the most popular way to achieve that is YouTube . Chances are, if you are producing video, you will be putting some of it on YouTube at some point, so let’s have a look at the most efficient way to get your work from Premiere to YouTube.
Check if your computer meet the Premiere System Requirements >>
This is a basic tutorial about Adobe Premiere, professional video editing software. However, if video editing is new to you, consider Wondershare Filmora , which is a powerful but easy-to-use tool for users just starting out. Download the free trial version below.
Download Mac Version ](https://tools.techidaily.com/wondershare/filmora/download/ )
How Do I Use Adobe Premiere To Upload YouTube Videos
1. Master Copy
Before exporting your work, it is important to first create a master copy of your project that is ‘as is’, in that it reflects the settings and codecs used in the original footage.
To do this you simply select the sequence within the Timeline or in the Project Panel, and go through the menu tree via File > Export > Media to bring up the export dialogue.
To create your Master Copy, simply select the first option of ‘Match Sequence Settings’, this exports a file that is of the same quality as your original footage, essentially producing a digital copy of the work for archiving before anything else is done.
With you work safe and secure it is now time to look at ensuring the project is suitable for YouTube. With our sequence selected in the Timeline or Project Panel again, we go through the same File > Export > Media path to bring up the media export dialogue as before.
2. Container
The first option we have to consider is the file format that our finished video needs to be in. Here you should refer to YouTube for its guidelines, whilst they do accept a number of file formats, digging through the YouTube help system to find the settings for highest quality we find that they recommend MPEG4 as the container, using the codec.
We can also see further recommended settings in this screenshot that will be covered later.
The good news is that Premiere automatically selects the appropriate container for us when we select our codec, however it is worth knowing the file type YouTube is expecting just to check yourself.
3. Video Codec
So having established that YouTube recommends the MPEG4 container using the codec, the first option we need to look for in the media export dialogue is to select the appropriate Format.
This is the first drop down in the dialogue box, and in this case we simply select from the list.
Once you select you can check the ‘output name’ field and see that premiere is automatically set the output file to .mp4 which is exactly what we need.
4. Preset
The next field we come to is the ‘Preset’ dropdown menu. This is a major help to most people, as Adobe have very kindly included large numbers of presets to quickly adapt video settings to suit specific uses. They vary depending on the exact version of Premiere you are using, and each format type does have its own list of presets, as we can see has a large number for YouTube, but also has many presets for specific devices (presets for iPad, Kindle, Nook, various other tablets and phones, Vimeo and a host of others) to make getting the right settings that bit easier for us.
It is important here to select the correct preset from the various YouTube options. You want to select the resolution and frame rate that match your source file, for the best results. So, if your source file is 1080p with a frame rate of 29.97 fps then that is the YouTube setting you would select.
Once a preset is selected a summary of the settings is displayed below, normally these will be well suited to your project, however you can fine tune anything you wish by selecting the video or audio tabs at the bottom which give you the chance to adjust each parameter individually. If you do this, you can save these changes as a custom preset by clicking the button at the side of the Preset dropdown menu and simply use it on later projects by selecting it from the list the same as any other, a great time saving tool.
5. Rendering
Once you are satisfied with the settings, either from the Preset alone or if you have adjusted anything yourself, you are nearly ready to render the file and export it.
For YouTube it is recommended you select the ‘Use Maximum Render Quality’ option to maintain the best output you can, it does add time to the render process but if you value the quality of your work it is worthwhile.
Finally you can choose a suitable filename and the destination of the file by clicking on the ‘Output Name’ field.
I normally use a filename that includes the destination medium so I can differentiate between different versions of a project and know which one to upload where, in this case I include ‘youtube’, but if I were planning on uploading clips of the project to vimeo as well for instance there may be a cut of the project with ‘vimeo’ in the name too. The destination is personal preference, because I do use filenames to differentiate versions I can put the various iterations into a single project file, others have folder structures for each type of file , so all YouTube output goes into a single folder and so on, how you organize is entirely dependent on how you work.
Once those are selected clicking ‘Export’ starts the rendering process, and eventually (how long depends on the speed of your computer and the size and type of file involved), you will end up with your YouTube optimized video in the location you chose.
Here I created 4 key frames that let the ‘Animation’ object move around the ‘Demo Text’ Object and finally come to rest below it. Whilst this type of effect does look very effective on screen, such is the ease of use of After Effects it really is just a few minutes work to achieve.
Learn more details about How to add text in Premiere >>
6. Uploading
Now you have your file, the next step is to go to your YouTube account and log in if you need to.
On the top of your homepage on the right is the upload button, selecting that brings up the select file menu as below.
You can either drag your file into the window or click on it to open a standard file browser to locate the desired file, click and the upload will begin. The dropdown underneath allows you to set the video as Public, Unlisted or Private. You can change this at any time once the video is uploaded as well.
This opens the upload progress window, where you can add in a name, description and tags as well as add the video to a playlist or adjust the privacy settings as the video is uploading.
Once the upload as finished, you can do final adjustments to settings and choose a thumbnail for the video. The final step is to click the ‘Publish’ button and your video will be processed and go live.
Benjamin Arango
Benjamin Arango is a writer and a lover of all things video.
Follow @Benjamin Arango
Also read:
- [Updated] Discover Engaging YouTube Threads
- 2024 Approved Enhancing Viewership with Informative YouTube Video Captions
- In 2024, Dancefloor Dynamics Top-Rated DJ Video Selections
- [Updated] Deciphering Digital Marketing The Power of YouTube Keywords
- YouTube Unearthing the Obscured Videotapes
- How to Shave Seconds Off Your YouTube Video Submission
- [Updated] Break Through the Crowd Key YouTube SEO Strategies to Rank High
- In 2024, Crafting Snug Winter Atmospheres for Engaging Online Content
- Connoisseurs Melding Visionary Sounds & Frames for 2024
- [New] Champion Toolkit 10 Budget-Friendly Caption Extractors
- [Updated] Embrace the Pause Button 3 Techniques for Decelerating YouTube Video Playback (59 Chars, Slight Overage with Rich Content Justification)
- Enhancing Visibility and Discoverability via Targeted Tags
- [New] Cutting-Edge Content Creation Premier Android Editors
- [Updated] Break Down Top 7 Video Streaming Tools that Revolutionize YouTube Broadcasts (iPhones/Android)
- Mastery in Making Compelling YouTube Videos for Brands
- [New] Channel Combat Determining Which Earns More From Videos—Dailymotion or YouTube
- How To Organize Photo Album On iPhone And iCloud
- Updated Elevate Your Podcasts Production Value with These Top 10 Editing Applications (Free/Paid) for 2024
- From No Followers to a Million Top 15 Tricks to Become an Instagram Phenomenon
- How to Unlock Apple ID Activation Lock From Apple iPhone 6s Plus?
- Updated In 2024, MovieMaster for macOS
- How to Delete iCloud Account with or without Password from your Apple iPhone 15 Pro Max/Windows/Mac
- Ways to stop parent tracking your Realme 10T 5G | Dr.fone
- Oppo A78 Not Connecting to Wi-Fi? 12 Quick Ways to Fix | Dr.fone
- FoodieHits Leading TikTok Food Bloggers for 2024
- [Updated] Authentic Allure Vs. Artificial Amassment Feed Focus for 2024
- How to recover old music from your Y100 5G
- [Updated] The 7 Best Total War Games
- Title: "Maximize Your YouTube Yields Small Channel Sponsorship Strategies"
- Author: Steven
- Created at : 2024-05-25 19:53:48
- Updated at : 2024-05-26 19:53:48
- Link: https://youtube-clips.techidaily.com/maximize-your-youtube-yields-small-channel-sponsorship-strategies/
- License: This work is licensed under CC BY-NC-SA 4.0.
