
:max_bytes(150000):strip_icc()/dellstudentdiscount-e67f4f7e4b4b46cba7af6aa676fcf535.jpg)
Leveraging YouTube for Affiliate Earnings
Leveraging YouTube for Affiliate Earnings
YouTube Affiliate Marketing: How to Make Money with It

Richard Bennett
Mar 27, 2024• Proven solutions
Many people are finding it harder to make money online today. However, there are always avenues to explore that can help you increase your revenue. If you’ve never considered YouTube affiliate marketing before, or you are considering to step into it, now could be the perfect time to find out more about this valuable opportunity.
In this article, we will explain how you can make money via YouTube affiliate marketing, so read on to find out more.
- Part1: What is YouTube affiliate marketing
- Part2: Steps to start your YouTube affiliate marketing project
- Part2: 3 Tips before you begin
Want to join the Filmora affiliate program but don’t have the media kit? Visit the Filmora Marketing Kit to download banners, logos and demo videos from Filmora.
Part 1: What is YouTube affiliate marketing?
In YouTube affiliate marketing, videos are made to encourage customers to purchase products from third-party sites including Amazon.
When users buy products via your links, you can receive commission, which can be up to 10% depending on the category of the product and how much you are selling.
Examples of YouTube affiliate marketing videos include reviews, how-to guides, un-boxing videos and more. Videos are designed to show off what products can do and explain why customers should go on to make a purchase.
When you have completed your video, you can register for an affiliate marketing program and then add links to your video. The links can be placed either in the video description or as annotations in the clip itself.
Amazon affiliate marketers don’t always just produce videos – they can also promote products via articles, written reviews and more. To make your marketing program successful, you must ensure people know about your video and encourage them to click on the links and buy the products.
Though this can seem daunting at first, the more experience you gain, the more revenue you can generate.
Part 2: Steps to start your YouTube affiliate marketing project
Step 1: build affiliate relationship
One of the first steps you should take when getting your project off the ground is to establish relationships with brands that you love. If you do have a genuine love for the product, this should be reflected in the content and encourage others to make purchases.
Viewers can often tell when your enthusiasm is not genuine, which is why it’s so important to identify products that really do appeal to you. Make a list of the products or programs you use in your daily life and search online to see if there is an affiliate program for it.
If this is the case, you simply need to apply to join it. You may find that the product, program or service that you love does not have a program. Should this be the situation, contact partners to tell them about your love for the product or service and see if they can set something up. Chances are they will be more than happy to do so, as it could be very beneficial for them.

Step 2: Create your product video
The next step is to actually produce your video. Viewers love honesty, so don’t be afraid to say so if there is a way you feel the product or service could be improved.
Remember to include calls to action. Un-boxing videos are very popular and show viewers everything inside a package, whilst review videos can also provide valuable insights.
Top 10 lists also generate high views. You must also remember to include a disclosure that informs viewers that you are being paid via an affiliate marketing scheme. This is a legal obligation.
Step 3: Promote your content
There are many things you can do to ensure your product is seen. Share your video on all your social media channels, respond to as many questions from viewers as possible and add links to online environments where the product is already being discussed.
Set up a channel that can be found when relevant search terms are used and make sure your titles are optimized for search too.

Part 3: 3 Tips before you begin
1. Commission Rate
All brands have different commission rates, with some offering up to 50% and others providing around 5%. Make sure you know what the rates are before you proceed and read the terms and conditions carefully. You may well wish to create a dedicated channel or channels to bring everything together. If you’re passionate about other people’s products, it makes perfect sense to get paid to talk about them.

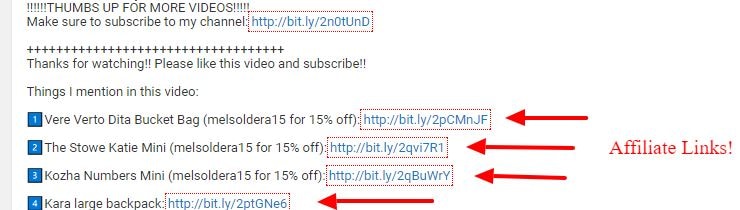
2. Where affiliate links appear
Affiliate links are placed below the YouTube video in the description. One issue for YouTube affiliate marketers is that buyers tend to exit YouTube once they have clicked on your link, whether they go on to buy the product or not.
It is important to try and get as many views as possible to boost exposure for your video, whilst achieving as many sales as you can. Try to strike the ideal balance between encouraging viewers to make a purchase and to watch as much of your content as possible. The more views you receive, the more favorably your content will be treated by YouTube.
3. Know your product well
It is really essential to know your product inside out when you are marketing it to viewers. YouTube viewers expect you to be an expert when it comes to the products you are showcasing, so take as much time as you need to gain an in-depth understanding of how it works and what its features are.
You must also be able to explain why it makes so much sense to choose the specific product or service over its competitors. Try not to be repetitive, use HD footage and a quality mic, avoid link spamming, choose the best kind of video for the product and plan out the video before you start creating it. Again, engage with your audience as much as you can.

Conclusion
There are various great reasons for getting involved in YouTube affiliate marketing. You may be amazed to see just how much cash you can generate when you follow the above steps and create inspiring videos that showcase products in the best possible light. Just remember to be honest and talk about the cons as well as the pros if they are any. Doing this will help you become a trusted, authentic YouTube affiliate marketer. Why wait any longer to get started?


Richard Bennett
Richard Bennett is a writer and a lover of all things video.
Follow @Richard Bennett
Richard Bennett
Mar 27, 2024• Proven solutions
Many people are finding it harder to make money online today. However, there are always avenues to explore that can help you increase your revenue. If you’ve never considered YouTube affiliate marketing before, or you are considering to step into it, now could be the perfect time to find out more about this valuable opportunity.
In this article, we will explain how you can make money via YouTube affiliate marketing, so read on to find out more.
- Part1: What is YouTube affiliate marketing
- Part2: Steps to start your YouTube affiliate marketing project
- Part2: 3 Tips before you begin
Want to join the Filmora affiliate program but don’t have the media kit? Visit the Filmora Marketing Kit to download banners, logos and demo videos from Filmora.
Part 1: What is YouTube affiliate marketing?
In YouTube affiliate marketing, videos are made to encourage customers to purchase products from third-party sites including Amazon.
When users buy products via your links, you can receive commission, which can be up to 10% depending on the category of the product and how much you are selling.
Examples of YouTube affiliate marketing videos include reviews, how-to guides, un-boxing videos and more. Videos are designed to show off what products can do and explain why customers should go on to make a purchase.
When you have completed your video, you can register for an affiliate marketing program and then add links to your video. The links can be placed either in the video description or as annotations in the clip itself.
Amazon affiliate marketers don’t always just produce videos – they can also promote products via articles, written reviews and more. To make your marketing program successful, you must ensure people know about your video and encourage them to click on the links and buy the products.
Though this can seem daunting at first, the more experience you gain, the more revenue you can generate.
Part 2: Steps to start your YouTube affiliate marketing project
Step 1: build affiliate relationship
One of the first steps you should take when getting your project off the ground is to establish relationships with brands that you love. If you do have a genuine love for the product, this should be reflected in the content and encourage others to make purchases.
Viewers can often tell when your enthusiasm is not genuine, which is why it’s so important to identify products that really do appeal to you. Make a list of the products or programs you use in your daily life and search online to see if there is an affiliate program for it.
If this is the case, you simply need to apply to join it. You may find that the product, program or service that you love does not have a program. Should this be the situation, contact partners to tell them about your love for the product or service and see if they can set something up. Chances are they will be more than happy to do so, as it could be very beneficial for them.
Step 2: Create your product video
The next step is to actually produce your video. Viewers love honesty, so don’t be afraid to say so if there is a way you feel the product or service could be improved.
Remember to include calls to action. Un-boxing videos are very popular and show viewers everything inside a package, whilst review videos can also provide valuable insights.
Top 10 lists also generate high views. You must also remember to include a disclosure that informs viewers that you are being paid via an affiliate marketing scheme. This is a legal obligation.
Step 3: Promote your content
There are many things you can do to ensure your product is seen. Share your video on all your social media channels, respond to as many questions from viewers as possible and add links to online environments where the product is already being discussed.
Set up a channel that can be found when relevant search terms are used and make sure your titles are optimized for search too.
Part 3: 3 Tips before you begin
1. Commission Rate
All brands have different commission rates, with some offering up to 50% and others providing around 5%. Make sure you know what the rates are before you proceed and read the terms and conditions carefully. You may well wish to create a dedicated channel or channels to bring everything together. If you’re passionate about other people’s products, it makes perfect sense to get paid to talk about them.
2. Where affiliate links appear
Affiliate links are placed below the YouTube video in the description. One issue for YouTube affiliate marketers is that buyers tend to exit YouTube once they have clicked on your link, whether they go on to buy the product or not.
It is important to try and get as many views as possible to boost exposure for your video, whilst achieving as many sales as you can. Try to strike the ideal balance between encouraging viewers to make a purchase and to watch as much of your content as possible. The more views you receive, the more favorably your content will be treated by YouTube.
3. Know your product well
It is really essential to know your product inside out when you are marketing it to viewers. YouTube viewers expect you to be an expert when it comes to the products you are showcasing, so take as much time as you need to gain an in-depth understanding of how it works and what its features are.
You must also be able to explain why it makes so much sense to choose the specific product or service over its competitors. Try not to be repetitive, use HD footage and a quality mic, avoid link spamming, choose the best kind of video for the product and plan out the video before you start creating it. Again, engage with your audience as much as you can.
Conclusion
There are various great reasons for getting involved in YouTube affiliate marketing. You may be amazed to see just how much cash you can generate when you follow the above steps and create inspiring videos that showcase products in the best possible light. Just remember to be honest and talk about the cons as well as the pros if they are any. Doing this will help you become a trusted, authentic YouTube affiliate marketer. Why wait any longer to get started?
Richard Bennett
Richard Bennett is a writer and a lover of all things video.
Follow @Richard Bennett
Adding Subtitles: A Step-by-Step YouTube Video Approach
How to Add Text to YouTube Video Before or After Uploading
Richard Bennett
Mar 27, 2024• Proven solutions
A great way to emphasize something you say in your vlog is to have your words appear next to you as you say them . Adding text to YouTube videos can look really professional. You might put a title at the beginning of your video, use bullet points to help people keep track of your monologue, or to highlight an important point by writing it on your screen. When you use text in your videos there are a few things you need to keep in mind. In this article, I will share with you 2 ways to add text/subtitles/captions to YouTube videos, whether you need to add text to the video during editing and upload it to YouTube later, or you have uploaded the video to YouTube already and want to add some captions and subtitles to complement it.
- Part 1: Add text to video before uploading YouTube
- Part 2: Add Text to YouTube video after uploading
- Part 3: Top 3 YouTube Video Text Tips
How to Add Text to YouTube Video Before Uploading
Before uploading the video to YouTube, it is recommended to add text to the video first. You can add simple texts and captions to videos with the free video editing software. To add more text effects to the video, you can use Filmora, Sony Vegas Movie Studio and Adobe Premiere CC based on your video editing skills and needs. These software programs are great video editors, which can help you input text easily.
1. Use Filmora to Add text to Videos
There are plenty of Text effects built in Filmora, you can apply motions and animation to texts, titles, subtitles, end credits and openers as well. Each title preset will present different effects. You can add multiple text boxes and place the text to any position in need. Besides writing texts to video, you can select the target font, size and color and customize the text effect in detail as well. To add text to a video in Filmora is easy, just follow the steps below:

- Open up Filmora and drag a clip into your timeline. Then, go to Text/Credit.
- Find a style that you like and drag it into your timeline where you want your text to appear. Make sure your text is selected in your timeline and click the Advanced Text Editing icon, which looks like a pen and paper.
- Insert your own words and drag your text to where you want it on the screen. Adjust the size by dragging the blue squares which surround your text.
- To change the color of your text, go into the Customize menu. You will find it near the top left of your screen. While you are in Customize there will be a section called Fill. This is where you select the color of your text. You can even change the fill type to ‘gradient fill’ and have your text transition between two colors.
- All of Filmora’s text options are animated – they fade, move around the screen, or perform some other type of action as they appear and disappear. To change the animation of your text select Animation next to Customize. A selection of different animations will appear. Double click on the one you want to apply to your text.
Download Mac Version ](https://tools.techidaily.com/wondershare/filmora/download/ )
Check the detailed steps of how to add text to video in Filmora.
2. Use Windows Movie Maker
As a simple video editing software, Windows Movie Maker also allows you to add text to videos. It provides 3 different options for you to add Title, Caption and Credits to the YouTube videos. You can follow the steps below to add text to the video in WMM.

- To start, launch the Windows Movie Maker.
- After, select import video to insert the video that you want to add text with.
- Select edit movie then click make credits or titles.
- Then add the text that you want to include.
For the step by step tutorial of adding text to YouTube video, check How to Add Text to Video with Windows Movie Maker . Besides adding text to video, you can use Windows Movie Maker to edit YouTube video further. Learn How to trim, cut, combine, split video and add transitions and upload video to YouTube in Windows Movie Maker?
3. Use Sony Vegas Movie Studio
Adding text to YouTube videos in Sony Vegas is not so complicated if you are new to this software. You can adjust the color, size, font and duration of the text effect and add fade in and fade out effects. Follow the steps below to add texts to video in Vegas:

- Launch Sony Vegas Movie Studio.
- Click the View Menu then select Media Generators.
- Choose the generator that you want to use.
- After, drag the generator you have chosen on the timeline.
- Then, the video event FX dialogue box will appear.
- Enter the text that you want and modify it by changing the font, size and style.
4. Use Adobe Premiere CC
For professionals who are looking for a professional way to adding text to video and also have a sufficient budget, Adobe Premiere CC is always recommended. You can check the video and the steps below to add text to video in Premiere:
- Click open or create a project.
- Click the file menu then choose new and title.
- After, the text window will appear then utilize the text tool to add text.
- You can also edit your text using the commands that are provided in the Title Menu.
- Save the text that you have made by clicking the file menu then choose Save As.
How to Add Text to video in YouTube after uploading
Sometimes, we have uploaded a video to YouTube and then want to add subtitles/cc to the video later. The good news is that YouTube is not only a site for videos but is also the place where you can edit your videos in an instant. As you have read, adding text and captions to the uploaded YouTube videos is just a breeze.
Of course, you can only add and edit texts and captions to the video under your YouTube account. Here are the steps on how you can add text to your videos with YouTube Video Editor after the video is uploaded.
- Go to youtube.com then sign in to your account. After sign in your YouTube account, click your avatar and select Creator Studio to enter the creator studio interface.
- Click the Video Manager tab and in Videos section you will see all your videos uploaded to YouTube. Select the video that you want to add captions to and then select Subtitles/CC after clicking Edit button.
- Add Captions/Subtitles

While YouTube may have already created the subtitles automatically for your video with its speech recognition technology. If it does, you will see something like Published: English (Automatic) to the right of your video. If the automatically generated subtitles is not correct, you can edit it to improve the accuracy. Select the line that needs modification to make the edits.
If there is no auto-subtitles, you can choose from 3 ways to add subtitles and closed captions to the video: Upload a file, Transcribe and auto-sync and create new subtitles or CC.

Upload a file: upload a text transcript or timed subtitles file.
Transcribe and auto-sync: Type or paste in a full transcript of the video and subtitle timings will be set automatically.
Create new subtitles or CC: Create subtitles and closed captions by typing them in as you watch the video.
If you already have a caption file which contains both text and time codes, just click Upload a file and upload the text to the video.
- Once everything is okay, you can change the name of the video and you can do it in the box beside Project.
Cons of Using YouTube Video Editor
When you make use of this editor, you cannot shorten the clips for music. Moreover, since it is an online editor, you need to refresh the page in order to do the changes. Aside from YouTube Video Editor, you can use Adobe Premier Pro, MAGIX Vegas Pro, OpenShot and Avidemux.
From 20th September 2017 users will no longer be able to use the complementary editing suite. Check the best YouTube video editor alternatives from this complete guide to find out more YouTube video editor alternatives if you want to add text to video with more features and customization.
Top 3 Tips for Adding Text to YouTube Videos
1. Leave Room
If you know you are going to add text to your video then make sure you leave room for it in your frame. Consider standing off to one side instead of directly in front of your camera. You do not want to have to choose between not using text, making your text really small, or placing it over your face.
While planning out your frame and leaving room for your text, consider what color you are going to make the words and whether it will stand out and look good against your background.
2. Bigger is Better
People should be able to read your text without putting in any extra effort, such as straining their eyes to make out small words. If it takes effort to read your text then a lot of people will just ignore it. Your text should be big enough that somebody watching your video on their smartphone screen – where everything is shrunk down – can read it easily.
It is easier to make your text larger when you stick to titles, keywords, and short sentences.
3. Do Not Overuse
Text is a great tool for making something stand out. However, if you try to use text to emphasize too much of what you say it will lose its effect. Text does not stand out anymore once viewers get too used to seeing it. Too much text can even get annoying and cause people to click away from your videos.
Try to use text to emphasize only the most important things you say.
Richard Bennett
Richard Bennett is a writer and a lover of all things video.
Follow @Richard Bennett
Richard Bennett
Mar 27, 2024• Proven solutions
A great way to emphasize something you say in your vlog is to have your words appear next to you as you say them . Adding text to YouTube videos can look really professional. You might put a title at the beginning of your video, use bullet points to help people keep track of your monologue, or to highlight an important point by writing it on your screen. When you use text in your videos there are a few things you need to keep in mind. In this article, I will share with you 2 ways to add text/subtitles/captions to YouTube videos, whether you need to add text to the video during editing and upload it to YouTube later, or you have uploaded the video to YouTube already and want to add some captions and subtitles to complement it.
- Part 1: Add text to video before uploading YouTube
- Part 2: Add Text to YouTube video after uploading
- Part 3: Top 3 YouTube Video Text Tips
How to Add Text to YouTube Video Before Uploading
Before uploading the video to YouTube, it is recommended to add text to the video first. You can add simple texts and captions to videos with the free video editing software. To add more text effects to the video, you can use Filmora, Sony Vegas Movie Studio and Adobe Premiere CC based on your video editing skills and needs. These software programs are great video editors, which can help you input text easily.
1. Use Filmora to Add text to Videos
There are plenty of Text effects built in Filmora, you can apply motions and animation to texts, titles, subtitles, end credits and openers as well. Each title preset will present different effects. You can add multiple text boxes and place the text to any position in need. Besides writing texts to video, you can select the target font, size and color and customize the text effect in detail as well. To add text to a video in Filmora is easy, just follow the steps below:
- Open up Filmora and drag a clip into your timeline. Then, go to Text/Credit.
- Find a style that you like and drag it into your timeline where you want your text to appear. Make sure your text is selected in your timeline and click the Advanced Text Editing icon, which looks like a pen and paper.
- Insert your own words and drag your text to where you want it on the screen. Adjust the size by dragging the blue squares which surround your text.
- To change the color of your text, go into the Customize menu. You will find it near the top left of your screen. While you are in Customize there will be a section called Fill. This is where you select the color of your text. You can even change the fill type to ‘gradient fill’ and have your text transition between two colors.
- All of Filmora’s text options are animated – they fade, move around the screen, or perform some other type of action as they appear and disappear. To change the animation of your text select Animation next to Customize. A selection of different animations will appear. Double click on the one you want to apply to your text.
Download Mac Version ](https://tools.techidaily.com/wondershare/filmora/download/ )
Check the detailed steps of how to add text to video in Filmora.
2. Use Windows Movie Maker
As a simple video editing software, Windows Movie Maker also allows you to add text to videos. It provides 3 different options for you to add Title, Caption and Credits to the YouTube videos. You can follow the steps below to add text to the video in WMM.
- To start, launch the Windows Movie Maker.
- After, select import video to insert the video that you want to add text with.
- Select edit movie then click make credits or titles.
- Then add the text that you want to include.
For the step by step tutorial of adding text to YouTube video, check How to Add Text to Video with Windows Movie Maker . Besides adding text to video, you can use Windows Movie Maker to edit YouTube video further. Learn How to trim, cut, combine, split video and add transitions and upload video to YouTube in Windows Movie Maker?
3. Use Sony Vegas Movie Studio
Adding text to YouTube videos in Sony Vegas is not so complicated if you are new to this software. You can adjust the color, size, font and duration of the text effect and add fade in and fade out effects. Follow the steps below to add texts to video in Vegas:
- Launch Sony Vegas Movie Studio.
- Click the View Menu then select Media Generators.
- Choose the generator that you want to use.
- After, drag the generator you have chosen on the timeline.
- Then, the video event FX dialogue box will appear.
- Enter the text that you want and modify it by changing the font, size and style.
4. Use Adobe Premiere CC
For professionals who are looking for a professional way to adding text to video and also have a sufficient budget, Adobe Premiere CC is always recommended. You can check the video and the steps below to add text to video in Premiere:
- Click open or create a project.
- Click the file menu then choose new and title.
- After, the text window will appear then utilize the text tool to add text.
- You can also edit your text using the commands that are provided in the Title Menu.
- Save the text that you have made by clicking the file menu then choose Save As.
How to Add Text to video in YouTube after uploading
Sometimes, we have uploaded a video to YouTube and then want to add subtitles/cc to the video later. The good news is that YouTube is not only a site for videos but is also the place where you can edit your videos in an instant. As you have read, adding text and captions to the uploaded YouTube videos is just a breeze.
Of course, you can only add and edit texts and captions to the video under your YouTube account. Here are the steps on how you can add text to your videos with YouTube Video Editor after the video is uploaded.
- Go to youtube.com then sign in to your account. After sign in your YouTube account, click your avatar and select Creator Studio to enter the creator studio interface.
- Click the Video Manager tab and in Videos section you will see all your videos uploaded to YouTube. Select the video that you want to add captions to and then select Subtitles/CC after clicking Edit button.
- Add Captions/Subtitles
While YouTube may have already created the subtitles automatically for your video with its speech recognition technology. If it does, you will see something like Published: English (Automatic) to the right of your video. If the automatically generated subtitles is not correct, you can edit it to improve the accuracy. Select the line that needs modification to make the edits.
If there is no auto-subtitles, you can choose from 3 ways to add subtitles and closed captions to the video: Upload a file, Transcribe and auto-sync and create new subtitles or CC.
Upload a file: upload a text transcript or timed subtitles file.
Transcribe and auto-sync: Type or paste in a full transcript of the video and subtitle timings will be set automatically.
Create new subtitles or CC: Create subtitles and closed captions by typing them in as you watch the video.
If you already have a caption file which contains both text and time codes, just click Upload a file and upload the text to the video.
- Once everything is okay, you can change the name of the video and you can do it in the box beside Project.
Cons of Using YouTube Video Editor
When you make use of this editor, you cannot shorten the clips for music. Moreover, since it is an online editor, you need to refresh the page in order to do the changes. Aside from YouTube Video Editor, you can use Adobe Premier Pro, MAGIX Vegas Pro, OpenShot and Avidemux.
From 20th September 2017 users will no longer be able to use the complementary editing suite. Check the best YouTube video editor alternatives from this complete guide to find out more YouTube video editor alternatives if you want to add text to video with more features and customization.
Top 3 Tips for Adding Text to YouTube Videos
1. Leave Room
If you know you are going to add text to your video then make sure you leave room for it in your frame. Consider standing off to one side instead of directly in front of your camera. You do not want to have to choose between not using text, making your text really small, or placing it over your face.
While planning out your frame and leaving room for your text, consider what color you are going to make the words and whether it will stand out and look good against your background.
2. Bigger is Better
People should be able to read your text without putting in any extra effort, such as straining their eyes to make out small words. If it takes effort to read your text then a lot of people will just ignore it. Your text should be big enough that somebody watching your video on their smartphone screen – where everything is shrunk down – can read it easily.
It is easier to make your text larger when you stick to titles, keywords, and short sentences.
3. Do Not Overuse
Text is a great tool for making something stand out. However, if you try to use text to emphasize too much of what you say it will lose its effect. Text does not stand out anymore once viewers get too used to seeing it. Too much text can even get annoying and cause people to click away from your videos.
Try to use text to emphasize only the most important things you say.
Richard Bennett
Richard Bennett is a writer and a lover of all things video.
Follow @Richard Bennett
Also read:
- Swift Valorant Image Crafting Professionally Done on the Fly
- Beyond Views and Likes Pursuing Profits on YouTube for 2024
- Reverse Video Magic Online Step-by-Step Guides
- In 2024, Download YouTube Images with Ease Online
- Add a Pop of Color to Your Videos Implementing Neons in YouTubes for 2024
- Download Playback Streaming Youtube Videos on iOS Securely and Smoothly
- [New] 2023'S Top Social Moment Infographics
- Transform Concepts to Successful YouTube Titles
- Unlocking the Power of Hashtags in YouTube Gaming Culture
- Unveiling the Top 8 Accelerating YouTube Communities
- [Updated] Elevate Engagement Cutting-Edge Hashtags for Hit-Making Videos
- Gender Diversity in Streaming Celebrating Top 10 Females
- In 2024, Essential Tips for YouTube Short Fixes
- 2024 Approved Comparing Micro-Video Formats The Battle of TikTok and YouTube Shorts
- Decoding YouTube's Algorithm The Role of Keyword Optimization for 2024
- Youtubers Unite with These 17 Top-Tier Lights
- [Updated] Essential Software to Rip YouTube Trailers
- Does YouTube Offer Regular Viewers Money, In 2024
- Dynamic Decibels The Best Background Sounds for YT Shorts
- 2024 Approved Design Channels - Get Free Visuals Now
- Master Technique Long-Term Disabling of YouTube Shorts
- In 2024, Capture Your Audience The Smartphone Guide to YouTube Thumbnails
- In 2024, Dive Deep Into the Past with These Top 10 Student-Friendly YT Channels
- Masterclass The Elite Group of Top 10 Free Artistic YouTube Platforms
- In 2024, Creating Content, Earning Currency Launching Your Vlog
- 2024 Approved A Step-by-Step Guide for Earning with YouTube Shorts
- [New] Best of Breed Top 10 YouTube Stations for Journalism
- Streamline Production Workflow Elevate Video Quality
- Top ASMR Gear Expert-Picked Microphone Selections
- Professional-Level YouTube Content via Adobe Premiere
- In 2024, The Best Android SIM Unlock Code Generators Unlock Your Vivo T2 5G Phone Hassle-Free
- [New] 2024 Approved Behance Portfolio Image Constraints
- My Videos Arent Playing on Vivo Y02T – What Can I Do? | Dr.fone
- How Can I Catch the Regional Pokémon without Traveling On Oppo Reno 11 5G | Dr.fone
- [Updated] Hone Your Skills How to Seamlessly Post Videos to Instagram via Desktop
- Apple iPhone 6s Plus Screen Mirroring You Must Know | Dr.fone
- [Updated] Best Online MP3 Extractors From TikTok Videos - Top 6 Rankings for 2024
- [Updated] 2024 Approved Simplifying Tasks with EZ Grabber Techniques
- How to Factory Reset Vivo Y100 5G in 5 Easy Ways | Dr.fone
- [Updated] 2024 Approved Zero-Price Audio Excellence Ranking of Top 10 Desktop Tools
- [New] In 2024, Twitch-Facebook Collaboration for Content Distribution
- In 2024, Your Account Has Been Disabled in the App Store and iTunes From Apple iPhone 14?
- [Updated] Freezing Your Gameplay Xbox One Screenshot Essentials for 2024
- [Updated] In 2024, PC Setup for Smooth TikTok Livestreams Made Easy
- In 2024, How to Unlock Apple iPhone 12 Pro Max, Apples New iPhone
- Will Pokémon Go Ban the Account if You Use PGSharp On Apple iPhone XR | Dr.fone
- Vivo Y77t Not Receiving Texts? 10 Hassle-Free Solutions Here | Dr.fone
- 4 Easy Ways for Your Realme 12 Pro 5G Hard Reset | Dr.fone
- Tips and Tricks for Apple ID Locked Issue From Apple iPhone 15 Pro Max
- [New] In 2024, How to Amass Wealth The Art of Vimeo Video Monetization
- [Updated] Your Guide to Retracing FB’s Most-Watched Videos, Now
- Updated Top 10 Audio Normalizers for Windows. Dont Miss It
- Video Fixer Software for all Corrupt Videos of Oppo K11x
- Unlock iPhone 14 Pro With Forgotten Passcode Different Methods You Can Try | Dr.fone
- 2024 Approved Unlock Instagram Broadcast Potential Through OBS Tutorials
- How To Activate and Use Life360 Ghost Mode On Poco C65 | Dr.fone
- [Updated] In 2024, Streamlined Mac TikTok Editing Tools (All Free)
- [Updated] From Setup to Streaming The Definitive Guide for Live TV Screen-Sharing on Windows for 2024
- Title: Leveraging YouTube for Affiliate Earnings
- Author: Steven
- Created at : 2024-05-25 19:50:50
- Updated at : 2024-05-26 19:50:50
- Link: https://youtube-clips.techidaily.com/leveraging-youtube-for-affiliate-earnings/
- License: This work is licensed under CC BY-NC-SA 4.0.
