
:max_bytes(150000):strip_icc()/GettyImages-585151372-a659baf0c7b441b9b7e7896716b12784.jpg)
Learn the Easy Tricks for Eliminating Unwanted Youtube Content (PC/Mobile)
Learn the Easy Tricks for Eliminating Unwanted Youtube Content (PC/Mobile)
How to Block YouTube Channels on Computer and Mobile Phones

Richard Bennett
Mar 27, 2024• Proven solutions
Anyone spending any time online recently might have come across something they regard as deplorable. YouTube consumes more than half of the internet’s users with its whopping 2 billion active monthly users. For all that might seem good on the humongous video sharing platform some of the most divisive of all human interactions happen on YouTube.
Now the question arises on how you can safeguard yourself and your family from the bad and inadequate content and how to block YouTube channels that create the toxic material.
In this article, we’ll go through how you can block YouTube channels and content creators that you consider will have bad effects on your mental health. You will learn:
- Part 1: How to block YouTube channels on a computer (Mac & Windows)
- Part 2: How to block YouTube channels on Mobile Phones (Android & iPhone)
- Part 3: How to block content on YouTube Kids
Part 1: How to block YouTube channels on a computer (Mac & Windows)
Blocking will prevent the user from trolling and bullying you or your channel subscribers. This will effectively prevent them to comment and interact with your video content. However, there is no way for you to prevent the bullies from watching your content you can at least prevent them from damaging your reputation, badmouthing, and inciting your active subscribers.
The process of blocking YouTube channels on a computer system is fairly simple and will only require a minute if you know the name of the user you want to block. Follow the steps below:
- 1. Log in to your YouTube account and look out for the account you want to block.
- 2. When you’re in the account head over to the About section. You can find it in the toolbar beneath the channel art or banner.
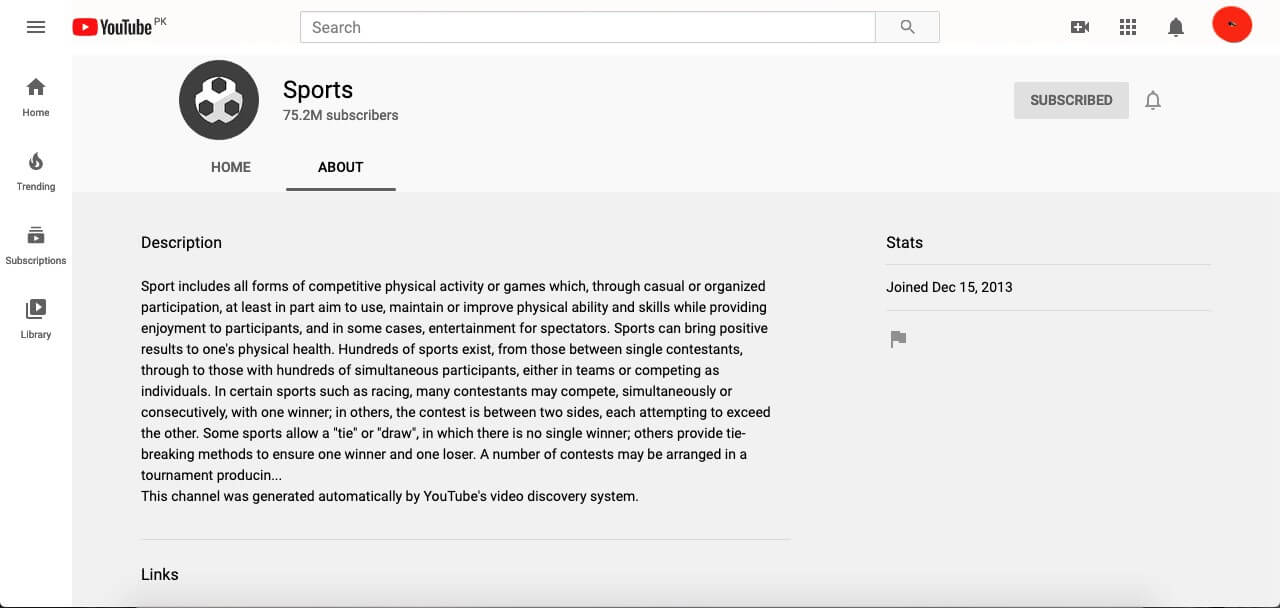
- 3. On the right-hand side right under the Stats, you will find a flag icon. Press the icon and it will show a drop-down menu, select Block user.
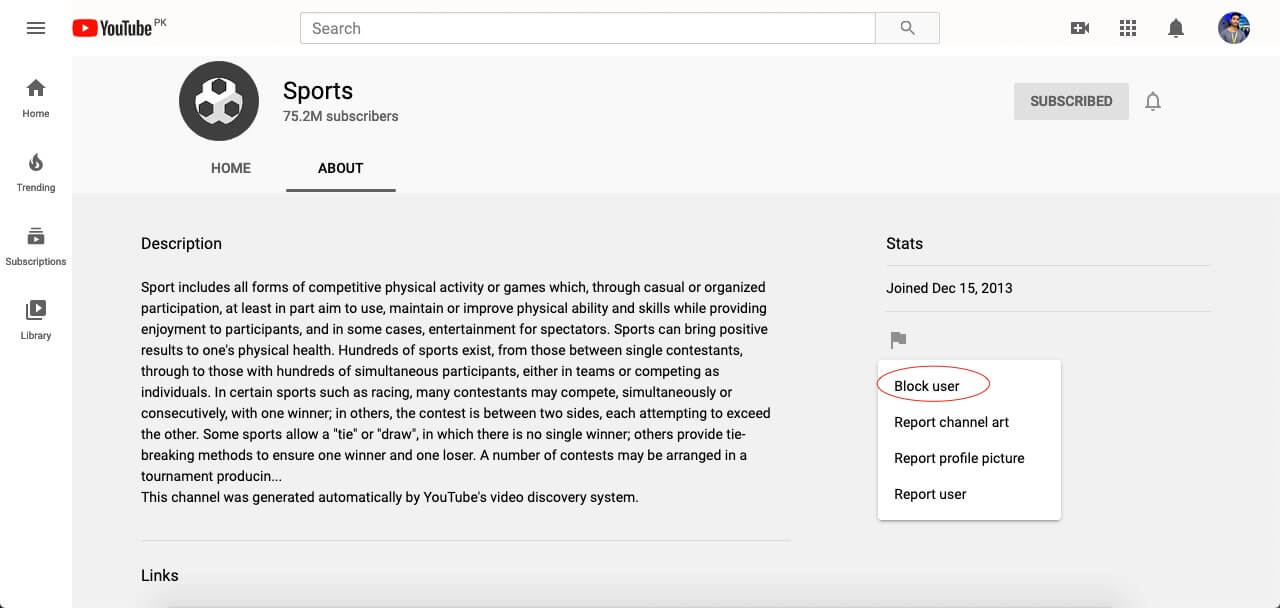
- 4. You will be prompted to confirm your selection, click Submit to confirm.

Part 2: How to block YouTube channels on Mobile Phones (Android & iPhone)
One can also block YouTube channels on mobile devices in the same manner as you would do it on the desktop computer. It will do the same effect and prevent bullying users from interacting with your content.
- 1. Sign in to your YouTube account on either YouTube’s Android or iPhone app.
- 2. Look around for the account or user you want to block.
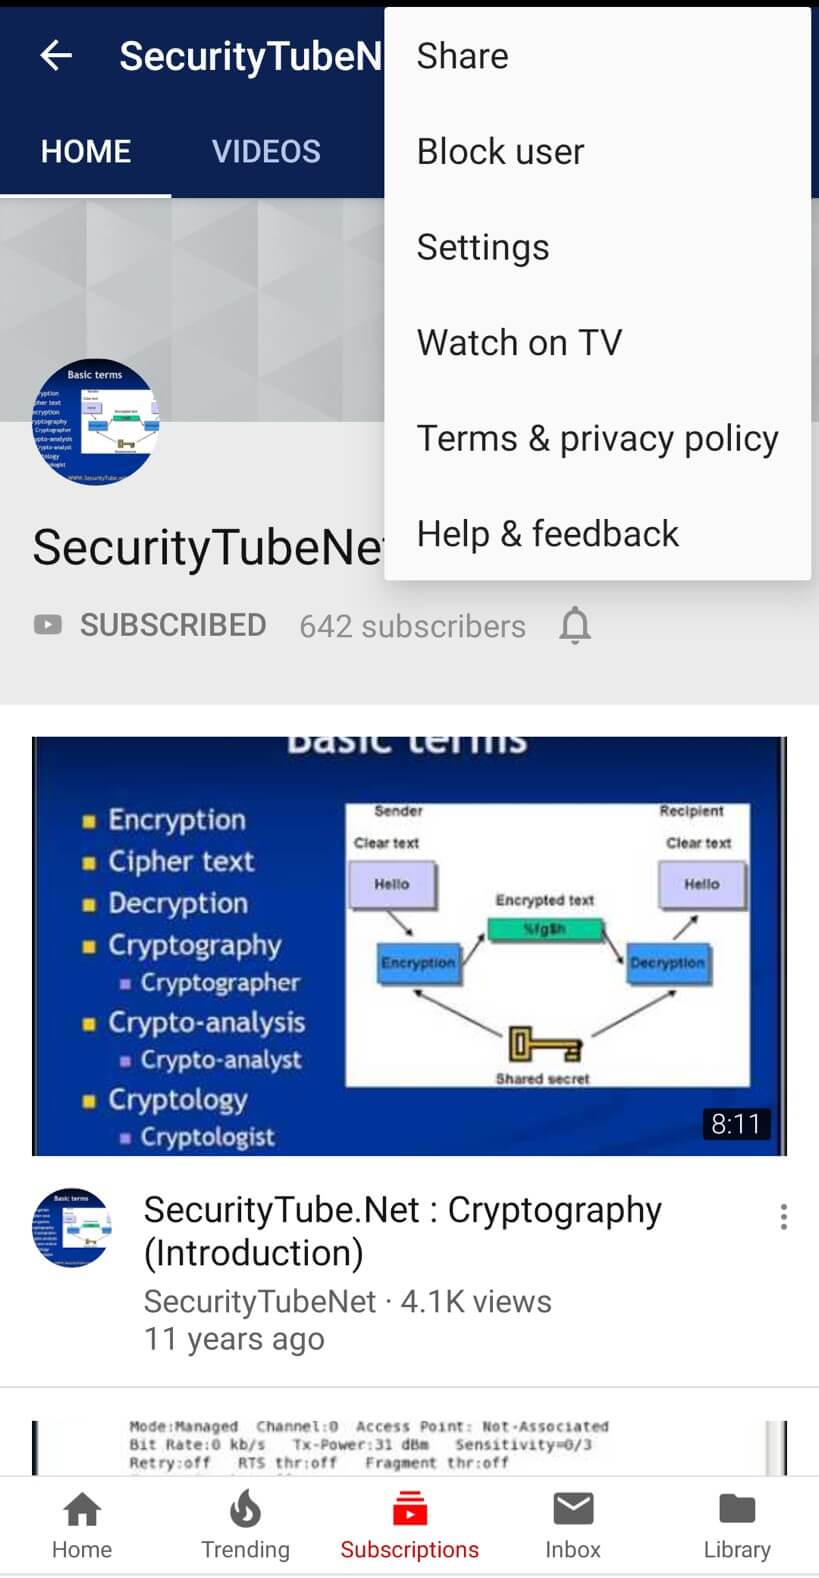
- 3. Open a particular account that you intend to block and go to their main account page.

- 4. When you’re on the account page, open the menu at the top-right corner of the screen and tap Block user.
Part 3: Block content on YouTube kids
YouTube Kids is the alternative version of YouTube’s video service dedicated and designed for kids. It’s entirely for children with all the content curated for kids’ education, family-friendly videos, and channels surrounding kid’s liking. The interface features colorful large images, and icons with five categories to explore from.
The app filters all the content allowing only safe content and parental control to watch their children’s online activity. The app prevents commenting and any kind of cyber bullying-related issues. YouTube Kids need to be set up by an adult with singing into the app with their Google credentials. Parents can sign in and block channels or videos they don’t see fit for their children. Let us see how to block YouTube channels on YouTube kids.
- 1. Open the YouTube Kids app and tap on I’m a parent to set up the app.

- 2. Sign in with your preferred Google account.

- 3. Here you’ll see a button Send Parental Consent Email, press it.
- 4. You’ll get an activation code on your email address.
- 5. Come back to the application and enter the code.
Now as you’re signed in as a parent you can block channels and specific content.
I. Block on Home screen
- 1. On the Home screen press the dotted menu next to the video

- 2. In the menu list, you will see Block this video, tap it.
- 3. You’ll be asked to enter the numbers written on the screen or a custom passcode.

II. Block from Watch Page
- 1. On the Watch Page tap the dotted More option at the top right corner of the video.

- 2. Press the Block option.
- 3. A dialog box will appear with two options, Block this video for blocking only this particular video or Block this channel to block the entire channel associated with the video.

- 4. Select any of the two options and then press Block again.
- 5. Enter the numbers you calculate from the presented numbers or a custom passcode.

Conclusion
Every minute more than 300 hours of video content is uploaded on to the YouTube databases while 5 billion videos are watched every day. This only shows the metrics a content creator and a user have to deal with. Content creators need to protect themselves from the unending trolls and scams that hit every other channel and affect its userbase. While kids and sensitive portions of the human population have to maintain a safe distance from damaging and provoking content that circulates on the platform. To safeguard both ends of the platform I made this guide to streamline the process of how to block YouTube channels and videos from affecting your happy life.
Richard Bennett
Richard Bennett is a writer and a lover of all things video.
Follow @Richard Bennett
Richard Bennett
Mar 27, 2024• Proven solutions
Anyone spending any time online recently might have come across something they regard as deplorable. YouTube consumes more than half of the internet’s users with its whopping 2 billion active monthly users. For all that might seem good on the humongous video sharing platform some of the most divisive of all human interactions happen on YouTube.
Now the question arises on how you can safeguard yourself and your family from the bad and inadequate content and how to block YouTube channels that create the toxic material.
In this article, we’ll go through how you can block YouTube channels and content creators that you consider will have bad effects on your mental health. You will learn:
- Part 1: How to block YouTube channels on a computer (Mac & Windows)
- Part 2: How to block YouTube channels on Mobile Phones (Android & iPhone)
- Part 3: How to block content on YouTube Kids
Part 1: How to block YouTube channels on a computer (Mac & Windows)
Blocking will prevent the user from trolling and bullying you or your channel subscribers. This will effectively prevent them to comment and interact with your video content. However, there is no way for you to prevent the bullies from watching your content you can at least prevent them from damaging your reputation, badmouthing, and inciting your active subscribers.
The process of blocking YouTube channels on a computer system is fairly simple and will only require a minute if you know the name of the user you want to block. Follow the steps below:
- 1. Log in to your YouTube account and look out for the account you want to block.
- 2. When you’re in the account head over to the About section. You can find it in the toolbar beneath the channel art or banner.
- 3. On the right-hand side right under the Stats, you will find a flag icon. Press the icon and it will show a drop-down menu, select Block user.
- 4. You will be prompted to confirm your selection, click Submit to confirm.
Part 2: How to block YouTube channels on Mobile Phones (Android & iPhone)
One can also block YouTube channels on mobile devices in the same manner as you would do it on the desktop computer. It will do the same effect and prevent bullying users from interacting with your content.
- 1. Sign in to your YouTube account on either YouTube’s Android or iPhone app.
- 2. Look around for the account or user you want to block.
- 3. Open a particular account that you intend to block and go to their main account page.
- 4. When you’re on the account page, open the menu at the top-right corner of the screen and tap Block user.
Part 3: Block content on YouTube kids
YouTube Kids is the alternative version of YouTube’s video service dedicated and designed for kids. It’s entirely for children with all the content curated for kids’ education, family-friendly videos, and channels surrounding kid’s liking. The interface features colorful large images, and icons with five categories to explore from.
The app filters all the content allowing only safe content and parental control to watch their children’s online activity. The app prevents commenting and any kind of cyber bullying-related issues. YouTube Kids need to be set up by an adult with singing into the app with their Google credentials. Parents can sign in and block channels or videos they don’t see fit for their children. Let us see how to block YouTube channels on YouTube kids.
- 1. Open the YouTube Kids app and tap on I’m a parent to set up the app.
- 2. Sign in with your preferred Google account.
- 3. Here you’ll see a button Send Parental Consent Email, press it.
- 4. You’ll get an activation code on your email address.
- 5. Come back to the application and enter the code.
Now as you’re signed in as a parent you can block channels and specific content.
I. Block on Home screen
- 1. On the Home screen press the dotted menu next to the video
- 2. In the menu list, you will see Block this video, tap it.
- 3. You’ll be asked to enter the numbers written on the screen or a custom passcode.
II. Block from Watch Page
- 1. On the Watch Page tap the dotted More option at the top right corner of the video.
- 2. Press the Block option.
- 3. A dialog box will appear with two options, Block this video for blocking only this particular video or Block this channel to block the entire channel associated with the video.
- 4. Select any of the two options and then press Block again.
- 5. Enter the numbers you calculate from the presented numbers or a custom passcode.
Conclusion
Every minute more than 300 hours of video content is uploaded on to the YouTube databases while 5 billion videos are watched every day. This only shows the metrics a content creator and a user have to deal with. Content creators need to protect themselves from the unending trolls and scams that hit every other channel and affect its userbase. While kids and sensitive portions of the human population have to maintain a safe distance from damaging and provoking content that circulates on the platform. To safeguard both ends of the platform I made this guide to streamline the process of how to block YouTube channels and videos from affecting your happy life.
Richard Bennett
Richard Bennett is a writer and a lover of all things video.
Follow @Richard Bennett
Step-By-Step Guide to Framing YouTube Content for Free
How to Go Frame by Frame on YouTube Video? [5 Methods]
Richard Bennett
Mar 27, 2024• Proven solutions
It’s always a handy process to be able to move the frame one by one if you binge-watch YouTube videos. Be it as complex as time-lapse or as simple as makeup tutorial, viewing YouTube video frame-by-frame is never an underestimated process.
To be able to achieve this, you ought to master the methods to move frame-by-frame using a frame by a frame video editor or frame by the frame video player.
But this might make you wonder which one would be best for you?
Then here are some methods to move a video frame-by-frame that may come handy for you.
Option 1: Frame-By-Frame Editing and Watching Video Offline
If you are looking for how to edit frame by frame on YouTube or how to go frame by frame on YouTube then you may use a variety of offline applications.
Below are the 2 highlighting benefits of making use of offline video editors instead of online ones:
- You are not required to have a fast and smooth internet connection once the targeted video has been downloaded and will have full liberty to edit or video vide while staying offline.
- You are granted with the full editing facilities whilst staying offline. You can trim, cut or do any video alterations using offline video editors.
If you don’t know how to download a YouTube video easily and quickly, check this guide on How to Download YouTube Videos without Any Software .
Beneath are some of the efficient offline video editors you can work with for editing and viewing videos of YouTube frame by frame.
How to Go Frame by Frame in YouTube Video Using Filmora
Filmora is a great video editor designed for those who are interested in video editing but lack professional experience. It’s very easy to use. Filmora is free to download. You can choose version that is compatible with your operating system.
Compatibility: Windows and Mac


Step 1: Tap on “New Project”.
Step 2: In “project settings” select the desired ratio rate.
Step 3: You can import files by clicking the “import” tab or drag-drop the desired file to this tool.

Step 4: Drag the file to the timeline.
Step 5: You can separate frames from video by hovering the mouse over the first desired frame and complete it by hovering mouse all the way to the end of the frame.
Step 6: Perform editing operations.
Step 7: Save the file by clicking “export” by selecting the desired format under the “format” option and set parameters in “advanced settings” or directly upload the final product to YouTube.

How to Move Frame by Frame in YouTube Video Using Movie Maker
Compatibility: windows
This video editing tool gives you enough option to perform basic editing. With its timeline option, one can edit the videos frame-by-frame which can be performed as guided below:
Step 1: The first step is to download the desired YouTube video.
Step 2: Import that video to movie maker.
Step 3: You have the facility to skip the video frame-by-frame and can also edit it by selecting a specific portion from the timeline.
Step 4: Tap on “edit” beneath video tools after selecting the targeted portion.
Step 5: You will have numerous editing options like transition, add texts, split, music, etc. for each of the frames one by one.
You may also like: YouTube to WAV File: 4 Best Free Convert Solutions >>
How to Advance Frame by Frame in YouTube Video Using iMovie
Compatibility: Mac
This is a free editing tool with a bundle of editing features. The steps are given below:
Step 1: Click “file”, then “new project” followed by “create” option
Step 2: Click “Import” to import video
Step 3: Tap on “edit” followed by the “play head” option to segregate the desired portion of the video to edit.
Step 4: Now apply editing features on the portion of the video given in this tool
Step 5: Press “share” and “export” option once done with editing.
Option 2: Frame-By-Frame Advancement Using YouTube Player
Why even bother ourselves to get a third-party program for the purpose of moving a video frame-by-frame when the YouTube player provides you the same facility within itself. Following are the steps to guide you about how to skip frame by frame on YouTube by using YouTube frame by frame hotkey:
Step 1: Make the video pause.
Step 2: To answer the query regarding how to go frame by frame on YouTube editor, you can make use of 2 keys on the keyboard which are basically used as a shortcut process for the sake of forwarding video frame-by-frame.
You can press “<” in order to skip a frame backward or you could either use a comma as well for the same purpose. For moving the frame forwards, you need to press “>” key or a full stop key will serve you with the same operation.
This is how to move frame by frame on YouTube.

Option 3: Go Frame-By-Frame In YouTube Video Using Online Application
If your work requires intricate analysis of the video where you have to view the view very closely then you may make use of an online external application for this purpose.
The following are the steps to show you how to advance frame by frame on YouTube using this online tool.
Step 1: Into the URL bar of the browser, paste the link www.watchframebyframe.com there where you will be redirected to the online tool which has quite an easy interface with several controls provided built-in.
Step 2: Tap on “Enter Video URL” box and paste the copied URL of a targeted YouTube video
Step 3: The video will get loaded after hitting enter. At the bottom, buttons are given to control accordingly for skipping the frame forwards and backward respectively.
Step 4: You can also personalize the frame skipping setting with the option given beside the forwards and backward button where you can customize fps (frame per second) setting and also adjust the number of frames to be skipped upon clicking forwards and backward button.
An application granting such diverse options gives precise accuracy level which would help make the learning process easier and accurate.

Where Will Need to Go Frame by Frame on YouTube?
- Viewing time-lapse:
Capturing minor details in a video having time-lapse is such a complicated task. It often becomes harder even after slowing the video down. Therefore, a frame-by-frame view is the perfect yet only way out to this problem.
- Viewing how-to video:
The main purpose of a learning video is to get the sound and thorough details of the process and hence can be made not only possible but easier through frame-by-frame scrolling.
- Video sharing or editing:
Clean editing or cropping from a particular position is an intricate process and becomes easier to pause at the desired moment by frame-by-frame forwarding.
- Learning tutorial
Learning needs an in-depth and clear delivery of the content which is made easier by the feature of frame-by-frame skipping of the video.
YouTube studio is the basement for YouTubers to upload and track their videos. To some newbies, they might don’t know how to use the YouTube Manager. If you happen to be one of them, check this article to get: Everything You Need to Know about YouTube Video Manager >>
Conclusion
The precise control over separate frames as well as set of frames, diverse OS support, and liberty to use a variety of editing features make Wondershare Filmora stand out among all other tools. But depending upon the suitability with respect to one’s available resources, any of the above tool will help you watch and edit YouTube video frame by frame.
Richard Bennett
Richard Bennett is a writer and a lover of all things video.
Follow @Richard Bennett
Richard Bennett
Mar 27, 2024• Proven solutions
It’s always a handy process to be able to move the frame one by one if you binge-watch YouTube videos. Be it as complex as time-lapse or as simple as makeup tutorial, viewing YouTube video frame-by-frame is never an underestimated process.
To be able to achieve this, you ought to master the methods to move frame-by-frame using a frame by a frame video editor or frame by the frame video player.
But this might make you wonder which one would be best for you?
Then here are some methods to move a video frame-by-frame that may come handy for you.
Option 1: Frame-By-Frame Editing and Watching Video Offline
If you are looking for how to edit frame by frame on YouTube or how to go frame by frame on YouTube then you may use a variety of offline applications.
Below are the 2 highlighting benefits of making use of offline video editors instead of online ones:
- You are not required to have a fast and smooth internet connection once the targeted video has been downloaded and will have full liberty to edit or video vide while staying offline.
- You are granted with the full editing facilities whilst staying offline. You can trim, cut or do any video alterations using offline video editors.
If you don’t know how to download a YouTube video easily and quickly, check this guide on How to Download YouTube Videos without Any Software .
Beneath are some of the efficient offline video editors you can work with for editing and viewing videos of YouTube frame by frame.
How to Go Frame by Frame in YouTube Video Using Filmora
Filmora is a great video editor designed for those who are interested in video editing but lack professional experience. It’s very easy to use. Filmora is free to download. You can choose version that is compatible with your operating system.
Compatibility: Windows and Mac
Step 1: Tap on “New Project”.
Step 2: In “project settings” select the desired ratio rate.
Step 3: You can import files by clicking the “import” tab or drag-drop the desired file to this tool.
Step 4: Drag the file to the timeline.
Step 5: You can separate frames from video by hovering the mouse over the first desired frame and complete it by hovering mouse all the way to the end of the frame.
Step 6: Perform editing operations.
Step 7: Save the file by clicking “export” by selecting the desired format under the “format” option and set parameters in “advanced settings” or directly upload the final product to YouTube.
How to Move Frame by Frame in YouTube Video Using Movie Maker
Compatibility: windows
This video editing tool gives you enough option to perform basic editing. With its timeline option, one can edit the videos frame-by-frame which can be performed as guided below:
Step 1: The first step is to download the desired YouTube video.
Step 2: Import that video to movie maker.
Step 3: You have the facility to skip the video frame-by-frame and can also edit it by selecting a specific portion from the timeline.
Step 4: Tap on “edit” beneath video tools after selecting the targeted portion.
Step 5: You will have numerous editing options like transition, add texts, split, music, etc. for each of the frames one by one.
You may also like: YouTube to WAV File: 4 Best Free Convert Solutions >>
How to Advance Frame by Frame in YouTube Video Using iMovie
Compatibility: Mac
This is a free editing tool with a bundle of editing features. The steps are given below:
Step 1: Click “file”, then “new project” followed by “create” option
Step 2: Click “Import” to import video
Step 3: Tap on “edit” followed by the “play head” option to segregate the desired portion of the video to edit.
Step 4: Now apply editing features on the portion of the video given in this tool
Step 5: Press “share” and “export” option once done with editing.
Option 2: Frame-By-Frame Advancement Using YouTube Player
Why even bother ourselves to get a third-party program for the purpose of moving a video frame-by-frame when the YouTube player provides you the same facility within itself. Following are the steps to guide you about how to skip frame by frame on YouTube by using YouTube frame by frame hotkey:
Step 1: Make the video pause.
Step 2: To answer the query regarding how to go frame by frame on YouTube editor, you can make use of 2 keys on the keyboard which are basically used as a shortcut process for the sake of forwarding video frame-by-frame.
You can press “<” in order to skip a frame backward or you could either use a comma as well for the same purpose. For moving the frame forwards, you need to press “>” key or a full stop key will serve you with the same operation.
This is how to move frame by frame on YouTube.
Option 3: Go Frame-By-Frame In YouTube Video Using Online Application
If your work requires intricate analysis of the video where you have to view the view very closely then you may make use of an online external application for this purpose.
The following are the steps to show you how to advance frame by frame on YouTube using this online tool.
Step 1: Into the URL bar of the browser, paste the link www.watchframebyframe.com there where you will be redirected to the online tool which has quite an easy interface with several controls provided built-in.
Step 2: Tap on “Enter Video URL” box and paste the copied URL of a targeted YouTube video
Step 3: The video will get loaded after hitting enter. At the bottom, buttons are given to control accordingly for skipping the frame forwards and backward respectively.
Step 4: You can also personalize the frame skipping setting with the option given beside the forwards and backward button where you can customize fps (frame per second) setting and also adjust the number of frames to be skipped upon clicking forwards and backward button.
An application granting such diverse options gives precise accuracy level which would help make the learning process easier and accurate.
Where Will Need to Go Frame by Frame on YouTube?
- Viewing time-lapse:
Capturing minor details in a video having time-lapse is such a complicated task. It often becomes harder even after slowing the video down. Therefore, a frame-by-frame view is the perfect yet only way out to this problem.
- Viewing how-to video:
The main purpose of a learning video is to get the sound and thorough details of the process and hence can be made not only possible but easier through frame-by-frame scrolling.
- Video sharing or editing:
Clean editing or cropping from a particular position is an intricate process and becomes easier to pause at the desired moment by frame-by-frame forwarding.
- Learning tutorial
Learning needs an in-depth and clear delivery of the content which is made easier by the feature of frame-by-frame skipping of the video.
YouTube studio is the basement for YouTubers to upload and track their videos. To some newbies, they might don’t know how to use the YouTube Manager. If you happen to be one of them, check this article to get: Everything You Need to Know about YouTube Video Manager >>
Conclusion
The precise control over separate frames as well as set of frames, diverse OS support, and liberty to use a variety of editing features make Wondershare Filmora stand out among all other tools. But depending upon the suitability with respect to one’s available resources, any of the above tool will help you watch and edit YouTube video frame by frame.
Richard Bennett
Richard Bennett is a writer and a lover of all things video.
Follow @Richard Bennett
Also read:
- Ideal Thumbnails for Maximum Clicks
- Hot List Today's YouTube Sensations
- Monetizing CarryMinati Journey to 2023 Income
- [Updated] Digital Riches Transitioning YouTube Earnings to Currency
- Audio Artists' Almanac Your Guide to Video Submission for 2024
- Essential Techniques for Designing YouTube Video Thumbnails for 2024
- In 2024, Channel Finale 101 Insider Tricks for Successful Outros
- [New] Essential Microphones Tailored to Channel Genres
- 2024 Approved 8 Best Webspots FREE Eco-Backdrops and Footage Collection
- Playlist Retrieval Made Straightforward - Your Compreenaside
- Essential Tools Ranking the Best Mobile Videography Apps for 2024
- 2024 Approved Elevate Your Video Profiles Using Smart Templates
- Mastering YouTube Video Text Overlay Techniques
- [Updated] Boost Popularity Quickly Top 30 Hashtags Every Gamer Needs
- [New] Essential 8 Linux Software for Editors
- [Updated] Dazzling Deception YouTube's Editors Magic Showcase
- 2024 Approved Dive Into the World of Cosmetics Launching a Beauty Channel
- Charting New Territory Strategies for YouTube Keyword Research for 2024
- In 2024, Cutting-Edge Camera Technology For YouTube Stars
- [Updated] Best Voice Conversion Tools for Vlogging Professionals
- Cultivating Commitment Gentle Subscription Strategies for 2024
- Cutting-Edge Content Sharing Your Guide to YouTube+TikTok Linkup for 2024
- [New] Craft a Memorable YouTube Channel Brand for More Viewers
- Average Income for YouTubers per Ad Displayed?
- 2024 Approved Curated Cinematic Journeys The Best YT Film Selections
- 2024 Approved 7 Free Video Editing Programs That Work Flawlessly
- 2024 Approved Apex Creators Video Giants in the Making
- [Updated] Earn While You Entertain The Content Creator's Guide
- Fix Noted Shorts Now Shown Prominently
- [New] Epicurean Escapades Crafting Kitchen Films
- Flawless Flow From TikTok Creations to Twitter Broadcasting
- In 2024, How to Use Google Assistant on Your Lock Screen Of Vivo Y200 Phone
- New Best Zero-Cost FLV Video Editors You Need for 2024
- In 2024, Top 10 AirPlay Apps in Tecno Pop 7 Pro for Streaming | Dr.fone
- Watermark-Free Video Editing The Top 7 Merging Solutions for 2024
- Can You Unlock iPhone 13 Pro After Forgetting the Passcode? | Dr.fone
- Simplify with Top 10 Free Mac Tools for Screen Recording
- [New] MiniCam Record Evaluation & Backup Software
- In 2024, How to Show Wi-Fi Password on Vivo V29e
- Updated The Ultimate Guide to GIF for Discord Profile for 2024
- [New] Step-by-Step Techniques for Earning Profits on Vimeo for 2024
- Title: Learn the Easy Tricks for Eliminating Unwanted Youtube Content (PC/Mobile)
- Author: Steven
- Created at : 2024-05-25 19:50:29
- Updated at : 2024-05-26 19:50:29
- Link: https://youtube-clips.techidaily.com/learn-the-easy-tricks-for-eliminating-unwanted-youtube-content-pcmobile/
- License: This work is licensed under CC BY-NC-SA 4.0.
