
:max_bytes(150000):strip_icc()/GettyImages-525956536-f1c8a23b12e2480cad7b8a4544b1c0d2.jpg)
"Integrating Video Content YouTube & Google Slides"
Integrating Video Content: YouTube & Google Slides
Create High-Quality Video - Wondershare Filmora
An easy and powerful YouTube video editor
Numerous video and audio effects to choose from
Detailed tutorials provided by the official channel
Google Slide presentation is a powerful tool for creators to keep their audience engaged. This online platform lets you create and demonstrate your ideas. It will capture your viewers’ attention from the very beginning. It also doesn’t matter whatever learning style you engage. Adding YouTube videos to Google Slide will appeal to all levels of individuals.
More so, it is the best way to provide a break for both the audience and the creator. You can break Google Slide presentations with videos to offer some break. Viewers and the presenter get a breather in the process. The presenter can take a short break from speaking while the video plays. Let’s now dive into how to embed a YouTube video in Google Slides.

In this article
01 Why should we add a video to Google Slides?
02 How to add a YouTube video to Google Slide
03 How to choose the right video for your Slides?
Why should we add a video to Google Slides?
There is a great impact of adding video to Google Slides.
For attention
Videos will automatically awaken you, especially if your thoughts have started to sway during a presentation. A video has a direct way of showing creativity. The audience automatically connects the dots between the video and the presentation lines alike.
To stimulate discussion
A picture is worth a thousand words. There is a way that an added video will help the audience connect to the day’s topic. It will bring up several ideas and stir up discussion with the presenter.
Easy following
With videos embedded in Google Slide, viewers will find it easy to understand and digest. Videos automatically eliminate boredom and make any topic interesting.
How to add a YouTube video to Google Slide
Use these two methods to add a YouTube video to Google Slides. Via the Search and Direct link.
Method 1. Embed YouTube video to Google Slide by search and selection
Google has owned YouTube since the year 2006. You can, therefore, integrate Google’s products with YouTube easily.
Step 1. First, go to the slide where you want to embed your video.
Step 2. Then choose the “Insert” option from the menu bar and hit the “Video” option.

Step 3. It would be best if you now viewed the “YouTube” search bar to type in the video you want to embed. You can use keywords to search for the video in question and view instant search results.
Step 4. Then select the video you want to embed, and you’ll see it appear on the “Slide.”

Step 5. Format your video. Remember that the entire video will be embedded. You don’t necessarily need the whole video. It is time to select just a brief but relevant clip from the video to use. Then position your video to the right point using the axes from the exact starting point to the finished part you want the video to appear in.
Method 2. Embed YouTube video to Google Slide by direct link
You can engage this method if you want to include the entire video.
Step 1. Get the URL of the specific YouTube video that you want to use.

Step 2. Then go to your browser’s “Address bar” to copy the YouTube link.
Step 3. Next, open the “Presentation” slide to put your video to.
Step 4. Choose the “Insert” tab from the menu bar.
Step 5. Then hit on the “Video” option from the drop-down menu that appears.
Step 6. A new window will open automatically. Choose the “By URL” tab.
Step 7. Then paste the YouTube video URL in the “Paste YouTube URL Here” bar section.

Step 8. Wait for the video file to load and press the “Select” option. The video will immediately appear in the presentation slide. Just drag and drop the video in your preferred position.
Note: You can do a few edits inside the application. Set the timer when your video should start and when to stop. You can also adjust the video player size.
How to choose the right video for your Slides?
Not all videos will make an impact on your Google Slide. You need to use the best shot that adds value to your presentation. These guidelines will help you to settle on the best video.
Be Professional – choose the best video for your presentation. Remember that the video is part of the presentation and carries more weight. Settling for quality video will bring out the professionalism in you.
Relevant – how do you know that what you are showing your audience corresponds to the presentation piece? Ensure that the video you add has something to do with the Google Slide presentation topic. The two should naturally flow to make it easy to understand the whole concept.
Precise – your presentation is not about the video. The ideal length should not exceed 60 seconds. The longer the video, the greater the chance for your audience to lose track along the way.
Know every footage you are working with – this will help you pick the best shots for your presentation. So, learn every aspect of the video before settling down to use it.
Add new content – even though one content may suit several presentations, don’t rely on the same piece each time. Your audience will want to feel something fresh each time you are presenting. So, compose different videos for different scenarios to make that big impact.
Create an eye-catching video for your Slides with Filmora
The video quality matters when it comes to creating your Slides. The best video creator – Filmora – works in simple steps to give you an eye-catching video. It will create videos for all scenarios like marketing, tutorial, gaming, etc.
Key features of Filmora
- It offers you advanced video effects like filters, motion elements, etc
- You can multiply your fun with multiple screens with the Split Screen feature
- Easily change backgrounds using the Green Screen feature
- The speed control lets you fast forward or slow down a special moment
- Import your video clips to social media platforms
- You can also adjust the audio of your tracks using the Audio Mixer feature
Follow this guide to create a video for your slide with Filmora
Step 1. Launch Filmora
First, begin by downloading and installing Filmora on your computer device. Once installed, launch it and allow it to run. You can either create a new project or open an existing project to work on.
Step 2. Create a new project
Here, click on the “New Project” tab on the app’s welcome screen. The editor should load immediately. Then proceed to register the product. Just hit on the “Register” tab.
Step 3. Import video
Check the upper left corner of your screen to see the “Import” tab. Click on it and choose the “Import Media Files” option. Next, navigate to the location of your computer’s local list to select the clip or video you want to edit. Then, hit the “Import” button to add the video to the timeline for editing.
Step 4. Edit video
Drag and drop the raw footage to Filmora’s timeline to begin editing. Here, you can trim, add other video clips, merge, and add effects as you wish. Likewise, you can add opening titles, subtitles, and end credits to your video. More so, this tool offers different templates to use. Just drag and drop the templates you wish to use to a specific location on the timeline.
Step 5. Preview your file
Last but not least, you can preview your files. Click on the “Play” tab to start previewing your video clips. The main essence of this part is to allow you to make the necessary changes to your clips if there is a need.
Step 6. Export and Share
With Filmora, you can export your file to various social media platforms. But first, go to the “Output window” and select the video file format to use. This software supports several output formats to apply to any platform and device. Just click on the “Format” tab and choose the file format to use. Then also change the resolution and other parameters like frame rate and channel of your video in the “Settings” section. Finally, share your video to your YouTube channel and get ready to add the video to the Google Slide presentation.
For Win 7 or later (64-bit)
For macOS 10.12 or later
Conclusion
● You now know how to put a YouTube video in Google Slides the simple way. You can search for your YouTube videos or directly use the URL link. Whatever the case, remember that it’s the quality of your video that carries more weight. Thanks to the availability of third-party apps that you can use to create and improve the quality of your videos.
● Filmora is at your service to create high-resolution videos that you can export in any format to your YouTube channel. The tool is intuitive, and it won’t matter whether you haven’t tried it before. It is a perfect choice for both professionals and first-time users.
Google Slide presentation is a powerful tool for creators to keep their audience engaged. This online platform lets you create and demonstrate your ideas. It will capture your viewers’ attention from the very beginning. It also doesn’t matter whatever learning style you engage. Adding YouTube videos to Google Slide will appeal to all levels of individuals.
More so, it is the best way to provide a break for both the audience and the creator. You can break Google Slide presentations with videos to offer some break. Viewers and the presenter get a breather in the process. The presenter can take a short break from speaking while the video plays. Let’s now dive into how to embed a YouTube video in Google Slides.
In this article
01 Why should we add a video to Google Slides?
02 How to add a YouTube video to Google Slide
03 How to choose the right video for your Slides?
Why should we add a video to Google Slides?
There is a great impact of adding video to Google Slides.
For attention
Videos will automatically awaken you, especially if your thoughts have started to sway during a presentation. A video has a direct way of showing creativity. The audience automatically connects the dots between the video and the presentation lines alike.
To stimulate discussion
A picture is worth a thousand words. There is a way that an added video will help the audience connect to the day’s topic. It will bring up several ideas and stir up discussion with the presenter.
Easy following
With videos embedded in Google Slide, viewers will find it easy to understand and digest. Videos automatically eliminate boredom and make any topic interesting.
How to add a YouTube video to Google Slide
Use these two methods to add a YouTube video to Google Slides. Via the Search and Direct link.
Method 1. Embed YouTube video to Google Slide by search and selection
Google has owned YouTube since the year 2006. You can, therefore, integrate Google’s products with YouTube easily.
Step 1. First, go to the slide where you want to embed your video.
Step 2. Then choose the “Insert” option from the menu bar and hit the “Video” option.
Step 3. It would be best if you now viewed the “YouTube” search bar to type in the video you want to embed. You can use keywords to search for the video in question and view instant search results.
Step 4. Then select the video you want to embed, and you’ll see it appear on the “Slide.”
Step 5. Format your video. Remember that the entire video will be embedded. You don’t necessarily need the whole video. It is time to select just a brief but relevant clip from the video to use. Then position your video to the right point using the axes from the exact starting point to the finished part you want the video to appear in.
Method 2. Embed YouTube video to Google Slide by direct link
You can engage this method if you want to include the entire video.
Step 1. Get the URL of the specific YouTube video that you want to use.
Step 2. Then go to your browser’s “Address bar” to copy the YouTube link.
Step 3. Next, open the “Presentation” slide to put your video to.
Step 4. Choose the “Insert” tab from the menu bar.
Step 5. Then hit on the “Video” option from the drop-down menu that appears.
Step 6. A new window will open automatically. Choose the “By URL” tab.
Step 7. Then paste the YouTube video URL in the “Paste YouTube URL Here” bar section.
Step 8. Wait for the video file to load and press the “Select” option. The video will immediately appear in the presentation slide. Just drag and drop the video in your preferred position.
Note: You can do a few edits inside the application. Set the timer when your video should start and when to stop. You can also adjust the video player size.
How to choose the right video for your Slides?
Not all videos will make an impact on your Google Slide. You need to use the best shot that adds value to your presentation. These guidelines will help you to settle on the best video.
Be Professional – choose the best video for your presentation. Remember that the video is part of the presentation and carries more weight. Settling for quality video will bring out the professionalism in you.
Relevant – how do you know that what you are showing your audience corresponds to the presentation piece? Ensure that the video you add has something to do with the Google Slide presentation topic. The two should naturally flow to make it easy to understand the whole concept.
Precise – your presentation is not about the video. The ideal length should not exceed 60 seconds. The longer the video, the greater the chance for your audience to lose track along the way.
Know every footage you are working with – this will help you pick the best shots for your presentation. So, learn every aspect of the video before settling down to use it.
Add new content – even though one content may suit several presentations, don’t rely on the same piece each time. Your audience will want to feel something fresh each time you are presenting. So, compose different videos for different scenarios to make that big impact.
Create an eye-catching video for your Slides with Filmora
The video quality matters when it comes to creating your Slides. The best video creator – Filmora – works in simple steps to give you an eye-catching video. It will create videos for all scenarios like marketing, tutorial, gaming, etc.
Key features of Filmora
- It offers you advanced video effects like filters, motion elements, etc
- You can multiply your fun with multiple screens with the Split Screen feature
- Easily change backgrounds using the Green Screen feature
- The speed control lets you fast forward or slow down a special moment
- Import your video clips to social media platforms
- You can also adjust the audio of your tracks using the Audio Mixer feature
Follow this guide to create a video for your slide with Filmora
Step 1. Launch Filmora
First, begin by downloading and installing Filmora on your computer device. Once installed, launch it and allow it to run. You can either create a new project or open an existing project to work on.
Step 2. Create a new project
Here, click on the “New Project” tab on the app’s welcome screen. The editor should load immediately. Then proceed to register the product. Just hit on the “Register” tab.
Step 3. Import video
Check the upper left corner of your screen to see the “Import” tab. Click on it and choose the “Import Media Files” option. Next, navigate to the location of your computer’s local list to select the clip or video you want to edit. Then, hit the “Import” button to add the video to the timeline for editing.
Step 4. Edit video
Drag and drop the raw footage to Filmora’s timeline to begin editing. Here, you can trim, add other video clips, merge, and add effects as you wish. Likewise, you can add opening titles, subtitles, and end credits to your video. More so, this tool offers different templates to use. Just drag and drop the templates you wish to use to a specific location on the timeline.
Step 5. Preview your file
Last but not least, you can preview your files. Click on the “Play” tab to start previewing your video clips. The main essence of this part is to allow you to make the necessary changes to your clips if there is a need.
Step 6. Export and Share
With Filmora, you can export your file to various social media platforms. But first, go to the “Output window” and select the video file format to use. This software supports several output formats to apply to any platform and device. Just click on the “Format” tab and choose the file format to use. Then also change the resolution and other parameters like frame rate and channel of your video in the “Settings” section. Finally, share your video to your YouTube channel and get ready to add the video to the Google Slide presentation.
For Win 7 or later (64-bit)
For macOS 10.12 or later
Conclusion
● You now know how to put a YouTube video in Google Slides the simple way. You can search for your YouTube videos or directly use the URL link. Whatever the case, remember that it’s the quality of your video that carries more weight. Thanks to the availability of third-party apps that you can use to create and improve the quality of your videos.
● Filmora is at your service to create high-resolution videos that you can export in any format to your YouTube channel. The tool is intuitive, and it won’t matter whether you haven’t tried it before. It is a perfect choice for both professionals and first-time users.
Ultimate Live Broadcast Guide: Software & Hardware Recommendations
Best YouTube Live Streaming Software and Hardware You Should Know

Richard Bennett
Mar 27, 2024• Proven solutions
- Part1.Best Software for Live Streaming Video to YouTube
- Part2.Best Software for Live Streaming Game to YouTube
- Part3.Best Software for Live Streaming Mobile to YouTube
- Part4.Hardware for Live Streaming to YouTube
Best Video Editor for You


Best Software for Live Streaming Video to YouTube
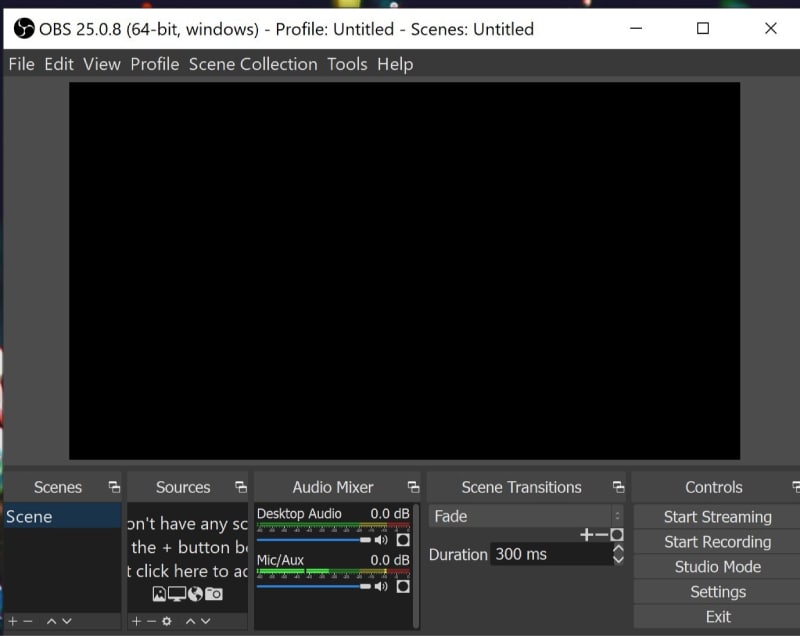
1.OBS:
Price: It is available for free.
OBS or Open Source Broadcaster is a popular recording and live streaming software tool that can be easily operated by all beginners. The best is that you can avail this software tool as an open source so it is possible to customize things as per need.
Key Features:
- It works perfectly on Linux, Mac and Windows.
- Advanced video editing tool with customized transitions.
- Filters, audio mixers, noise suppressor and automatic gain booster added for development of classic videos.
- Users can easily access light and dark themes as per their need.
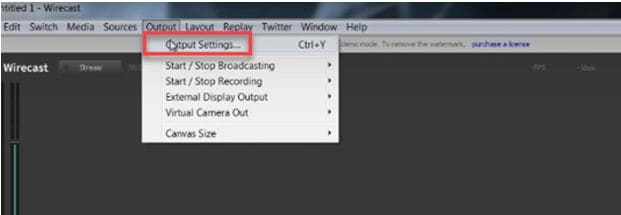
2. Wirecast Play:
Price:
- Wirecast Play 6: Free/ $9.99
- Wirecast Play Studio 6: $279
- Wirecast Play Pro 6: $549.
Wirecast play allows users to enjoy professional kind of stuff with impressive live recording facilities. Users can easily encode all live streams over multiple platforms or servers.
- The professional version of this software tool allows users to add web stream, Ip cameras and input sources.
- It possesses so many professional level editing features such as advanced audio controls, virtual sets, reply and live scoreboards.
- With its interactive user interface, Wirecast is rated as one of the most useful multicamera type live streaming package.
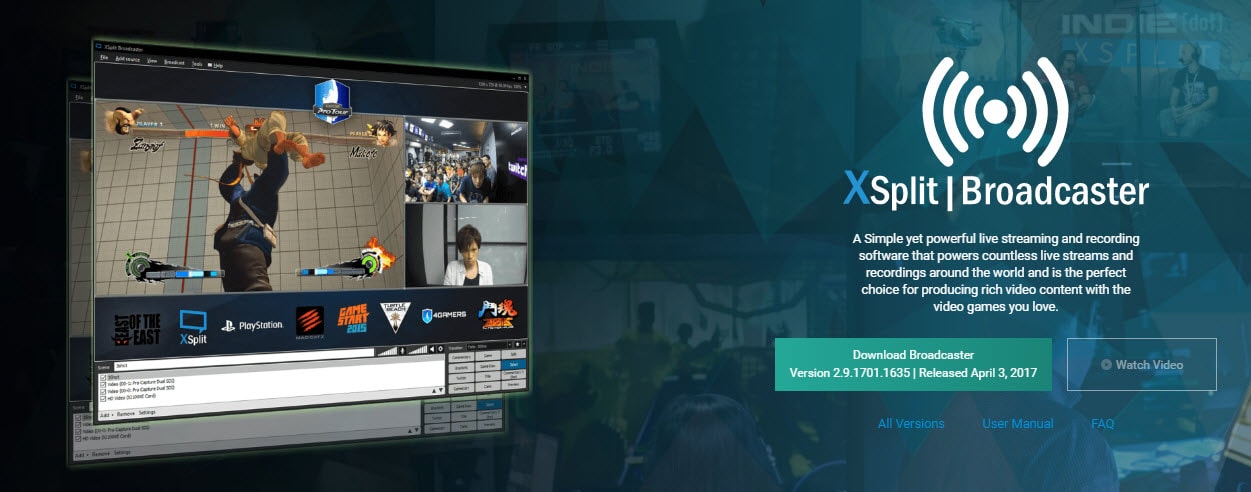
3. XSplit Broadcaster:
Price: Free and Paid
Here is a simple yet highly powerful live streaming software tool that can produce rich video content with its impressive user interface. It possesses all basic video development tools along with audio support feature. You will be glad to know that Xsplit offers Full HD recording ability; other then this you can access social features, in game annotations, in game production control as well as unique live production features.
Key Features:
- XSplit supports almost all capture cards.
- It possesses so many custom integrations and plugins.
- Easy video editing supported with professional production tools.
- You will be able to access notifications and chat option for organizing uploads in interactive manner.
Best Software for Live Streaming Game to YouTube
1. XSplit Gamecaster:
Price: Free and Paid
If you love gaming then Xsplit can assist you to share your memorable gaming moments on social media sites so that viewers can come to know about your creativity. Xsplit Gamecaster works perfectly with console games as well as on personal computers.
Key Features:
- It extends its support to all latest capture card designs.
- Users can easily switch to webcam mode and background can be easily removed.
- It offers loads of professional quality editing features.
- There are so many customizable integrations and plugins.
- Chat and notification feature supported.

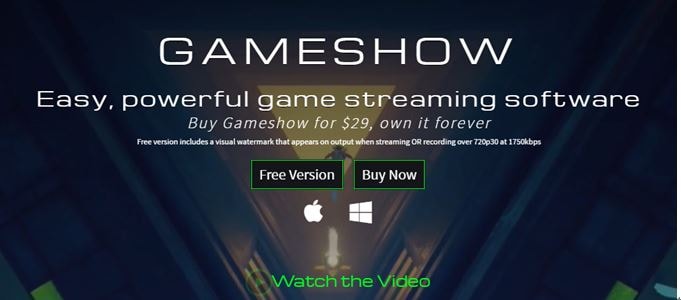
2. Gameshow (Mac/Win):
Price: $29
It is possible to start live streaming within few seconds using your gameshow oftware tool. Gameshow will help you to pick right template, adjust widgets and start streaming content within few seconds. It is possible to stream content directly to all popular social media platforms like Hitbox, YouTube and Twitch.
Key Features:
- It offers multiple layer combinations for development of interactive videos.
- Users will have complete control over scene development.
- It is possible to create playlists using transitions and customized timing effects.
- It works with low CPU usage hence will not affect your device performance.
Best Software for Live Streaming Mobile to YouTube
1. Airserver:
Price: $7.99 to $11.99 only for educational needs, $14.99- Consumer License and $19.99 for Business License.
AirServer is one of the most advanced and interactive screen mirroring type software receiver tools for Xbox, PC and Mac etc. Using this tool, users can easily receive content from chromcast device, Apple TV, Miracast Streams, Google Cast and AirPlay etc.
Key Features:
- It is designed with zero client footprint feature that means everything is just ready for your needs and you will not even need any third party support.
- This software tool enables collaboration between various applications that are working on different platforms.
- It is compatible with Windows, Chrombook and Android platform.
- Comes with retina quality mirroring that can effectively improve picture quality.

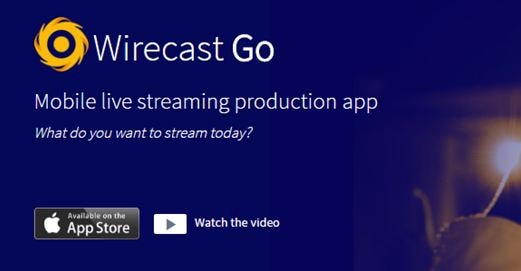
2. Wirecast Go (iOS device only):
Price: Free and upgrades demand payment of $5.99 only.
It is possible to stream rich video content from iPhone directly to Youtube using Wirecast platform. Users will be able to stream their interactive videos with effective editing and customization tools like text, replays and graphics etc. This software tool is compatible with iPod Touch, iPad and iPhone.
Key Features:
- One click type YouTube streaming option.
- Unlimited streaming available even for free version users.
- One can easily add graphics, logos and images for stream content.
- It replays all highlights for live broadcasts.
Hardware for Live Streaming to YouTube
1. Elgato Game Capture HD 60:
Price: $179.95 only
Elgato Game Capture HD 60 is well known for its wide range of compatibility, efficiency and set of powerful features that assists in top quality content development. You can develop videos with 1080p resolution at 60fps frame rate using Elgato tool.
Key Features:
- Rich content quality with Full HD video support.
- It can easily record your overlays, webcam, audio and gameplay with additional facility to separate them as per need so that users can access anything upon selection.
- Easy editing functions that assist in direct upload.

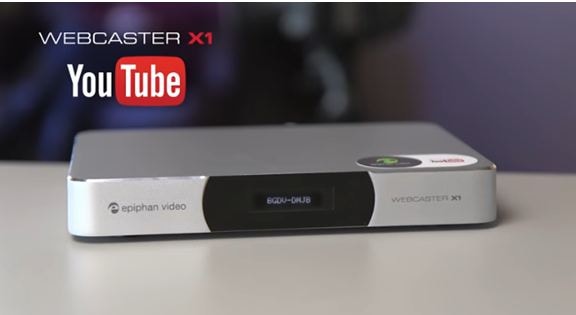
2. Webcaster X1 for YouTube:
Price: $329.95 only.
Webcaster allows users to enjoy interactive video uploading experience while offering easy connectivity to DSLR and dedicated Video camera units so that videos can be directly sent to YouTube.
Key Features:
- It offers easy setup options and starts automatically when you pair it up with a device using pairing code.
- This software tool can accept high quality audio content via HDMI inputs.
- It is possible to use advanced configuration options like keyboard, mouse and monitor connectivity for precise live streaming.
- One can easily make selections between Wi-Fi and Ethernet connections for content uploading.
Richard Bennett
Richard Bennett is a writer and a lover of all things video.
Follow @Richard Bennett
Richard Bennett
Mar 27, 2024• Proven solutions
- Part1.Best Software for Live Streaming Video to YouTube
- Part2.Best Software for Live Streaming Game to YouTube
- Part3.Best Software for Live Streaming Mobile to YouTube
- Part4.Hardware for Live Streaming to YouTube
Best Video Editor for You
Best Software for Live Streaming Video to YouTube
1.OBS:
Price: It is available for free.
OBS or Open Source Broadcaster is a popular recording and live streaming software tool that can be easily operated by all beginners. The best is that you can avail this software tool as an open source so it is possible to customize things as per need.
Key Features:
- It works perfectly on Linux, Mac and Windows.
- Advanced video editing tool with customized transitions.
- Filters, audio mixers, noise suppressor and automatic gain booster added for development of classic videos.
- Users can easily access light and dark themes as per their need.
2. Wirecast Play:
Price:
- Wirecast Play 6: Free/ $9.99
- Wirecast Play Studio 6: $279
- Wirecast Play Pro 6: $549.
Wirecast play allows users to enjoy professional kind of stuff with impressive live recording facilities. Users can easily encode all live streams over multiple platforms or servers.
- The professional version of this software tool allows users to add web stream, Ip cameras and input sources.
- It possesses so many professional level editing features such as advanced audio controls, virtual sets, reply and live scoreboards.
- With its interactive user interface, Wirecast is rated as one of the most useful multicamera type live streaming package.
3. XSplit Broadcaster:
Price: Free and Paid
Here is a simple yet highly powerful live streaming software tool that can produce rich video content with its impressive user interface. It possesses all basic video development tools along with audio support feature. You will be glad to know that Xsplit offers Full HD recording ability; other then this you can access social features, in game annotations, in game production control as well as unique live production features.
Key Features:
- XSplit supports almost all capture cards.
- It possesses so many custom integrations and plugins.
- Easy video editing supported with professional production tools.
- You will be able to access notifications and chat option for organizing uploads in interactive manner.
Best Software for Live Streaming Game to YouTube
1. XSplit Gamecaster:
Price: Free and Paid
If you love gaming then Xsplit can assist you to share your memorable gaming moments on social media sites so that viewers can come to know about your creativity. Xsplit Gamecaster works perfectly with console games as well as on personal computers.
Key Features:
- It extends its support to all latest capture card designs.
- Users can easily switch to webcam mode and background can be easily removed.
- It offers loads of professional quality editing features.
- There are so many customizable integrations and plugins.
- Chat and notification feature supported.
2. Gameshow (Mac/Win):
Price: $29
It is possible to start live streaming within few seconds using your gameshow oftware tool. Gameshow will help you to pick right template, adjust widgets and start streaming content within few seconds. It is possible to stream content directly to all popular social media platforms like Hitbox, YouTube and Twitch.
Key Features:
- It offers multiple layer combinations for development of interactive videos.
- Users will have complete control over scene development.
- It is possible to create playlists using transitions and customized timing effects.
- It works with low CPU usage hence will not affect your device performance.
Best Software for Live Streaming Mobile to YouTube
1. Airserver:
Price: $7.99 to $11.99 only for educational needs, $14.99- Consumer License and $19.99 for Business License.
AirServer is one of the most advanced and interactive screen mirroring type software receiver tools for Xbox, PC and Mac etc. Using this tool, users can easily receive content from chromcast device, Apple TV, Miracast Streams, Google Cast and AirPlay etc.
Key Features:
- It is designed with zero client footprint feature that means everything is just ready for your needs and you will not even need any third party support.
- This software tool enables collaboration between various applications that are working on different platforms.
- It is compatible with Windows, Chrombook and Android platform.
- Comes with retina quality mirroring that can effectively improve picture quality.
2. Wirecast Go (iOS device only):
Price: Free and upgrades demand payment of $5.99 only.
It is possible to stream rich video content from iPhone directly to Youtube using Wirecast platform. Users will be able to stream their interactive videos with effective editing and customization tools like text, replays and graphics etc. This software tool is compatible with iPod Touch, iPad and iPhone.
Key Features:
- One click type YouTube streaming option.
- Unlimited streaming available even for free version users.
- One can easily add graphics, logos and images for stream content.
- It replays all highlights for live broadcasts.
Hardware for Live Streaming to YouTube
1. Elgato Game Capture HD 60:
Price: $179.95 only
Elgato Game Capture HD 60 is well known for its wide range of compatibility, efficiency and set of powerful features that assists in top quality content development. You can develop videos with 1080p resolution at 60fps frame rate using Elgato tool.
Key Features:
- Rich content quality with Full HD video support.
- It can easily record your overlays, webcam, audio and gameplay with additional facility to separate them as per need so that users can access anything upon selection.
- Easy editing functions that assist in direct upload.
2. Webcaster X1 for YouTube:
Price: $329.95 only.
Webcaster allows users to enjoy interactive video uploading experience while offering easy connectivity to DSLR and dedicated Video camera units so that videos can be directly sent to YouTube.
Key Features:
- It offers easy setup options and starts automatically when you pair it up with a device using pairing code.
- This software tool can accept high quality audio content via HDMI inputs.
- It is possible to use advanced configuration options like keyboard, mouse and monitor connectivity for precise live streaming.
- One can easily make selections between Wi-Fi and Ethernet connections for content uploading.
Richard Bennett
Richard Bennett is a writer and a lover of all things video.
Follow @Richard Bennett
Also read:
- Charting Your Course Building Plays on YouTube for 2024
- [New] Efficient Video Marketing Incorporating Timestamps Effectively
- Unleashing Viewer Engagement - Explore 12 Successful YouTube Strategies
- 2024 Approved 10 Strategies for Educators Starting Their Own YouTube Series
- Mastering Monetization in YTP2024 for YouTubers
- Discovering Great Videostreams YouTube's Best 27 Alternatives for 2024
- [Updated] DIY GIF Creation Extracting Motion From YouTube Videos
- Learn More Top Education Streams Online
- Deciphering How TSeries Benefits From YouTube
- [New] Cutting Clout, Not Content Efficient Video Length Reduction
- A Simple Path to Enhanced YouTube Sign-Ups - Create Animated Subscription Bar Using Filmora
- Craft Unforgettable Experiences for More Subscribers with These 6 Tips for 2024
- 2024 Approved Audience Acclaim Index World's Most Engaged YouTubers
- Edit with Ease #10 Video-to-Mp3 Tools of the Trade for 2024
- Channel Growth Blueprint Selecting Between Studio and Latest Beta
- Triple the Fun with YouTube + Twitch Live Sessions
- The Prime 5 Alternatives for Android & iPhone Users' Videos
- Captivating Audiences with Unique Haul Content Ideas
- Unlocking Financial Success Through Youtube's Viewer Count
- Enhancing Engagement IMovie Techniques for YouTube Intros for 2024
- In 2024, Best Movie Swaps Top 7 Alternate Films
- In 2024, Apex Chart Seeker Monitor Most Viewed Videos
- In 2024, Breakdown of How YouTube Ad Revenue Works (CPM)
- Initiating Your Sporty Online Presence with Mac
- Navigating the Best Video Formats for Your YouTube Channel
- Blueprints for Breaking Ground in Edu-Video Production on YouTube Channels
- [Updated] Digital Dominion Rise as a YouTube Guru
- Crafting Attention A Look at the Best 15 Video Intro Plans for 2024
- The Ultimate Guide to Earning Through YouTubing Enabling Monetization on Mobile Devices
- In 2024, Advanced Techniques for High-Quality YouTube Content
- Supercharge Your Channel with Smart YouTube Collaborations
- In 2024, Crafting Chic Looks The Ultimate Cosmetic Compendium
- Dynamic Shots Infusing Energy Into Your YouTube Videos
- 2024 Approved Crafting Visuals The Science of YouTube Banners & Thumbnails
- [New] How to Embed A YouTube Playlist On a Website
- Expert Insights for YouTube End Credits - Top Makers' Advice
- [Updated] Elevate Your Content Top Reasons and Solutions for Gaining Video Views
- When You're Not Who You Think During a Facebook Call for 2024
- [Updated] Tweeting with Videos A Quick Tutorial
- Transform Your Snaps with Smart Zoom Usage in Snapchat
- Discover the Power of Final Cut Pro 90-Day Free Trial Available
- Why Your WhatsApp Location is Not Updating and How to Fix On Motorola Edge 40 | Dr.fone
- New 2024 Approved The Ultimate Guide to Freezing Frames in Videos (Updated )
- [New] 2024 Approved Comprehensively Understanding Recmeister's Screen Recording Strengths
- New In 2024, The Ultimate Voice Eradication Suite Handpicking the Top 7 Tools for Online & Offline Use
- In 2024, The Battle of Screen Capture Supremacy OBS vs Fraps
- [Updated] 2024 Approved Effective Strategies to Mute Unwanted Voices in GoMeet
- In 2024, Two Ways to Track My Boyfriends Nokia 150 (2023) without Him Knowing | Dr.fone
- Seamless Volume Reduction for Apple and Microsoft Systems
- [New] 2024 Approved The Art of Aural Storytelling on Instagram Reels
- 2024 Approved Play Anywhere, Anytime The Ultimate Collection of the Best GB Advance Emulators on PCs
- 16 Unique Metaverse Scenarios Demonstrating VR's Impact for 2024
- Enhancing Your FB Video Experience with 1080P Quality for 2024
- In 2024, Top 10 AirPlay Apps in Samsung Galaxy S23 Ultra for Streaming | Dr.fone
- In 2024, Snap to GIFs Making Twitter Video Freely Convertible
- [Updated] Ensuring Audio Clarity Amidst Remote Recording Challenges for 2024
- [Updated] In 2024, Direct Video Transmission From Twitters to WhatsApp
- Pro Tips for Immediate Use of IO Screen Recorder
- In 2024, Additional Tips About Sinnoh Stone For Honor X9b | Dr.fone
- New Learn How to Make Your Characters Interactive in Unity Animation Rigging
- Want to Uninstall Google Play Service from Nokia XR21? Here is How | Dr.fone
- [Updated] 2024 Approved Harmonizing with Instagram A Songwriter's Compliance Primer
- How To Fix Unresponsive Touch Screen on Honor X9b | Dr.fone
- Updated 2024 Approved Transform Your Home Movies Essential Editing Techniques
- [Updated] Elevate Your Social Presence Proven Methods for FB Fan Expansion
- In 2024, A Quick Guide to Motorola Moto G Stylus 5G (2023) FRP Bypass Instantly
- Title: "Integrating Video Content YouTube & Google Slides"
- Author: Steven
- Created at : 2024-05-25 19:49:12
- Updated at : 2024-05-26 19:49:12
- Link: https://youtube-clips.techidaily.com/integrating-video-content-youtube-and-google-slides/
- License: This work is licensed under CC BY-NC-SA 4.0.
