
:max_bytes(150000):strip_icc()/Apple-Self-Service-Repair-iPhone-6617e65293a04de7916169bea41d286f.jpg)
"In-Depth Walkthrough Editing YouTube Videos in WMM"
In-Depth Walkthrough: Editing YouTube Videos in WMM
How to Edit YouTube videos in Windows Movie Maker

Richard Bennett
Mar 27, 2024• Proven solutions
We all know YouTube is an important platform for sharing and watching videos. Are you a YouTuber looking for how to edit YouTube video with the best YouTube movie maker? You have come the right place if you wonder how to edit a video for YouTube on Windows. While, if you have free Windows Movie Maker already installed on your computer, you can edit YouTube videos in Windows Movie Maker and then upload to YouTube directly. In this article, I will show you all the information you need to know about how to edit a video for YouTube in Windows Movie Maker with step by step.
You may also like : The Ultimate Guide to YouTube Video Editing Tools
In case that you do not have free Windows Movie Maker in your computer, you may need to download it from other website since Microsoft has removed the downloading link after January 2017. Please pay attention when downloading the Movie Maker application from website and never download it from untrusted website.
A better way to edit YouTube Videos - Wondershare Filmora supports many formats including MP4, MOV, MKV, and FLV, which means that you will not need to convert the files before and after editing. Like Windows Movie Maker, Wondershare Filmora is easy to use but comes with many more features that allow for professional-grade videos. One of these features is the animated text. There are also built-in presets that you can use to quickly edit your videos. There is also the option to directly upload a video to YouTube from Filmora, so no time is wasted waiting for a video to process.
 Download Mac Version ](https://tools.techidaily.com/wondershare/filmora/download/ )
It is hard to list all the information of how to use Filmora to edit YouTube videos here, but we have composed an article about how to edit videos, you can check How to Edit Video in Filmora: Beginners’ Guide .
Windows Movie Maker YouTube: How to Edit YouTube Videos?
Before editing the video in Windows Movie Maker , you have to make sure that the video format is supported by free Windows Movie Maker. As you may know that Window Movie Maker only accept the following file formats at importing: .WMV/.ASF, .MPG (MPEG-1), .AVI (DV-AVI), .WMA, .WAV, and .MP3. Importing formats such as MP4/3GP, FLV and MOV, are also supported you are running Windows 7 or later and you have installed the necessary codec as well.
If your videos are not supported at importing in Windows Movie Maker, you may need to converter it first or choose a video editor like Filmora video editor which supports the almost all popular formats.
Step 1: Import Video Files Into Windows Movie Maker

To import video or photo into Windows Movie Maker, you can click on the button Add Videos or Photos located at the top of the program. A file window will open, and you can select the videos from any area of your computer. Once you have the files selected, click OK to import the files to the storyboard in the right hand panel.
You can also choose to record a webcam on your windows 10 or windows 7 computer and use it as the material.

Step 2: Trim/Cut/Split/Combine videos in Windows Movie Maker
Preview the video clips in the preview box. You can always use the Previous Frame or Next Frame to preview video frame by frame. When editing a video for YouTube, you may need to trim to remove unwanted parts from the video , combine several clips into a new one or split the video into several smaller parts .
To remove any parts of the video that you do not want in the final version of the video, locate the start frame that you want to remove in the storyboard, and then click the Split button to get the starting point of the split segment, and then locate the end frame that you want to remove and click Split again. Right-click the split video clip you want to remove and select Remove from the context menu. This can be done as many times as you want.

Step 3: Apply Transitions and Visual Effects to YouTube Video
Once you have all the clips that you want in your video, you can then add transitions to the video. At the top of Windows Movie Maker, there is a button that says Animations. This will open a menu that has different options. You need to select the clip, and add the transition that you want. The program does the rest of the work. You can see how it looks by clicking play.

Applying visual effects, overlays and filters work in the same way, but you click on Visual Effects, which is located at the top of the window. You can apply effects to any clip as along as the clip is selected first.
Step 4: Edit/Mute Audio in Video or Add New Audio Sound
If you are planning on adding music to your video, you should think about muting the audio in video or decrease the audio volume in Video. Double click the video clip to enter the Edit panel, and then then click on Video Volume button. You can then mute the audio by drag the volume slider to the left end. Of course, you can adjust the video audio volume per your need. This will affect the all the sounds on that video clip. If you want to mute all the clips, you need to select all the clips, or you will end up with one clip with no sound, and the rest of the clips having sound.

Once the sound has been adjusted on the clips, you can add new audio sound to the video. You can record narrations for your YouTube video in Windows Movie Maker by clicking Record narration button in Home tab and add music to video by clicking Add music button and select the music to import it. You can add music from your computer or find new music sound from AudioMicro, Vimeo or Free Music Archive online.

After importing the new audio file for your YouTube video, you can now adjust the music volume. In the Music Tools tab, there is an Option tab, you can control the volume and other options about the music.

Step 5: Add Title and Text to Video for YouTube
Windows Movie Maker allows you to add different types of text freely. You will see 3 buttons that allow different types of text to video: stationary title, captions and rolling credits. Click on Title, you can add text before the video begins; select Caption, you will write text to the video frames; and click Credits will add end credits to the end of the video.

After selecting the type of text you want, you can enter your text and edit the text effects. You can change the text duration and apply text visual effects, and change the text outline size and more.

Check the detailed information of How to Add Text in Windows Movie Maker .
Step 6: Save and Publish
Once all the edits are done, you can save the video by clicking on File then clicking on Publish Movie. You will need to select where you want to save the file and the file type. Since we are editing videos for YouTube, choose YouTube to upload the edited video to YouTube. You can also save the video in computer with different formats, resolution or burn to DVD. Windows Movie Maker also allows you to save the Video for Email or for mobile devices.

Conclusion
That’s it. That’s how you can edit your YouTube video with Windows Movie Maker. It is a great YouTube video editor to make video with various features. However, you may consider other YouTube movie maker as it won’t updated. Why not try Filmora. It is one of the best movie editor for YouTube. Download it now to have a try!
Download Mac Version ](https://tools.techidaily.com/wondershare/filmora/download/ )
Richard Bennett
Richard Bennett is a writer and a lover of all things video.
Follow @Richard Bennett
Richard Bennett
Mar 27, 2024• Proven solutions
We all know YouTube is an important platform for sharing and watching videos. Are you a YouTuber looking for how to edit YouTube video with the best YouTube movie maker? You have come the right place if you wonder how to edit a video for YouTube on Windows. While, if you have free Windows Movie Maker already installed on your computer, you can edit YouTube videos in Windows Movie Maker and then upload to YouTube directly. In this article, I will show you all the information you need to know about how to edit a video for YouTube in Windows Movie Maker with step by step.
You may also like : The Ultimate Guide to YouTube Video Editing Tools
In case that you do not have free Windows Movie Maker in your computer, you may need to download it from other website since Microsoft has removed the downloading link after January 2017. Please pay attention when downloading the Movie Maker application from website and never download it from untrusted website.
A better way to edit YouTube Videos - Wondershare Filmora supports many formats including MP4, MOV, MKV, and FLV, which means that you will not need to convert the files before and after editing. Like Windows Movie Maker, Wondershare Filmora is easy to use but comes with many more features that allow for professional-grade videos. One of these features is the animated text. There are also built-in presets that you can use to quickly edit your videos. There is also the option to directly upload a video to YouTube from Filmora, so no time is wasted waiting for a video to process.
Download Mac Version ](https://tools.techidaily.com/wondershare/filmora/download/ )
It is hard to list all the information of how to use Filmora to edit YouTube videos here, but we have composed an article about how to edit videos, you can check How to Edit Video in Filmora: Beginners’ Guide .
Windows Movie Maker YouTube: How to Edit YouTube Videos?
Before editing the video in Windows Movie Maker , you have to make sure that the video format is supported by free Windows Movie Maker. As you may know that Window Movie Maker only accept the following file formats at importing: .WMV/.ASF, .MPG (MPEG-1), .AVI (DV-AVI), .WMA, .WAV, and .MP3. Importing formats such as MP4/3GP, FLV and MOV, are also supported you are running Windows 7 or later and you have installed the necessary codec as well.
If your videos are not supported at importing in Windows Movie Maker, you may need to converter it first or choose a video editor like Filmora video editor which supports the almost all popular formats.
Step 1: Import Video Files Into Windows Movie Maker
To import video or photo into Windows Movie Maker, you can click on the button Add Videos or Photos located at the top of the program. A file window will open, and you can select the videos from any area of your computer. Once you have the files selected, click OK to import the files to the storyboard in the right hand panel.
You can also choose to record a webcam on your windows 10 or windows 7 computer and use it as the material.
Step 2: Trim/Cut/Split/Combine videos in Windows Movie Maker
Preview the video clips in the preview box. You can always use the Previous Frame or Next Frame to preview video frame by frame. When editing a video for YouTube, you may need to trim to remove unwanted parts from the video , combine several clips into a new one or split the video into several smaller parts .
To remove any parts of the video that you do not want in the final version of the video, locate the start frame that you want to remove in the storyboard, and then click the Split button to get the starting point of the split segment, and then locate the end frame that you want to remove and click Split again. Right-click the split video clip you want to remove and select Remove from the context menu. This can be done as many times as you want.
Step 3: Apply Transitions and Visual Effects to YouTube Video
Once you have all the clips that you want in your video, you can then add transitions to the video. At the top of Windows Movie Maker, there is a button that says Animations. This will open a menu that has different options. You need to select the clip, and add the transition that you want. The program does the rest of the work. You can see how it looks by clicking play.
Applying visual effects, overlays and filters work in the same way, but you click on Visual Effects, which is located at the top of the window. You can apply effects to any clip as along as the clip is selected first.
Step 4: Edit/Mute Audio in Video or Add New Audio Sound
If you are planning on adding music to your video, you should think about muting the audio in video or decrease the audio volume in Video. Double click the video clip to enter the Edit panel, and then then click on Video Volume button. You can then mute the audio by drag the volume slider to the left end. Of course, you can adjust the video audio volume per your need. This will affect the all the sounds on that video clip. If you want to mute all the clips, you need to select all the clips, or you will end up with one clip with no sound, and the rest of the clips having sound.
Once the sound has been adjusted on the clips, you can add new audio sound to the video. You can record narrations for your YouTube video in Windows Movie Maker by clicking Record narration button in Home tab and add music to video by clicking Add music button and select the music to import it. You can add music from your computer or find new music sound from AudioMicro, Vimeo or Free Music Archive online.
After importing the new audio file for your YouTube video, you can now adjust the music volume. In the Music Tools tab, there is an Option tab, you can control the volume and other options about the music.
Step 5: Add Title and Text to Video for YouTube
Windows Movie Maker allows you to add different types of text freely. You will see 3 buttons that allow different types of text to video: stationary title, captions and rolling credits. Click on Title, you can add text before the video begins; select Caption, you will write text to the video frames; and click Credits will add end credits to the end of the video.
After selecting the type of text you want, you can enter your text and edit the text effects. You can change the text duration and apply text visual effects, and change the text outline size and more.
Check the detailed information of How to Add Text in Windows Movie Maker .
Step 6: Save and Publish
Once all the edits are done, you can save the video by clicking on File then clicking on Publish Movie. You will need to select where you want to save the file and the file type. Since we are editing videos for YouTube, choose YouTube to upload the edited video to YouTube. You can also save the video in computer with different formats, resolution or burn to DVD. Windows Movie Maker also allows you to save the Video for Email or for mobile devices.
Conclusion
That’s it. That’s how you can edit your YouTube video with Windows Movie Maker. It is a great YouTube video editor to make video with various features. However, you may consider other YouTube movie maker as it won’t updated. Why not try Filmora. It is one of the best movie editor for YouTube. Download it now to have a try!
Download Mac Version ](https://tools.techidaily.com/wondershare/filmora/download/ )
Richard Bennett
Richard Bennett is a writer and a lover of all things video.
Follow @Richard Bennett
Unlocking Your Sub4sub Potential: The Critical Pre-Entry Guide
Create High-Quality Video - Wondershare Filmora
An easy and powerful YouTube video editor
Numerous video and audio effects to choose from
Detailed tutorials provided by the official channel
YouTube streaming service is a beehive of activities. Promoters strive for a higher number of subscribers to boost their content. Several ways are available for you to increase the number of subscribers and visitors to your site. YouTube sub for sub is one common practice for this noble cause. In this practice, a person subscribes, in anticipation of the recipient subscribing back as well.
However, the practice may not give your channel that genuine growth. The subscribers may not even watch your videos or care much about leaving comments or other engagements. All in all, the aim is to hit a certain number of subscribers so that you can get into the recommended territory and probably start earning. But are there other options to increase YouTube subscriptions apart from Sub4Sub? Be genuine and use real avenues to rise to the top. This article corresponds adequately on the matter by giving you alternative ways to gain real subscribers who will stick around to grow your channel.
In this article
03 Tips & tricks to use sub for sub
04 Additional thoughts - Should we rely on subforsub to get more subscribers?
What is sub for sub?
Subforsub means a subscription for a subscription. In this practice, there are subscribers and subscriptions. Those who subscribe to you on YouTube are the subscribers while those whom you subscribe to, are the subscriptions. Both video makers’ subscribers are, therefore, increased equally and doesn’t give each other a competitive advantage against the other member. Sub for sub was founded in Germany, 4 years ago. It is easy to use and free platform that takes only about 5 minutes to contact a subscriber and complete the initiative. To get started, a user signs up and creates a new account on the home page. You can then reach out to other members for a subscription.
How does sub for sub work?
With YouTube sub for sub, you market your YouTube channel to get more subscribers. Simply sub to one another’s channel and they sub back.
You can do this on different channels such as YouTube live videos, among other channels. But again, these subscribers are not so much concerned about getting the real subs. What matters is that you get 1,000 subscribers to enable you to monetize on YouTube. However, YouTube also has its measures in place, and manipulating the matrix is one of which they don’t advocate for. But in most cases, subforsub participants operate fake YouTube accounts and you can find one person corresponding up to 5 accounts to gain subscriptions. This isn’t good for your rating as you don’t get real subscribers but you only boost the number of subscribers. And since they don’t watch your videos, neither will they share them with other viewers.
Tips & tricks to use sub for sub
Subforsub isn’t genuine and all you get is bot subscribers who don’t engage. However, you can use available tricks to gain popularity.
- Using fake accounts

A user should only run one genuine YouTube account. However, the trick that most subscribers use to gain more subs is by creating other additional fake accounts to gain more subs in return. But again, it is not a guarantee as some subscribers may not sub back to all the accounts.
- Subscribers don’t watch the videos
Perhaps there is no time for subscribers to watch the potential sub videos before subscribing. Your mission is to gain as many subs as possible even if your watch time doesn’t go up. This doesn’t bring any positivity to your channel rather an increased number of subscribers.
- Reach out to friends
You can also boost your sub for sub by reaching out to friends to inform them of your channel and ask for subscriptions in return for theirs as well. This, however, could be a slow process as not all your friends will be attracted to what you do.
- Don’t do subforsub for followers
A subforsub may not give you followers parse. So, don’t get into it for genuine followers. Those who sub to your channel won’t follow you in most cases. Rather, they might unsubscribe after a short duration of time.
- Use channel branding
This trick will glue viewers to your channel. These can include banner art to welcome everyone who clicks into your channel.
Additional thoughts - Should we rely on subforsub to get more subscribers?
You should not rely on subforsub as it doesn’t give the real figures but manipulates the outcome. Nonetheless, you need real subscribers to climb the YouTube ladder. That’s the best way to push the YouTube algorithm. There are genuine aspects of gaining subscribers to grow your channel.
Get to social media platforms

These include Facebook, Instagram, WhatsApp, and other sites. Introduce your YouTube channel to your followers and remind them to subscribe. Likewise, demonstrate why your channel is worth subscribing to.
Upload content consistently
Ensure your upload schedule is consistent and you’ll see viewers having a reason to subscribe to your channel. Once you introduce your channel with the first video, post a second and third video to build more momentum on your potential subscribers.
Incorporate YouTube stories
Stories can be a good starting point for those who have not subscribed to your content yet despite watching. Short video stories will attract viewers’ attention and want to get more from your channel.
Use Calls to Action

Ask your audience to subscribe after watching your videos. A great idea is to use animation or graphics to attract the viewers’ attention instantly. Other free options like green screen are also available for use.
Make it easy for viewers to understand your channel
You can make it easy by giving your viewers a guided tour. By this, they’ll know where to find important sections like comments. You can also create a channel banner that tells your audience what you do. They’ll soon familiarize themselves with your channel and be friends in no time.
Build a relationship with your audience
It is good to connect with your audience in various aspects. Expressing yourself probably in front of a camera has a deeper impact. You can also use illustrations to bring out your points for a quick understanding. Engaging them in the process is the best way to make them feel like they belong and eventually turn into subscribers.
Focus on the video that’s working for you
You should know which video is working and which is not. Judge and put more emphasis on the video that’s working for you. Check out which videos turn viewers into subscribers as that’s your main aim. More so, be creative and innovative.
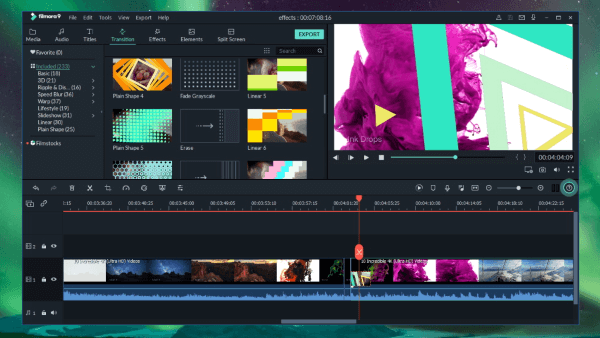
A video editor is worth a try – Filmora
Since creativity is paramount, engaging a video editor tool will make you achieve your goal in a few clicks. Filmora Video Editor will transform your videos into magical content. It comes with powerful editing tools to make your video stand tall from the rest. You will also manage to import and export your videos in various formats for easy access on different platforms and devices. Whether you wish to create a tutorial for learning or promotional purposes, Filmora will give you exceptional results. The steps are as easy as 1-2-3 and the process is effective. Check out its key features to help you produce quality videos.
For Win 7 or later (64-bit)
For macOS 10.12 or later
Key Features of Filmora Video Editor
- 4K editing support: Quality and sharp videos are attractive to viewers. Filmora lets you edit and export your videos at high resolutions of up to 4K.
- Noise removal: Make your videos noise-free by removing unwanted background sounds. Viewers won’t be destructed and can concentrate more on the important aspects of the video.
- Speed control: There are important sections of your video that you may wish to emphasize more. You can slow down the speed in such sections for your viewers to understand them in detail. Nonetheless, you can speed up certain parts that don’t require too much emphasis.
- Reverse: What about being creative using this feature. Simply flip your clips and play them backward with this feature.
- Preview frame by frame: Focus on precise editing by using this feature. It lets you move to any section of the frame at a time to ascertain that the final product will be the best.
- Audio separation: Do it in a few clicks. Detach audio from video and put any other background music depending on the theme of that moment.
Conclusion
● You may gain subscribers from the YouTube sub for sub but you will be violating YouTube’s terms of service. Additionally, the YouTube algorithm will eventually notice that your subscribers are not watching your videos. It will presume that you are buying subscribers, which is illegal in the long run. Be smart and engage the Filmora video editor. It works in simple steps to create wanting videos that will upsell your brand. Editing isn’t a worry either as it presents you with numerous stunning effects to transform your video to a compelling piece of art.
YouTube streaming service is a beehive of activities. Promoters strive for a higher number of subscribers to boost their content. Several ways are available for you to increase the number of subscribers and visitors to your site. YouTube sub for sub is one common practice for this noble cause. In this practice, a person subscribes, in anticipation of the recipient subscribing back as well.
However, the practice may not give your channel that genuine growth. The subscribers may not even watch your videos or care much about leaving comments or other engagements. All in all, the aim is to hit a certain number of subscribers so that you can get into the recommended territory and probably start earning. But are there other options to increase YouTube subscriptions apart from Sub4Sub? Be genuine and use real avenues to rise to the top. This article corresponds adequately on the matter by giving you alternative ways to gain real subscribers who will stick around to grow your channel.
In this article
03 Tips & tricks to use sub for sub
04 Additional thoughts - Should we rely on subforsub to get more subscribers?
What is sub for sub?
Subforsub means a subscription for a subscription. In this practice, there are subscribers and subscriptions. Those who subscribe to you on YouTube are the subscribers while those whom you subscribe to, are the subscriptions. Both video makers’ subscribers are, therefore, increased equally and doesn’t give each other a competitive advantage against the other member. Sub for sub was founded in Germany, 4 years ago. It is easy to use and free platform that takes only about 5 minutes to contact a subscriber and complete the initiative. To get started, a user signs up and creates a new account on the home page. You can then reach out to other members for a subscription.
How does sub for sub work?
With YouTube sub for sub, you market your YouTube channel to get more subscribers. Simply sub to one another’s channel and they sub back.
You can do this on different channels such as YouTube live videos, among other channels. But again, these subscribers are not so much concerned about getting the real subs. What matters is that you get 1,000 subscribers to enable you to monetize on YouTube. However, YouTube also has its measures in place, and manipulating the matrix is one of which they don’t advocate for. But in most cases, subforsub participants operate fake YouTube accounts and you can find one person corresponding up to 5 accounts to gain subscriptions. This isn’t good for your rating as you don’t get real subscribers but you only boost the number of subscribers. And since they don’t watch your videos, neither will they share them with other viewers.
Tips & tricks to use sub for sub
Subforsub isn’t genuine and all you get is bot subscribers who don’t engage. However, you can use available tricks to gain popularity.
- Using fake accounts
A user should only run one genuine YouTube account. However, the trick that most subscribers use to gain more subs is by creating other additional fake accounts to gain more subs in return. But again, it is not a guarantee as some subscribers may not sub back to all the accounts.
- Subscribers don’t watch the videos
Perhaps there is no time for subscribers to watch the potential sub videos before subscribing. Your mission is to gain as many subs as possible even if your watch time doesn’t go up. This doesn’t bring any positivity to your channel rather an increased number of subscribers.
- Reach out to friends
You can also boost your sub for sub by reaching out to friends to inform them of your channel and ask for subscriptions in return for theirs as well. This, however, could be a slow process as not all your friends will be attracted to what you do.
- Don’t do subforsub for followers
A subforsub may not give you followers parse. So, don’t get into it for genuine followers. Those who sub to your channel won’t follow you in most cases. Rather, they might unsubscribe after a short duration of time.
- Use channel branding
This trick will glue viewers to your channel. These can include banner art to welcome everyone who clicks into your channel.
Additional thoughts - Should we rely on subforsub to get more subscribers?
You should not rely on subforsub as it doesn’t give the real figures but manipulates the outcome. Nonetheless, you need real subscribers to climb the YouTube ladder. That’s the best way to push the YouTube algorithm. There are genuine aspects of gaining subscribers to grow your channel.
Get to social media platforms
These include Facebook, Instagram, WhatsApp, and other sites. Introduce your YouTube channel to your followers and remind them to subscribe. Likewise, demonstrate why your channel is worth subscribing to.
Upload content consistently
Ensure your upload schedule is consistent and you’ll see viewers having a reason to subscribe to your channel. Once you introduce your channel with the first video, post a second and third video to build more momentum on your potential subscribers.
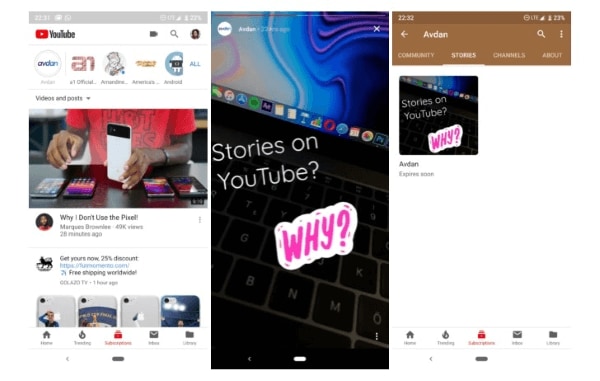
Incorporate YouTube stories
Stories can be a good starting point for those who have not subscribed to your content yet despite watching. Short video stories will attract viewers’ attention and want to get more from your channel.
Use Calls to Action
Ask your audience to subscribe after watching your videos. A great idea is to use animation or graphics to attract the viewers’ attention instantly. Other free options like green screen are also available for use.
Make it easy for viewers to understand your channel
You can make it easy by giving your viewers a guided tour. By this, they’ll know where to find important sections like comments. You can also create a channel banner that tells your audience what you do. They’ll soon familiarize themselves with your channel and be friends in no time.
Build a relationship with your audience
It is good to connect with your audience in various aspects. Expressing yourself probably in front of a camera has a deeper impact. You can also use illustrations to bring out your points for a quick understanding. Engaging them in the process is the best way to make them feel like they belong and eventually turn into subscribers.
Focus on the video that’s working for you
You should know which video is working and which is not. Judge and put more emphasis on the video that’s working for you. Check out which videos turn viewers into subscribers as that’s your main aim. More so, be creative and innovative.
A video editor is worth a try – Filmora
Since creativity is paramount, engaging a video editor tool will make you achieve your goal in a few clicks. Filmora Video Editor will transform your videos into magical content. It comes with powerful editing tools to make your video stand tall from the rest. You will also manage to import and export your videos in various formats for easy access on different platforms and devices. Whether you wish to create a tutorial for learning or promotional purposes, Filmora will give you exceptional results. The steps are as easy as 1-2-3 and the process is effective. Check out its key features to help you produce quality videos.
For Win 7 or later (64-bit)
For macOS 10.12 or later
Key Features of Filmora Video Editor
- 4K editing support: Quality and sharp videos are attractive to viewers. Filmora lets you edit and export your videos at high resolutions of up to 4K.
- Noise removal: Make your videos noise-free by removing unwanted background sounds. Viewers won’t be destructed and can concentrate more on the important aspects of the video.
- Speed control: There are important sections of your video that you may wish to emphasize more. You can slow down the speed in such sections for your viewers to understand them in detail. Nonetheless, you can speed up certain parts that don’t require too much emphasis.
- Reverse: What about being creative using this feature. Simply flip your clips and play them backward with this feature.
- Preview frame by frame: Focus on precise editing by using this feature. It lets you move to any section of the frame at a time to ascertain that the final product will be the best.
- Audio separation: Do it in a few clicks. Detach audio from video and put any other background music depending on the theme of that moment.
Conclusion
● You may gain subscribers from the YouTube sub for sub but you will be violating YouTube’s terms of service. Additionally, the YouTube algorithm will eventually notice that your subscribers are not watching your videos. It will presume that you are buying subscribers, which is illegal in the long run. Be smart and engage the Filmora video editor. It works in simple steps to create wanting videos that will upsell your brand. Editing isn’t a worry either as it presents you with numerous stunning effects to transform your video to a compelling piece of art.
YouTube streaming service is a beehive of activities. Promoters strive for a higher number of subscribers to boost their content. Several ways are available for you to increase the number of subscribers and visitors to your site. YouTube sub for sub is one common practice for this noble cause. In this practice, a person subscribes, in anticipation of the recipient subscribing back as well.
However, the practice may not give your channel that genuine growth. The subscribers may not even watch your videos or care much about leaving comments or other engagements. All in all, the aim is to hit a certain number of subscribers so that you can get into the recommended territory and probably start earning. But are there other options to increase YouTube subscriptions apart from Sub4Sub? Be genuine and use real avenues to rise to the top. This article corresponds adequately on the matter by giving you alternative ways to gain real subscribers who will stick around to grow your channel.
In this article
03 Tips & tricks to use sub for sub
04 Additional thoughts - Should we rely on subforsub to get more subscribers?
What is sub for sub?
Subforsub means a subscription for a subscription. In this practice, there are subscribers and subscriptions. Those who subscribe to you on YouTube are the subscribers while those whom you subscribe to, are the subscriptions. Both video makers’ subscribers are, therefore, increased equally and doesn’t give each other a competitive advantage against the other member. Sub for sub was founded in Germany, 4 years ago. It is easy to use and free platform that takes only about 5 minutes to contact a subscriber and complete the initiative. To get started, a user signs up and creates a new account on the home page. You can then reach out to other members for a subscription.
How does sub for sub work?
With YouTube sub for sub, you market your YouTube channel to get more subscribers. Simply sub to one another’s channel and they sub back.
You can do this on different channels such as YouTube live videos, among other channels. But again, these subscribers are not so much concerned about getting the real subs. What matters is that you get 1,000 subscribers to enable you to monetize on YouTube. However, YouTube also has its measures in place, and manipulating the matrix is one of which they don’t advocate for. But in most cases, subforsub participants operate fake YouTube accounts and you can find one person corresponding up to 5 accounts to gain subscriptions. This isn’t good for your rating as you don’t get real subscribers but you only boost the number of subscribers. And since they don’t watch your videos, neither will they share them with other viewers.
Tips & tricks to use sub for sub
Subforsub isn’t genuine and all you get is bot subscribers who don’t engage. However, you can use available tricks to gain popularity.
- Using fake accounts
A user should only run one genuine YouTube account. However, the trick that most subscribers use to gain more subs is by creating other additional fake accounts to gain more subs in return. But again, it is not a guarantee as some subscribers may not sub back to all the accounts.
- Subscribers don’t watch the videos
Perhaps there is no time for subscribers to watch the potential sub videos before subscribing. Your mission is to gain as many subs as possible even if your watch time doesn’t go up. This doesn’t bring any positivity to your channel rather an increased number of subscribers.
- Reach out to friends
You can also boost your sub for sub by reaching out to friends to inform them of your channel and ask for subscriptions in return for theirs as well. This, however, could be a slow process as not all your friends will be attracted to what you do.
- Don’t do subforsub for followers
A subforsub may not give you followers parse. So, don’t get into it for genuine followers. Those who sub to your channel won’t follow you in most cases. Rather, they might unsubscribe after a short duration of time.
- Use channel branding
This trick will glue viewers to your channel. These can include banner art to welcome everyone who clicks into your channel.
Additional thoughts - Should we rely on subforsub to get more subscribers?
You should not rely on subforsub as it doesn’t give the real figures but manipulates the outcome. Nonetheless, you need real subscribers to climb the YouTube ladder. That’s the best way to push the YouTube algorithm. There are genuine aspects of gaining subscribers to grow your channel.
Get to social media platforms
These include Facebook, Instagram, WhatsApp, and other sites. Introduce your YouTube channel to your followers and remind them to subscribe. Likewise, demonstrate why your channel is worth subscribing to.
Upload content consistently
Ensure your upload schedule is consistent and you’ll see viewers having a reason to subscribe to your channel. Once you introduce your channel with the first video, post a second and third video to build more momentum on your potential subscribers.
Incorporate YouTube stories
Stories can be a good starting point for those who have not subscribed to your content yet despite watching. Short video stories will attract viewers’ attention and want to get more from your channel.
Use Calls to Action
Ask your audience to subscribe after watching your videos. A great idea is to use animation or graphics to attract the viewers’ attention instantly. Other free options like green screen are also available for use.
Make it easy for viewers to understand your channel
You can make it easy by giving your viewers a guided tour. By this, they’ll know where to find important sections like comments. You can also create a channel banner that tells your audience what you do. They’ll soon familiarize themselves with your channel and be friends in no time.
Build a relationship with your audience
It is good to connect with your audience in various aspects. Expressing yourself probably in front of a camera has a deeper impact. You can also use illustrations to bring out your points for a quick understanding. Engaging them in the process is the best way to make them feel like they belong and eventually turn into subscribers.
Focus on the video that’s working for you
You should know which video is working and which is not. Judge and put more emphasis on the video that’s working for you. Check out which videos turn viewers into subscribers as that’s your main aim. More so, be creative and innovative.
A video editor is worth a try – Filmora
Since creativity is paramount, engaging a video editor tool will make you achieve your goal in a few clicks. Filmora Video Editor will transform your videos into magical content. It comes with powerful editing tools to make your video stand tall from the rest. You will also manage to import and export your videos in various formats for easy access on different platforms and devices. Whether you wish to create a tutorial for learning or promotional purposes, Filmora will give you exceptional results. The steps are as easy as 1-2-3 and the process is effective. Check out its key features to help you produce quality videos.
For Win 7 or later (64-bit)
For macOS 10.12 or later
Key Features of Filmora Video Editor
- 4K editing support: Quality and sharp videos are attractive to viewers. Filmora lets you edit and export your videos at high resolutions of up to 4K.
- Noise removal: Make your videos noise-free by removing unwanted background sounds. Viewers won’t be destructed and can concentrate more on the important aspects of the video.
- Speed control: There are important sections of your video that you may wish to emphasize more. You can slow down the speed in such sections for your viewers to understand them in detail. Nonetheless, you can speed up certain parts that don’t require too much emphasis.
- Reverse: What about being creative using this feature. Simply flip your clips and play them backward with this feature.
- Preview frame by frame: Focus on precise editing by using this feature. It lets you move to any section of the frame at a time to ascertain that the final product will be the best.
- Audio separation: Do it in a few clicks. Detach audio from video and put any other background music depending on the theme of that moment.
Conclusion
● You may gain subscribers from the YouTube sub for sub but you will be violating YouTube’s terms of service. Additionally, the YouTube algorithm will eventually notice that your subscribers are not watching your videos. It will presume that you are buying subscribers, which is illegal in the long run. Be smart and engage the Filmora video editor. It works in simple steps to create wanting videos that will upsell your brand. Editing isn’t a worry either as it presents you with numerous stunning effects to transform your video to a compelling piece of art.
Also read:
- 2024 Approved Best Practices in Selecting YouTube Video Extractor Apps for Android
- [Updated] Elevate Your Channel Ranking with These 11 SEO Secrets
- [New] Dynamic Decibels The Best Background Sounds for YT Shorts
- The Most Effective Android Apps to Download YouTube Videos
- In 2024, Diving Deep The Intricacies of the Mukbang Phenomenon
- Your Comprehensible Guide to Economical Webinars on YouTube
- In 2024, Breakout 8 Channel Visionaries Amplifying Impact
- 2024 Approved Easy, Effective Strategy Immediate Clearance of Unwanted YouTube Comments
- [New] Embellish Your YT Previews with Sparkly Borders
- Dispelling Darkness, Enhancing Youtube Views
- [New] Effortless Youtube Playback Downloading Content to iDevices
- Playlist Extraction - Step by Step From YouTube's Archive
- In 2024, Becoming an Expert at YT Studio Navigation
- [New] Curate Your Learning Best 15 Science YT Experts
- Converting YT to IGTV 3 Effective Methods
- Mac's 2023 Update YouTube Audio to MP3 Step-by-Step
- First Steps in YouTube Tech A Comprehensive List
- [Updated] All About Virtual Idols and Their Rise
- [Updated] 7 Easy Steps for a Subscriber Surge on YouTube
- Stock Success The Ultimate List of Channels
- 2024 Approved Crafting Splitscreen YouTube Videos A Guide to Creativity
- 2024 Approved Crafting Curls and Contours Creating a Personalized Beauty Channel
- Developing A Streamlined YouTube Subscribe Link
- In 2024, Everything You Need to Succeed with YouTube Short Videos
- Android, iOS & PC-Friendly YouTube Downloader Apps Reviewed
- Simplify Your Video Sharing with Our YouTube Upload Strategy
- [Updated] Essential Film Techniques on YouTube by Future Visionaries
- [Updated] Comprehensive Coverage Coalition Picking an MCN
- Navigating YouTube's Payment System
- Building Size
- [Updated] Build Your Brand with Dynamic Haul Videography
- In 2024, Connecting YouTube & TikTok Your Ultimate Step-by-Step Walkthrough
- Comprehensive Guide to YouTube Content Moderation Rules for 2024
- Hits at Hyperspeed The Fast Track to 100 Million Views on YouTube in '24
- Captivating YT Cover Art for Maximum Traffic
- Tips for Stellar Video Conclusions
- Directly Stream Google Meet - YouTube Edition Steps for 2024
- Epicurean Education Recipe Film-Making for 2024
- In 2024, Cheap Yet Good Quality Cameras Reviewed Here
- Peak Traffic Times for Stellar Video Performance
- How Can We Bypass Vivo V30 FRP?
- Straightforward Strategies for Recording Games for 2024
- 2024 Approved Change the Pace Best GIF Speed Changer Tools Reviewed
- New 2024 Approved Edit Like a Pro Free and Easy GoPro Video Editing Solutions
- [New] Navigating the Art of Facebook Video Advertising
- In 2024, How to Unlock Apple iPhone 11? | Dr.fone
- How to Save Your Video Tweets as High-Quality MP3 Files
- [Updated] Complete Review of Razer Video Streaming Device
- Apply These Techniques to Improve How to Detect Fake GPS Location On Apple iPhone XR | Dr.fone
- In 2024, How Can Tecno Pop 8Mirror Share to PC? | Dr.fone
- New Steady Shots on a Budget Top 5 Free Video Stabilizers for Android
- How To Unlock Apple iPhone 11 Pro Max Official Method to Unlock Your Apple iPhone 11 Pro Max
- Updated 2024 Approved How to Create OBS Slideshow
- Premier Movie Access on Facebook Ranked #8 List for 2024
- [New] In 2024, Techniques to Pull Facebook Videos Easily
- [New] Noticing Lack of Interaction in Chatworld for 2024
- Updated 2024 Approved Top 10 Talking Photo Online Tools You Have To Try
- 8 Solutions to Solve YouTube App Crashing on Google Pixel 7a | Dr.fone
- In 2024, How To Use Allshare Cast To Turn On Screen Mirroring On Asus ROG Phone 8 | Dr.fone
- [Updated] 2024 Approved Elevate Your Video Conferencing Game with Slack & Filmora Integration
- Top-Rated No-Cost Vocal Transformer Guide and Professional Audio Sculpting with Filmora Tutorials for 2024
- Title: "In-Depth Walkthrough Editing YouTube Videos in WMM"
- Author: Steven
- Created at : 2024-05-25 19:47:44
- Updated at : 2024-05-26 19:47:44
- Link: https://youtube-clips.techidaily.com/in-depth-walkthrough-editing-youtube-videos-in-wmm/
- License: This work is licensed under CC BY-NC-SA 4.0.
