
:max_bytes(150000):strip_icc()/GettyImages-153126740-584f1ddc3df78c491e4b2c60.jpg)
"In 2024, Enchanting Edit YouTube's Ultimate Magic Tricks"
Enchanting Edit: YouTube’s Ultimate Magic Tricks
Our mission here at Filmora is to help millions of video lovers like you do what they love, seek SUPER EASY tips to find out the best YouTube video editor, and make an impact through the power of video. While these tips don’t exactly teach you how to make edits to your video clips, they can help reduce your trial-and-error cost of trying numerous video editors and help you produce better results in the end.
- Backup Your Original Video
- The Ultimate Video Editing Fundamentals
- 32 Best YouTube Video Editing Tools Solutions (2022 Review)
- Top 12 YouTube Video Editing Software to Check Out
- Top 12 YouTube Video Editing App to Check Out
- Top 10 YouTube Video Editor Online to Check Out
- Export & Share Your YouTube Video
- In-depth Exporting for Any Screen or Device
- Previewing, Sharing, Managing, and Exporting the Videos
- How Can You Get Support?
- Optimize Video and Grow Your YouTube Channel
- Add Multiple Ad Breaks
- Add Optimal Description
- Add Optimal Tags
- Add Optimal Title Length
- Respond to Comments
- Script Your Videos
- Tips for More Ad Revenue
Part 1: Shoot Your YouTube Video Content
YouTube Video Editor
1. Equipment List for Shooting Videos
You need the following equipment to shoot a perfect video for your YouTube channel:
- Camera /Camcorder /Mobile Phone
- Lens
- SD Card
- Tripod
- Microphone
- Lighting
- White Balance Card
- Audio cables
2. Types of Video Shooting
With regards to shooting video, there are three fundamental sorts:
- True to Life
- Activity
- Screencast
Surprisingly realistic recordings are costly to deliver and can be hard to shoot well. Notwithstanding, they are exceptionally captivating and can make a strong close-to-home association with watchers.
Part 2: Backup Your Original Video
1. Backup Your Original Video
YouTube has been known to erase recordings for an assortment of reasons. That is the reason it means a lot to reinforce your current YouTube recordings.
2. Backup New Videos to Google Drive
Here are the steps to take:
Step 1Open Google Drive and sign in
Step 2Click on the New button in the top left corner of the screen
Step 3Select File Upload
Step 4Select the video files you want to upload
Step 5Click on Upload
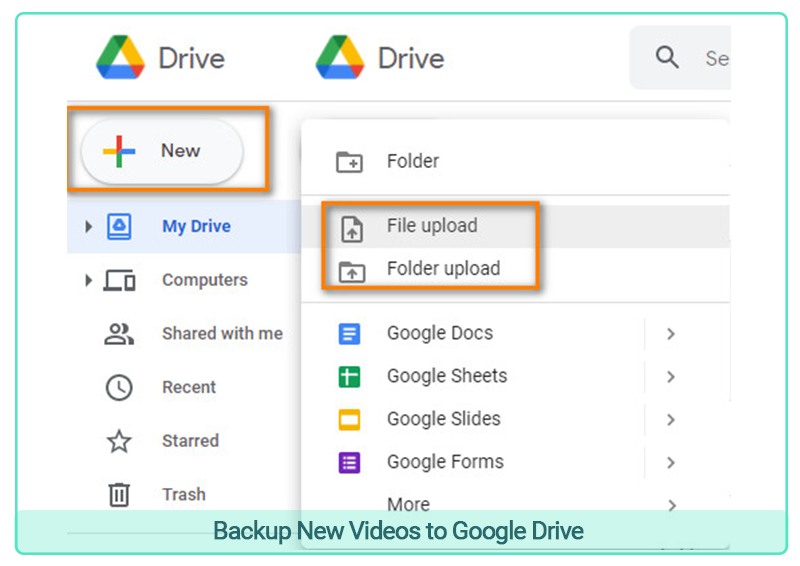
Upload Video to Google Drive
Part 3: The Ultimate Video Editing Fundamentals
How to decide which youtube video editing software is best in various basic choices available today? Take a look at this quick checklist for all the video editing fundamentals you’ll ever need so your blockbusters will never miss a step again.
- Intro/Outro
- Background Music
- Color Matching
- Video Footage
- Transition
- Effects
- Titles and Graphics
- Video Format
Part 4: 32 Best YouTube Video Editing Tools Solutions (2022 Review)
1. Top 12 YouTube Video Editing Software to Check Out
A. YouTube Official Video Editor
YouTube database stores so many videos without running out of storage space. You can also edit them on YouTube and the Official Video Editor is free and easy to use, but it’s not as powerful as other video editors. The Official Video Editor can be used to accomplish basic editing tasks. However, if you are looking for more features like adding text overlays or merging two different clips, this might not be the right editing tool.
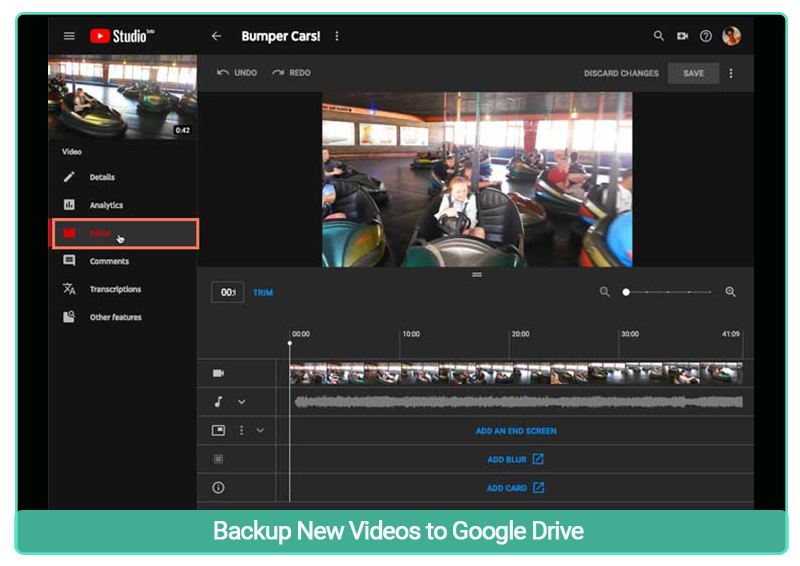
Youtube Studio Editor
B. Top 5 YouTube Video Editing Software for Beginners
01of 05VSDC
An enormous arrangement of in-vogue video impacts, channels, and changes. Fundamental instruments like zoom, graphs, 360 video altering, and a variety of amendments. Advantageous commodity profiles that make saving recordings for different gadgets a snap.
![]()
Note: Most reduced framework prerequisites conceivable - VSDC works even on obsolete PCs!
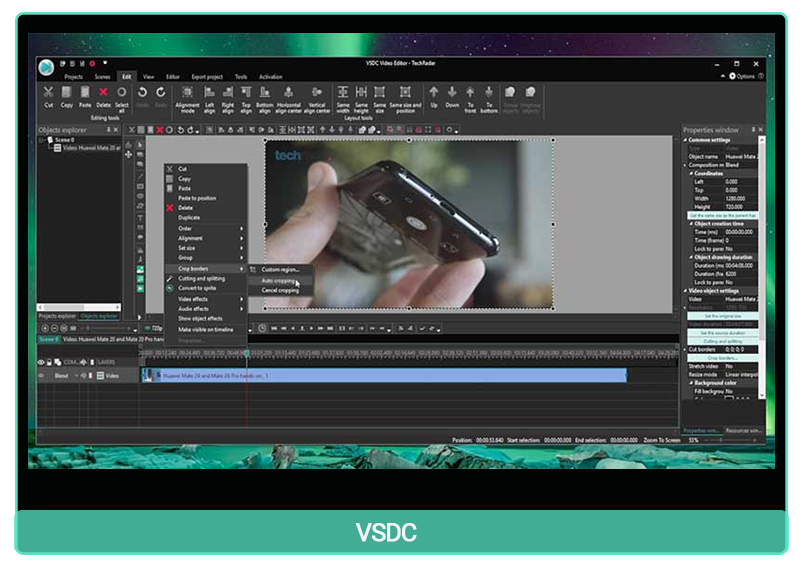
VSDC
Cost: Free of cost; however, it comes with a premium version also.
OS: The best part about this video editing tool is that it is compatible with the older versions of Windows.
Rating & Review: As per the G2 reviews, VSDC scores a 4-star rating.
Features
- Non-linear editing.
- Chroma key feature.
- Text editing in the video.
- Creating split-screen videos.
Pros
- Compatible with older versions of Windows.
- Easy to use interface.
- Amazing blending modes are available.
Cons
- Some features like audio waveform, video stabilization, etc. are missing.
- The free version lacks some important video editing features.
- It’s not compatible with resolutions of more than 1080 pixels.
Tips
1. Easy-to-Use
You can easily create both linear and non-linear videos using VSDC.
2. Download the Free Version
You can easily download the free version from its official website.
3. Powerful Editing
It facilitates powerful editing of HD videos even on low-end computers.
02of 05Windows Video Editor
For fast and simple single-clip editing, you can use the Video Editor app.
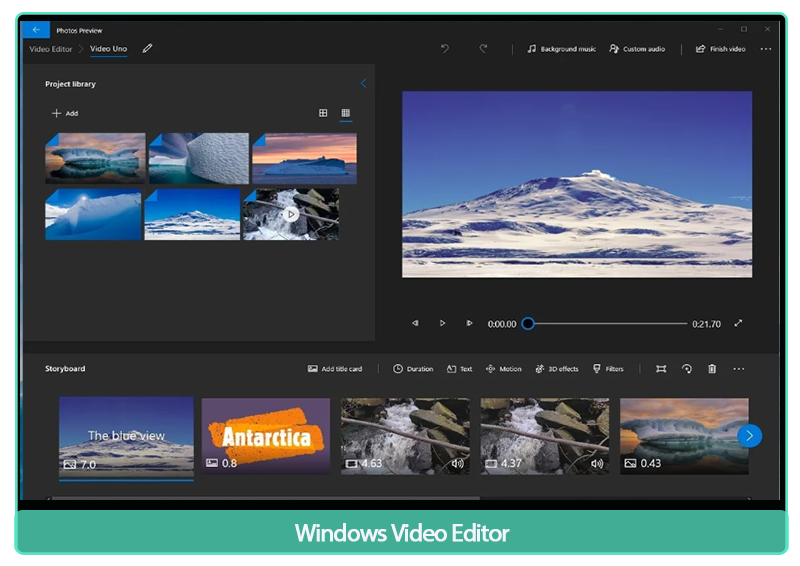
Windows Video Editor
Cost: Free
OS: Windows 10 and higher versions of Windows.
Rating & Review: G2 reviews - 4 stars
Features
- Easy to edit, trim, and create slideshows.
- You can add slo-mo.
- You can draw your creative designs on the videos
Pros
- It has easy-to-use and creative editing tools.
- You can add 3D text effects using this tool.
Cons
- It lacks many premium features for professional video editors.
- It doesn’t support Multicam and screen recording.
Tips
1. Automatically Create Slideshow
You can use it “Make a video for me” tool to automatically create a slideshow of the selected pictures.
2. Import Backup
It has an additional feature named “Import Backup” for importing backup videos and continuing editing them.
03of 05Wondershare Filmora
Filmora video editor works on cutting-edge highlights to save your time and exertion. It’s straightforward in Filmora. It is the most used YouTube video editor to create mind-blowing videos.
Wondershare Filmora
Wondershare Filmora 11 The Best video editor that makes your editing experience efficient and playful.
Try It Free Try It Free Learn More

Cost: Free to use but need to take the premium subscription to remove the watermark.
OS: Windows & macOS
Rating & Review: G2 reviews - 4.4 stars
Features
- It supports a number of video and audio formats.
- It delivers quick and amazing results.
- 4K editing support.
- Noise removal.
- Audio equalizer.
Pros
- You can easily increase or decrease the consistency of the layers.
- Contains a wide range of effects, text styles, and background music.
- There’s no point in virus interactions while installing the software.
- Easily download it from the official website.
Cons
- The size of the file increases tremendously after editing.
- Free version users cannot remove the watermark.
Tips
1. Online and Offline Mode
Filmora allows you to add a white border to your videos both n online and offline mode.
2. Insert Logos in the Videos
You can use Filmora to insert logos in the videos for marketing and branding purposes.
04of 05Blender
Blender is a free and open-source 3D PC designs programming toolset utilized for making vivified films, special visualizations, workmanship, 3D-printed models, movement illustrations, intelligent 3D applications, computer-generated reality, and, previously, computer games.
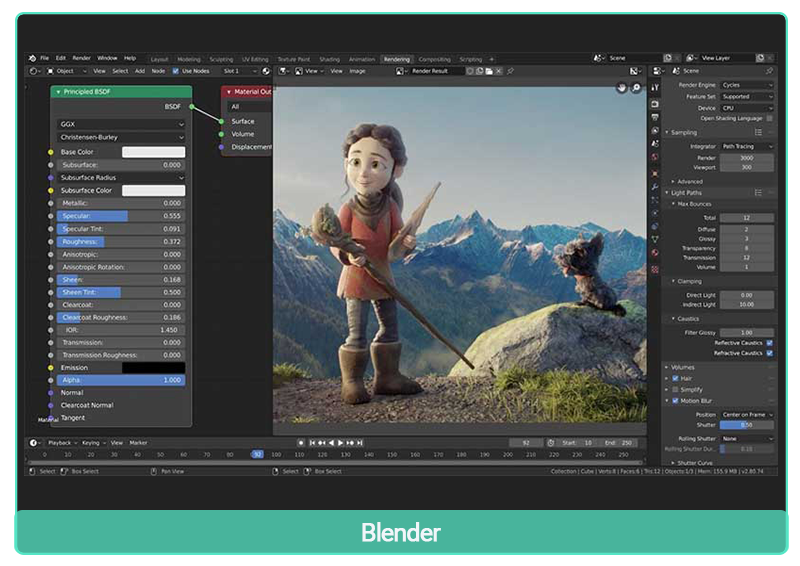
Blender
Cost: Free.
OS: Windows & macOS
Rating & Review: G2 reviews - 4.5 stars
Features
- Contains a wide range of amazing tools for modeling, animation, video editing, etc.
- Used for game creation.
- Improved shadows, ray-tracing, and subsurface scattering.
Pros
- It is a great tool for beginners.
- It is one of the best tools for digital drawing creation.
- Available to beginners at no cost.
Cons
- Prone to bugs and glitches.
Tips
Shortcut Convenience
1. Use the shortcut “Ctrl + R” to repeat the last command.
2. You can use the shortcut “Ctrl + O” to activate the light alignment camera.
05of 055. Kdenlive
Kdenlive is an open-source video manager. The venture was begun around 2003. Kdenlive is based on Qt and the KDE Frameworks libraries. The greater part of the video handling is finished by the MLT Framework, which depends on numerous other open-source projects like FFmpeg, freir, movit, ladspa, sox, and so on.
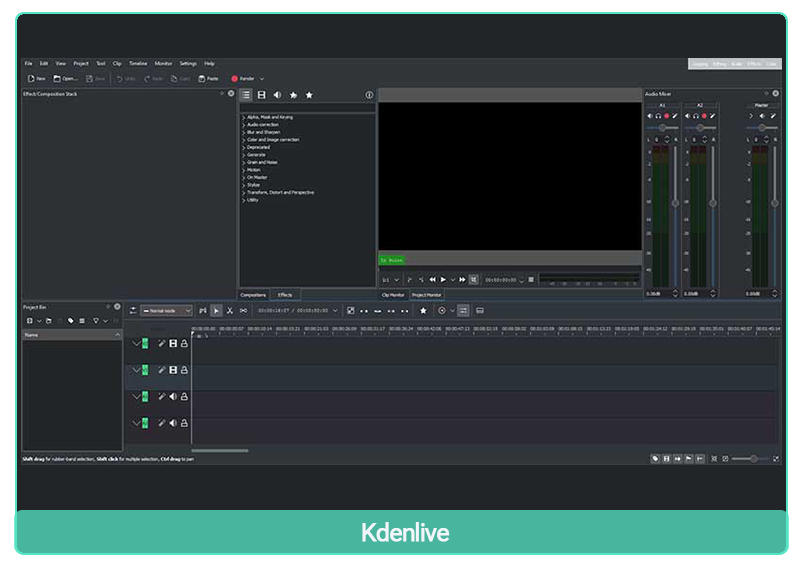
Kdenlive
Cost: Free and open-source YouTube editor.
OS: Linux, macOS, and Windows.
Rating & Review: G2 reviews - 4.4 stars.
Features
- Offers non-linear and multi-purpose video editing.
- It allows you to add slow-motion effects.
- It also offers automatic audio and video management.
Pros
- Supports all video and audio formats.
- Easy to use and great for beginners.
- You don’t need deep knowledge about video editing to use this software.
- Great video editing tool for new startups.
- It is versatile.
Cons
- Sometimes it delivers work at a much slower speed.
- Multi-frame video editing is not possible with this editor.
Tips
1. Non-multi-frame Video Editing
Multi-frame video editing is not possible with this editor.
2. Easily Retard the Clip
You can easily retard the clip by rotating the mouse wheel.
C. Top 7 YouTube Video Editing Software for Advanced Users
01of 07Apple iMovie
With iMovie, make proficient-looking recordings without an altering degree. Effectively add photographs and recordings to projects, trim clasps with your finger, add consistent advances and blur sound like a star. You can likewise import and alter ProRes video 2 and add Apple ProRAW pictures to your films and trailers.
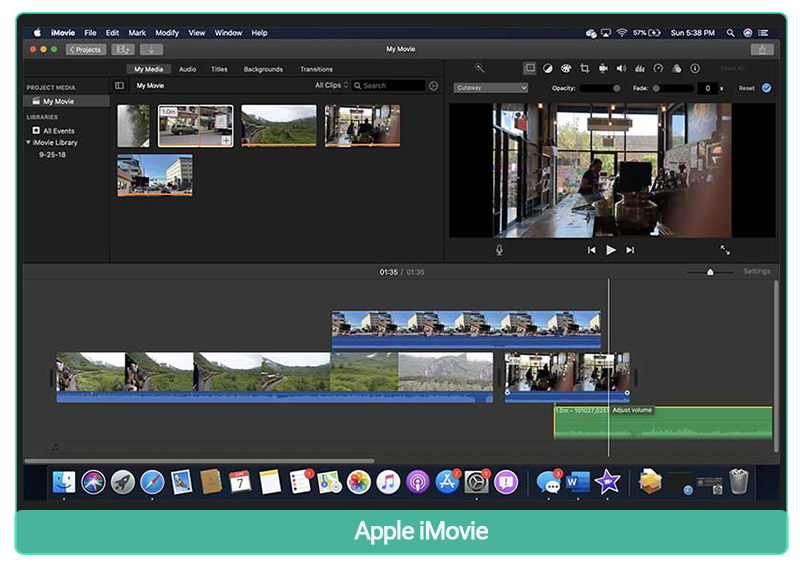
Apple iMovie
Cost:
- Free
Features
- It enables modifying and enhancing color schemes.
- It offers stabilization of unstable and shaky videos.
- You can easily change the speed of different video clips.
Pros
- It allows you to share the videos directly on different social media platforms.
- It has an easy-to-use user interface.
- It comes with a wide range of effects and enhancements.
- You can even operate it through your phone.
- It is available to use free of cost.
Cons
- It takes a large space.
- The size of the video increases tremendously after editing.
Tips
1. Supports 4K
It supports a 4K video format.
2. Crop Tool
You can use the crop tool to zoom in on the video.
3. Detach Audio
You can detach audio and add any soundtrack of your choice.
02of 07Adobe Premiere Pro
Premiere Pro is the main video altering programming for making extraordinary recordings quick. Try not to simply make content — share your vision. Look at proficient formats or tweak your own enlivened illustrations and titles. Shift tones to suit your mindset. Also, give your story an extraordinary sound with sound devices and music tracks.
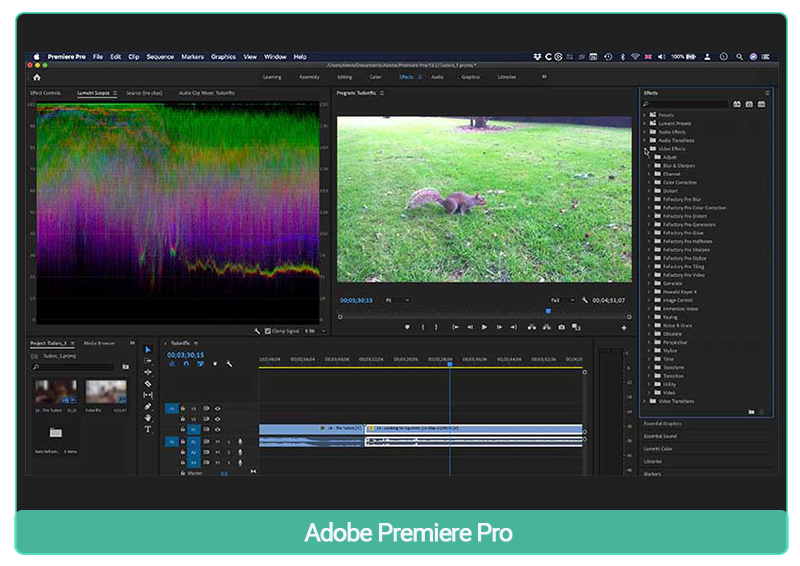
Adobe Premiere Pro
Cost:
- $20.99 per month
Features
- It enables VR editing of both audio and video.
- You can directly upload the video on YouTube with Adobe Premiere Pro.
- It can work on different projects simultaneously.
Pros
- It is compatible with any type of operating system.
- It supports a large number of audio and video formats.
- It supports virtual reality.
Cons
- It supports virtual reality.
- It is an offline tool and is not available free of cost.
Tips
1. Shortcut Convenience
Use the shortcut “Shift + 2” to cycle the recent video in the source monitor.
2. Adjustments Layers
The proper use of adjustment layers delivers great results.
3. Color Coding
You can even use color coding for your video clips.
03of 07Lightworks
Lightworks is a non-direct altering framework (NLE) for altering and dominating computerized video. It was an early engineer of PC-based non-direct altering frameworks and has been being developed beginning around 1989. Lightworks won a 2017 EMMY Award for being one of the first to make advanced nonlinear altering programming.
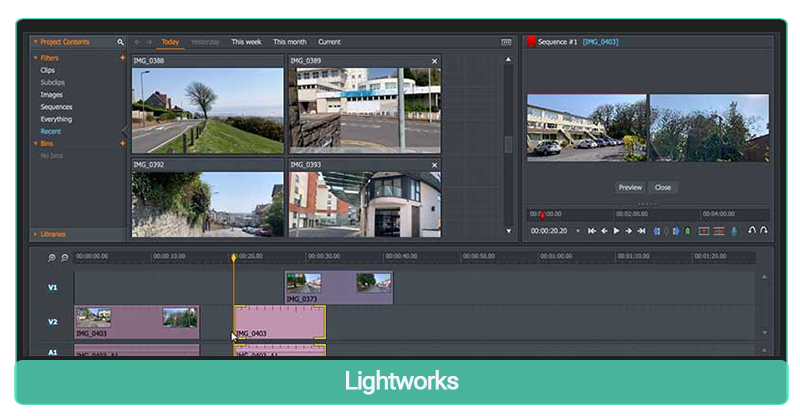
Lightworks
Cost:
- $23.99 per month
Features
- It is a professional film editing software.
- It is generally used for editing large-scale feature films.
- It allows you to export your videos directly on YouTube.
Pros
- It is available to download free of cost.
- The free version of Lightworks doesn’t leave any watermark on the final clip.
- Generally, all the tools are available to use in the free version.
Cons
- The free version restricts certain output formats.
- Users can sometimes face software crashes.
Tips
1. Backup for Work
Always create a backup of your work.
2. Keyboard Shortcuts
Learn all the keyboard shortcuts to get results faster and efficiently.
04of 07HitFilm Express
HitFilm Express is free video altering programming with proficient grade VFX apparatuses and all that you want to make amazing substance, movies or gaming recordings. Ideal for amateurs, film understudies, gamers, YouTubers, or any inventive without a financial plan. All of this from there, the sky is the limit, for nothing.
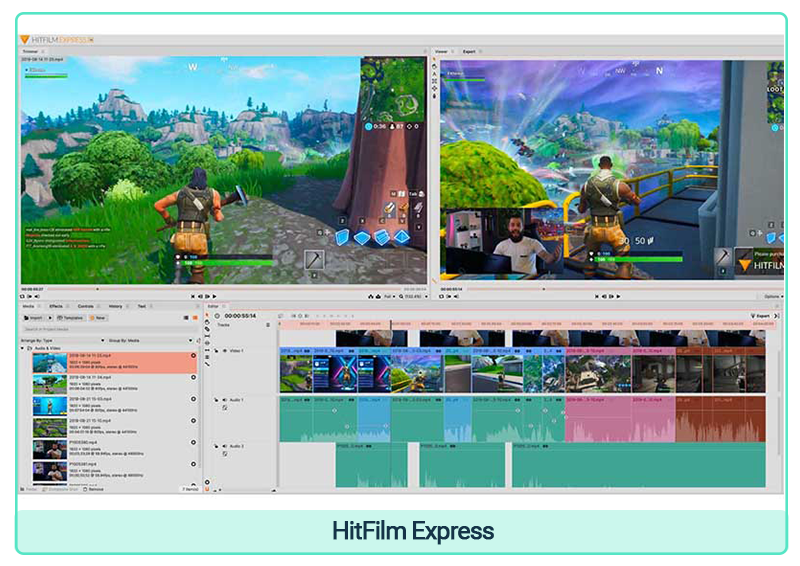
HitFilm Express
Cost:
- $299
Features
- It supports all types of video formats.
- It supports 4K resolution videos.
- It offers 360 degrees animation feature.
Pros
- It is a free video editing software.
- It offers a wide range of customizable video effects.
- It comes with great and professional VFX tools.
Cons
- It comes with great and professional VFX tools.
- Not many transitions and effects are stored in the library.
Tips
1. Drag and Drop
Use the drag and drop feature to create effects easily.
2. Keyboard Shortcuts
Learn the use of keyboard shortcuts for better results.
05of 07Adobe After Effects
Adobe After Effects is an advanced special visualization, movement illustrations, and compositing application created by Adobe Systems and utilized in the after-creation interaction of filmmaking, computer games, and TV creation. In addition to other things, After Effects can be utilized for keying, following, compositing, and liveliness.
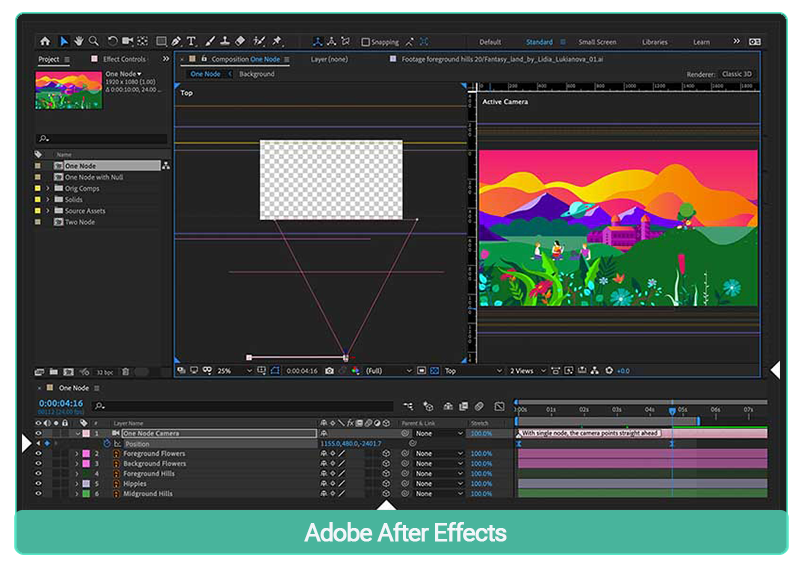
Adobe After Effects
Cost:
- $20.99 per month
Features
- It supports virtual reality.
- It comes with a variety of editing tools like crop, trim, shape, mask, etc.
- It is suitable for motion graphics.
- Comes with a chroma key feature.
Pros
- You can add animated text effects to your videos.
- The layer animation feature helps in giving special effects.
Cons
- Only experienced video editors can use it efficiently.
- Expensive software.
- It comes with the limited option of 3D animation.
Tips
1. Keyboard Shortcuts
Use keyboard shortcuts like “A” for animation, “B” for blur, etc.
2. Easy and Helpful
Duplication of different layers is easy and helpful.
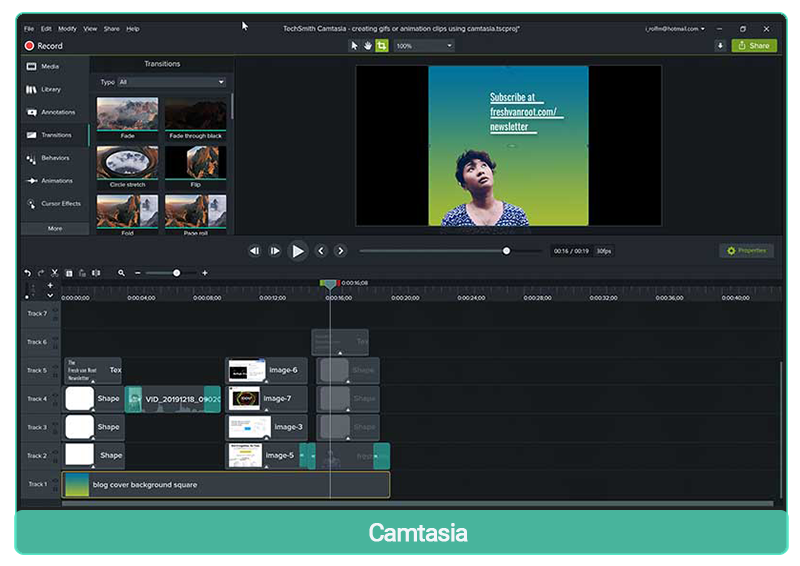
06of 07Camtasia
Camtasia by TechSmith is straightforward, across-the-board video altering and screen recording programming program. It is also a good YouTube video editing software. Worked considering amateurs, Camtasia permits architects to make proficient preparation recordings rapidly and effectively. It is accessible for the two Windows and macOS.
Camtasia
Cost:
- $299.99 per user
Features
- It has around 75+ transition effects.
- It has great features like motion blur effect, corner rounding effect, etc.
- It supports a wide range of video formats.
Pros
- You can make easy and quick transitions using Camtasia.
- It allows screen recording.
- It allows the creation of wonderful presentations for school and college projects.
Cons
- It allows the creation of wonderful presentations for school and college projects.
- It is buggy and often crashes.
Tips
1. Storyboard
You can easily create a storyboard using Camtasia.
1. Customizable Templates
It has many customizable templates. Use them to create great videos more efficiently.
07of 07Final Cut Pro
Final Cut Pro is a YouTube video editing app for making, altering, and delivering the greatest video. Finished product Pro joins elite execution advanced altering and local help for practically any video design with simple to-utilize and efficient elements that let you center around narrating.
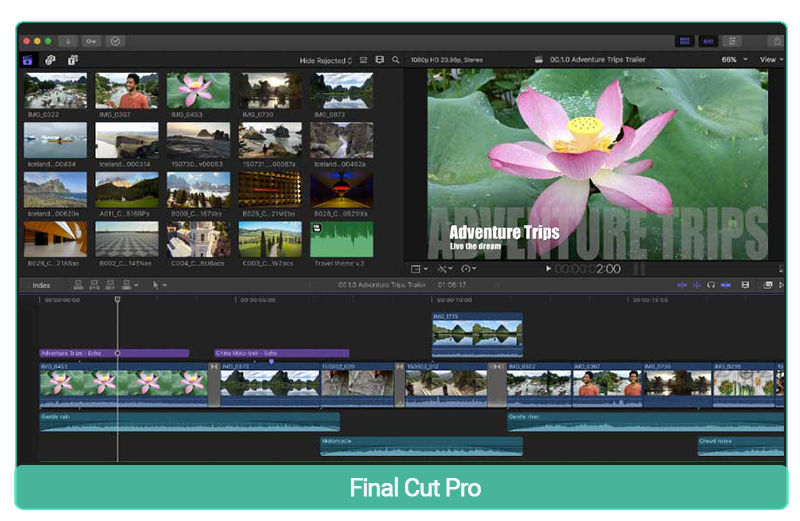
Final Cut Pro
Cost:
- $299.99
Features
- It supports VR editing effects.
- You can even edit the background noise of the video.
Pros
- It can edit videos effortlessly.
- It allows adding both 2D and 3D titles.
- It is easy to learn.
Cons
- It is relatively expensive.
- Its user interface creates frequent stuttering.
- It is harder to store a large number of clips.
Tips
1. Hard to Store
It is harder to store a large number of clips.
2. Shortcut
Use “Shift + Z to fit something into a window.
2. Top 12 YouTube Video Editing App to Check Out
A. The Best 6 YouTube Video Editing Apps for Beginners
 Filmmaker Pro The best easy-to-use app for creating videos with 1 billion downloads. Filmmaker Pro The best easy-to-use app for creating videos with 1 billion downloads. |
 Filmora The best video editing app for YouTube, suitable for both beginners and advanced users. Filmora The best video editing app for YouTube, suitable for both beginners and advanced users. |
|---|---|
| Specifications System: iPhone Cost: $39 yearly subscription 4k Support: Yes Ratings: Filmmaker Pro scores an overall rating of 4.6 stars. Direct YouTube Export: No | Specifications System: iPhone and Android Cost: Free but an in-app purchase 4k Support: Yes Ratings: 5 stars Direct YouTube Export: Yes |
| Reasons to buy It works on both web and mobile phones. You can edit the whole video in manual editing mode. Provides decent image quality. | Reasons to buy Filmora supports both ios and android versions. You can use it on a PC as well as on a mobile phone. There are multiple editing options for creating great video clips for different social media platforms. |
| Reasons to avoid A free version of Filmmaker pro leaves a watermark on the edited videos. The free version is restricted to the usage of certain features. | Reasons to avoid It lags while editing big video content. You need a premium version to get rid of the watermark and unlock some of the amazing editing features. |
| You can edit shaky footage and stabilize it using Filmmaker Pro. Keep editing simple to attract your audience. | Customize the slow motion and fast motion effects easily with Filmora. Use the video effects as per your choice to make your video clip look great. |
| View details | View details |
 Movavi It offers a wide assortment of mixed media programs. Movavi It offers a wide assortment of mixed media programs. |
 LumaFusion The head proficient video altering and impacts application for you. LumaFusion The head proficient video altering and impacts application for you. |
|---|---|
| Specifications System: ios and Android Cost: ios and Android 4k Support: Yes Ratings: 4.7 stars Direct YouTube Export: Yes | Specifications System: ios Cost: $29.99 4k Support: No Ratings: 4 stars Direct YouTube Export: No |
| Reasons to buy It scores an overall rating of 4.8 stars. Great for creating social media video clips. | Reasons to buy Compatible with both web and mobile phones. Compatible with Mac os, Windows, ios, and Android versions. Its robust and user-friendly features are great for beginners. |
| Reasons to avoid Not suitable for professional editing. It contains some underdeveloped features. Slow video rendering of heavy files. | Reasons to avoid Sync between different devices is not possible. Prone to software crashes. |
| It lets you add personalized watermark and logo. It provides high-quality output and time lapse videos. | Use an SSD to work efficiently with 4K and other high-resolution files. The premium version of LumaFusion comes with a feature of directly exporting videos on YouTube. |
| View details | View details |
 Capcut A free across-the-board video-altering application that assists you with making fantastic recordings. Capcut A free across-the-board video-altering application that assists you with making fantastic recordings. |
 VivaVideo It can be utilized to make a slideshow of photographs that have text craftsmanship and vivified text. VivaVideo It can be utilized to make a slideshow of photographs that have text craftsmanship and vivified text. |
|---|---|
| Specifications System: Android and ios Cost: Free 4k Support: No Ratings: 4.5 stars Direct YouTube Export: No | Specifications System: Android and ios Cost: Free but in-app purchases 4k Support: Yes Ratings: 4.4 stars Direct YouTube Export: Yes |
| Reasons to buy It is very to use with no deep knowledge of video editing. It helps in creating great cinematic videos. | Reasons to buy It comes with in-app camera. It allows social media integration. It offers 60+ video effects to create amazing videos. |
| Reasons to avoid It lacks advanced color effects. Doesn’t support higher frame rate. | Reasons to avoid It offers 60+ video effects to create amazing videos. Free version lacks some advanced features. |
| You can easily cut, reverse, and change the speed with help of keyboard shortcuts. | Learn to use the “J-cut” feature for giving natural effects to your videos. |
| View details | View details |
B. The Best 6 YouTube Video Editing Apps for Advanced Users
 Adobe Premiere Rush The free versatile and work area video altering application for inventiveness in a hurry. Adobe Premiere Rush The free versatile and work area video altering application for inventiveness in a hurry. |
|---|
| Specifications System: Android and ios Cost: Free but in-app purchases for better functions 4k Support: Yes Ratings: 5 stars Direct YouTube Export: No |
| Reasons to buy Its free trial is great for beginners to understand the tools and commands. Keyboard shortcuts make it easier to edit videos with less time consumption. |
| Reasons to avoid It doesn’t contain storyboard templates. It has a limited edition of transitions. |
| Master the adjustment of monitor size for a better experience. Don’t use colorful titles; it will ruin the look of your clip. |
| View details |
 Splice Smoothen out the divided course of making and sharing music, liberating performers to invest on the inventive approach. Splice Smoothen out the divided course of making and sharing music, liberating performers to invest on the inventive approach. |
 Vimeo Create Effectively and immediately make video from stock recordings, photographs, and individual recordings. Vimeo Create Effectively and immediately make video from stock recordings, photographs, and individual recordings. |
|---|---|
| Specifications System: ios and Android Cost: Free but in-app purchases 4k Support: No Ratings: 4.9 stars Direct YouTube Export: Yes | Specifications System: Android and ios Cost: Free but in-app purchases 4k Support: No Ratings: 4.5 stars Direct YouTube Export: No |
| Reasons to buy Compatible with ios and Android. You can easily use it on both the web and phone. The Premium version includes numerous samples and presets. | Reasons to buy It has great customizable features. It makes uploading the videos easier. |
| Reasons to avoid Generally, the samples and presets are overused. Record labels do not approve of some of the songs and music. | Reasons to avoid Basic users cannot access stock photos, advanced templates, etc. It costs money for uploading videos. |
| It is a great choice for discovering social media trends. Follow the social media guidelines before creating the videos. | You can use Vimeo to earn money with help of Tip Jar. Check your content before uploading, it should be web-friendly. |
| View details | View details |
 Adobe Spark Adobe Spark empowers you to recount stories and offer thoughts rapidly and delightfully. Adobe Spark Adobe Spark empowers you to recount stories and offer thoughts rapidly and delightfully. |
 Videoshop A FREE and simple video proofreader with quick altering instruments, channels, and numerous different impacts for customizing recordings. Videoshop A FREE and simple video proofreader with quick altering instruments, channels, and numerous different impacts for customizing recordings. |
|---|---|
| Specifications System: Android and ios Cost: 14 days free trial 4k Support: No Ratings: 4.6 stars Direct YouTube Export: No | Specifications System: Android and ios Cost: Monthly subscription is $3.99 4k Support: No Ratings: 4.6 stars Direct YouTube Export: Yes |
| Reasons to buy It comes with a large variety of templates. It has an easy to use interface for better and more efficient working. | Reasons to buy It is quick and saves a lot of time. It is easy to use even for beginners. |
| Reasons to avoid Not affordable by all. Requires expensive hardware connections. | Reasons to avoid Watermark is available in the free version. It is buggy. |
| It allows you to remove unwanted sections from the templates. You can also experiment with fonts as per your choice. | You can also use this YouTube video editing software to record your videos. It enables various vertical and horizontal transitions. |
| View details | View details |
3. Top 10 YouTube Video Editors Online to Check Out
A. The Best 5 YouTube Video Editors Online for Beginners
Top 10 Online YouTube Video Editors
01of 05InVideo
InVideo is a strong, YouTube video editor online. It comes loaded with 5000+ formats, iStock media, music library, channels, advances, and substantially more. It is an online application; therefore, no download is required.
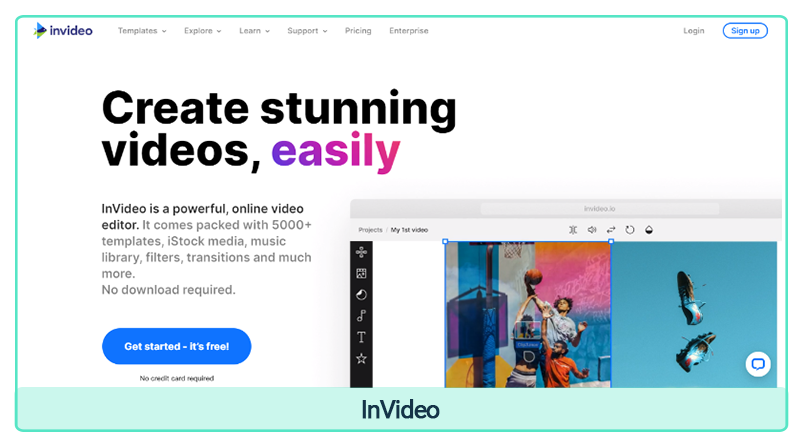
InVideo
Best for: YouTubers and content creators
Cost: $30 per month
Ratings: 4.3 stars
Features
- It provides access to millions of images and clips.
- It provides multi-lingual support.
- It comes with completely customizable video templates.
Pros
- The availability of video templates makes video editing easy for beginners.
- It is a time-saver tool for video editing.
Cons
- The free version contains a watermark on the edited videos.
- You need a stable internet connection to work properly.
- Switching between templates is not possible.
![]()
Note: Watch your clips carefully before editing and use transitions where needed.
02of 05Media.io
Use Media.io internet-based instruments to alter, convert, or pack video/sound/picture documents in 3 simple tasks.
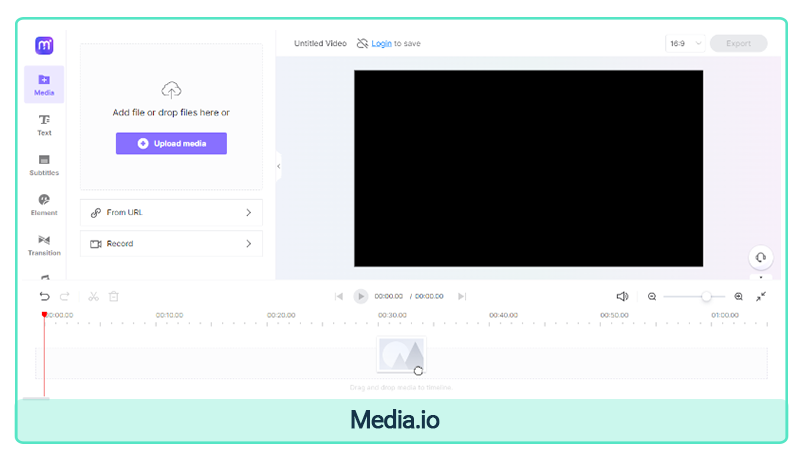
Media.io
Best for: Beginners who want to improve editing skills
Cost: Free but an in-app purchase is $9.99 per month
Ratings: 3.5 stars
Features
- It supports multiple audio and video formats.
- It comes with a screen recorder and webcam recorder.
Pros
- It supports an AI lab.
- It allows you to remove the background easily.
Cons
- It allows you to remove the background easily.
- It is sometimes buggy and glitchy.
![]()
Note: Use Media.io audio remover to remove the background noise. You should have the correct knowledge of video, audio, and image files.
03of 05PowToon
PowToon is the main video and visual correspondence stage sent off in 2012. PowToon’s main goal is to enable people, groups, and organizations to accomplish quantifiable outcomes by changing correspondences into visual encounters that get their crowd to mind, interface, and act.
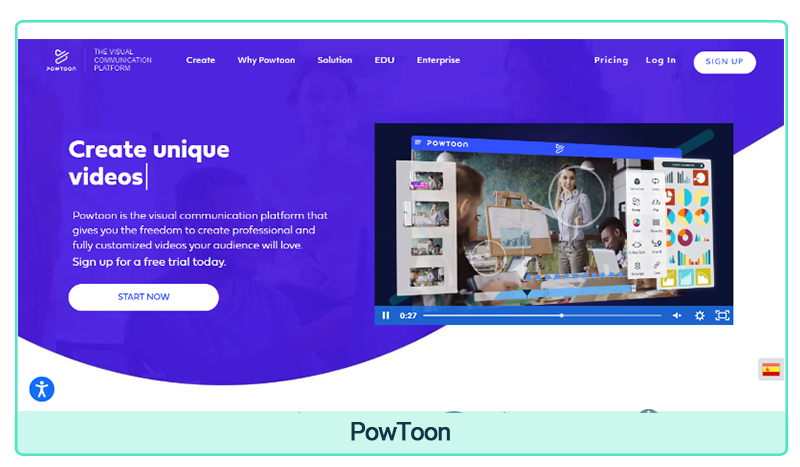
PowToon
Best for: Creating educational and training videos.
Cost: For free trial, you have to sign up. And the pro plan costs $3.63 per month
Ratings: 4.4 stars
Features
- Helps in creating great animation effects.
- You can even create GIFs in PowToon.
Pros
- Unique features and easy to use
- It comes with a wide range of customizable video templates.
Cons
- It doesn’t have any downloadable version.
- Exporting videos is very tricky.
![]()
Note: Record your narration before animating the video clip. Keep a check on the video timings.
04of 05DaVinci Resolve
It is the world’s just arrangement that consolidates altering, variety amendment, enhanced visualizations, movement designs and sound after creation across the board programming apparatus! Its rich, current point of interaction is quick to learn and simple for new clients, yet strong for experts.
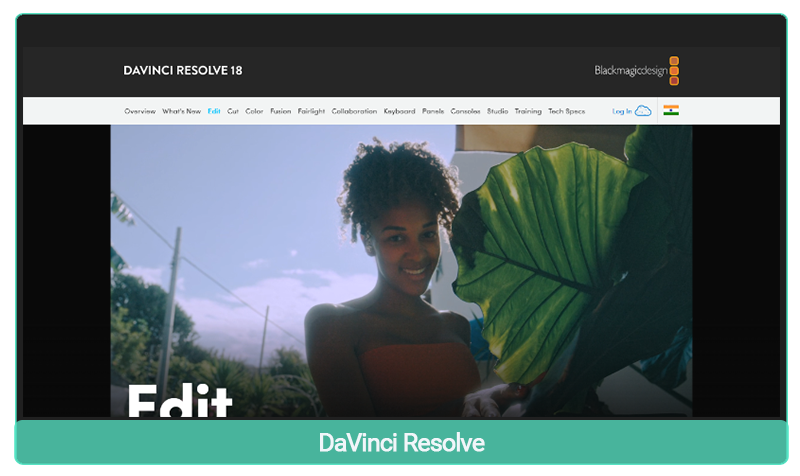
DaVinci Resolve
Best for: Advanced level editors and video creators
Cost: $337.4
Ratings: 4.7 stars
Features
- It supports 4K quality.
- It offers a great color scheme.
Pros
- It is a great choice for video editors.
- It provides advanced color corrections.
Cons
- It doesn’t come with any free trial or free version.
- Keyboard shortcuts are a bit confusing.
![]()
Note: You can achieve a better playback performance using the proxy mode. You can speed up the work by changing the video format to a lower value.
05of 05ClipChamp
Clipchamp is presently our go-to video creation and altering suite. Unquestionably simple to use with phenomenal usefulness and a broad stock library, text, and variety altering suite, Clipchamp has empowered me to add another income stream to our computerized advertising office. Extraordinary help and a fabulous item.
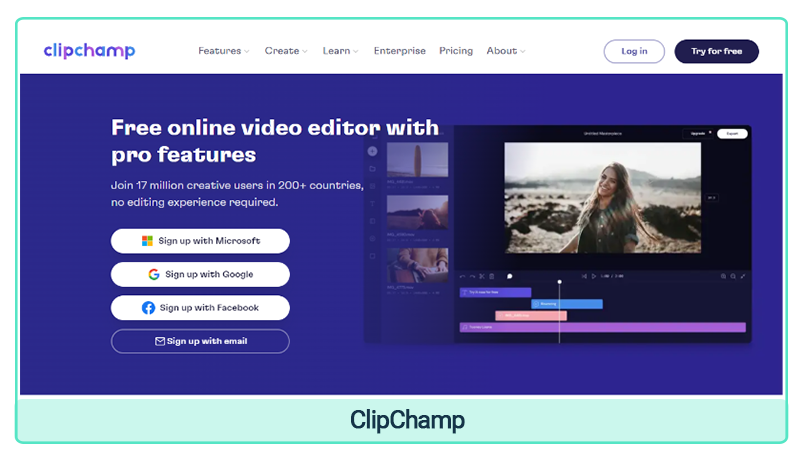
ClipChamp
Best for: Creating presentations and social media videos, simple and basic video editing.
Cost: Sign up for a free trial, the creator level costs $72 per year and the business level costs $156 per year.
Ratings: 4.5 stars.
Features
- It allows you to add filters and integrate audio in the clips.
- You can edit, trim, crop, etc. using Clipchamp.
Pros
- It has great video templates that help in creating amazing videos within no time.
- You don’t require in-depth knowledge of video editing to use this application.
Cons
- You can’t export high-quality videos without a watermark in the free version.
- It can be glitchy and the editing becomes slow, consuming a lot of time.
![]()
Note: Speed up your video using ClipChamp. You can also add an outro to your video clips.
B. The Best 5 YouTube Video Editor Online for Advanced Users
01of 05VEED
VEED simplifies proficient video creation. It offers online video altering, recording, facilitating and sharing. Key elements incorporate a single tick captioning, interpretation, sound decrease, trimming, advances, custom marking, pressure and configuration change. VEED is great for groups as it is cloud-based. Keep away from slow document moves and PC stockpiling issues. All things being equal, keep all your video projects on the web and available. Permit various YouTube video editors to chip away at a similar task. Share recordings by means of URL.
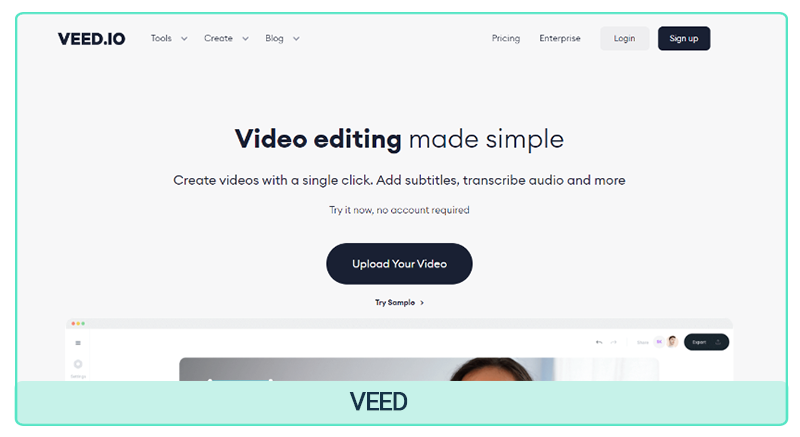
VEED
Best for: Making tutorials, marketers, social media managers, etc.
Cost: Comes with both free and premium versions. Basic costs $5.97 per month and Pro costs $9.87 per month
Ratings: Scores an overall rating of 3.9 stars.
4k Support: No
Direct YouTube Export: No
Include Templates: No
Features
- It offers direct social media sharing.
- It comes with many collaboration tools.
- It offers support for editing HD and 4K videos.
Pros
- Automatic generation of captions.
- It works well on different versions of Windows.
- It is a great video editing tool with the simple user interface.
Cons
- It can sometimes be glitchy.
- Software crashes are common.
![]()
Note: VEED makes it easier to add subtitles in any language with its automatic translator. Use VEED to edit your YouTube videos like a pro.
02of 05Wideo
Wideo utilizes layouts to assist you with making proficient recordings for promoting, inner interchanges, and virtual entertainment and that are just the beginning. (Think: Squarespace or Minted, however for recordings).
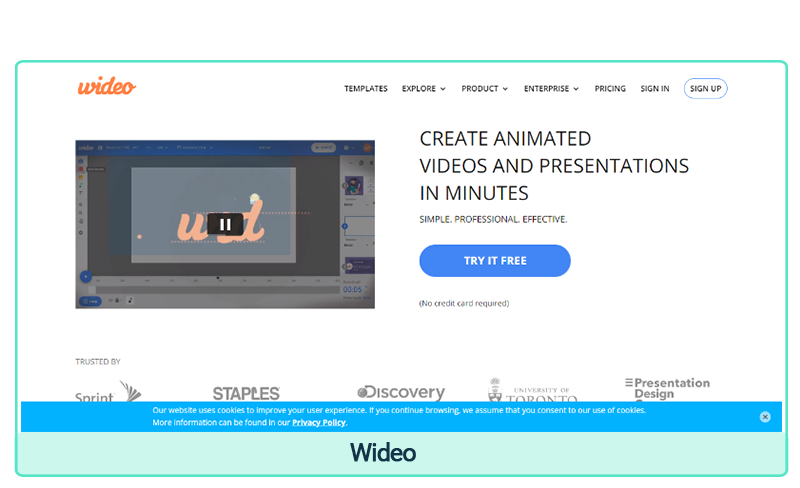
Wideo
Best for: A great online platform that is used to edit and animate videos.
Cost: Sign up for free for a 1-minute video. The basic plan costs $19 per month and the pro costs $35 per month.
Ratings: Overall rating of 4 stars.
4k Support: No
Direct YouTube Export: Yes
Include Templates: Yes
Features
- It also allows creating presentations.
- You can add different text effects using Wideo.
- It allows you to share the videos directly using the URLs.
Pros
- Wideo is completely free of cost to use.
- It makes animation and video editing very easy and simple.
- It comes with more than 250 free video templates.
- It is a great platform for marketing professionals and digital agencies.
Cons
- Completely online application.
- It is prone to glitches and bugs.
![]()
Note: Use a keyboard shortcut to get the desired results faster. Make the original video with plenty of lights.
03of 05Kapwing
If somebody had any desire to begin a YouTube channel today, there’s a ton that goes into making the main video. Arranging out a story, shooting cuts, and teaming up with different makers is adequately hard - also the numerous years it can take to gain proficiency with conventional video altering programming.
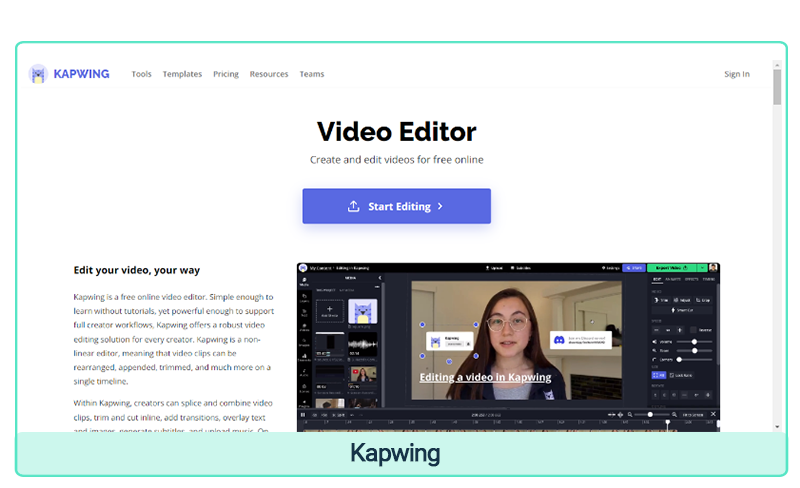
Kapwing
Best for: Both beginners and experts
Cost: Free for basic functions. The Pro plan costs $16 per month
Ratings: 4.7 stars
4k Support: No
Direct YouTube Export: No
Include Templates: Yes
Features
- It provides multi-lingual support.
- It comes with a default configuration with social media networks.
- It has great and amazing editing features.
Pros
- It has a great easy to use interface.
- Auto subtitles are available.
- It comes with great video editing templates.
Cons
- It is glitchy sometimes.
- The free version provides a low-quality output.
![]()
Note: Click outside the canvas on the right-hand side to view and customize the video quality. Use the ripple mode to edit your videos to avoid keep the gaps in the layers.
04of 05Renderforest
Renderforest gives you the most exceptional advertising devices to make broadcast-quality recordings and movements, notorious logos, and expert sites easily. Leisure time-saving development of advertising instruments to succeed: great recordings, movements, mock-ups, logos, introductions, SMM illustrations, and an expert site.
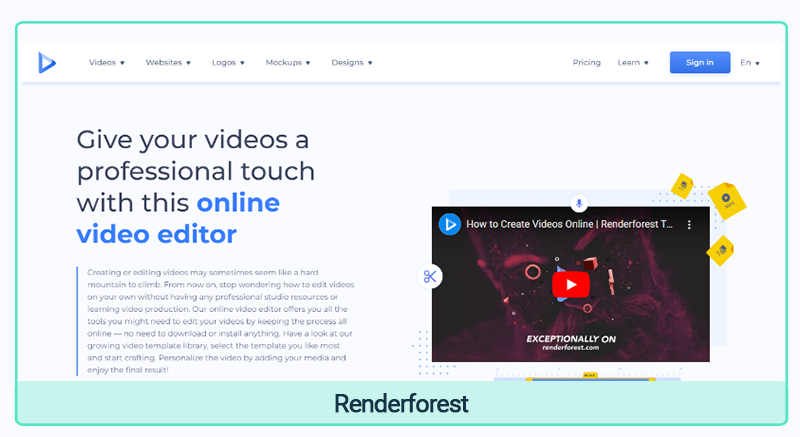
Renderforest
Best for: Advanced level creators and animators
Cost: Free version with limitations. The Lite version costs $11.67 per month and the pro version costs $15.56 per month.
Ratings: 4.8 stars.
4k Support: Yes
Direct YouTube Export: No
Include Templates: Yes
Features
- It offers 3D animation.
- You create multiple effects using this software.
- It supports a large number of audio and video files.
Pros
- It comes with a wide variety of templates.
- It facilitates faster video creation.
- The customer care team provides great support.
Cons
- The free version contains a watermark.
- The cost of the premium version is relatively high and it is not affordable to many people.
![]()
Note: Use Renderforest to create amazing graphics without any deep knowledge about graphic designing. It is used to create professional YouTube videos to attract a large number of audiences.
05of 05WeVideo
Make like a professional right away by any means. Add highlights like a green screen for a major financial plan look without the expense or trouble. Alter recordings with zero transfer stand-by time utilizing our free web-based video manager. Browse different configurations to stand apart via online entertainment, web, and portable showcases.
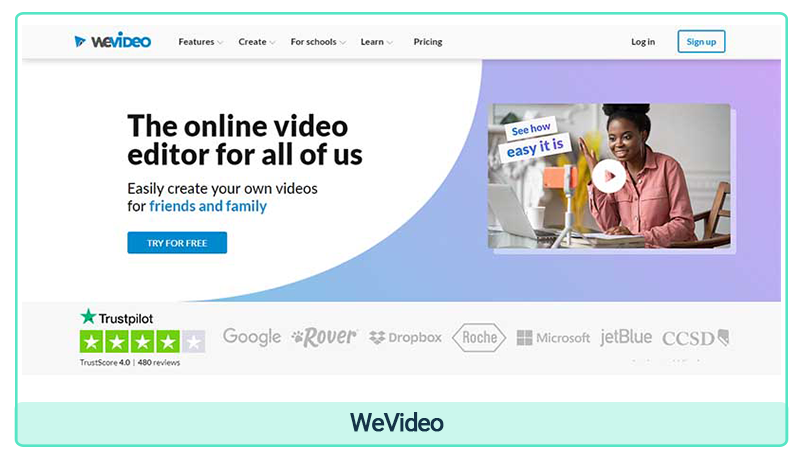
WeVideo
Best for: Both beginners and experienced video editors.
Cost: $4 per month
Ratings: 4 stars
4k Support: Yes
Direct YouTube Export: Yes
Include Templates: Yes
Features
- It allows you to upload the videos directly on YouTube.
- You can easily share the edited videos on different platforms using Wevideo.
- It is available for both web and mobile versions.
Pros
- Different color schemes, themes, fonts, effects, etc. allow you to experiment with your creation.
- Chroma key feature is also available.
Cons
- Its direct sharing feature is somewhere a threat to your privacy.
- Free version of this software allows you to download a clip with a maximum length of 5 minutes.
![]()
Note: Create digital storyboards using this software. Use WeVideo to create collaborative projects.
Part 5: Export & Share Your YouTube Video
There are a couple of ways of imparting your YouTube video to individuals who don’t have YouTube accounts. You can trade the video and offer it on your site or blog, or you can install the video on another site.
1. In-depth Exporting for Any Screen or Device
The following are a couple of tips to kick you off:
- This will assist with keeping your arranging steady regardless gadget you’re focusing on.
- Each screen and gadget are unique, so you’ll have to as needs be tailoring your substance.
- Utilize responsive plan standards to make remarkable designs.
2. Previewing, Sharing, Managing, and Exporting the Videos
While reviewing a video, you can either watch it completely or utilize the thumbnail view to get a brief look at what’s going on with the video. In the thumbnail view, you can likewise perceive the amount of the video that has been watched. This is useful for deciding if individuals are really inspired by the substance.
3. How Can You Get Support?
There are a couple of ways of getting support for your YouTube video, and it means quite a bit to know what they are and how to utilize them.
Part 6: Optimize Video and Grow Your YouTube Channel
You can use the following ways to optimize your videos and grow your YouTube channel:
1. Add Multiple Ad Breaks
- Sign in to YouTube Studio.
- From the left menu, select Videos.
- Choose a video, then select Monetization.
- If you haven’t already, enable monetization for the video.
- Beneath “Location of video ads”, check the box next to “During video (mid-roll)”.
- Select MANAGE MID-ROLLS.
- Add an ad break: Click + ADD BREAK. Enter the start time of the ad, or drag the vertical bar to the desired time.
- Delete an ad break: Click Deletenext to the ad break.
2. Add Optimal Description
- Be specific.
- Do keyword research.
- Use searchable keywords.
- Know how to use keywords.
- Know where to use your keywords.
- Track which keywords work for you.
- Find out what else your audience is watching.
- Offer value.
3. Add Optimal Tags
Picture result for how to add the best labels for YouTube recordings. The best put to search for catchphrases is on YouTube, however, you ought to likewise utilize more conventional watchword research apparatuses (like Google Search Console, SEMrush, SEOProfiler, Moz or others.) YouTube permits you to incorporate “tags” to assist with arranging your video by watchword, yet it restricts the number of labels you can incorporate.
4. Add Optimal Title Length
While you can use upwards of 100 characters in your YouTube title, the ideal length is 70 characters (counting spaces) as anything over that will anyway be abbreviated. At the end of the day, just the initial 70 characters will be noticeable to the audience.
5. Respond to Comments
- Reply: Click Reply to respond to comment directly.
- Heart: Select the heart beneath a comment to show appreciation.
- Like: Select thumbs up to like a comment.
- Dislike: Select thumbs down to dislike a comment.
- Pin: Select More.
6. Script Your Videos
- Start with a brief.
- Use your brief to write an outline.
- Introduce yourself and/or the topic at the beginning of your script.
- Start writing your script, section by section.
- Support any B-roll with the proper callouts in your main narrative.
- Be as concise as you can.
7. Tips for More Ad Revenue
- Join the YouTube Partner Program.
- Sell your own merch.
- Create sponsored content.
- Become an affiliate partner.
- Get your fans to pay you directly.
- Use crowdfunding.
Wrap Up – Bonus Tips
Summarize: Use the following points to choose the best video editing app
1. Convenience
iMovie. Apple items are known for their convenience and are for the most part easy to get and begin utilizing as they are calibrated for use by amateurs.
2. Impacts
Filmora. Filmora’s preset impacts are unparalleled by some other amateur altering stage. With movement preset and adjustable video and sound impacts, Filmora’s contributions are matched impeccably for another proofreader hoping to enliven their recording.
3. Utilization
Filmora. Filmora is presented for clients running Windows, Linux, and Mac working frameworks and is, subsequently, more generally open by a wide cluster of editors.
- Backup Your Existing YouTube Videos
- Backup New Videos to Google Drive
- The Ultimate Video Editing Fundamentals
- 32 Best YouTube Video Editing Tools Solutions (2022 Review)
- Top 12 YouTube Video Editing Software to Check Out
- Top 12 YouTube Video Editing App to Check Out
- Top 10 YouTube Video Editor Online to Check Out
- Export & Share Your YouTube Video
- In-depth Exporting for Any Screen or Device
- Previewing, Sharing, Managing, and Exporting the Videos
- How Can You Get Support?
- Optimize Video and Grow Your YouTube Channel
- Add Multiple Ad Breaks
- Add Optimal Description
- Add Optimal Tags
- Add Optimal Title Length
- Respond to Comments
- Script Your Videos
- Tips for More Ad Revenue
Part 1: Shoot Your YouTube Video Content
YouTube Video Editor
1. Equipment List for Shooting Videos
You need the following equipment to shoot a perfect video for your YouTube channel:
- Camera /Camcorder /Mobile Phone
- Lens
- SD Card
- Tripod
- Microphone
- Lighting
- White Balance Card
- Audio cables
2. Types of Video Shooting
With regards to shooting video, there are three fundamental sorts:
- True to Life
- Activity
- Screencast
Surprisingly realistic recordings are costly to deliver and can be hard to shoot well. Notwithstanding, they are exceptionally captivating and can make a strong close-to-home association with watchers.
Part 2: Backup Your Original Video
1. Backup Your Original Video
YouTube has been known to erase recordings for an assortment of reasons. That is the reason it means a lot to reinforce your current YouTube recordings.
2. Backup New Videos to Google Drive
Here are the steps to take:
Step 1Open Google Drive and sign in
Step 2Click on the New button in the top left corner of the screen
Step 3Select File Upload
Step 4Select the video files you want to upload
Step 5Click on Upload
Upload Video to Google Drive
Part 3: The Ultimate Video Editing Fundamentals
How to decide which youtube video editing software is best in various basic choices available today? Take a look at this quick checklist for all the video editing fundamentals you’ll ever need so your blockbusters will never miss a step again.
- Intro/Outro
- Background Music
- Color Matching
- Video Footage
- Transition
- Effects
- Titles and Graphics
- Video Format
Part 4: 32 Best YouTube Video Editing Tools Solutions (2022 Review)
1. Top 12 YouTube Video Editing Software to Check Out
A. YouTube Official Video Editor
YouTube database stores so many videos without running out of storage space. You can also edit them on YouTube and the Official Video Editor is free and easy to use, but it’s not as powerful as other video editors. The Official Video Editor can be used to accomplish basic editing tasks. However, if you are looking for more features like adding text overlays or merging two different clips, this might not be the right editing tool.
Youtube Studio Editor
B. Top 5 YouTube Video Editing Software for Beginners
01of 05VSDC
An enormous arrangement of in-vogue video impacts, channels, and changes. Fundamental instruments like zoom, graphs, 360 video altering, and a variety of amendments. Advantageous commodity profiles that make saving recordings for different gadgets a snap.
![]()
Note: Most reduced framework prerequisites conceivable - VSDC works even on obsolete PCs!
VSDC
Cost: Free of cost; however, it comes with a premium version also.
OS: The best part about this video editing tool is that it is compatible with the older versions of Windows.
Rating & Review: As per the G2 reviews, VSDC scores a 4-star rating.
Features
- Non-linear editing.
- Chroma key feature.
- Text editing in the video.
- Creating split-screen videos.
Pros
- Compatible with older versions of Windows.
- Easy to use interface.
- Amazing blending modes are available.
Cons
- Some features like audio waveform, video stabilization, etc. are missing.
- The free version lacks some important video editing features.
- It’s not compatible with resolutions of more than 1080 pixels.
Tips
1. Easy-to-Use
You can easily create both linear and non-linear videos using VSDC.
2. Download the Free Version
You can easily download the free version from its official website.
3. Powerful Editing
It facilitates powerful editing of HD videos even on low-end computers.
02of 05Windows Video Editor
For fast and simple single-clip editing, you can use the Video Editor app.
Windows Video Editor
Cost: Free
OS: Windows 10 and higher versions of Windows.
Rating & Review: G2 reviews - 4 stars
Features
- Easy to edit, trim, and create slideshows.
- You can add slo-mo.
- You can draw your creative designs on the videos
Pros
- It has easy-to-use and creative editing tools.
- You can add 3D text effects using this tool.
Cons
- It lacks many premium features for professional video editors.
- It doesn’t support Multicam and screen recording.
Tips
1. Automatically Create Slideshow
You can use it “Make a video for me” tool to automatically create a slideshow of the selected pictures.
2. Import Backup
It has an additional feature named “Import Backup” for importing backup videos and continuing editing them.
03of 05Wondershare Filmora
Filmora video editor works on cutting-edge highlights to save your time and exertion. It’s straightforward in Filmora. It is the most used YouTube video editor to create mind-blowing videos.
Wondershare Filmora
Wondershare Filmora 11 The Best video editor that makes your editing experience efficient and playful.
Try It Free Try It Free Learn More
Cost: Free to use but need to take the premium subscription to remove the watermark.
OS: Windows & macOS
Rating & Review: G2 reviews - 4.4 stars
Features
- It supports a number of video and audio formats.
- It delivers quick and amazing results.
- 4K editing support.
- Noise removal.
- Audio equalizer.
Pros
- You can easily increase or decrease the consistency of the layers.
- Contains a wide range of effects, text styles, and background music.
- There’s no point in virus interactions while installing the software.
- Easily download it from the official website.
Cons
- The size of the file increases tremendously after editing.
- Free version users cannot remove the watermark.
Tips
1. Online and Offline Mode
Filmora allows you to add a white border to your videos both n online and offline mode.
2. Insert Logos in the Videos
You can use Filmora to insert logos in the videos for marketing and branding purposes.
04of 05Blender
Blender is a free and open-source 3D PC designs programming toolset utilized for making vivified films, special visualizations, workmanship, 3D-printed models, movement illustrations, intelligent 3D applications, computer-generated reality, and, previously, computer games.
Blender
Cost: Free.
OS: Windows & macOS
Rating & Review: G2 reviews - 4.5 stars
Features
- Contains a wide range of amazing tools for modeling, animation, video editing, etc.
- Used for game creation.
- Improved shadows, ray-tracing, and subsurface scattering.
Pros
- It is a great tool for beginners.
- It is one of the best tools for digital drawing creation.
- Available to beginners at no cost.
Cons
- Prone to bugs and glitches.
Tips
Shortcut Convenience
1. Use the shortcut “Ctrl + R” to repeat the last command.
2. You can use the shortcut “Ctrl + O” to activate the light alignment camera.
05of 055. Kdenlive
Kdenlive is an open-source video manager. The venture was begun around 2003. Kdenlive is based on Qt and the KDE Frameworks libraries. The greater part of the video handling is finished by the MLT Framework, which depends on numerous other open-source projects like FFmpeg, freir, movit, ladspa, sox, and so on.
Kdenlive
Cost: Free and open-source YouTube editor.
OS: Linux, macOS, and Windows.
Rating & Review: G2 reviews - 4.4 stars.
Features
- Offers non-linear and multi-purpose video editing.
- It allows you to add slow-motion effects.
- It also offers automatic audio and video management.
Pros
- Supports all video and audio formats.
- Easy to use and great for beginners.
- You don’t need deep knowledge about video editing to use this software.
- Great video editing tool for new startups.
- It is versatile.
Cons
- Sometimes it delivers work at a much slower speed.
- Multi-frame video editing is not possible with this editor.
Tips
1. Non-multi-frame Video Editing
Multi-frame video editing is not possible with this editor.
2. Easily Retard the Clip
You can easily retard the clip by rotating the mouse wheel.
C. Top 7 YouTube Video Editing Software for Advanced Users
01of 07Apple iMovie
With iMovie, make proficient-looking recordings without an altering degree. Effectively add photographs and recordings to projects, trim clasps with your finger, add consistent advances and blur sound like a star. You can likewise import and alter ProRes video 2 and add Apple ProRAW pictures to your films and trailers.
Apple iMovie
Cost:
- Free
Features
- It enables modifying and enhancing color schemes.
- It offers stabilization of unstable and shaky videos.
- You can easily change the speed of different video clips.
Pros
- It allows you to share the videos directly on different social media platforms.
- It has an easy-to-use user interface.
- It comes with a wide range of effects and enhancements.
- You can even operate it through your phone.
- It is available to use free of cost.
Cons
- It takes a large space.
- The size of the video increases tremendously after editing.
Tips
1. Supports 4K
It supports a 4K video format.
2. Crop Tool
You can use the crop tool to zoom in on the video.
3. Detach Audio
You can detach audio and add any soundtrack of your choice.
02of 07Adobe Premiere Pro
Premiere Pro is the main video altering programming for making extraordinary recordings quick. Try not to simply make content — share your vision. Look at proficient formats or tweak your own enlivened illustrations and titles. Shift tones to suit your mindset. Also, give your story an extraordinary sound with sound devices and music tracks.
Adobe Premiere Pro
Cost:
- $20.99 per month
Features
- It enables VR editing of both audio and video.
- You can directly upload the video on YouTube with Adobe Premiere Pro.
- It can work on different projects simultaneously.
Pros
- It is compatible with any type of operating system.
- It supports a large number of audio and video formats.
- It supports virtual reality.
Cons
- It supports virtual reality.
- It is an offline tool and is not available free of cost.
Tips
1. Shortcut Convenience
Use the shortcut “Shift + 2” to cycle the recent video in the source monitor.
2. Adjustments Layers
The proper use of adjustment layers delivers great results.
3. Color Coding
You can even use color coding for your video clips.
03of 07Lightworks
Lightworks is a non-direct altering framework (NLE) for altering and dominating computerized video. It was an early engineer of PC-based non-direct altering frameworks and has been being developed beginning around 1989. Lightworks won a 2017 EMMY Award for being one of the first to make advanced nonlinear altering programming.
Lightworks
Cost:
- $23.99 per month
Features
- It is a professional film editing software.
- It is generally used for editing large-scale feature films.
- It allows you to export your videos directly on YouTube.
Pros
- It is available to download free of cost.
- The free version of Lightworks doesn’t leave any watermark on the final clip.
- Generally, all the tools are available to use in the free version.
Cons
- The free version restricts certain output formats.
- Users can sometimes face software crashes.
Tips
1. Backup for Work
Always create a backup of your work.
2. Keyboard Shortcuts
Learn all the keyboard shortcuts to get results faster and efficiently.
04of 07HitFilm Express
HitFilm Express is free video altering programming with proficient grade VFX apparatuses and all that you want to make amazing substance, movies or gaming recordings. Ideal for amateurs, film understudies, gamers, YouTubers, or any inventive without a financial plan. All of this from there, the sky is the limit, for nothing.
HitFilm Express
Cost:
- $299
Features
- It supports all types of video formats.
- It supports 4K resolution videos.
- It offers 360 degrees animation feature.
Pros
- It is a free video editing software.
- It offers a wide range of customizable video effects.
- It comes with great and professional VFX tools.
Cons
- It comes with great and professional VFX tools.
- Not many transitions and effects are stored in the library.
Tips
1. Drag and Drop
Use the drag and drop feature to create effects easily.
2. Keyboard Shortcuts
Learn the use of keyboard shortcuts for better results.
05of 07Adobe After Effects
Adobe After Effects is an advanced special visualization, movement illustrations, and compositing application created by Adobe Systems and utilized in the after-creation interaction of filmmaking, computer games, and TV creation. In addition to other things, After Effects can be utilized for keying, following, compositing, and liveliness.
Adobe After Effects
Cost:
- $20.99 per month
Features
- It supports virtual reality.
- It comes with a variety of editing tools like crop, trim, shape, mask, etc.
- It is suitable for motion graphics.
- Comes with a chroma key feature.
Pros
- You can add animated text effects to your videos.
- The layer animation feature helps in giving special effects.
Cons
- Only experienced video editors can use it efficiently.
- Expensive software.
- It comes with the limited option of 3D animation.
Tips
1. Keyboard Shortcuts
Use keyboard shortcuts like “A” for animation, “B” for blur, etc.
2. Easy and Helpful
Duplication of different layers is easy and helpful.
06of 07Camtasia
Camtasia by TechSmith is straightforward, across-the-board video altering and screen recording programming program. It is also a good YouTube video editing software. Worked considering amateurs, Camtasia permits architects to make proficient preparation recordings rapidly and effectively. It is accessible for the two Windows and macOS.
Camtasia
Cost:
- $299.99 per user
Features
- It has around 75+ transition effects.
- It has great features like motion blur effect, corner rounding effect, etc.
- It supports a wide range of video formats.
Pros
- You can make easy and quick transitions using Camtasia.
- It allows screen recording.
- It allows the creation of wonderful presentations for school and college projects.
Cons
- It allows the creation of wonderful presentations for school and college projects.
- It is buggy and often crashes.
Tips
1. Storyboard
You can easily create a storyboard using Camtasia.
1. Customizable Templates
It has many customizable templates. Use them to create great videos more efficiently.
07of 07Final Cut Pro
Final Cut Pro is a YouTube video editing app for making, altering, and delivering the greatest video. Finished product Pro joins elite execution advanced altering and local help for practically any video design with simple to-utilize and efficient elements that let you center around narrating.
Final Cut Pro
Cost:
- $299.99
Features
- It supports VR editing effects.
- You can even edit the background noise of the video.
Pros
- It can edit videos effortlessly.
- It allows adding both 2D and 3D titles.
- It is easy to learn.
Cons
- It is relatively expensive.
- Its user interface creates frequent stuttering.
- It is harder to store a large number of clips.
Tips
1. Hard to Store
It is harder to store a large number of clips.
2. Shortcut
Use “Shift + Z to fit something into a window.
2. Top 12 YouTube Video Editing App to Check Out
A. The Best 6 YouTube Video Editing Apps for Beginners
| Filmmaker Pro The best easy-to-use app for creating videos with 1 billion downloads. |
Filmora The best video editing app for YouTube, suitable for both beginners and advanced users. |
|---|---|
| Specifications System: iPhone Cost: $39 yearly subscription 4k Support: Yes Ratings: Filmmaker Pro scores an overall rating of 4.6 stars. Direct YouTube Export: No | Specifications System: iPhone and Android Cost: Free but an in-app purchase 4k Support: Yes Ratings: 5 stars Direct YouTube Export: Yes |
| Reasons to buy It works on both web and mobile phones. You can edit the whole video in manual editing mode. Provides decent image quality. | Reasons to buy Filmora supports both ios and android versions. You can use it on a PC as well as on a mobile phone. There are multiple editing options for creating great video clips for different social media platforms. |
| Reasons to avoid A free version of Filmmaker pro leaves a watermark on the edited videos. The free version is restricted to the usage of certain features. | Reasons to avoid It lags while editing big video content. You need a premium version to get rid of the watermark and unlock some of the amazing editing features. |
| You can edit shaky footage and stabilize it using Filmmaker Pro. Keep editing simple to attract your audience. | Customize the slow motion and fast motion effects easily with Filmora. Use the video effects as per your choice to make your video clip look great. |
| View details | View details |
| Movavi It offers a wide assortment of mixed media programs. |
LumaFusion The head proficient video altering and impacts application for you. |
|---|---|
| Specifications System: ios and Android Cost: ios and Android 4k Support: Yes Ratings: 4.7 stars Direct YouTube Export: Yes | Specifications System: ios Cost: $29.99 4k Support: No Ratings: 4 stars Direct YouTube Export: No |
| Reasons to buy It scores an overall rating of 4.8 stars. Great for creating social media video clips. | Reasons to buy Compatible with both web and mobile phones. Compatible with Mac os, Windows, ios, and Android versions. Its robust and user-friendly features are great for beginners. |
| Reasons to avoid Not suitable for professional editing. It contains some underdeveloped features. Slow video rendering of heavy files. | Reasons to avoid Sync between different devices is not possible. Prone to software crashes. |
| It lets you add personalized watermark and logo. It provides high-quality output and time lapse videos. | Use an SSD to work efficiently with 4K and other high-resolution files. The premium version of LumaFusion comes with a feature of directly exporting videos on YouTube. |
| View details | View details |
| Capcut A free across-the-board video-altering application that assists you with making fantastic recordings. |
VivaVideo It can be utilized to make a slideshow of photographs that have text craftsmanship and vivified text. |
|---|---|
| Specifications System: Android and ios Cost: Free 4k Support: No Ratings: 4.5 stars Direct YouTube Export: No | Specifications System: Android and ios Cost: Free but in-app purchases 4k Support: Yes Ratings: 4.4 stars Direct YouTube Export: Yes |
| Reasons to buy It is very to use with no deep knowledge of video editing. It helps in creating great cinematic videos. | Reasons to buy It comes with in-app camera. It allows social media integration. It offers 60+ video effects to create amazing videos. |
| Reasons to avoid It lacks advanced color effects. Doesn’t support higher frame rate. | Reasons to avoid It offers 60+ video effects to create amazing videos. Free version lacks some advanced features. |
| You can easily cut, reverse, and change the speed with help of keyboard shortcuts. | Learn to use the “J-cut” feature for giving natural effects to your videos. |
| View details | View details |
B. The Best 6 YouTube Video Editing Apps for Advanced Users
| Adobe Premiere Rush The free versatile and work area video altering application for inventiveness in a hurry. |
|---|
| Specifications System: Android and ios Cost: Free but in-app purchases for better functions 4k Support: Yes Ratings: 5 stars Direct YouTube Export: No |
| Reasons to buy Its free trial is great for beginners to understand the tools and commands. Keyboard shortcuts make it easier to edit videos with less time consumption. |
| Reasons to avoid It doesn’t contain storyboard templates. It has a limited edition of transitions. |
| Master the adjustment of monitor size for a better experience. Don’t use colorful titles; it will ruin the look of your clip. |
| View details |
| Splice Smoothen out the divided course of making and sharing music, liberating performers to invest on the inventive approach. |
Vimeo Create Effectively and immediately make video from stock recordings, photographs, and individual recordings. |
|---|---|
| Specifications System: ios and Android Cost: Free but in-app purchases 4k Support: No Ratings: 4.9 stars Direct YouTube Export: Yes | Specifications System: Android and ios Cost: Free but in-app purchases 4k Support: No Ratings: 4.5 stars Direct YouTube Export: No |
| Reasons to buy Compatible with ios and Android. You can easily use it on both the web and phone. The Premium version includes numerous samples and presets. | Reasons to buy It has great customizable features. It makes uploading the videos easier. |
| Reasons to avoid Generally, the samples and presets are overused. Record labels do not approve of some of the songs and music. | Reasons to avoid Basic users cannot access stock photos, advanced templates, etc. It costs money for uploading videos. |
| It is a great choice for discovering social media trends. Follow the social media guidelines before creating the videos. | You can use Vimeo to earn money with help of Tip Jar. Check your content before uploading, it should be web-friendly. |
| View details | View details |
| Adobe Spark Adobe Spark empowers you to recount stories and offer thoughts rapidly and delightfully. |
Videoshop A FREE and simple video proofreader with quick altering instruments, channels, and numerous different impacts for customizing recordings. |
|---|---|
| Specifications System: Android and ios Cost: 14 days free trial 4k Support: No Ratings: 4.6 stars Direct YouTube Export: No | Specifications System: Android and ios Cost: Monthly subscription is $3.99 4k Support: No Ratings: 4.6 stars Direct YouTube Export: Yes |
| Reasons to buy It comes with a large variety of templates. It has an easy to use interface for better and more efficient working. | Reasons to buy It is quick and saves a lot of time. It is easy to use even for beginners. |
| Reasons to avoid Not affordable by all. Requires expensive hardware connections. | Reasons to avoid Watermark is available in the free version. It is buggy. |
| It allows you to remove unwanted sections from the templates. You can also experiment with fonts as per your choice. | You can also use this YouTube video editing software to record your videos. It enables various vertical and horizontal transitions. |
| View details | View details |
3. Top 10 YouTube Video Editors Online to Check Out
A. The Best 5 YouTube Video Editors Online for Beginners
Top 10 Online YouTube Video Editors
01of 05InVideo
InVideo is a strong, YouTube video editor online. It comes loaded with 5000+ formats, iStock media, music library, channels, advances, and substantially more. It is an online application; therefore, no download is required.
InVideo
Best for: YouTubers and content creators
Cost: $30 per month
Ratings: 4.3 stars
Features
- It provides access to millions of images and clips.
- It provides multi-lingual support.
- It comes with completely customizable video templates.
Pros
- The availability of video templates makes video editing easy for beginners.
- It is a time-saver tool for video editing.
Cons
- The free version contains a watermark on the edited videos.
- You need a stable internet connection to work properly.
- Switching between templates is not possible.
![]()
Note: Watch your clips carefully before editing and use transitions where needed.
02of 05Media.io
Use Media.io internet-based instruments to alter, convert, or pack video/sound/picture documents in 3 simple tasks.
Media.io
Best for: Beginners who want to improve editing skills
Cost: Free but an in-app purchase is $9.99 per month
Ratings: 3.5 stars
Features
- It supports multiple audio and video formats.
- It comes with a screen recorder and webcam recorder.
Pros
- It supports an AI lab.
- It allows you to remove the background easily.
Cons
- It allows you to remove the background easily.
- It is sometimes buggy and glitchy.
![]()
Note: Use Media.io audio remover to remove the background noise. You should have the correct knowledge of video, audio, and image files.
03of 05PowToon
PowToon is the main video and visual correspondence stage sent off in 2012. PowToon’s main goal is to enable people, groups, and organizations to accomplish quantifiable outcomes by changing correspondences into visual encounters that get their crowd to mind, interface, and act.
PowToon
Best for: Creating educational and training videos.
Cost: For free trial, you have to sign up. And the pro plan costs $3.63 per month
Ratings: 4.4 stars
Features
- Helps in creating great animation effects.
- You can even create GIFs in PowToon.
Pros
- Unique features and easy to use
- It comes with a wide range of customizable video templates.
Cons
- It doesn’t have any downloadable version.
- Exporting videos is very tricky.
![]()
Note: Record your narration before animating the video clip. Keep a check on the video timings.
04of 05DaVinci Resolve
It is the world’s just arrangement that consolidates altering, variety amendment, enhanced visualizations, movement designs and sound after creation across the board programming apparatus! Its rich, current point of interaction is quick to learn and simple for new clients, yet strong for experts.
DaVinci Resolve
Best for: Advanced level editors and video creators
Cost: $337.4
Ratings: 4.7 stars
Features
- It supports 4K quality.
- It offers a great color scheme.
Pros
- It is a great choice for video editors.
- It provides advanced color corrections.
Cons
- It doesn’t come with any free trial or free version.
- Keyboard shortcuts are a bit confusing.
![]()
Note: You can achieve a better playback performance using the proxy mode. You can speed up the work by changing the video format to a lower value.
05of 05ClipChamp
Clipchamp is presently our go-to video creation and altering suite. Unquestionably simple to use with phenomenal usefulness and a broad stock library, text, and variety altering suite, Clipchamp has empowered me to add another income stream to our computerized advertising office. Extraordinary help and a fabulous item.
ClipChamp
Best for: Creating presentations and social media videos, simple and basic video editing.
Cost: Sign up for a free trial, the creator level costs $72 per year and the business level costs $156 per year.
Ratings: 4.5 stars.
Features
- It allows you to add filters and integrate audio in the clips.
- You can edit, trim, crop, etc. using Clipchamp.
Pros
- It has great video templates that help in creating amazing videos within no time.
- You don’t require in-depth knowledge of video editing to use this application.
Cons
- You can’t export high-quality videos without a watermark in the free version.
- It can be glitchy and the editing becomes slow, consuming a lot of time.
![]()
Note: Speed up your video using ClipChamp. You can also add an outro to your video clips.
B. The Best 5 YouTube Video Editor Online for Advanced Users
01of 05VEED
VEED simplifies proficient video creation. It offers online video altering, recording, facilitating and sharing. Key elements incorporate a single tick captioning, interpretation, sound decrease, trimming, advances, custom marking, pressure and configuration change. VEED is great for groups as it is cloud-based. Keep away from slow document moves and PC stockpiling issues. All things being equal, keep all your video projects on the web and available. Permit various YouTube video editors to chip away at a similar task. Share recordings by means of URL.
VEED
Best for: Making tutorials, marketers, social media managers, etc.
Cost: Comes with both free and premium versions. Basic costs $5.97 per month and Pro costs $9.87 per month
Ratings: Scores an overall rating of 3.9 stars.
4k Support: No
Direct YouTube Export: No
Include Templates: No
Features
- It offers direct social media sharing.
- It comes with many collaboration tools.
- It offers support for editing HD and 4K videos.
Pros
- Automatic generation of captions.
- It works well on different versions of Windows.
- It is a great video editing tool with the simple user interface.
Cons
- It can sometimes be glitchy.
- Software crashes are common.
![]()
Note: VEED makes it easier to add subtitles in any language with its automatic translator. Use VEED to edit your YouTube videos like a pro.
02of 05Wideo
Wideo utilizes layouts to assist you with making proficient recordings for promoting, inner interchanges, and virtual entertainment and that are just the beginning. (Think: Squarespace or Minted, however for recordings).
Wideo
Best for: A great online platform that is used to edit and animate videos.
Cost: Sign up for free for a 1-minute video. The basic plan costs $19 per month and the pro costs $35 per month.
Ratings: Overall rating of 4 stars.
4k Support: No
Direct YouTube Export: Yes
Include Templates: Yes
Features
- It also allows creating presentations.
- You can add different text effects using Wideo.
- It allows you to share the videos directly using the URLs.
Pros
- Wideo is completely free of cost to use.
- It makes animation and video editing very easy and simple.
- It comes with more than 250 free video templates.
- It is a great platform for marketing professionals and digital agencies.
Cons
- Completely online application.
- It is prone to glitches and bugs.
![]()
Note: Use a keyboard shortcut to get the desired results faster. Make the original video with plenty of lights.
03of 05Kapwing
If somebody had any desire to begin a YouTube channel today, there’s a ton that goes into making the main video. Arranging out a story, shooting cuts, and teaming up with different makers is adequately hard - also the numerous years it can take to gain proficiency with conventional video altering programming.
Kapwing
Best for: Both beginners and experts
Cost: Free for basic functions. The Pro plan costs $16 per month
Ratings: 4.7 stars
4k Support: No
Direct YouTube Export: No
Include Templates: Yes
Features
- It provides multi-lingual support.
- It comes with a default configuration with social media networks.
- It has great and amazing editing features.
Pros
- It has a great easy to use interface.
- Auto subtitles are available.
- It comes with great video editing templates.
Cons
- It is glitchy sometimes.
- The free version provides a low-quality output.
![]()
Note: Click outside the canvas on the right-hand side to view and customize the video quality. Use the ripple mode to edit your videos to avoid keep the gaps in the layers.
04of 05Renderforest
Renderforest gives you the most exceptional advertising devices to make broadcast-quality recordings and movements, notorious logos, and expert sites easily. Leisure time-saving development of advertising instruments to succeed: great recordings, movements, mock-ups, logos, introductions, SMM illustrations, and an expert site.
Renderforest
Best for: Advanced level creators and animators
Cost: Free version with limitations. The Lite version costs $11.67 per month and the pro version costs $15.56 per month.
Ratings: 4.8 stars.
4k Support: Yes
Direct YouTube Export: No
Include Templates: Yes
Features
- It offers 3D animation.
- You create multiple effects using this software.
- It supports a large number of audio and video files.
Pros
- It comes with a wide variety of templates.
- It facilitates faster video creation.
- The customer care team provides great support.
Cons
- The free version contains a watermark.
- The cost of the premium version is relatively high and it is not affordable to many people.
![]()
Note: Use Renderforest to create amazing graphics without any deep knowledge about graphic designing. It is used to create professional YouTube videos to attract a large number of audiences.
05of 05WeVideo
Make like a professional right away by any means. Add highlights like a green screen for a major financial plan look without the expense or trouble. Alter recordings with zero transfer stand-by time utilizing our free web-based video manager. Browse different configurations to stand apart via online entertainment, web, and portable showcases.
WeVideo
Best for: Both beginners and experienced video editors.
Cost: $4 per month
Ratings: 4 stars
4k Support: Yes
Direct YouTube Export: Yes
Include Templates: Yes
Features
- It allows you to upload the videos directly on YouTube.
- You can easily share the edited videos on different platforms using Wevideo.
- It is available for both web and mobile versions.
Pros
- Different color schemes, themes, fonts, effects, etc. allow you to experiment with your creation.
- Chroma key feature is also available.
Cons
- Its direct sharing feature is somewhere a threat to your privacy.
- Free version of this software allows you to download a clip with a maximum length of 5 minutes.
![]()
Note: Create digital storyboards using this software. Use WeVideo to create collaborative projects.
Part 5: Export & Share Your YouTube Video
There are a couple of ways of imparting your YouTube video to individuals who don’t have YouTube accounts. You can trade the video and offer it on your site or blog, or you can install the video on another site.
1. In-depth Exporting for Any Screen or Device
The following are a couple of tips to kick you off:
- This will assist with keeping your arranging steady regardless gadget you’re focusing on.
- Each screen and gadget are unique, so you’ll have to as needs be tailoring your substance.
- Utilize responsive plan standards to make remarkable designs.
2. Previewing, Sharing, Managing, and Exporting the Videos
While reviewing a video, you can either watch it completely or utilize the thumbnail view to get a brief look at what’s going on with the video. In the thumbnail view, you can likewise perceive the amount of the video that has been watched. This is useful for deciding if individuals are really inspired by the substance.
3. How Can You Get Support?
There are a couple of ways of getting support for your YouTube video, and it means quite a bit to know what they are and how to utilize them.
Part 6: Optimize Video and Grow Your YouTube Channel
You can use the following ways to optimize your videos and grow your YouTube channel:
1. Add Multiple Ad Breaks
- Sign in to YouTube Studio.
- From the left menu, select Videos.
- Choose a video, then select Monetization.
- If you haven’t already, enable monetization for the video.
- Beneath “Location of video ads”, check the box next to “During video (mid-roll)”.
- Select MANAGE MID-ROLLS.
- Add an ad break: Click + ADD BREAK. Enter the start time of the ad, or drag the vertical bar to the desired time.
- Delete an ad break: Click Deletenext to the ad break.
2. Add Optimal Description
- Be specific.
- Do keyword research.
- Use searchable keywords.
- Know how to use keywords.
- Know where to use your keywords.
- Track which keywords work for you.
- Find out what else your audience is watching.
- Offer value.
3. Add Optimal Tags
Picture result for how to add the best labels for YouTube recordings. The best put to search for catchphrases is on YouTube, however, you ought to likewise utilize more conventional watchword research apparatuses (like Google Search Console, SEMrush, SEOProfiler, Moz or others.) YouTube permits you to incorporate “tags” to assist with arranging your video by watchword, yet it restricts the number of labels you can incorporate.
4. Add Optimal Title Length
While you can use upwards of 100 characters in your YouTube title, the ideal length is 70 characters (counting spaces) as anything over that will anyway be abbreviated. At the end of the day, just the initial 70 characters will be noticeable to the audience.
5. Respond to Comments
- Reply: Click Reply to respond to comment directly.
- Heart: Select the heart beneath a comment to show appreciation.
- Like: Select thumbs up to like a comment.
- Dislike: Select thumbs down to dislike a comment.
- Pin: Select More.
6. Script Your Videos
- Start with a brief.
- Use your brief to write an outline.
- Introduce yourself and/or the topic at the beginning of your script.
- Start writing your script, section by section.
- Support any B-roll with the proper callouts in your main narrative.
- Be as concise as you can.
7. Tips for More Ad Revenue
- Join the YouTube Partner Program.
- Sell your own merch.
- Create sponsored content.
- Become an affiliate partner.
- Get your fans to pay you directly.
- Use crowdfunding.
Wrap Up – Bonus Tips
Summarize: Use the following points to choose the best video editing app
1. Convenience
iMovie. Apple items are known for their convenience and are for the most part easy to get and begin utilizing as they are calibrated for use by amateurs.
2. Impacts
Filmora. Filmora’s preset impacts are unparalleled by some other amateur altering stage. With movement preset and adjustable video and sound impacts, Filmora’s contributions are matched impeccably for another proofreader hoping to enliven their recording.
3. Utilization
Filmora. Filmora is presented for clients running Windows, Linux, and Mac working frameworks and is, subsequently, more generally open by a wide cluster of editors.
The Complete Thumbnail Playbook: From Creation to Analysis
The Ultimate Guide to YouTube Thumbnails that Get Views

Richard Bennett
Oct 26, 2023• Proven solutions
Search for any topic on YouTube and you’ll find thousands of videos. How do you decide which of them to watch? Thumbnails play a major role in what viewers decide to click on. They’re often more important than video titles.
Viewers click on thumbnails that both standout and feel relevant to their search. Your task when it comes to creating YouTube thumbnails is to make something that does both of those things while also maintaining your personal style.
- How to Make a YouTube Thumbnail
- How to Upload a YouTube Thumbnail
- YouTube Thumbnail Makers
- How to Make Thumbnails that Get Clicks (Without Clickbait!)
- Animated YouTube Thumbnails
Part 1: How to Make a YouTube Thumbnail
In order to create a custom video thumbnail, you’ll need a program to put it together in. You can use an image editing program like Photoshop if you have one, but if you don’t you can check out these free thumbnail makers.
Here are some examples of popular thumbnail styles.

1. The Classic Thumbnail (Photo or Screenshot)
A photo that shows what happens in your video – whether that means the finished ‘look’ from your makeup tutorial or you posing in front of the landmark you shot your travel vlog in front of – is a great way to let viewers know what to expect. While curiosity can be a big motive behind clicking on a video thumbnail (or anything online), when people have searched for a specific topic they want to be convinced that your video has what they’re looking for.
#1. Choose Your Photo
To start off, either choose a still frame from your video or take a photograph while you’re still set up from your video. A separate photograph is usually a better idea because your video editor might not be able to export a high-quality snapshot, and also because you’re able to choose your facial expression.
Aim to make this shot a close-up or medium close-up and make sure you’re either in the center of the screen or off to one side, as per the ‘rule of thirds’. Many cameras allow you to bring an optional grid up onto your viewfinder. This will divide your screen into three equal segments both vertically and horizontally. Try to make sure your eyes line up with the top line, and if you’re going to be off to one side then make sure you’re on one of the vertical lines. This will ensure your image is visually appealing.
If you want to add text later, it’s a good idea to be off to one side.
Including your face is important for most types of YouTube videos. People are attracted to eye contact and are more likely to click on thumbnails that feature a face. Gamers might choose to use a picture of a video game character instead and it will have the same effect.
Some situations where it isn’t essential to include your face include tech reviews, where viewers will be more interested in seeing the product, and cooking videos where people are looking to be tempted by a yummy food pic.
#2. Add Text and/or Images
This part isn’t essential – in some cases, a photo is enough – but a lot of the thumbnails for the videos ranked highest in YouTube’s search results include either a couple of words of text, a simple graphic (i.e. an emoji), or both.
In some cases you might use text to make it clear what type of video you’ve made, i.e. ‘review’ or ‘tutorial’. It’s best to keep any text you use brief, but you could get a bit more descriptive and write something like ‘fall makeup tutorial’. Three words is probably the most you can get away with. Remember that your text will be shrunk down with the rest of your image; you need to make it big enough to read easily once it’s shrunk, and that means you don’t have a ton of room for text.
You should also avoid fonts that are harder to read. Fonts with a lot of curves can be harder to read, and you want to make sure you choose a color that stands out from your background. Yellow might work against black, but it probably won’t work against the beige wall of your sunny bedroom. Sans serif fonts tend to be best.
Another tactic used in successful thumbnails is to add small graphics, like emojis or small images (i.e. pumpkins for a Halloween video), which are related to your video’s content. As with text, you don’t want to overload your thumbnail with images, but they’re a great way to add something eye-catching that’s a bit different from competing thumbnails.
2. The Emotional Laser (Background + Face Reacting)
One increasingly popular style of YouTube thumbnail is what we’re going to call the ‘Emotional Laser’. It’s bright (like, blindingly bright), it communicates a clear feeling, and it creates high expectations for how exciting the video’s content is going to be.
The three main elements of the Emotional Laser thumbnail are a background (usually bright), your face on the right wearing an over-pronounced expression, and either the thing your expression is in reaction to (i.e. food, a product, the topic of your video in text) or reinforcement of your emotion (i.e an emoji or question marks) on the left.


#1. Ham It Up (Take Your Reaction Photo)
Take a high-quality photograph of yourself conveying strong emotion. Generally, you want to look extremely excited, disgusted, angry, or shocked depending on the theme of the video.
If there’s an object you want to include in your thumbnail, like a product you’ll be talking about, then it’s a good idea to hold it for this photo. Hold it to one side of your head, turn towards it slightly (but not so much that the camera can only see the side of your face) and put on the expression that’s supposed to be a reaction to the object.
It can be a good idea to take this photo in front of a solid color so you can remove the background easily with chroma key.
#2. Choose Your Background
Your background might be scenery, a solid color, or even the room you filmed the video in. Light or bright colors are popular. Make sure there’s nothing that will distract from your expression. If your background is a room, or anything else where there could be things like pictures hanging, you may want to add a blur effect in the next step.
#3. Put It Together
In your thumbnail maker or a program like Photoshop, you’ll need to put your photo and your background together. This will work differently depending on what program you use. If your program has a chroma key tool and your reaction photo was taken against a solid color then you can make that solid color transparent.
What if I don’t have a separate background? If you don’t have a background you want to use, but you still want your reaction to stand out the same way it would if you did, then you can use your photo editor’s blur tool to turn the normal background of your photo into something you can pop-out from.
#4. Add Extras (Text, Emojis, etc.)
If instead of an object you plan to fill the other side of your thumbnail with text, question marks, emojis, or some other graphic element then now is the time to add it.
Part 2: How to Upload a YouTube Thumbnail
When you upload a new video to YouTube, you will see a Custom thumbnail option under Video thumbnails after your upload is complete.
If you want to add a custom thumbnail to a video that’s already up, that’s easy too.
- Go to your Video Manager in the Creator Studio.
- Find the video you want to change the thumbnail for and click Edit next to it.
- Click Custom thumbnail on the right of the preview screen.
- Upload your thumbnail and click Save changes.
Remember when you’re uploading custom thumbnails that you need to use a .JPG, .GIF, .BMP, or .PNG image with an aspect ratio of 16:9 and that your file size has to be under 2MB.
YouTube recommends that thumbnail images have a resolution of 1280x720px, and you cannot upload an image with a width of less than 640 pixels.
Make sure that all of your thumbnails adhere to YouTube’s Community guidelines. Anything sexually suggestive, violent, or otherwise graphic could result in your video being age-restricted.
Part 3: YouTube Thumbnail Makers
You don’t have to go out and buy a photo editor like Photoshop to make custom video thumbnails (although it’s a good thing to use if you already have it). Here are two free online programs you can use instead:
Canva is an intuitive option with templates for Thumbnails, Channel Art, and other social media graphics. There are stock photos and graphics provided, but not all of them are free (paid options cost $1 each). Canva’s templates do tend to include paid resources, so you may want to use them mostly for their layouts or as inspiration and replace everything they provide with your own images.
Generally, using Canva is as easy as dragging and dropping things where you want them. You’ll be able to set the dimensions for your project so the image you export is a perfect size. Adding text and changing the size, font, or color is easy too.
Adobe Spark also has templates for channel art, and it’s also very easy to use. The first time you use it helpful notes will pop up to guide you through the process. Using templates is especially simple because you just click on the elements in the pre-made thumbnail and replace them with your own photos/text.
You can make changes to the colors in your Spark thumbnail easily by selecting a new color scheme or filter. You can even toggle through layouts easily. When you choose a new layout, Spark will rearrange all the pieces of your current thumbnail to align with the new layout so you can quickly see what it looks like instead of having to rebuild.
Click to check more YouTube thumbnail makers
Part 4: How to Make Thumbnails That Get Clicks (Without Clickbait!)
Here are the top 10 best practices for creating effective YouTube thumbnails:
#1. Show What Your Video Is About
Being mysterious and clickbaity can get you views, if you’re already big. For small YouTubers, it pays off to be clear about your video’s topic. You want people to click who want to watch the actual content of your video. Even if you manage to get some clicks by being mysterious, you’ll probably end up with low viewer retention because people are clicking away when they realize your video isn’t what they were looking for. That will make YouTube’s algorithm rank your video lower, and then even fewer people will find it.
If your video is a product review, show the product in the thumbnail and maybe even write ‘review’ on it. If your video is a makeup tutorial, show your face with the finished makeup and maybe even include pictures of the products you used. People want to know what they’re clicking on before they click.
#2. Use a Consistent Layout
As you grow, you’ll want people to be able to see one of your thumbnails and instantly know it’s yours. Building a recognizable brand is about consistency. Try to stick with one basic layout for all of your videos. You can still customize every individual thumbnail by using different facial expressions and different graphics, but try to use similar backgrounds, fonts, and general layouts (i.e. you to the right of the thumbnails, text to the left) over and over.
#3. Use Your Face
Why should people want to watch your videos? If the answer is ‘because I can teach them to create delicious food’ or ‘because they want to learn about the latest iPhone’ then your thumbnail should include that food or that iPhone.
If part of the reason people want to watch your videos is you – your personality and your sense of humor – then you should be in your thumbnail.
Viewers who are on YouTube because they like seeing a creator’s personality like to feel the presence of that personality in the video thumbnail, and eye contact naturally draws attention and clicks.
#4. Add Small Graphics
Adding small graphics, like emojis or hearts, to your thumbnail can help you stand out in a couple different ways. First, if they’re being compared to thumbnails that are just screenshots from the video, your thumbnails will look a lot more polished. Second, they’ll add a splash of color which can draw eyes to your video in a search where other thumbnails are not using those same colors.
#5. Your Text Should Be Huge
Your thumbnail will end up being a fraction of the size it is while you’re creating it in your thumbnail maker, and that means that any text you use will end up being shrunk down. You could probably type a six-word sentence in a size 18 font and have it look fine while you’re making your thumbnail, but after you upload it there’s no way people will be able to read it at a glance.
Aim for a huge font size, and 3 words or less (so your thumbnail doesn’t end up looking crowded).
#6. Check Out The Competition
Type your video’s title or topic into the search engine on YouTube and look at the thumbnails for the videos that come up. These are your competition. You want to make a thumbnail that is similar enough to what comes up that viewers know it’s on the same topic, but different enough that it stands out.
Generally, if most of the thumbnails have the same layout, you’ll want to mimic that layout. Where you can break from the crowd is in the colors, fonts, and graphics you use.
Part 5: Animated YouTube Thumbnails
Whether or not you upload a custom thumbnail to YouTube, YouTube’s A.I will choose what it thinks are the 3 juiciest seconds of your video (you cannot choose for yourself) and play them as a GIF-like animation when people mouseover your video thumbnails.
As of now, this only works in the Google Chrome desktop browser. Videos have to be at least 30 seconds long to get moving thumbnails.
Alright, now that you know everything about YouTube thumbnails, go make one! Tell us in the comments what you’re going to do to make your video thumbnails stand out.
Touch Up YouTube Videos with Effects & Elements in Filmora
As one of the most widely used video editing software in YouTube video editing, Filmora provides lots of templates and effects with an intuitive interface. Download the free trial version and get started now.
Richard Bennett
Richard Bennett is a writer and a lover of all things video.
Follow @Richard Bennett
Richard Bennett
Oct 26, 2023• Proven solutions
Search for any topic on YouTube and you’ll find thousands of videos. How do you decide which of them to watch? Thumbnails play a major role in what viewers decide to click on. They’re often more important than video titles.
Viewers click on thumbnails that both standout and feel relevant to their search. Your task when it comes to creating YouTube thumbnails is to make something that does both of those things while also maintaining your personal style.
- How to Make a YouTube Thumbnail
- How to Upload a YouTube Thumbnail
- YouTube Thumbnail Makers
- How to Make Thumbnails that Get Clicks (Without Clickbait!)
- Animated YouTube Thumbnails
Part 1: How to Make a YouTube Thumbnail
In order to create a custom video thumbnail, you’ll need a program to put it together in. You can use an image editing program like Photoshop if you have one, but if you don’t you can check out these free thumbnail makers.
Here are some examples of popular thumbnail styles.
1. The Classic Thumbnail (Photo or Screenshot)
A photo that shows what happens in your video – whether that means the finished ‘look’ from your makeup tutorial or you posing in front of the landmark you shot your travel vlog in front of – is a great way to let viewers know what to expect. While curiosity can be a big motive behind clicking on a video thumbnail (or anything online), when people have searched for a specific topic they want to be convinced that your video has what they’re looking for.
#1. Choose Your Photo
To start off, either choose a still frame from your video or take a photograph while you’re still set up from your video. A separate photograph is usually a better idea because your video editor might not be able to export a high-quality snapshot, and also because you’re able to choose your facial expression.
Aim to make this shot a close-up or medium close-up and make sure you’re either in the center of the screen or off to one side, as per the ‘rule of thirds’. Many cameras allow you to bring an optional grid up onto your viewfinder. This will divide your screen into three equal segments both vertically and horizontally. Try to make sure your eyes line up with the top line, and if you’re going to be off to one side then make sure you’re on one of the vertical lines. This will ensure your image is visually appealing.
If you want to add text later, it’s a good idea to be off to one side.
Including your face is important for most types of YouTube videos. People are attracted to eye contact and are more likely to click on thumbnails that feature a face. Gamers might choose to use a picture of a video game character instead and it will have the same effect.
Some situations where it isn’t essential to include your face include tech reviews, where viewers will be more interested in seeing the product, and cooking videos where people are looking to be tempted by a yummy food pic.
#2. Add Text and/or Images
This part isn’t essential – in some cases, a photo is enough – but a lot of the thumbnails for the videos ranked highest in YouTube’s search results include either a couple of words of text, a simple graphic (i.e. an emoji), or both.
In some cases you might use text to make it clear what type of video you’ve made, i.e. ‘review’ or ‘tutorial’. It’s best to keep any text you use brief, but you could get a bit more descriptive and write something like ‘fall makeup tutorial’. Three words is probably the most you can get away with. Remember that your text will be shrunk down with the rest of your image; you need to make it big enough to read easily once it’s shrunk, and that means you don’t have a ton of room for text.
You should also avoid fonts that are harder to read. Fonts with a lot of curves can be harder to read, and you want to make sure you choose a color that stands out from your background. Yellow might work against black, but it probably won’t work against the beige wall of your sunny bedroom. Sans serif fonts tend to be best.
Another tactic used in successful thumbnails is to add small graphics, like emojis or small images (i.e. pumpkins for a Halloween video), which are related to your video’s content. As with text, you don’t want to overload your thumbnail with images, but they’re a great way to add something eye-catching that’s a bit different from competing thumbnails.
2. The Emotional Laser (Background + Face Reacting)
One increasingly popular style of YouTube thumbnail is what we’re going to call the ‘Emotional Laser’. It’s bright (like, blindingly bright), it communicates a clear feeling, and it creates high expectations for how exciting the video’s content is going to be.
The three main elements of the Emotional Laser thumbnail are a background (usually bright), your face on the right wearing an over-pronounced expression, and either the thing your expression is in reaction to (i.e. food, a product, the topic of your video in text) or reinforcement of your emotion (i.e an emoji or question marks) on the left.
#1. Ham It Up (Take Your Reaction Photo)
Take a high-quality photograph of yourself conveying strong emotion. Generally, you want to look extremely excited, disgusted, angry, or shocked depending on the theme of the video.
If there’s an object you want to include in your thumbnail, like a product you’ll be talking about, then it’s a good idea to hold it for this photo. Hold it to one side of your head, turn towards it slightly (but not so much that the camera can only see the side of your face) and put on the expression that’s supposed to be a reaction to the object.
It can be a good idea to take this photo in front of a solid color so you can remove the background easily with chroma key.
#2. Choose Your Background
Your background might be scenery, a solid color, or even the room you filmed the video in. Light or bright colors are popular. Make sure there’s nothing that will distract from your expression. If your background is a room, or anything else where there could be things like pictures hanging, you may want to add a blur effect in the next step.
#3. Put It Together
In your thumbnail maker or a program like Photoshop, you’ll need to put your photo and your background together. This will work differently depending on what program you use. If your program has a chroma key tool and your reaction photo was taken against a solid color then you can make that solid color transparent.
What if I don’t have a separate background? If you don’t have a background you want to use, but you still want your reaction to stand out the same way it would if you did, then you can use your photo editor’s blur tool to turn the normal background of your photo into something you can pop-out from.
#4. Add Extras (Text, Emojis, etc.)
If instead of an object you plan to fill the other side of your thumbnail with text, question marks, emojis, or some other graphic element then now is the time to add it.
Part 2: How to Upload a YouTube Thumbnail
When you upload a new video to YouTube, you will see a Custom thumbnail option under Video thumbnails after your upload is complete.
If you want to add a custom thumbnail to a video that’s already up, that’s easy too.
- Go to your Video Manager in the Creator Studio.
- Find the video you want to change the thumbnail for and click Edit next to it.
- Click Custom thumbnail on the right of the preview screen.
- Upload your thumbnail and click Save changes.
Remember when you’re uploading custom thumbnails that you need to use a .JPG, .GIF, .BMP, or .PNG image with an aspect ratio of 16:9 and that your file size has to be under 2MB.
YouTube recommends that thumbnail images have a resolution of 1280x720px, and you cannot upload an image with a width of less than 640 pixels.
Make sure that all of your thumbnails adhere to YouTube’s Community guidelines. Anything sexually suggestive, violent, or otherwise graphic could result in your video being age-restricted.
Part 3: YouTube Thumbnail Makers
You don’t have to go out and buy a photo editor like Photoshop to make custom video thumbnails (although it’s a good thing to use if you already have it). Here are two free online programs you can use instead:
Canva is an intuitive option with templates for Thumbnails, Channel Art, and other social media graphics. There are stock photos and graphics provided, but not all of them are free (paid options cost $1 each). Canva’s templates do tend to include paid resources, so you may want to use them mostly for their layouts or as inspiration and replace everything they provide with your own images.
Generally, using Canva is as easy as dragging and dropping things where you want them. You’ll be able to set the dimensions for your project so the image you export is a perfect size. Adding text and changing the size, font, or color is easy too.
Adobe Spark also has templates for channel art, and it’s also very easy to use. The first time you use it helpful notes will pop up to guide you through the process. Using templates is especially simple because you just click on the elements in the pre-made thumbnail and replace them with your own photos/text.
You can make changes to the colors in your Spark thumbnail easily by selecting a new color scheme or filter. You can even toggle through layouts easily. When you choose a new layout, Spark will rearrange all the pieces of your current thumbnail to align with the new layout so you can quickly see what it looks like instead of having to rebuild.
Click to check more YouTube thumbnail makers
Part 4: How to Make Thumbnails That Get Clicks (Without Clickbait!)
Here are the top 10 best practices for creating effective YouTube thumbnails:
#1. Show What Your Video Is About
Being mysterious and clickbaity can get you views, if you’re already big. For small YouTubers, it pays off to be clear about your video’s topic. You want people to click who want to watch the actual content of your video. Even if you manage to get some clicks by being mysterious, you’ll probably end up with low viewer retention because people are clicking away when they realize your video isn’t what they were looking for. That will make YouTube’s algorithm rank your video lower, and then even fewer people will find it.
If your video is a product review, show the product in the thumbnail and maybe even write ‘review’ on it. If your video is a makeup tutorial, show your face with the finished makeup and maybe even include pictures of the products you used. People want to know what they’re clicking on before they click.
#2. Use a Consistent Layout
As you grow, you’ll want people to be able to see one of your thumbnails and instantly know it’s yours. Building a recognizable brand is about consistency. Try to stick with one basic layout for all of your videos. You can still customize every individual thumbnail by using different facial expressions and different graphics, but try to use similar backgrounds, fonts, and general layouts (i.e. you to the right of the thumbnails, text to the left) over and over.
#3. Use Your Face
Why should people want to watch your videos? If the answer is ‘because I can teach them to create delicious food’ or ‘because they want to learn about the latest iPhone’ then your thumbnail should include that food or that iPhone.
If part of the reason people want to watch your videos is you – your personality and your sense of humor – then you should be in your thumbnail.
Viewers who are on YouTube because they like seeing a creator’s personality like to feel the presence of that personality in the video thumbnail, and eye contact naturally draws attention and clicks.
#4. Add Small Graphics
Adding small graphics, like emojis or hearts, to your thumbnail can help you stand out in a couple different ways. First, if they’re being compared to thumbnails that are just screenshots from the video, your thumbnails will look a lot more polished. Second, they’ll add a splash of color which can draw eyes to your video in a search where other thumbnails are not using those same colors.
#5. Your Text Should Be Huge
Your thumbnail will end up being a fraction of the size it is while you’re creating it in your thumbnail maker, and that means that any text you use will end up being shrunk down. You could probably type a six-word sentence in a size 18 font and have it look fine while you’re making your thumbnail, but after you upload it there’s no way people will be able to read it at a glance.
Aim for a huge font size, and 3 words or less (so your thumbnail doesn’t end up looking crowded).
#6. Check Out The Competition
Type your video’s title or topic into the search engine on YouTube and look at the thumbnails for the videos that come up. These are your competition. You want to make a thumbnail that is similar enough to what comes up that viewers know it’s on the same topic, but different enough that it stands out.
Generally, if most of the thumbnails have the same layout, you’ll want to mimic that layout. Where you can break from the crowd is in the colors, fonts, and graphics you use.
Part 5: Animated YouTube Thumbnails
Whether or not you upload a custom thumbnail to YouTube, YouTube’s A.I will choose what it thinks are the 3 juiciest seconds of your video (you cannot choose for yourself) and play them as a GIF-like animation when people mouseover your video thumbnails.
As of now, this only works in the Google Chrome desktop browser. Videos have to be at least 30 seconds long to get moving thumbnails.
Alright, now that you know everything about YouTube thumbnails, go make one! Tell us in the comments what you’re going to do to make your video thumbnails stand out.
Touch Up YouTube Videos with Effects & Elements in Filmora
As one of the most widely used video editing software in YouTube video editing, Filmora provides lots of templates and effects with an intuitive interface. Download the free trial version and get started now.
Richard Bennett
Richard Bennett is a writer and a lover of all things video.
Follow @Richard Bennett
Also read:
- In 2024, 7 Comedy YouTube Video Ideas That Only Funny People Are Allowed to Try
- Live Google Meet on YouTube – Streaming Tutorial for Beginners
- 2024 Approved Boosting YouTube Productions Best Mac MP4 Editors Guide
- [New] Charting the Course to YouTube Success – Top 5 Strategies Inside
- In 2024, Crafting Emotional Impact in Personal YouTube Content
- [New] Eradicating YouTube Content in a Device-Friendly Way
- [New] Creating a Memorable and Unique Moniker for Your Filmora Content
- [New] DIY Tips to Cut Unwanted Sounds From Your Videos
- From Zero to YouTube Creating a Stellar New Chanel
- 2024 Approved Engaging Audiences Triad of Effective Storytelling
- What Are the Laws Around YouTube Video Capture?
- Thriving on YouTube Using Creative Studio Tools
- Charting Out Your Audience YouTube's Blueprint for 2024
- Leading 8 Linux Editors for Media Professionals
- From YouTube to Studio Quality Free Converters for WAV Format
- Essential Tech for New Channel Launches
- 2024 Approved Captivating Audiences Adopting YouTube Vlogger Charisma
- Stepwise Instructions for Enhancing YouTube Clips in WMM
- [Updated] Accelerated Sizing YouTube Content for MACs
- In 2024, Crafting Shareable Moments A Guide to Enhanced Viewership in 15-Second Videos
- Subscriber Growth and Its Impact on YouTube Success
- Dispelling Darkness, Enhancing Youtube Views
- Decrypting YouTube Live Thumbnails for Success for 2024
- Hastened Steps for Clear Background Filming Success
- [Updated] Captivating Audiences with Cross-Platform Multistreaming on Youtube and Twitch
- Initiating Your Sporty Online Presence with Mac
- Achieve Impact Innovative iMovie Techniques for YouTube Startups
- A Novice's Roadmap to YouTube Traffic Success
- 2024 Approved Building Custom Auto Subscribe Hyperlink for Channels
- 2024 Approved Calculating YouTube's Income Potential with CPM Rates
- 2024 Approved Enhancing Viewership with Informative YouTube Video Captions
- A Practical Guide To Applying Creative Commons Rights for 2024
- Engage and Inspire Audiences Professional-Level Tips for YouTube Edits
- Affordable Techniques to Enhance Written Content with Media
- In 2024, Ensuring Long-Term YouTube Success with Creative Commons Mainteninas
- Infuse Thumbnails Unforgettable Scenes
- [Updated] 2024 | How to Make a YouTube Intro Video?
- [Updated] Engage Audiences on All Sides Live 360-Degree Video Broadcasting for YouTube
- Unlock Creativity Idea-Driven YouTube Channel Titles
- Deciphering the Art of Personalized Playlist Curation for YouTube
- Crafting the Quintessential Thumbnails for Live Video Success
- Cash Flow Strategies Enrolling in YouTube's 2024 Membership Plan
- In 2024, Essential Tips for YouTube Audio Optimization
- In 2024, Craft Compelling Videos Utilize No-Cost Templates & Samples
- Premiere's Role in Your YouTube Creation Process
- Sony Vegas for the Aspiring YouTube Editor A Comprehensive Overview
- Navigate the Quickest-Growing YT Havens for Mental Brightness
- 2024 Approved Enigma of the Edgers Video Magic at Its Finest
- Strategies for Soaring Up the YouTube Ranks List
- In 2024, How to Fake GPS on Android without Mock Location For your Samsung Galaxy A05s | Dr.fone
- In 2024, Top 7 Skype Hacker to Hack Any Skype Account On your Apple iPhone 7 Plus | Dr.fone
- All You Need To Know About Mega Greninja For Apple iPhone 7 Plus | Dr.fone
- 11 Proven Solutions to Fix Google Play Store Not Working Issue on Xiaomi Redmi 13C 5G | Dr.fone
- In 2024, Dissecting SplitCam A Video Recorder Standout Analysis
- Looking For A Location Changer On Samsung Galaxy A23 5G? Look No Further | Dr.fone
- In 2024, How Can You Transfer Files From Xiaomi 13 Ultra To iPhone 15/14/13? | Dr.fone
- 2024 Approved Comprehensively Ranked Win 11 HD Cameras & Recorders
- In 2024, Mastering PS2 Replay on Android Devices - Top Picks
- [New] A Curated List of Happiness-Crying Combo on Instagram Pages
- Updated Chic Ambiance Soundtrack for Online Video Creations for 2024
- [Updated] How to Rectify Silent Streams with OBS
- Top 10 Fingerprint Lock Apps to Lock Your Vivo Y55s 5G (2023) Phone
- Unlocking Made Easy The Best 10 Apps for Unlocking Your Samsung Galaxy A34 5G Device
- The Ultimate Guide to Make a Text Collage
- 2024 Approved Invisible Watch Top 5 Stealthy Story Apps
- In 2024, How to Make the Most of Your Apple iPhone 6 Lock Screen with Notifications? | Dr.fone
- [New] Unveiling ITop A Screencast Game-Changer for 2024
- [Updated] In 2024, Best Screen Recording Tips
- Water Wonders Leading Fluid Game Selections for 2024
- In 2024, The Best Methods to Unlock the iPhone Locked to Owner for iPhone 8
- 2024 Approved Exclusive ScreenFlow Examination for Mac Users
- In 2024, 10 Fake GPS Location Apps on Android Of your Oppo A2 | Dr.fone
- Gamer's Choice The Best of the Best 4K TVs
- 2024 Approved Unleashing Your Brand Potential with Advanced Insights on Instagram Data
- Essential iPhone & Android Video Editor Choices
- 2024 Approved Seeking Authentic PS2 Play? Check Out the 5 Best Android Simulators!
- Updated Battle of the Giants Adobe Premiere Pro vs After Effects for Visual Storytelling
- What You Need To Know To Improve Your Oppo A58 4G Hard Reset | Dr.fone
- [New] Deciphering the Maximum Duration for Instagram Videos for 2024
- Simple and Free The Best Online Tone Creators
- In 2024, How to Fix Locked Apple ID from Apple iPhone 6
- Title: "In 2024, Enchanting Edit YouTube's Ultimate Magic Tricks"
- Author: Steven
- Created at : 2024-05-25 19:44:56
- Updated at : 2024-05-26 19:44:56
- Link: https://youtube-clips.techidaily.com/in-2024-enchanting-edit-youtubes-ultimate-magic-tricks/
- License: This work is licensed under CC BY-NC-SA 4.0.
