
:max_bytes(150000):strip_icc()/ImagefromiOS1-d1c97c13048a4fc88627e315957d98d8.jpg)
In 2024, Effortless Free Extraction of YouTube Desktops
Effortless Free Extraction of YouTube Desktops
10 Free YouTube Thumbnail Downloaders/Savers Online-Download YouTube Thumbnail

Shanoon Cox
Mar 27, 2024• Proven solutions
YouTube thumbnails can be required for download for various reasons ranging from personal to professional. Some thumbnails are very attractive, and users might want to download YouTube thumbnail to use as wallpaper or as inspiration. Whereas other times, thumbnails are required to be added to blogs.
In either case, you can take help from a YouTube thumbnail downloader that can save your day. As the name suggests, a YouTube thumbnail saver can let you save any thumbnail you like, and sometimes you can also custom select the quality. For your ease, we have rounded up the best tools to download YouTube thumbnail.
Let’s dive in.
- 10 Free Online YouTube Thumbnail Downloaders/Savers
- Bonus Tip: The Best YouTube Video Editor-Wondershare Filmora
10 Free Online YouTube Thumbnail Downloaders/Savers
There are tons of tools on the web that let you download YouTube thumbnail. But, not all of them are reliable and secure. Choosing the best YouTube thumbnail downloaders that offer all the features you are looking for can be time taking and tedious. So, we are here to save the day by listing the top YouTube thumbnail saver tools.
1. ThumbnailSave
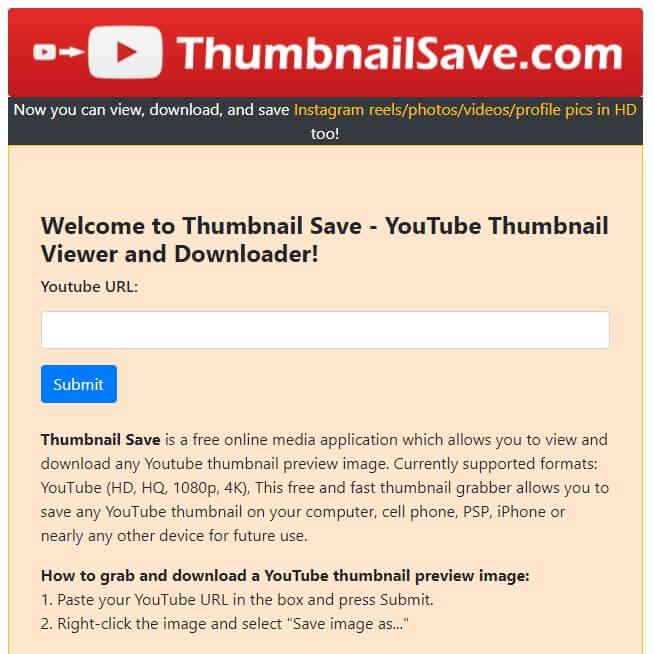
As a free YouTube thumbnail downloader, ThumbnailSave is frequently used by people. It enables users to download YouTube thumbnail without any hassle. There a variety of resolutions available, and you can choose the quality you like, ranging from HD to 360p. The simple interface of this downloader further makes it an excellent tool. All you have to do is enter the URL link and click Save As after the thumbnail is loaded. Also, this versatile YouTube thumbnail downloader works on almost every kind of device. Whether you are using a desktop PC or an iPhone, ThumbnailSave is compatible with all.
2. YouTube Thumbnail Grabber
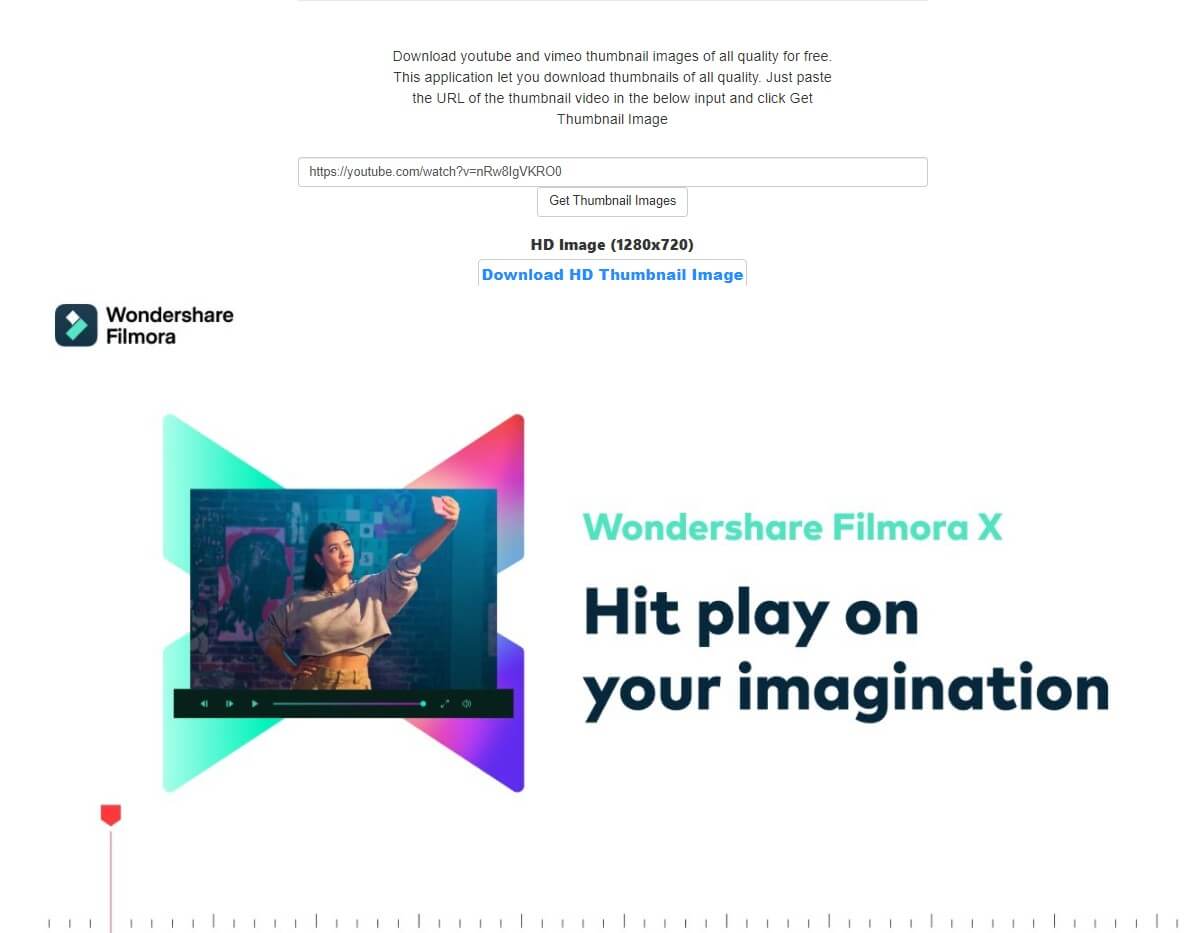
Another powerful and free YouTube thumbnail downloader is this one, which can download both YouTube and Vimeo thumbnails. After you copy-paste the link of the video whose thumbnail you wish to save, you can press on Get Thumbnail Images. After that, you can choose the quality of the thumbnail as per your requirements. Moreover, you can also get a free extension of this YouTube thumbnail saver on both Chrome and Firefox browsers. This will allow fast and easy use of the YouTube thumbnail downloader. What’s more, unlike other downloaders, this one doesn’t bombard the user with pesky ads.
3. Youthumbnail.com
YouThumbnail, also known as YT YouTube thumbnail downloader, is a robust tool that allows users to quickly download YouTube thumbnail absolutely free of cost. It requires no installation. Three different sizes, namely medium, small, and HD, are available for download. By clicking on the desired quality, you can quickly and safely download YouTube thumbnail. Also, there is no limit to the number of downloads. Better yet, there are multiple languages available. So, a diverse population can use this online YouTube thumbnail saver with great ease.
4. YouTube-thumbnails.com

As a free and open for all YouTube thumbnail saver, this one lets users get the thumbnail of their choice in the quality of their choice. Using this YouTube thumbnail downloader won’t cost a penny, no matter how many thumbnails are downloaded. It also has a very simple user interface. Just enter the YouTube video link and press Find. The qualities of the thumbnail supported by this tool are MQ 320x180, HQ 480x360, SD 640x480, and HD 1280x720 , and will be almost instantly displayed. Click on the quality you wish to save locally, and your download will start immediately.
5. YT Thumbnail Downloader
YT Thumbnail Downloader is an excellent and lightning-fast tool to download YouTube thumbnail. It poses no limitations or charges on the use. Moreover, you can custom select the resolution of the thumbnail before you click to save. This YouTube thumbnail downloader prides itself on being the fastest in the market. The thumbnail processing time is just 2 seconds, after which you can download YouTube thumbnail. Besides, this YouTube thumbnail saver is safe and secure as it doesn’t display tons of ads and also does not save the user’s data.
6. BoingBoing
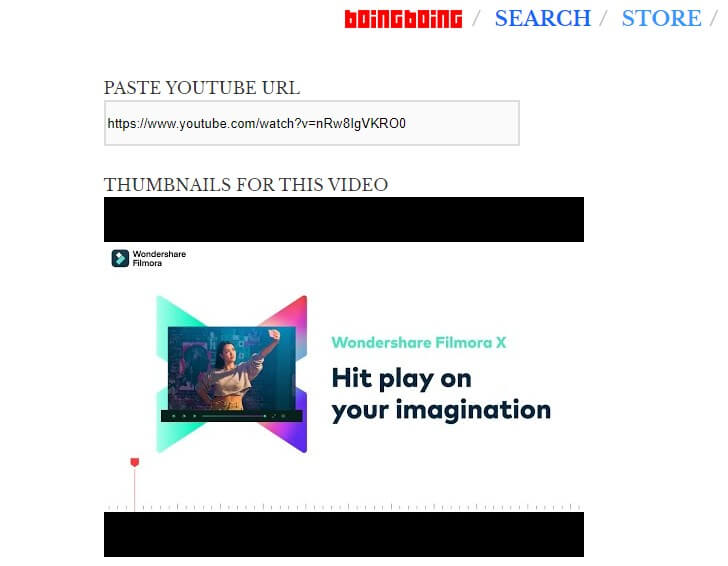
BoingBoing is also a free and very easy-to-use YouTube thumbnail saver. All you have to do is paste the URL you copied, and this YouTube thumbnail downloader will take care of the rest. There is no button to press to start the process. The thumbnails are almost instantly loaded. However, BoingBoing displays a lot of annoying ads. Also, the different qualities that are displayed don’t mention the size, and you will have to press and hold the image to download. All in all, this YouTube thumbnail saver is worth your time and effort as it is fast at what it does.
7. Get YouTube Thumbnail
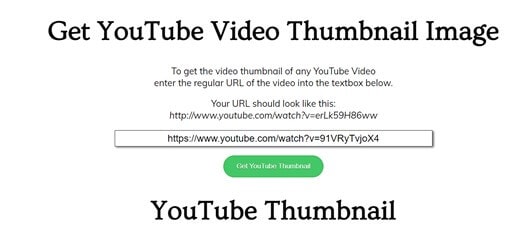
Get YouTube Thumbnail is a very simple tool to download YouTube thumbnail. It comes with no extra features. But, it is widely used due to the fact that it is a very straightforward YouTube thumbnail downloader. It doesn’t even display intrusive ads or pop-ups. But, the downside is that the quality options are limited. There are only 2 qualities available for download, and no size is mentioned on them. To download YouTube thumbnail, you will have to right-click and open the image URL created and then save it in the next tab.
8. YouTube Thumbnail Image
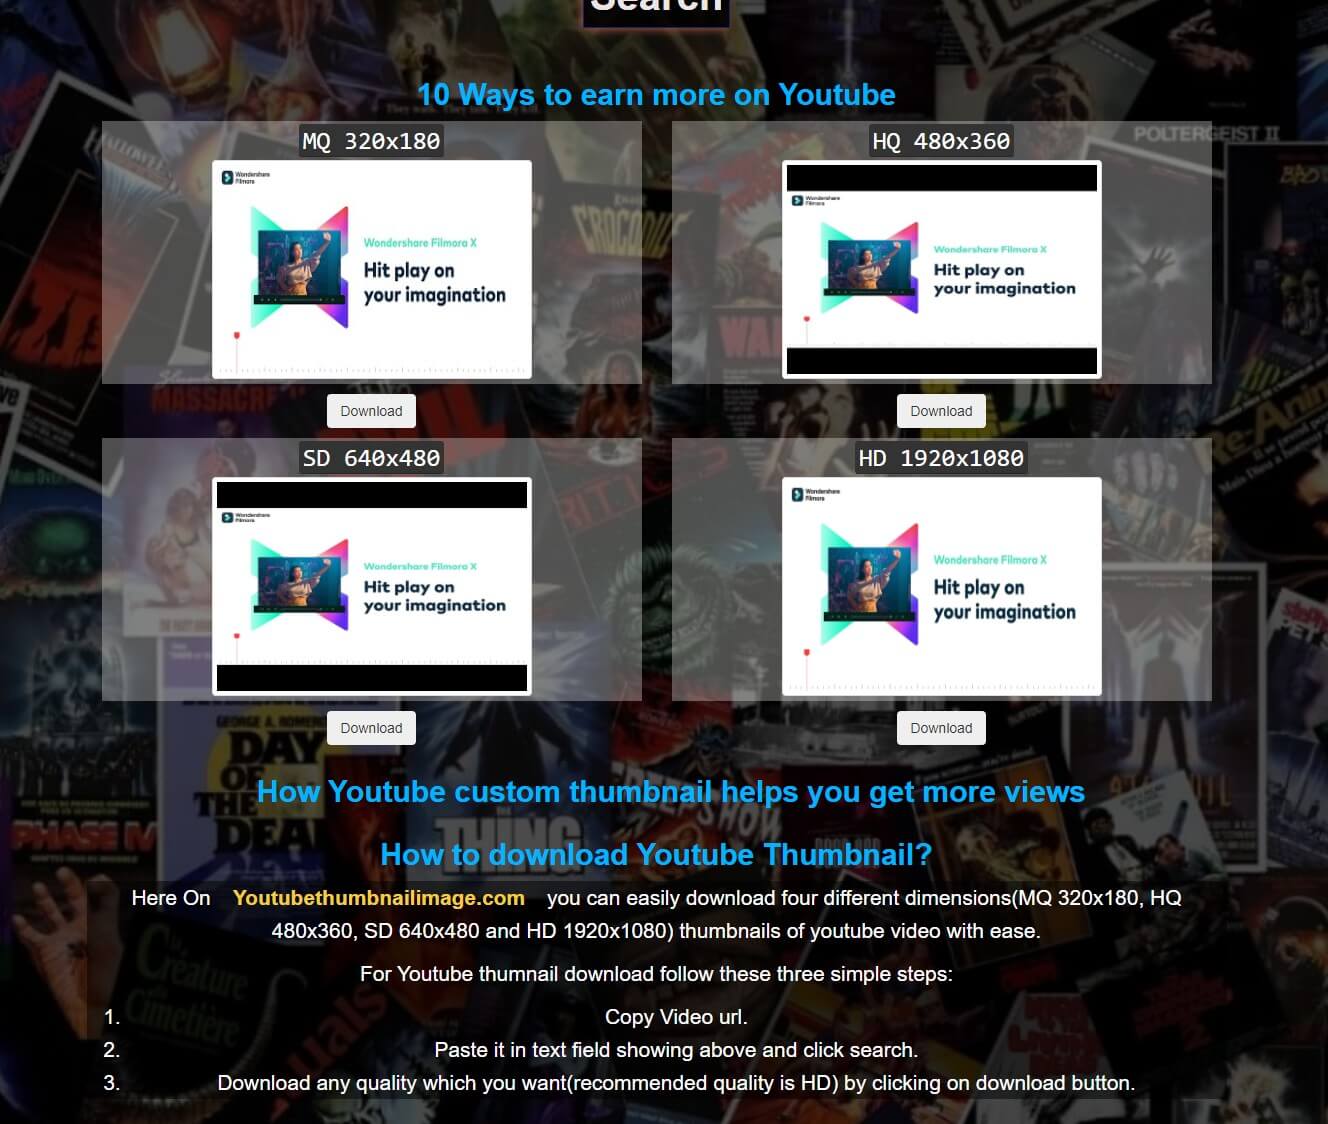
A fast and easy way to download YouTube thumbnail is by using this powerful tool available online. Without any hassle of downloading or registering an account, you can easily copy-paste the link of your favorite video and click on Search. You will be displayed with four qualities such as 1920x1080 (HD), 640X480 (SD), 480X360 (HQ), and 320x180 (MQ). This feature makes it a versatile YouTube thumbnail downloader as users can choose the quality depending on the space they have available. Other than this, the YouTube thumbnail saver offers round-the-clock customer support. So, in case you face any technical issue or are unable to download YouTube thumbnail, this tool will be present for prompt assistance.
9. Thumbnail-download.com
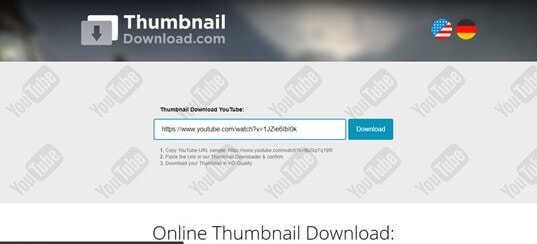
Another addition to the list of top YouTube thumbnail downloader tools is this one. Like the other tools, this one is also free for use and is renowned for being super fast. No matter which YouTube video you want to save the thumbnail from, this tool will allow you easy access to download it in HD quality. The website is SSL encrypted, so the user’s data is protected, and thus this is a safe site to download YouTube thumbnail. What’s more, this YouTube thumbnail downloader is robust. Although there a few ads displayed, they aren’t very intrusive and do not disrupt the user experience.
Bonus Tip: The Best YouTube Video Editor-Wondershare Filmora
With Wondershare Filmora, you can create captivating videos by using one-click tools. This powerful yet intuitive video editor is loaded with various high-end editing features that can help you add striking and cinematic effects to your videos. Motion tracking, color matching, and even keyframing are made easy through Filmora.
1.After you download and install Filmora on your PC, launch it. Then, click on File and tap on Import Media Files.

2.The Audio tab of Filmora offers a variety of music. Just click on the plus icon on any audio to add it to your video as background music. Cut the extra audio part to match your video length.
3.From the Titles tab, you can choose a preset template and then personalize it by double-clicking the title you have added to the timeline.

4.The Transition tab also displays multiple types of dynamic transitions; click to add to the timeline and then drag to adjust the duration of the effect.
5.You can also choose an aesthetic filter or overlay from the Effects tab.
6.The Elements tab features numerous categories like Love, Journey, Badges, and many more. You can add these elements to your video and then adjust their size, rotation, opacity, and much more.
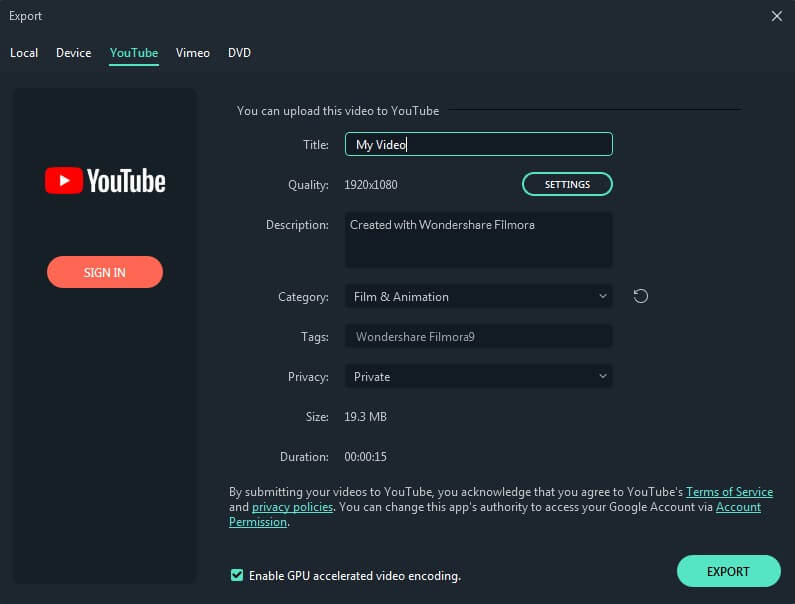
7.Lastly, you can click on Export and either save the video locally or share it directly on social media.
Conclusion
Finally, you can download YouTube thumbnail at the site of your choice. Whether you want to download it in HD or in a lower quality, one of the YouTube thumbnail downloaders mentioned above will be able to fulfill your requirements.
No more browsing through unsecured and ad-laden sites to find a reliable YouTube thumbnail downloader. We have hand-picked, tried, and tested all these tools. All you have to do is take your pick of the YouTube thumbnail saver that best fits your needs. Any tool you choose, you will be able to download YouTube thumbnail with ease and security.
Shanoon Cox
Shanoon Cox is a writer and a lover of all things video.
Follow @Shanoon Cox
Shanoon Cox
Mar 27, 2024• Proven solutions
YouTube thumbnails can be required for download for various reasons ranging from personal to professional. Some thumbnails are very attractive, and users might want to download YouTube thumbnail to use as wallpaper or as inspiration. Whereas other times, thumbnails are required to be added to blogs.
In either case, you can take help from a YouTube thumbnail downloader that can save your day. As the name suggests, a YouTube thumbnail saver can let you save any thumbnail you like, and sometimes you can also custom select the quality. For your ease, we have rounded up the best tools to download YouTube thumbnail.
Let’s dive in.
- 10 Free Online YouTube Thumbnail Downloaders/Savers
- Bonus Tip: The Best YouTube Video Editor-Wondershare Filmora
10 Free Online YouTube Thumbnail Downloaders/Savers
There are tons of tools on the web that let you download YouTube thumbnail. But, not all of them are reliable and secure. Choosing the best YouTube thumbnail downloaders that offer all the features you are looking for can be time taking and tedious. So, we are here to save the day by listing the top YouTube thumbnail saver tools.
1. ThumbnailSave
As a free YouTube thumbnail downloader, ThumbnailSave is frequently used by people. It enables users to download YouTube thumbnail without any hassle. There a variety of resolutions available, and you can choose the quality you like, ranging from HD to 360p. The simple interface of this downloader further makes it an excellent tool. All you have to do is enter the URL link and click Save As after the thumbnail is loaded. Also, this versatile YouTube thumbnail downloader works on almost every kind of device. Whether you are using a desktop PC or an iPhone, ThumbnailSave is compatible with all.
2. YouTube Thumbnail Grabber
Another powerful and free YouTube thumbnail downloader is this one, which can download both YouTube and Vimeo thumbnails. After you copy-paste the link of the video whose thumbnail you wish to save, you can press on Get Thumbnail Images. After that, you can choose the quality of the thumbnail as per your requirements. Moreover, you can also get a free extension of this YouTube thumbnail saver on both Chrome and Firefox browsers. This will allow fast and easy use of the YouTube thumbnail downloader. What’s more, unlike other downloaders, this one doesn’t bombard the user with pesky ads.
3. Youthumbnail.com
YouThumbnail, also known as YT YouTube thumbnail downloader, is a robust tool that allows users to quickly download YouTube thumbnail absolutely free of cost. It requires no installation. Three different sizes, namely medium, small, and HD, are available for download. By clicking on the desired quality, you can quickly and safely download YouTube thumbnail. Also, there is no limit to the number of downloads. Better yet, there are multiple languages available. So, a diverse population can use this online YouTube thumbnail saver with great ease.
4. YouTube-thumbnails.com
As a free and open for all YouTube thumbnail saver, this one lets users get the thumbnail of their choice in the quality of their choice. Using this YouTube thumbnail downloader won’t cost a penny, no matter how many thumbnails are downloaded. It also has a very simple user interface. Just enter the YouTube video link and press Find. The qualities of the thumbnail supported by this tool are MQ 320x180, HQ 480x360, SD 640x480, and HD 1280x720 , and will be almost instantly displayed. Click on the quality you wish to save locally, and your download will start immediately.
5. YT Thumbnail Downloader
YT Thumbnail Downloader is an excellent and lightning-fast tool to download YouTube thumbnail. It poses no limitations or charges on the use. Moreover, you can custom select the resolution of the thumbnail before you click to save. This YouTube thumbnail downloader prides itself on being the fastest in the market. The thumbnail processing time is just 2 seconds, after which you can download YouTube thumbnail. Besides, this YouTube thumbnail saver is safe and secure as it doesn’t display tons of ads and also does not save the user’s data.
6. BoingBoing
BoingBoing is also a free and very easy-to-use YouTube thumbnail saver. All you have to do is paste the URL you copied, and this YouTube thumbnail downloader will take care of the rest. There is no button to press to start the process. The thumbnails are almost instantly loaded. However, BoingBoing displays a lot of annoying ads. Also, the different qualities that are displayed don’t mention the size, and you will have to press and hold the image to download. All in all, this YouTube thumbnail saver is worth your time and effort as it is fast at what it does.
7. Get YouTube Thumbnail
Get YouTube Thumbnail is a very simple tool to download YouTube thumbnail. It comes with no extra features. But, it is widely used due to the fact that it is a very straightforward YouTube thumbnail downloader. It doesn’t even display intrusive ads or pop-ups. But, the downside is that the quality options are limited. There are only 2 qualities available for download, and no size is mentioned on them. To download YouTube thumbnail, you will have to right-click and open the image URL created and then save it in the next tab.
8. YouTube Thumbnail Image
A fast and easy way to download YouTube thumbnail is by using this powerful tool available online. Without any hassle of downloading or registering an account, you can easily copy-paste the link of your favorite video and click on Search. You will be displayed with four qualities such as 1920x1080 (HD), 640X480 (SD), 480X360 (HQ), and 320x180 (MQ). This feature makes it a versatile YouTube thumbnail downloader as users can choose the quality depending on the space they have available. Other than this, the YouTube thumbnail saver offers round-the-clock customer support. So, in case you face any technical issue or are unable to download YouTube thumbnail, this tool will be present for prompt assistance.
9. Thumbnail-download.com
Another addition to the list of top YouTube thumbnail downloader tools is this one. Like the other tools, this one is also free for use and is renowned for being super fast. No matter which YouTube video you want to save the thumbnail from, this tool will allow you easy access to download it in HD quality. The website is SSL encrypted, so the user’s data is protected, and thus this is a safe site to download YouTube thumbnail. What’s more, this YouTube thumbnail downloader is robust. Although there a few ads displayed, they aren’t very intrusive and do not disrupt the user experience.
Bonus Tip: The Best YouTube Video Editor-Wondershare Filmora
With Wondershare Filmora, you can create captivating videos by using one-click tools. This powerful yet intuitive video editor is loaded with various high-end editing features that can help you add striking and cinematic effects to your videos. Motion tracking, color matching, and even keyframing are made easy through Filmora.
1.After you download and install Filmora on your PC, launch it. Then, click on File and tap on Import Media Files.
2.The Audio tab of Filmora offers a variety of music. Just click on the plus icon on any audio to add it to your video as background music. Cut the extra audio part to match your video length.
3.From the Titles tab, you can choose a preset template and then personalize it by double-clicking the title you have added to the timeline.
4.The Transition tab also displays multiple types of dynamic transitions; click to add to the timeline and then drag to adjust the duration of the effect.
5.You can also choose an aesthetic filter or overlay from the Effects tab.
6.The Elements tab features numerous categories like Love, Journey, Badges, and many more. You can add these elements to your video and then adjust their size, rotation, opacity, and much more.
7.Lastly, you can click on Export and either save the video locally or share it directly on social media.
Conclusion
Finally, you can download YouTube thumbnail at the site of your choice. Whether you want to download it in HD or in a lower quality, one of the YouTube thumbnail downloaders mentioned above will be able to fulfill your requirements.
No more browsing through unsecured and ad-laden sites to find a reliable YouTube thumbnail downloader. We have hand-picked, tried, and tested all these tools. All you have to do is take your pick of the YouTube thumbnail saver that best fits your needs. Any tool you choose, you will be able to download YouTube thumbnail with ease and security.
Shanoon Cox
Shanoon Cox is a writer and a lover of all things video.
Follow @Shanoon Cox
Incor Writings on the Best Practices for YouTube Commentary
How to Add YouTube Annotations and Cards?

Richard Bennett
Mar 27, 2024• Proven solutions
Update: YouTube has replaced annotation with end screen. You can find the latest informaiton about YouTube screen and YouTube cards here.
YouTube Cards and Annotations are very useful if you want to encourage your viewrs to take an action, like Subscribe, go to another video or associated website, etc. Today, we’re going to show you the differences between cards and annotations, and how to add them in YouTube videos.
Do you want to make your YouTube video more attractive? Wondershare Filmora is a such video editing software designed for YouTube creator. It not only allows you cut, trim, crop, zoom, reverse, rotate the video clips, but also makes the advanced features like green screen, PIP, tilt-shift and mosaic easy like a piece of cake. With Wondershare Filmora, you can ignite your YouTube videos with over 300 effects like Fashion, Beauty, Block Buster, Travel, etc.
 Download Mac Version ](https://tools.techidaily.com/wondershare/filmora/download/ )
The main difference between annotation and cards is their outlook. Cards are more graphical whereas annotations are text based. The cards slide in once you click the small “i” button on the video where as the annotation is there based on the timings set by the user. Moreover the main differences between the two are:
1. YouTube Cards are small and unobtrusive, unless a viewer chooses to click on them, which is why they are the better option when you are trying to get views on other videos. Irritating a few people with a big annotation might be worth it if you also draw other people’s attention to your cause or website, but it is not a good way to endear yourself to people you are trying to get views and subscriptions from. When a card is clicked a thumbnail will appear with a link to your additional content. YouTube Cards are often better than annotations for adding links to your videos because they look much tidier. Also, unlike annotations, cards will be visible to people watching your videos on their mobile devices.
2. You cannot use Cards just to insert notes into your videos, though, and you cannot adjust their size like you can with annotations. So, if you do need a link to be large and extremely noticeable, annotations might still be your best option. Cards and annotations can even be used in combination sometimes.
How to add YouTube Cards
YouTube Cards are similar to annotations but more interactive. They allow the owner of the video to add images and other links. A small box appears, clicking on which will activate the cards.
- Click on the “Video Manager” tab

- Click “Edit” tab under the video screen shot you want to add the card on
- Click on the “Cards” tab

- On the right panel click on “Add Card” drop down menu and select the type of card you want to add
- Click on the create button which will open the corresponding video
- Once you finish the subsequent information required click create card
- Select the timeline for the playhead to appear which leads to the card slide

- Apply changes and exit
How to add YouTube annotations
YouTube Annotation is addition of a text layer, link or hotspots over your video. They add interactive boxes which link to other websites or videos (any link you want).
- Click on the video manager tab
- Click edit tab under the video screen shot you want to add the annotation on
- Click on the “End screen & Annotation” tab

- On the right panel click on “+ Add Element” and select the kind of annotation you want to add
- Adjust the position of Annotation, you can drag the rectangle to locate it at any position of the video, move the slide to set the start and end time of the annotation

- Apply changes
The types of YouTube annotations:
1. Speech Bubbles
Speech Bubbles: look like the dialogue box in a comic strip. There is a tail which you can adjust so it looks like one of the people in your video is saying what is written in the annotation. Speech bubbles are great for adding in funny comments.
2. Notes
Notes: come in a limited selection of colors and can be adjusted to take up a maximum of 30% of your player screen. Sometimes you need a huge annotation to get an important point across, but using huge note annotations too often – especially near the beginnings of your videos – will annoy viewers. If you need a large note annotation make sure to place it later in your video, when a viewer will already be invested in what they are watching and less likely to click away.
3. Titles
Titles: are large pieces of text that go either at the beginning of your video or in-between different topics within your video. YouTube’s titles are not very nice to look at, but they are a decent option if you do not have access to video editing software.
4. Spotlights
Spotlights: have a subtle border and are completely clear inside. Your text only appears when a user hovers over the spotlight. Spotlights are great for turning elements within your video into links.
5. Labels
Labels: are completely transparent, like spotlights, but the user does not have to hover over them for your text to be visible.
6. Pauses
Pauses: are no longer available to add to your videos, although Pause Annotations added before they were removed still work. Pause Annotations used to stop your video for a set period of time when your annotation appeared.
If somebody watches your video and gets to the end then that means they enjoyed it and will probably be open to checking out more of your content. Rather than hoping that your other videos show up in the ‘Suggested Videos’ YouTube will show after yours has finished playing you should always include an outro, or ending card, after your video to recommend your own work. Annotations are used in a lot of successful YouTuber’s ending cards.
One form this takes is small Note annotations in the bottom corners of the screen, one linking to your previous video and one to the next. Sometimes your viewers might not necessarily get the most enjoyment out of your videos by watching them in order, though. Sometimes you want to link viewers to the videos that are most related to the one they just watched.
The best outros also include a subscribe button, which can be created using annotations. These annotations work best when combined with a verbal call to action. Make sure your outro lasts long enough for people to make the decision to subscribe or click another video.
No matter what kind of annotations you are using, you should never use more than two of them at a time anywhere except for your outro. You should also never place annotations at the very top of your screen, or in the middle at the bottom. If your video is embedding on a separate website then the player will cover annotations at the top of the screen, and ads might cover annotations placed in the bottom-middle of the screen. Keep in mind when using annotations that they will not be visible to users watching your videos on mobile devices. If mobile traffic is very important to you then consider using YouTube Cards.
Richard Bennett
Richard Bennett is a writer and a lover of all things video.
Follow @Richard Bennett
Richard Bennett
Mar 27, 2024• Proven solutions
Update: YouTube has replaced annotation with end screen. You can find the latest informaiton about YouTube screen and YouTube cards here.
YouTube Cards and Annotations are very useful if you want to encourage your viewrs to take an action, like Subscribe, go to another video or associated website, etc. Today, we’re going to show you the differences between cards and annotations, and how to add them in YouTube videos.
Do you want to make your YouTube video more attractive? Wondershare Filmora is a such video editing software designed for YouTube creator. It not only allows you cut, trim, crop, zoom, reverse, rotate the video clips, but also makes the advanced features like green screen, PIP, tilt-shift and mosaic easy like a piece of cake. With Wondershare Filmora, you can ignite your YouTube videos with over 300 effects like Fashion, Beauty, Block Buster, Travel, etc.
Download Mac Version ](https://tools.techidaily.com/wondershare/filmora/download/ )
The main difference between annotation and cards is their outlook. Cards are more graphical whereas annotations are text based. The cards slide in once you click the small “i” button on the video where as the annotation is there based on the timings set by the user. Moreover the main differences between the two are:
1. YouTube Cards are small and unobtrusive, unless a viewer chooses to click on them, which is why they are the better option when you are trying to get views on other videos. Irritating a few people with a big annotation might be worth it if you also draw other people’s attention to your cause or website, but it is not a good way to endear yourself to people you are trying to get views and subscriptions from. When a card is clicked a thumbnail will appear with a link to your additional content. YouTube Cards are often better than annotations for adding links to your videos because they look much tidier. Also, unlike annotations, cards will be visible to people watching your videos on their mobile devices.
2. You cannot use Cards just to insert notes into your videos, though, and you cannot adjust their size like you can with annotations. So, if you do need a link to be large and extremely noticeable, annotations might still be your best option. Cards and annotations can even be used in combination sometimes.
How to add YouTube Cards
YouTube Cards are similar to annotations but more interactive. They allow the owner of the video to add images and other links. A small box appears, clicking on which will activate the cards.
- Click on the “Video Manager” tab
- Click “Edit” tab under the video screen shot you want to add the card on
- Click on the “Cards” tab
- On the right panel click on “Add Card” drop down menu and select the type of card you want to add
- Click on the create button which will open the corresponding video
- Once you finish the subsequent information required click create card
- Select the timeline for the playhead to appear which leads to the card slide
- Apply changes and exit
How to add YouTube annotations
YouTube Annotation is addition of a text layer, link or hotspots over your video. They add interactive boxes which link to other websites or videos (any link you want).
- Click on the video manager tab
- Click edit tab under the video screen shot you want to add the annotation on
- Click on the “End screen & Annotation” tab
- On the right panel click on “+ Add Element” and select the kind of annotation you want to add
- Adjust the position of Annotation, you can drag the rectangle to locate it at any position of the video, move the slide to set the start and end time of the annotation
- Apply changes
The types of YouTube annotations:
1. Speech Bubbles
Speech Bubbles: look like the dialogue box in a comic strip. There is a tail which you can adjust so it looks like one of the people in your video is saying what is written in the annotation. Speech bubbles are great for adding in funny comments.
2. Notes
Notes: come in a limited selection of colors and can be adjusted to take up a maximum of 30% of your player screen. Sometimes you need a huge annotation to get an important point across, but using huge note annotations too often – especially near the beginnings of your videos – will annoy viewers. If you need a large note annotation make sure to place it later in your video, when a viewer will already be invested in what they are watching and less likely to click away.
3. Titles
Titles: are large pieces of text that go either at the beginning of your video or in-between different topics within your video. YouTube’s titles are not very nice to look at, but they are a decent option if you do not have access to video editing software.
4. Spotlights
Spotlights: have a subtle border and are completely clear inside. Your text only appears when a user hovers over the spotlight. Spotlights are great for turning elements within your video into links.
5. Labels
Labels: are completely transparent, like spotlights, but the user does not have to hover over them for your text to be visible.
6. Pauses
Pauses: are no longer available to add to your videos, although Pause Annotations added before they were removed still work. Pause Annotations used to stop your video for a set period of time when your annotation appeared.
If somebody watches your video and gets to the end then that means they enjoyed it and will probably be open to checking out more of your content. Rather than hoping that your other videos show up in the ‘Suggested Videos’ YouTube will show after yours has finished playing you should always include an outro, or ending card, after your video to recommend your own work. Annotations are used in a lot of successful YouTuber’s ending cards.
One form this takes is small Note annotations in the bottom corners of the screen, one linking to your previous video and one to the next. Sometimes your viewers might not necessarily get the most enjoyment out of your videos by watching them in order, though. Sometimes you want to link viewers to the videos that are most related to the one they just watched.
The best outros also include a subscribe button, which can be created using annotations. These annotations work best when combined with a verbal call to action. Make sure your outro lasts long enough for people to make the decision to subscribe or click another video.
No matter what kind of annotations you are using, you should never use more than two of them at a time anywhere except for your outro. You should also never place annotations at the very top of your screen, or in the middle at the bottom. If your video is embedding on a separate website then the player will cover annotations at the top of the screen, and ads might cover annotations placed in the bottom-middle of the screen. Keep in mind when using annotations that they will not be visible to users watching your videos on mobile devices. If mobile traffic is very important to you then consider using YouTube Cards.
Richard Bennett
Richard Bennett is a writer and a lover of all things video.
Follow @Richard Bennett
Also read:
- Decoding Your YouTube's View-Zero Dilemma 10 Insights for 2024
- Access High-Quality YouTube Images Without Paying a Dime for 2024
- 2024 Approved Ensuring Visual Presentation YouTube Shorts Thumbnails Fix
- In 2024, Deciphering YouTube's New Earning Standards
- [New] Decoding the Art of YouTube Playlist Recalibration
- Eliminating Robotic Ratings to Grow Views
- [Updated] Audiovisual Power Evaluating Mirrorless vs DSLR Cameras
- [Updated] Deciphering the Must-Haves for an Enhanced YouTube Experience
- 2024 Approved Brand Visualization Inserting Watermarks and Logos Into YouTube Media
- Essential Banner Design Rules for Top YouTube Channels for 2024
- The Components That Lift You in YouTube Viewership
- [Updated] Create Identity A Quick Walkthrough of Customizing Your YouTube Url
- 2024 Approved Elevating YouTube Productions with Effective Video Lighting
- 2024 Approved 10 Online Tools to Retrieve YouTube Graphics
- In 2024, Direct Download & MP3 Creation for Streaming Video Files
- 2024 Approved Convert & Share with Ease Selecting the Top FLV-to-YouTube Applications
- [New] Enthralling Enchantment YouTube Edition of Best Magic
- YouTube Legends Rapidly Climbing to 100 Million Views in Early 2024
- Understanding T-Series YouTube Business Model
- Can Instant Subscription Lead to Higher Watch Time, In 2024
- From Buffer to Broadcast Learn How to Convert Your YouTube Viewing Into a Screenshot for Free.
- Beginner's OBS Techniques for YouTube Live Streaming
- [New] Attract More Viewers Crafting Impressive Youtube Description with Custom Templates
- [Updated] Chuckling Challenge Brainstroming 7 Humorous YouTube Videos
- Confirmation Techniques for Youtube Accounts
- [New] Deep Dive Into the Rise of Online Performing Artists
- 2024 Approved Decoding the Visual Language of Live Videos on YouTube
- Cohesive Title Blueprint for Social & Mobile Platforms for 2024
- [New] Digital Delegates Top YouTube Creators by Followers
- [New] Essential Knowledge for Effective Use of the IO Screener for 2024
- How to Unlock iPhone 12 mini Passcode without Computer? | Dr.fone
- [New] Social Media Savvy Turning Friends Into Customers and Coins
- [Updated] In 2024, From Startup to Shutdown Steam on Discord Devices
- How to Fix Error 495 While Download/Updating Android Apps On Samsung Galaxy A25 5G | Dr.fone
- Efficiency Meets Entertainment The Finest 31 Video Cutters for Phones
- Updated In 2024, How to Create After Effects Gifs
- In 2024, Deciphering Screens A Comprehensive Review of Recording Apps
- [Updated] 2024 Approved Learn to Edit The Ultimate Guide for IGTV Titles
- New Integrating Volume Automation Into Win-Based Projects Using Adobe Premiere Pro
- New In 2024, Online Video Trimming Made Easy A Tutorial on Using Kapwing
- Title: In 2024, Effortless Free Extraction of YouTube Desktops
- Author: Steven
- Created at : 2024-05-25 19:43:11
- Updated at : 2024-05-26 19:43:11
- Link: https://youtube-clips.techidaily.com/in-2024-effortless-free-extraction-of-youtube-desktops/
- License: This work is licensed under CC BY-NC-SA 4.0.
