
:max_bytes(150000):strip_icc()/cigarette-lighter-fuse-58854b035f9b58bdb39e3e74.jpg)
In 2024, Disrupt Bot Patterns for Natural Viewer Increase
Disrupt Bot Patterns for Natural Viewer Increase
YouTube View Bots and Other Easy Hacks to Increase Views

Richard Bennett
Oct 26, 2023• Proven solutions
YouTube view bots are against YouTube’s rules, making them dangerous for your channel. We recommend you build your following organically, but we’ve provided this information if you feel the risk is worth it.
To gain organic traffic for your YouTube videos, you need good YouTube video editing software that helps you to express your ideas and grow up the YouTube channel. We recommend you to try Filmora , an easy-to-use yet powerful enough to make videos polished with various templates and video effects. Download Filmora video editor and have a try. Please share your experience in the comments below with us.
 -
- 
One of the greatest problems facing many YouTube creators is capturing views. It’s hard to crack the top search engine rankings as a small channel. Many people on YouTube would probably love their content, but all of those views are going to already popular channels.
Many YouTubers look for alternative ways to get views for their videos, not to replace organic views, but to better position their videos to be seen by real viewers. Buying views or signing up for a view exchange platform are two methods some YouTubers consider, and another is bots.
View exchange platforms are allowed, and buying views is grey, but bots are against the rules. Warning: be aware that increasing your view count with a bot is against YouTube’s Terms of Service and that if you get caught, your video will be taken down. If you still wish to learn more about bots, keep reading. If you want safer options, scroll down to ‘Alternatives to Bots.’
What else can a YouTube view bot do?
Are there risks to using a YouTube view bot?
Alternatives to YouTube view bots
What Is A YouTube View Bot?
Bots work in an automated sense, just like software, and they can run in the background. Bots automatically add views to your videos.
Setting up a bot can be as easy as using other pieces of software, and there are lots of free tutorials on YouTube for view bots.
Why Use a YouTube View Bot?
Bots are used to create the illusion that a video is already popular to attract real viewers who view the existing view count as ‘social proof’ of the video’s quality. The main benefit is that it is fast, easy, and usually free. There are other ways, besides bots, bot accomplishes this, but if a YouTuber is resorting to a bot, it probably means they don’t have the money to buy real human views or the time to participate in a view exchange platform.
Bots can also be used to generate comments and likes for videos.
What Else Can A YouTube View Bot Do?
The most effective bots come with more features than bypassing Captchas and generating views.
You can set up a YouTube bot to perform daily tasks and automate your workflow. An example might be ensuring that every video on your page gets a view and comment every day. You can also use bots (or content organization platforms) to share your videos across social media automatically. This frees you up to focus on creating quality content.
Using a bot to increase your views artificially has its dangers, but it also has the potential to kick start the organic growth of your channel. Once you start attracting real viewers and subscribers, you will not need to keep relying on a bot.
Are There Risks to Using A YouTube View Bot?
Yes.
Bots are against YouTube’s TOS, especially for partners using AdSense (learn more about YouTube’s partnership program here ). Suppose you are suspected of using a bot. In that case, your videos can get taken down, and you could lose the ability to monetize content (YouTube reviews channels now before they can monetize, and it will be obvious to them if you’ve used a bot to get to the 10,000 lifetime views you need for monetization). Repeated offenses could even get you banned from YouTube, and it is much easier to lose AdSense access.
The biggest danger isn’t YouTube taking your videos down, though. So long as you don’t persist after being warned, you can always recover. No, the real danger of bots is that they generate low retention views. Essentially, the views you get from a bot appear to YouTube’s algorithm as if people have clicked on your videos but haven’t watched them. The algorithm interprets that as ‘the people clicking on this don’t like it, we should rank it lower down in search results. Rather than attracting organic views, bots can make it very difficult for a real viewer to find your content.
If you are going to use a bot, you need to use it smartly and sparingly to prevent damage to your channel.
Alternatives to Using View Bots to Increase YouTube Views
1. Organically Growing Your Channel
Using bots, or any of the services below, won’t grow your channel more quickly than the tactics like posting on a schedule , creating clickable thumbnails , or mastering SEO . There can be some perks to using them - we won’t deny that there are people who have benefitted from bots through a mixture of luck and careful strategy - but in general, it is better to focus your efforts on your content and solid YouTube strategies .
2. View2.be
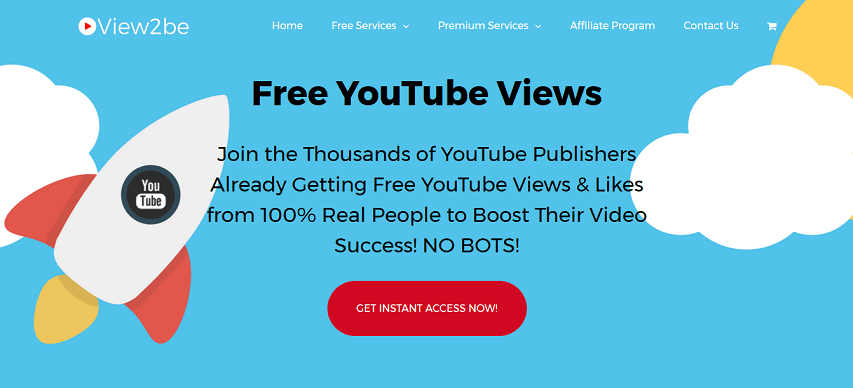
View2be is a free YouTube views service that also comes with a premium option. The company will deliver a series of free subscription, engagement, and view packages. In most cases, this is a traffic exchange service (you must participate by watching other people’s videos) until you get into the premium and affiliate services. In these cases, users can advertise the services of View2be to get access to more views and subscriptions. The premium services are just a straight charge for a total number of views, subscribers, or other items.
3. UltraViews
UltraViewers is another traffic exchange service in which people can trade traffic to get more views on their webpages or YouTube videos. This site requires you to open your browser and automatically navigate to a number of websites. You will be rewarded with new hits to your videos based on the number of websites you visit. This is a fairly simple system. There is also a lottery where you can win extra hits.
4. My Social Following
My Social Following is a source for YouTube viewers, subscribers, and likes. As a professional marketing service, the company allows for various benefits such as location targeted services, fast deliveries, improvements in the ranking, and (most importantly)real viewers watching your YouTube videos in full to boost your retention rates and search engine rankings.
If you are truly serious about earning free views, YouTube view bots are one of many options, but they do mean accepting whatever consequences YouTube might hand down.
-
Richard Bennett
Richard Bennett is a writer and a lover of all things video.
Follow @Richard Bennett
Richard Bennett
Oct 26, 2023• Proven solutions
YouTube view bots are against YouTube’s rules, making them dangerous for your channel. We recommend you build your following organically, but we’ve provided this information if you feel the risk is worth it.
To gain organic traffic for your YouTube videos, you need good YouTube video editing software that helps you to express your ideas and grow up the YouTube channel. We recommend you to try Filmora , an easy-to-use yet powerful enough to make videos polished with various templates and video effects. Download Filmora video editor and have a try. Please share your experience in the comments below with us.
-
One of the greatest problems facing many YouTube creators is capturing views. It’s hard to crack the top search engine rankings as a small channel. Many people on YouTube would probably love their content, but all of those views are going to already popular channels.
Many YouTubers look for alternative ways to get views for their videos, not to replace organic views, but to better position their videos to be seen by real viewers. Buying views or signing up for a view exchange platform are two methods some YouTubers consider, and another is bots.
View exchange platforms are allowed, and buying views is grey, but bots are against the rules. Warning: be aware that increasing your view count with a bot is against YouTube’s Terms of Service and that if you get caught, your video will be taken down. If you still wish to learn more about bots, keep reading. If you want safer options, scroll down to ‘Alternatives to Bots.’
What else can a YouTube view bot do?
Are there risks to using a YouTube view bot?
Alternatives to YouTube view bots
What Is A YouTube View Bot?
Bots work in an automated sense, just like software, and they can run in the background. Bots automatically add views to your videos.
Setting up a bot can be as easy as using other pieces of software, and there are lots of free tutorials on YouTube for view bots.
Why Use a YouTube View Bot?
Bots are used to create the illusion that a video is already popular to attract real viewers who view the existing view count as ‘social proof’ of the video’s quality. The main benefit is that it is fast, easy, and usually free. There are other ways, besides bots, bot accomplishes this, but if a YouTuber is resorting to a bot, it probably means they don’t have the money to buy real human views or the time to participate in a view exchange platform.
Bots can also be used to generate comments and likes for videos.
What Else Can A YouTube View Bot Do?
The most effective bots come with more features than bypassing Captchas and generating views.
You can set up a YouTube bot to perform daily tasks and automate your workflow. An example might be ensuring that every video on your page gets a view and comment every day. You can also use bots (or content organization platforms) to share your videos across social media automatically. This frees you up to focus on creating quality content.
Using a bot to increase your views artificially has its dangers, but it also has the potential to kick start the organic growth of your channel. Once you start attracting real viewers and subscribers, you will not need to keep relying on a bot.
Are There Risks to Using A YouTube View Bot?
Yes.
Bots are against YouTube’s TOS, especially for partners using AdSense (learn more about YouTube’s partnership program here ). Suppose you are suspected of using a bot. In that case, your videos can get taken down, and you could lose the ability to monetize content (YouTube reviews channels now before they can monetize, and it will be obvious to them if you’ve used a bot to get to the 10,000 lifetime views you need for monetization). Repeated offenses could even get you banned from YouTube, and it is much easier to lose AdSense access.
The biggest danger isn’t YouTube taking your videos down, though. So long as you don’t persist after being warned, you can always recover. No, the real danger of bots is that they generate low retention views. Essentially, the views you get from a bot appear to YouTube’s algorithm as if people have clicked on your videos but haven’t watched them. The algorithm interprets that as ‘the people clicking on this don’t like it, we should rank it lower down in search results. Rather than attracting organic views, bots can make it very difficult for a real viewer to find your content.
If you are going to use a bot, you need to use it smartly and sparingly to prevent damage to your channel.
Alternatives to Using View Bots to Increase YouTube Views
1. Organically Growing Your Channel
Using bots, or any of the services below, won’t grow your channel more quickly than the tactics like posting on a schedule , creating clickable thumbnails , or mastering SEO . There can be some perks to using them - we won’t deny that there are people who have benefitted from bots through a mixture of luck and careful strategy - but in general, it is better to focus your efforts on your content and solid YouTube strategies .
2. View2.be
View2be is a free YouTube views service that also comes with a premium option. The company will deliver a series of free subscription, engagement, and view packages. In most cases, this is a traffic exchange service (you must participate by watching other people’s videos) until you get into the premium and affiliate services. In these cases, users can advertise the services of View2be to get access to more views and subscriptions. The premium services are just a straight charge for a total number of views, subscribers, or other items.
3. UltraViews
UltraViewers is another traffic exchange service in which people can trade traffic to get more views on their webpages or YouTube videos. This site requires you to open your browser and automatically navigate to a number of websites. You will be rewarded with new hits to your videos based on the number of websites you visit. This is a fairly simple system. There is also a lottery where you can win extra hits.
4. My Social Following
My Social Following is a source for YouTube viewers, subscribers, and likes. As a professional marketing service, the company allows for various benefits such as location targeted services, fast deliveries, improvements in the ranking, and (most importantly)real viewers watching your YouTube videos in full to boost your retention rates and search engine rankings.
If you are truly serious about earning free views, YouTube view bots are one of many options, but they do mean accepting whatever consequences YouTube might hand down.
-
Richard Bennett
Richard Bennett is a writer and a lover of all things video.
Follow @Richard Bennett
Bring Your GSlides to Life with YouTube Media
Create High-Quality Video - Wondershare Filmora
An easy and powerful YouTube video editor
Numerous video and audio effects to choose from
Detailed tutorials provided by the official channel
Google Slide presentation is a powerful tool for creators to keep their audience engaged. This online platform lets you create and demonstrate your ideas. It will capture your viewers’ attention from the very beginning. It also doesn’t matter whatever learning style you engage. Adding YouTube videos to Google Slide will appeal to all levels of individuals.
More so, it is the best way to provide a break for both the audience and the creator. You can break Google Slide presentations with videos to offer some break. Viewers and the presenter get a breather in the process. The presenter can take a short break from speaking while the video plays. Let’s now dive into how to embed a YouTube video in Google Slides.

In this article
01 Why should we add a video to Google Slides?
02 How to add a YouTube video to Google Slide
03 How to choose the right video for your Slides?
Why should we add a video to Google Slides?
There is a great impact of adding video to Google Slides.
For attention
Videos will automatically awaken you, especially if your thoughts have started to sway during a presentation. A video has a direct way of showing creativity. The audience automatically connects the dots between the video and the presentation lines alike.
To stimulate discussion
A picture is worth a thousand words. There is a way that an added video will help the audience connect to the day’s topic. It will bring up several ideas and stir up discussion with the presenter.
Easy following
With videos embedded in Google Slide, viewers will find it easy to understand and digest. Videos automatically eliminate boredom and make any topic interesting.
How to add a YouTube video to Google Slide
Use these two methods to add a YouTube video to Google Slides. Via the Search and Direct link.
Method 1. Embed YouTube video to Google Slide by search and selection
Google has owned YouTube since the year 2006. You can, therefore, integrate Google’s products with YouTube easily.
Step 1. First, go to the slide where you want to embed your video.
Step 2. Then choose the “Insert” option from the menu bar and hit the “Video” option.

Step 3. It would be best if you now viewed the “YouTube” search bar to type in the video you want to embed. You can use keywords to search for the video in question and view instant search results.
Step 4. Then select the video you want to embed, and you’ll see it appear on the “Slide.”

Step 5. Format your video. Remember that the entire video will be embedded. You don’t necessarily need the whole video. It is time to select just a brief but relevant clip from the video to use. Then position your video to the right point using the axes from the exact starting point to the finished part you want the video to appear in.
Method 2. Embed YouTube video to Google Slide by direct link
You can engage this method if you want to include the entire video.
Step 1. Get the URL of the specific YouTube video that you want to use.

Step 2. Then go to your browser’s “Address bar” to copy the YouTube link.
Step 3. Next, open the “Presentation” slide to put your video to.
Step 4. Choose the “Insert” tab from the menu bar.
Step 5. Then hit on the “Video” option from the drop-down menu that appears.
Step 6. A new window will open automatically. Choose the “By URL” tab.
Step 7. Then paste the YouTube video URL in the “Paste YouTube URL Here” bar section.

Step 8. Wait for the video file to load and press the “Select” option. The video will immediately appear in the presentation slide. Just drag and drop the video in your preferred position.
Note: You can do a few edits inside the application. Set the timer when your video should start and when to stop. You can also adjust the video player size.
How to choose the right video for your Slides?
Not all videos will make an impact on your Google Slide. You need to use the best shot that adds value to your presentation. These guidelines will help you to settle on the best video.
Be Professional – choose the best video for your presentation. Remember that the video is part of the presentation and carries more weight. Settling for quality video will bring out the professionalism in you.
Relevant – how do you know that what you are showing your audience corresponds to the presentation piece? Ensure that the video you add has something to do with the Google Slide presentation topic. The two should naturally flow to make it easy to understand the whole concept.
Precise – your presentation is not about the video. The ideal length should not exceed 60 seconds. The longer the video, the greater the chance for your audience to lose track along the way.
Know every footage you are working with – this will help you pick the best shots for your presentation. So, learn every aspect of the video before settling down to use it.
Add new content – even though one content may suit several presentations, don’t rely on the same piece each time. Your audience will want to feel something fresh each time you are presenting. So, compose different videos for different scenarios to make that big impact.
Create an eye-catching video for your Slides with Filmora
The video quality matters when it comes to creating your Slides. The best video creator – Filmora – works in simple steps to give you an eye-catching video. It will create videos for all scenarios like marketing, tutorial, gaming, etc.
Key features of Filmora
- It offers you advanced video effects like filters, motion elements, etc
- You can multiply your fun with multiple screens with the Split Screen feature
- Easily change backgrounds using the Green Screen feature
- The speed control lets you fast forward or slow down a special moment
- Import your video clips to social media platforms
- You can also adjust the audio of your tracks using the Audio Mixer feature
Follow this guide to create a video for your slide with Filmora
Step 1. Launch Filmora
First, begin by downloading and installing Filmora on your computer device. Once installed, launch it and allow it to run. You can either create a new project or open an existing project to work on.
Step 2. Create a new project
Here, click on the “New Project” tab on the app’s welcome screen. The editor should load immediately. Then proceed to register the product. Just hit on the “Register” tab.
Step 3. Import video
Check the upper left corner of your screen to see the “Import” tab. Click on it and choose the “Import Media Files” option. Next, navigate to the location of your computer’s local list to select the clip or video you want to edit. Then, hit the “Import” button to add the video to the timeline for editing.
Step 4. Edit video
Drag and drop the raw footage to Filmora’s timeline to begin editing. Here, you can trim, add other video clips, merge, and add effects as you wish. Likewise, you can add opening titles, subtitles, and end credits to your video. More so, this tool offers different templates to use. Just drag and drop the templates you wish to use to a specific location on the timeline.
Step 5. Preview your file
Last but not least, you can preview your files. Click on the “Play” tab to start previewing your video clips. The main essence of this part is to allow you to make the necessary changes to your clips if there is a need.
Step 6. Export and Share
With Filmora, you can export your file to various social media platforms. But first, go to the “Output window” and select the video file format to use. This software supports several output formats to apply to any platform and device. Just click on the “Format” tab and choose the file format to use. Then also change the resolution and other parameters like frame rate and channel of your video in the “Settings” section. Finally, share your video to your YouTube channel and get ready to add the video to the Google Slide presentation.
For Win 7 or later (64-bit)
For macOS 10.12 or later
Conclusion
● You now know how to put a YouTube video in Google Slides the simple way. You can search for your YouTube videos or directly use the URL link. Whatever the case, remember that it’s the quality of your video that carries more weight. Thanks to the availability of third-party apps that you can use to create and improve the quality of your videos.
● Filmora is at your service to create high-resolution videos that you can export in any format to your YouTube channel. The tool is intuitive, and it won’t matter whether you haven’t tried it before. It is a perfect choice for both professionals and first-time users.
Google Slide presentation is a powerful tool for creators to keep their audience engaged. This online platform lets you create and demonstrate your ideas. It will capture your viewers’ attention from the very beginning. It also doesn’t matter whatever learning style you engage. Adding YouTube videos to Google Slide will appeal to all levels of individuals.
More so, it is the best way to provide a break for both the audience and the creator. You can break Google Slide presentations with videos to offer some break. Viewers and the presenter get a breather in the process. The presenter can take a short break from speaking while the video plays. Let’s now dive into how to embed a YouTube video in Google Slides.
In this article
01 Why should we add a video to Google Slides?
02 How to add a YouTube video to Google Slide
03 How to choose the right video for your Slides?
Why should we add a video to Google Slides?
There is a great impact of adding video to Google Slides.
For attention
Videos will automatically awaken you, especially if your thoughts have started to sway during a presentation. A video has a direct way of showing creativity. The audience automatically connects the dots between the video and the presentation lines alike.
To stimulate discussion
A picture is worth a thousand words. There is a way that an added video will help the audience connect to the day’s topic. It will bring up several ideas and stir up discussion with the presenter.
Easy following
With videos embedded in Google Slide, viewers will find it easy to understand and digest. Videos automatically eliminate boredom and make any topic interesting.
How to add a YouTube video to Google Slide
Use these two methods to add a YouTube video to Google Slides. Via the Search and Direct link.
Method 1. Embed YouTube video to Google Slide by search and selection
Google has owned YouTube since the year 2006. You can, therefore, integrate Google’s products with YouTube easily.
Step 1. First, go to the slide where you want to embed your video.
Step 2. Then choose the “Insert” option from the menu bar and hit the “Video” option.
Step 3. It would be best if you now viewed the “YouTube” search bar to type in the video you want to embed. You can use keywords to search for the video in question and view instant search results.
Step 4. Then select the video you want to embed, and you’ll see it appear on the “Slide.”
Step 5. Format your video. Remember that the entire video will be embedded. You don’t necessarily need the whole video. It is time to select just a brief but relevant clip from the video to use. Then position your video to the right point using the axes from the exact starting point to the finished part you want the video to appear in.
Method 2. Embed YouTube video to Google Slide by direct link
You can engage this method if you want to include the entire video.
Step 1. Get the URL of the specific YouTube video that you want to use.
Step 2. Then go to your browser’s “Address bar” to copy the YouTube link.
Step 3. Next, open the “Presentation” slide to put your video to.
Step 4. Choose the “Insert” tab from the menu bar.
Step 5. Then hit on the “Video” option from the drop-down menu that appears.
Step 6. A new window will open automatically. Choose the “By URL” tab.
Step 7. Then paste the YouTube video URL in the “Paste YouTube URL Here” bar section.
Step 8. Wait for the video file to load and press the “Select” option. The video will immediately appear in the presentation slide. Just drag and drop the video in your preferred position.
Note: You can do a few edits inside the application. Set the timer when your video should start and when to stop. You can also adjust the video player size.
How to choose the right video for your Slides?
Not all videos will make an impact on your Google Slide. You need to use the best shot that adds value to your presentation. These guidelines will help you to settle on the best video.
Be Professional – choose the best video for your presentation. Remember that the video is part of the presentation and carries more weight. Settling for quality video will bring out the professionalism in you.
Relevant – how do you know that what you are showing your audience corresponds to the presentation piece? Ensure that the video you add has something to do with the Google Slide presentation topic. The two should naturally flow to make it easy to understand the whole concept.
Precise – your presentation is not about the video. The ideal length should not exceed 60 seconds. The longer the video, the greater the chance for your audience to lose track along the way.
Know every footage you are working with – this will help you pick the best shots for your presentation. So, learn every aspect of the video before settling down to use it.
Add new content – even though one content may suit several presentations, don’t rely on the same piece each time. Your audience will want to feel something fresh each time you are presenting. So, compose different videos for different scenarios to make that big impact.
Create an eye-catching video for your Slides with Filmora
The video quality matters when it comes to creating your Slides. The best video creator – Filmora – works in simple steps to give you an eye-catching video. It will create videos for all scenarios like marketing, tutorial, gaming, etc.
Key features of Filmora
- It offers you advanced video effects like filters, motion elements, etc
- You can multiply your fun with multiple screens with the Split Screen feature
- Easily change backgrounds using the Green Screen feature
- The speed control lets you fast forward or slow down a special moment
- Import your video clips to social media platforms
- You can also adjust the audio of your tracks using the Audio Mixer feature
Follow this guide to create a video for your slide with Filmora
Step 1. Launch Filmora
First, begin by downloading and installing Filmora on your computer device. Once installed, launch it and allow it to run. You can either create a new project or open an existing project to work on.
Step 2. Create a new project
Here, click on the “New Project” tab on the app’s welcome screen. The editor should load immediately. Then proceed to register the product. Just hit on the “Register” tab.
Step 3. Import video
Check the upper left corner of your screen to see the “Import” tab. Click on it and choose the “Import Media Files” option. Next, navigate to the location of your computer’s local list to select the clip or video you want to edit. Then, hit the “Import” button to add the video to the timeline for editing.
Step 4. Edit video
Drag and drop the raw footage to Filmora’s timeline to begin editing. Here, you can trim, add other video clips, merge, and add effects as you wish. Likewise, you can add opening titles, subtitles, and end credits to your video. More so, this tool offers different templates to use. Just drag and drop the templates you wish to use to a specific location on the timeline.
Step 5. Preview your file
Last but not least, you can preview your files. Click on the “Play” tab to start previewing your video clips. The main essence of this part is to allow you to make the necessary changes to your clips if there is a need.
Step 6. Export and Share
With Filmora, you can export your file to various social media platforms. But first, go to the “Output window” and select the video file format to use. This software supports several output formats to apply to any platform and device. Just click on the “Format” tab and choose the file format to use. Then also change the resolution and other parameters like frame rate and channel of your video in the “Settings” section. Finally, share your video to your YouTube channel and get ready to add the video to the Google Slide presentation.
For Win 7 or later (64-bit)
For macOS 10.12 or later
Conclusion
● You now know how to put a YouTube video in Google Slides the simple way. You can search for your YouTube videos or directly use the URL link. Whatever the case, remember that it’s the quality of your video that carries more weight. Thanks to the availability of third-party apps that you can use to create and improve the quality of your videos.
● Filmora is at your service to create high-resolution videos that you can export in any format to your YouTube channel. The tool is intuitive, and it won’t matter whether you haven’t tried it before. It is a perfect choice for both professionals and first-time users.
Also read:
- Key Dimensions YouTube Titles & Images That Work
- 2024 Approved Create Effective YouTube Advertisements on a Budget
- Capture YouTube's Iconic Icons Online Tools, Desktop Software & Commands
- The Complete Playbook to Propel Your YouTube Gaming Vids with Hashes
- Engineering Engaging Media Excerpts
- [Updated] Avoiding Piracy Safe Techniques for Youtube-to-MP4
- [New] Evaluating Rapid Subscription's Impact on Video Engagement
- [Updated] AutoPlay YouTube on Mobile, No Distractions
- Streamline Animated Subscribe Buttons in Filmora for YouTube Success
- How to Live Stream to Youtube with Wirecast?
- A Simple Approach to YouTube Statistics Review for 2024
- Phenomenal Flair YouTube’s Ultimate Video Magic
- In 2024, Become the Brand You Want With Our Exclusive Set of FREE Graphics
- 2024 Approved Engage Audiences Best Hashtags for Going Viral on YT
- [New] Corrected Non-Existence of Shorts on Feeds
- 2024 Approved Elevating YouTube Consumption Strategies for Organizing Videos for Future Viewing
- Chromatic Brilliance for Video Enthusiasts
- [Updated] Earning in the E-Commerce Arena via Engaging Reviews
- [New] Beyond the Buffering A Ranked List of Top 27 Video Streamers Excluding YouTube
- [Updated] Chartbusters of the Digital Era Top Video Milestones Achieved by '24
- 2024 Approved Audiovisual Excellence The Premier Video Formats for YouTube
- [New] Essential 10 History YouTube Feeds For Learners
- The Ultimate Toolkit for YouTube Marketers Banner Mastery Guide
- Decoding the Art of Engaging in YouTube Short Forms for 2024
- [New] Breaking Down the Elements of a YouTube Shorts Template
- The Right Way to Raise Your Video's Reach Responsibly
- In 2024, Crafting Engaging Video Teasers for YouTube Success
- 2024 Approved Crafting Unique Content to Differentiate Your Channel
- IPhone/iPad Content Upload Solutions on YouTube
- In 2024, Deciphering YouTube's New Earning Standards
- Essential Skills for YouTube Success 8 Free Online Courses
- In 2024, Elevate Reach Optimal Strategies for Crafting YouTube Titles & Tags
- [New] 2024'S Rapid Rise Videos Achieving 100M Views Quickly
- Tailoring Thumbnails for Maximum YouTube Impact
- In 2024, Don't Overlook Tags in Video Description
- In 2024, Decoding the Features That Make YouTube Premium Special
- Earn on YouTube Beginner's Path to Profitability for 2024
- [New] Enhance Smarts with These Premier 15 Science YTs
- Exploring 9 Zero Price Editors for YouTube Content
- Mastering YouTube Stat Tracking Essentials
- [New] Dive Into Digital Green Magic Top 4 YouTube Sources for No-Cost Background Workshops
- How to Mirror PC Screen to Vivo Y02T Phones? | Dr.fone
- Top 4 Ways to Trace Vivo V27e Location | Dr.fone
- Updated MP4 File Editor for PC Quickly Trim, Cut, and Merge Videos for 2024
- [New] Bypassing Influencers Establishing Your Brand Identity on TikTok for 2024
- In 2024, Sky-High Engagement 50+ Outstanding TikTok Username Ideas
- Vimeo Demystified For Passionate Creators & Viewers for 2024
- 2024 Approved Masterful Video Cropping Elevate Your Content Game on Instagram
- New High-Quality on a Budget Top Free 4K Video Editing Solutions for 2024
- A Complete Guide To OEM Unlocking on Vivo Y02T
- What is the best Pokemon for pokemon pvp ranking On Vivo S17t? | Dr.fone
- Complete Tutorial for Vivo X Flip Hard Reset | Dr.fone
- iPogo will be the new iSpoofer On Motorola Moto E13? | Dr.fone
- [New] Temporary Hold Recording Assistance for 2024
- Getting the Pokemon Go GPS Signal Not Found 11 Error in Honor X9b | Dr.fone
- Harmonizing Sounds Seamless Transitions in Ableton Live
- Strategies for Effective Scheduling of Digital Meetups for 2024
- Design to Convert YouTube Thumbnail Size Guidelines and Effective Strategies for 2024
- In 2024, Tips and Tricks for Setting Up your Samsung Galaxy S24+ Phone Pattern Lock
- 2024 Approved Elite List Ten Economical Desktop Sharing Apps
- New Best 4K Video Editing Software for Proxy Editing
- [New] In 2024, Expert Insights Mastering Your Game Recording on Windows 10
- [Updated] 2024 Approved How to Make Vimeo Videos
- MKVtoolnix for macOS A Beginners Guide to Video Editing
- Dominate the Digital Domain with TikTok Marketing Strategies & Noteworthy Examples
- Fake the Location to Get Around the MLB Blackouts on Asus ROG Phone 8 Pro | Dr.fone
- 2024 Approved Is Broadcasting Facebook Videos a Reality Yet?
- [New] Best TikTok PFP Ideas to Make Your TikTok Profile Stand Out for 2024
- [New] In 2024, How to Unlink Lively Logos From Your Profile (Mobile/PC)
- Title: In 2024, Disrupt Bot Patterns for Natural Viewer Increase
- Author: Steven
- Created at : 2024-05-25 19:41:08
- Updated at : 2024-05-26 19:41:08
- Link: https://youtube-clips.techidaily.com/in-2024-disrupt-bot-patterns-for-natural-viewer-increase/
- License: This work is licensed under CC BY-NC-SA 4.0.
