
:max_bytes(150000):strip_icc()/Screenshot2024-05-15at10.20.00-1e387cc6ab4c44f88f4833be26cc905b.jpg)
"In 2024, Charting a Course Essential Equipment for YouTube Enthusiasts"
Charting a Course: Essential Equipment for YouTube Enthusiasts
YouTube Equipment Starter Guide For Beginners

Sumia Rafique
Feb 19, 2024• Proven solutions
If you want to start creating videos and uploading them onto YouTube, you’ll need to have access to some basic equipment. This guide will go over everything you’ll need to be a YouTuber.
Part 1: YOUTUBE EQUIPMENT: CAMERA
The best camera for beginners is the one you already have. Most smartphones these days already come equipped with a powerful camera that can record HD videos. If you still want to add a camera to your equipment list as a beginner YouTuber, you should look for a camera with the following eight qualities:
What To Look For In A Camera As A YouTuber
1. Fully articulated screen (flip screen)
2. Good continual auto focus while recording video
3. Good focus priority through face recognition
4. Touch to focus
5. Good low-light performance
6. external mic jack, hot/cold shoe bracket
7. optical image stabilization
8. good battery life
Check out my full list of 10 Things To Look For In A Vlogging Camera to understand the importance of these camera features.
Best Cheap Vlogging Cameras
Below are the best cheap vlogging cameras that you can get for under $500. They all record at least 1080p HD video and all but the Sony Alpha a5100 come with optical image stabilization (if you want OIS with the Sony a5100, you’ll have it get it in the lens).
| Camera | Release Date | Camera Type | Flip Screen | 4K | Price | |
|---|---|---|---|---|---|---|
| Yi 4KAction Camera | 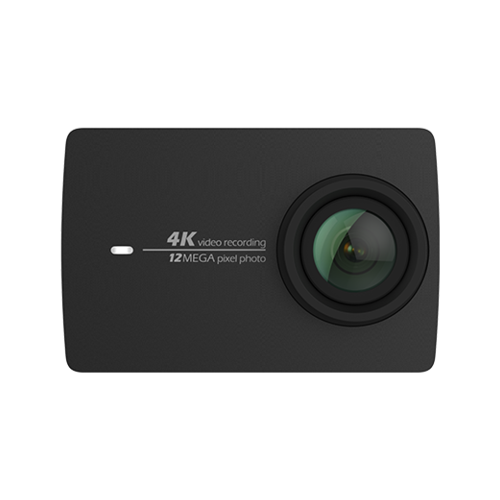 |
February2017 | Action Camera | No | Yes | $169 (MSRP) |
| NikonCoolpixA900 | 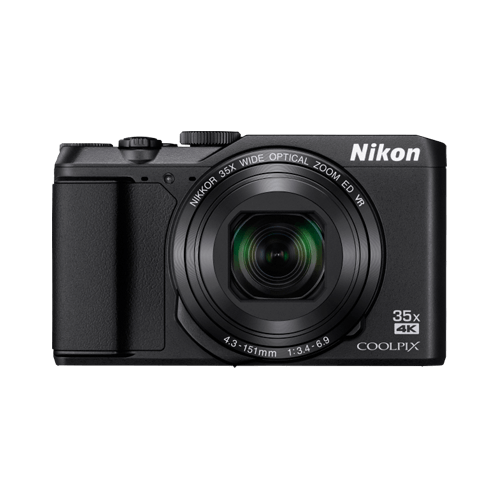 |
February2016 | Compact | Flip Up | Yes | $399 (MSRP) |
| NikonCoolpixB500 | 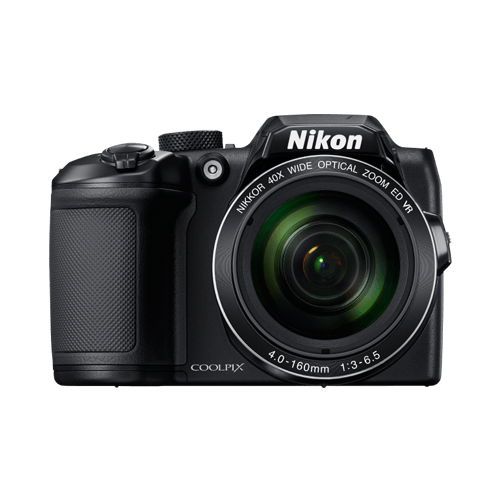 |
February2016 | SLR-like (bridge) | Tilting | No | $250 (MSRP) |
| PolaroidCube+ | 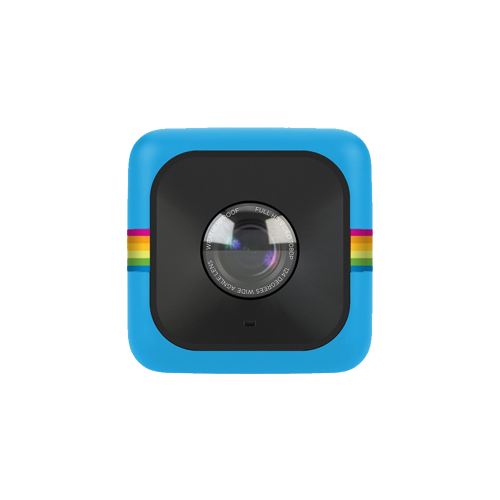 |
June2015 | Action Camera | No | No | $99 (MSRP) |
| SonyAlphaa5100 | 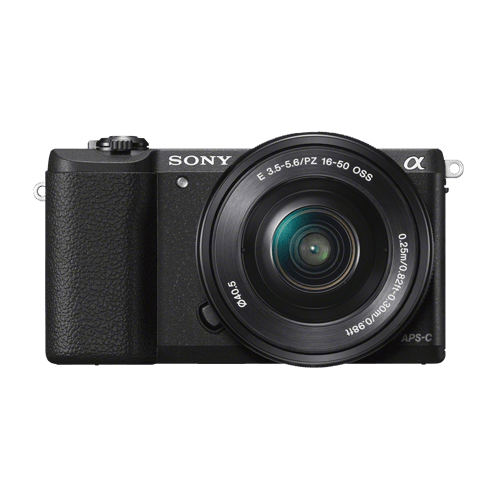 |
August2014 | Mirrorless | Flip Up | No | $450 (MSRP) |
|
Best cheap vlogging camera under $100: Polaroid Cube+ Even before GoPro released their GoPro Session, Polaroid was the first to come out with a 1.4-inch, cube-shaped action camera, small enough to mount on a bike or a helmet. This camera has built-in magnets so that you can attach them to metal surfaces. This action camera is water-resistant, shock-proof, and weather-proof. It can record full HD 1080p videos at 60 fps with its wide-angle lens. You can connect this camera with your phone to preview and take your shots. |
|---|---|
|
Best cheap vlogging camera under $200: Yi 4K At $200, you can record 4K videos with the Yi 4K action camera. Like many other action cameras, this camera is small, durable, and shoots through a wide-angle lens. You won’t be able to take this camera underwater though because it isn’t waterproof. You’ll need to buy the right accessories for that. |
|
Best cheap vlogging camera under $300: Nikon B500 The Nikon B500 gives you a non-interchangeable zoom lens so that you have more control over how you compose your shots. This camera records full HD 1080p videos at either 30 or 25 fps. You can only set its ISO as high as 3200, so it’s not going to perform the best in low-light conditions. The tilting LCD screen does not have touchscreen and cannot be fully flipped up or flipped to the side, it only tilts. For a camera in its price range, the Nikon B500 offers a lot of features. |
|
Best cheap vlogging camera under $400: Nikon A900 The Nikon A900 not only comes with a non-interchangeable zoom lens, but it can also record videos in UHD 4K quality. Like the Nikon B500, the A900’s ISO goes only up to 3200, making it a weak performer in poorly lit conditions. |
|
Best cheap vlogging camera under $500: Sony a5100 Among the cameras listed in our top cheap cameras list, the Sony a5100 is the only one you can interchange lenses with. All Sony E-mount lenses are compatible with this camera. This camera can record up to 1080p videos at 60 fps. Out of all of the above top cheap cameras, this one also auto focuses the best. |
Best Entry-Level and Mid-Range Vlogging Cameras
If you have a bigger budget to work with, the following vlogging cameras are great options:
| Camera | Release Date | Camera Type | Flip Screen | Mic Port | Price | |
|---|---|---|---|---|---|---|
| CanonEOSM50 | 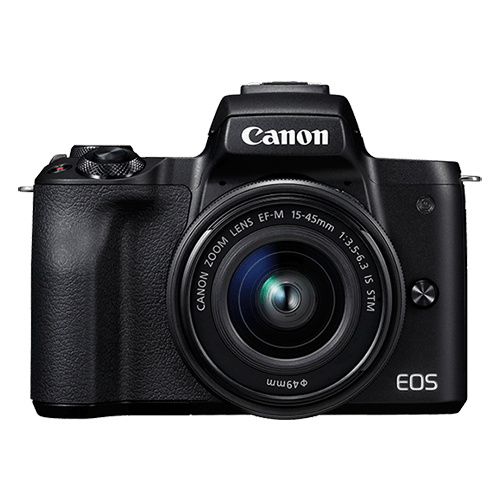 |
February2018 | Mirrorless | Fully Articulated | Yes | $- |
| CanonEOSM100 | 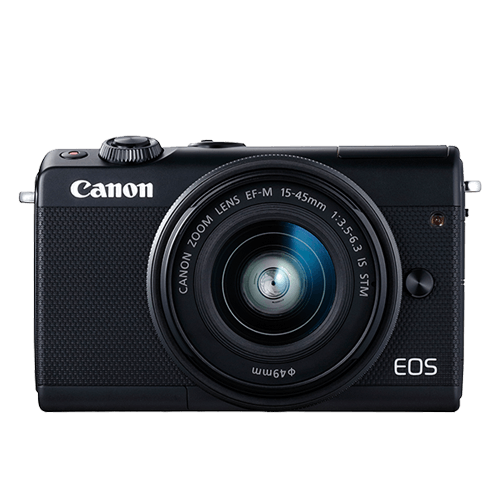 |
August2017 | Mirrorless | Flip Up | No | $ |
| CanonEOS RebelSL2 | 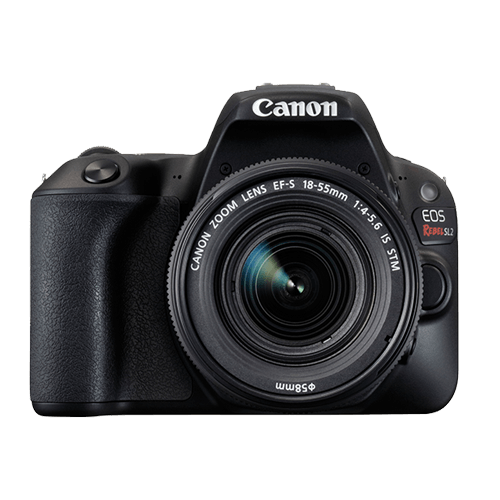 |
June2017 | Compact SLR | Fully Articulated | Yes | $ |
| CanonEOS RebelT7i |  |
February2017 | Mid-size SLR | Fully Articulated | Yes | $- |
| CanonEOS80D | 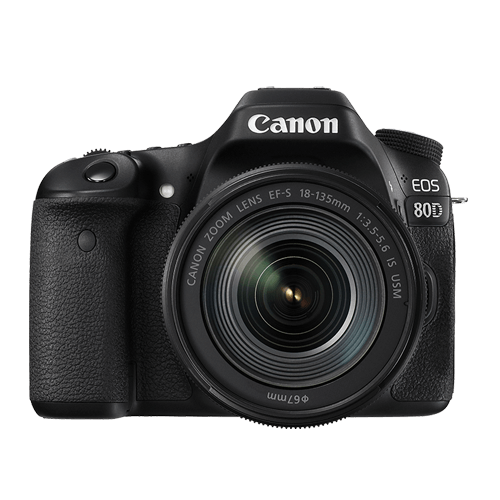 |
February2016 | Mid-size SLR | Fully Articulated | Yes | $$ |
|
Best entry-level mirrorless camera for vlogging: Canon EOS M100 The Canon M100 is a small and powerful camera that can shoot full HD (1080p) videos up to 60 fps. The touchscreen LCD of this camera flips up so that you can see yourself as you vlog in selfie mode. |
|---|---|
|
Best mid-range mirrorless camera for vlogging: Canon EOS M50 The Canon EOS M50 can shoot UHD 4K videos at 23.98 fps. You can also record 120 fps slow-motion videos at 720p. Unlike the M100, which only has a flip up screen, the M50 has a fully articulated screen, so you can use this camera in selfie mode, all while using an on-camera shotgun microphone attached to the camera hot/cold shoe. |
|
Best DSLR camera for daily vlogging: Canon EOS T7i The Canon EOS T7i is a great DSLR camera for daily vlogging. It can record full HD 1080p videos at 60 fps, it can create HDR and time-lapse movies, and it also has a fully articulated screen. |
|
Best entry-level DSLR camera for vlogging: Canon EOS SL2 The Canon EOS SL2 delivers a lot of power at a low price. This DSLR camera can capture full HD 1080p videos at 60 fps. |
|
Best mid-range DSLR camera for vlogging: Canon EOS 80D The Canon 80D is an exceptional mid-range DSLR vlogging camera with many features. Coming with a 45-point all cross phase detection autofocusing and a dual pixel CMOS AF system, the camera is great at finding the right focus while recording video. |
Part 2: YOUTUBE EQUIPMENT: LENS
A lot of compact cameras already come with the lens as a part of the camera body. When it comes to these kinds of cameras, you won’t have to worry about which lens is right for you since the decision has already been made for you!
When you start looking into bigger cameras, though, you’ll have to think about which lens you want to shoot with.
The Wide-Angle Lens
Every YouTuber should have a wide-angle lens. With this kind of lens, you can fit much more of a scene into your camera frame, including your own face when you’re just an arm’s length away from your camera. This is especially important for YouTubers because most YouTubers have to operate their camera on their own, without the assistance of an additional camera person.
Optical Image Stabilization
You should also look for a lens with optical image stabilization if you’re shooting a lot of your YouTube videos handheld.
For more information on camera lenses, check out my Vlogger’s Guide To Camera Lenses .
Part 3: YOUTUBE EQUIPMENT: TRIPOD
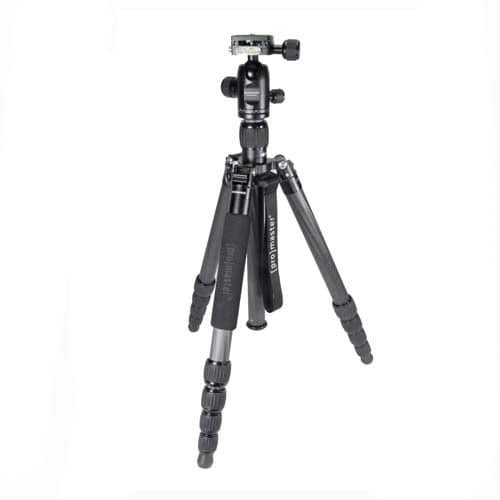 |
Tripod If you plan to film yourself talking in front of the same, unchanging background for an extended period of time, it doesn’t make sense to film yourself handheld the entire time. You’ll just end up tiring your arm out and adding distracting shakiness to your footage. A tripod is a great solution to this problem. You can set up your framing once, press record, and leave your camera in its fixed position while you talk with both hands free. |
|---|---|
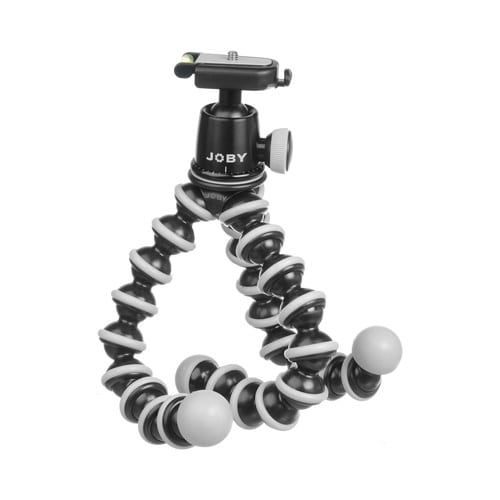 |
Joby GorillaPod With Ballhead When you film yourself handheld, it’s difficult to keep your arm higher up so that your camera shoots down at an ideal angle. You may also notice that a lot of your arm gets into your shot, which you and other viewers might find distracting. Holding your camera up by a GorillaPod, however, can give you the extension you need to get that higher angle shot more easily, all without so much of your arm getting into your shot. |
Part 4: YOUTUBE EQUIPMENT: MICROPHONE
Most vlogging cameras come with a built-in microphone that gets the job done. If you want higher quality audio recordings, though, you should check out the following list of top microphones.
| Top Condenser Mics For Music and Singing | Top Condenser Mics For Voiceovers-Podcasts, Interviews | Top On-Camera Shotgun Mics | Top Shotgun Mics | Top Low-Profile Lavalier Mics |
|---|---|---|---|---|
| Audio-Technica AT2035 Rode NT1-A AKG C214 | Apogee Mic 96K Blue Yeti Rode NT-USB Blue Snowball Audio-Technica AT2020 Rode Procaster | Rode VideoMic Go Shure VP83 Rode VideoMic Pro+ Sennheiser MKE 440 | Rode NTG-3 Audio-Technica AT4053B Sennheiser MKH416 | Rode SmartLav+ Audio-Technica ATR3350iS Sennheiser ME2 |
To read more about each of these microphones, check out our post on The 19 Best YouTube Microphones 2018 – Options for Music, Voiceovers, Vlogging, and more!
Part 5: YOUTUBE EQUIPMENT: SMARTPHONE ACCESSORIES

Using your smartphone’s camera to film your YouTube videos is a great idea since it’s light, portable, and most likely always with you. The following six smartphone accessories can help you make better YouTube videos:
- Arkon Tripod Mount
- FLII Selfie Ring Light
- RODE VideoMic Me
- Aukey Optic 3-in-1 Smartphone Lens Set
- iOgrapher Go for Android and iPhone
- Manfrotto TwistGrip System
Read about each one of these items and more in The 9 Best Smartphone Camera Accessories For Vloggers .
Part 6: YOUTUBE EQUIPMENT: LIGHT
Lighting for home living and lighting for filming is very different. If you try to make use of just the lights you have at home, you may find that your footage is too dark, grainy, and orange-tinted.
The solution to this problem is getting additional video lighting equipment with daytime light bulbs.
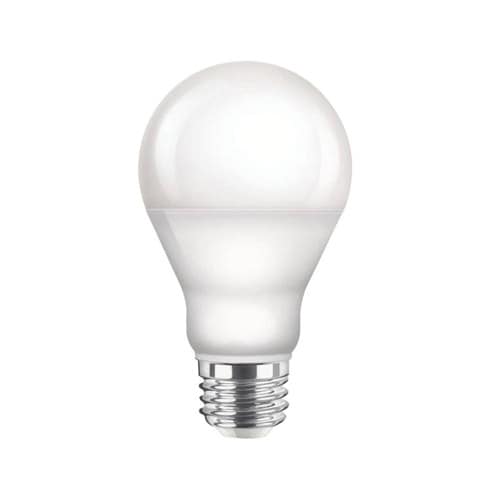 |
Daytime Light Bulbs Your home is most likely lit with incandescent light bulbs that illuminate orange-tinted light. You can remove those light bulbs and replace them with daytime light bulbs that illuminate more of a white colored light. |
|---|---|
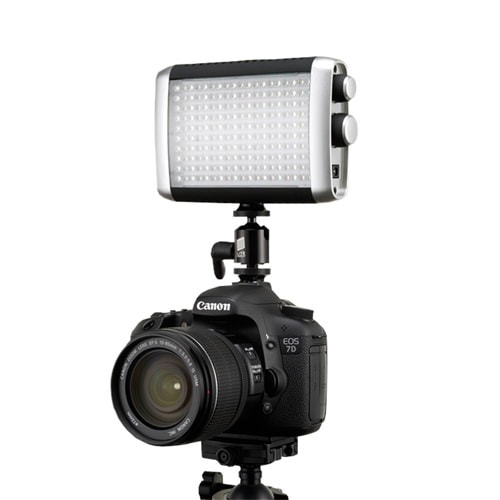 |
On-Camera LED Light If you need more light just in front of the camera and you need this light to be portable, LED lights that attach to your camera’s hot/cold shoe will do the job. |
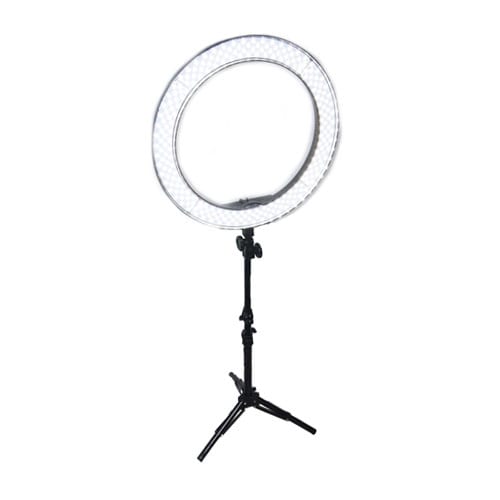 |
LED Ring Light If you need more light just in front of the camera, you don’t have a lot of space, and you don’t need this light to be small and portable, an LED ring light is the best piece of equipment for you. You can position your camera inside the circular space of the ring light. This kind of light also gives your eyes the circular shaped highlight that many people like to see. |
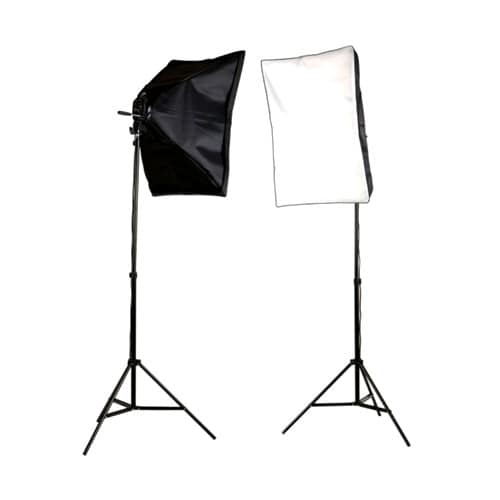 |
Softbox Video Light If you need more light and have more space, another piece of lighting equipment good for beginners is a softbox video light. |
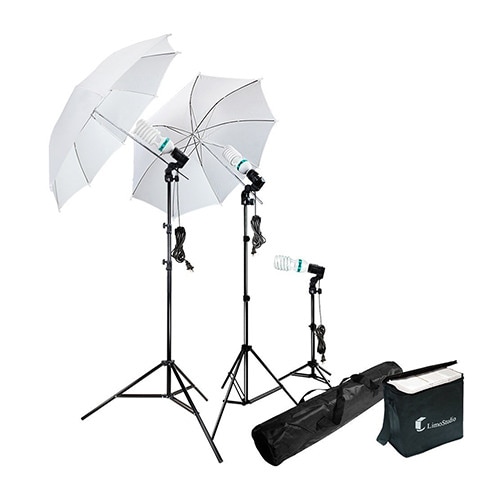 |
Umbrella Video Light Umbrella video lights are very portable and affordable. The direction of the light from umbrella lights are more difficult to control than the light from softbox video lights. |
If you’re looking for recommendations on which piece of lighting equipment to buy, check out my list of the Top 17 Video Lighting Equipment For YouTubers .
Part 7: YOUTUBE EQUIPMENT: COMPUTER
After you’ve recorded all your footage, you’ll need a computer to edit your video clips together. You can perform basic video editing tasks and upload your video onto YouTube with any computer less than ten years old.
Laptop computers are popular among YouTubers because their portability allows you to work on your videos from anywhere. This way, you can finish and upload your videos more frequently, which is another important part of being a YouTuber.
The following three laptop computers handle video editing very well:
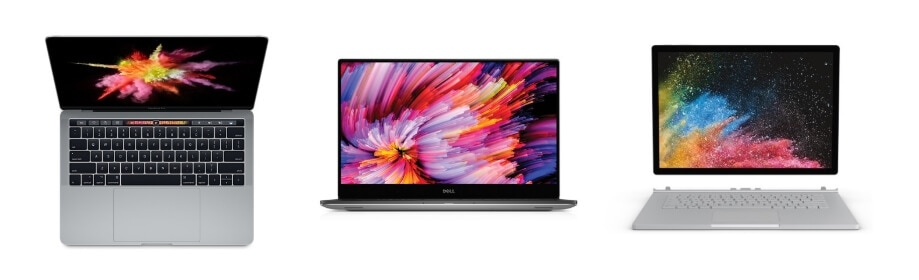
- MacBook Pro With Touch Bar
- Dell XPS 15
- Microsoft Surface Book 2
Read more about these laptop computers for 4K video editing in The Best Laptops for 4K Video Editing .
Part 8: YOUTUBE EQUIPMENT: VIDEO EDITING SOFTWARE


| FREE VIDEO EDITING SOFTWARES | PAID VIDEO EDITING SOFTWARES |
|---|---|
| OpenShot Video Editor (Windows, Mac, Linux) ShotCut (Windows, Mac, Linux) Hitfilm Express (Windows, Mac) VideoPad Video Editor (Windows) Lightworks (Windows, Mac, Linux) VSDC Video Editor (Windows) Machete Video Editor Lite (Windows) Avidemux (Windows, Mac, Linux, BSD) Read more about each of these softwares in our post about The Best Free Video Editing Software for YouTube . | Filmora Video Editor (Windows, Mac) - $40 one year license, $79.99 perpetual license. Free trial Final Cut Pro (Mac) - $299.99, Free trial Vegas Movie Studio (Windows) - $49.99 |
YOUTUBE EQUIPMENT: AUDIO
Music Libraries
Music is an important part of YouTube video creation. Here’s where you can get access to music:
| ROYALTY-FREE MUSIC LIBRARIES | PAID MUSIC LIBRARIES | PAID SUBSCRIPTION MUSIC LIBRARIES |
|---|---|---|
| Audionautix Bensound dig.ccMixter Free Music Archive Free Stock Music Incompetech Josh Woodward Moby Gratis Musopen Purple Planet Music TeknoAXE YouTube Audio Library | Premium Beat Audio Jungle | Audio Network Audio Blocks Epidemic Sound |
Sound Effects
Free Sound Effect Sites
- Filmstock Sound Effects
- Freesound
- PacDV
- Sound Bible
- Sound Gator
- Sounds Crate
- Zapsplat
Sumia Rafique
Sumia Rafique is a writer and a lover of all things video.
Follow @Sumia Rafique
Sumia Rafique
Feb 19, 2024• Proven solutions
If you want to start creating videos and uploading them onto YouTube, you’ll need to have access to some basic equipment. This guide will go over everything you’ll need to be a YouTuber.
Part 1: YOUTUBE EQUIPMENT: CAMERA
The best camera for beginners is the one you already have. Most smartphones these days already come equipped with a powerful camera that can record HD videos. If you still want to add a camera to your equipment list as a beginner YouTuber, you should look for a camera with the following eight qualities:
What To Look For In A Camera As A YouTuber
1. Fully articulated screen (flip screen)
2. Good continual auto focus while recording video
3. Good focus priority through face recognition
4. Touch to focus
5. Good low-light performance
6. external mic jack, hot/cold shoe bracket
7. optical image stabilization
8. good battery life
Check out my full list of 10 Things To Look For In A Vlogging Camera to understand the importance of these camera features.
Best Cheap Vlogging Cameras
Below are the best cheap vlogging cameras that you can get for under $500. They all record at least 1080p HD video and all but the Sony Alpha a5100 come with optical image stabilization (if you want OIS with the Sony a5100, you’ll have it get it in the lens).
| Camera | Release Date | Camera Type | Flip Screen | 4K | Price | |
|---|---|---|---|---|---|---|
| Yi 4KAction Camera | |
February2017 | Action Camera | No | Yes | $169 (MSRP) |
| NikonCoolpixA900 | |
February2016 | Compact | Flip Up | Yes | $399 (MSRP) |
| NikonCoolpixB500 | |
February2016 | SLR-like (bridge) | Tilting | No | $250 (MSRP) |
| PolaroidCube+ | |
June2015 | Action Camera | No | No | $99 (MSRP) |
| SonyAlphaa5100 | |
August2014 | Mirrorless | Flip Up | No | $450 (MSRP) |
|
Best cheap vlogging camera under $100: Polaroid Cube+ Even before GoPro released their GoPro Session, Polaroid was the first to come out with a 1.4-inch, cube-shaped action camera, small enough to mount on a bike or a helmet. This camera has built-in magnets so that you can attach them to metal surfaces. This action camera is water-resistant, shock-proof, and weather-proof. It can record full HD 1080p videos at 60 fps with its wide-angle lens. You can connect this camera with your phone to preview and take your shots. |
|---|---|
|
Best cheap vlogging camera under $200: Yi 4K At $200, you can record 4K videos with the Yi 4K action camera. Like many other action cameras, this camera is small, durable, and shoots through a wide-angle lens. You won’t be able to take this camera underwater though because it isn’t waterproof. You’ll need to buy the right accessories for that. |
|
Best cheap vlogging camera under $300: Nikon B500 The Nikon B500 gives you a non-interchangeable zoom lens so that you have more control over how you compose your shots. This camera records full HD 1080p videos at either 30 or 25 fps. You can only set its ISO as high as 3200, so it’s not going to perform the best in low-light conditions. The tilting LCD screen does not have touchscreen and cannot be fully flipped up or flipped to the side, it only tilts. For a camera in its price range, the Nikon B500 offers a lot of features. |
|
Best cheap vlogging camera under $400: Nikon A900 The Nikon A900 not only comes with a non-interchangeable zoom lens, but it can also record videos in UHD 4K quality. Like the Nikon B500, the A900’s ISO goes only up to 3200, making it a weak performer in poorly lit conditions. |
|
Best cheap vlogging camera under $500: Sony a5100 Among the cameras listed in our top cheap cameras list, the Sony a5100 is the only one you can interchange lenses with. All Sony E-mount lenses are compatible with this camera. This camera can record up to 1080p videos at 60 fps. Out of all of the above top cheap cameras, this one also auto focuses the best. |
Best Entry-Level and Mid-Range Vlogging Cameras
If you have a bigger budget to work with, the following vlogging cameras are great options:
| Camera | Release Date | Camera Type | Flip Screen | Mic Port | Price | |
|---|---|---|---|---|---|---|
| CanonEOSM50 | |
February2018 | Mirrorless | Fully Articulated | Yes | $- |
| CanonEOSM100 | |
August2017 | Mirrorless | Flip Up | No | $ |
| CanonEOS RebelSL2 | |
June2017 | Compact SLR | Fully Articulated | Yes | $ |
| CanonEOS RebelT7i | |
February2017 | Mid-size SLR | Fully Articulated | Yes | $- |
| CanonEOS80D | |
February2016 | Mid-size SLR | Fully Articulated | Yes | $$ |
|
Best entry-level mirrorless camera for vlogging: Canon EOS M100 The Canon M100 is a small and powerful camera that can shoot full HD (1080p) videos up to 60 fps. The touchscreen LCD of this camera flips up so that you can see yourself as you vlog in selfie mode. |
|---|---|
|
Best mid-range mirrorless camera for vlogging: Canon EOS M50 The Canon EOS M50 can shoot UHD 4K videos at 23.98 fps. You can also record 120 fps slow-motion videos at 720p. Unlike the M100, which only has a flip up screen, the M50 has a fully articulated screen, so you can use this camera in selfie mode, all while using an on-camera shotgun microphone attached to the camera hot/cold shoe. |
|
Best DSLR camera for daily vlogging: Canon EOS T7i The Canon EOS T7i is a great DSLR camera for daily vlogging. It can record full HD 1080p videos at 60 fps, it can create HDR and time-lapse movies, and it also has a fully articulated screen. |
|
Best entry-level DSLR camera for vlogging: Canon EOS SL2 The Canon EOS SL2 delivers a lot of power at a low price. This DSLR camera can capture full HD 1080p videos at 60 fps. |
|
Best mid-range DSLR camera for vlogging: Canon EOS 80D The Canon 80D is an exceptional mid-range DSLR vlogging camera with many features. Coming with a 45-point all cross phase detection autofocusing and a dual pixel CMOS AF system, the camera is great at finding the right focus while recording video. |
Part 2: YOUTUBE EQUIPMENT: LENS
A lot of compact cameras already come with the lens as a part of the camera body. When it comes to these kinds of cameras, you won’t have to worry about which lens is right for you since the decision has already been made for you!
When you start looking into bigger cameras, though, you’ll have to think about which lens you want to shoot with.
The Wide-Angle Lens
Every YouTuber should have a wide-angle lens. With this kind of lens, you can fit much more of a scene into your camera frame, including your own face when you’re just an arm’s length away from your camera. This is especially important for YouTubers because most YouTubers have to operate their camera on their own, without the assistance of an additional camera person.
Optical Image Stabilization
You should also look for a lens with optical image stabilization if you’re shooting a lot of your YouTube videos handheld.
For more information on camera lenses, check out my Vlogger’s Guide To Camera Lenses .
Part 3: YOUTUBE EQUIPMENT: TRIPOD
|
Tripod If you plan to film yourself talking in front of the same, unchanging background for an extended period of time, it doesn’t make sense to film yourself handheld the entire time. You’ll just end up tiring your arm out and adding distracting shakiness to your footage. A tripod is a great solution to this problem. You can set up your framing once, press record, and leave your camera in its fixed position while you talk with both hands free. |
|---|---|
|
Joby GorillaPod With Ballhead When you film yourself handheld, it’s difficult to keep your arm higher up so that your camera shoots down at an ideal angle. You may also notice that a lot of your arm gets into your shot, which you and other viewers might find distracting. Holding your camera up by a GorillaPod, however, can give you the extension you need to get that higher angle shot more easily, all without so much of your arm getting into your shot. |
Part 4: YOUTUBE EQUIPMENT: MICROPHONE
Most vlogging cameras come with a built-in microphone that gets the job done. If you want higher quality audio recordings, though, you should check out the following list of top microphones.
| Top Condenser Mics For Music and Singing | Top Condenser Mics For Voiceovers-Podcasts, Interviews | Top On-Camera Shotgun Mics | Top Shotgun Mics | Top Low-Profile Lavalier Mics |
|---|---|---|---|---|
| Audio-Technica AT2035 Rode NT1-A AKG C214 | Apogee Mic 96K Blue Yeti Rode NT-USB Blue Snowball Audio-Technica AT2020 Rode Procaster | Rode VideoMic Go Shure VP83 Rode VideoMic Pro+ Sennheiser MKE 440 | Rode NTG-3 Audio-Technica AT4053B Sennheiser MKH416 | Rode SmartLav+ Audio-Technica ATR3350iS Sennheiser ME2 |
To read more about each of these microphones, check out our post on The 19 Best YouTube Microphones 2018 – Options for Music, Voiceovers, Vlogging, and more!
Part 5: YOUTUBE EQUIPMENT: SMARTPHONE ACCESSORIES
Using your smartphone’s camera to film your YouTube videos is a great idea since it’s light, portable, and most likely always with you. The following six smartphone accessories can help you make better YouTube videos:
- Arkon Tripod Mount
- FLII Selfie Ring Light
- RODE VideoMic Me
- Aukey Optic 3-in-1 Smartphone Lens Set
- iOgrapher Go for Android and iPhone
- Manfrotto TwistGrip System
Read about each one of these items and more in The 9 Best Smartphone Camera Accessories For Vloggers .
Part 6: YOUTUBE EQUIPMENT: LIGHT
Lighting for home living and lighting for filming is very different. If you try to make use of just the lights you have at home, you may find that your footage is too dark, grainy, and orange-tinted.
The solution to this problem is getting additional video lighting equipment with daytime light bulbs.
|
Daytime Light Bulbs Your home is most likely lit with incandescent light bulbs that illuminate orange-tinted light. You can remove those light bulbs and replace them with daytime light bulbs that illuminate more of a white colored light. |
|---|---|
|
On-Camera LED Light If you need more light just in front of the camera and you need this light to be portable, LED lights that attach to your camera’s hot/cold shoe will do the job. |
|
LED Ring Light If you need more light just in front of the camera, you don’t have a lot of space, and you don’t need this light to be small and portable, an LED ring light is the best piece of equipment for you. You can position your camera inside the circular space of the ring light. This kind of light also gives your eyes the circular shaped highlight that many people like to see. |
|
Softbox Video Light If you need more light and have more space, another piece of lighting equipment good for beginners is a softbox video light. |
|
Umbrella Video Light Umbrella video lights are very portable and affordable. The direction of the light from umbrella lights are more difficult to control than the light from softbox video lights. |
If you’re looking for recommendations on which piece of lighting equipment to buy, check out my list of the Top 17 Video Lighting Equipment For YouTubers .
Part 7: YOUTUBE EQUIPMENT: COMPUTER
After you’ve recorded all your footage, you’ll need a computer to edit your video clips together. You can perform basic video editing tasks and upload your video onto YouTube with any computer less than ten years old.
Laptop computers are popular among YouTubers because their portability allows you to work on your videos from anywhere. This way, you can finish and upload your videos more frequently, which is another important part of being a YouTuber.
The following three laptop computers handle video editing very well:
- MacBook Pro With Touch Bar
- Dell XPS 15
- Microsoft Surface Book 2
Read more about these laptop computers for 4K video editing in The Best Laptops for 4K Video Editing .
Part 8: YOUTUBE EQUIPMENT: VIDEO EDITING SOFTWARE
| FREE VIDEO EDITING SOFTWARES | PAID VIDEO EDITING SOFTWARES |
|---|---|
| OpenShot Video Editor (Windows, Mac, Linux) ShotCut (Windows, Mac, Linux) Hitfilm Express (Windows, Mac) VideoPad Video Editor (Windows) Lightworks (Windows, Mac, Linux) VSDC Video Editor (Windows) Machete Video Editor Lite (Windows) Avidemux (Windows, Mac, Linux, BSD) Read more about each of these softwares in our post about The Best Free Video Editing Software for YouTube . | Filmora Video Editor (Windows, Mac) - $40 one year license, $79.99 perpetual license. Free trial Final Cut Pro (Mac) - $299.99, Free trial Vegas Movie Studio (Windows) - $49.99 |
YOUTUBE EQUIPMENT: AUDIO
Music Libraries
Music is an important part of YouTube video creation. Here’s where you can get access to music:
| ROYALTY-FREE MUSIC LIBRARIES | PAID MUSIC LIBRARIES | PAID SUBSCRIPTION MUSIC LIBRARIES |
|---|---|---|
| Audionautix Bensound dig.ccMixter Free Music Archive Free Stock Music Incompetech Josh Woodward Moby Gratis Musopen Purple Planet Music TeknoAXE YouTube Audio Library | Premium Beat Audio Jungle | Audio Network Audio Blocks Epidemic Sound |
Sound Effects
Free Sound Effect Sites
- Filmstock Sound Effects
- Freesound
- PacDV
- Sound Bible
- Sound Gator
- Sounds Crate
- Zapsplat
Sumia Rafique
Sumia Rafique is a writer and a lover of all things video.
Follow @Sumia Rafique
Engage and Captivate Viewers: Ultimate Tips for Cutting-Edge Youtube Edits
How To Edit YouTube Videos

Richard Bennett
Oct 26, 2023• Proven solutions
YouTube videos have a certain look and feel that many viewers have come to expect and enjoy. Much of the aesthetics of YouTube videos developed as a result of the biggest YouTubers having to quickly and efficiently edit videos together on a daily basis. Below is our list of some of the most common video editing techniques used by famous YouTubers.
Part 1: Introduction
1. Start Big
“I’m doing something really exciting… within the first ten seconds of this video. That way you stay here.” – Liza Koshy (How To Be A YouTuber 101!! | Lizzza)
In the same way that a teaser or trailer builds anticipation for a full film, many YouTubers start with a preview of the most high-energy part of their video.
In Jake Paul’s prank vlog (above), Jake shows his brother, Logan, chasing and beating him up as Jake screams for help at the top of his lungs. The already high-energy scene is even more intensified by the epic music playing in the background. This seven-second clip, which resurfaces halfway through the video, is enough to entice many viewers to continue watching. It very effectively leaves enough room for viewers to wonder, “How did Logan’s room actually look in the end?” “What was Logan’s initial reaction before he started chasing Jake?” By creating curiosity gaps like these, you can incentivize your viewers to close these gaps by watching longer.
2. Opening Title Introduction
Just as TV episodes begin with opening credits and theme music, quite similarly, some YouTubers start their YouTube videos with an intro.
Greg from “How To Drink” has an effective twenty-second intro (above). In this video, he shows you who he is and what his videos are generally about. Since these two things don’t change so much for him from video to video, he can start many of his videos off with this same intro.
Below is a video tutorial about how to add text and titles to video in Filmora, hope that helps you in creating your own YouTube video texts and titles.
For more information on intros, check out our post on How to Make a YouTube Intro?
Part 2: Cuts
1. Jump Cut
A jump cut is a simple and straightforward type of video editing cutting technique that “jumps” from one section of a clip to a later section of a clip, cutting out whatever happened in the middle. Some of the middle parts you might want to remove may include mistakes, long silent pauses, and filler words (umm, like, etc.).
Although the use of jump cuts to remove these parts had been discouraged for a long time in the film world, its extensive use by so many YouTubers has established it as its own style that many viewers have come to expect and enjoy. The jumpiness that comes from jump cuts can be effective in keeping your audience’s attention in a shock-inducing manner.
Jump cuts can also be used to show a passage of time in a creative way or make objects magically appear on-screen.
Zack King (above) makes a toy taxi magically appear in his hands using this video editing technique. Filmora allows you to do jump cut easily, you can watch the tutorial below and learn more jump cut tips and tricks .
2. Associative Cut
Not everyone in your audience may recognize the cultural or historical references you make in your videos. It can, therefore, be helpful (and also quite enjoyable) to show the original clip of the reference you are making.
In the same vlog that Jake Paul gets chased down by his brother (above), twenty-eight seconds into the video, Jake expresses his desire to go fast in his car. Right after he says “I want to go fast,” Jake cuts into a scene from the movie Talladega Nights. In that scene, Ricky Bobby, Will Ferrell’s character, also says that he wants to go fast.

Part 3: Transform
1. Zoom
Many YouTubers digitally adjust the zoom of their talking head shots in order to create additional emphasis or suspense. When zoom is used very slowly and smoothly, this technique can be effective in building up suspense and drawing a viewer deeper into the speaker’s message. When a drastic zoom is used suddenly, it can be effective in emphasizing a particular spoken line.
RiceGum is one YouTuber who uses zoom video editing effects extensively in his talking head videos. Want to pan and zoom your video footage too? Check our guide to getting Ken Burns Effect on Videos .
2. Camera Shake
Camera shake is a video effect that makes the original clip appear like it was filmed during a violent earthquake. Many YouTubers use this effect to emphasize their voice when they are talking about something erratic or out of control.
3. Color/Level Adjustment
A lot of comedy YouTubers change the color and levels of their videos in order to emphasize different moods. One common thing YouTubers do when they talk about anything slightly sad is to gradually fade out the colors in their talking head shots. In a cheesy way, the black and white look can emphasize a feeling of emptiness. For his “sad” reactions, PewDiePie often jump cuts into a black and white, slowed down clip of his sad face while playing some sad music in the background. To emphasize a darker message, some YouTubers increase the amount of shadows in their video. In the video below, while his daughter is delivering a darker message from 0:32 to 0:50, La Guardia Cross gradually adds more shadows around his daughter’s face through what appears to be a vignette effect.
Part 4: Transitions
1. Wipe
Many YouTubers transition from one scene into the next using a wipe transition. In a wipe transition, the next clip that you want to transition into slides into the frame horizontally or vertically until it completely covers the first clip. For additional wiping effect, many YouTubers also use a fast, high pitched “woosh” sound effect with this transition.
2. Zoom
The zoom transition is quite similar to the wipe transition, except it uses a zoom effect. Many of the top YouTubers combine this transition with a lower-pitched “woosh” sound effect.
Part 5: Visual Elements
In other genres of film, the only appropriate visual elements filmmakers can tastefully add to their footage seem to be clean looking, seamlessly integrated text and motion graphics. YouTube, on the other hand, is another world with much more room to get outrageous. Many of the top YouTubers add a lot of visual elements (emojis , images, filters, explosions) to their videos to emphasize their jokes, play-on-words, historical or cultural references, and mood.
1. Call-To-Action Visuals
Whether they’re prompting you to subscribe, like, comment, or check out their purchasable merchandise, many YouTubers include visuals to strengthen their calls-to-action.
Part 6: Time Manipulation
1. Timelapse
“The staple of any Casey Neistat vlog is the timelapse, which he uses both to further the narrative or set the time of day.” -@omgurheadsgone
A lot of cameras now come with a timelapse/hyperlapse function, requiring no further video editing. To achieve the kind of timelapses that Casey Neistat makes, though, you’ll have to film real-time footage and then manipulate the speed of it in post. Since sped up ambient sound is hardly ever pleasing to the ear, a lot of YouTubers replace the audio with music that enhances the mood of the timelapse.
2. Slow Motion
Slowing down footage is another way YouTubers like to manipulate the passage of time. This technique can draw the audience’s attention into the intricacies of a movement captured on film. But if you stretch your video clip digitally in order to achieve this look, your video may not look so smooth – your software will need to create extra frames of footage based on your existing footage. The solution around this problem is to make sure to record your video at a very high frame rate.

Part 7: Audio
1. Censor
The traditional practice for censoring out explicit language in television has been to replace profanity with a high pitched “bleep” sound effect . YouTubers, however, have popularized the use of animal sound effects to censor out explicit language. Epic Meal Time frequently uses the “caw” of a crow for this purpose.
2. Sound Effects
Whether it is pouring water into a cup or drinking a glass of water, adding louder sound effects can enhance your viewer’s experience of the action that is taking place on camera.
3. Background Music
Music is very effective in helping people feel all kinds of emotions. It is no wonder so many of the top YouTubers make gratuitous use of music in their videos. Some even add background music to every single clip of their entire YouTube video and only drop the music when the following technique (below) is used.
4. Muting Background Music
A lot of YouTubers who talk over background music abruptly mute the music when they want their audience to focus their attention on whatever it is that they have to say at that very moment. Isolating one’s speech in this way can be a very effective way to emphasize something serious or emphasize a punchline to a joke.
5. Voice-Over
Adding additional recorded verbal commentary is another technique used by many of the top YouTubers. This technique can be helpful when the visuals of your footage do not sufficiently communicate the full message you want to get across to your audience.
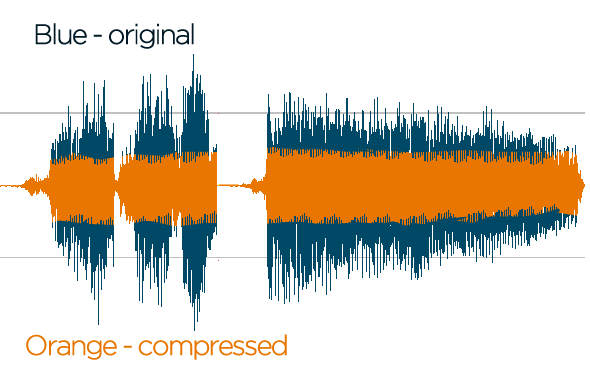
6. Compressor
A lot of video editing software programs give you the option to add compression to your video’s audio. Compression lessens the dynamic range between the softest and loudest parts of your audio. This technique can help your speech sound more uniform in volume.
For those who want to make their YouTube videos better, I recommend Wondershare Filmora for editing YouTube videos . Filmora video editor allows you to create and edit a YouTube video easily with plentiful templates and effects pre-programmed.
Richard Bennett
Richard Bennett is a writer and a lover of all things video.
Follow @Richard Bennett
Richard Bennett
Oct 26, 2023• Proven solutions
YouTube videos have a certain look and feel that many viewers have come to expect and enjoy. Much of the aesthetics of YouTube videos developed as a result of the biggest YouTubers having to quickly and efficiently edit videos together on a daily basis. Below is our list of some of the most common video editing techniques used by famous YouTubers.
Part 1: Introduction
1. Start Big
“I’m doing something really exciting… within the first ten seconds of this video. That way you stay here.” – Liza Koshy (How To Be A YouTuber 101!! | Lizzza)
In the same way that a teaser or trailer builds anticipation for a full film, many YouTubers start with a preview of the most high-energy part of their video.
In Jake Paul’s prank vlog (above), Jake shows his brother, Logan, chasing and beating him up as Jake screams for help at the top of his lungs. The already high-energy scene is even more intensified by the epic music playing in the background. This seven-second clip, which resurfaces halfway through the video, is enough to entice many viewers to continue watching. It very effectively leaves enough room for viewers to wonder, “How did Logan’s room actually look in the end?” “What was Logan’s initial reaction before he started chasing Jake?” By creating curiosity gaps like these, you can incentivize your viewers to close these gaps by watching longer.
2. Opening Title Introduction
Just as TV episodes begin with opening credits and theme music, quite similarly, some YouTubers start their YouTube videos with an intro.
Greg from “How To Drink” has an effective twenty-second intro (above). In this video, he shows you who he is and what his videos are generally about. Since these two things don’t change so much for him from video to video, he can start many of his videos off with this same intro.
Below is a video tutorial about how to add text and titles to video in Filmora, hope that helps you in creating your own YouTube video texts and titles.
For more information on intros, check out our post on How to Make a YouTube Intro?
Part 2: Cuts
1. Jump Cut
A jump cut is a simple and straightforward type of video editing cutting technique that “jumps” from one section of a clip to a later section of a clip, cutting out whatever happened in the middle. Some of the middle parts you might want to remove may include mistakes, long silent pauses, and filler words (umm, like, etc.).
Although the use of jump cuts to remove these parts had been discouraged for a long time in the film world, its extensive use by so many YouTubers has established it as its own style that many viewers have come to expect and enjoy. The jumpiness that comes from jump cuts can be effective in keeping your audience’s attention in a shock-inducing manner.
Jump cuts can also be used to show a passage of time in a creative way or make objects magically appear on-screen.
Zack King (above) makes a toy taxi magically appear in his hands using this video editing technique. Filmora allows you to do jump cut easily, you can watch the tutorial below and learn more jump cut tips and tricks .
2. Associative Cut
Not everyone in your audience may recognize the cultural or historical references you make in your videos. It can, therefore, be helpful (and also quite enjoyable) to show the original clip of the reference you are making.
In the same vlog that Jake Paul gets chased down by his brother (above), twenty-eight seconds into the video, Jake expresses his desire to go fast in his car. Right after he says “I want to go fast,” Jake cuts into a scene from the movie Talladega Nights. In that scene, Ricky Bobby, Will Ferrell’s character, also says that he wants to go fast.
Part 3: Transform
1. Zoom
Many YouTubers digitally adjust the zoom of their talking head shots in order to create additional emphasis or suspense. When zoom is used very slowly and smoothly, this technique can be effective in building up suspense and drawing a viewer deeper into the speaker’s message. When a drastic zoom is used suddenly, it can be effective in emphasizing a particular spoken line.
RiceGum is one YouTuber who uses zoom video editing effects extensively in his talking head videos. Want to pan and zoom your video footage too? Check our guide to getting Ken Burns Effect on Videos .
2. Camera Shake
Camera shake is a video effect that makes the original clip appear like it was filmed during a violent earthquake. Many YouTubers use this effect to emphasize their voice when they are talking about something erratic or out of control.
3. Color/Level Adjustment
A lot of comedy YouTubers change the color and levels of their videos in order to emphasize different moods. One common thing YouTubers do when they talk about anything slightly sad is to gradually fade out the colors in their talking head shots. In a cheesy way, the black and white look can emphasize a feeling of emptiness. For his “sad” reactions, PewDiePie often jump cuts into a black and white, slowed down clip of his sad face while playing some sad music in the background. To emphasize a darker message, some YouTubers increase the amount of shadows in their video. In the video below, while his daughter is delivering a darker message from 0:32 to 0:50, La Guardia Cross gradually adds more shadows around his daughter’s face through what appears to be a vignette effect.
Part 4: Transitions
1. Wipe
Many YouTubers transition from one scene into the next using a wipe transition. In a wipe transition, the next clip that you want to transition into slides into the frame horizontally or vertically until it completely covers the first clip. For additional wiping effect, many YouTubers also use a fast, high pitched “woosh” sound effect with this transition.
2. Zoom
The zoom transition is quite similar to the wipe transition, except it uses a zoom effect. Many of the top YouTubers combine this transition with a lower-pitched “woosh” sound effect.
Part 5: Visual Elements
In other genres of film, the only appropriate visual elements filmmakers can tastefully add to their footage seem to be clean looking, seamlessly integrated text and motion graphics. YouTube, on the other hand, is another world with much more room to get outrageous. Many of the top YouTubers add a lot of visual elements (emojis , images, filters, explosions) to their videos to emphasize their jokes, play-on-words, historical or cultural references, and mood.
1. Call-To-Action Visuals
Whether they’re prompting you to subscribe, like, comment, or check out their purchasable merchandise, many YouTubers include visuals to strengthen their calls-to-action.
Part 6: Time Manipulation
1. Timelapse
“The staple of any Casey Neistat vlog is the timelapse, which he uses both to further the narrative or set the time of day.” -@omgurheadsgone
A lot of cameras now come with a timelapse/hyperlapse function, requiring no further video editing. To achieve the kind of timelapses that Casey Neistat makes, though, you’ll have to film real-time footage and then manipulate the speed of it in post. Since sped up ambient sound is hardly ever pleasing to the ear, a lot of YouTubers replace the audio with music that enhances the mood of the timelapse.
2. Slow Motion
Slowing down footage is another way YouTubers like to manipulate the passage of time. This technique can draw the audience’s attention into the intricacies of a movement captured on film. But if you stretch your video clip digitally in order to achieve this look, your video may not look so smooth – your software will need to create extra frames of footage based on your existing footage. The solution around this problem is to make sure to record your video at a very high frame rate.
Part 7: Audio
1. Censor
The traditional practice for censoring out explicit language in television has been to replace profanity with a high pitched “bleep” sound effect . YouTubers, however, have popularized the use of animal sound effects to censor out explicit language. Epic Meal Time frequently uses the “caw” of a crow for this purpose.
2. Sound Effects
Whether it is pouring water into a cup or drinking a glass of water, adding louder sound effects can enhance your viewer’s experience of the action that is taking place on camera.
3. Background Music
Music is very effective in helping people feel all kinds of emotions. It is no wonder so many of the top YouTubers make gratuitous use of music in their videos. Some even add background music to every single clip of their entire YouTube video and only drop the music when the following technique (below) is used.
4. Muting Background Music
A lot of YouTubers who talk over background music abruptly mute the music when they want their audience to focus their attention on whatever it is that they have to say at that very moment. Isolating one’s speech in this way can be a very effective way to emphasize something serious or emphasize a punchline to a joke.
5. Voice-Over
Adding additional recorded verbal commentary is another technique used by many of the top YouTubers. This technique can be helpful when the visuals of your footage do not sufficiently communicate the full message you want to get across to your audience.
6. Compressor
A lot of video editing software programs give you the option to add compression to your video’s audio. Compression lessens the dynamic range between the softest and loudest parts of your audio. This technique can help your speech sound more uniform in volume.
For those who want to make their YouTube videos better, I recommend Wondershare Filmora for editing YouTube videos . Filmora video editor allows you to create and edit a YouTube video easily with plentiful templates and effects pre-programmed.
Richard Bennett
Richard Bennett is a writer and a lover of all things video.
Follow @Richard Bennett
Also read:
- [New] Achieving YouTube Live Prominence with Pro-Level Tips
- Streamlining Multiple YouTube Videos Into One
- [Updated] Channel Prodigy Skyrocketing with Content Innovation
- The Expert Guide to Earning with YouTube
- In 2024, Dial in the Perfect Moment YouTube Optimal Posting
- Essential Choice 10 FREE YouTube Subtitle Extractors for 2024
- A Bundle of Nine Premium Holiday Treasures Watch for Free on YouTube
- Uncomplicated Online Music Conversion Top 6 Free iOS Apps for Video & Audio
- Affiliate Advancements How Small Channels Thrive Financially
- Maximizing Engagement with Proper YT Thumbnail Size
- In 2024, Building Brands Together A Guide to Selecting YouTube Teams
- 2024 Approved Enhancing Visual Appeal Tips for Striking Haul Videos
- The Monetary Value of Each YouTube Brand Partnership?
- In 2024, Creating Viral Haul Videos A Comprehensible Guide
- Complete Guide What Does Unlisted Mean on YouTube
- In 2024, Bridging Platforms Loop-Ready Setups for YouTube and TV
- Cross-Platform Engagement via YouTube + Twitch Broadcasts for 2024
- In 2024, Discover the Leading Online Video Cutter for YouTube
- [Updated] Top 5 Tactile Social Symbols Dynamic Designs for 2024
- 2024 Approved Unleashing the Power of Color in Final Cut Pro
- New Mastering AVI File Editing A Beginners Guide to Splitting and Trimming for 2024
- [New] Top 10 Video Editors Rising From Vimeo's Shadow for 2024
- Transforming Words Into Audio Proven MP3 Conversion Strategies for 2024
- [Updated] 2024 Approved The Art of Memory Management Increasing RAM in Minecraft
- New In 2024, Mastering Time Manipulation in FCPX
- New Audacity on Your Chrome OS Complete Installation and Deletion Processes
- In 2024, Locked Out of iPhone 13 mini? 5 Ways to get into a Locked iPhone 13 mini | Dr.fone
- New The Best Video Editing Apps for Those New to Video Editing
- Advanced Photographic Distortion Tactics
- Strategic Exposure The Art of Opening Gains
- Updated Top 15 Scores Melodies & Harmonies Catering to Various Video Genres
- [New] 2024 Approved Pro Tips for Using Filters on Zoom for Crystal Clear Calls
- Here are Some Pro Tips for Pokemon Go PvP Battles On Poco F5 5G | Dr.fone
- Integrating Seamless Multimedia Elements on Your Mac Screen
- In 2024, How to Change Your Location on Apple iPhone 15 | Dr.fone
- Title: "In 2024, Charting a Course Essential Equipment for YouTube Enthusiasts"
- Author: Steven
- Created at : 2024-05-25 19:35:25
- Updated at : 2024-05-26 19:35:25
- Link: https://youtube-clips.techidaily.com/in-2024-charting-a-course-essential-equipment-for-youtube-enthusiasts/
- License: This work is licensed under CC BY-NC-SA 4.0.
