
"In 2024, Best 5 Non-YouTube Editing Tools for Vids"
Best 5 Non-YouTube Editing Tools for Vids
Best 5 YouTube Video Editor Alternatives

Richard Bennett
Mar 27, 2024• Proven solutions
YouTube provides a free tool that allows the user to create a video by putting together various clips and then publish them with a single click. All the uploads that the user has made before are added to the YouTube Video Editor. The tool allows the user to combine, trim, add music and customize. However, its functionality is limited to just that, and that’s why people are looking for the best YouTube Video Editor alternative.
Note: From 20th September 2017 users will no longer be able to use the complimentary editing suite. Check the best YouTube video editor alternatives from this complete guide.
Some of the cons of the YouTube Video Editor are:
- It doesn’t have advanced editing features.
- It requires Internet connection to use.
- It is slow.
- Users can only edit videos that were already uploaded to their YouTube account.
Best 5 YouTube Video Editor Alternatives
The good news is that there are good offline YouTube Video Editor Alternatives out there. Below are the top five:
1. Wondershare Filmora
Wondershare Filmora is one of the most popular YouTube Video Editor alternatives. It is available for both Windows and Mac platforms. The best thing about Wondershare Filmora is that it is easy to use. And at the same time, it has more features than the YouTube Video Editor.
 Download Mac Version ](https://tools.techidaily.com/wondershare/filmora/download/ )
Some of the key features of Filmora include:
- Allows the user to crop, cut, and combine video clips in just a few clicks
- Supports the addition of multiple audio and video tracks
- Choose from various overlays and filters
- Supports face off, green screen, and PIP effects
- Supports a wide range of video formats that include MP4, AVI, MOV, MKV, and WMV, just to name a few
- Burn video to DVD, or instantly upload it to YouTube, Facebook, and Vimeo
2. WeVideo
Another YouTube Video Editor alternative is WeVideo . It is a cloud-based video editor that allows the user to do the editing in any web browser. Just like the YouTube editing tool, the user must first upload the clips online in order to edit them, and create a video.
Pros:
One advantage of WeVideo is that it allows different users to collaborate in making a single video. A user can invite others to upload clips to the project, or even make different videos based on the same clips.
Cons:
And because it is a cloud-based video editor, it requires an Internet connection in order to get the clips and do the editing. Not only that, the videos must be uploaded before they can be used. And there are cases in which a five-minute video will require hours of raw footages. Users with slow upload speeds will take hours before they can start editing. And users of the free version can only export 480p videos that have a watermark. Users need to pay for the full version.
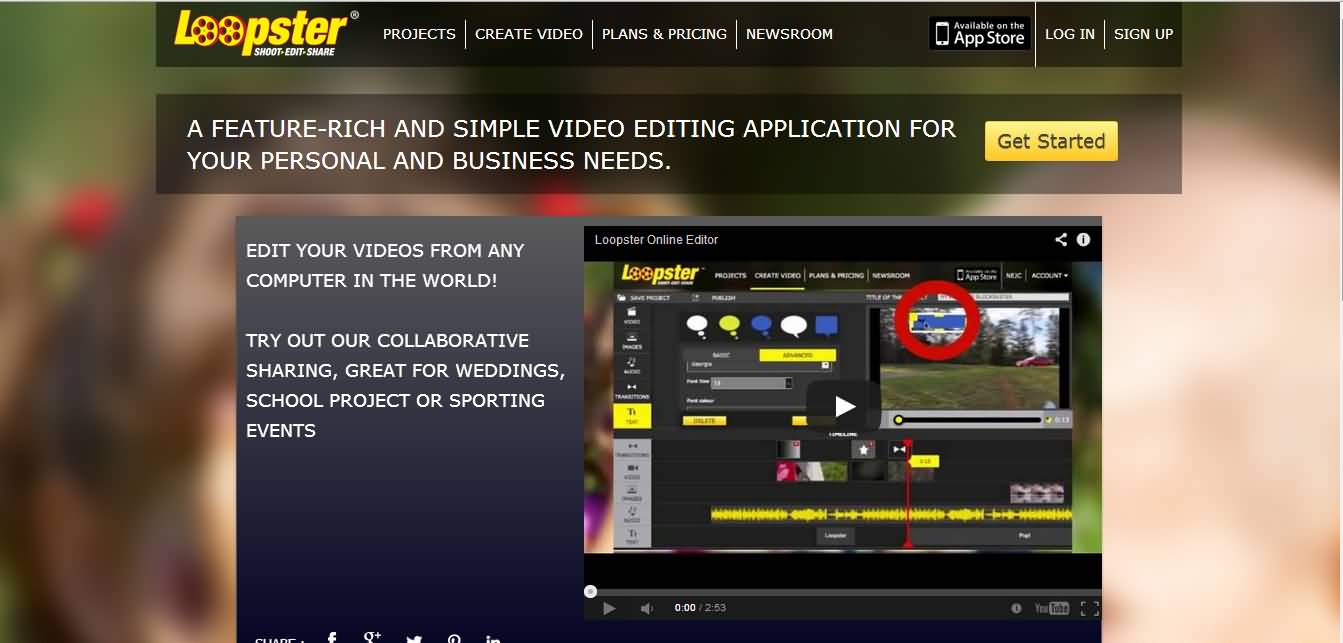
3. Loopster
Loopster is a mobile app that can be a YouTube Video Editor alternative. It is available for both the Android and iOS platforms. The tool allows the user to rotate, splice and add sound effects, zoom, and crop videos directly from one’s smartphone. It comes with advanced features that include title screens, slow motion effect, and bubble text. The app also lets the user record video and sounds directly. After editing the video, the app can export it directly to Facebook or YouTube.
Pros:
It does what it was designed to do when it is working. It is user-friendly and comes with a tutorial. It also works even if the smartphone is not connected to the internet. Editing is done offline. And best of all, it is free.
Cons:
One the downside, it looks like the developer is no longer updating the app. Some users experience crashes and other bugs. There are also some users that stated that the slow motion effect didn’t work for them, which is why they can’t recommend it as a YouTube Video Editor alternative.
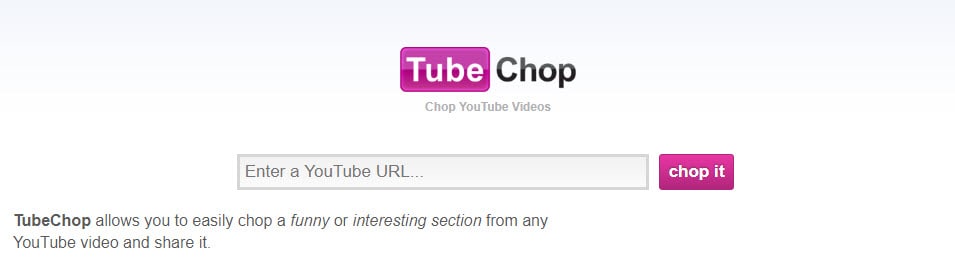
4. Tubechop
Tubechop allows the user to trim a video from any YouTube video and then share it. There are some videos that are just too long, and you want to cut it to the section that you find interesting.
Pros:
Just like the other YouTube Video Editor alternatives, Tubechop is easy to use. The user just needs to enter the YouTube URL of the video, and then indicate the section that’s interesting, and that’s it.
Cons:
However, Tubechop doesn’t allow users to download the resulting video. Tubechop only provides a link that allows users to view the chopped video. And when the original video is deleted, the chopped version will also be deleted.
5. Viddyad
Viddyad is another cloud-based platform that lets users convert images, music, clips, and animated effects into a video. It is said to be the best way to create video ads for businesses.

Pros:
There are several templates to choose from. Users can create video ads by adding videos, text, voiceover, special effects, music, and images. The platform also provides access to millions of image and video stock.
Cons:
Viddyad is a YouTube Video Editor alternative for businesses that want to create video ads. It might not be the right video editor for individuals who just want to create and share their personal videos.
Richard Bennett
Richard Bennett is a writer and a lover of all things video.
Follow @Richard Bennett
Richard Bennett
Mar 27, 2024• Proven solutions
YouTube provides a free tool that allows the user to create a video by putting together various clips and then publish them with a single click. All the uploads that the user has made before are added to the YouTube Video Editor. The tool allows the user to combine, trim, add music and customize. However, its functionality is limited to just that, and that’s why people are looking for the best YouTube Video Editor alternative.
Note: From 20th September 2017 users will no longer be able to use the complimentary editing suite. Check the best YouTube video editor alternatives from this complete guide.
Some of the cons of the YouTube Video Editor are:
- It doesn’t have advanced editing features.
- It requires Internet connection to use.
- It is slow.
- Users can only edit videos that were already uploaded to their YouTube account.
Best 5 YouTube Video Editor Alternatives
The good news is that there are good offline YouTube Video Editor Alternatives out there. Below are the top five:
1. Wondershare Filmora
Wondershare Filmora is one of the most popular YouTube Video Editor alternatives. It is available for both Windows and Mac platforms. The best thing about Wondershare Filmora is that it is easy to use. And at the same time, it has more features than the YouTube Video Editor.
Download Mac Version ](https://tools.techidaily.com/wondershare/filmora/download/ )
Some of the key features of Filmora include:
- Allows the user to crop, cut, and combine video clips in just a few clicks
- Supports the addition of multiple audio and video tracks
- Choose from various overlays and filters
- Supports face off, green screen, and PIP effects
- Supports a wide range of video formats that include MP4, AVI, MOV, MKV, and WMV, just to name a few
- Burn video to DVD, or instantly upload it to YouTube, Facebook, and Vimeo
2. WeVideo
Another YouTube Video Editor alternative is WeVideo . It is a cloud-based video editor that allows the user to do the editing in any web browser. Just like the YouTube editing tool, the user must first upload the clips online in order to edit them, and create a video.
Pros:
One advantage of WeVideo is that it allows different users to collaborate in making a single video. A user can invite others to upload clips to the project, or even make different videos based on the same clips.
Cons:
And because it is a cloud-based video editor, it requires an Internet connection in order to get the clips and do the editing. Not only that, the videos must be uploaded before they can be used. And there are cases in which a five-minute video will require hours of raw footages. Users with slow upload speeds will take hours before they can start editing. And users of the free version can only export 480p videos that have a watermark. Users need to pay for the full version.
3. Loopster
Loopster is a mobile app that can be a YouTube Video Editor alternative. It is available for both the Android and iOS platforms. The tool allows the user to rotate, splice and add sound effects, zoom, and crop videos directly from one’s smartphone. It comes with advanced features that include title screens, slow motion effect, and bubble text. The app also lets the user record video and sounds directly. After editing the video, the app can export it directly to Facebook or YouTube.
Pros:
It does what it was designed to do when it is working. It is user-friendly and comes with a tutorial. It also works even if the smartphone is not connected to the internet. Editing is done offline. And best of all, it is free.
Cons:
One the downside, it looks like the developer is no longer updating the app. Some users experience crashes and other bugs. There are also some users that stated that the slow motion effect didn’t work for them, which is why they can’t recommend it as a YouTube Video Editor alternative.
4. Tubechop
Tubechop allows the user to trim a video from any YouTube video and then share it. There are some videos that are just too long, and you want to cut it to the section that you find interesting.
Pros:
Just like the other YouTube Video Editor alternatives, Tubechop is easy to use. The user just needs to enter the YouTube URL of the video, and then indicate the section that’s interesting, and that’s it.
Cons:
However, Tubechop doesn’t allow users to download the resulting video. Tubechop only provides a link that allows users to view the chopped video. And when the original video is deleted, the chopped version will also be deleted.
5. Viddyad
Viddyad is another cloud-based platform that lets users convert images, music, clips, and animated effects into a video. It is said to be the best way to create video ads for businesses.
Pros:
There are several templates to choose from. Users can create video ads by adding videos, text, voiceover, special effects, music, and images. The platform also provides access to millions of image and video stock.
Cons:
Viddyad is a YouTube Video Editor alternative for businesses that want to create video ads. It might not be the right video editor for individuals who just want to create and share their personal videos.
Richard Bennett
Richard Bennett is a writer and a lover of all things video.
Follow @Richard Bennett
Compreranzo Il Background: Ottenere Video Più Chiaro Su YouTube
How to Blur Background of Your YouTube Video
Richard Bennett
Mar 27, 2024• Proven solutions
A lot of YouTubers like to vlog in front of blurred backgrounds. Blurring the background of your YouTube video is a fast way to make it look more professional – you stand out when you are entirely in focus, and everything behind you is blurry. Plus, it is an easy way to disguise the room you are vlogging from.

Even if your set is clean, there could be things like books behind you, which will distract viewers; they will be trying to read the spines. Blurring out the background of your shot makes your video look polished and keeps people’s focus entirely on you.
- Part 1: Blur YouTube Video Background in Shooting Videos
- Part 2: Add Tilt-Shift Effects to Video in Editing
Part 1: How to Blur Background of Your YouTube Video in Shooting Videos
Blurring your background is also how you create a beautiful bokeh lighting effect. Bokeh is when you blur lights in the background of your shot, creating halo-like circles of light. By attaching a filter with a shape cut out to the camera lens, you can even generate bokeh lights in other shapes, like hearts or stars.
Aperture refers to the hole in your lens which allows light into your camera. A narrow aperture lets in less light, and a wide aperture lets in more. The wider your aperture is, the shallower your depth of field will be. Widening your aperture also helps your camera perform better in low-light situations. Widening your aperture too much under the wrong circumstances can let in too much light and result in your footage being overexposed.
Depth of Field is the area of your image that is in focus. If you have a large depth of field, then objects close to and far away from your camera will all be in focus. Only a select area will be focused and the rest will be blurred if you have a shallow depth of field.
F-Stops are the measurement of an aperture’s width. The higher your f-stop, the narrower your aperture will be. To create a blurred background or a bokeh effect, you need a wide aperture, and thus a small f-stop. F-stops are written like ‘f/1.4’. You need an f-stop of less than f/4 to blur your background, and less than f/2.8 for bokeh.
1. Blurring and Bokeh
Blurred backgrounds and bokeh are very closely related. A bokeh effect is essentially a blurred background that includes lights.
To achieve a blurred background or a bokeh effect, you need to have a shallow depth of field. That means a wide aperture and a low f-stop.
2. How to Blur your Background
Place your subject – in the case of a vlog, your subject is probably yourself – in a shallow depth of field, and they will remain sharply in focus while everything behind them is blurred.
If the subject is yourself, you might need a helper to either operate your camera or stand in for you while you set up your camera. You will need to be able to check that the place you plan to stand or sit is in focus.
To get a shallow depth of field, make sure your aperture is wide. Do this by setting a low f-stop. Ideally, your f-stop will be 2.8 or lower, but if your camera cannot go that low, then f/3 or f/4 can also work.
Creating a bokeh effect is mostly the same, except that it works best when your subject/depth of field is very close to the camera, and you have a light source off in the background. Zoom Lenses do not usually have wide enough apertures to create bokeh backgrounds.
Blur Video Background in Post-Production with Wondershare Filmora Video Editor
If you need to blur the video background after shooting, you can use some video editing software to add the bokeh effect or the tilt-off effect in post-production. Here, I will show you how to do that in Filmora.
Filmora is one of the most widely used video editing software among YouTubers. Its user-friendly interface and tutorial guide enables green-hands to start video editing quickly. Besides, you can find many free filters, effects, and elements pre-programmed, so you can use them directly without looking for presets and templates somewhere else.
1. Add Bokeh Filter to Video in Filmora
There are about 20 bokeh effects available in filters and overlays. You can find them easily by typing bokeh in the search bar in Effects.
Note: you should select Included to see all bokeh effects pre-programmed in Filmora. If you need more visual effects, just go to the Filmstock effects store.

Double click the bokeh effect to preview the result, and if you find the bokeh effect fits the video, just drop it to the track above the video. And the bokeh filter or overlay will be applied to the video automatically.
2. Use Tilt-Shift Circle/Linear Effect to Blur Video Background
Filmora features two tilt effects, tilt-shift circle and tilt-shift linear, which allows you to highlight people in the video, blur, and conceal the video background.
Go to the Effects tab and then switch to the Utility menu under Included category.

Here, I will select the Tilt-Shift Circle effect and drop it to the track above the video. Now, you can adjust the size, position, and intensity of the tilt-shift circle effect

You see, the video background is blurred, and the people are highlighted. Now it’s your turn to download the Filmora video editor and try it yourself.

Richard Bennett
Richard Bennett is a writer and a lover of all things video.
Follow @Richard Bennett
Richard Bennett
Mar 27, 2024• Proven solutions
A lot of YouTubers like to vlog in front of blurred backgrounds. Blurring the background of your YouTube video is a fast way to make it look more professional – you stand out when you are entirely in focus, and everything behind you is blurry. Plus, it is an easy way to disguise the room you are vlogging from.
Even if your set is clean, there could be things like books behind you, which will distract viewers; they will be trying to read the spines. Blurring out the background of your shot makes your video look polished and keeps people’s focus entirely on you.
- Part 1: Blur YouTube Video Background in Shooting Videos
- Part 2: Add Tilt-Shift Effects to Video in Editing
Part 1: How to Blur Background of Your YouTube Video in Shooting Videos
Blurring your background is also how you create a beautiful bokeh lighting effect. Bokeh is when you blur lights in the background of your shot, creating halo-like circles of light. By attaching a filter with a shape cut out to the camera lens, you can even generate bokeh lights in other shapes, like hearts or stars.
Aperture refers to the hole in your lens which allows light into your camera. A narrow aperture lets in less light, and a wide aperture lets in more. The wider your aperture is, the shallower your depth of field will be. Widening your aperture also helps your camera perform better in low-light situations. Widening your aperture too much under the wrong circumstances can let in too much light and result in your footage being overexposed.
Depth of Field is the area of your image that is in focus. If you have a large depth of field, then objects close to and far away from your camera will all be in focus. Only a select area will be focused and the rest will be blurred if you have a shallow depth of field.
F-Stops are the measurement of an aperture’s width. The higher your f-stop, the narrower your aperture will be. To create a blurred background or a bokeh effect, you need a wide aperture, and thus a small f-stop. F-stops are written like ‘f/1.4’. You need an f-stop of less than f/4 to blur your background, and less than f/2.8 for bokeh.
1. Blurring and Bokeh
Blurred backgrounds and bokeh are very closely related. A bokeh effect is essentially a blurred background that includes lights.
To achieve a blurred background or a bokeh effect, you need to have a shallow depth of field. That means a wide aperture and a low f-stop.
2. How to Blur your Background
Place your subject – in the case of a vlog, your subject is probably yourself – in a shallow depth of field, and they will remain sharply in focus while everything behind them is blurred.
If the subject is yourself, you might need a helper to either operate your camera or stand in for you while you set up your camera. You will need to be able to check that the place you plan to stand or sit is in focus.
To get a shallow depth of field, make sure your aperture is wide. Do this by setting a low f-stop. Ideally, your f-stop will be 2.8 or lower, but if your camera cannot go that low, then f/3 or f/4 can also work.
Creating a bokeh effect is mostly the same, except that it works best when your subject/depth of field is very close to the camera, and you have a light source off in the background. Zoom Lenses do not usually have wide enough apertures to create bokeh backgrounds.
Blur Video Background in Post-Production with Wondershare Filmora Video Editor
If you need to blur the video background after shooting, you can use some video editing software to add the bokeh effect or the tilt-off effect in post-production. Here, I will show you how to do that in Filmora.
Filmora is one of the most widely used video editing software among YouTubers. Its user-friendly interface and tutorial guide enables green-hands to start video editing quickly. Besides, you can find many free filters, effects, and elements pre-programmed, so you can use them directly without looking for presets and templates somewhere else.
1. Add Bokeh Filter to Video in Filmora
There are about 20 bokeh effects available in filters and overlays. You can find them easily by typing bokeh in the search bar in Effects.
Note: you should select Included to see all bokeh effects pre-programmed in Filmora. If you need more visual effects, just go to the Filmstock effects store.
Double click the bokeh effect to preview the result, and if you find the bokeh effect fits the video, just drop it to the track above the video. And the bokeh filter or overlay will be applied to the video automatically.
2. Use Tilt-Shift Circle/Linear Effect to Blur Video Background
Filmora features two tilt effects, tilt-shift circle and tilt-shift linear, which allows you to highlight people in the video, blur, and conceal the video background.
Go to the Effects tab and then switch to the Utility menu under Included category.
Here, I will select the Tilt-Shift Circle effect and drop it to the track above the video. Now, you can adjust the size, position, and intensity of the tilt-shift circle effect
You see, the video background is blurred, and the people are highlighted. Now it’s your turn to download the Filmora video editor and try it yourself.
Richard Bennett
Richard Bennett is a writer and a lover of all things video.
Follow @Richard Bennett
Also read:
- [New] Captivating Videos Start Here These 7 Royalty-Free Audios for 2024
- [New] In 2024, Snappy Movement Capturing Blur with iPhone Photos
- [New] Premium 20 Unrestricted PUBG Captures Array
- [New] Supreme Session Naming Service for 2024
- [Updated] Mobile Screening Guide GoGoogleMeetRecorder Tips
- 2024 Approved Efficient Editing Techniques Mastering Video Cropping and Exporting
- Expert Tips on Softening Volume in Logic Pro Mixes for 2024
- From Script to Screen YouTube Tutorial & Alternative Pathways
- In 2024, 4 solution to get rid of pokemon fail to detect location On Meizu 21 | Dr.fone
- In 2024, Discover the Best Editing Tools for Your YouTube Channel
- In 2024, How To Change Country on App Store for iPhone 12 mini With 7 Methods | Dr.fone
- Initiate Investment Cost-Effective YouTube Monetization Options
- Leaders Shaping the Marvel Online Experience
- Title: In 2024, Best 5 Non-YouTube Editing Tools for Vids
- Author: Steven
- Created at : 2025-01-20 16:03:56
- Updated at : 2025-01-22 16:30:39
- Link: https://youtube-clips.techidaily.com/in-2024-best-5-non-youtube-editing-tools-for-vids/
- License: This work is licensed under CC BY-NC-SA 4.0.