
:max_bytes(150000):strip_icc()/Holding-iPhone-Emergency-SOS-Power-Off-Screen-8630001-1896d5a5d1e84350b096a0098f4e45c4.jpg)
In 2024, Auto Subscribe URL Creation for YouTube Enthusiasts
Auto Subscribe URL Creation for YouTube Enthusiasts
Create High-Quality Video - Wondershare Filmora
An easy and powerful YouTube video editor
Numerous video and audio effects to choose from
Detailed tutorials provided by the official channel
Building a YouTube channel isn’t a walk-in-the-park. As a content creator, you go toiling several processes to ensure its success. More so, you are probably building a brand and want people to know about your product or services. What about one easy way to remember the URL and share it with your potential subscribers? Besides sending such links to people, you’ll be reminding them to subscribe with just a click. And that’s YouTube auto-subscribe link. It is a more effective way than asking or directing to check your YouTube channel. They’ll probably not find it easy, maneuvering around numbers of other channels that bear names close to your channel. A visitor will quickly give up. You can save them the crap and engage more effectively.

In this article
01 How to subscribe to a YouTube channel?
02 How to create an auto-subscribe link for your YouTube channel?
03 Other tricks that work besides YouTube auto-subscribe.
How to subscribe to a YouTube channel?
A YouTube auto-subscribe link will be beneficial in many ways. Here are the steps to subscribe to a YouTube channel. You can subscribe from your phone or computer.
Using a phone
- First, open the YouTube app. Look for it on your phone’s home screen or search through apps.
- Then sign in to your “Google” account for you to be able to subscribe to YouTube channels.
- Next, locate the channel that you want to subscribe to. You can either subscribe from the channel home page or watch the channel video.
- Tap on the “Subscribe” button. The text on the “Subscribe” button will immediately change to “Subscribed” once you hit the subscribe tab.
- Finally, hit the “Subscriptions” tab to manage your channel subscriptions. You’ll also manage to see other latest updates from your subscription.
- You can now easily manage your notifications. You now start to receive notifications of other new channels by default. It is possible to modify this by choosing “All,” “None,” or “Personalized” to determine how to get notifications.

Using a computer
- First, visit the YouTube web page https://www.youtube.com in a web browser. The YouTube website will then be open.
- Then sign in to your YT account. Remember, you must also be signed in to a Google account to subscribe to YouTube channels.
- Browse for a channel and find what’s trending in the left-side panel of the screen.
- Hit the “Subscribe” button to subscribe to a channel. Once you are subscribed, the Subscribe text button will turn grey and change to “Subscribed.”
- View subscriptions by clicking the “three horizontal lines” found at the top-left corner of YouTube. You can also adjust your notification preferences to receive more or fewer updates from a channel.

How an auto-subscribe link will help boost your YouTube channel?
1. Links will auto-prompt visitors to subscribe to your YouTube channel.
2. You can use the link anywhere and reach very many visitors.
3. It works automatically to boost your subscriber count.
How to create an auto-subscribe link for your YouTube channel?
Here are the steps to create YouTube auto subscribers’ links on your computer and mobile device.

How to create a YouTube subscribe link on your computer
- Step 1. First, go to your YouTube Channel URL.
- Step 2. Press on your “Profile,” then click on the “Settings” option in the drop-down menu.
- Step 3. Next, click on the “Profile” picture and copy the URL link.
- Step 4. Add your “YouTube” channel URL with an “Auto Subscribe Tag.” “YouTube channel URL + ?sub_confirmation=1 Then remove the Plus Sign in between to get a YouTube subscribe link.
How to create a YouTube subscribe link on your mobile
- Step 1. Launch the YouTube app on your mobile phone, then click on the “Profile” icon.
- Step 2. Then go to the “Menu” tab and click on the “Your Channel” option.
- Step 3. Select the “Share” option from the drop-down menu.
- Step 4. Next, click on the “Copy link” of your YouTube Channel.
- Step 5. Finally, add your “YouTube” channel URL with the Auto Subscribe Tag.
How to locate your YouTube Channel URL
Unfortunately, many people don’t know their YouTube Channel URL. Check out how to locate your URL.
- Click on your “Profile” icon in the top-right corner of the YouTube page.
- Choose the “Settings” option from the drop-down menu.
- Next, hit the “Advanced” tab below your name.
- Boom! You get your link.
- Finally, combine your channel URL with the “Auto Subscribe” Tag.
● The formula: YouTube channel URL + “?sub_confirmation=1.” Remember to remove the parenthesis to get your auto-subscribe link.
Other tricks that work besides YouTube auto-subscribe
As a content creator, you need to do more to add YouTube auto subscribers to your channel.
Use closed captions to improve accessibility
Including subtitles or closed captions can drive a larger audience to access your content. Some YouTube users have challenges, for example, the deaf or those with hearing problems. Creating a video and not considering this may limit such users from getting to your channel as they may not get all the needed information. Follow these steps to create subtitles or closed captions.
- Sign in to YouTube Studio.
- Then select the “Subtitles” option from the left menu.
- Click on the video that you wish to edit.
- Next, click on the “Add Language” button and select your language.
- Go to the “Subtitles” section and select the “Add” button.
- Finally, enter your captions as the video plays. It will enable viewers who find it challenging to understand your video in detail and probably hit the subscribe button.

Translate your video descriptions
YouTube is accessed worldwide and not necessarily by those who speak your language. You can increase the chances of subscribers by translating your video titles and descriptions to make them understandable to people from across the world. It will make your videos more discoverable and show that you care about those from other regions. Check out how to add translations to YouTube videos.
- First, sign in to YouTube Studio.
- Then go to the left menu and select the “Subtitles” option.
- Choose the video in which you want to add the translations.
- It would be best if you choose a language for your video. Click the “Confirm” button.
- Then select the “Add language” option and choose the language you wish to translate your video into
- Go to “Titles & descriptions” and select the “Add” tab.
- Lastly, enter the translated description and hit the “Publish” button.
Use end screens for extra content promotion
An end screen call-to-action is essential in every video that you post on YouTube. They appear in the last 10 seconds and are useful in directing viewers to your chosen destination. Use them to direct a viewer to visit another channel, subscribe to your channel, or play another video. Here’s how to do it:
- Firstly, sign in to YouTube Studio.
- Then go to the “Videos” page and select a video to use.
- Select the “Editor” tab from the left menu.
- Next, choose the “Add an end screen” option to direct viewers appropriately.
Add a comment to your feed
This functionality is essential if many commenters repeatedly ask the same question. Besides, it will help you to boost engagement with a question.
Here are the simple steps on how to pin a comment to the top of your feed.
- Go to your “Community” tab.
- Then choose the comment that you wish to pin.
- Click on the “More” tab > “Pin” option.

Bonus: Will YouTube auto-subscribe me to a new channel?
It is not necessarily true that YouTube auto-subscribe will subscribe to a new channel. However, some reasons may contribute to that. You may have realized that YouTube just subscribed you to random channels without asking you. Here are the possible reasons for that.
• Spinoff Channel
A content creator may decide to come up with a Spinoff channel. In this case, they may automatically subscribe you to their new channel. In most cases, such content creators want to promote their new channel.
• Check your extensions
One of your browsers may be playing tricks on your YouTube account. Extensions may change your browser’s settings and make the “Unsubscribe” option unavailable. Try disabling all of your browser extensions, then check back if YouTube still subscribes you to channels unknown to you. If so, solve the issue by uninstalling the specific extensions. These could be ad blockers or free VPN extensions.
• Someone else can hit the button
Do you share your computer with other fellows? The chances are that someone hit the “Subscribe” button without your consent. Just unsubscribe and keep watching next time.
Conclusion
● The internet arena is very competitive. It would be best if you did everything right to drive as many YouTube auto-subscribers as possible to your channel. And creating a YouTube auto-subscribe link is the first step to making things easier for your potential subscribers. We have covered how to create a YouTube subscribe link and shown other tricks to help you keep your viewers locked.
Building a YouTube channel isn’t a walk-in-the-park. As a content creator, you go toiling several processes to ensure its success. More so, you are probably building a brand and want people to know about your product or services. What about one easy way to remember the URL and share it with your potential subscribers? Besides sending such links to people, you’ll be reminding them to subscribe with just a click. And that’s YouTube auto-subscribe link. It is a more effective way than asking or directing to check your YouTube channel. They’ll probably not find it easy, maneuvering around numbers of other channels that bear names close to your channel. A visitor will quickly give up. You can save them the crap and engage more effectively.
In this article
01 How to subscribe to a YouTube channel?
02 How to create an auto-subscribe link for your YouTube channel?
03 Other tricks that work besides YouTube auto-subscribe.
How to subscribe to a YouTube channel?
A YouTube auto-subscribe link will be beneficial in many ways. Here are the steps to subscribe to a YouTube channel. You can subscribe from your phone or computer.
Using a phone
- First, open the YouTube app. Look for it on your phone’s home screen or search through apps.
- Then sign in to your “Google” account for you to be able to subscribe to YouTube channels.
- Next, locate the channel that you want to subscribe to. You can either subscribe from the channel home page or watch the channel video.
- Tap on the “Subscribe” button. The text on the “Subscribe” button will immediately change to “Subscribed” once you hit the subscribe tab.
- Finally, hit the “Subscriptions” tab to manage your channel subscriptions. You’ll also manage to see other latest updates from your subscription.
- You can now easily manage your notifications. You now start to receive notifications of other new channels by default. It is possible to modify this by choosing “All,” “None,” or “Personalized” to determine how to get notifications.
Using a computer
- First, visit the YouTube web page https://www.youtube.com in a web browser. The YouTube website will then be open.
- Then sign in to your YT account. Remember, you must also be signed in to a Google account to subscribe to YouTube channels.
- Browse for a channel and find what’s trending in the left-side panel of the screen.
- Hit the “Subscribe” button to subscribe to a channel. Once you are subscribed, the Subscribe text button will turn grey and change to “Subscribed.”
- View subscriptions by clicking the “three horizontal lines” found at the top-left corner of YouTube. You can also adjust your notification preferences to receive more or fewer updates from a channel.
How an auto-subscribe link will help boost your YouTube channel?
1. Links will auto-prompt visitors to subscribe to your YouTube channel.
2. You can use the link anywhere and reach very many visitors.
3. It works automatically to boost your subscriber count.
How to create an auto-subscribe link for your YouTube channel?
Here are the steps to create YouTube auto subscribers’ links on your computer and mobile device.
How to create a YouTube subscribe link on your computer
- Step 1. First, go to your YouTube Channel URL.
- Step 2. Press on your “Profile,” then click on the “Settings” option in the drop-down menu.
- Step 3. Next, click on the “Profile” picture and copy the URL link.
- Step 4. Add your “YouTube” channel URL with an “Auto Subscribe Tag.” “YouTube channel URL + ?sub_confirmation=1 Then remove the Plus Sign in between to get a YouTube subscribe link.
How to create a YouTube subscribe link on your mobile
- Step 1. Launch the YouTube app on your mobile phone, then click on the “Profile” icon.
- Step 2. Then go to the “Menu” tab and click on the “Your Channel” option.
- Step 3. Select the “Share” option from the drop-down menu.
- Step 4. Next, click on the “Copy link” of your YouTube Channel.
- Step 5. Finally, add your “YouTube” channel URL with the Auto Subscribe Tag.
How to locate your YouTube Channel URL
Unfortunately, many people don’t know their YouTube Channel URL. Check out how to locate your URL.
- Click on your “Profile” icon in the top-right corner of the YouTube page.
- Choose the “Settings” option from the drop-down menu.
- Next, hit the “Advanced” tab below your name.
- Boom! You get your link.
- Finally, combine your channel URL with the “Auto Subscribe” Tag.
● The formula: YouTube channel URL + “?sub_confirmation=1.” Remember to remove the parenthesis to get your auto-subscribe link.
Other tricks that work besides YouTube auto-subscribe
As a content creator, you need to do more to add YouTube auto subscribers to your channel.
Use closed captions to improve accessibility
Including subtitles or closed captions can drive a larger audience to access your content. Some YouTube users have challenges, for example, the deaf or those with hearing problems. Creating a video and not considering this may limit such users from getting to your channel as they may not get all the needed information. Follow these steps to create subtitles or closed captions.
- Sign in to YouTube Studio.
- Then select the “Subtitles” option from the left menu.
- Click on the video that you wish to edit.
- Next, click on the “Add Language” button and select your language.
- Go to the “Subtitles” section and select the “Add” button.
- Finally, enter your captions as the video plays. It will enable viewers who find it challenging to understand your video in detail and probably hit the subscribe button.
Translate your video descriptions
YouTube is accessed worldwide and not necessarily by those who speak your language. You can increase the chances of subscribers by translating your video titles and descriptions to make them understandable to people from across the world. It will make your videos more discoverable and show that you care about those from other regions. Check out how to add translations to YouTube videos.
- First, sign in to YouTube Studio.
- Then go to the left menu and select the “Subtitles” option.
- Choose the video in which you want to add the translations.
- It would be best if you choose a language for your video. Click the “Confirm” button.
- Then select the “Add language” option and choose the language you wish to translate your video into
- Go to “Titles & descriptions” and select the “Add” tab.
- Lastly, enter the translated description and hit the “Publish” button.
Use end screens for extra content promotion
An end screen call-to-action is essential in every video that you post on YouTube. They appear in the last 10 seconds and are useful in directing viewers to your chosen destination. Use them to direct a viewer to visit another channel, subscribe to your channel, or play another video. Here’s how to do it:
- Firstly, sign in to YouTube Studio.
- Then go to the “Videos” page and select a video to use.
- Select the “Editor” tab from the left menu.
- Next, choose the “Add an end screen” option to direct viewers appropriately.
Add a comment to your feed
This functionality is essential if many commenters repeatedly ask the same question. Besides, it will help you to boost engagement with a question.
Here are the simple steps on how to pin a comment to the top of your feed.
- Go to your “Community” tab.
- Then choose the comment that you wish to pin.
- Click on the “More” tab > “Pin” option.
Bonus: Will YouTube auto-subscribe me to a new channel?
It is not necessarily true that YouTube auto-subscribe will subscribe to a new channel. However, some reasons may contribute to that. You may have realized that YouTube just subscribed you to random channels without asking you. Here are the possible reasons for that.
• Spinoff Channel
A content creator may decide to come up with a Spinoff channel. In this case, they may automatically subscribe you to their new channel. In most cases, such content creators want to promote their new channel.
• Check your extensions
One of your browsers may be playing tricks on your YouTube account. Extensions may change your browser’s settings and make the “Unsubscribe” option unavailable. Try disabling all of your browser extensions, then check back if YouTube still subscribes you to channels unknown to you. If so, solve the issue by uninstalling the specific extensions. These could be ad blockers or free VPN extensions.
• Someone else can hit the button
Do you share your computer with other fellows? The chances are that someone hit the “Subscribe” button without your consent. Just unsubscribe and keep watching next time.
Conclusion
● The internet arena is very competitive. It would be best if you did everything right to drive as many YouTube auto-subscribers as possible to your channel. And creating a YouTube auto-subscribe link is the first step to making things easier for your potential subscribers. We have covered how to create a YouTube subscribe link and shown other tricks to help you keep your viewers locked.
Efficient Content Management: Rank of the Top 10 YouTube Trimmers
YouTube is one of the most popular video-sharing social media websites. It offers a wide range of media, including music videos, trailers, live broadcasts, games, and how-to videos. It also has the greatest societal influence because most artists, musicians, and significant corporations utilize this platform to promote their work.
However, because of the growing consumer interest in media content, many providers utilize it to advertise businesses and products. These paid marketing videos aren’t always relevant to the material you want to see. With these circumstances in mind, this article will help you find an excellent YouTube Video Trimmer Online, which you may use to clip and trim YouTube videos.
In this article
01 Part 1: Best YouTube Video Trimmer Online
02 Part 2: FAQs About Online YouTube Video Trimmer
Part 1: Best YouTube Video Trimmer Online
YouTube is amongst the most frequently used social media platform. People get their content ideas and teach others about them. However, videos might contain some unnecessary parts, and it can be a problem if you want to save the video. The following YouTube trimmers online can assist you.
1. Filmora Instant Cutter Tool [Offline but More Powerful]
Before you try the below online tools, Filmora Instant Cutter tool will be another choice when you need more powerful features. It lets you input huge video clips in formats and rapidly reduce or combine them without re-encoding. This is a very valuable tool when working with high-resolution movies. It supports MP4/MOV and MTS/M2TS video files.It maintains the quality of the video It supports 4K UHD video formats It allows you to merge the videos You can trim massive files with ease.
You can download Youtube videos first and then make trimming or add effects on it.
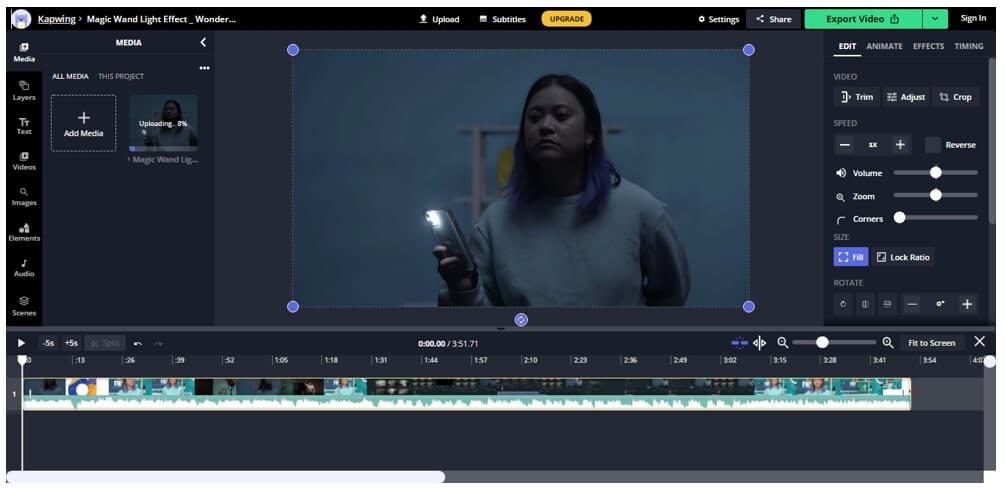
2. Kapwing
Kapwing is an online video editor that helps you edit videos without downloading the software. It features several editing tools with an easy-to-use interface. There’s no need to register yourself for editing the videos through Kapwing. That’s why it has millions of users worldwide.
Kapwing’s Video Trimmer makes it simple to trim YouTube videos. The service includes the same video cutting functionality as before but with a much prettier UI. After pasting the YouTube video URL to crop, you may use the easy-to-use timestamp slider to decide the sections of the YouTube video to edit.
Pros
- Different templates
- Multiple editing features
- Easy-to-use interface
- Fast
Cons
- Leaves a watermark if you don’t sign up
Find out more online video editors without a watermark.
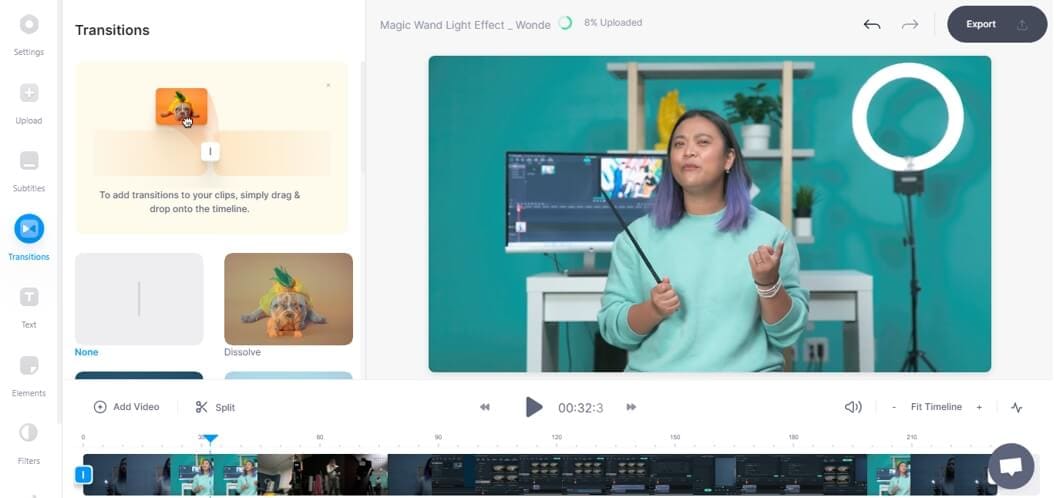
3. VEED .iO
VEED.io video editor is a simple yet powerful video-editing program that allow s users to make stunning videos. VEED may be an important element of your sales funnel. With this program, you may edit, enhance, and add a lot of creativity to presentations, marketing videos, review videos, or video blogging.
You need to choose a file and start trimming it. After that, download the video with its easy-to-use interface. You need to sign up for editing the video with the VEED online tool. Moreover, there’s no watermark in the exported video.
Pros
- Fast and straightforward
- Multiple output options
- No watermark
Cons
- Minor bugs
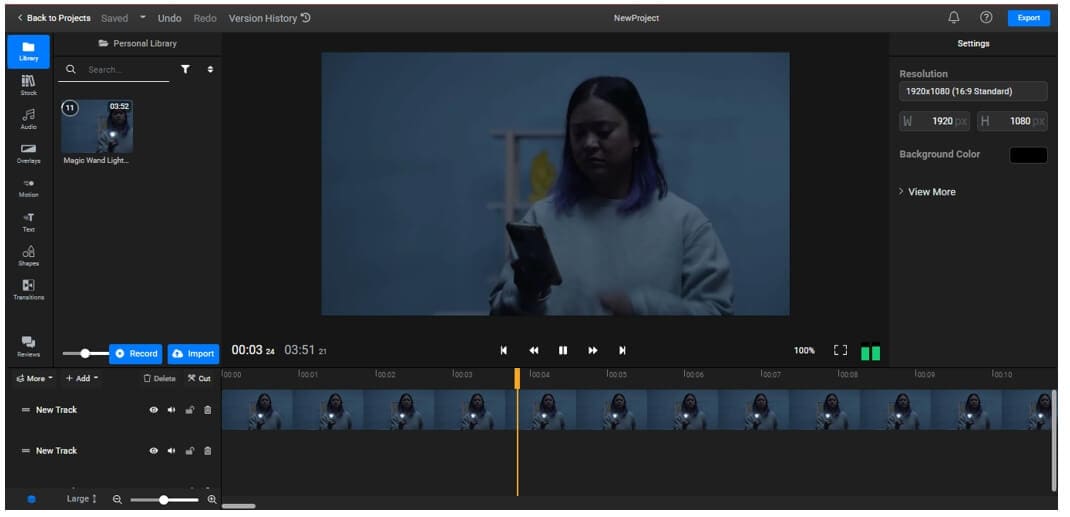
4. Flixier
Flixier provides powerful video editing software with 1-minute exports to any device, easy collaboration, and enough cloud storage, all in one window. Flixier enables users to export any video, independent of technology. Cloud storage and complete version history are available, including feedback comments, sophisticated exporting, and email notifications.
Select a file and begin cutting it. Then, using the simple interface, download the video. No sign-up is required for the Flixier online tool to modify the video. In addition, there is no watermark in the exported video.
Pros
- 4x faster
- Cloud storage and history
- No registration
- Supports multiple operating systems
Cons
- Exports video up to one minute
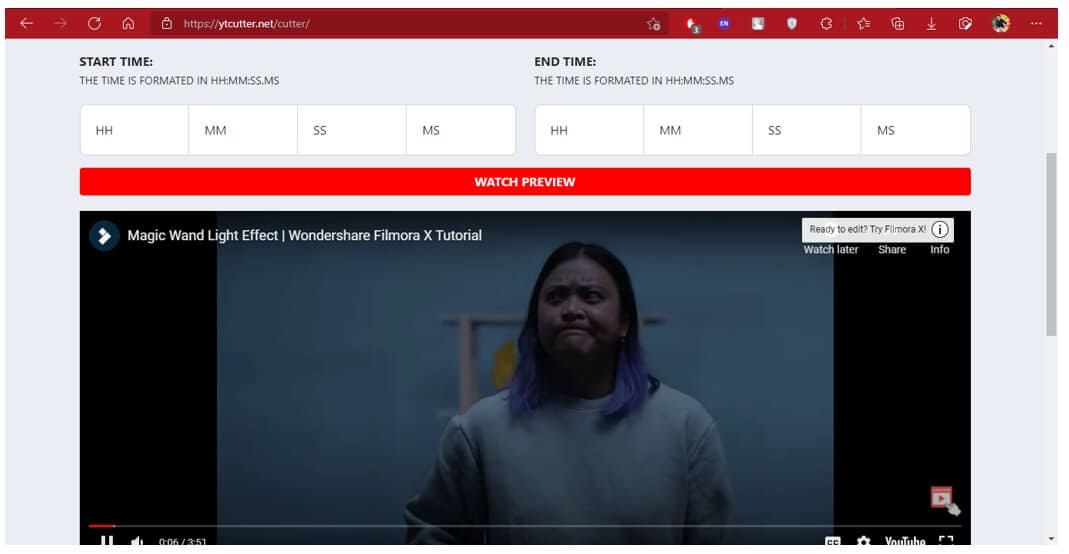
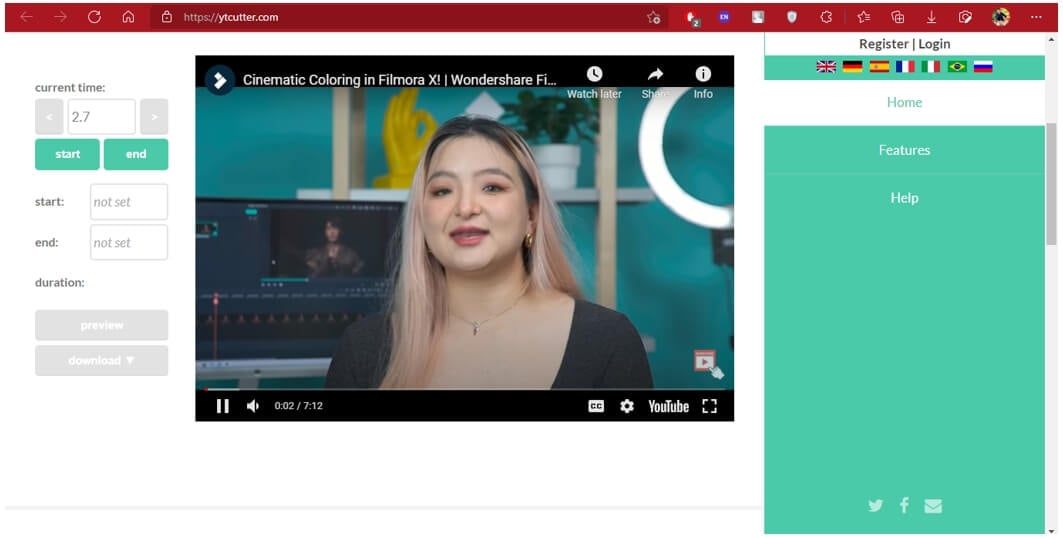
5. YTCutter.net
It is one of the best YouTube to mp3 converters online with trimmer available. YTCutter.net has various editing features that help you easily trim and modify the videos. It allows you to watch the video in preview mode before downloading it. It does not leave any watermark on the exported video.
You may extract favourite moments from YouTube videos with this ad-supported web tool. The app’s operation is rather simple. You have to paste a YouTube URL and set the start and end times. After that, you may download the cropped video, audio, or GIF. However, you need to register yourself for downloading the video through this tool.
Pros
- No watermark
- Simple interface
- Several editing features
Cons
- Requires an account to save the video to your profile or your device
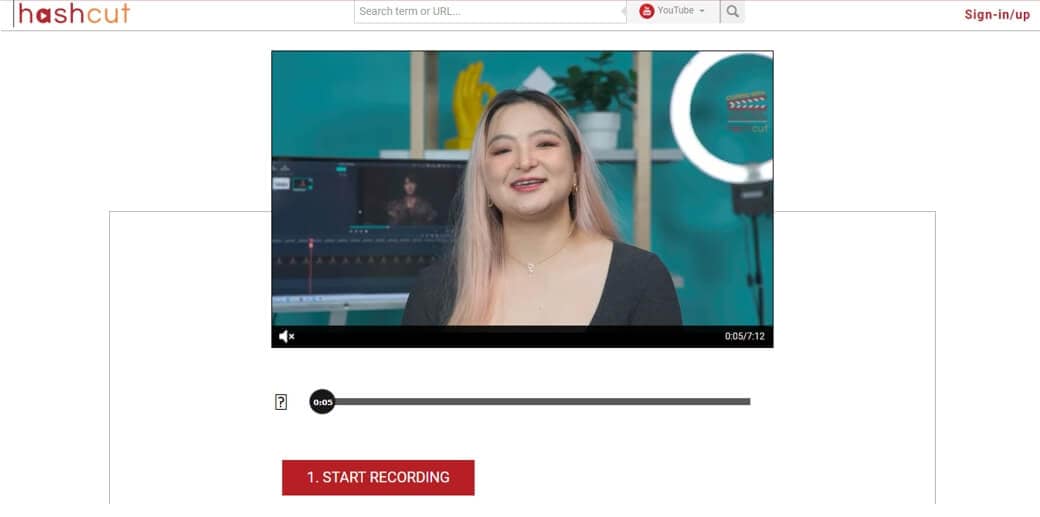
6. HashCut
HashCut is a unique YouTube online trimmer that allows you to save the highlights. It is possible to extract a segment from a YouTube video by tracing the section you require. Even better, you may customize the text and stickers with your tastes.
To begin, open your favourite web browser and navigate to the online YouTube trimmer. Paste the URL and specify the start and finish points of the clip you wish to obtain. Then, save the video. Furthermore, you may use its many capabilities to enhance the video, such as previewing footage, adding annotation, and embedding stickers on the film. It requires sign-up to edit the video and leaves a watermark on the exported one.
Pros
- Adds text and animations
- Chrome extension
- Preview Mode
- Embeds stickers
Cons
- Slow uploading procedure
7. YT Cutter
As the name indicates, YT Cutter is a YouTube video trimmer and downloader online that allows you to remove specific segments from YouTube videos. It can operate successfully online without any registration. Furthermore, you may accurately clip YouTube videos to 0.1 seconds, capture screenshots, and output files to video, animation GIF, or audio.
Paste the URL into the YT Cutter search field and wait for the video to refresh. Then, press the start and finish buttons to give your movie a beginning and an endpoint. Then, save the movie to your device in the format of your choice. Moreover, it does not leave any watermark on the exported video.
Pros
- No watermark
- User-friendly interface
- Supports multiple output formats
Cons
- Limited input formats
8. YouTube4kDownloader
Because of its simple interface, YouTube4kdownloader is a thorough and simple online YouTube video trimmer. It has a tool that allows you to trim or edit video segments from YouTube videos. One of its cutting features includes the ability to go to the beginning and conclusion of the choice for fast and easy clip trimming.
It also features a play and stop button that allows you to crop a specific scene from a YouTube video. Aside from that, it demonstrates three methods for sharing the cropped video link, including copying the plugin, the URL or media link, and watching the trimmed video on the YouTube website. It does not require sign-up for editing the video and leaves a watermark on the exported one.
Pros
- Trim specific segments
- No sign-up
- No watermark
Cons
- Completely web-based
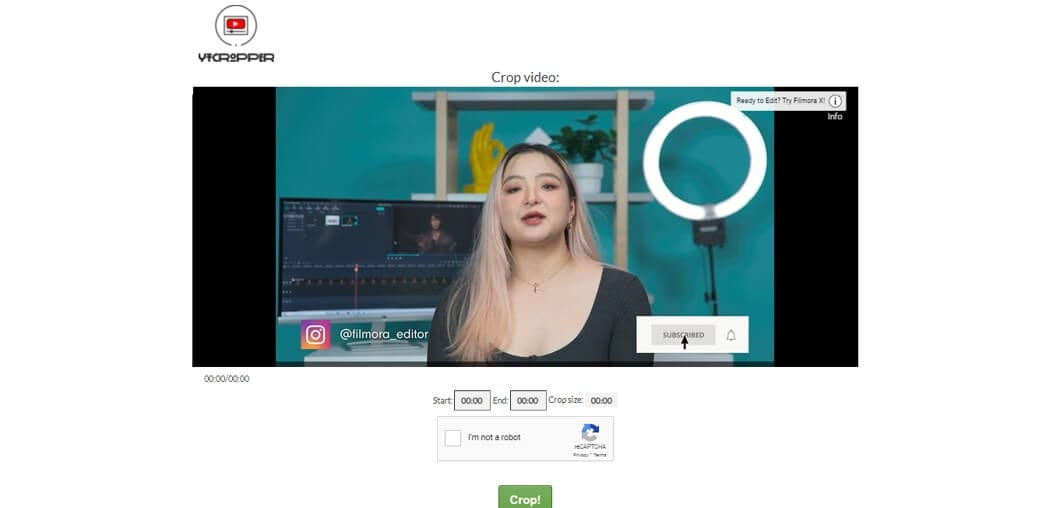
9. YT Cropper
Another YouTube video clipper online is YT Cropper, allowing users to extract particular clips from YouTube videos. Its Drag function allows users to choose a beginning and finishing point for the clips, and the markers will assist users in locating the clips that can be obtained that they desire. Users can make use of a one-of-a-kind feature known as looping.
Copy and paste the URL into the search field. Wait for the system to evaluate the video. Finally, use the markers to crop a select scene from a YouTube video. Then, to evaluate your clips, click the trim button. No sign-up and watermark are required for this YouTube trimmer.
Pros
- Looping feature
- Drag and drop function
- Easy trimming
Cons
- Slow
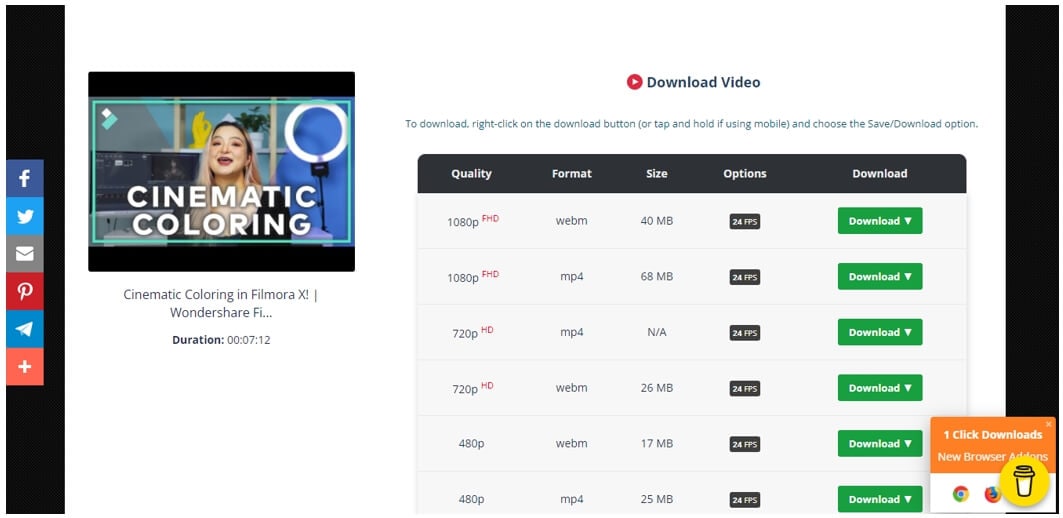
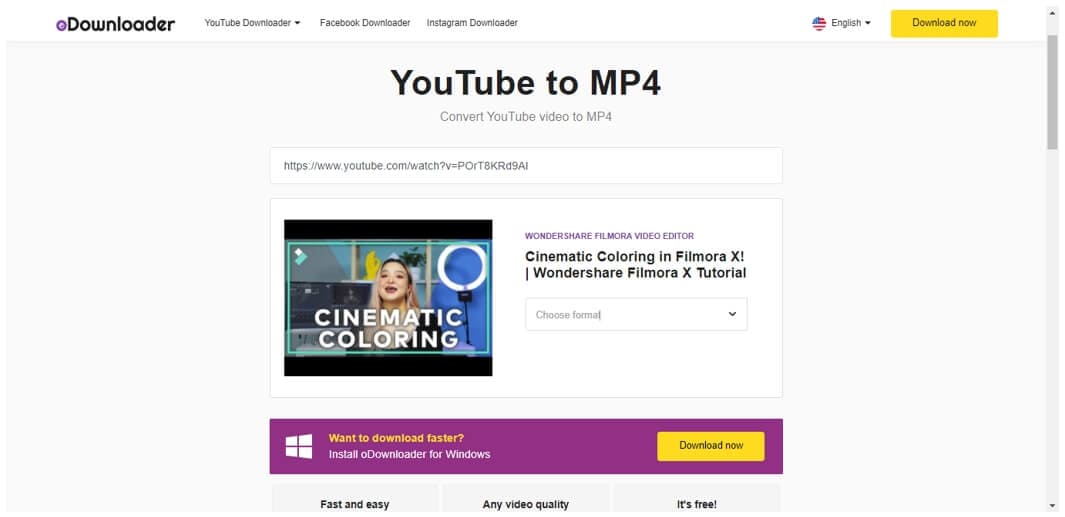
10. Odownloader
Odownloader Is another ad-supported YouTube trimmer that allows you to chop YouTube videos quickly. It allows you to download either audio alone or complete video. You may also choose between .webm and.mp4 formats.
Paste the link or URL into the search field and wait for the video to refresh. Then, press the start and finish buttons to give your movie a beginning and an endpoint. Then, save the movie to your device in the format of your choice. Moreover, it does not leave any watermark on the exported video.
Pros
- Exports in audio format as well
- Multiple output formats
- Easy-to-use
Cons
- Several ads
11. VideoCrops
It allows users to crop YouTube videos by dragging the two marks to the beginning and conclusion of the clip. It provides a high level of security, as only the users can access their data, which cannot be viewed by other users or on any site.
Cropping a video entails three steps. The video is first downloaded to the server. This may potentially take some time, depending on the length of the video. Second, the video has been trimmed. Finally, the video is saved as.MP4. You should also consider that this is a free site with limited resources.
Pros
- Easy trimming
- No watermark
- Free website
- High-level security
Cons
- Limited resources

Part 2: FAQs About Online YouTube Video Trimmer
Does YouTube have a trimmer?
Yes, you may cut videos after they’ve been uploaded to the YouTube site. You may chop off the beginning, middle, or ending of your movie on a computer. It is not necessary to re-upload a video to cut it. The video’s URL, view counts, and comments will remain unchanged. This functionality is only accessible for less than 6 hours long videos.
What is the difference between cut and trim in video editing?
Cutting is the process of separating pieces of a clip. You can reuse these portions in another video or delete them entirely. On the other hand, trimming is the process of eliminating or expanding the duration of a video clip’s front or tail regions in video editing.
Conclusion
Numerous programs will swiftly upload and trim your tiny movies, ideal for folks who make YouTube videos. Then, some tools can handle huge and bulky files and are ideal for file output and video quality. It’s a shame that some of these tools need payment to access their additional editing features. However, you have an excellent YouTube Video Trimmer Online, which is completely free and listed in detail within this article.
02 Part 2: FAQs About Online YouTube Video Trimmer
Part 1: Best YouTube Video Trimmer Online
YouTube is amongst the most frequently used social media platform. People get their content ideas and teach others about them. However, videos might contain some unnecessary parts, and it can be a problem if you want to save the video. The following YouTube trimmers online can assist you.
1. Filmora Instant Cutter Tool [Offline but More Powerful]
Before you try the below online tools, Filmora Instant Cutter tool will be another choice when you need more powerful features. It lets you input huge video clips in formats and rapidly reduce or combine them without re-encoding. This is a very valuable tool when working with high-resolution movies. It supports MP4/MOV and MTS/M2TS video files.It maintains the quality of the video It supports 4K UHD video formats It allows you to merge the videos You can trim massive files with ease.
You can download Youtube videos first and then make trimming or add effects on it.
2. Kapwing
Kapwing is an online video editor that helps you edit videos without downloading the software. It features several editing tools with an easy-to-use interface. There’s no need to register yourself for editing the videos through Kapwing. That’s why it has millions of users worldwide.
Kapwing’s Video Trimmer makes it simple to trim YouTube videos. The service includes the same video cutting functionality as before but with a much prettier UI. After pasting the YouTube video URL to crop, you may use the easy-to-use timestamp slider to decide the sections of the YouTube video to edit.
Pros
- Different templates
- Multiple editing features
- Easy-to-use interface
- Fast
Cons
- Leaves a watermark if you don’t sign up
Find out more online video editors without a watermark.
3. VEED .iO
VEED.io video editor is a simple yet powerful video-editing program that allow s users to make stunning videos. VEED may be an important element of your sales funnel. With this program, you may edit, enhance, and add a lot of creativity to presentations, marketing videos, review videos, or video blogging.
You need to choose a file and start trimming it. After that, download the video with its easy-to-use interface. You need to sign up for editing the video with the VEED online tool. Moreover, there’s no watermark in the exported video.
Pros
- Fast and straightforward
- Multiple output options
- No watermark
Cons
- Minor bugs
4. Flixier
Flixier provides powerful video editing software with 1-minute exports to any device, easy collaboration, and enough cloud storage, all in one window. Flixier enables users to export any video, independent of technology. Cloud storage and complete version history are available, including feedback comments, sophisticated exporting, and email notifications.
Select a file and begin cutting it. Then, using the simple interface, download the video. No sign-up is required for the Flixier online tool to modify the video. In addition, there is no watermark in the exported video.
Pros
- 4x faster
- Cloud storage and history
- No registration
- Supports multiple operating systems
Cons
- Exports video up to one minute
5. YTCutter.net
It is one of the best YouTube to mp3 converters online with trimmer available. YTCutter.net has various editing features that help you easily trim and modify the videos. It allows you to watch the video in preview mode before downloading it. It does not leave any watermark on the exported video.
You may extract favourite moments from YouTube videos with this ad-supported web tool. The app’s operation is rather simple. You have to paste a YouTube URL and set the start and end times. After that, you may download the cropped video, audio, or GIF. However, you need to register yourself for downloading the video through this tool.
Pros
- No watermark
- Simple interface
- Several editing features
Cons
- Requires an account to save the video to your profile or your device
6. HashCut
HashCut is a unique YouTube online trimmer that allows you to save the highlights. It is possible to extract a segment from a YouTube video by tracing the section you require. Even better, you may customize the text and stickers with your tastes.
To begin, open your favourite web browser and navigate to the online YouTube trimmer. Paste the URL and specify the start and finish points of the clip you wish to obtain. Then, save the video. Furthermore, you may use its many capabilities to enhance the video, such as previewing footage, adding annotation, and embedding stickers on the film. It requires sign-up to edit the video and leaves a watermark on the exported one.
Pros
- Adds text and animations
- Chrome extension
- Preview Mode
- Embeds stickers
Cons
- Slow uploading procedure
7. YT Cutter
As the name indicates, YT Cutter is a YouTube video trimmer and downloader online that allows you to remove specific segments from YouTube videos. It can operate successfully online without any registration. Furthermore, you may accurately clip YouTube videos to 0.1 seconds, capture screenshots, and output files to video, animation GIF, or audio.
Paste the URL into the YT Cutter search field and wait for the video to refresh. Then, press the start and finish buttons to give your movie a beginning and an endpoint. Then, save the movie to your device in the format of your choice. Moreover, it does not leave any watermark on the exported video.
Pros
- No watermark
- User-friendly interface
- Supports multiple output formats
Cons
- Limited input formats
8. YouTube4kDownloader
Because of its simple interface, YouTube4kdownloader is a thorough and simple online YouTube video trimmer. It has a tool that allows you to trim or edit video segments from YouTube videos. One of its cutting features includes the ability to go to the beginning and conclusion of the choice for fast and easy clip trimming.
It also features a play and stop button that allows you to crop a specific scene from a YouTube video. Aside from that, it demonstrates three methods for sharing the cropped video link, including copying the plugin, the URL or media link, and watching the trimmed video on the YouTube website. It does not require sign-up for editing the video and leaves a watermark on the exported one.
Pros
- Trim specific segments
- No sign-up
- No watermark
Cons
- Completely web-based
9. YT Cropper
Another YouTube video clipper online is YT Cropper, allowing users to extract particular clips from YouTube videos. Its Drag function allows users to choose a beginning and finishing point for the clips, and the markers will assist users in locating the clips that can be obtained that they desire. Users can make use of a one-of-a-kind feature known as looping.
Copy and paste the URL into the search field. Wait for the system to evaluate the video. Finally, use the markers to crop a select scene from a YouTube video. Then, to evaluate your clips, click the trim button. No sign-up and watermark are required for this YouTube trimmer.
Pros
- Looping feature
- Drag and drop function
- Easy trimming
Cons
- Slow
10. Odownloader
Odownloader Is another ad-supported YouTube trimmer that allows you to chop YouTube videos quickly. It allows you to download either audio alone or complete video. You may also choose between .webm and.mp4 formats.
Paste the link or URL into the search field and wait for the video to refresh. Then, press the start and finish buttons to give your movie a beginning and an endpoint. Then, save the movie to your device in the format of your choice. Moreover, it does not leave any watermark on the exported video.
Pros
- Exports in audio format as well
- Multiple output formats
- Easy-to-use
Cons
- Several ads
11. VideoCrops
It allows users to crop YouTube videos by dragging the two marks to the beginning and conclusion of the clip. It provides a high level of security, as only the users can access their data, which cannot be viewed by other users or on any site.
Cropping a video entails three steps. The video is first downloaded to the server. This may potentially take some time, depending on the length of the video. Second, the video has been trimmed. Finally, the video is saved as.MP4. You should also consider that this is a free site with limited resources.
Pros
- Easy trimming
- No watermark
- Free website
- High-level security
Cons
- Limited resources
Part 2: FAQs About Online YouTube Video Trimmer
Does YouTube have a trimmer?
Yes, you may cut videos after they’ve been uploaded to the YouTube site. You may chop off the beginning, middle, or ending of your movie on a computer. It is not necessary to re-upload a video to cut it. The video’s URL, view counts, and comments will remain unchanged. This functionality is only accessible for less than 6 hours long videos.
What is the difference between cut and trim in video editing?
Cutting is the process of separating pieces of a clip. You can reuse these portions in another video or delete them entirely. On the other hand, trimming is the process of eliminating or expanding the duration of a video clip’s front or tail regions in video editing.
Conclusion
Numerous programs will swiftly upload and trim your tiny movies, ideal for folks who make YouTube videos. Then, some tools can handle huge and bulky files and are ideal for file output and video quality. It’s a shame that some of these tools need payment to access their additional editing features. However, you have an excellent YouTube Video Trimmer Online, which is completely free and listed in detail within this article.
Also read:
- More than Clicks What Determines YouTube's View Numbers
- Synergy in Streaming Maximizing Viewership Across Youtube & Twitch
- [New] Captivate Audiences with This Essential Guide to Making YouTube Shorts
- How Big Should a Good Thumbnail Be? YouTube's Ultimate Guide
- Is Channel Growth Primarily a Product of Organic Effort or Paid Strategies?
- [Updated] Celebrating Matrimony The Best Wedding Movies From YouTube to Vimeo
- Make Your Mark Stand Out with YouTube Studio Editing
- A Comprehensive Overview of YouTube Standards for Content Creators
- In 2024, Create a Standout Presence with YouTube Custom Imagery
- Chronicles of Time Student-Approved Historical YT Content
- Navigating Personal Brand Identity [High Engagement]
- Snapchat to Subscribers How Jake Crafted YouTube Magic
- Strategic Steps for Professional-Level YouTube Promos
- In 2024, Cease Non-Filtered YouTube Video Trail
- ASMR Viewers' Essentials Explained for 2024
- Elevating Video Reach The Role of Smart Backlinking Techniques for 2024
- In 2024, Elevating Video Previews A Compreayer Approach for YouTube
- 6 FREE YouTube Outros for Aspiring Filmmakers
- 2024 Approved Breakthrough in Video Production Advanced Techniques for Uploading 360° Content on YouTube
- Essential Apps Best 10 Software to Capture Your Screens
- [New] Accelerated Fame – The Speed of YouTube’s Most-Watched Video Milestones
- Decisive Content Reduction Find the Best Video Cutters for 2024
- Design Strategies for Top-Tier Valorant Thumbnails on Social Media for 2024
- [Updated] Download YouTube Beats on Android The Ultimate 6-App Guide
- 2024 Approved Ceased Shorts Missing on YouTube Screen
- In 2024, Best Screen Reporter Toolkit for YouTube Streamers
- 2024 Approved Essential Free Editing Software Rankings
- Just Initial Acquisition
- [Updated] Boost or Bust Is Investing in Video Popularity Worthwhile?
- Peaking at Number One on YouTube What to Know
- [Updated] Digital Whirlwind Top 30 Hashes for Video Stardom
- [New] Beyond the Lens Innovative Ideas for YouTube Video Creation
- Effortless Entertainment Galore Top Free Film Series on YouTube
- Youtube Policies Versus Creative Commons A Comparative Study
- Acquire High-Quality Sounds for Media Creators!
- [New] Airborne Broadcasting How to Stream with DJI Drones
- Planning to Use a Pokemon Go Joystick on Vivo Y27 5G? | Dr.fone
- [Updated] Mastering Video Recordings on Windows 10/11
- 5 Ways to Track Nokia C22 without App | Dr.fone
- Easy Guide How To Bypass Samsung Galaxy A15 5G FRP Android 10/11/12/13
- How to Cast Realme Narzo N55 to Computer for iPhone and Android? | Dr.fone
- 2024 Approved Unlocking Facebook Blue Verification A Step-by-Step Guide
- Prank Your Friends! Easy Ways to Fake and Share Google Maps Location On Realme 11 5G | Dr.fone
- [New] 2024 Approved Social Media Blend Easy Twitch to Facebook Integration
- In 2024, VLC Video Trimmer for Mac How to Cut Clips Without Losing a Single Pixel
- Discovering Keepsake Bell Ringtone Implementations
- Ultimate Guide on Motorola Edge 40 Neo FRP Bypass
- In 2024, Three Ways to Sim Unlock Samsung Galaxy XCover 7
- [New] Best Practices for Advanced AE Plug-Ins
- In 2024, 4 Feasible Ways to Fake Location on Facebook For your Oppo A18 | Dr.fone
- What Legendaries Are In Pokemon Platinum On Oppo A56s 5G? | Dr.fone
- Title: In 2024, Auto Subscribe URL Creation for YouTube Enthusiasts
- Author: Steven
- Created at : 2024-05-25 19:31:08
- Updated at : 2024-05-26 19:31:08
- Link: https://youtube-clips.techidaily.com/in-2024-auto-subscribe-url-creation-for-youtube-enthusiasts/
- License: This work is licensed under CC BY-NC-SA 4.0.
