
:max_bytes(150000):strip_icc()/anete-lusina-609863-unsplash-5c2aa78e46e0fb0001867b68.jpg)
"In 2024, Advanced Google Slides Techniques Adding YouTube Media"
Advanced Google Slides Techniques: Adding YouTube Media
Create High-Quality Video - Wondershare Filmora
An easy and powerful YouTube video editor
Numerous video and audio effects to choose from
Detailed tutorials provided by the official channel
Google Slide presentation is a powerful tool for creators to keep their audience engaged. This online platform lets you create and demonstrate your ideas. It will capture your viewers’ attention from the very beginning. It also doesn’t matter whatever learning style you engage. Adding YouTube videos to Google Slide will appeal to all levels of individuals.
More so, it is the best way to provide a break for both the audience and the creator. You can break Google Slide presentations with videos to offer some break. Viewers and the presenter get a breather in the process. The presenter can take a short break from speaking while the video plays. Let’s now dive into how to embed a YouTube video in Google Slides.

In this article
01 Why should we add a video to Google Slides?
02 How to add a YouTube video to Google Slide
03 How to choose the right video for your Slides?
Why should we add a video to Google Slides?
There is a great impact of adding video to Google Slides.
For attention
Videos will automatically awaken you, especially if your thoughts have started to sway during a presentation. A video has a direct way of showing creativity. The audience automatically connects the dots between the video and the presentation lines alike.
To stimulate discussion
A picture is worth a thousand words. There is a way that an added video will help the audience connect to the day’s topic. It will bring up several ideas and stir up discussion with the presenter.
Easy following
With videos embedded in Google Slide, viewers will find it easy to understand and digest. Videos automatically eliminate boredom and make any topic interesting.
How to add a YouTube video to Google Slide
Use these two methods to add a YouTube video to Google Slides. Via the Search and Direct link.
Method 1. Embed YouTube video to Google Slide by search and selection
Google has owned YouTube since the year 2006. You can, therefore, integrate Google’s products with YouTube easily.
Step 1. First, go to the slide where you want to embed your video.
Step 2. Then choose the “Insert” option from the menu bar and hit the “Video” option.

Step 3. It would be best if you now viewed the “YouTube” search bar to type in the video you want to embed. You can use keywords to search for the video in question and view instant search results.
Step 4. Then select the video you want to embed, and you’ll see it appear on the “Slide.”

Step 5. Format your video. Remember that the entire video will be embedded. You don’t necessarily need the whole video. It is time to select just a brief but relevant clip from the video to use. Then position your video to the right point using the axes from the exact starting point to the finished part you want the video to appear in.
Method 2. Embed YouTube video to Google Slide by direct link
You can engage this method if you want to include the entire video.
Step 1. Get the URL of the specific YouTube video that you want to use.

Step 2. Then go to your browser’s “Address bar” to copy the YouTube link.
Step 3. Next, open the “Presentation” slide to put your video to.
Step 4. Choose the “Insert” tab from the menu bar.
Step 5. Then hit on the “Video” option from the drop-down menu that appears.
Step 6. A new window will open automatically. Choose the “By URL” tab.
Step 7. Then paste the YouTube video URL in the “Paste YouTube URL Here” bar section.

Step 8. Wait for the video file to load and press the “Select” option. The video will immediately appear in the presentation slide. Just drag and drop the video in your preferred position.
Note: You can do a few edits inside the application. Set the timer when your video should start and when to stop. You can also adjust the video player size.
How to choose the right video for your Slides?
Not all videos will make an impact on your Google Slide. You need to use the best shot that adds value to your presentation. These guidelines will help you to settle on the best video.
Be Professional – choose the best video for your presentation. Remember that the video is part of the presentation and carries more weight. Settling for quality video will bring out the professionalism in you.
Relevant – how do you know that what you are showing your audience corresponds to the presentation piece? Ensure that the video you add has something to do with the Google Slide presentation topic. The two should naturally flow to make it easy to understand the whole concept.
Precise – your presentation is not about the video. The ideal length should not exceed 60 seconds. The longer the video, the greater the chance for your audience to lose track along the way.
Know every footage you are working with – this will help you pick the best shots for your presentation. So, learn every aspect of the video before settling down to use it.
Add new content – even though one content may suit several presentations, don’t rely on the same piece each time. Your audience will want to feel something fresh each time you are presenting. So, compose different videos for different scenarios to make that big impact.
Create an eye-catching video for your Slides with Filmora
The video quality matters when it comes to creating your Slides. The best video creator – Filmora – works in simple steps to give you an eye-catching video. It will create videos for all scenarios like marketing, tutorial, gaming, etc.
Key features of Filmora
- It offers you advanced video effects like filters, motion elements, etc
- You can multiply your fun with multiple screens with the Split Screen feature
- Easily change backgrounds using the Green Screen feature
- The speed control lets you fast forward or slow down a special moment
- Import your video clips to social media platforms
- You can also adjust the audio of your tracks using the Audio Mixer feature
Follow this guide to create a video for your slide with Filmora
Step 1. Launch Filmora
First, begin by downloading and installing Filmora on your computer device. Once installed, launch it and allow it to run. You can either create a new project or open an existing project to work on.
Step 2. Create a new project
Here, click on the “New Project” tab on the app’s welcome screen. The editor should load immediately. Then proceed to register the product. Just hit on the “Register” tab.
Step 3. Import video
Check the upper left corner of your screen to see the “Import” tab. Click on it and choose the “Import Media Files” option. Next, navigate to the location of your computer’s local list to select the clip or video you want to edit. Then, hit the “Import” button to add the video to the timeline for editing.
Step 4. Edit video
Drag and drop the raw footage to Filmora’s timeline to begin editing. Here, you can trim, add other video clips, merge, and add effects as you wish. Likewise, you can add opening titles, subtitles, and end credits to your video. More so, this tool offers different templates to use. Just drag and drop the templates you wish to use to a specific location on the timeline.
Step 5. Preview your file
Last but not least, you can preview your files. Click on the “Play” tab to start previewing your video clips. The main essence of this part is to allow you to make the necessary changes to your clips if there is a need.
Step 6. Export and Share
With Filmora, you can export your file to various social media platforms. But first, go to the “Output window” and select the video file format to use. This software supports several output formats to apply to any platform and device. Just click on the “Format” tab and choose the file format to use. Then also change the resolution and other parameters like frame rate and channel of your video in the “Settings” section. Finally, share your video to your YouTube channel and get ready to add the video to the Google Slide presentation.
For Win 7 or later (64-bit)
For macOS 10.12 or later
Conclusion
● You now know how to put a YouTube video in Google Slides the simple way. You can search for your YouTube videos or directly use the URL link. Whatever the case, remember that it’s the quality of your video that carries more weight. Thanks to the availability of third-party apps that you can use to create and improve the quality of your videos.
● Filmora is at your service to create high-resolution videos that you can export in any format to your YouTube channel. The tool is intuitive, and it won’t matter whether you haven’t tried it before. It is a perfect choice for both professionals and first-time users.
Google Slide presentation is a powerful tool for creators to keep their audience engaged. This online platform lets you create and demonstrate your ideas. It will capture your viewers’ attention from the very beginning. It also doesn’t matter whatever learning style you engage. Adding YouTube videos to Google Slide will appeal to all levels of individuals.
More so, it is the best way to provide a break for both the audience and the creator. You can break Google Slide presentations with videos to offer some break. Viewers and the presenter get a breather in the process. The presenter can take a short break from speaking while the video plays. Let’s now dive into how to embed a YouTube video in Google Slides.
In this article
01 Why should we add a video to Google Slides?
02 How to add a YouTube video to Google Slide
03 How to choose the right video for your Slides?
Why should we add a video to Google Slides?
There is a great impact of adding video to Google Slides.
For attention
Videos will automatically awaken you, especially if your thoughts have started to sway during a presentation. A video has a direct way of showing creativity. The audience automatically connects the dots between the video and the presentation lines alike.
To stimulate discussion
A picture is worth a thousand words. There is a way that an added video will help the audience connect to the day’s topic. It will bring up several ideas and stir up discussion with the presenter.
Easy following
With videos embedded in Google Slide, viewers will find it easy to understand and digest. Videos automatically eliminate boredom and make any topic interesting.
How to add a YouTube video to Google Slide
Use these two methods to add a YouTube video to Google Slides. Via the Search and Direct link.
Method 1. Embed YouTube video to Google Slide by search and selection
Google has owned YouTube since the year 2006. You can, therefore, integrate Google’s products with YouTube easily.
Step 1. First, go to the slide where you want to embed your video.
Step 2. Then choose the “Insert” option from the menu bar and hit the “Video” option.
Step 3. It would be best if you now viewed the “YouTube” search bar to type in the video you want to embed. You can use keywords to search for the video in question and view instant search results.
Step 4. Then select the video you want to embed, and you’ll see it appear on the “Slide.”
Step 5. Format your video. Remember that the entire video will be embedded. You don’t necessarily need the whole video. It is time to select just a brief but relevant clip from the video to use. Then position your video to the right point using the axes from the exact starting point to the finished part you want the video to appear in.
Method 2. Embed YouTube video to Google Slide by direct link
You can engage this method if you want to include the entire video.
Step 1. Get the URL of the specific YouTube video that you want to use.
Step 2. Then go to your browser’s “Address bar” to copy the YouTube link.
Step 3. Next, open the “Presentation” slide to put your video to.
Step 4. Choose the “Insert” tab from the menu bar.
Step 5. Then hit on the “Video” option from the drop-down menu that appears.
Step 6. A new window will open automatically. Choose the “By URL” tab.
Step 7. Then paste the YouTube video URL in the “Paste YouTube URL Here” bar section.
Step 8. Wait for the video file to load and press the “Select” option. The video will immediately appear in the presentation slide. Just drag and drop the video in your preferred position.
Note: You can do a few edits inside the application. Set the timer when your video should start and when to stop. You can also adjust the video player size.
How to choose the right video for your Slides?
Not all videos will make an impact on your Google Slide. You need to use the best shot that adds value to your presentation. These guidelines will help you to settle on the best video.
Be Professional – choose the best video for your presentation. Remember that the video is part of the presentation and carries more weight. Settling for quality video will bring out the professionalism in you.
Relevant – how do you know that what you are showing your audience corresponds to the presentation piece? Ensure that the video you add has something to do with the Google Slide presentation topic. The two should naturally flow to make it easy to understand the whole concept.
Precise – your presentation is not about the video. The ideal length should not exceed 60 seconds. The longer the video, the greater the chance for your audience to lose track along the way.
Know every footage you are working with – this will help you pick the best shots for your presentation. So, learn every aspect of the video before settling down to use it.
Add new content – even though one content may suit several presentations, don’t rely on the same piece each time. Your audience will want to feel something fresh each time you are presenting. So, compose different videos for different scenarios to make that big impact.
Create an eye-catching video for your Slides with Filmora
The video quality matters when it comes to creating your Slides. The best video creator – Filmora – works in simple steps to give you an eye-catching video. It will create videos for all scenarios like marketing, tutorial, gaming, etc.
Key features of Filmora
- It offers you advanced video effects like filters, motion elements, etc
- You can multiply your fun with multiple screens with the Split Screen feature
- Easily change backgrounds using the Green Screen feature
- The speed control lets you fast forward or slow down a special moment
- Import your video clips to social media platforms
- You can also adjust the audio of your tracks using the Audio Mixer feature
Follow this guide to create a video for your slide with Filmora
Step 1. Launch Filmora
First, begin by downloading and installing Filmora on your computer device. Once installed, launch it and allow it to run. You can either create a new project or open an existing project to work on.
Step 2. Create a new project
Here, click on the “New Project” tab on the app’s welcome screen. The editor should load immediately. Then proceed to register the product. Just hit on the “Register” tab.
Step 3. Import video
Check the upper left corner of your screen to see the “Import” tab. Click on it and choose the “Import Media Files” option. Next, navigate to the location of your computer’s local list to select the clip or video you want to edit. Then, hit the “Import” button to add the video to the timeline for editing.
Step 4. Edit video
Drag and drop the raw footage to Filmora’s timeline to begin editing. Here, you can trim, add other video clips, merge, and add effects as you wish. Likewise, you can add opening titles, subtitles, and end credits to your video. More so, this tool offers different templates to use. Just drag and drop the templates you wish to use to a specific location on the timeline.
Step 5. Preview your file
Last but not least, you can preview your files. Click on the “Play” tab to start previewing your video clips. The main essence of this part is to allow you to make the necessary changes to your clips if there is a need.
Step 6. Export and Share
With Filmora, you can export your file to various social media platforms. But first, go to the “Output window” and select the video file format to use. This software supports several output formats to apply to any platform and device. Just click on the “Format” tab and choose the file format to use. Then also change the resolution and other parameters like frame rate and channel of your video in the “Settings” section. Finally, share your video to your YouTube channel and get ready to add the video to the Google Slide presentation.
For Win 7 or later (64-bit)
For macOS 10.12 or later
Conclusion
● You now know how to put a YouTube video in Google Slides the simple way. You can search for your YouTube videos or directly use the URL link. Whatever the case, remember that it’s the quality of your video that carries more weight. Thanks to the availability of third-party apps that you can use to create and improve the quality of your videos.
● Filmora is at your service to create high-resolution videos that you can export in any format to your YouTube channel. The tool is intuitive, and it won’t matter whether you haven’t tried it before. It is a perfect choice for both professionals and first-time users.
Innovative Youtube Monikers for Vloggers & Filmmakers (Up to 156 Characters)
50+ Youtube Channel Names for Vloggers [100% New]

Richard Bennett
Mar 27, 2024• Proven solutions


Want to make a lasting impression on your YouTube fans? Have a great name! One of the vital decisions you have to take while beginning your vlog channel is selecting a vlog channel name. Believe it or not, your vlog channel name can impact the channel’s success, so choosing the ideal one is essential. If you’re unsure of how to have the best vlog channel names or are just looking for channel rebranding, you’ve come to the right place!
Here, we’ve 50+ lists of the best YouTube channel names for vloggers, along with sections discussing how you can select the ideal one plus their importance for the channel’s growth.
- Part 1: Why are Vlog Channel Names Important?
- Part 2: What to Consider Before Picking YouTube channel names for Vloggers?
- Part 3: 50+ Vlog Channel Names Ideas in 2021
- Part 4: Top 5 Free Vlog Channel Name Generators in 2021
- Part 5: Versatile YouTube Vlogs Editor
Part 1: Why are Vlog Channel Names Important?
Your Channel Name appears on your channel page, videos, and in YouTube’s search results.
Just like a boring title, a generic vlog channel name will not last in the viewer’s memory, precisely when there’s so much competition vying for their YouTube engagement and attention. However, using attention-grabbing, punchy words can make for an entertaining YouTube channel name for vloggers. Remember, if your YouTube channel becomes successful, this will be the name that everyone knows you.
Part 2: What to Consider Before Picking YouTube channel names for Vloggers?
Selecting a vlog channel name might not be simple as it seems. There are multiple options out there, so how will you know if you’ve chosen the right one?
To help you decide better, we’ve designed a step-by-step guide that shows you exactly how to develop some excellent vlog channel name ideas.
Step 1: Consider the Image You Want to Portray
Vlog channel names often highlight the brand or person on the other end. While not the case for all, you will notice how many define their overall objective or mission. This can be ideal to begin when thinking of new Youtube channel names for vloggers. Don’t pretend to be someone you’re not when you select your vlog channel name.
It’s pretty vital that you, the channel owner, portray a message or an image that feels natural and provides your audience with an opportunity for best relation and recognition.
Step 2: Stay Consistent with Your YouTube Niche
The name you select must also reflect the niche upon which you based your channel. If you have a new channel, it can be hard to compete with more prominent vlog channels that cover important content topics. That’s why you should try to be particular and become the best at designing topics for the subject you’ve selected.
While you may get required exposure with a random name to grow your channel, it’s better, to begin with, something focal to the point.
Step 3: Get a Feel for Your Target Audience
Your target audience could be a huge factor in selecting the best name for a vlogging channel. Also, consider other vlog channels in the niche you’ve chosen and read through their video comments. Search out what your audience likes and vice versa. A precise scenario of your audience’s interests will allow you to choose the best name for a vlogging channel.
Step 4: Keep Your Channel Name Short
A YouTube channel name, or username, is max up to 60 characters, but generally, you get nowhere near that! Long channel names are not essential and can also be confusing to the viewers. They can also be tough to replicate or spell while searching. A concise, short username for your YouTube vlog channel can also give you the image of having more authority.
Step 5: Make Your Channel Name Memorable
Remember, if your YouTube vlog channel namebecomes excellent, this will be the name that everyone knows you by. It will be there with your videos, your playlists, and thumbnails. You don’t want a bad image that drags you downwards, but add creative writing tools like word plays, abbreviations, sibilance, alliteration, and puns to increase memorability.
Part 3: 50+ Vlog Channel Names Ideas in 2022
Strictly Cyber
Top Song Critic
Hashtag Hits
All Things Sports
The Virtual Coach
Game Hub
CyberLife
The Daily Cloud
Inner Sphere
Fashion Channel
Button Smasher
Numb thumbs
Gentle Gamer
Headset Hero
Headset Heaven
Headset Habitat / Home
Headset Hub
Gorgeous Gamer
Avatar auditions
3D Josh
abroad broad
adventures abroad
van life
[country] life
van fan
suitcase suckers
hotel hobbyists
travel treats
transit travel
travel tricks
life (long) lovers
love [name]
lovebirds
hug my husband / housewife / boyfriend / girlfriend
husband at home
cuddle my girlfriend
couples paradise
trouble in paradise
couple productions
couples therapy
in a nutshell
tutorial hero
info nuggets
[name] teaches [topic]
[topic] by [name]
learning [topic]
curiosity satisfied
[topic] academy / school / tutorials / teacher / made easy / explained / for beginners
edu owl
nothing too difficult
Part 4: Top 5 Free Vlog Channel Name Generators in 2022
There are numerous ways to personalizing a cool YouTube vlog channel nameor brainstorm fantastic vlog channel name ideas. Check out some of the most used YouTube name generator tools that got the higher ranking even from professionals.
1.Spinxo

This platform helps users search for cool names as per their characters, descriptions, niche, etc. You can begin the search with universal keywords and a set of specific details. Spinxo also helps YouTubers to manage contests online and grab the best suggestions for vlog names.
Queries Required: They can be raised based on multiple things you like, such as Niche, Keywords, and Topics.
Ideal for: Those who have few specific directions about the name.
No. of Results: 30 names.
2.Screen Name Generator
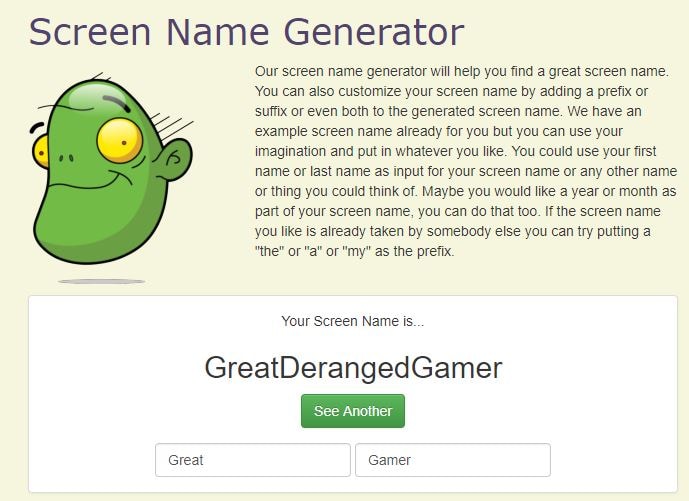
Gamers will admire this YouTube name generator tool that works based on the YouTubers’ provided prefix. It has sections like fantasy name generators, place name generators, username generators, thing names, etc.
Queries Required: It can be with prefix and suffix.
Ideal for: Those who have a specific direction and need for the name.
No. of Results: One name.
3.Username Generator
Username Generator makes it simpler to look for game-specific usernames. Users can put in the keywords and number of lines as their preferences. Then, the software will get you the most appropriate vlog channel names ideas.
Queries Needed: Based on the keywords only.
Best for: those of all genres.
No. of Results: Hundreds of names.
4.Name Generator
This name generator tool also helps people to get the best random combo names where details are pretty particular to content related to your entered works like “vids,” “director,” “TV,” “channel,” etc. Every time you tap the Generate tab provided, it will offer you the most random names.
Queries Required: Based on Prefix and Suffix
Ideal for: Those who have particular directions with the name.
No. of Results: 1
5.Scratch
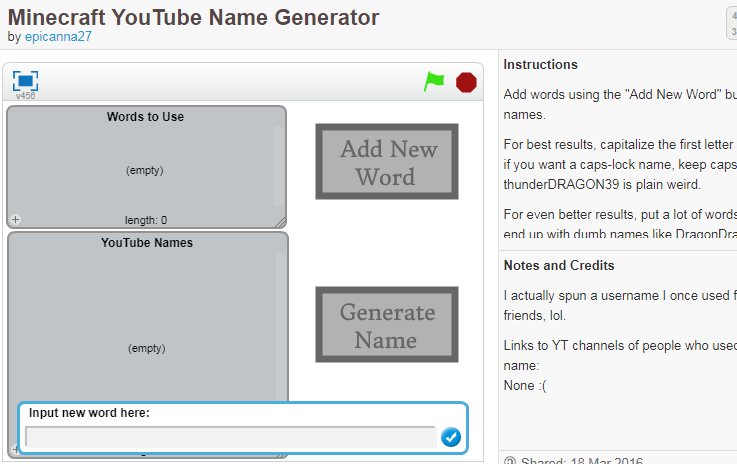
With this software, you can get the best names for vlogging channels with caps specifications that look awesome. You can select game highlights for your channel name. And, one can also prefer to put several words into the list to get finer results.
Queries Needed: Works with keywords only.
Best for: Those of all genres.
No. of Results: One name.
Part 5: Versatile YouTube Vlogs Editor
After you have decided to develop your YouTube vlog channel, the first thing you’ll look for is premium-looking video editing. And, here, we recommend using Filmora9 to edit YouTube vlogs easily.
You can use Filmora to make YouTube vlogs with built-in royalty-free audio. The software also can help you create fantastic YouTube intros. It consists of 500 plus templates, text resources, and transition effects.
Filmora is the ideal editing tool to make a green screen and split-screen video for YouTubers. Free Download it now to watch if it’s the best for you!
Conclusion
So, now, do you think you got some cool YouTube channel names for vloggers? Share your feedback towards the end of the blog, and let us know if you’ve ever used a free YouTube name generator!
Richard Bennett
Richard Bennett is a writer and a lover of all things video.
Follow @Richard Bennett
Richard Bennett
Mar 27, 2024• Proven solutions
Want to make a lasting impression on your YouTube fans? Have a great name! One of the vital decisions you have to take while beginning your vlog channel is selecting a vlog channel name. Believe it or not, your vlog channel name can impact the channel’s success, so choosing the ideal one is essential. If you’re unsure of how to have the best vlog channel names or are just looking for channel rebranding, you’ve come to the right place!
Here, we’ve 50+ lists of the best YouTube channel names for vloggers, along with sections discussing how you can select the ideal one plus their importance for the channel’s growth.
- Part 1: Why are Vlog Channel Names Important?
- Part 2: What to Consider Before Picking YouTube channel names for Vloggers?
- Part 3: 50+ Vlog Channel Names Ideas in 2021
- Part 4: Top 5 Free Vlog Channel Name Generators in 2021
- Part 5: Versatile YouTube Vlogs Editor
Part 1: Why are Vlog Channel Names Important?
Your Channel Name appears on your channel page, videos, and in YouTube’s search results.
Just like a boring title, a generic vlog channel name will not last in the viewer’s memory, precisely when there’s so much competition vying for their YouTube engagement and attention. However, using attention-grabbing, punchy words can make for an entertaining YouTube channel name for vloggers. Remember, if your YouTube channel becomes successful, this will be the name that everyone knows you.
Part 2: What to Consider Before Picking YouTube channel names for Vloggers?
Selecting a vlog channel name might not be simple as it seems. There are multiple options out there, so how will you know if you’ve chosen the right one?
To help you decide better, we’ve designed a step-by-step guide that shows you exactly how to develop some excellent vlog channel name ideas.
Step 1: Consider the Image You Want to Portray
Vlog channel names often highlight the brand or person on the other end. While not the case for all, you will notice how many define their overall objective or mission. This can be ideal to begin when thinking of new Youtube channel names for vloggers. Don’t pretend to be someone you’re not when you select your vlog channel name.
It’s pretty vital that you, the channel owner, portray a message or an image that feels natural and provides your audience with an opportunity for best relation and recognition.
Step 2: Stay Consistent with Your YouTube Niche
The name you select must also reflect the niche upon which you based your channel. If you have a new channel, it can be hard to compete with more prominent vlog channels that cover important content topics. That’s why you should try to be particular and become the best at designing topics for the subject you’ve selected.
While you may get required exposure with a random name to grow your channel, it’s better, to begin with, something focal to the point.
Step 3: Get a Feel for Your Target Audience
Your target audience could be a huge factor in selecting the best name for a vlogging channel. Also, consider other vlog channels in the niche you’ve chosen and read through their video comments. Search out what your audience likes and vice versa. A precise scenario of your audience’s interests will allow you to choose the best name for a vlogging channel.
Step 4: Keep Your Channel Name Short
A YouTube channel name, or username, is max up to 60 characters, but generally, you get nowhere near that! Long channel names are not essential and can also be confusing to the viewers. They can also be tough to replicate or spell while searching. A concise, short username for your YouTube vlog channel can also give you the image of having more authority.
Step 5: Make Your Channel Name Memorable
Remember, if your YouTube vlog channel namebecomes excellent, this will be the name that everyone knows you by. It will be there with your videos, your playlists, and thumbnails. You don’t want a bad image that drags you downwards, but add creative writing tools like word plays, abbreviations, sibilance, alliteration, and puns to increase memorability.
Part 3: 50+ Vlog Channel Names Ideas in 2022
Strictly Cyber
Top Song Critic
Hashtag Hits
All Things Sports
The Virtual Coach
Game Hub
CyberLife
The Daily Cloud
Inner Sphere
Fashion Channel
Button Smasher
Numb thumbs
Gentle Gamer
Headset Hero
Headset Heaven
Headset Habitat / Home
Headset Hub
Gorgeous Gamer
Avatar auditions
3D Josh
abroad broad
adventures abroad
van life
[country] life
van fan
suitcase suckers
hotel hobbyists
travel treats
transit travel
travel tricks
life (long) lovers
love [name]
lovebirds
hug my husband / housewife / boyfriend / girlfriend
husband at home
cuddle my girlfriend
couples paradise
trouble in paradise
couple productions
couples therapy
in a nutshell
tutorial hero
info nuggets
[name] teaches [topic]
[topic] by [name]
learning [topic]
curiosity satisfied
[topic] academy / school / tutorials / teacher / made easy / explained / for beginners
edu owl
nothing too difficult
Part 4: Top 5 Free Vlog Channel Name Generators in 2022
There are numerous ways to personalizing a cool YouTube vlog channel nameor brainstorm fantastic vlog channel name ideas. Check out some of the most used YouTube name generator tools that got the higher ranking even from professionals.
1.Spinxo
This platform helps users search for cool names as per their characters, descriptions, niche, etc. You can begin the search with universal keywords and a set of specific details. Spinxo also helps YouTubers to manage contests online and grab the best suggestions for vlog names.
Queries Required: They can be raised based on multiple things you like, such as Niche, Keywords, and Topics.
Ideal for: Those who have few specific directions about the name.
No. of Results: 30 names.
2.Screen Name Generator
Gamers will admire this YouTube name generator tool that works based on the YouTubers’ provided prefix. It has sections like fantasy name generators, place name generators, username generators, thing names, etc.
Queries Required: It can be with prefix and suffix.
Ideal for: Those who have a specific direction and need for the name.
No. of Results: One name.
3.Username Generator
Username Generator makes it simpler to look for game-specific usernames. Users can put in the keywords and number of lines as their preferences. Then, the software will get you the most appropriate vlog channel names ideas.
Queries Needed: Based on the keywords only.
Best for: those of all genres.
No. of Results: Hundreds of names.
4.Name Generator
This name generator tool also helps people to get the best random combo names where details are pretty particular to content related to your entered works like “vids,” “director,” “TV,” “channel,” etc. Every time you tap the Generate tab provided, it will offer you the most random names.
Queries Required: Based on Prefix and Suffix
Ideal for: Those who have particular directions with the name.
No. of Results: 1
5.Scratch
With this software, you can get the best names for vlogging channels with caps specifications that look awesome. You can select game highlights for your channel name. And, one can also prefer to put several words into the list to get finer results.
Queries Needed: Works with keywords only.
Best for: Those of all genres.
No. of Results: One name.
Part 5: Versatile YouTube Vlogs Editor
After you have decided to develop your YouTube vlog channel, the first thing you’ll look for is premium-looking video editing. And, here, we recommend using Filmora9 to edit YouTube vlogs easily.
You can use Filmora to make YouTube vlogs with built-in royalty-free audio. The software also can help you create fantastic YouTube intros. It consists of 500 plus templates, text resources, and transition effects.
Filmora is the ideal editing tool to make a green screen and split-screen video for YouTubers. Free Download it now to watch if it’s the best for you!
Conclusion
So, now, do you think you got some cool YouTube channel names for vloggers? Share your feedback towards the end of the blog, and let us know if you’ve ever used a free YouTube name generator!
Richard Bennett
Richard Bennett is a writer and a lover of all things video.
Follow @Richard Bennett
Also read:
- Comparative Content Crusade Analyzing Your Videos Against Others' For 2024
- In 2024, Edu-Topic 10 Selective Learning Channels Online
- Best Capturing Software For Streamers on YouTube
- Achieving Top Quality on YouTube Video Enhancement Fundamentals for 2024
- Decoding Shorts Into Professional-Grade MP4 Videos for 2024
- How to Extract YouTube Trailers & More
- Swift Valorant Image Crafting Professionally Done on the Fly
- Earnings Breakdown One Million Glances at Youtube for 2024
- The Ultimate Checklist for Your YouTube's Most Impactful Visuals
- The Creative Edge Filmmaker's Blueprint for Captivating Anime Subscribers (Filmora)
- Crafting Engaging YouTube Thumbnails A Step-by-Step Guide for 2024
- Framework Developing Transformative Lifestyle Broadcasts
- Secrets to Crafting Entertaining Haul Videos
- Unleash Creativity with the Right Camera Lenses
- Enjoy Pure Browsing Our Selections of 7 Top Android AdBlockers for 2024
- Unveil Vlogger Success Key YouTube SEO Tech
- Secure Your Content's Identity Adding Logo and Watermark to Videos
- Monetization Milestone The 500-Subscriber Trick
- Elevating Channels Strategies for Stardom on YouTube
- In 2024, Enhance Listening Pleasure Constructing a YouTube Playlist
- Decode YouTube Shorts A Complete Breakdown
- In 2024, Easy Steps to Extract and Save Your YouTube Watch Lists
- In 2024, Channel Aspirations – Reach and Secure 10K Views for YouTube Partner Perks
- From Individual Tracks to Albums Building a Personalized Soundtrack on Web & Mobile
- Expert Tips for Removing Persistent Youtube Channels (Mobile/PC)
- 2024 Approved Crafting a Personalized YouTube Pathway to Viewers
- [New] Demystifying T-Series Income Streams via YouTube Platforms
- [Updated] Budget-Friendly Video Recorder Sets Top 11 Picks
- 2024 Approved Download All YouTube Images for Free
- [Updated] 9 Powerful Applications for Saving YouTube Content on Android
- 2024 Approved Boost Your Visibility with a Cutting-Edge Set of Banners
- Essential Tips for YouTube Audio Optimization
- In 2024, Clip Weaver Workshop
- [New] Discover the Ultimate Blend of Mind, Body, and Spirit in Yoga
- 2024 Approved Dazzling Deception YouTube's Editors Magic Showcase
- Speedy Alteration of YT Vids for Mac Screens
- 2024 Approved Branding with Visuals Inserting Watermarks Into YouTube Vids
- [Updated] 10 Visionary Beauticians Poised Success
- 10 Free YouTube Thumbnail Downloaders/Savers Online-Download YouTube Thumbnail for 2024
- Investigating the Economics of T-Series on YouTube
- Essential YouTube Beauty Influencers 10 Creators to Watch
- How To Leave a Life360 Group On Xiaomi 13T Pro Without Anyone Knowing? | Dr.fone
- How To Fix OEM Unlock Missing on Vivo S17 Pro?
- [New] Top Screen Grabber Software in the Windows 10 Arena
- Stellar Data Recovery for iPhone SE (2022) failed to recognize my iPhone. How to fix it? | Stellar
- New Mastering the Art of Audio Replacement A Comprehensive Guide to Video Dubbing with Wondershare Filmora
- [Updated] In 2024, Identifying When Unfriended on Snapchat
- 2024 Approved Comprehensive Guide to Effective Multiframe Use in Edge
- In 2024, Capturing the Unseen GoPro HERO vs Nikon's KM-170
- Life360 Learn How Everything Works On Realme 11 Pro+ | Dr.fone
- [New] In 2024, Boost Interaction with These 4 Effective Instagram Video Loops
- [New] Step-In The Journey to Mastering Discord Text Styles for 2024
- 7 Fixes for Unfortunately, Phone Has Stopped on Xiaomi Redmi Note 12 Pro+ 5G | Dr.fone
- How to Unlock Vivo X100 Pro Phone Password Without Factory Reset?
- [New] 2024 Approved Instagram Video Wizardry Techniques for Massive Reach
- How to Find iSpoofer Pro Activation Key On Lava Yuva 2? | Dr.fone
- [New] 2024 Approved Fundamental Constructs in Creating Effective FB Ad Copy
- New How to Loop YouTube Videos on iPhone for 2024
- In 2024, Change Location on Yik Yak For your Samsung Galaxy XCover 7 to Enjoy More Fun | Dr.fone
- In 2024, iSpoofer is not working On Nokia G42 5G? Fixed | Dr.fone
- Updated From Basic to Brilliant Mastering Picture-in-Picture in Final Cut Pro
- In 2024, Unova Stone Pokémon Go Evolution List and How Catch Them For Honor X50 GT | Dr.fone
- [Updated] Unmarked TikTok Video Access for iPhone Users
- In 2024, Charting the Course to Cash How Much Does PewDoPeep Make?
- In 2024, Hassle-Free Ways to Remove FRP Lock on Tecno Spark 10 5Gwith/without a PC
- New In 2024, Beyond Vegas Pro 10 Exceptional Video Editing Software Options for Mac Users
- How to Detect and Stop mSpy from Spying on Your Samsung Galaxy A23 5G | Dr.fone
- Identifying Ideal Frame Rates in Slow-Mo Vids
- Precision in Perception Advanced Techniques for Taming Tangled Sounds for 2024
- Inspirational Quotations for the Metaverse Era
- Quickly Remove Google FRP Lock on Samsung Galaxy A25 5G
- In 2024, How to Change Google Play Location On Poco F5 5G | Dr.fone
- New 2024 Approved The Leading Voice Alteration and Production Software for Aspiring Sopranos & Tenors
- [New] 2024 Approved Hack the System Avoid Video Ads Directly on FB
- [New] In 2024, Unveiling the Secrets to Successful iPhone Sound Captures
- New In 2024, Make It a Valentines Day to Remember DIY Video Ideas for Your Loved One
- Title: "In 2024, Advanced Google Slides Techniques Adding YouTube Media"
- Author: Steven
- Created at : 2024-05-25 19:29:55
- Updated at : 2024-05-26 19:29:55
- Link: https://youtube-clips.techidaily.com/in-2024-advanced-google-slides-techniques-adding-youtube-media/
- License: This work is licensed under CC BY-NC-SA 4.0.
