
:max_bytes(150000):strip_icc()/how-to-tell-how-old-your-computer-is-5212230-6-5689d0e2960347bdb8ef419191d713f2.jpg)
"Illuminating Success Brightening Up Your YouTube Videos"
Illuminating Success: Brightening Up Your YouTube Videos
How To Light Your YouTube Video

Richard Bennett
Oct 26, 2023• Proven solutions
When it comes to sensitivity to light, no consumer-level camera sensor comes close in performance to the human eye. Many newbies to videography, though, don’t think about this when they use their camera indoors and discover that their recorded footage appears too dark.
If you want to use your camera indoors as many YouTubers do, you’ll need to have extra light. But the solution is not as simple as surrounding yourself with lamps that are all randomly placed.
Below, I’ll go into detail on how you can set up your lighting equipment to make your YouTube videos look good.
| Table of Contents Using Light You Already Have Window LightingHome Lighting Home Studio Lighting Light Control3-Point Lighting4-Point Lighting |
|---|
Part 1: Using Light You Already Have
Most beginner YouTubers light their videos with what they already have. That’s what I did to start as well. In the past, my video recording space consisted of natural sunlight coming from my window and ceiling light for times when the sunlight wasn’t strong enough.
1. Window Lighting
The best thing about window lighting is that it’s free. The worst thing about it is that it’s uncontrollable. The amount of light you get in your video can vary with all the changes in the weather.
Window lighting for me was especially difficult to work with because I live in a very rainy and cloudy city, Vancouver, Canada, where we pretty much just get three months of good sun.

Above are two freeze frames from one of Daniel’s past window-lit vlogs. Although these two frames are both from the same vlog, you can see that the image on the right looks brighter due to clearer skies at that moment. These varying amounts of light is what you will have to deal with if you choose to light your YouTube video with window lighting.
2. Home Lighting
Home lighting is another source of light that many new YouTubers use. In the past, when my window light wasn’t strong enough to light my video recording space, I would turn on the ceiling light.

Notice how the color of Daniel’s skin looks much more orange here (above) than the color of the skin in the two side-by-side window lighting examples? The side of the face also appears to look bluer. This all happened because he mixed up different color temperatures shining out of the two lights (cooler window light and warmer ceiling light).
Most home lighting is warmer in its color temperature. If you want to use your home lights without everything being orange-tinted, you’ll need to switch out your light bulbs for daytime LED light bulbs.
Ceiling lights are also typically situated in the center of a room in order to light an entire room evenly. This is not likely to be the best location for your filming video. Since the ceiling light was directly above the face in the above example, you can see harder shadows beneath his cheeks.
Part 2: Home Studio Lighting
If you rather not deal with all the window and home lighting challenges, you can set up studio lighting in your home.
1. Light Control
The first thing you’ll want to do to set up studio lighting in your home is to pick a room to film in and eliminate as much external lighting as you can. Use blinds, curtains, towels, or any thick fabric to block sunlight from shining into your room.
2. 3-Point Lighting
The most common setup for studio lighting is 3-point lighting. For this kind of lighting you’ll need three lights: a key light, a fill light, and a back light (also called a hair light).

Out of the three lights, the key light should be the brightest. When it is positioned to the left of you (as shown in the diagram above) your right side will have shadows.
To minimize the shadows on your right side, use a weaker light as a fill light. You don’t want your fill light to completely eliminate all your shadows or else your shot will look flat.
Lastly, a backlight positioned behind you can give an appealing highlight to the ends of your head and even help to separate your hair from blending into your background if both happen to be dark.
3. 4-Point Lighting
As a YouTuber, you may not only want yourself to be seen optimally with proper lighting, but you may also want your background to be seen optimally, especially if you’ve taken the time to decorate it for your audience.
What you’ll need to ensure that your background is sufficiently lit is 4-point lighting setup. The 4-point lighting setup is the same as a 3-point lighting setup, but with an additional light shining at your background.
For more information on lighting equipment, check out my Top 17 Video Lighting Equipment For YouTubers .
Touch Up YouTube Videos with Filmora
Filmora is one of the best video editing software for YouTube beginners to start the YouTube channel. So, if you find the lighting isn’t perfect after recording, you can use the Auto Color Enhancement feature in Filmora to adjust the color with one-click. Or, you can change the white balance, Light, color, and HSL manually. Filmora also features some presets and LUTs templates , which allows you to apply pre-programmed effects to video for color correction faster.


Richard Bennett
Richard Bennett is a writer and a lover of all things video.
Follow @Richard Bennett
Richard Bennett
Oct 26, 2023• Proven solutions
When it comes to sensitivity to light, no consumer-level camera sensor comes close in performance to the human eye. Many newbies to videography, though, don’t think about this when they use their camera indoors and discover that their recorded footage appears too dark.
If you want to use your camera indoors as many YouTubers do, you’ll need to have extra light. But the solution is not as simple as surrounding yourself with lamps that are all randomly placed.
Below, I’ll go into detail on how you can set up your lighting equipment to make your YouTube videos look good.
| Table of Contents Using Light You Already Have Window LightingHome Lighting Home Studio Lighting Light Control3-Point Lighting4-Point Lighting |
|---|
Part 1: Using Light You Already Have
Most beginner YouTubers light their videos with what they already have. That’s what I did to start as well. In the past, my video recording space consisted of natural sunlight coming from my window and ceiling light for times when the sunlight wasn’t strong enough.
1. Window Lighting
The best thing about window lighting is that it’s free. The worst thing about it is that it’s uncontrollable. The amount of light you get in your video can vary with all the changes in the weather.
Window lighting for me was especially difficult to work with because I live in a very rainy and cloudy city, Vancouver, Canada, where we pretty much just get three months of good sun.
Above are two freeze frames from one of Daniel’s past window-lit vlogs. Although these two frames are both from the same vlog, you can see that the image on the right looks brighter due to clearer skies at that moment. These varying amounts of light is what you will have to deal with if you choose to light your YouTube video with window lighting.
2. Home Lighting
Home lighting is another source of light that many new YouTubers use. In the past, when my window light wasn’t strong enough to light my video recording space, I would turn on the ceiling light.
Notice how the color of Daniel’s skin looks much more orange here (above) than the color of the skin in the two side-by-side window lighting examples? The side of the face also appears to look bluer. This all happened because he mixed up different color temperatures shining out of the two lights (cooler window light and warmer ceiling light).
Most home lighting is warmer in its color temperature. If you want to use your home lights without everything being orange-tinted, you’ll need to switch out your light bulbs for daytime LED light bulbs.
Ceiling lights are also typically situated in the center of a room in order to light an entire room evenly. This is not likely to be the best location for your filming video. Since the ceiling light was directly above the face in the above example, you can see harder shadows beneath his cheeks.
Part 2: Home Studio Lighting
If you rather not deal with all the window and home lighting challenges, you can set up studio lighting in your home.
1. Light Control
The first thing you’ll want to do to set up studio lighting in your home is to pick a room to film in and eliminate as much external lighting as you can. Use blinds, curtains, towels, or any thick fabric to block sunlight from shining into your room.
2. 3-Point Lighting
The most common setup for studio lighting is 3-point lighting. For this kind of lighting you’ll need three lights: a key light, a fill light, and a back light (also called a hair light).
Out of the three lights, the key light should be the brightest. When it is positioned to the left of you (as shown in the diagram above) your right side will have shadows.
To minimize the shadows on your right side, use a weaker light as a fill light. You don’t want your fill light to completely eliminate all your shadows or else your shot will look flat.
Lastly, a backlight positioned behind you can give an appealing highlight to the ends of your head and even help to separate your hair from blending into your background if both happen to be dark.
3. 4-Point Lighting
As a YouTuber, you may not only want yourself to be seen optimally with proper lighting, but you may also want your background to be seen optimally, especially if you’ve taken the time to decorate it for your audience.
What you’ll need to ensure that your background is sufficiently lit is 4-point lighting setup. The 4-point lighting setup is the same as a 3-point lighting setup, but with an additional light shining at your background.
For more information on lighting equipment, check out my Top 17 Video Lighting Equipment For YouTubers .
Touch Up YouTube Videos with Filmora
Filmora is one of the best video editing software for YouTube beginners to start the YouTube channel. So, if you find the lighting isn’t perfect after recording, you can use the Auto Color Enhancement feature in Filmora to adjust the color with one-click. Or, you can change the white balance, Light, color, and HSL manually. Filmora also features some presets and LUTs templates , which allows you to apply pre-programmed effects to video for color correction faster.
Richard Bennett
Richard Bennett is a writer and a lover of all things video.
Follow @Richard Bennett
Make the Most of Sub4sub - Initial Steps Unveiled Herein
Create High-Quality Video - Wondershare Filmora
An easy and powerful YouTube video editor
Numerous video and audio effects to choose from
Detailed tutorials provided by the official channel
YouTube streaming service is a beehive of activities. Promoters strive for a higher number of subscribers to boost their content. Several ways are available for you to increase the number of subscribers and visitors to your site. YouTube sub for sub is one common practice for this noble cause. In this practice, a person subscribes, in anticipation of the recipient subscribing back as well.
However, the practice may not give your channel that genuine growth. The subscribers may not even watch your videos or care much about leaving comments or other engagements. All in all, the aim is to hit a certain number of subscribers so that you can get into the recommended territory and probably start earning. But are there other options to increase YouTube subscriptions apart from Sub4Sub? Be genuine and use real avenues to rise to the top. This article corresponds adequately on the matter by giving you alternative ways to gain real subscribers who will stick around to grow your channel.
In this article
03 Tips & tricks to use sub for sub
04 Additional thoughts - Should we rely on subforsub to get more subscribers?
What is sub for sub?
Subforsub means a subscription for a subscription. In this practice, there are subscribers and subscriptions. Those who subscribe to you on YouTube are the subscribers while those whom you subscribe to, are the subscriptions. Both video makers’ subscribers are, therefore, increased equally and doesn’t give each other a competitive advantage against the other member. Sub for sub was founded in Germany, 4 years ago. It is easy to use and free platform that takes only about 5 minutes to contact a subscriber and complete the initiative. To get started, a user signs up and creates a new account on the home page. You can then reach out to other members for a subscription.
How does sub for sub work?
With YouTube sub for sub, you market your YouTube channel to get more subscribers. Simply sub to one another’s channel and they sub back.
You can do this on different channels such as YouTube live videos, among other channels. But again, these subscribers are not so much concerned about getting the real subs. What matters is that you get 1,000 subscribers to enable you to monetize on YouTube. However, YouTube also has its measures in place, and manipulating the matrix is one of which they don’t advocate for. But in most cases, subforsub participants operate fake YouTube accounts and you can find one person corresponding up to 5 accounts to gain subscriptions. This isn’t good for your rating as you don’t get real subscribers but you only boost the number of subscribers. And since they don’t watch your videos, neither will they share them with other viewers.
Tips & tricks to use sub for sub
Subforsub isn’t genuine and all you get is bot subscribers who don’t engage. However, you can use available tricks to gain popularity.
- Using fake accounts

A user should only run one genuine YouTube account. However, the trick that most subscribers use to gain more subs is by creating other additional fake accounts to gain more subs in return. But again, it is not a guarantee as some subscribers may not sub back to all the accounts.
- Subscribers don’t watch the videos
Perhaps there is no time for subscribers to watch the potential sub videos before subscribing. Your mission is to gain as many subs as possible even if your watch time doesn’t go up. This doesn’t bring any positivity to your channel rather an increased number of subscribers.
- Reach out to friends
You can also boost your sub for sub by reaching out to friends to inform them of your channel and ask for subscriptions in return for theirs as well. This, however, could be a slow process as not all your friends will be attracted to what you do.
- Don’t do subforsub for followers
A subforsub may not give you followers parse. So, don’t get into it for genuine followers. Those who sub to your channel won’t follow you in most cases. Rather, they might unsubscribe after a short duration of time.
- Use channel branding
This trick will glue viewers to your channel. These can include banner art to welcome everyone who clicks into your channel.
Additional thoughts - Should we rely on subforsub to get more subscribers?
You should not rely on subforsub as it doesn’t give the real figures but manipulates the outcome. Nonetheless, you need real subscribers to climb the YouTube ladder. That’s the best way to push the YouTube algorithm. There are genuine aspects of gaining subscribers to grow your channel.
Get to social media platforms

These include Facebook, Instagram, WhatsApp, and other sites. Introduce your YouTube channel to your followers and remind them to subscribe. Likewise, demonstrate why your channel is worth subscribing to.
Upload content consistently
Ensure your upload schedule is consistent and you’ll see viewers having a reason to subscribe to your channel. Once you introduce your channel with the first video, post a second and third video to build more momentum on your potential subscribers.
Incorporate YouTube stories
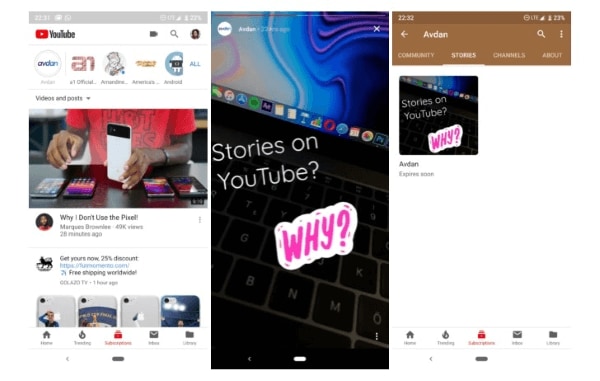
Stories can be a good starting point for those who have not subscribed to your content yet despite watching. Short video stories will attract viewers’ attention and want to get more from your channel.
Use Calls to Action

Ask your audience to subscribe after watching your videos. A great idea is to use animation or graphics to attract the viewers’ attention instantly. Other free options like green screen are also available for use.
Make it easy for viewers to understand your channel
You can make it easy by giving your viewers a guided tour. By this, they’ll know where to find important sections like comments. You can also create a channel banner that tells your audience what you do. They’ll soon familiarize themselves with your channel and be friends in no time.
Build a relationship with your audience
It is good to connect with your audience in various aspects. Expressing yourself probably in front of a camera has a deeper impact. You can also use illustrations to bring out your points for a quick understanding. Engaging them in the process is the best way to make them feel like they belong and eventually turn into subscribers.
Focus on the video that’s working for you
You should know which video is working and which is not. Judge and put more emphasis on the video that’s working for you. Check out which videos turn viewers into subscribers as that’s your main aim. More so, be creative and innovative.
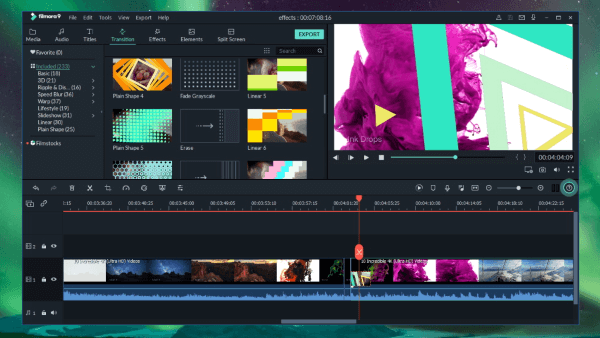
A video editor is worth a try – Filmora
Since creativity is paramount, engaging a video editor tool will make you achieve your goal in a few clicks. Filmora Video Editor will transform your videos into magical content. It comes with powerful editing tools to make your video stand tall from the rest. You will also manage to import and export your videos in various formats for easy access on different platforms and devices. Whether you wish to create a tutorial for learning or promotional purposes, Filmora will give you exceptional results. The steps are as easy as 1-2-3 and the process is effective. Check out its key features to help you produce quality videos.
For Win 7 or later (64-bit)
For macOS 10.12 or later
Key Features of Filmora Video Editor
- 4K editing support: Quality and sharp videos are attractive to viewers. Filmora lets you edit and export your videos at high resolutions of up to 4K.
- Noise removal: Make your videos noise-free by removing unwanted background sounds. Viewers won’t be destructed and can concentrate more on the important aspects of the video.
- Speed control: There are important sections of your video that you may wish to emphasize more. You can slow down the speed in such sections for your viewers to understand them in detail. Nonetheless, you can speed up certain parts that don’t require too much emphasis.
- Reverse: What about being creative using this feature. Simply flip your clips and play them backward with this feature.
- Preview frame by frame: Focus on precise editing by using this feature. It lets you move to any section of the frame at a time to ascertain that the final product will be the best.
- Audio separation: Do it in a few clicks. Detach audio from video and put any other background music depending on the theme of that moment.
Conclusion
● You may gain subscribers from the YouTube sub for sub but you will be violating YouTube’s terms of service. Additionally, the YouTube algorithm will eventually notice that your subscribers are not watching your videos. It will presume that you are buying subscribers, which is illegal in the long run. Be smart and engage the Filmora video editor. It works in simple steps to create wanting videos that will upsell your brand. Editing isn’t a worry either as it presents you with numerous stunning effects to transform your video to a compelling piece of art.
YouTube streaming service is a beehive of activities. Promoters strive for a higher number of subscribers to boost their content. Several ways are available for you to increase the number of subscribers and visitors to your site. YouTube sub for sub is one common practice for this noble cause. In this practice, a person subscribes, in anticipation of the recipient subscribing back as well.
However, the practice may not give your channel that genuine growth. The subscribers may not even watch your videos or care much about leaving comments or other engagements. All in all, the aim is to hit a certain number of subscribers so that you can get into the recommended territory and probably start earning. But are there other options to increase YouTube subscriptions apart from Sub4Sub? Be genuine and use real avenues to rise to the top. This article corresponds adequately on the matter by giving you alternative ways to gain real subscribers who will stick around to grow your channel.
In this article
03 Tips & tricks to use sub for sub
04 Additional thoughts - Should we rely on subforsub to get more subscribers?
What is sub for sub?
Subforsub means a subscription for a subscription. In this practice, there are subscribers and subscriptions. Those who subscribe to you on YouTube are the subscribers while those whom you subscribe to, are the subscriptions. Both video makers’ subscribers are, therefore, increased equally and doesn’t give each other a competitive advantage against the other member. Sub for sub was founded in Germany, 4 years ago. It is easy to use and free platform that takes only about 5 minutes to contact a subscriber and complete the initiative. To get started, a user signs up and creates a new account on the home page. You can then reach out to other members for a subscription.
How does sub for sub work?
With YouTube sub for sub, you market your YouTube channel to get more subscribers. Simply sub to one another’s channel and they sub back.
You can do this on different channels such as YouTube live videos, among other channels. But again, these subscribers are not so much concerned about getting the real subs. What matters is that you get 1,000 subscribers to enable you to monetize on YouTube. However, YouTube also has its measures in place, and manipulating the matrix is one of which they don’t advocate for. But in most cases, subforsub participants operate fake YouTube accounts and you can find one person corresponding up to 5 accounts to gain subscriptions. This isn’t good for your rating as you don’t get real subscribers but you only boost the number of subscribers. And since they don’t watch your videos, neither will they share them with other viewers.
Tips & tricks to use sub for sub
Subforsub isn’t genuine and all you get is bot subscribers who don’t engage. However, you can use available tricks to gain popularity.
- Using fake accounts
A user should only run one genuine YouTube account. However, the trick that most subscribers use to gain more subs is by creating other additional fake accounts to gain more subs in return. But again, it is not a guarantee as some subscribers may not sub back to all the accounts.
- Subscribers don’t watch the videos
Perhaps there is no time for subscribers to watch the potential sub videos before subscribing. Your mission is to gain as many subs as possible even if your watch time doesn’t go up. This doesn’t bring any positivity to your channel rather an increased number of subscribers.
- Reach out to friends
You can also boost your sub for sub by reaching out to friends to inform them of your channel and ask for subscriptions in return for theirs as well. This, however, could be a slow process as not all your friends will be attracted to what you do.
- Don’t do subforsub for followers
A subforsub may not give you followers parse. So, don’t get into it for genuine followers. Those who sub to your channel won’t follow you in most cases. Rather, they might unsubscribe after a short duration of time.
- Use channel branding
This trick will glue viewers to your channel. These can include banner art to welcome everyone who clicks into your channel.
Additional thoughts - Should we rely on subforsub to get more subscribers?
You should not rely on subforsub as it doesn’t give the real figures but manipulates the outcome. Nonetheless, you need real subscribers to climb the YouTube ladder. That’s the best way to push the YouTube algorithm. There are genuine aspects of gaining subscribers to grow your channel.
Get to social media platforms
These include Facebook, Instagram, WhatsApp, and other sites. Introduce your YouTube channel to your followers and remind them to subscribe. Likewise, demonstrate why your channel is worth subscribing to.
Upload content consistently
Ensure your upload schedule is consistent and you’ll see viewers having a reason to subscribe to your channel. Once you introduce your channel with the first video, post a second and third video to build more momentum on your potential subscribers.
Incorporate YouTube stories
Stories can be a good starting point for those who have not subscribed to your content yet despite watching. Short video stories will attract viewers’ attention and want to get more from your channel.
Use Calls to Action
Ask your audience to subscribe after watching your videos. A great idea is to use animation or graphics to attract the viewers’ attention instantly. Other free options like green screen are also available for use.
Make it easy for viewers to understand your channel
You can make it easy by giving your viewers a guided tour. By this, they’ll know where to find important sections like comments. You can also create a channel banner that tells your audience what you do. They’ll soon familiarize themselves with your channel and be friends in no time.
Build a relationship with your audience
It is good to connect with your audience in various aspects. Expressing yourself probably in front of a camera has a deeper impact. You can also use illustrations to bring out your points for a quick understanding. Engaging them in the process is the best way to make them feel like they belong and eventually turn into subscribers.
Focus on the video that’s working for you
You should know which video is working and which is not. Judge and put more emphasis on the video that’s working for you. Check out which videos turn viewers into subscribers as that’s your main aim. More so, be creative and innovative.
A video editor is worth a try – Filmora
Since creativity is paramount, engaging a video editor tool will make you achieve your goal in a few clicks. Filmora Video Editor will transform your videos into magical content. It comes with powerful editing tools to make your video stand tall from the rest. You will also manage to import and export your videos in various formats for easy access on different platforms and devices. Whether you wish to create a tutorial for learning or promotional purposes, Filmora will give you exceptional results. The steps are as easy as 1-2-3 and the process is effective. Check out its key features to help you produce quality videos.
For Win 7 or later (64-bit)
For macOS 10.12 or later
Key Features of Filmora Video Editor
- 4K editing support: Quality and sharp videos are attractive to viewers. Filmora lets you edit and export your videos at high resolutions of up to 4K.
- Noise removal: Make your videos noise-free by removing unwanted background sounds. Viewers won’t be destructed and can concentrate more on the important aspects of the video.
- Speed control: There are important sections of your video that you may wish to emphasize more. You can slow down the speed in such sections for your viewers to understand them in detail. Nonetheless, you can speed up certain parts that don’t require too much emphasis.
- Reverse: What about being creative using this feature. Simply flip your clips and play them backward with this feature.
- Preview frame by frame: Focus on precise editing by using this feature. It lets you move to any section of the frame at a time to ascertain that the final product will be the best.
- Audio separation: Do it in a few clicks. Detach audio from video and put any other background music depending on the theme of that moment.
Conclusion
● You may gain subscribers from the YouTube sub for sub but you will be violating YouTube’s terms of service. Additionally, the YouTube algorithm will eventually notice that your subscribers are not watching your videos. It will presume that you are buying subscribers, which is illegal in the long run. Be smart and engage the Filmora video editor. It works in simple steps to create wanting videos that will upsell your brand. Editing isn’t a worry either as it presents you with numerous stunning effects to transform your video to a compelling piece of art.
Also read:
- 2024 Approved Counterclockwise Content YouTube Replay Methods
- 2024 Approved Complete Blueprint for Tracking YT Views/Revenue
- The First-Timer's Blueprint for YouTube Income
- Fusing Your Content Creation with YouTube & TikTok Synergy
- Your Guide to Easy Entertainment No-Cost, High-Quality Films on YouTube
- [Updated] Demographic Relevance for Higher YouTube Rankings
- In 2024, Audience Choice Great Movies Not on the Main List
- [Updated] Elevate Your Vlogs Optimizing Title, Description & Tags
- In 2024, Beyond YouTube A Curated Selection of Top Videostreaming Sites
- Turn Your YouTube Tracks Into MP3 with MacOS
- Can Subforsub Help Increase My YouTube Subscribers Without Risk, In 2024
- Dismantling the Profit Strategy of TSeries on Digital Platforms (YouTube) for 2024
- Elevate Your Content with Insightful Channel Descriptions for 2024
- [Updated] Does the Sub4Sub Strategy Improve Content Consumption?
- In 2024, Achieve 10 Free Tools for Thumbnail Extraction
- Designing an Easy Access Subscribe Link to Channels for 2024
- Dynamic Slideshows Embedding YouTube Content
- [Updated] Decipher High-Impact Content Selecting Premier Rank Trackers for YouTubers
- Examining YouTube's Workflow After Content Submission
- Top 10 Game Recorder Software List
- Tiny Tempo Truths Character Beats Exposed
- Decoding the Science of Hash Optimization for Game Streaming for 2024
- In 2024, Entering the World of Content Creation Sign Up Tutorial
- In 2024, Confirming YouTube Pro-Rated Earnings
- A Beginner's Tutorial How to Insert On-Screen Dialogue in Video Formats for 2024
- Amplify Video Impact Leading Trackers for YouTube Ranks for 2024
- High-Quality Game Capture Apps Reviewed
- In 2024, Top 10 AirPlay Apps in Oppo A38 for Streaming | Dr.fone
- [Updated] In 2024, Eight Free Android Recorders – Top Selection List
- [Updated] Essential, No-Cost Software Compilation for High-Quality Discord Audio Capture
- New 2024 Approved Discover the Chime of the Bell Waveform
- Top 4 SIM Location Trackers To Easily Find Your Lost Realme C33 2023 Device
- [New] How To Record Desktop on Windows 8 Effortlessly for 2024
- [New] In 2024, Instagram Audio Intellectual Property
- [New] 2024 Approved Enhancing Mobile & Desktop Streaming Experience on Discord
- In 2024, To Closely Observe the Content on Screen, We Often Zoom in to Catch the Details. This Article Will Provide You with a Brief Note on How to Zoom in on YouTube Videos Quickly on Your Devices
- 2024 Approved A Complete Manual for Logging & Storing Periscope Video
- In 2024, How to Transfer Music from Motorola Moto G84 5G to iPod | Dr.fone
- Avoidance Tactics for EDG Vids in Learning for 2024
- Title: "Illuminating Success Brightening Up Your YouTube Videos"
- Author: Steven
- Created at : 2024-05-25 19:27:38
- Updated at : 2024-05-26 19:27:38
- Link: https://youtube-clips.techidaily.com/illuminating-success-brightening-up-your-youtube-videos/
- License: This work is licensed under CC BY-NC-SA 4.0.
